Wayfair prices change often, which makes checking products by hand impractical. Automating the process is the solution, but building a reliable Wayfair price tracker means you need to handle anti-scraping protections like rate limits and CAPTCHAs.
In this article, you’ll learn how to build a Wayfair price tracking pipeline using Apify and n8n. The workflow pairs Apify's web data extraction with n8n's integrations to create a production-ready price monitoring system.
Why automate Wayfair price tracking?
Automation turns a tedious manual check into a continuous process: you can monitor products around the clock, build historical data, and get notified the moment a price or promotion changes - which matters most for items with frequent, limited-time offers.
It's also useful beyond individual deal-hunting. Businesses can feed the same data into competitive intelligence pipelines to track competitor prices, availability, promotions, and market trends.
Using Apify to automate Wayfair price tracking
Apify is the largest marketplace of tools for AI, offering thousands ready-made tools to automate web data extraction, business workflows, and AI-powered use cases. These tools are called Actors and help you access real-time web data, automate processes, and much more.
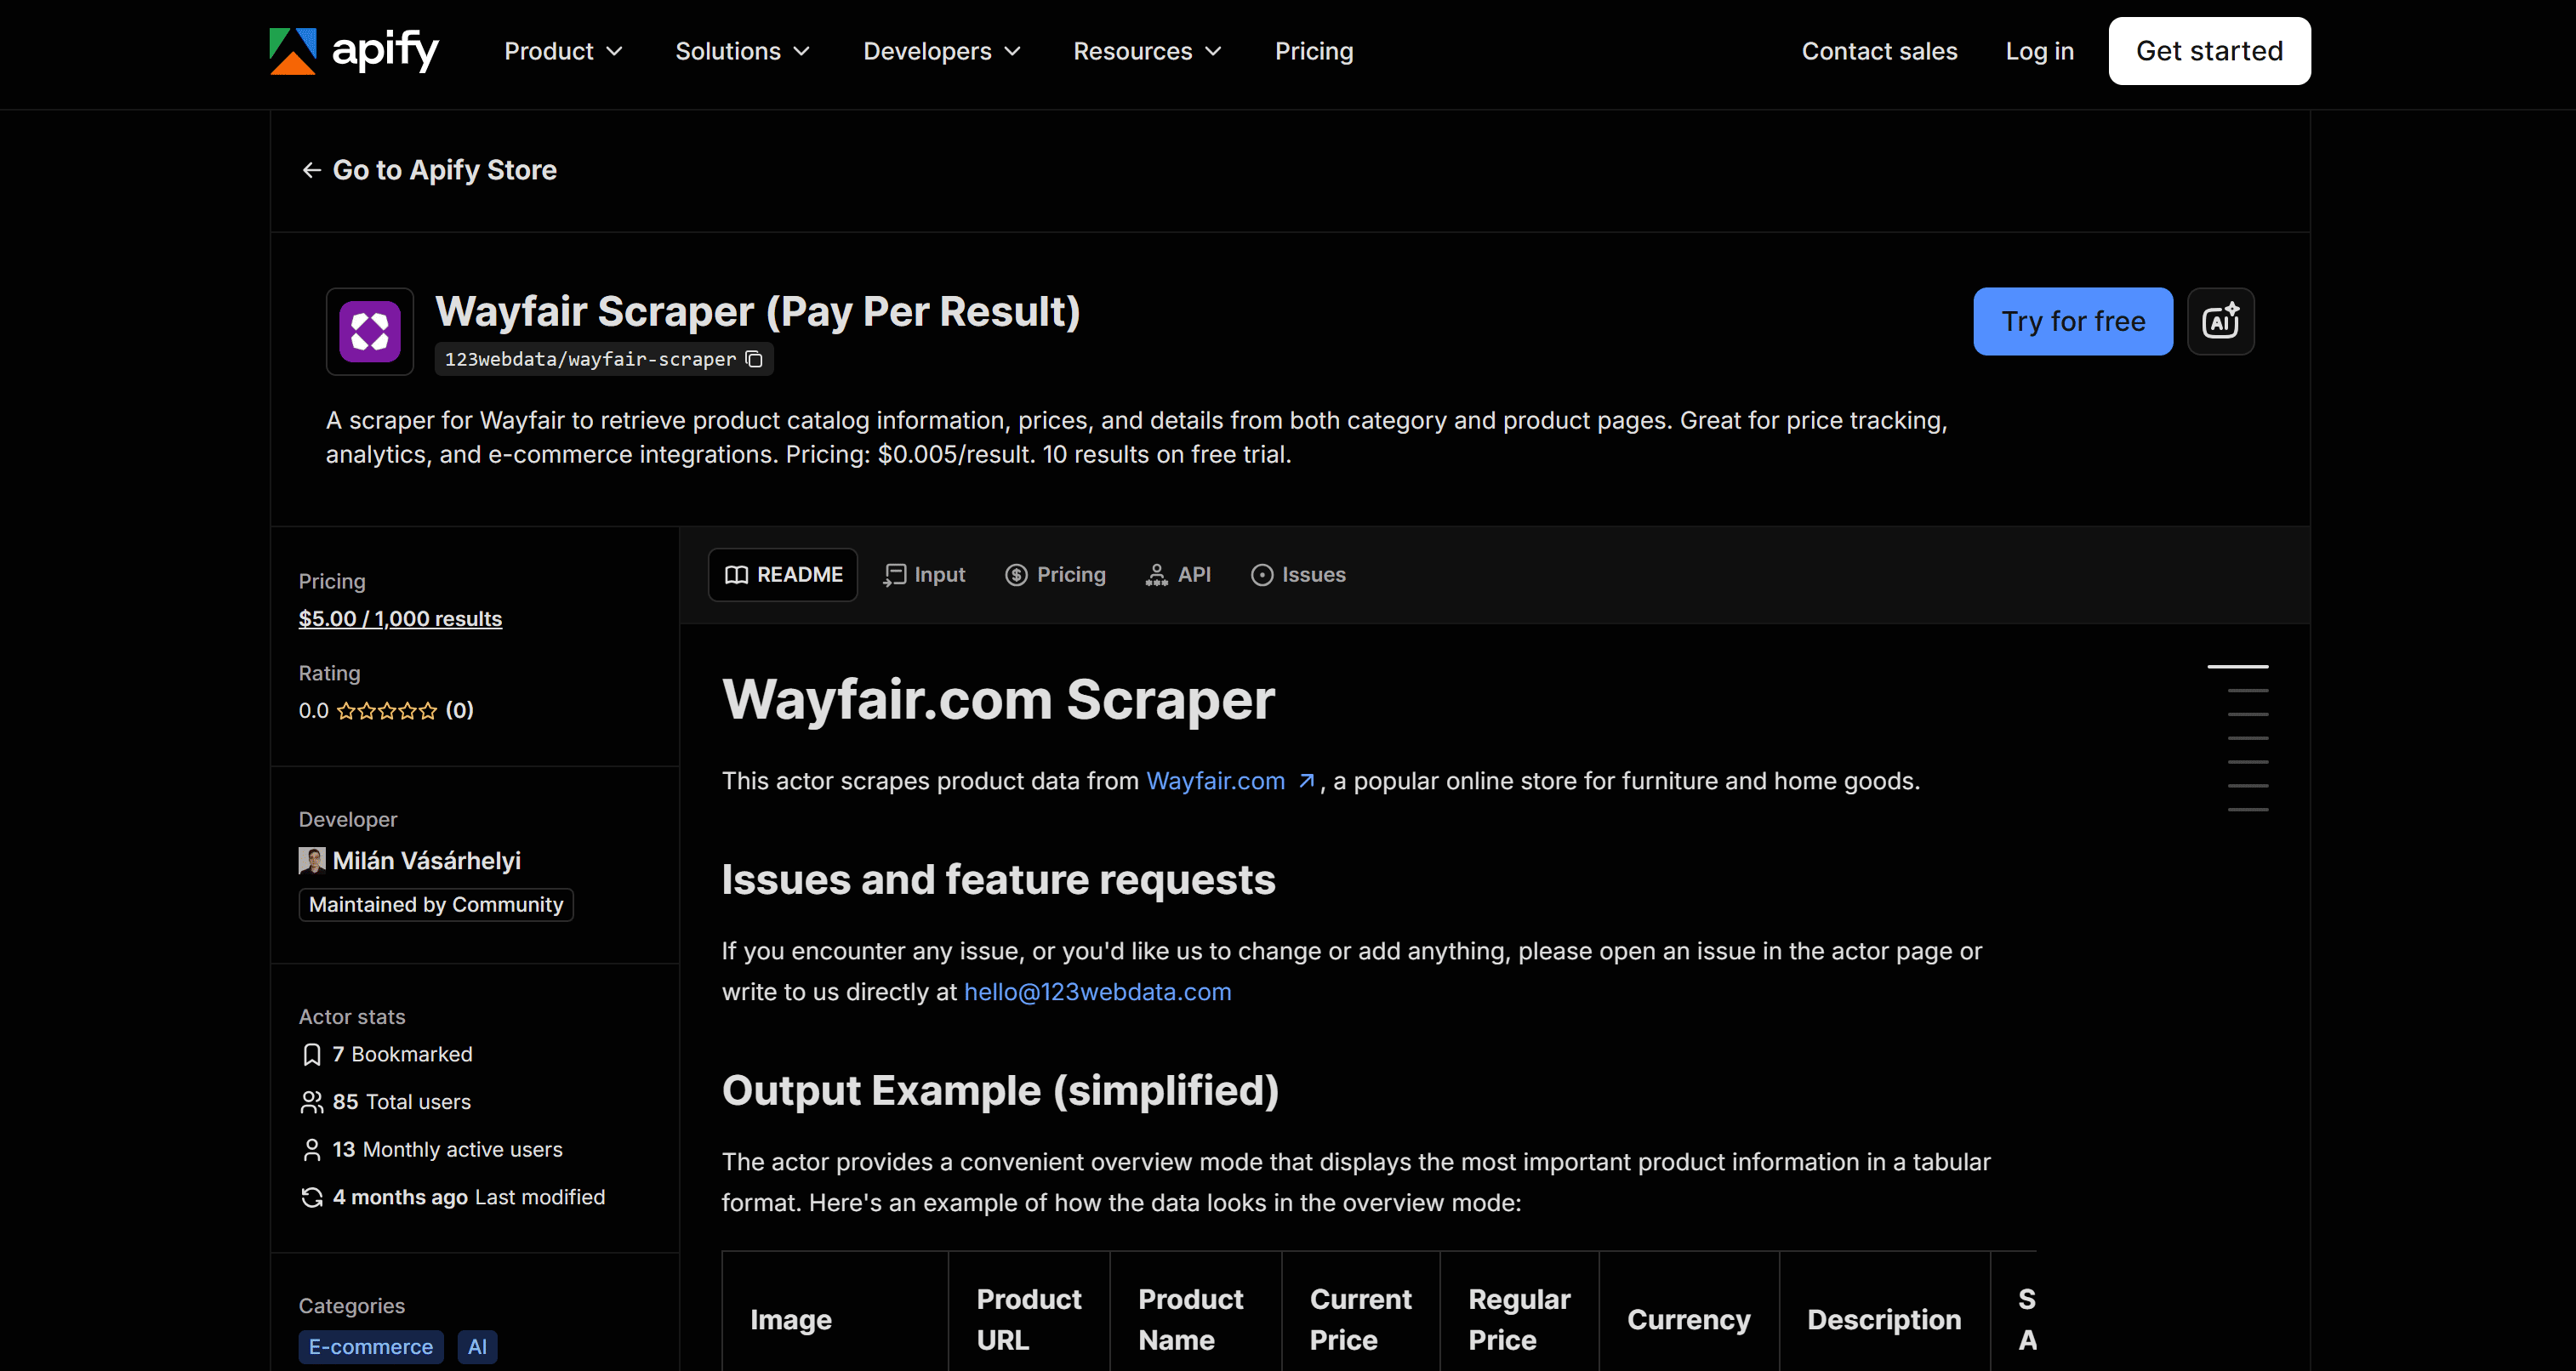
Apify also has several Actors for Wayfair scraping. In this regard, Wayfair Scraper (Pay Per Result) can collect product information such as names, prices, regular prices, and currencies from Wayfair product and category page URLs.
Remember that you can connect Apify Actors with automation platforms such as n8n, Make, Zapier, and Gumloop through native integrations. This allows you to build custom workflows, such as a Wayfair price tracker.
Build a custom Wayfair price tracker in n8n with Apify
In this step-by-step section, you’ll learn how to build a Wayfair price monitoring pipeline in n8n. The workflow will:
- Run automatically based on a configured schedule, such as every 6 hours.
- Execute an Apify Actor to scrape Wayfair product data on each run.
- Store scraped product information in a Google Sheets document to build a historical price database.
- Process stored prices to detect whether the latest price is the lowest recorded value.
- Send an email notification when a new lowest price is detected.
Prerequisites
Make sure you have:
- An Apify account.
- n8n running locally (via npm or Docker) or an n8n Cloud subscription.
- A Google Cloud account configured with OAuth credentials, with the Google Drive API, Gmail API, and Google Sheets API enabled.
Step #1: Schedule the workflow execution
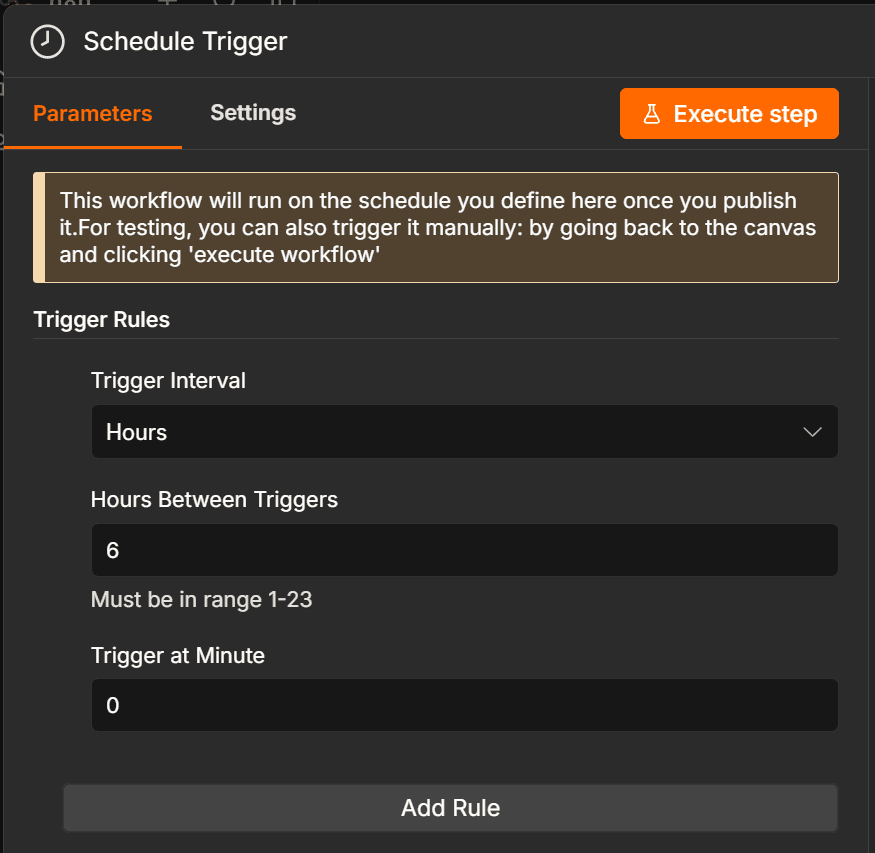
Launch n8n and create a new workflow. Add a Schedule Trigger node as the first step.
For example, configure it to run every 6 hours. This frequency is useful for timely and accurate tracking during deal events or when you want to catch limited-time offers.
Outside of major deal seasons, running the pipeline once per day is usually more than enough.
Step #2: Connect n8n to Apify’s Wayfair Scraper Actor
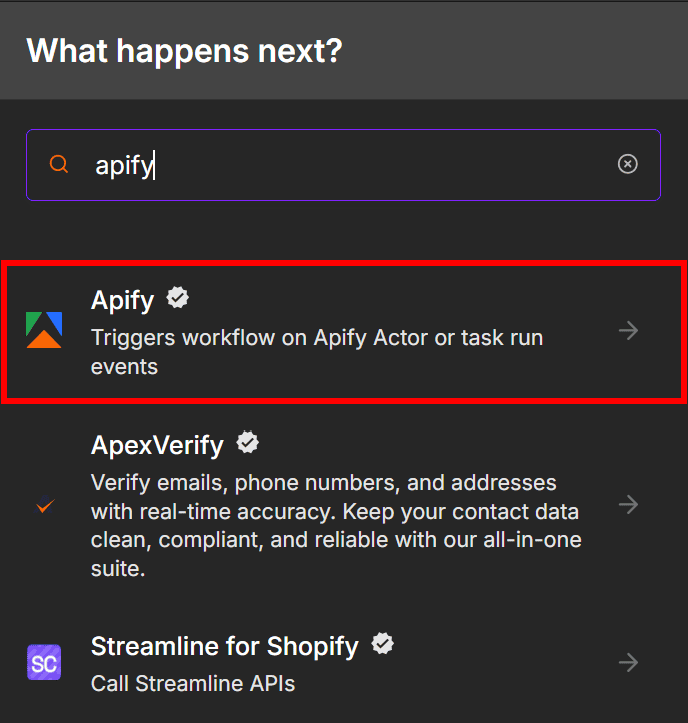
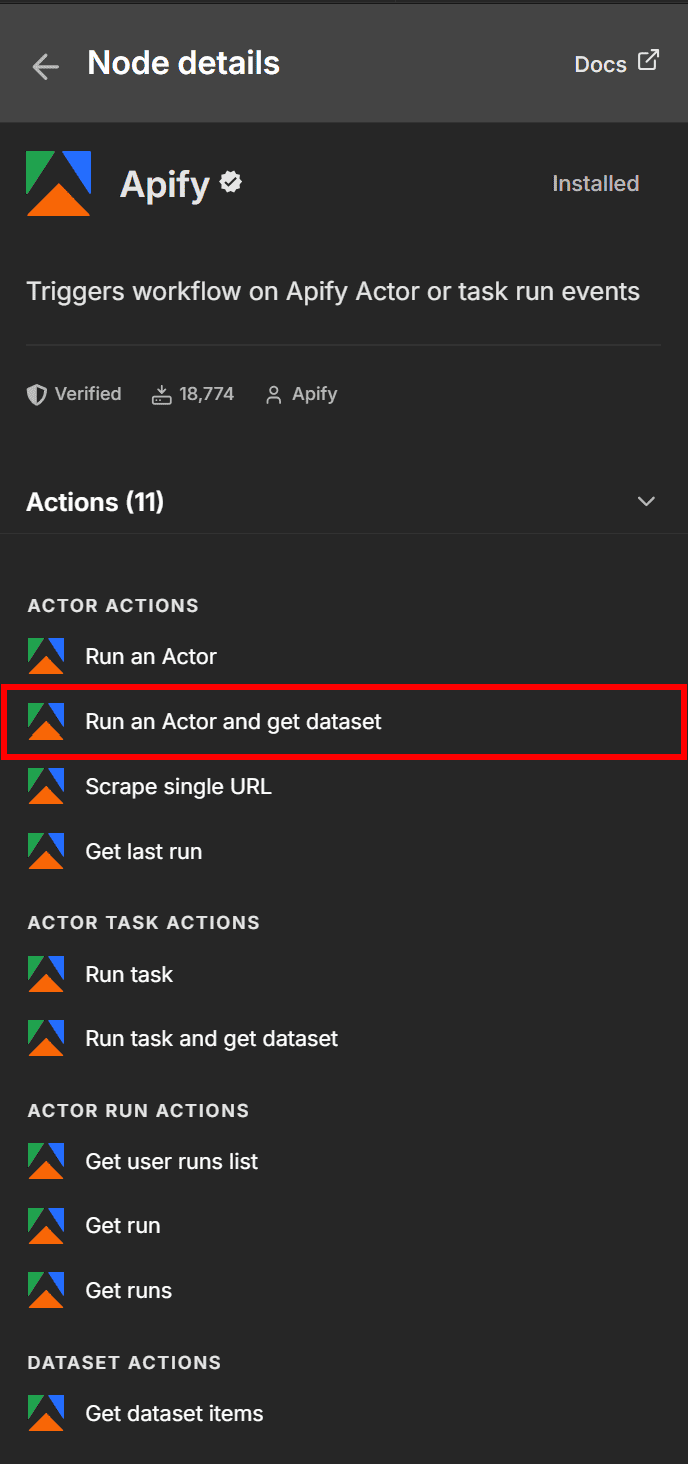
Next, open the node panel on the right side and search for Apify. Select the Apify node. If you have not installed the node yet, install it first. Then, add the Apify node with the Run an Actor and get dataset action to your workflow.
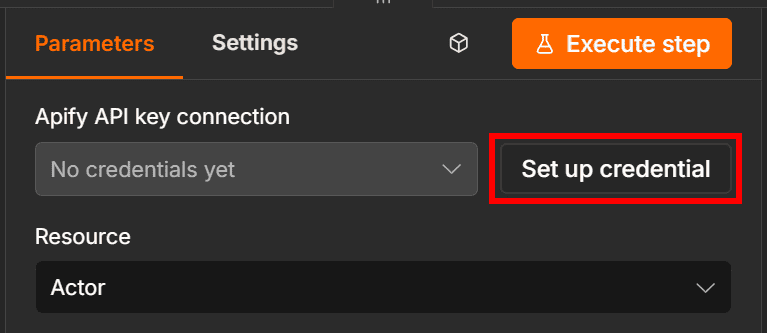
Open the node and click Set up credential to connect n8n with your Apify account.
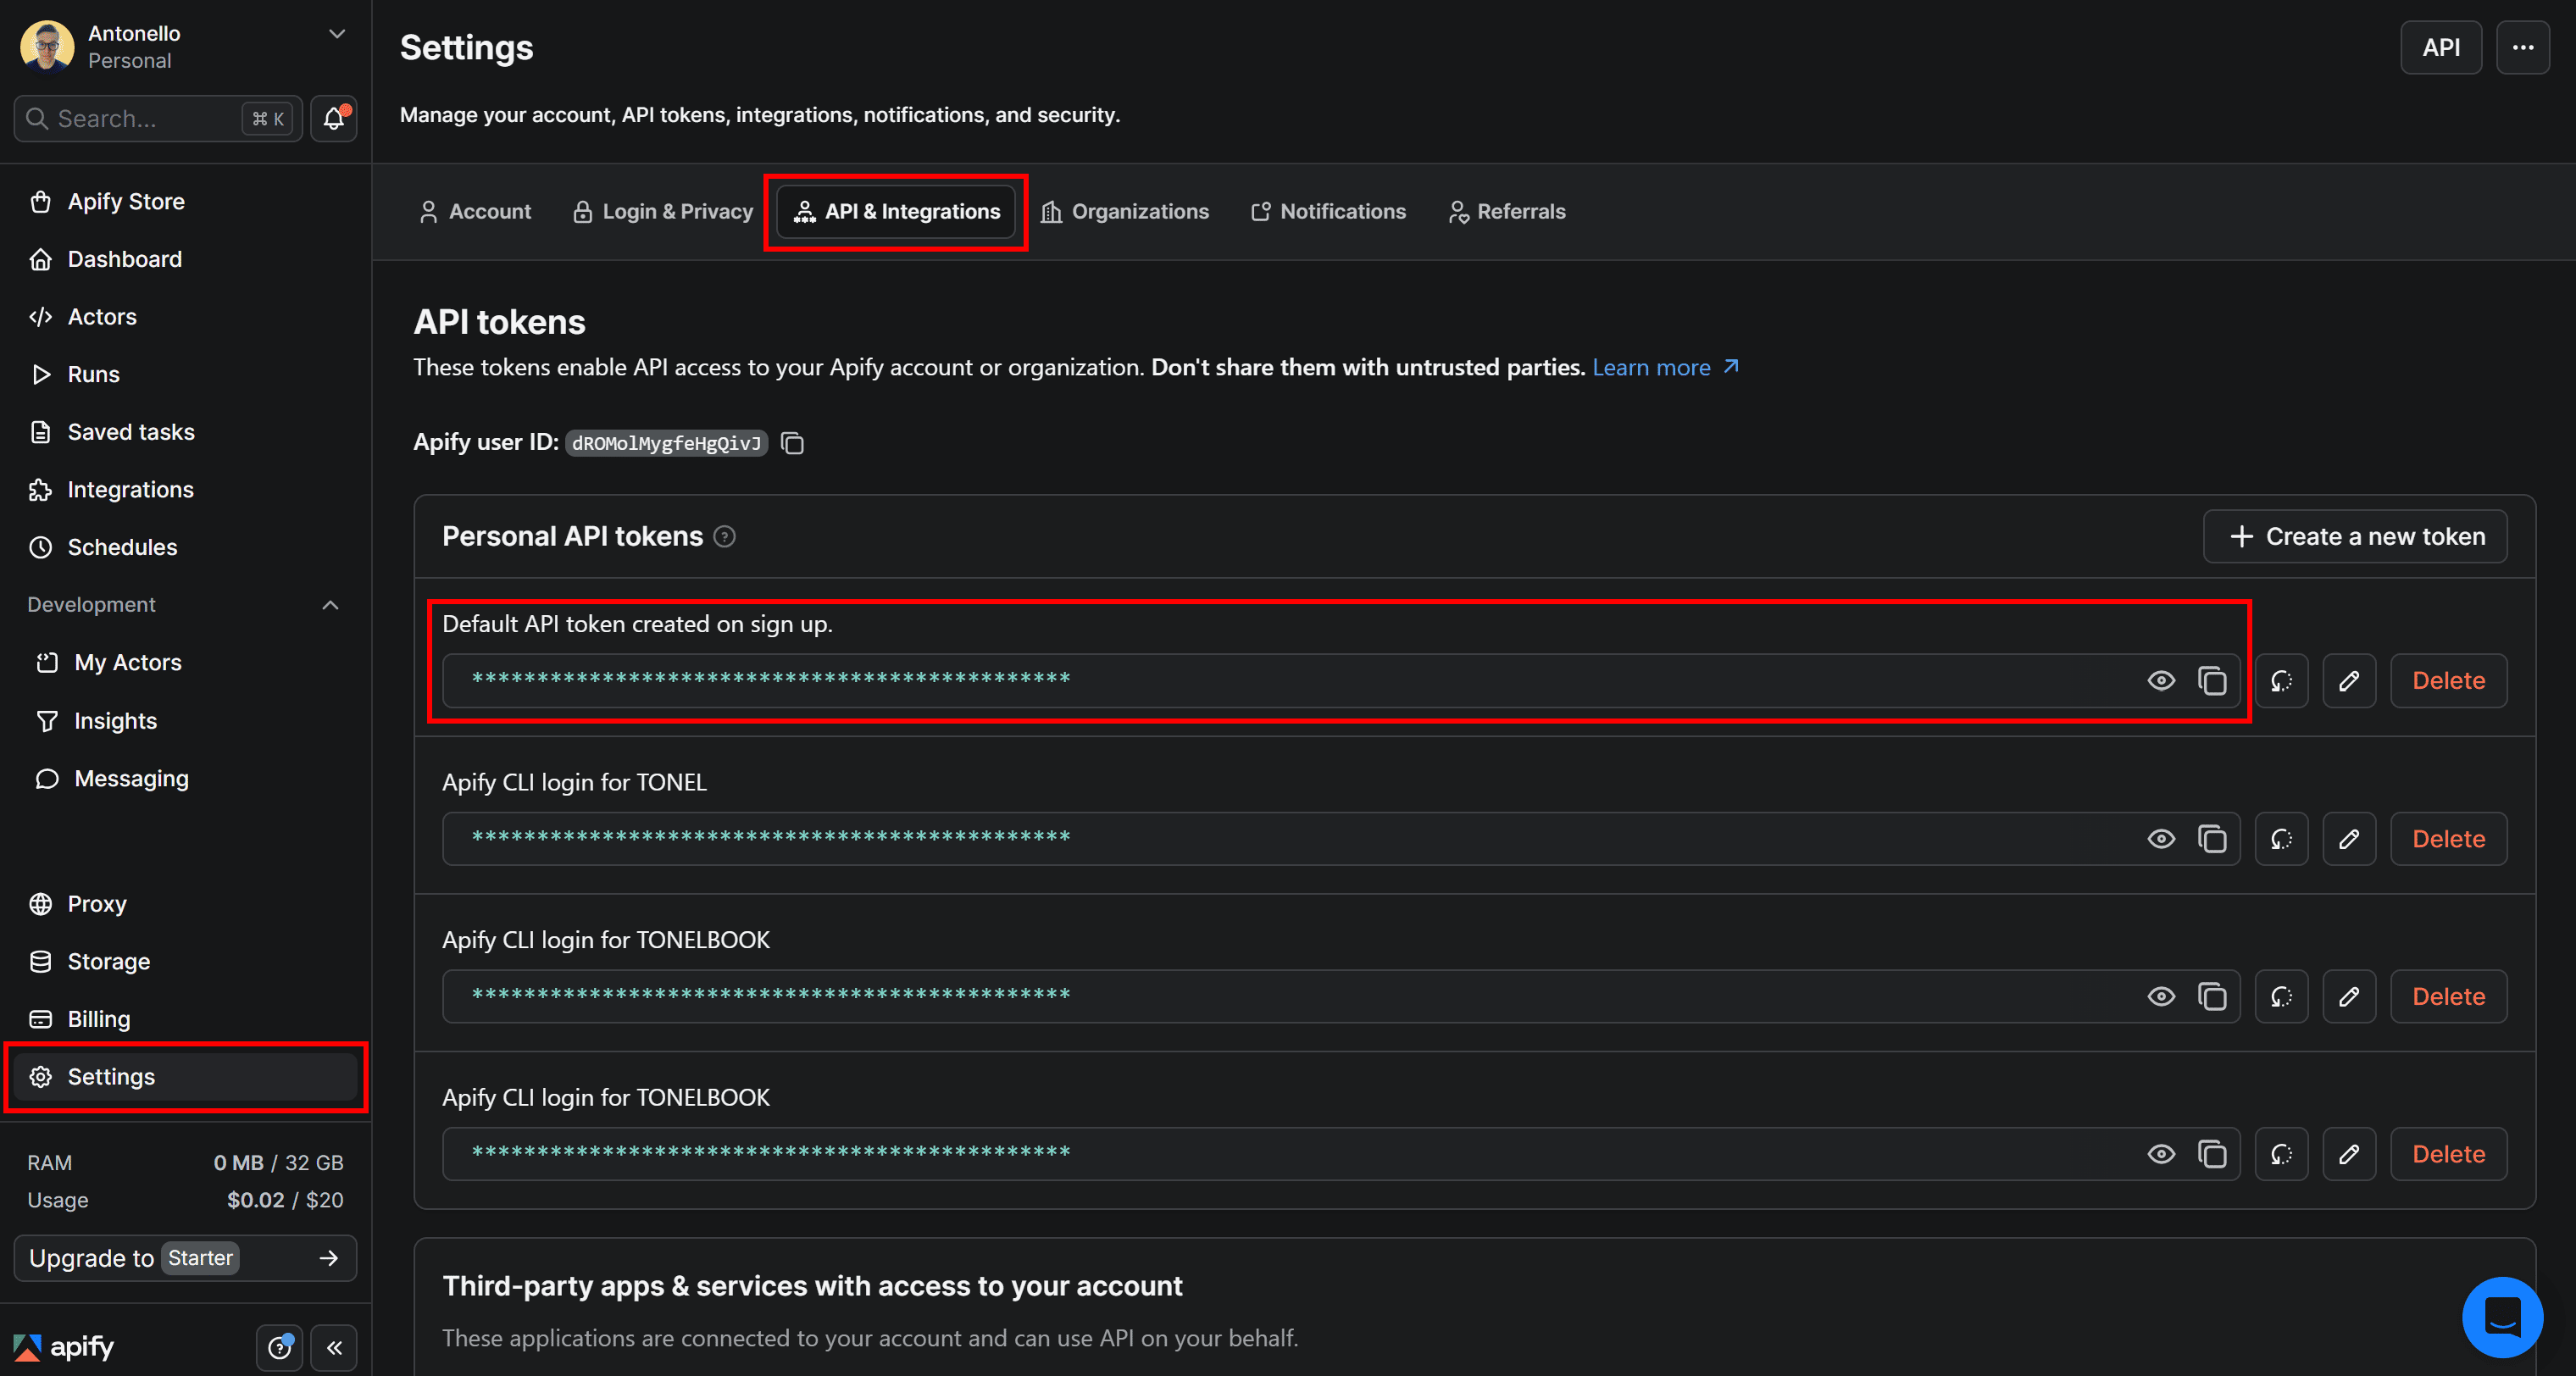
n8n will ask for your Apify API key. You can find it in Apify Console under Settings > API & Integrations:
After connecting your account, select Apify Store Actors as the Actor Source and choose the By URL option. Then, paste the URL of the Wayfair Scraper (Pay Per Result) Actor:
<https://console.apify.com/actors/Z4pv73DXI48fPLG4i>
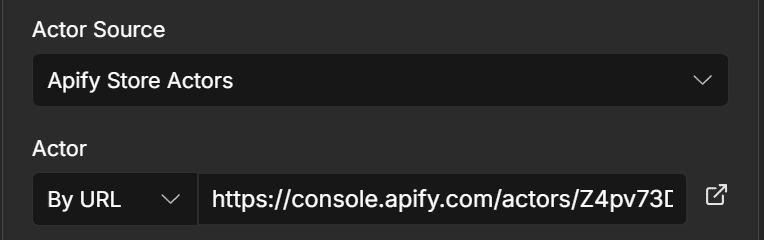
The Apify node is now connected to the desired Actor and ready to collect Wayfair price data.
Step #3: Configure the Wayfair Scraper Actor Run
Before configuring n8n to trigger a Wayfair Scraper (Pay Per Result) run, familiarize yourself with the Actor. Open Apify Console and navigate to the Actor page.
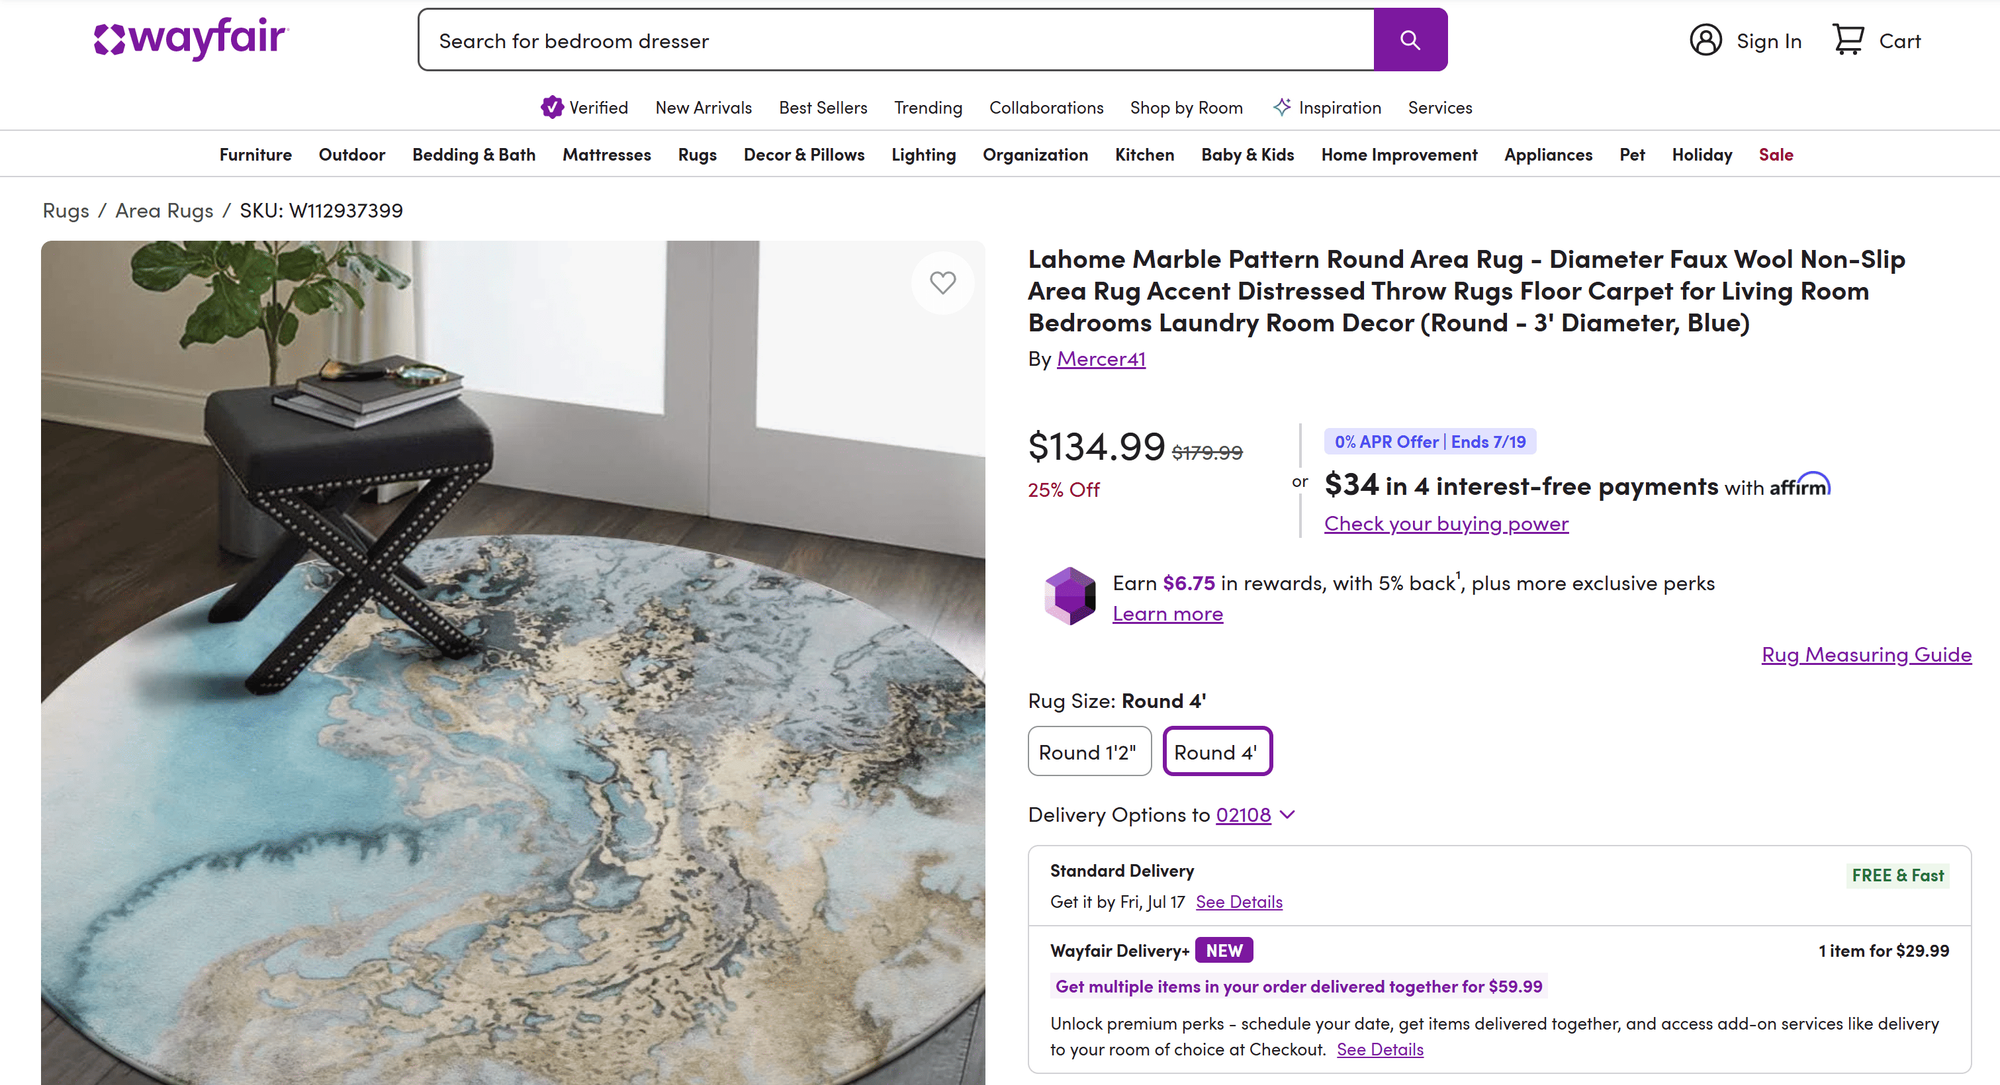
Assume you want to monitor the price of the following Wayfair product:
<https://www.wayfair.com/rugs/pdp/mercer41-lahome-marble-pattern-round-area-rug-diameter-faux-wool-non-slip-area-rug-accent-distressed-throw-rugs-floor-carpet-for-living-room-bedrooms-laundry-room-decor-round-3-diameter-blue-w112937399.html?piid=659254127>
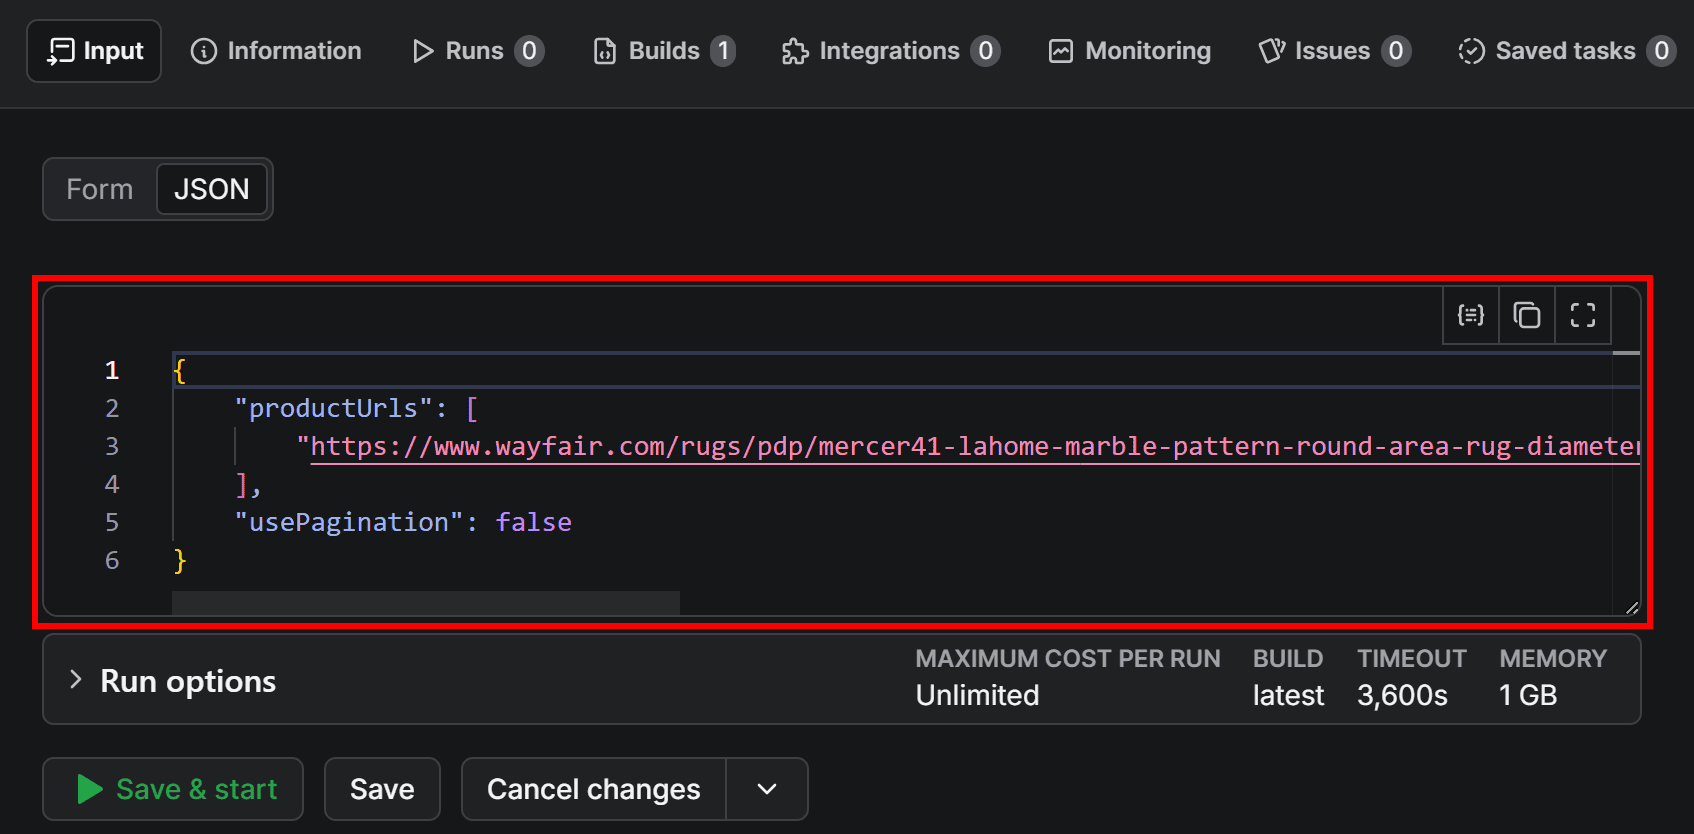
In the Input tab, configure the Actor by:
- pasting the target product URL into the Product URLs field;
- removing any URLs from the Category URLs field;
- disabling the Use Pagination option.
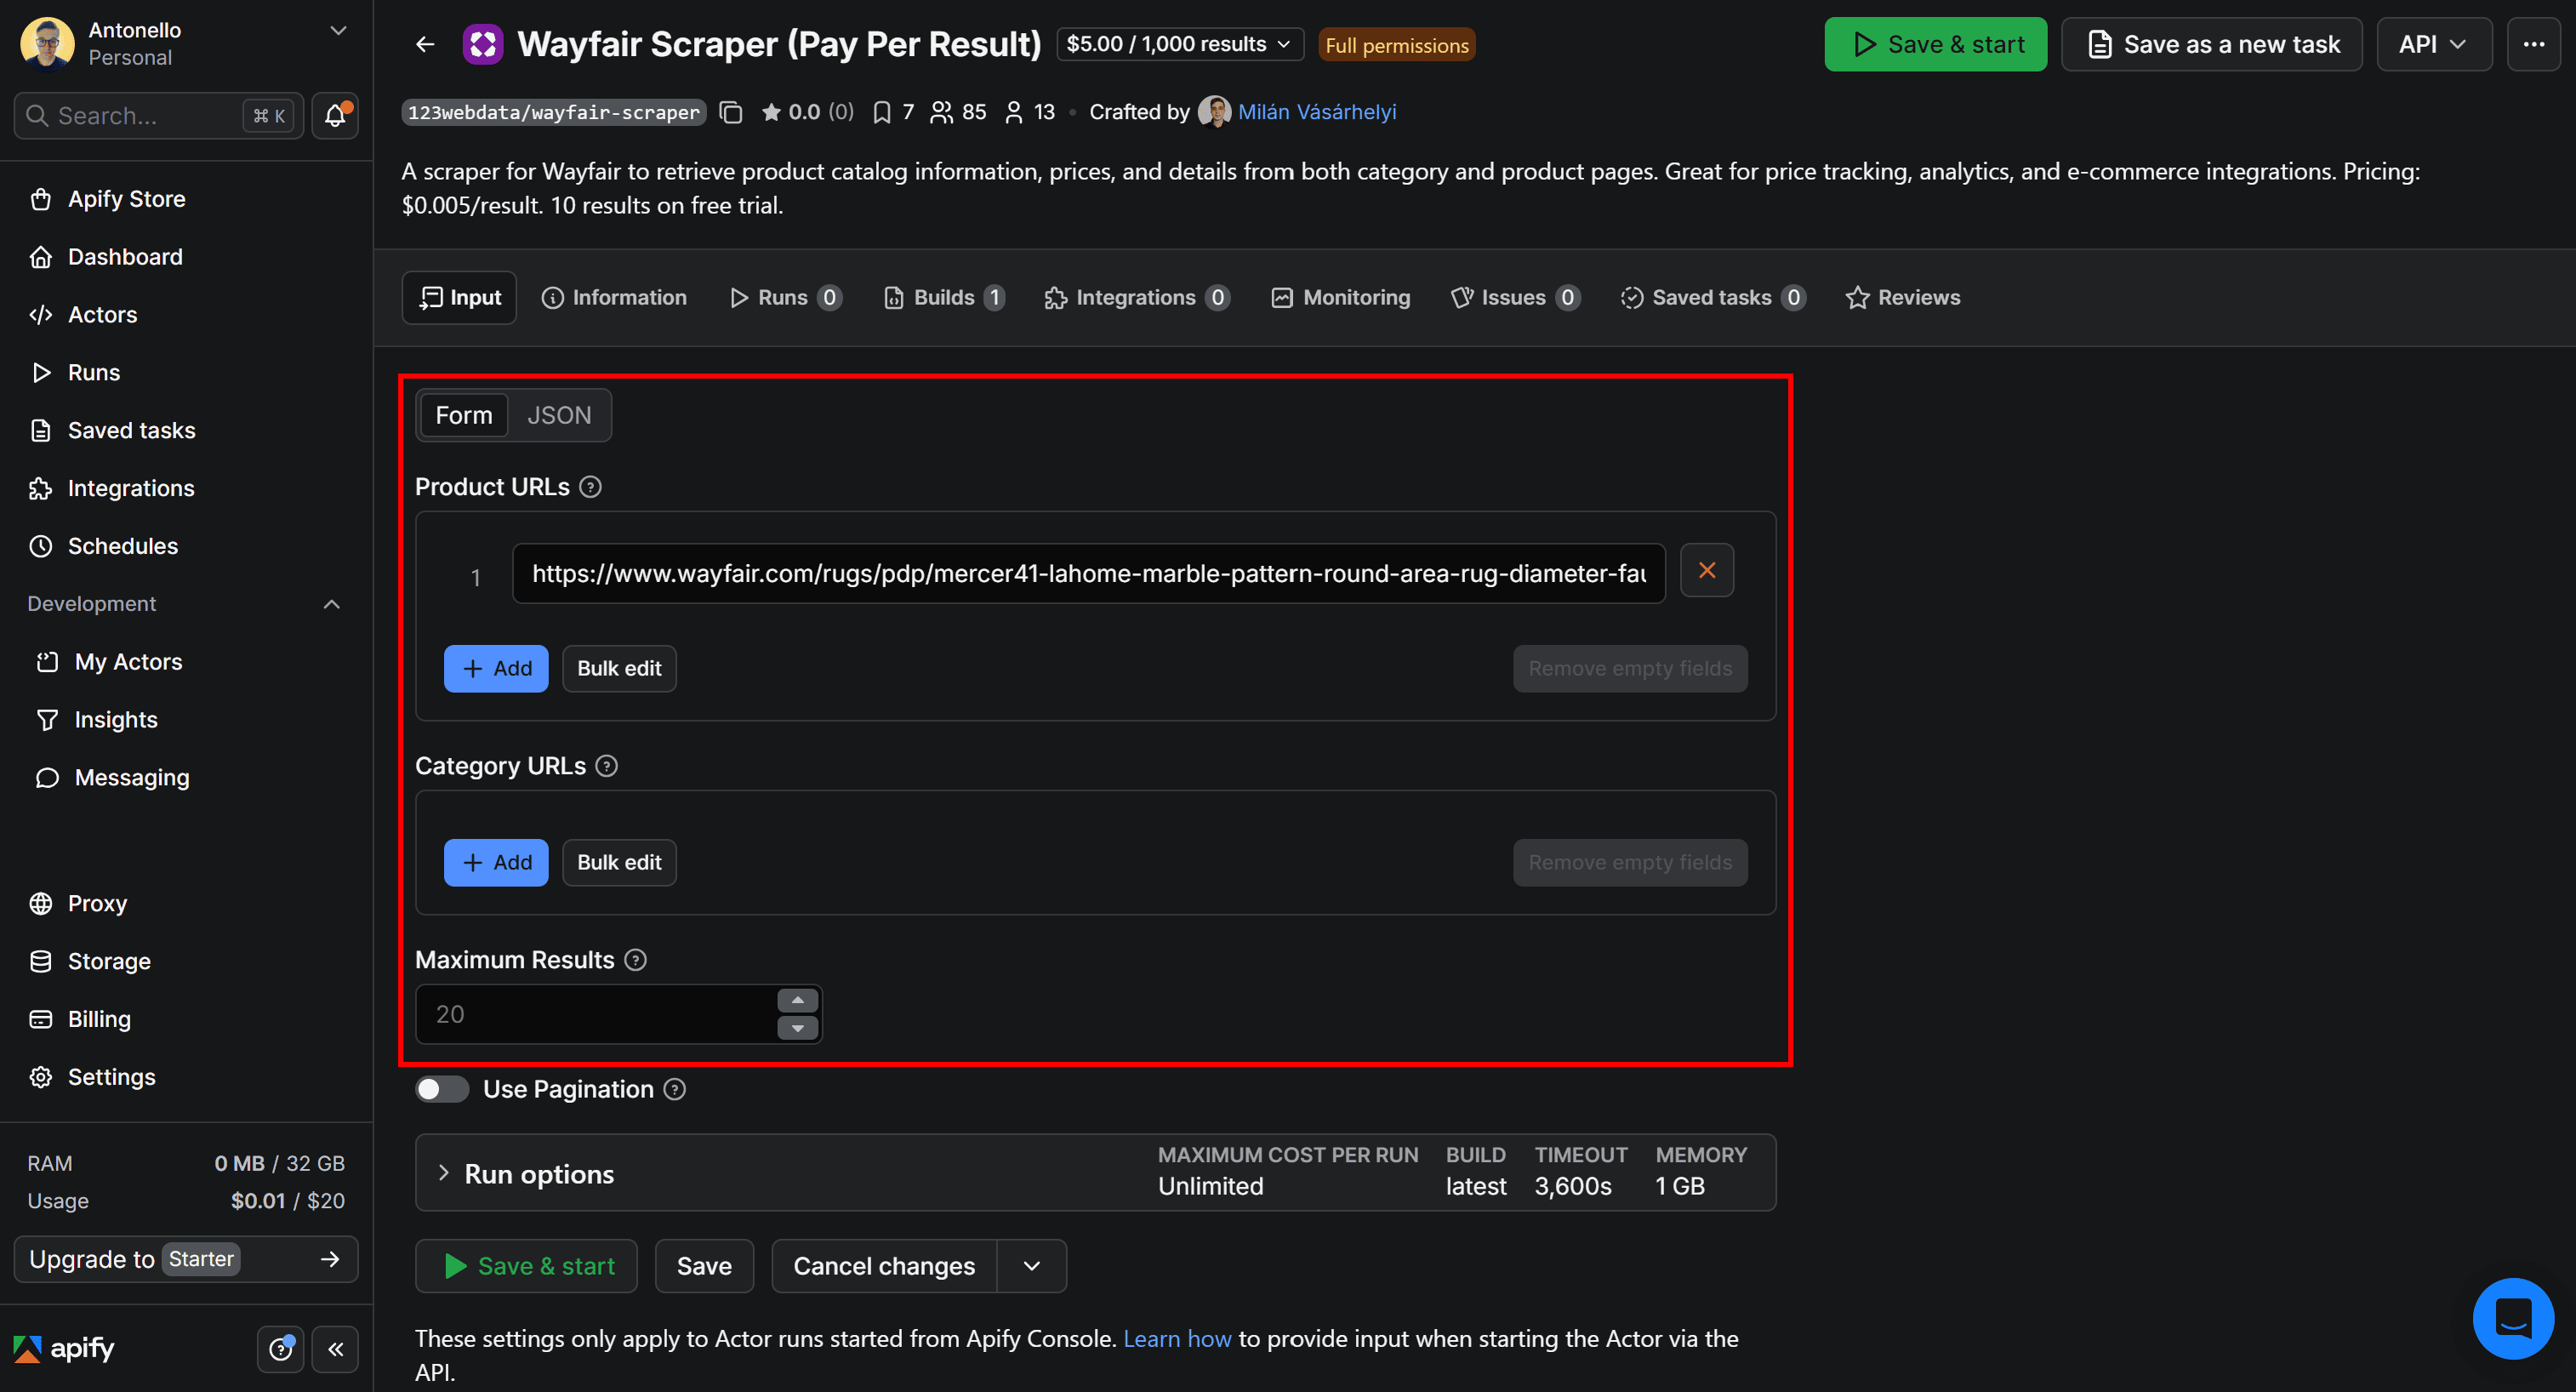
Verify that the Actor works. Running it in Apify Console by clicking Save & Start. You’ll be asked to grant the Actor access to your Apify data. Proceed if you trust the Actor developer.
After the run completes, you’ll see an output like this:
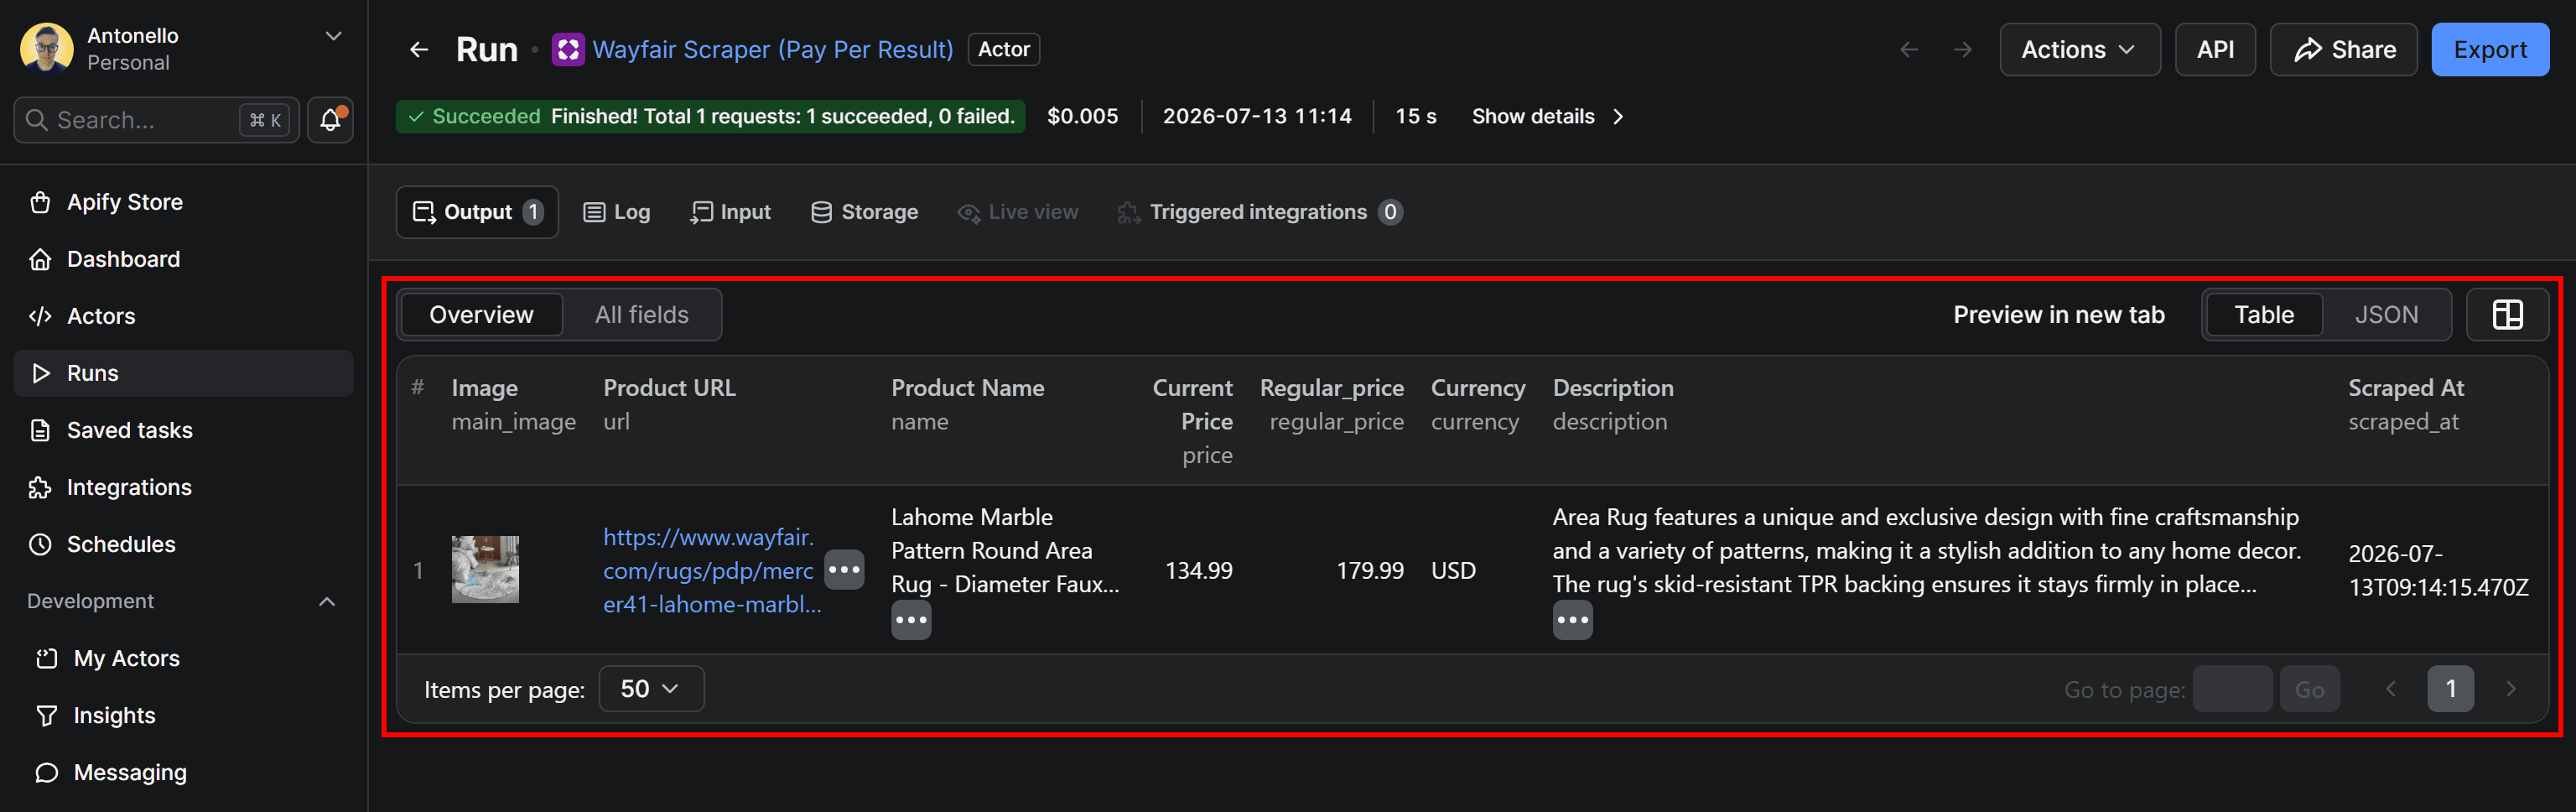
Note how the output contains the main information scraped from the target Wayfair product page in a structured format:
Since the Actor ran successfully, copy its configuration and use it in your n8n workflow. Go back to the Input tab and select the JSON option. In the Apify node, paste this JSON configuration into the Input JSON field.
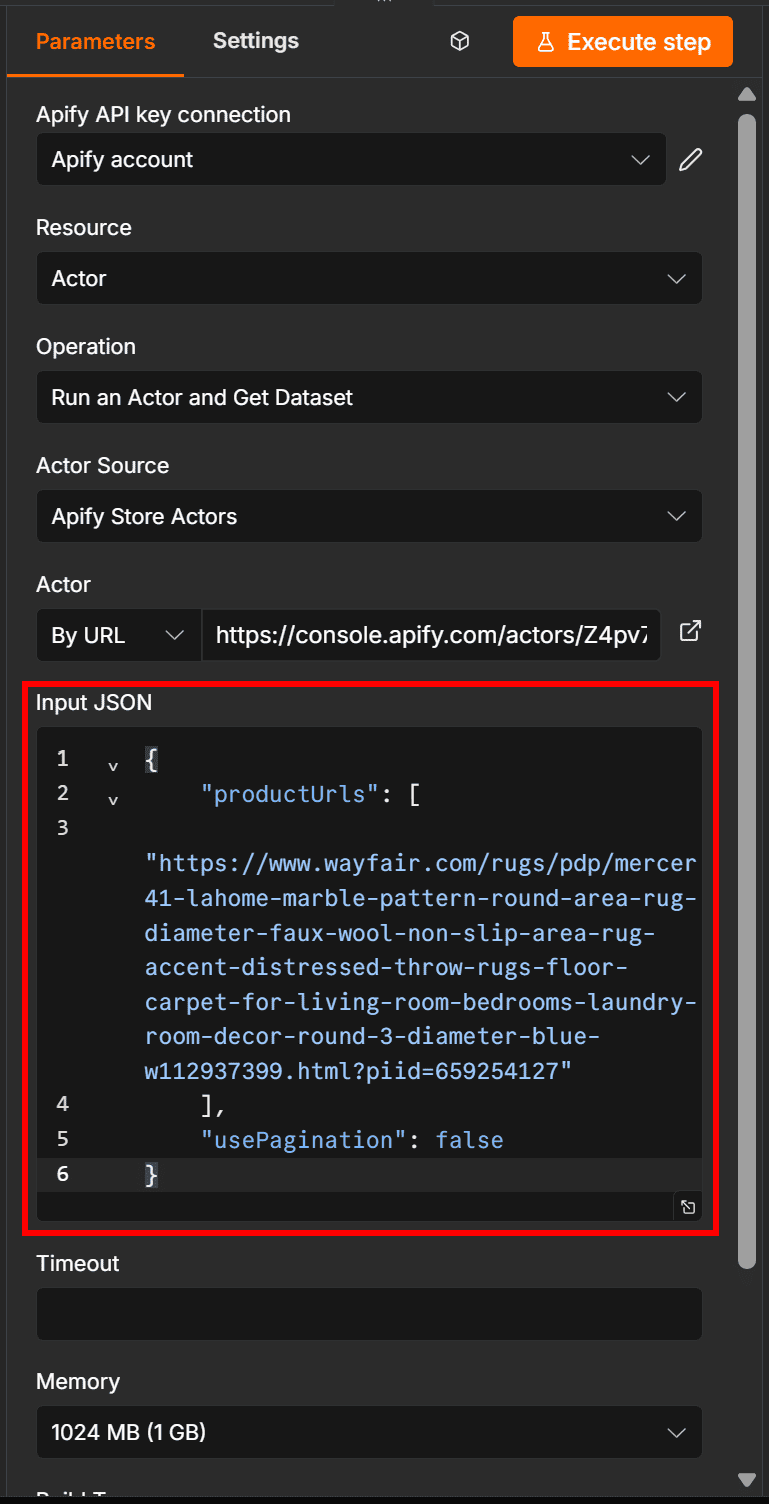
Pasting the Actor run’s configuration in the Input JSON field
Step #4: Retrieve scraped data from Apify
Click Execute step to trigger the Run an Actor and get dataset action:
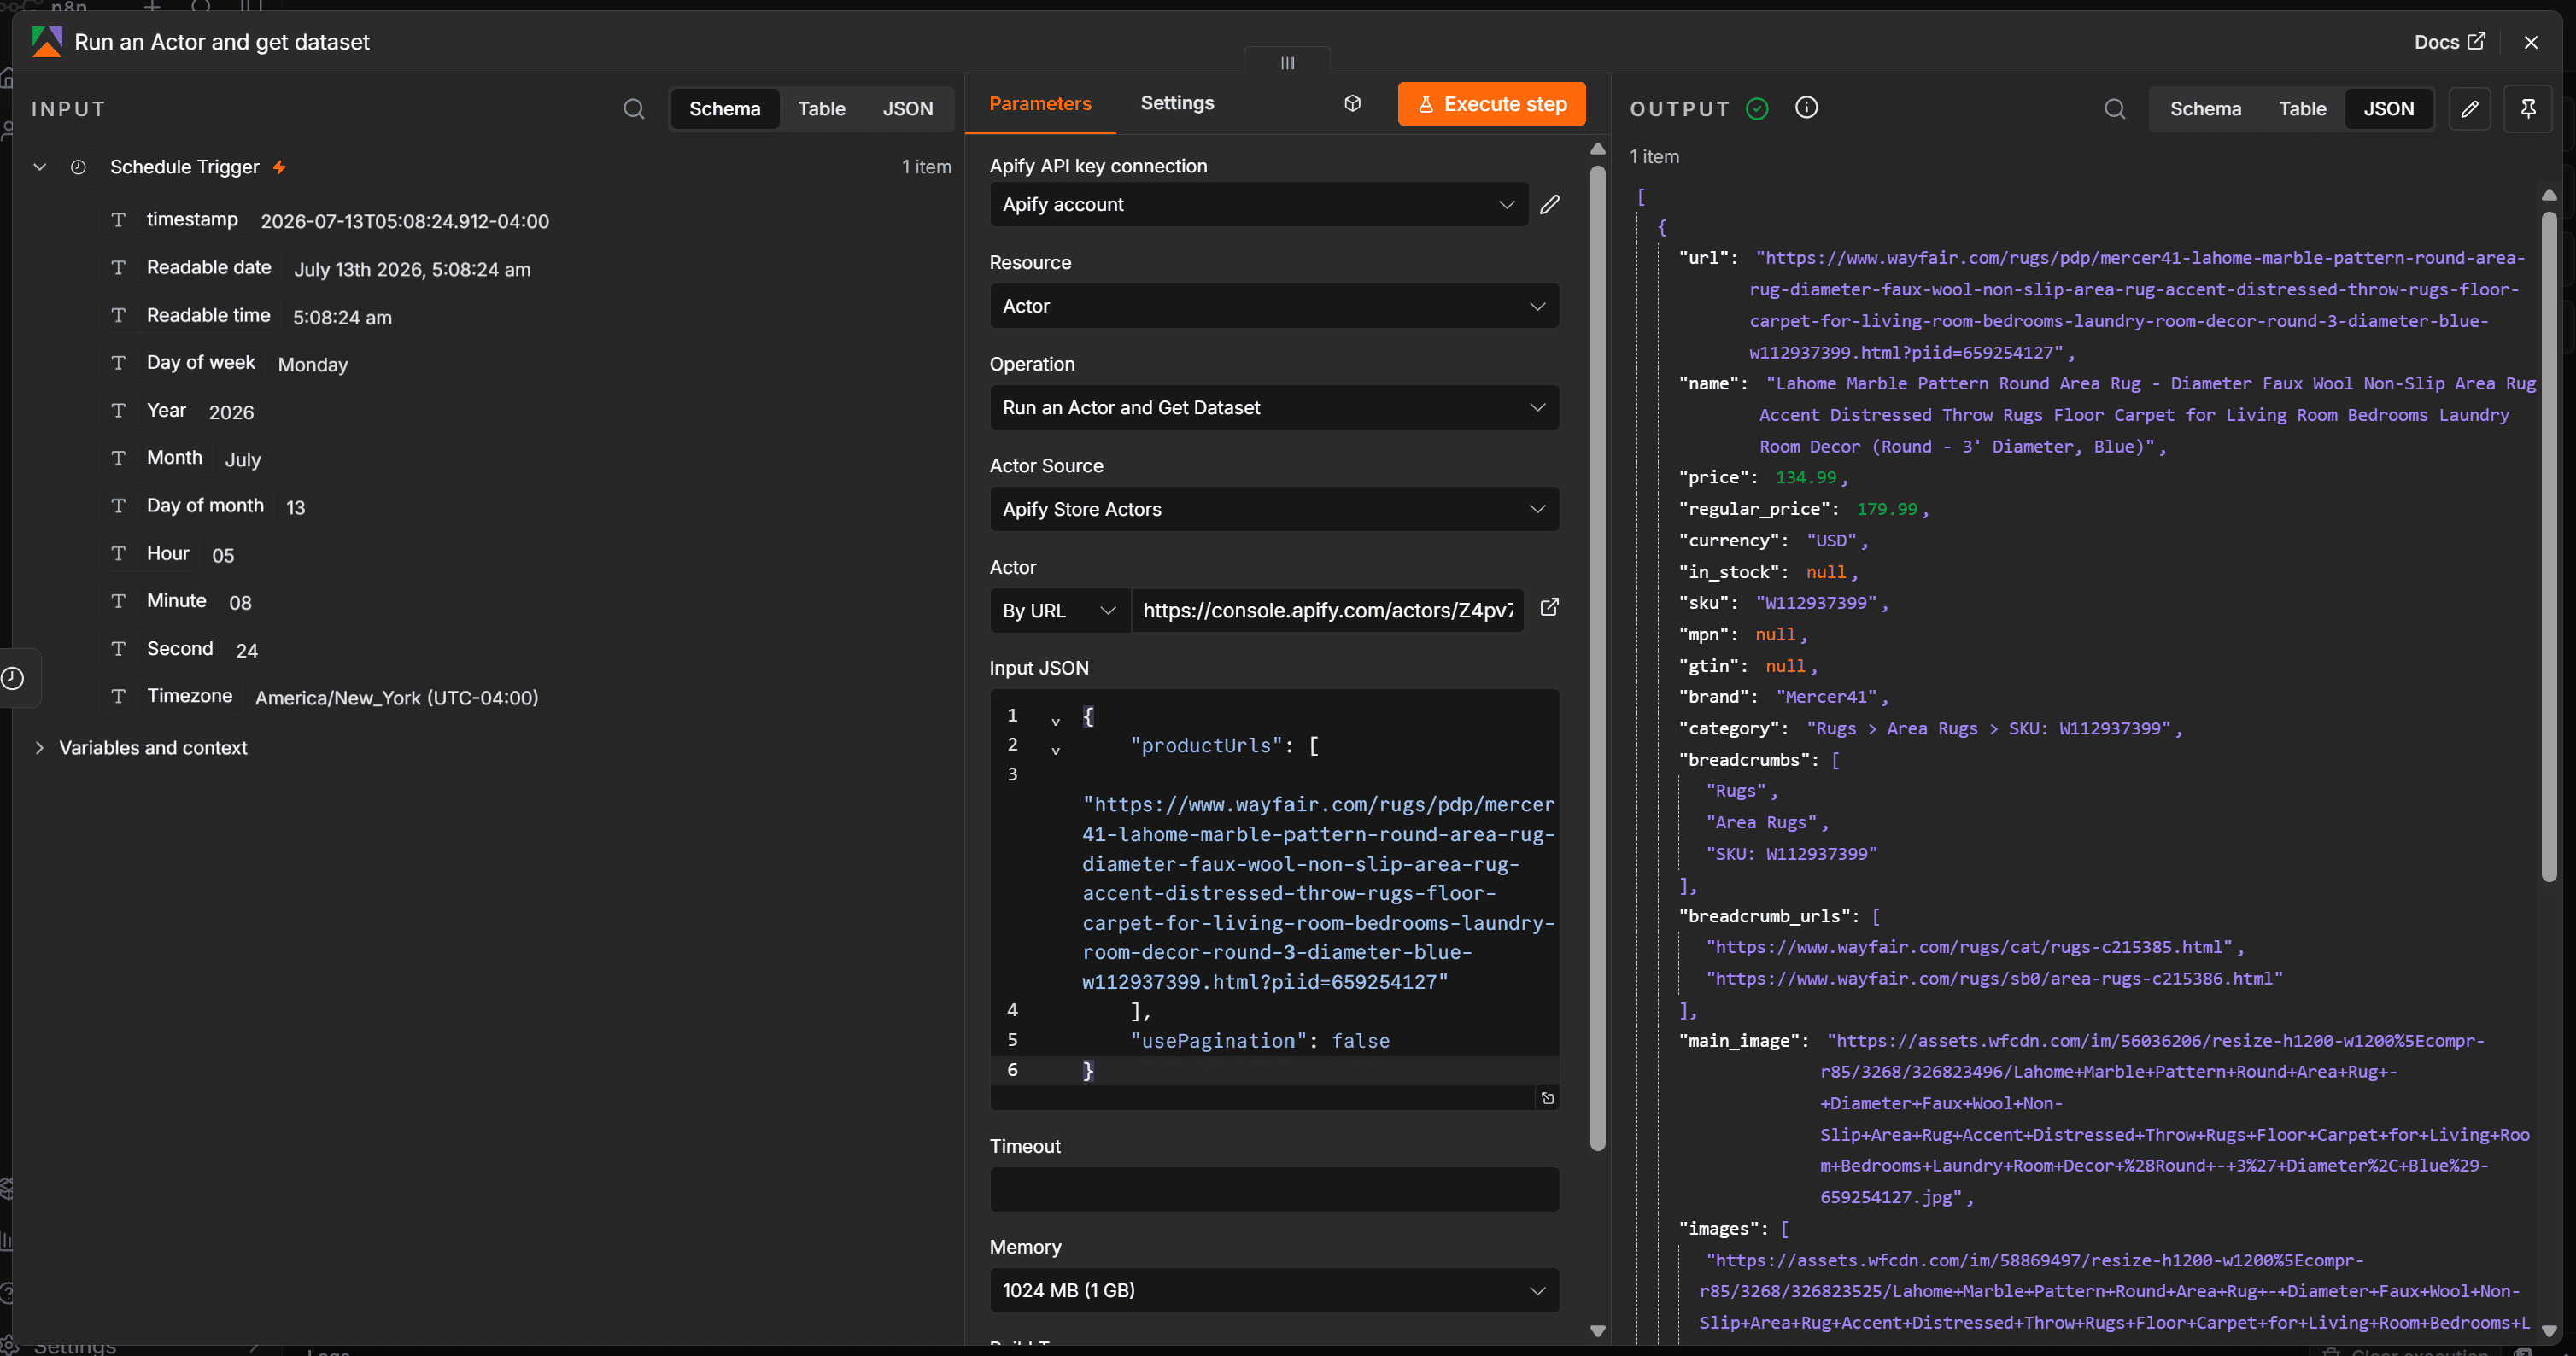
You’ll receive the same result produced by the previous Actor run in Apify Console (here displayed in JSON format). This confirms that your n8n pipeline can programmatically connect to the configured Apify Actor to track Wayfair prices.
Step #5: Store product data and price history
Right now, the workflow only retrieves the current product data. To receive notifications when a product reaches its lowest price, you need to maintain a Wayfair price history.
To do that, you can store the scraped data in a Google Sheets document and use it as a database. On every run, n8n will append the latest product information as a new row.
Now, you first need an initial spreadsheet. In Apify Console, reach the Wayfair Scraper (Pay Per Result)'s Run page, go to the Storage tab, and export the dataset as an Excel file:
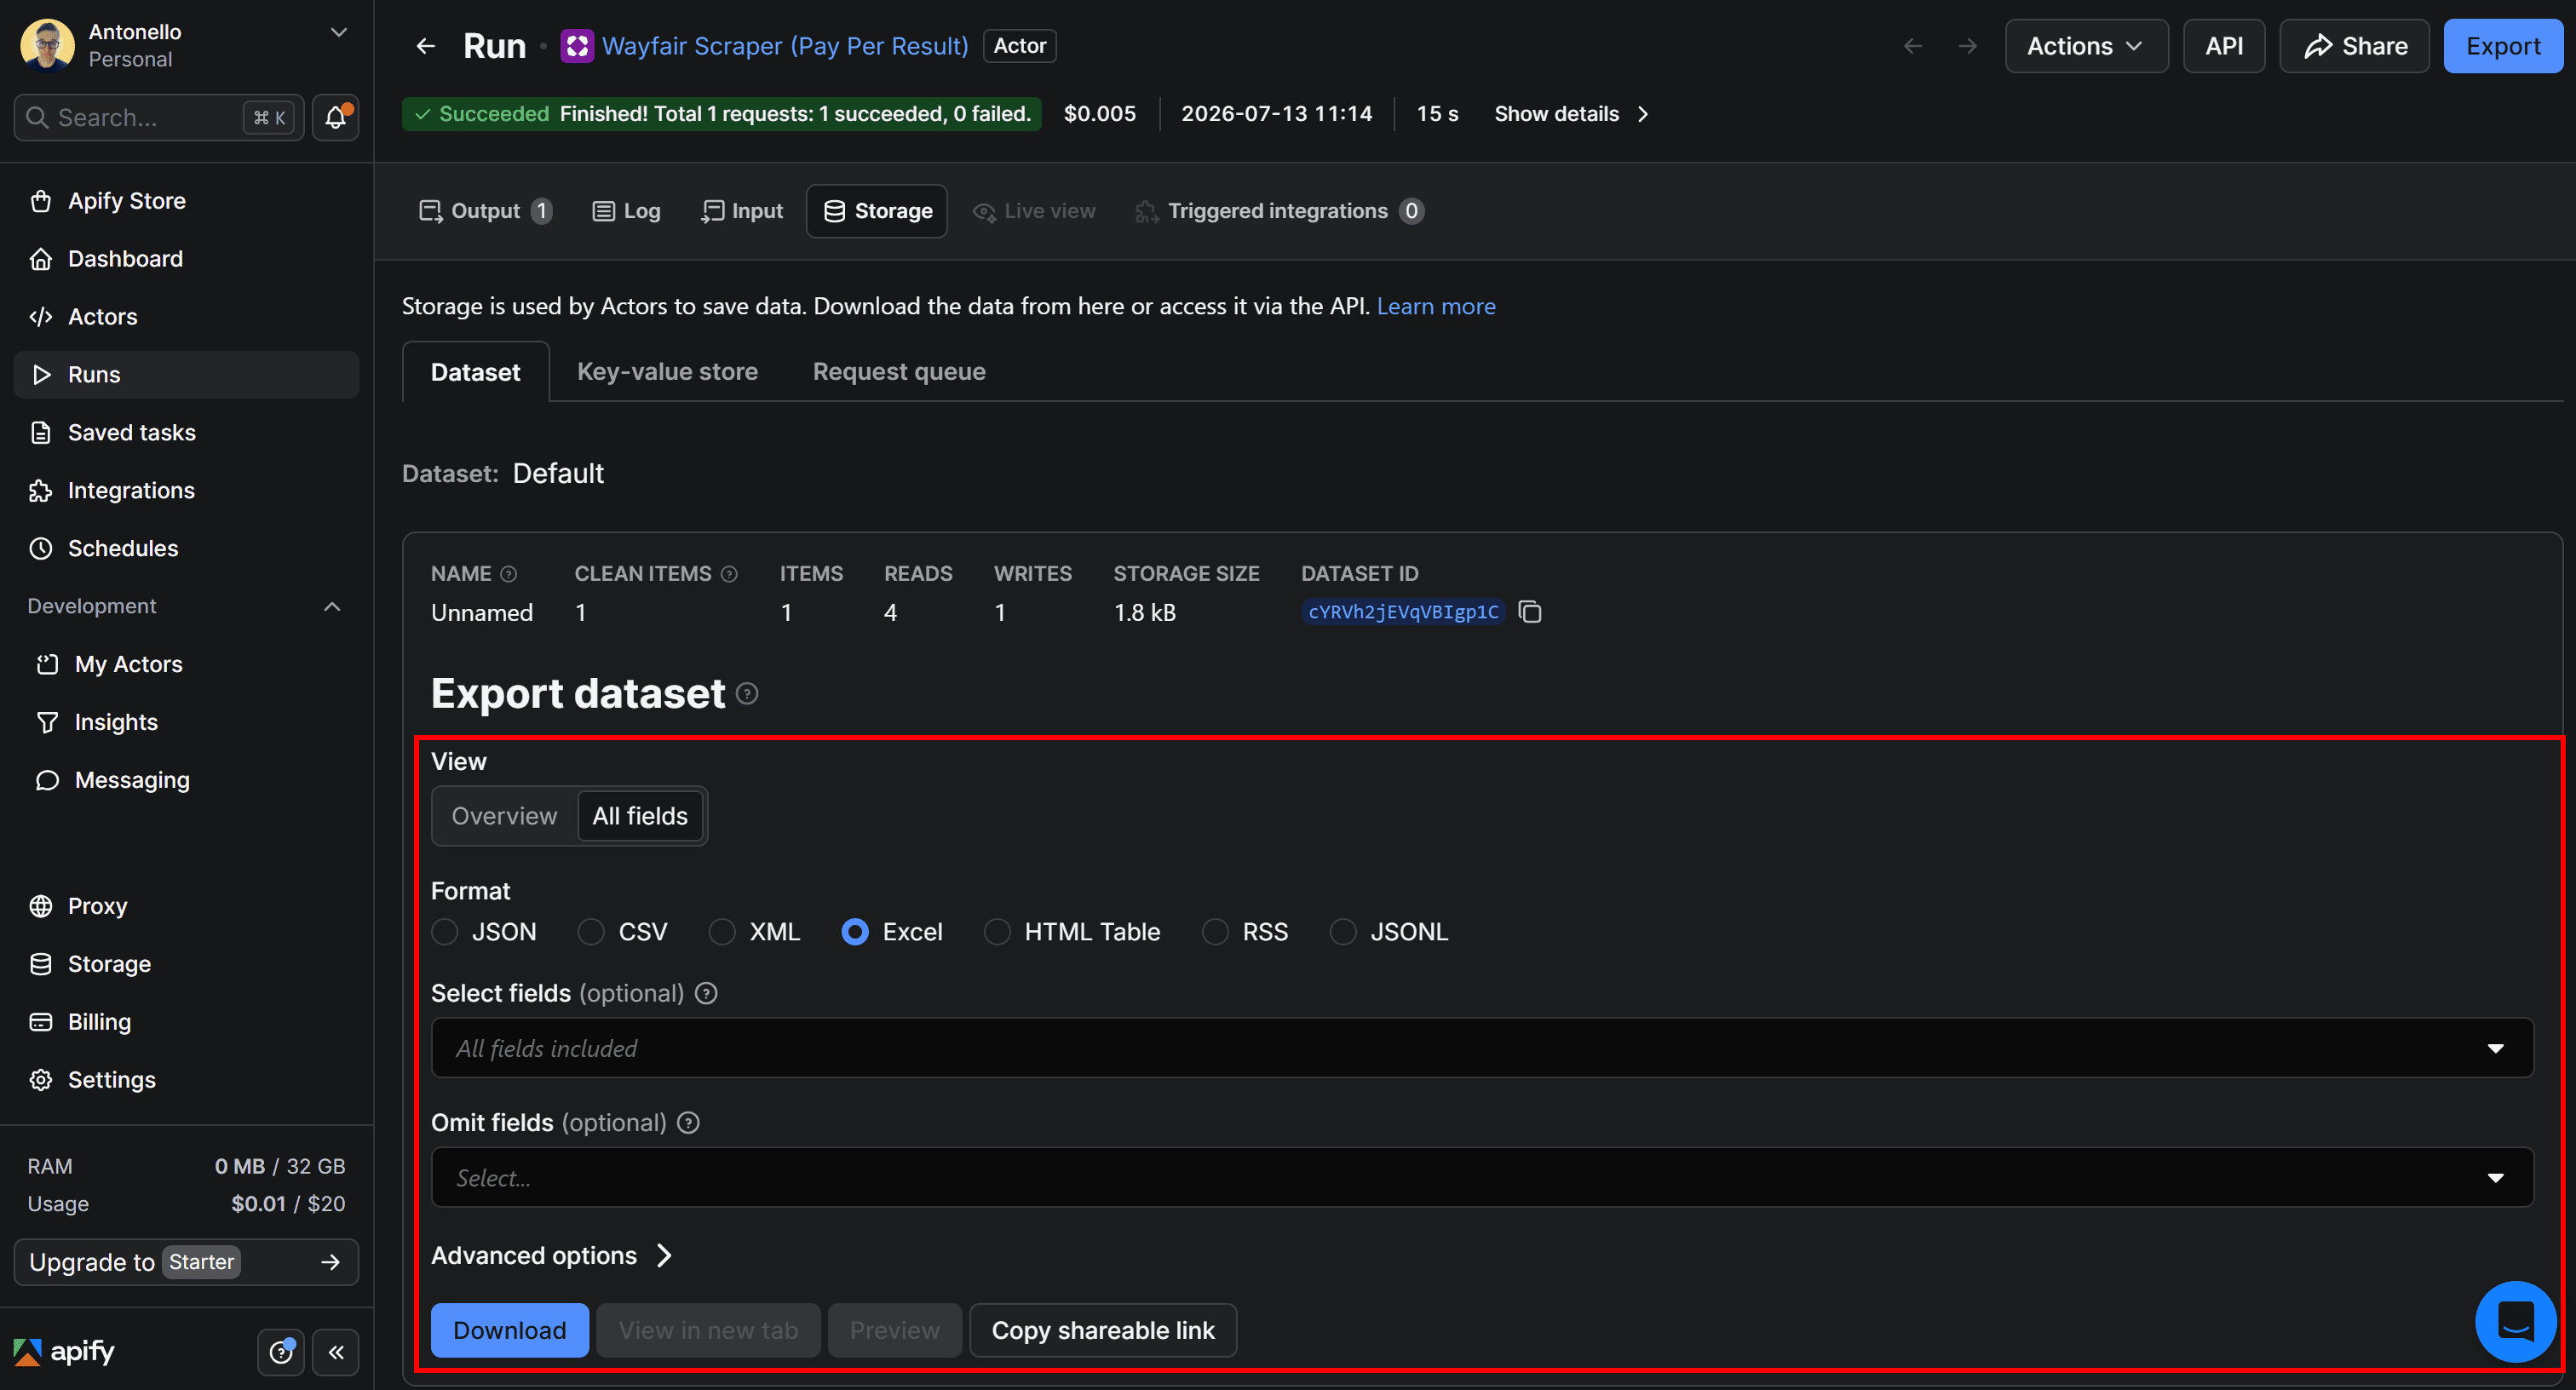
You’ll download a file named dataset_wayfair-scraper_<TIMESTAMP>.xlsx.Upload the downloaded dataset to Google Drive, open it with Google Sheets, and select File > Save as Google Sheets. Save it with a descriptive name, such as “price_monitoring”:
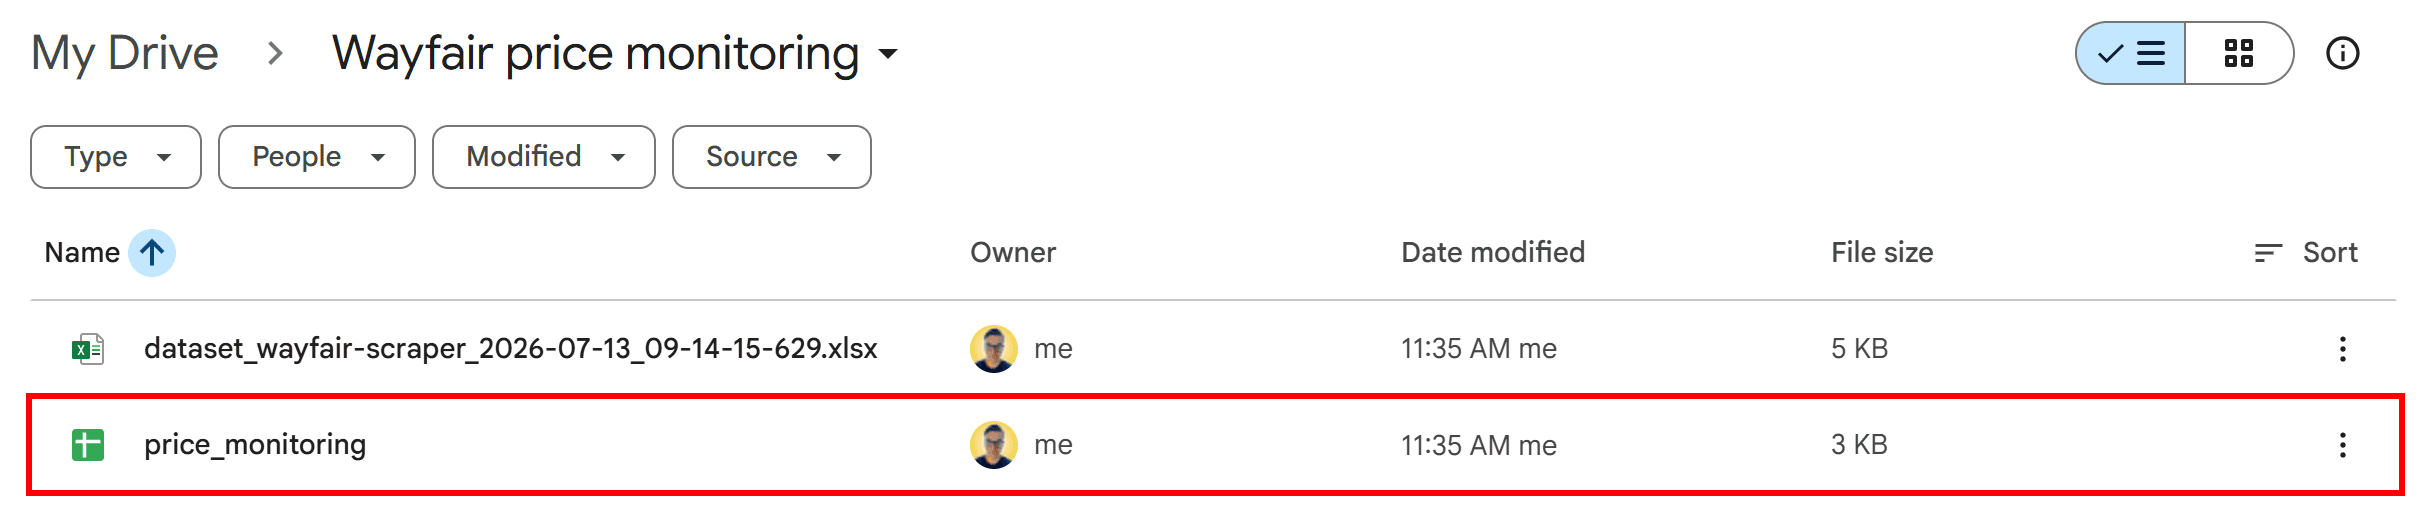
This converts the Excel file generated by the Actor into a Google Sheets document that n8n can write to.
Next, add a Google Sheets node to your workflow and select the Append row in sheet action:
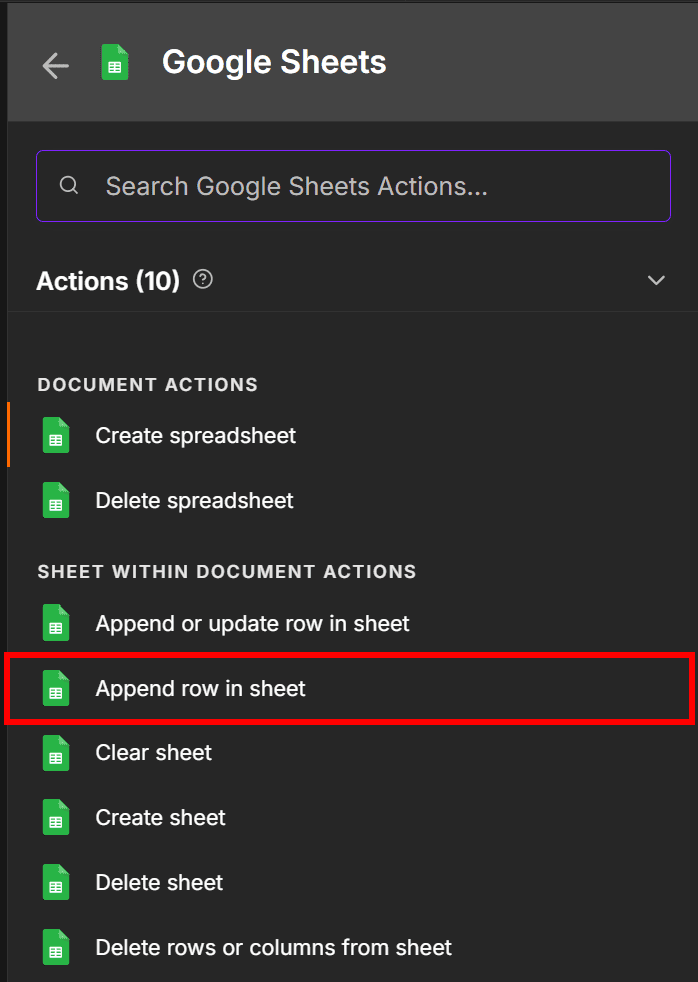
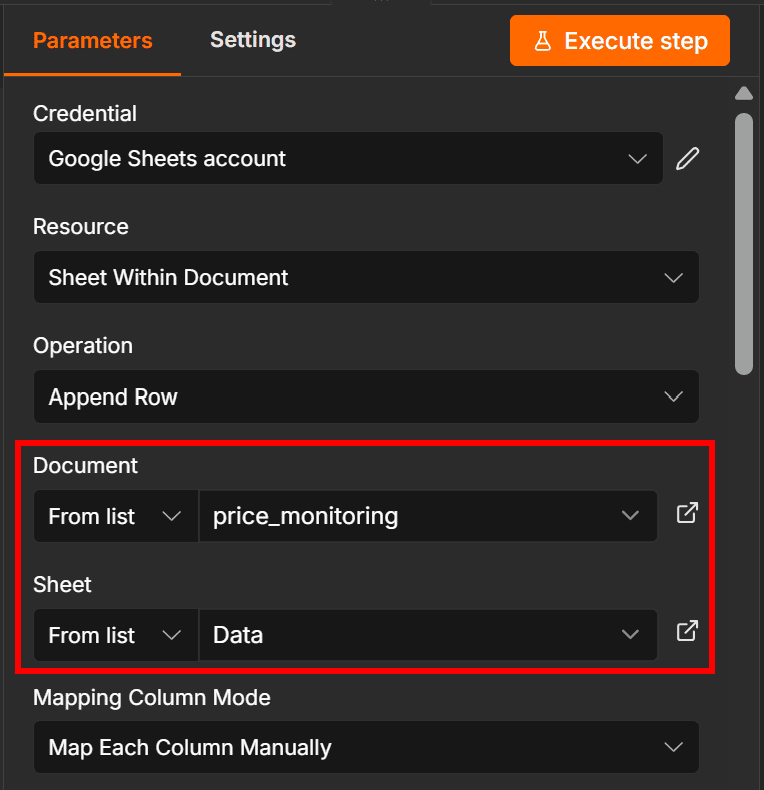
Connect the node to your Google account as described in the n8n documentation. Then configure it to use your price_monitoring spreadsheet by selecting it from the From list option and choosing the main worksheet (named Data in this example):
To ensure each value is written to the correct column, select the Map Each Column Manually mode. Drag each field from the Apify node output on the left to its corresponding column on the right:
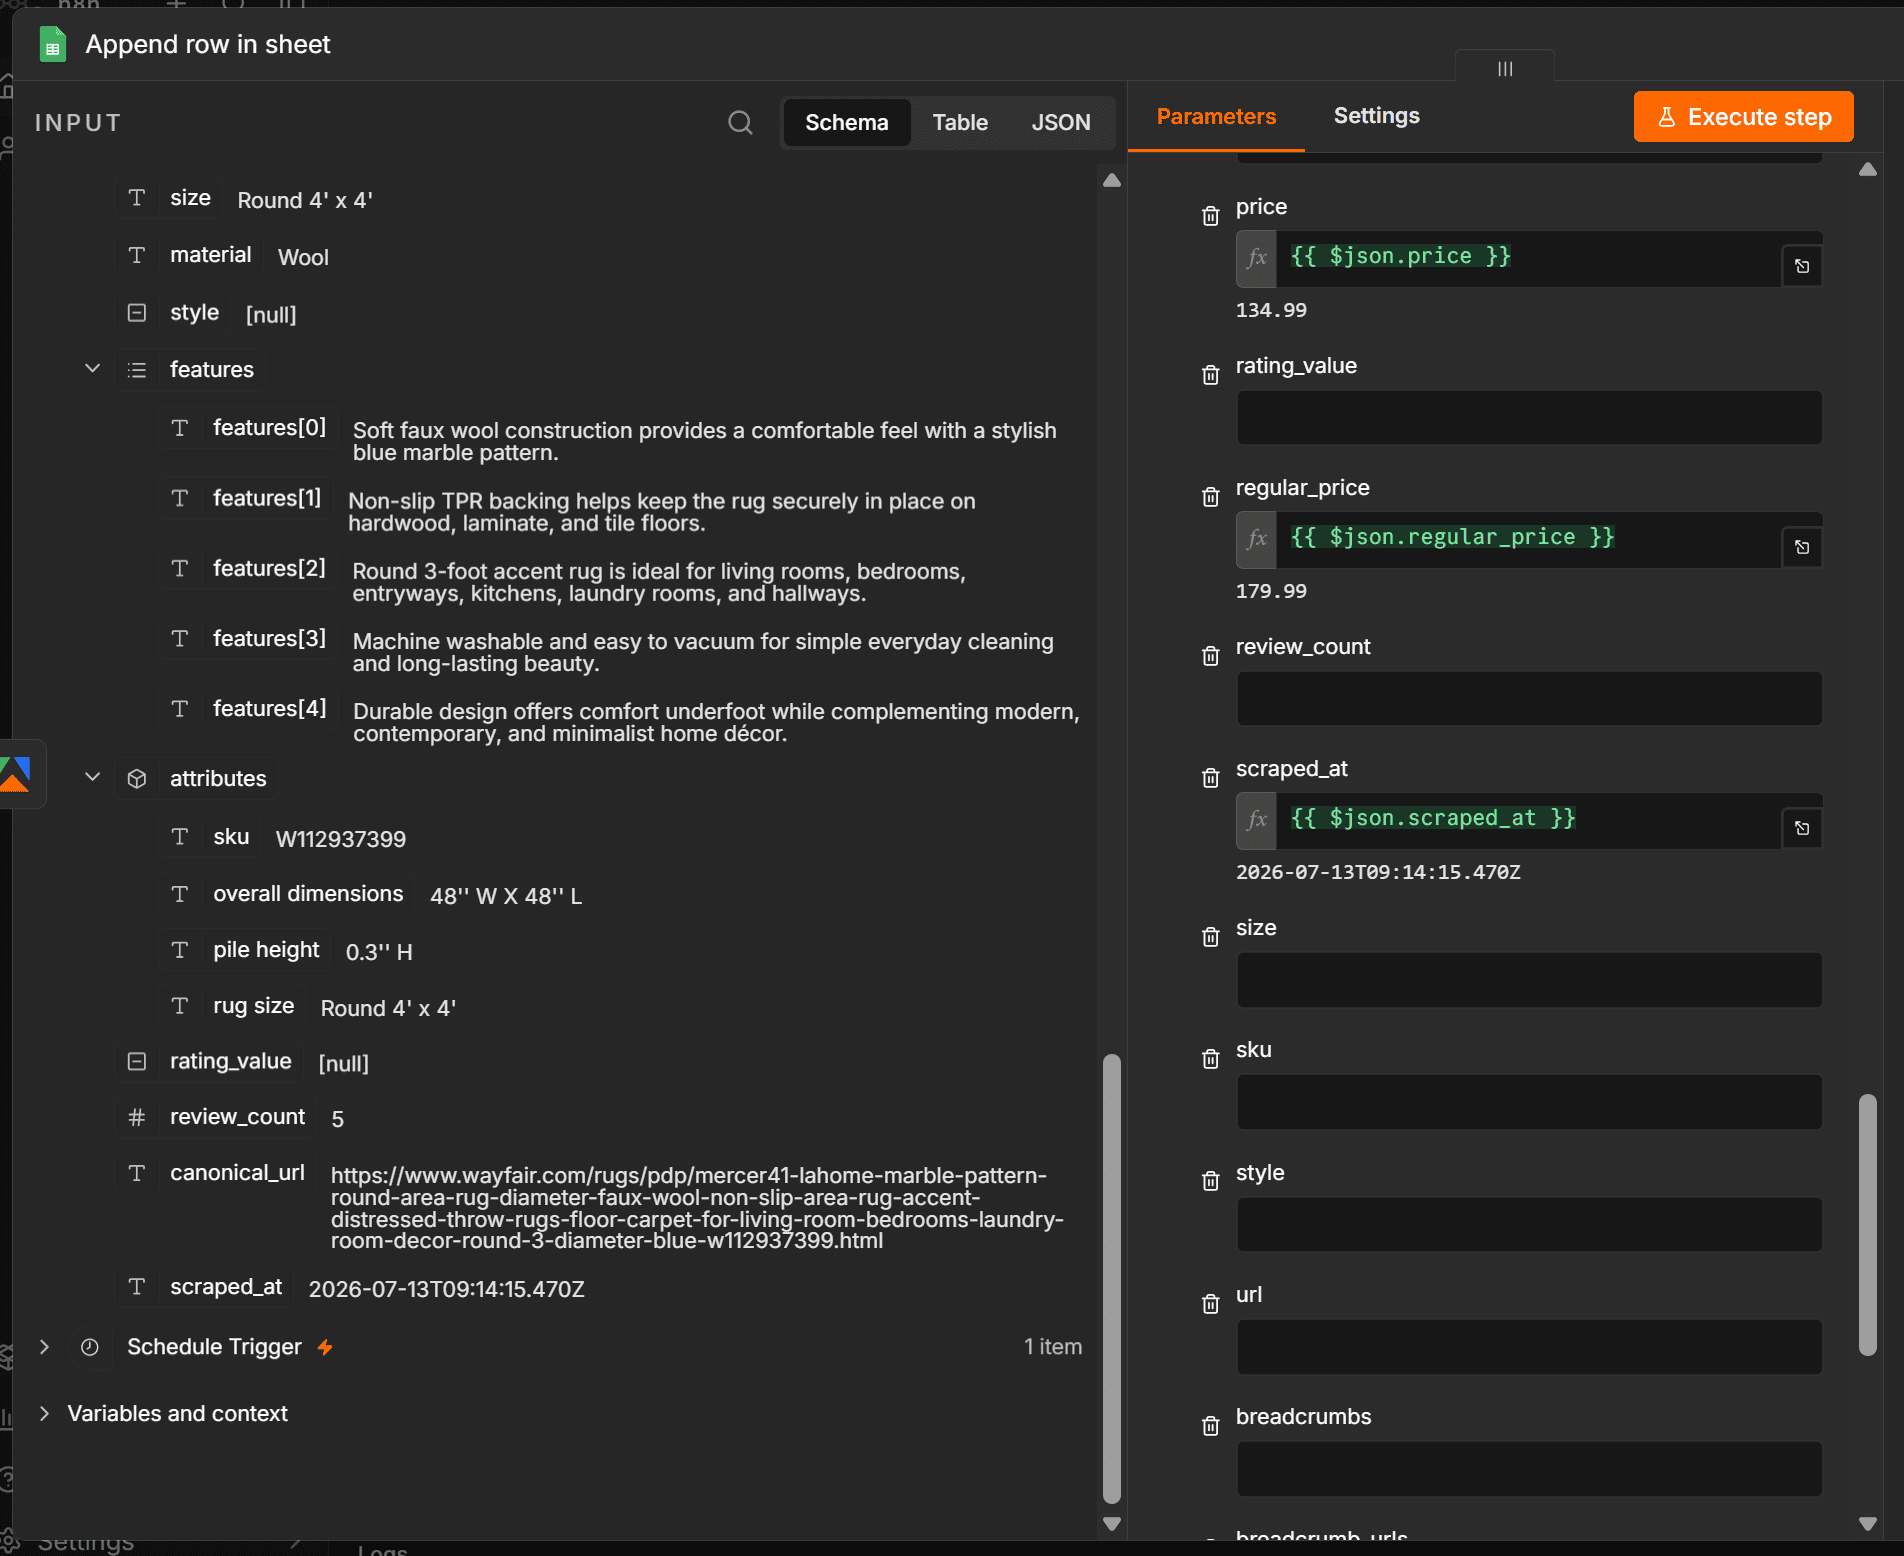
At a minimum, map the price, regular_price, and scraped_at columns. Those fields are enough to build a Wayfair price history tracker.
Step #6: Check whether the latest price is a new minimum
The price_monitoring Sheets document contains the Wayfair price history for your selected product (with a new entry added every 6 hours). Define simple custom logic to read the stored price history and determine whether the latest scraped price is the lowest one.
Start by adding a Google Sheets > Get row(s) in sheet node configured to read all rows from the price_monitoring spreadsheet:
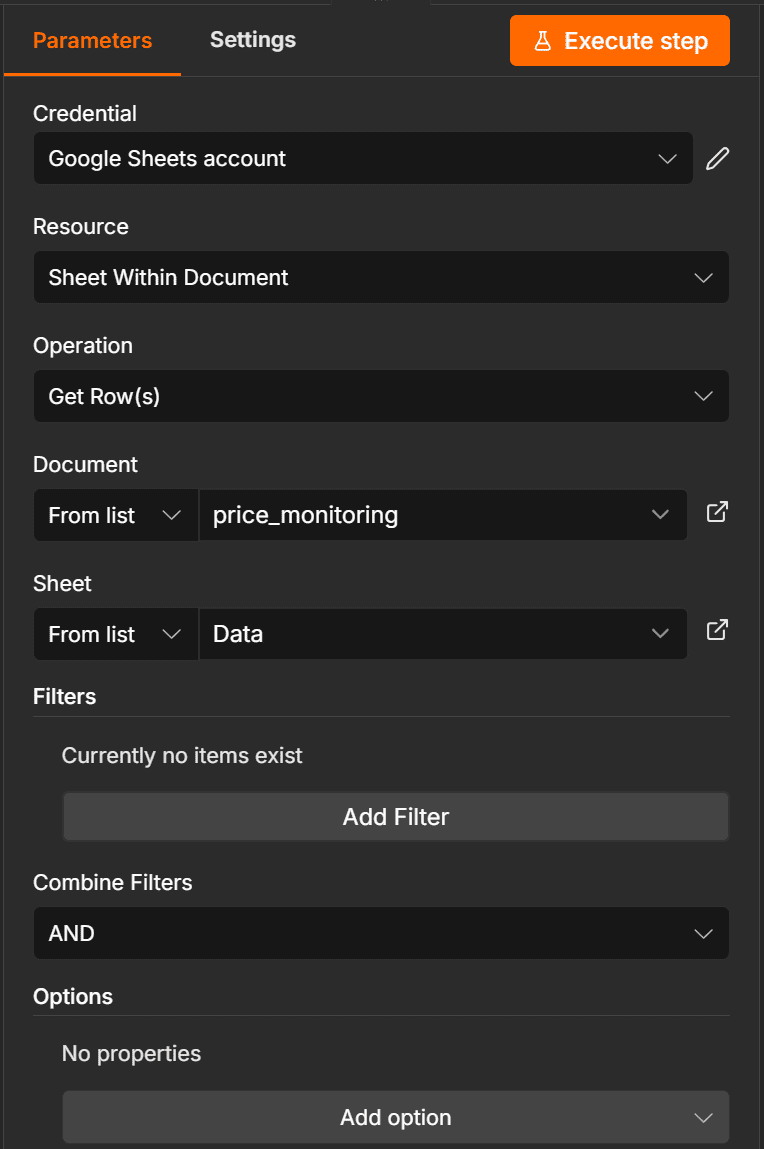
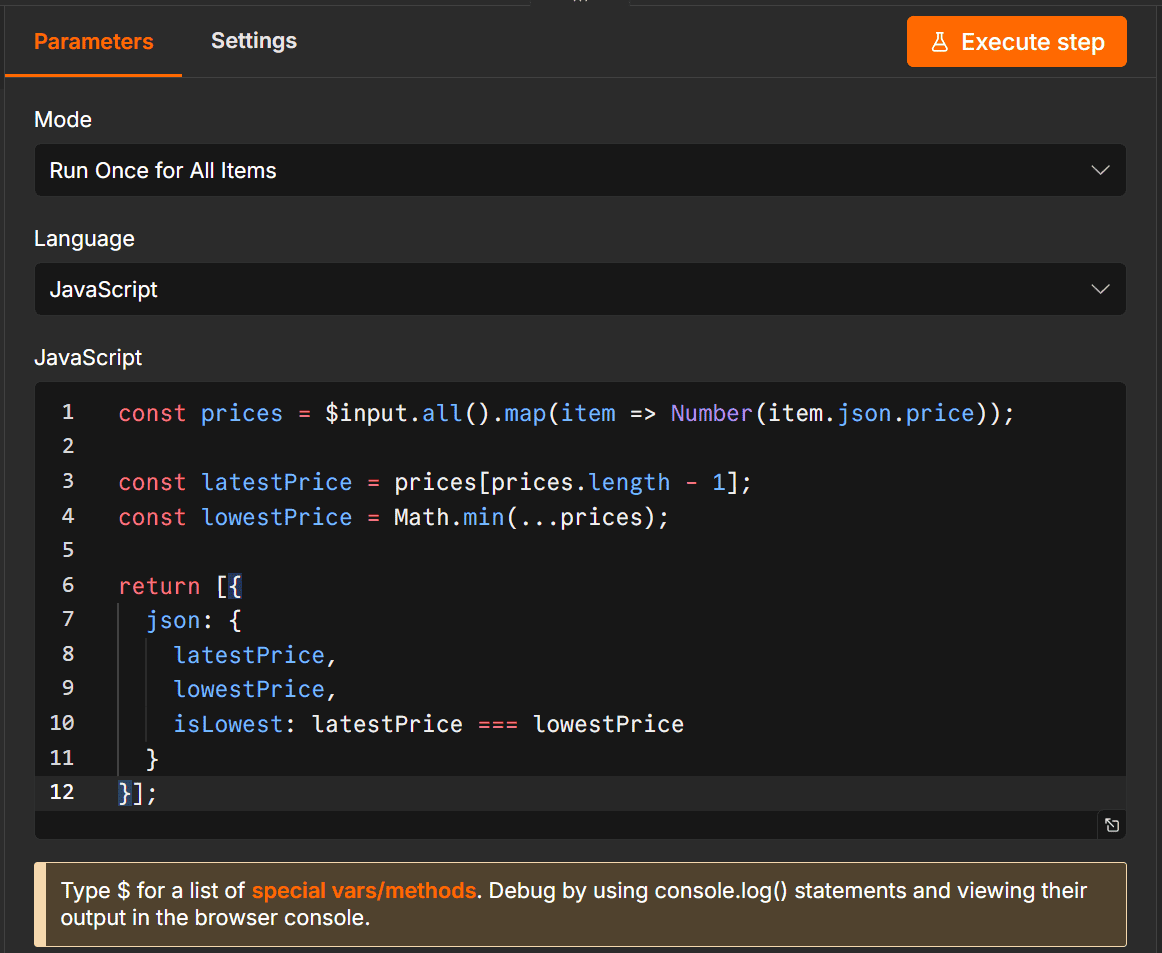
Next, add a Code node with the following JavaScript:
const prices = $input.all().map(item => Number(item.json.price));

const latestPrice = prices[prices.length - 1];
const lowestPrice = Math.min(...prices);

return [{
  json: {
    latestPrice,
    lowestPrice,
    isLowest: latestPrice === lowestPrice
  }
}];
This extracts all recorded prices, identifies both the latest and the lowest recorded price, and returns a JSON object indicating whether the latest price is the lowest one. In detail, isLowest is true when the most recently scraped price is the lowest price recorded so far, and false otherwise.
Finally, add an If node and configure it to check whether the isLowest field returned by the previous node is true. Drag isLowest from the Code node into the Conditions field, then select Boolean > is true:
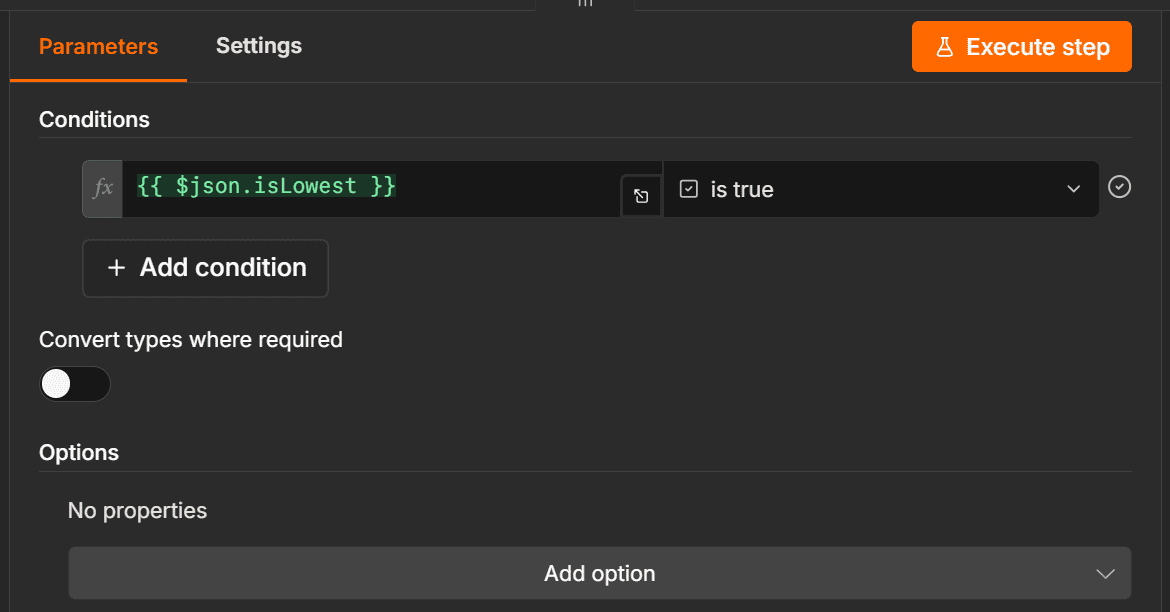
This creates two execution paths:
- The
truebranch: Runs when the latest scraped price is the lowest price. - The
falsebranch: Runs when the latest scraped price isn’t the lowest price.
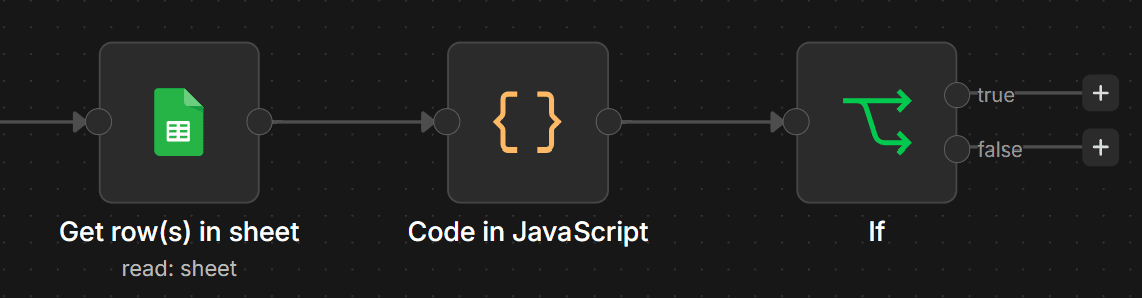
Step #7: Send an automated email notification
Connect a Gmail > Send a message node to the true branch. This way, your Wayfair price tracker sends a notification whenever it detects that the latest scraped price is the lowest price recorded so far.
Specify the recipient's email address in the To field. Then add a subject (e.g., “[Wayfair Price Tracker] Lowest Price Available!”), and configure the email body as follows:
Your monitored Wayfair product "{{ $('Get row(s) in sheet').item.json.name }}" has just reached its lowest recorded price: ${{ $('Code in JavaScript').item.json.lowestPrice }}.

URL: {{ $('Get row(s) in sheet').item.json.canonical_url }}
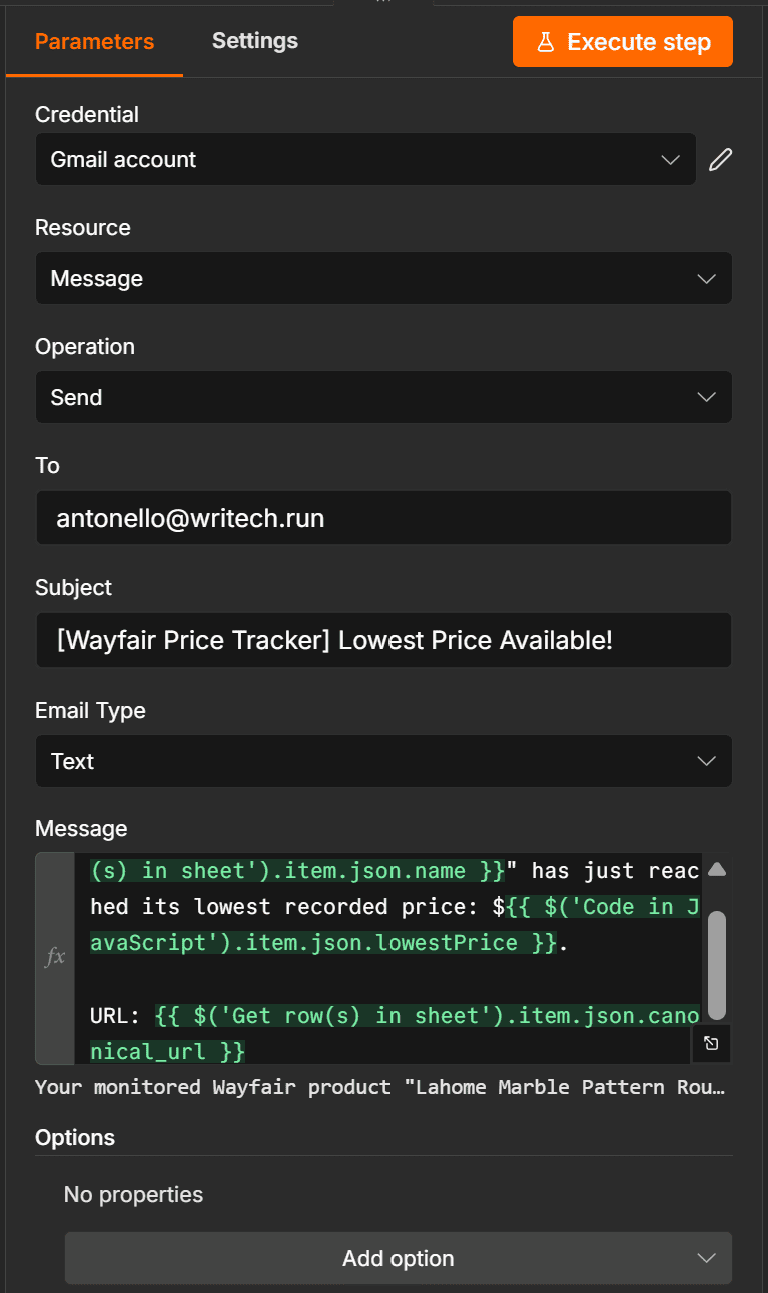
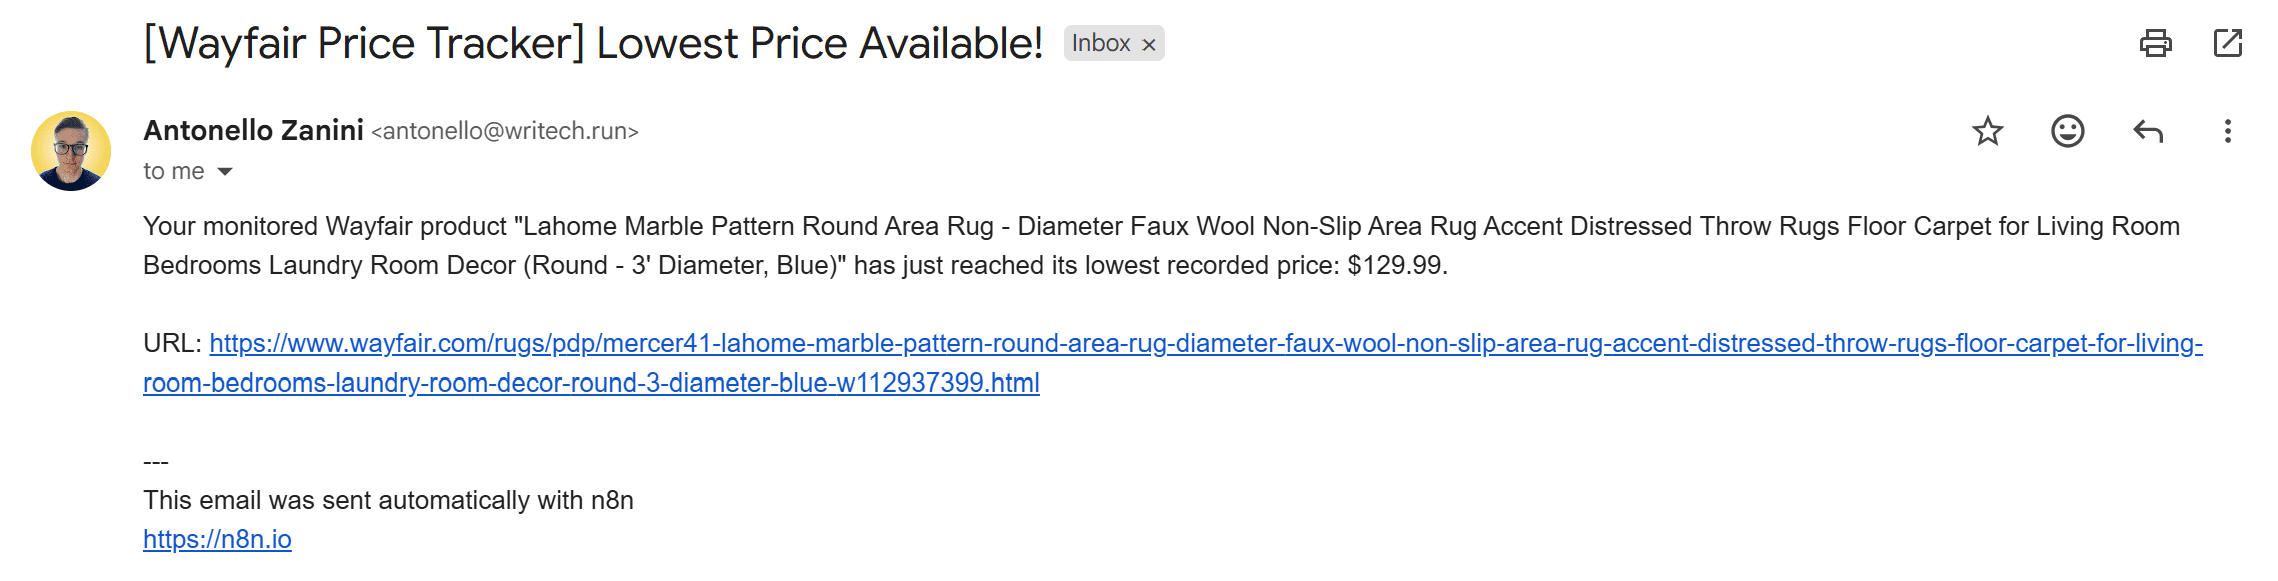
Thanks to the variables used in the email body, each notification includes the product name, its new lowest recorded price, and a direct link to the Wayfair product page, allowing you to quickly review the deal.
Step #8: Final workflow
That’s what your n8n workflow for Wayfair price tracking should look like:
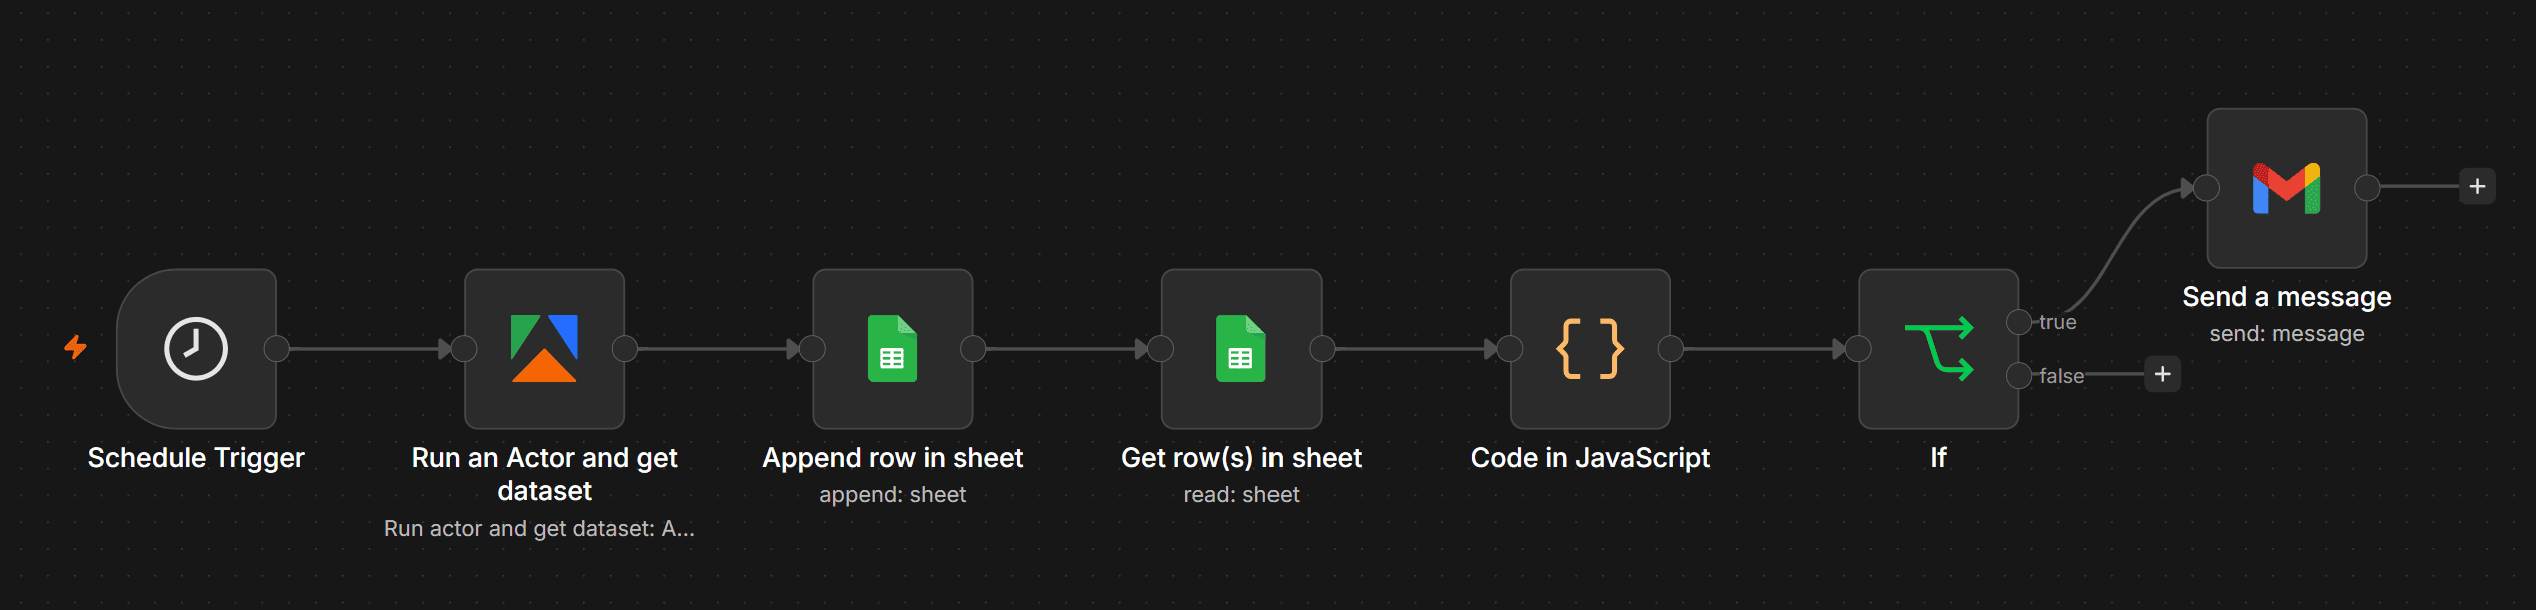
Activate the workflow, and n8n will start scraping the Wayfair product price according to your configured schedule (every 6 hours in this case):

Note that only the price, regular_price, and scraped_at fields are populated on new entries, as configured.
When the workflow detects a new lowest price, you’ll receive an email notification like this:
Next steps: Extend your Wayfair price tracking pipeline
You can extend your Wayfair monitoring workflow by tracking additional product signals, such as review count, review ratings, and more. Simply map more fields from the scraped data into your Google Sheets document and then use AI nodes to summarize the main changes, perform sentiment analysis on the product’s reviews, identify pricing patterns, and more.
Beyond Wayfair, you could also combine data from multiple retailers to build broader market research workflows. For example, you can compare prices across e-commerce platforms and discover trends.
Conclusion
This workflow turns Wayfair price tracking from a manual checking task into an automated monitoring pipeline. Because the Apify-powered workflow runs through n8n, it’s easy to extend. Today, it detects new lowest prices and sends email alerts, but you can integrate AI analysis or send alerts through Telegram while keeping the data collection layer unchanged.
FAQ
What is a Wayfair price tracker?
A Wayfair price tracker is a tool that automatically monitors product prices on Wayfair over time. It collects and stores prices, tracks changes over time, and notifies you when a product reaches a lower price or a specific target price.
What are the best tips to effectively track Wayfair prices?
To effectively track Wayfair prices, you should monitor products regularly, store historical price data, and configure relevant alerts for price drops or significant changes. Automated workflows can help eliminate manual checks and ensure you don’t miss limited-time deals.
How can you keep track of the Wayfair price history for a given product?
To maintain a Wayfair price history for a given product, you can periodically collect price data at regular intervals and store each result in a database, local file, or cloud document. This allows you to analyze historical changes and monitor price fluctuations over time.
How does Apify support Wayfair price tracking?
Apify supports Wayfair price tracking by providing multiple ready-made Actors to fetch Wayfair product data. You can use these Actors to build custom price monitoring workflows directly in Apify Console or integrate them with automation platforms such as Make, n8n, and Zapier.