E-commerce pricing and revenue teams operate in highly volatile markets where competitor prices change continuously across marketplaces - often outside business hours. Staying competitive without losing profit is a constant challenge, especially when pricing decisions rely on delayed reports, manual checks, or incomplete datasets. By the time teams react, conversion rates may have already dropped, or market share has shifted.
The lack of real-time visibility leads to problems: undetected price wars, reactive discounting, inconsistent competitive data, and no automated way to trigger pricing responses.
E-commerce Scraping Tool solves this by continuously scraping competitor prices across marketplaces and providing structured data ready for automation. When combined with tools such as Make or n8n, you can build a real-time pricing intelligence workflow that monitors competitor prices and triggers alerts whenever they change.
How to scrape prices from e-commerce websites
E-commerce Scraping Tool is one of the thousands of scrapers available on Apify Store - the world's largest marketplace of web data collection tools. You can use it via the UI (natural language or JSON) or programmatically through the API. The UI is the fastest way to start, so that's what we'll demo here.
Actors have access to platform features such as built-in proxy management, anti-bot evasion support, integrated storage with structured CSV/Excel/JSON exports, and standardized input parameters (URLs, keywords, limits, etc.). Actors also integrate easily with third-party apps and can be configured via workflow tools such as Make.
Here’s how to extract pricing data.
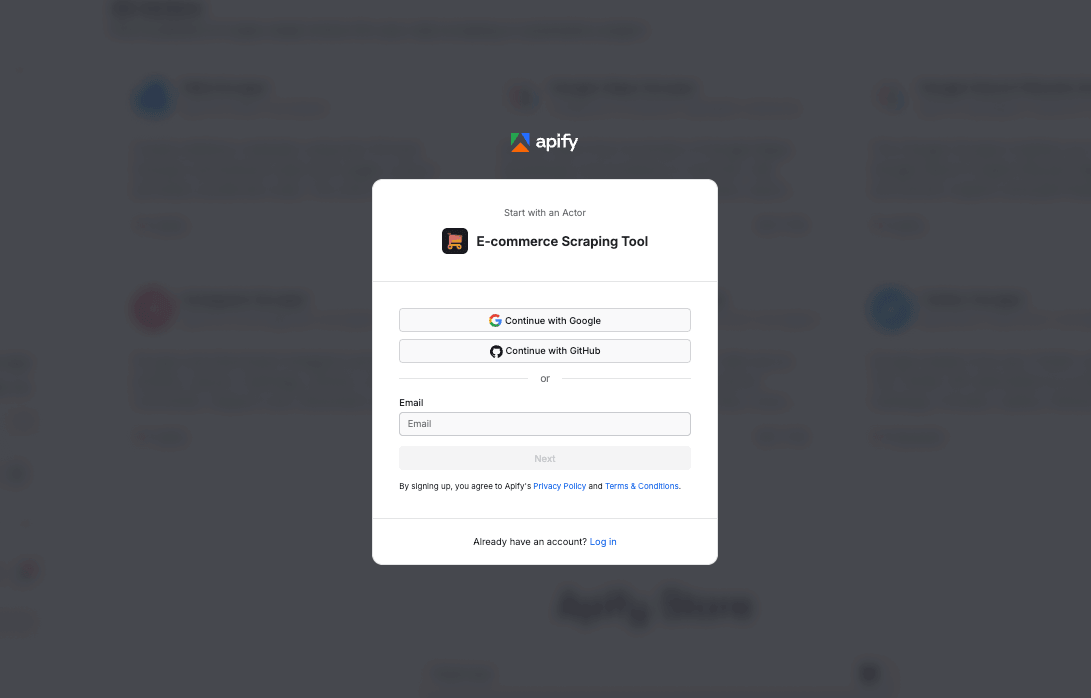
Step 1. Go to E-commerce Scraping Tool
Head to E-commerce Scraping Tool and click Try for free. If you don’t have an Apify account yet, you’ll be prompted to create one for free. You’ll then access Apify Console, a workspace for running and building web automation tools.
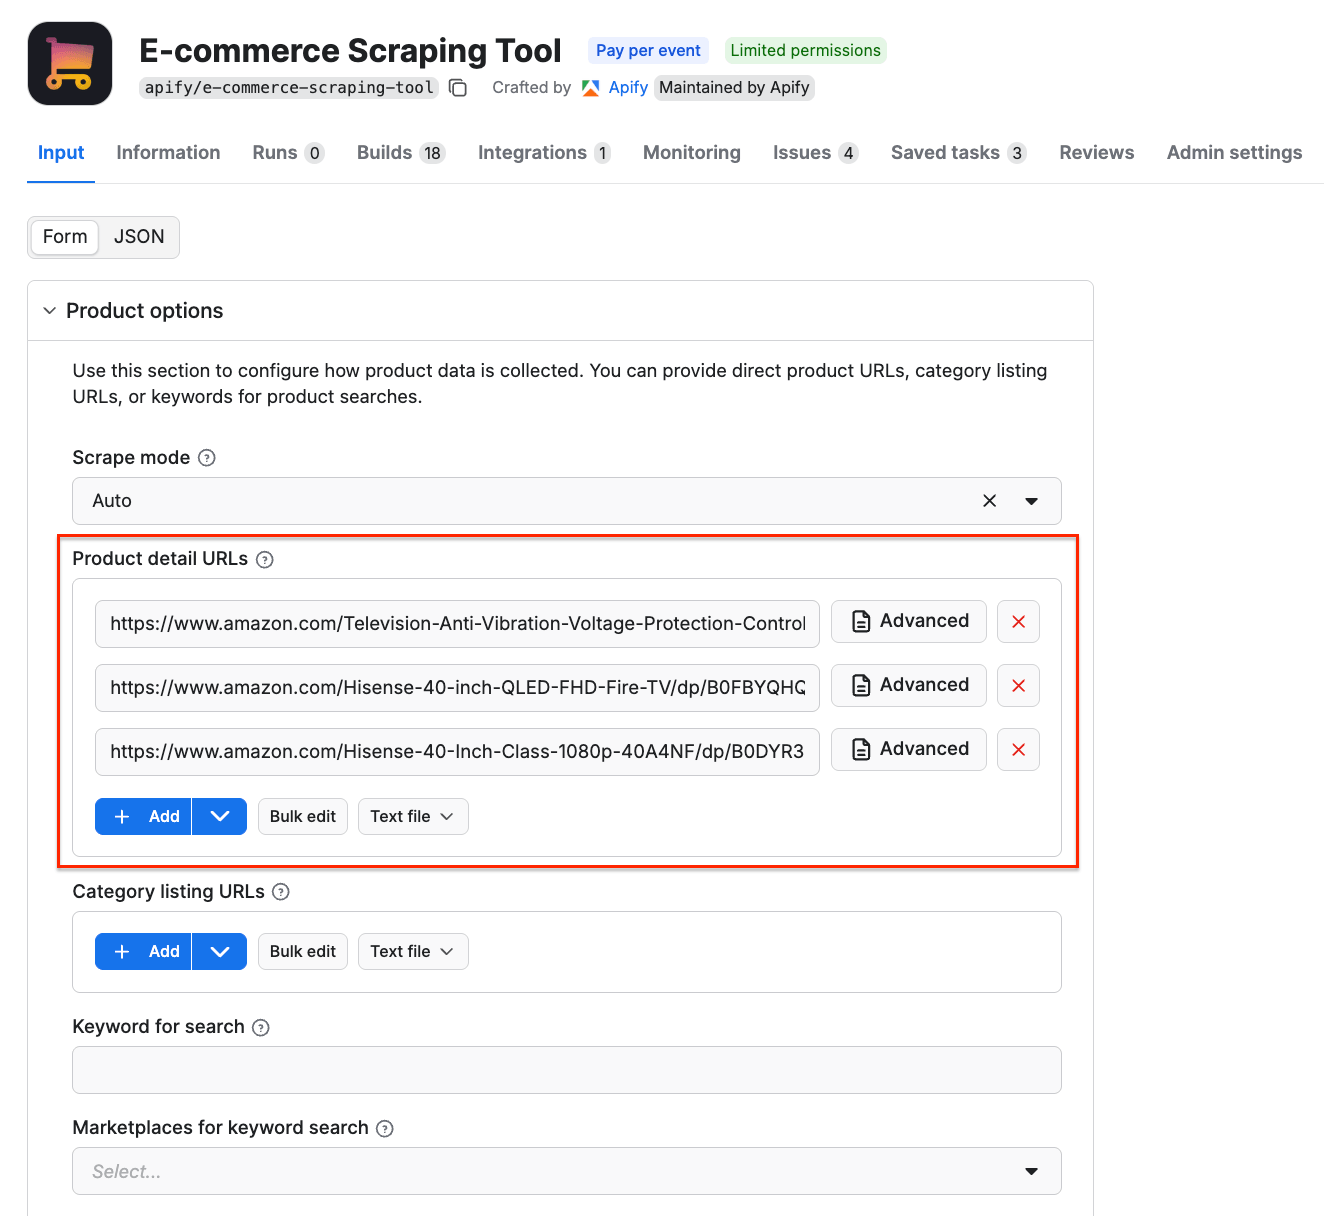
Step 2. Choose your input type and configure the run
Once you're logged in, you can configure the tool in Apify Console.
This scraper supports three input methods: Category listing URLs, Product detail URLs, and Keywords search. You can only use one input type per run.
| Input type | What it is | When to use it |
|---|---|---|
| Category listing URLs | Search results or category pages with multiple products | Discover many products, monitor whole categories, find new arrivals |
| Product detail URLs | URLs pointing directly to a single product page | Monitor known SKUs, track specific items for price/stock changes |
| Keyword search | Search marketplaces (i.e. amazon.de, ikea.com, kaufland.at) by keywords | Fast search — no need to gather URLs. Great for market research |
This example uses Product detail URLs to track the prices of smart TVs listed on Amazon. You can use URLs from any e-commerce platform.
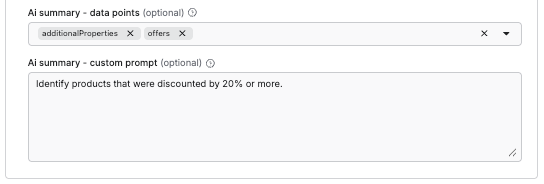
The AI analysis feature allows you to get more out of your data, using natural-language instructions. To use it, define which dataset fields are relevant, and add a custom prompt for the scraper.
- How to use keywords instead
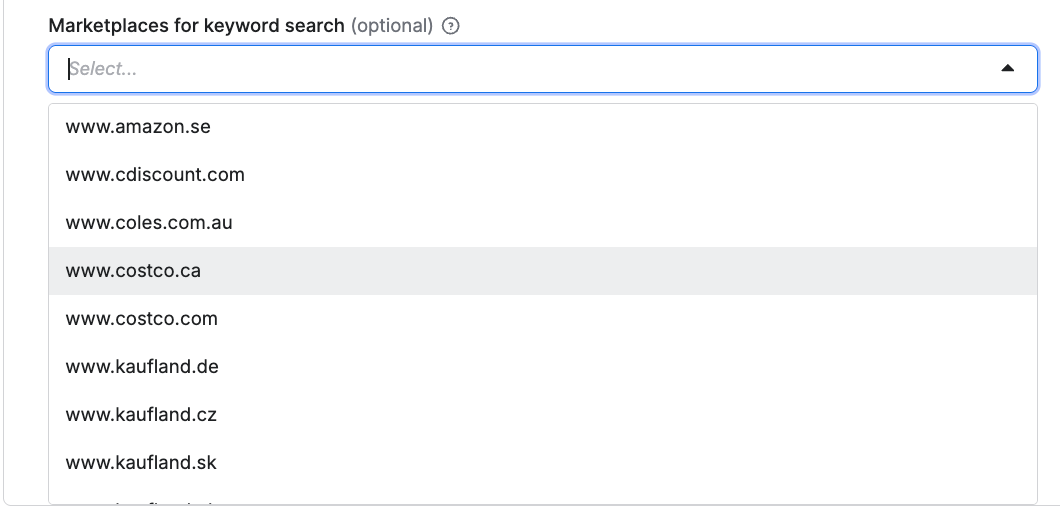
If product discovery is your main objective, choose one or more keywords as your input instead of the category/product URLs used above. Next, decide which marketplaces you want to source data from - E-commerce Scraping Tool supports global platforms and their local marketplaces, including Amazon, Walmart, Costco, Kaufland, Allegro, IKEA, and more.
Step 3. Run the scraper and export your data
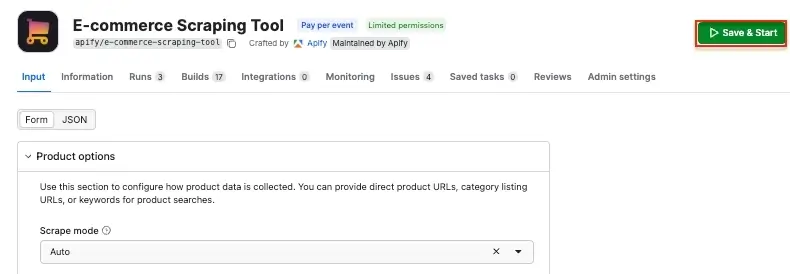
Once you’re happy with the configuration, click Save & Start to run the scraper.
When the run finishes, you can export your results. Scroll down to check the preview of your dataset, with prices, name, URL, image, and other product information, along with the AI summary we configured earlier.
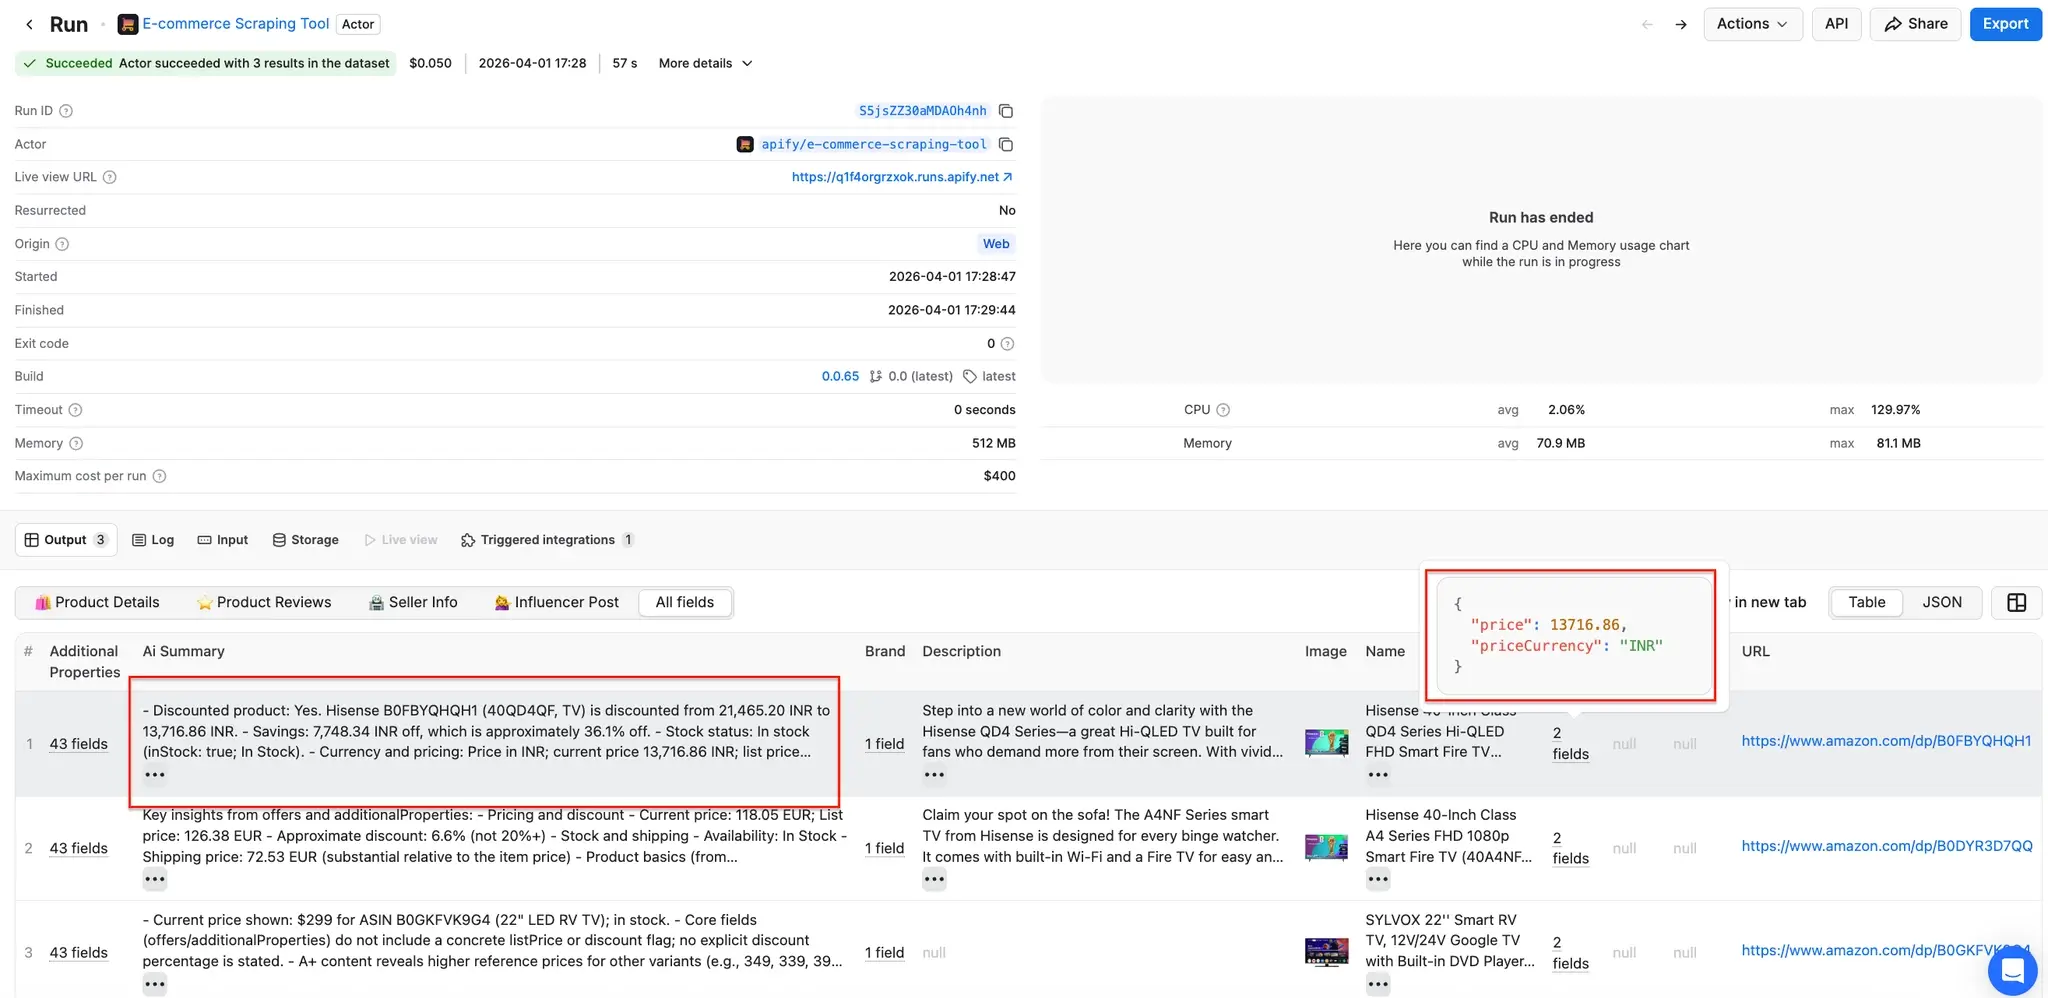
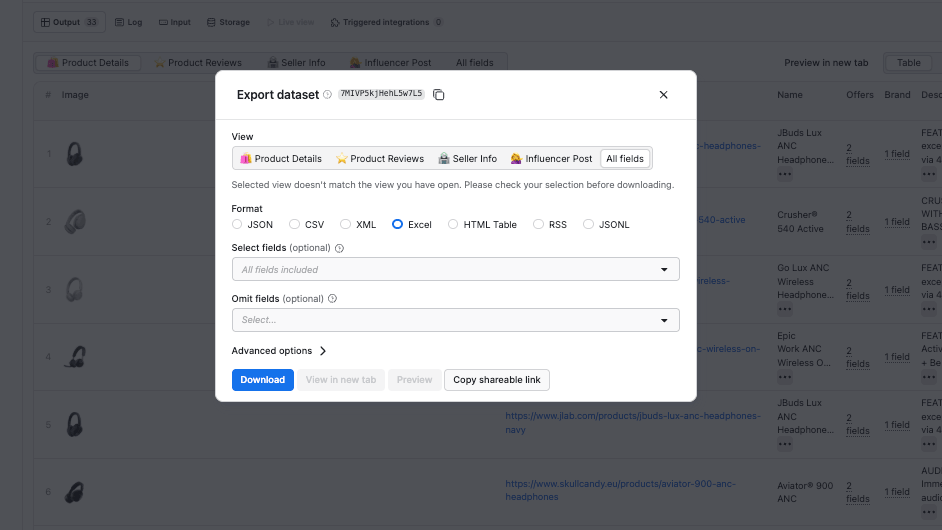
Click the Export button to choose from multiple data export options, and filter results using Select or Omit fields (if you only want prices in your dataset, select only the offers field).
Automated competitor price monitoring workflow with Make and Apify
If you want to monitor price changes continuously, you can use the following Make scenario that scrapes competitor prices from e-commerce sites using Apify, compares them against your own prices in Google Sheets, and even automatically updates your store when repricing conditions are met.
What the workflow does
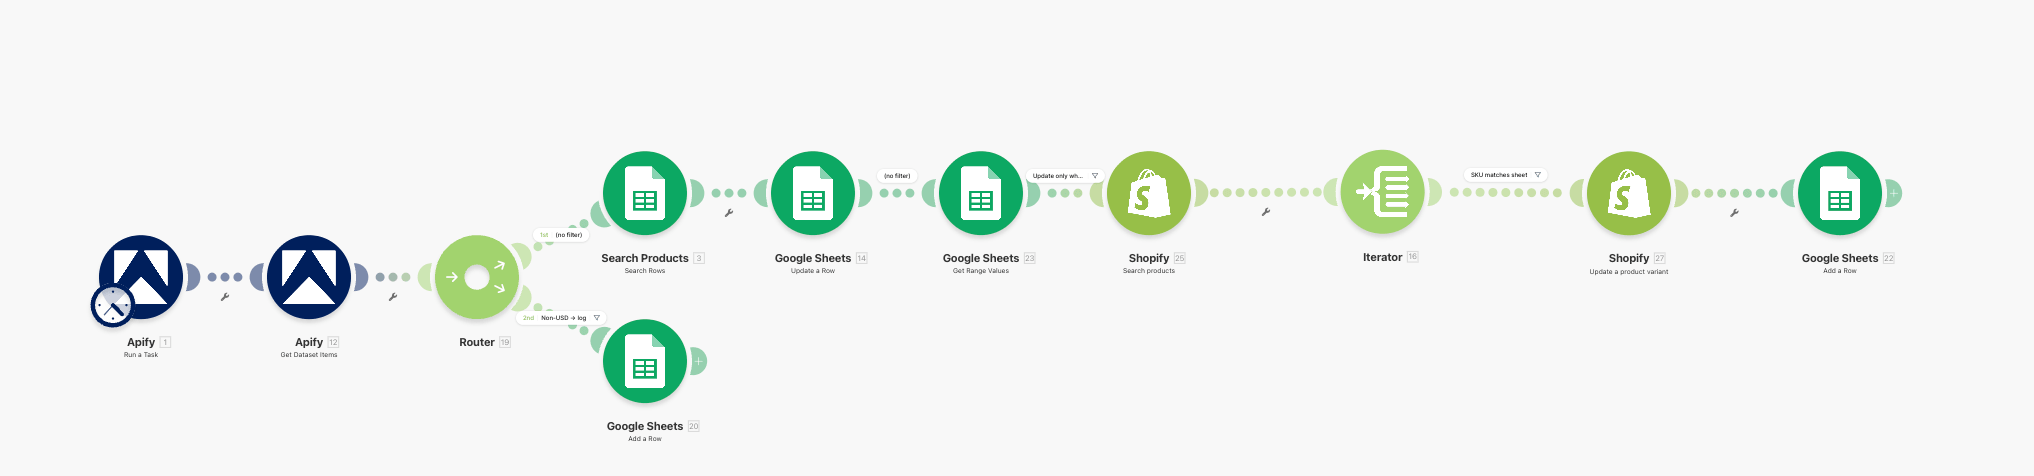
The scenario runs in a linear sequence with two branches:
- Runs an Apify task that scrapes competitor product listings from e-commerce sites.
- Fetches the resulting dataset.
- Splits into two routes via a Router:
- Route 1 (repricing pipeline): For each scraped product, looks up the matching SKU in a Google Sheet, writes the competitor price, re-reads the row to check repricing rules, searches Shopify for the matching variant, updates the variant price, and logs the update.
- Route 2 (skip log): If the scraped product's currency is not USD, logs the skip to a separate sheet tab.
The blueprint handles all module configuration, routing, and filter logic. After importing, you only need to re-authenticate your connections and select your specific spreadsheet and task:
- Shopify modules to search products by SKU and update variant prices directly.
- WooCommerce, BigCommerce, PrestaShop, or Adobe Commerce modules available in Make's app library.
- An HTTP module to call any platform's REST API directly if a native Make connector does not exist.
How to connect your Apify account to Make
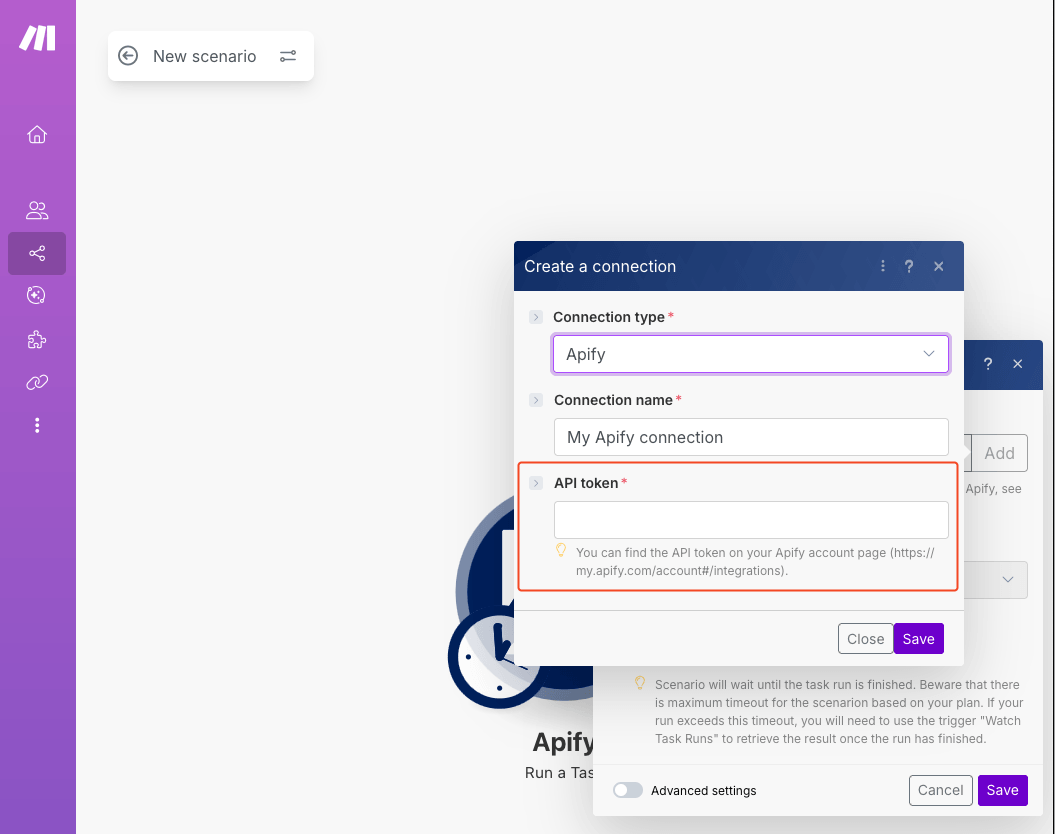
Access Make and create a scenario from the blueprint. In the first Apify module (Apify: Run a Task), choose to connect using the Apify API token.
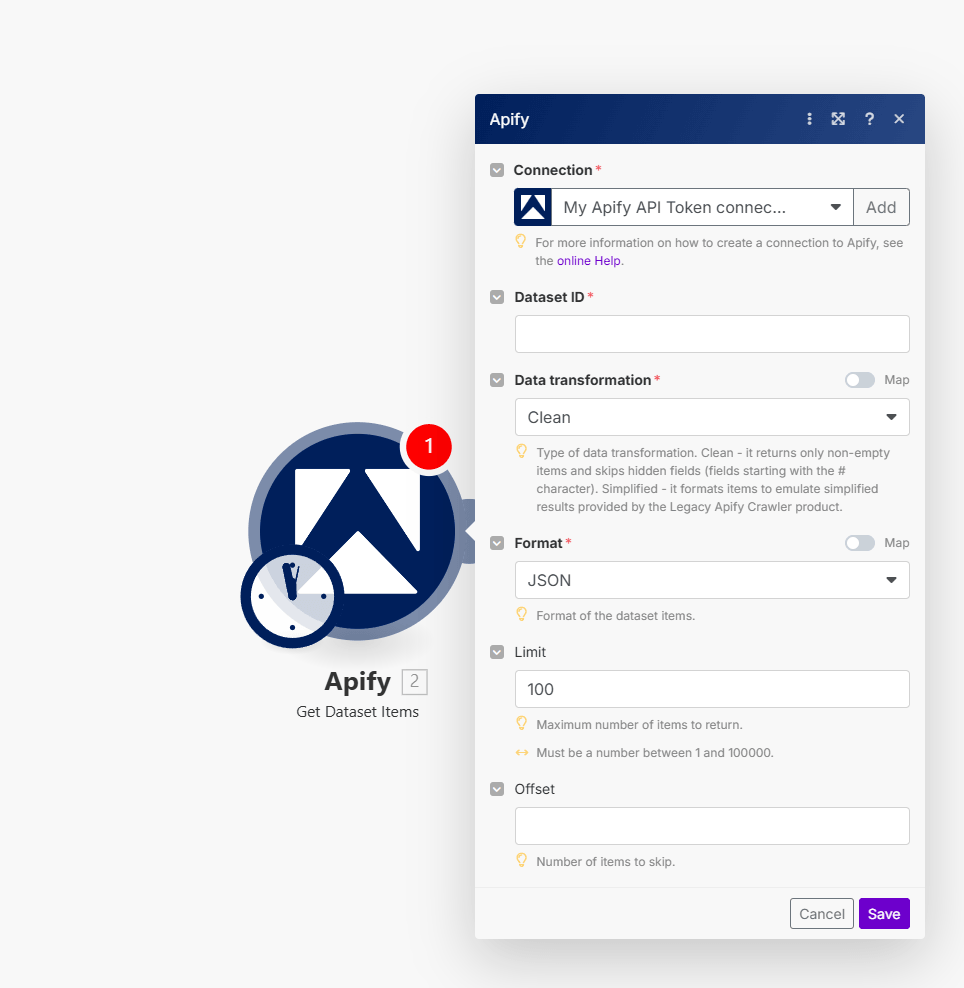
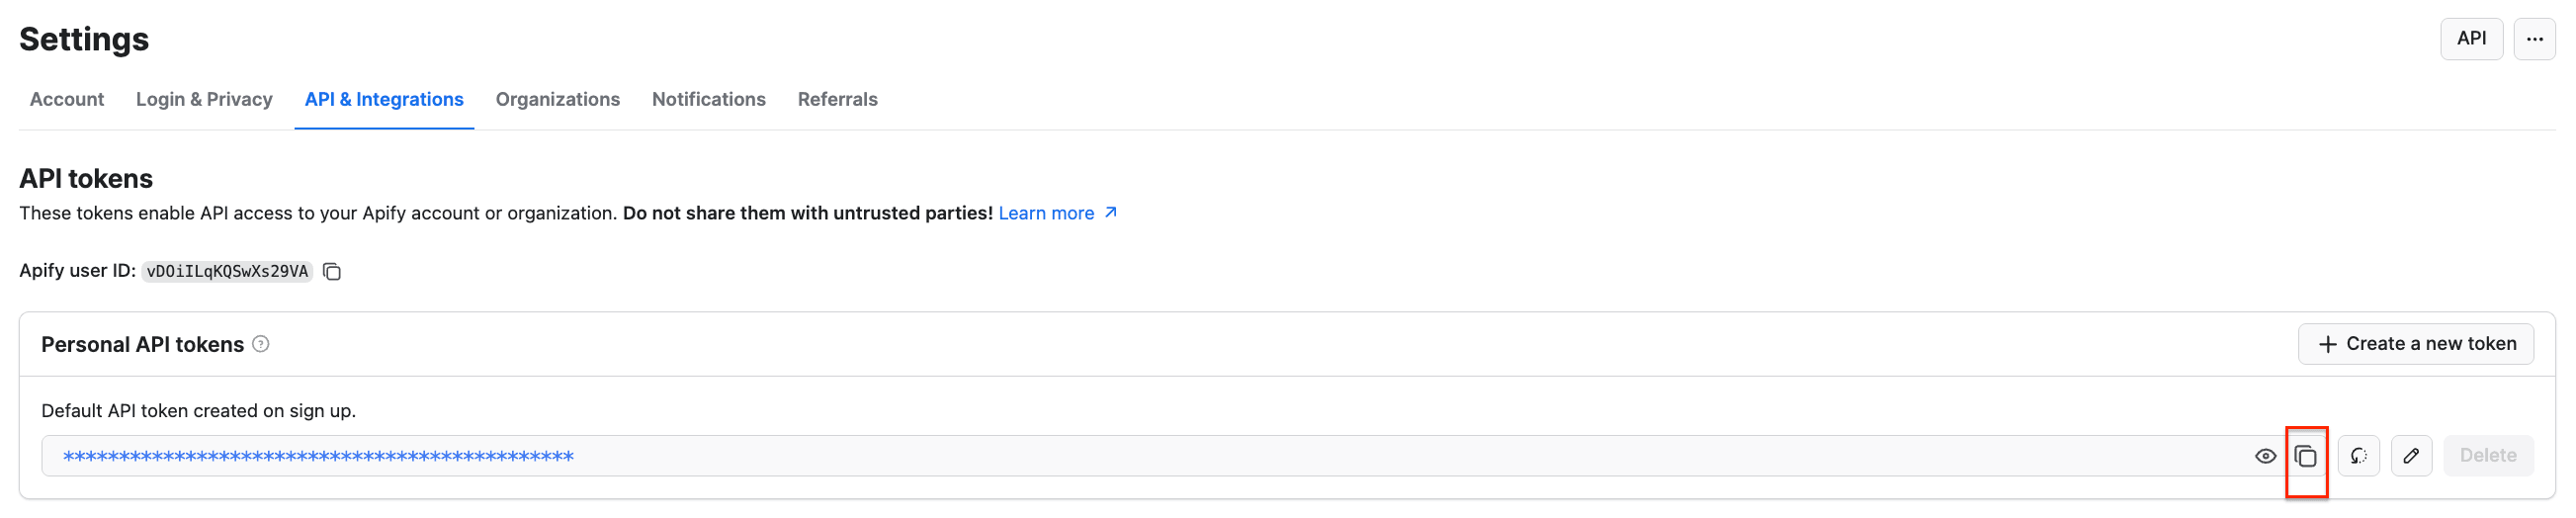
To get your API token, head to Apify Console, select Settings → API & Integrations, where you can copy your API token. Check out the Apify - Make integration guide for more details.
How to set up the Google Sheets spreadsheet
The spreadsheet used in this workflow acts as both a dashboard and a control layer, giving you full visibility and allowing you to override any automated decision by changing a cell. A logging route captures every action the workflow takes, including skipped products, giving you a complete overview.
Create a Google Sheet with two tabs. The first will serve as the monitoring database, and the second will serve as an operations log.
- Sheet1 is the pricing matrix. Create columns from A through I, like so:
| Column | Header | Purpose |
|---|---|---|
| A | SKU | Product ASIN or SKU identifier |
| B | My price | Your current selling price |
| C | Competitor price | Populated by the workflow |
| D | Difference % | Formula: percentage gap between B and C =(C2-B2)/B2. |
| E | Reprice trigger % | Threshold that triggers a reprice |
| F | Minimum threshold | Floor price you will not go below |
| G | Maximum threshold | Ceiling price |
| H | New price | The price to push to online store (formula or manual) |
| I | Update? | YES or NO; controls whether online store gets updated |
Pre-populate columns A, B, E, F, G, H, and I with your product data. Column C will be filled automatically by the workflow.

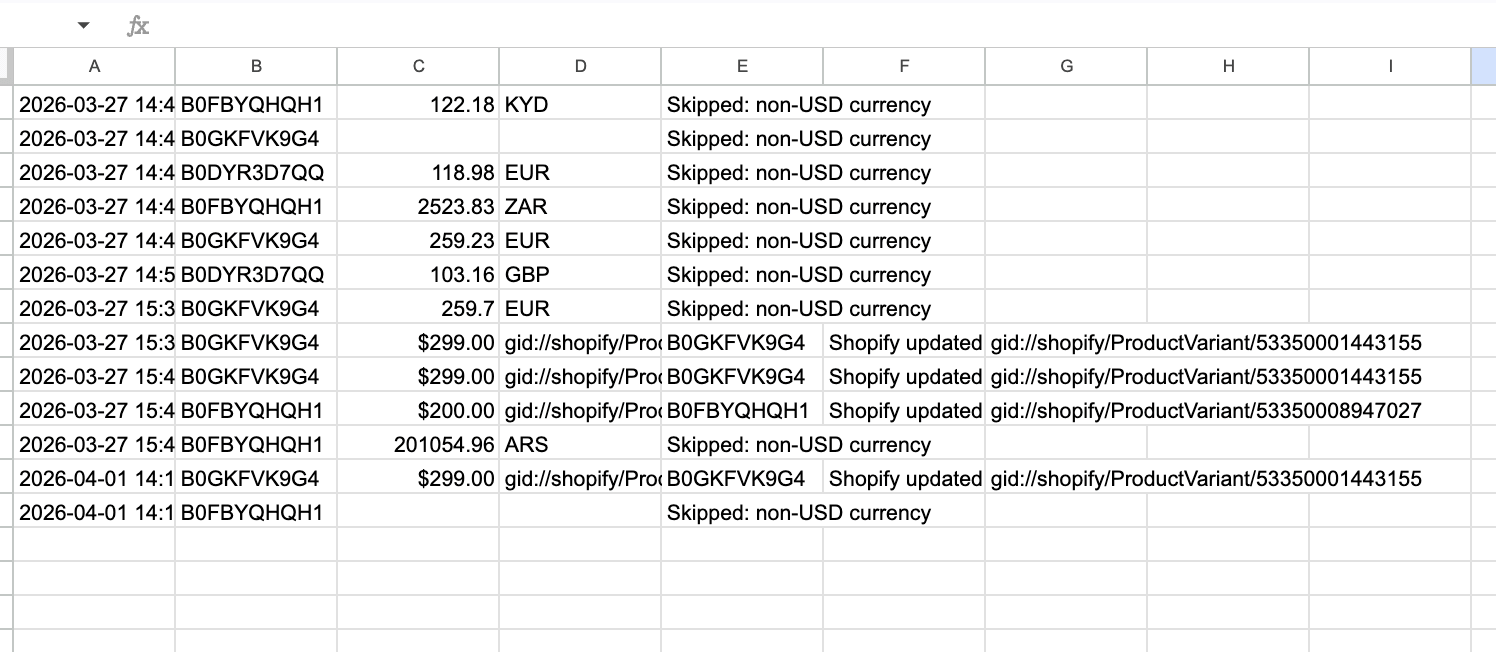
- Log (second sheet) doesn’t need headers. The workflow appends rows with columns A through E (or A through G on the repricing route): timestamp, SKU, price, currency/variant ID, and a status message. You can check the log any time to see what changes were made automatically in your store.
How to create the Apify task
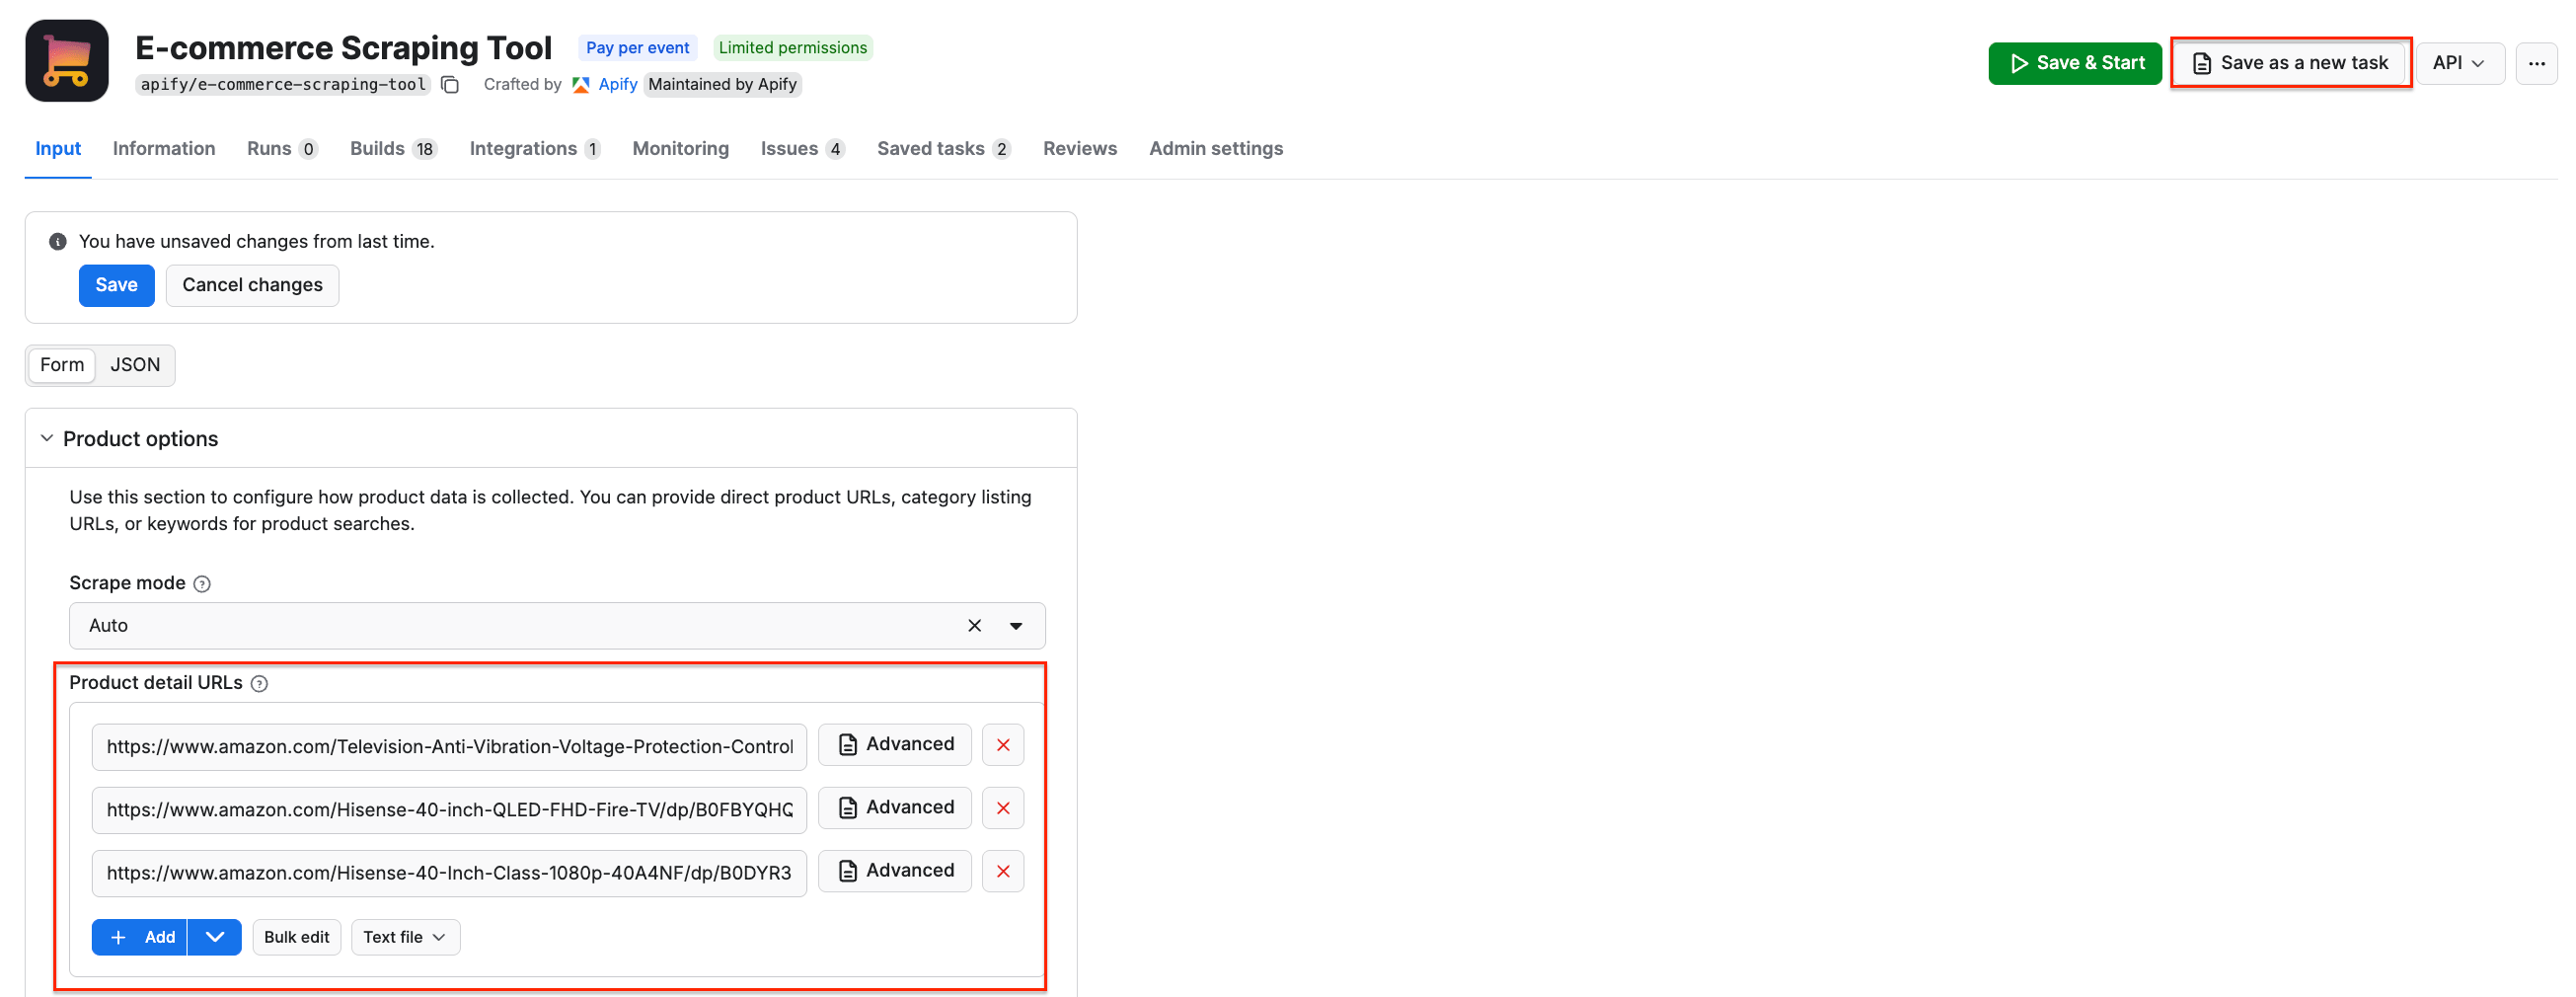
The workflow uses an Apify task configured through the scraper’s UI. Go to the Apify Console and find the Actor you want to use for scraping - in this case, E-commerce Scraping Tool. Configure it with the product URLs you want to monitor and click Save as a new task. Follow the on-screen instructions to give your task a name and save it.
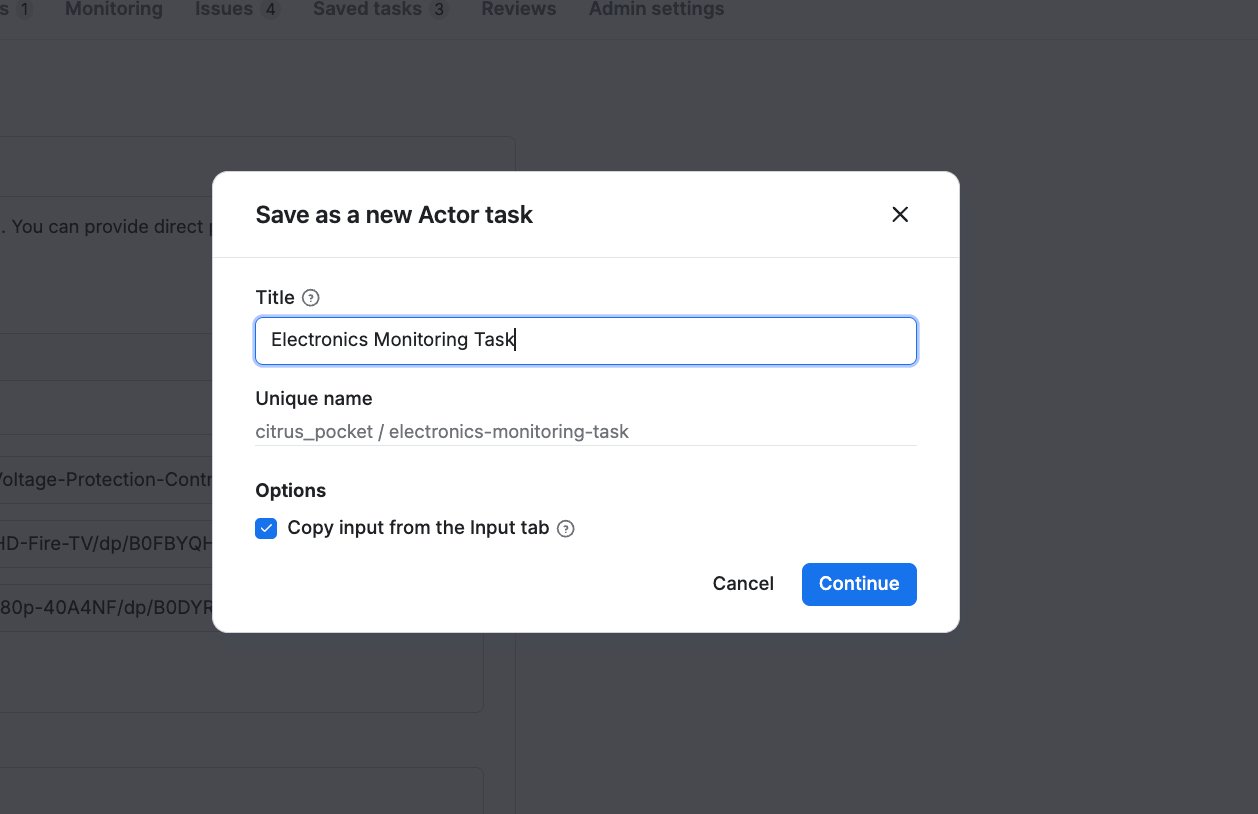
You can check if the task was created successfully by selecting the Saved tasks on the left-hand menu. Once you connect your Apify account to Make, you’ll be able to pick the task directly in the module’s configuration.

Automated repricing option
The workflow gives you a live competitor price monitoring dashboard. Every time the scenario runs, your Google Sheet gets updated with the latest competitor prices, and the formulas in columns D, H, and I tell you exactly which products need repricing and what the new price should be.
The next step is to close the loop by pushing those new prices back to your e-commerce platform automatically. This scenario includes a Shopify integration that does exactly this, and the same pattern works with any platform that has a Make connector or an API.
Track competitor prices at scale
Combining the capabilities of E-commerce Scraping Tool with workflow orchestration platforms such as Make allows you to shift from manual price tracking to a fully automated system. With scheduled runs, you’ll be aware of price changes no matter when they occur - so you can respond instantly to market shifts, protect margins, and maintain stable price positioning without manual effort.

FAQ
How much does E-commerce Scraping Tool cost?
E-commerce Scraping Tool uses a pay per event pricing model. You pay for:
- Actor start (per run)
- Listings scraped (for each pagination page)
- Details (for product, reviews, or seller)
- Optional: Residential proxy use (per product)
- Optional: Browser rendering (per product)
- Optional: AI summary
Higher subscription plans unlock lower Actor costs, as seen when comparing Free and Business plans. For frequent large-scale runs, the Business plan offers the most efficiency.
How often should I run the price monitoring workflow?
The frequency depends on how dynamic your market is. For highly competitive categories like electronics or fashion, running the workflow every 15-60 minutes helps you detect price changes quickly and respond in near real time. For less volatile products, hourly or daily runs may be sufficient.
In Make, you can easily adjust the frequency to balance responsiveness and cost.
How accurate and reliable is scraped pricing data?
E-commerce Scraping Tool extracts pricing data directly from live product pages across supported marketplaces. With high-frequency runs and structured outputs, you get consistent and up-to-date datasets suitable for automation.