Competitor research on Meta usually means stitching together data from multiple sources. You might know some of the players in your niche, but not what they’re actively advertising, which products they’re pushing, or how those products are priced. That information is public - it’s just scattered across Facebook Pages, the Meta Ads Library, and the product pages behind those ads.
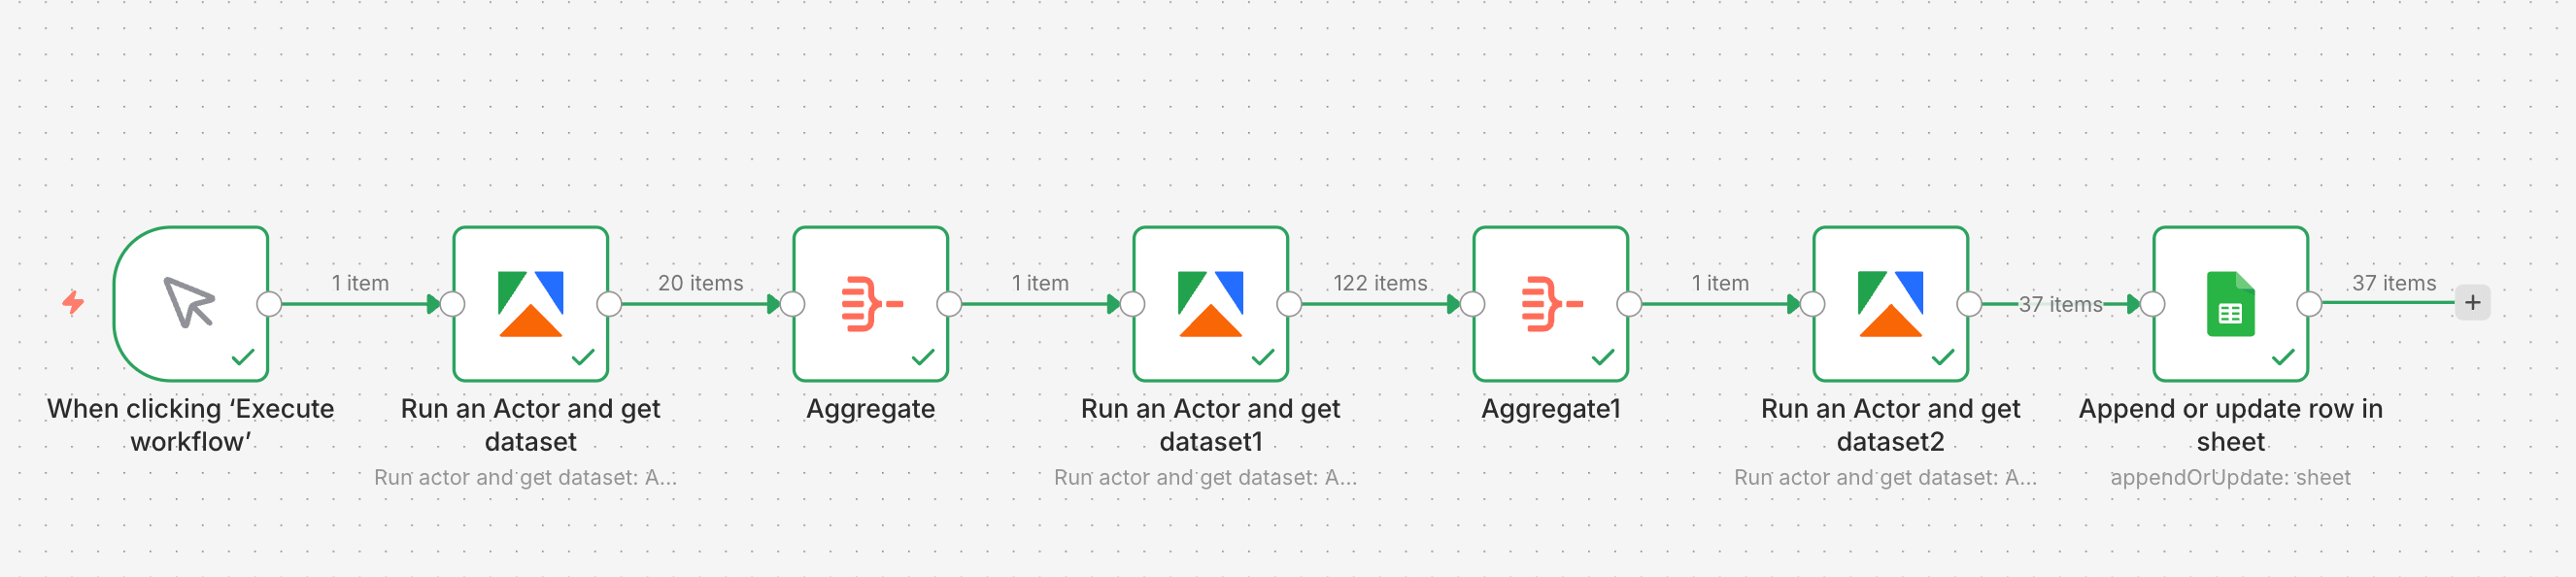
In this tutorial, we’ll build a single n8n workflow using three Apify scrapers to:
- Discover relevant competitors on Meta
- See what those competitors are actively advertising
- Extract product and pricing data from the advertised URLs
By the end, you’ll have a workflow that turns a simple search input into a clean spreadsheet of products, descriptions, prices, and currencies - ready for monitoring, reporting, or repricing.
How to create the competitor monitoring workflow with n8n
We’ll use Apify tools to scrape Facebook and product pages, then send data directly to Google Sheets. Before you begin, make sure you have:
- an n8n account
- an Apify account with API access
- a Google account connected to Google Sheets
Actors have access to platform features such as built-in proxy management, anti-bot evasion support, integrated storage with structured CSV/Excel/JSON exports, and standardized input parameters (URLs, keywords, limits, etc.). Actors also integrate easily with third-party apps and can be configured via tools such as n8n using Apify nodes.
Step 1: Set up the Apify node to discover Facebook pages
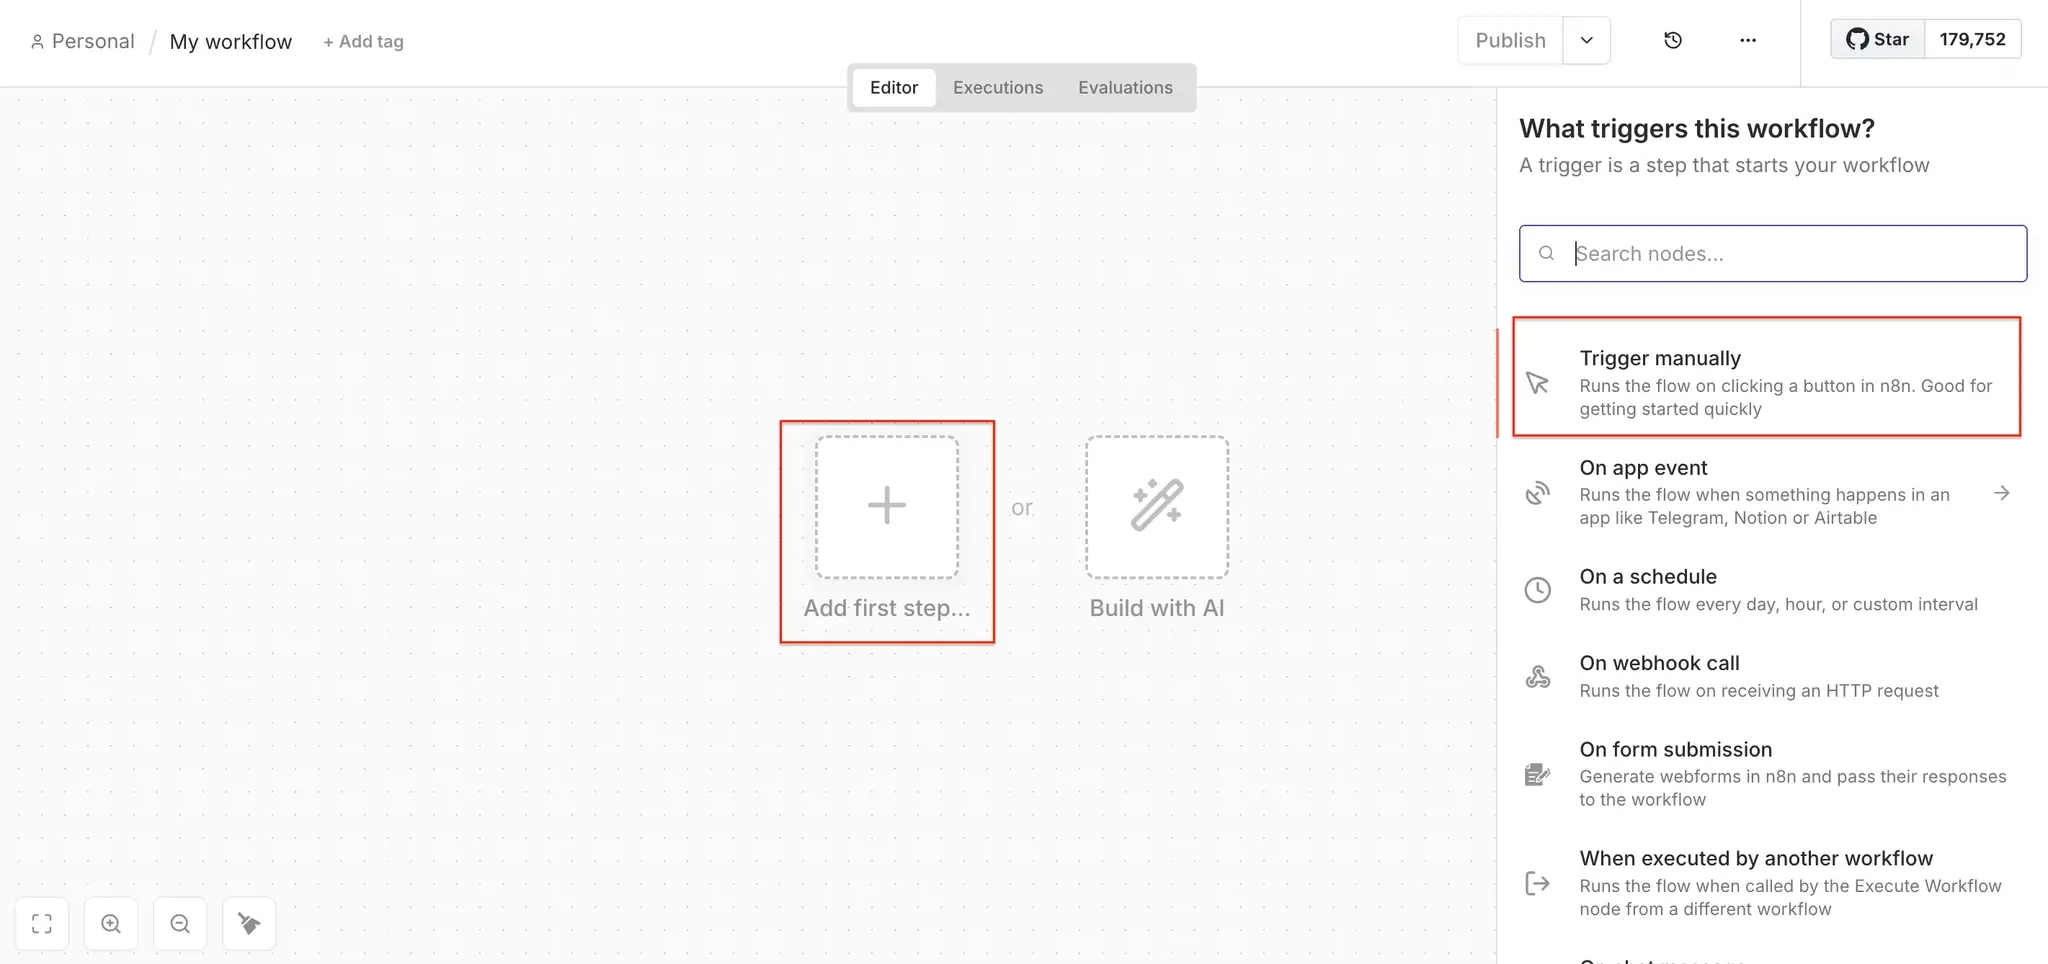
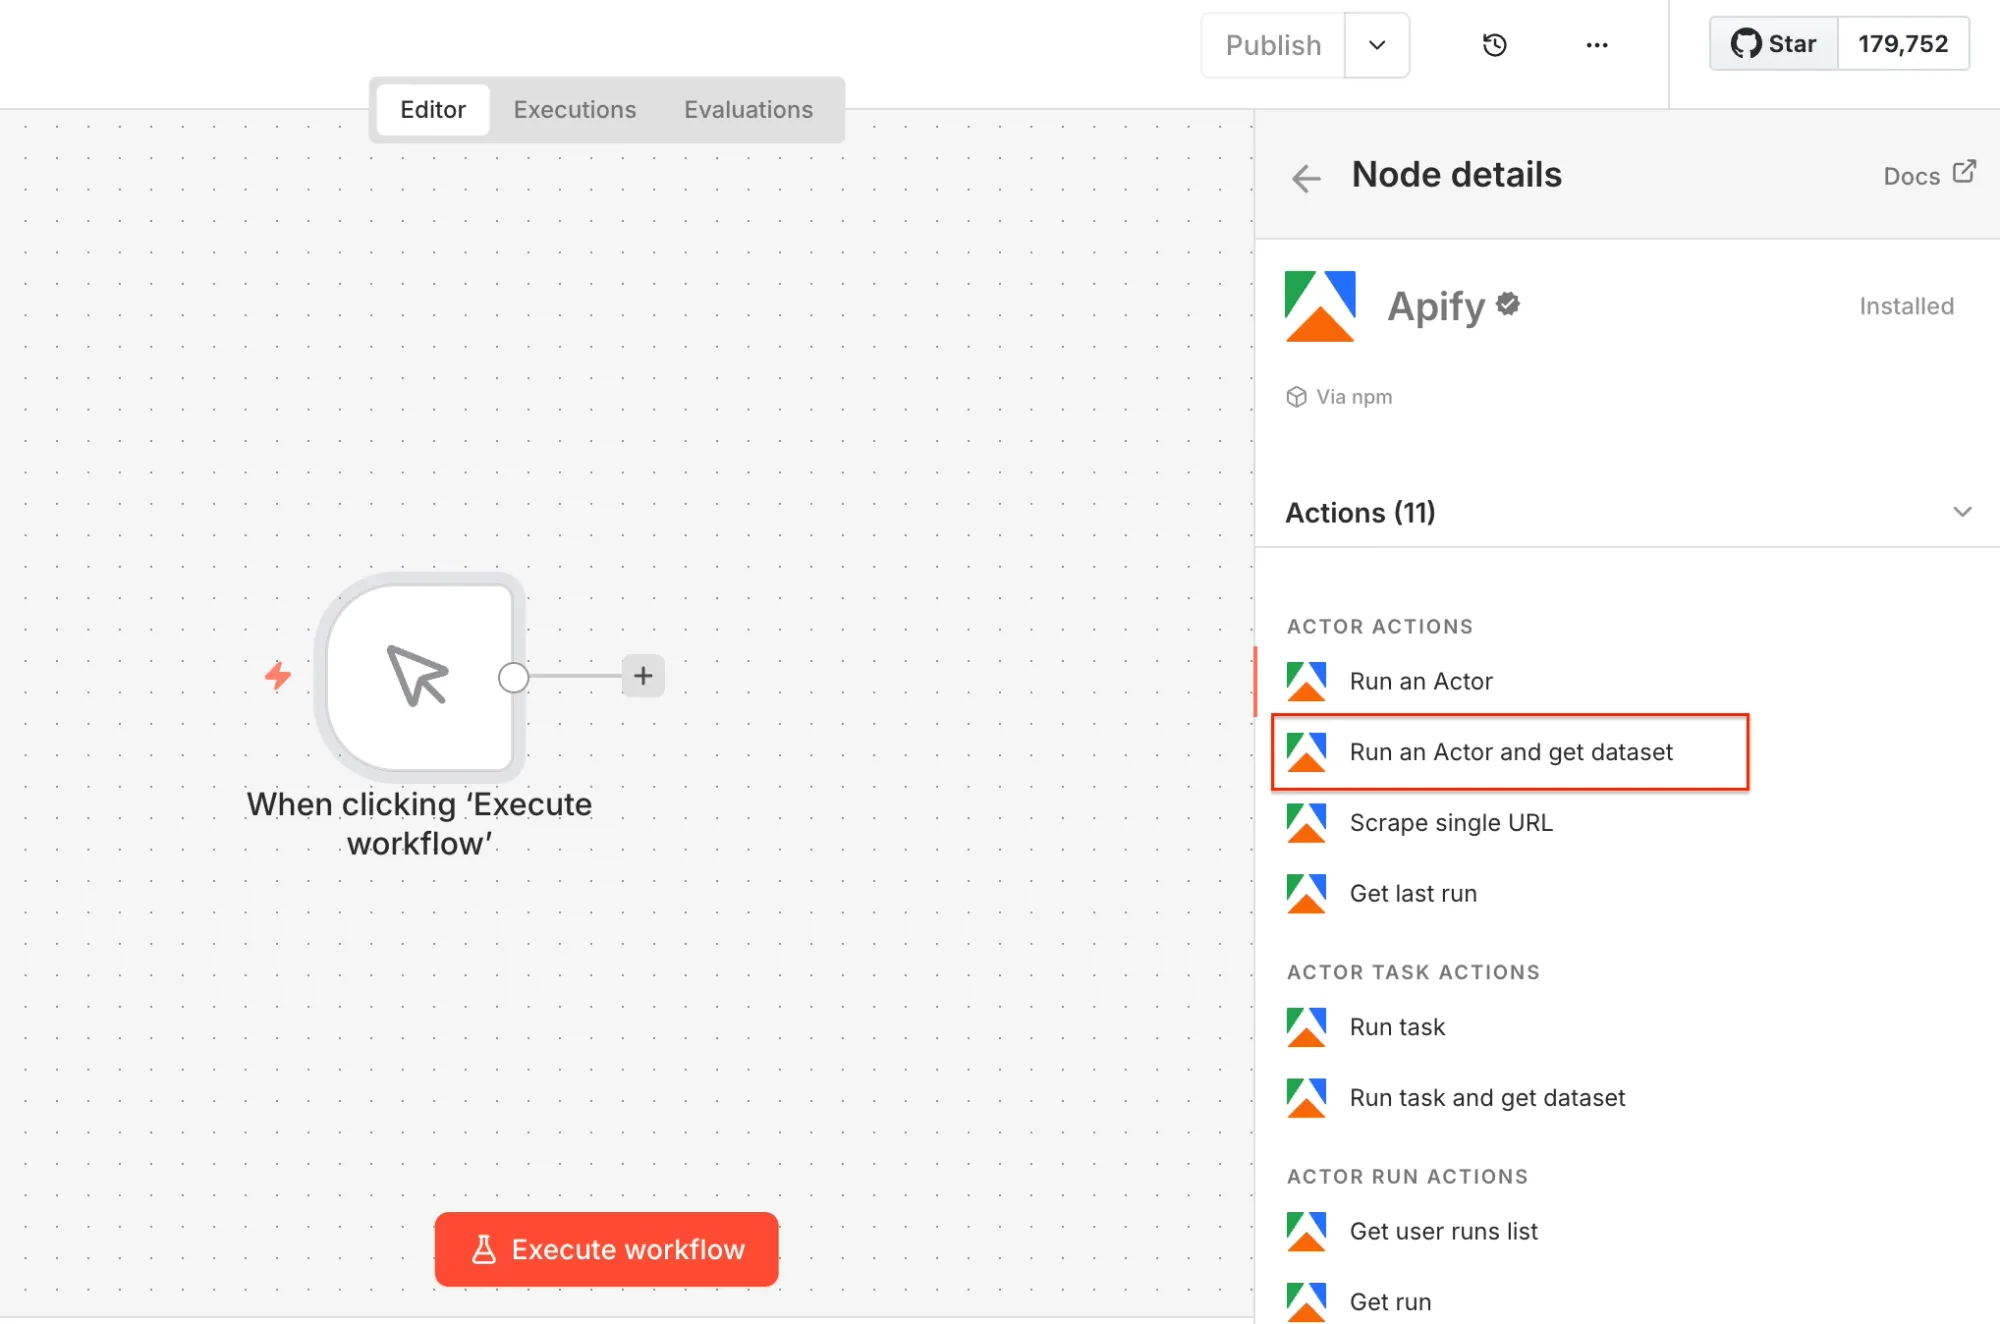
Open n8n to create a new workflow and choose a manual trigger as the first step. Next, search for the Apify node in your canvas (and install it if you haven’t already).
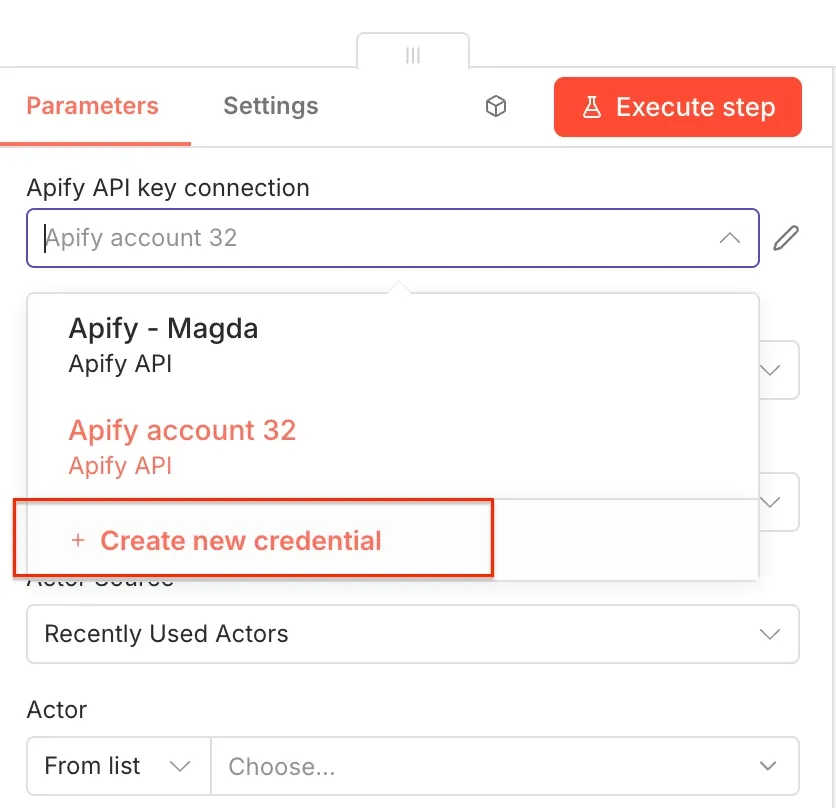
Select the Run an Actor and get dataset operation as the second workflow step. Once you open the node, you can connect n8n to your Apify account. Click on Create new credential to get started.
Next, you’ll be asked for your Apify API key. You can find it in Apify Console under Settings → API & Integrations, where you can copy your API token.
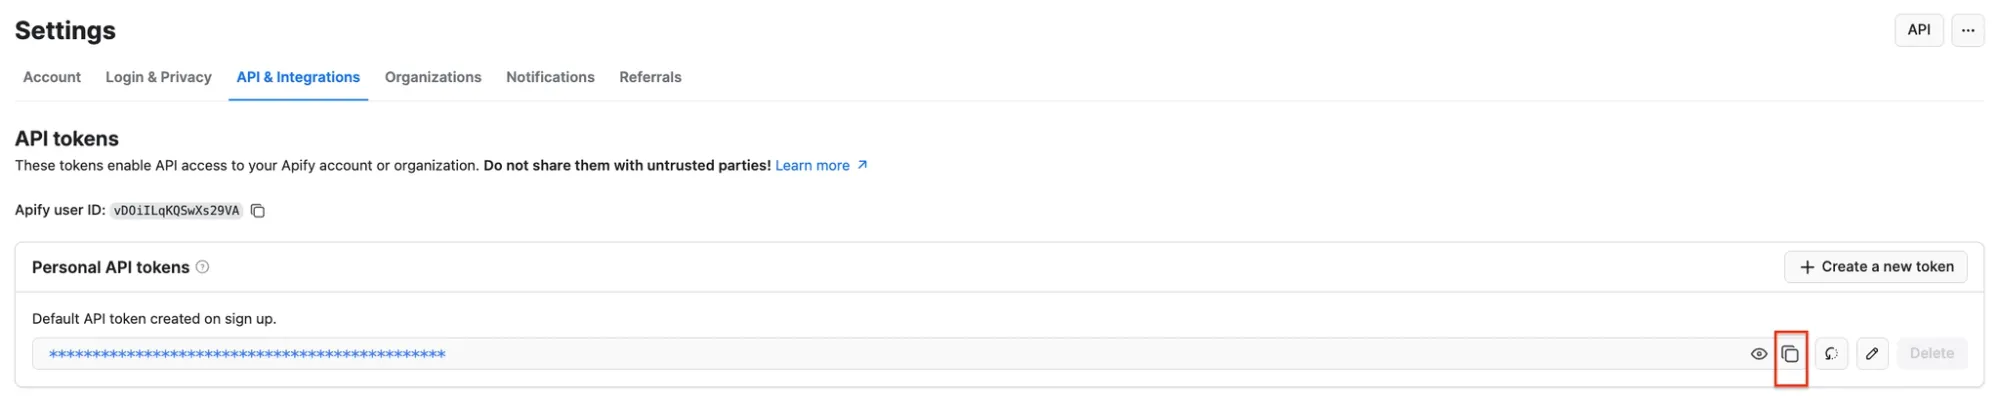
Paste the token into n8n and save the credential. Your Apify connection is ready to use.
Next, you’ll select the Actor you want to run from Apify Store and grab its JSON input so n8n can run it.
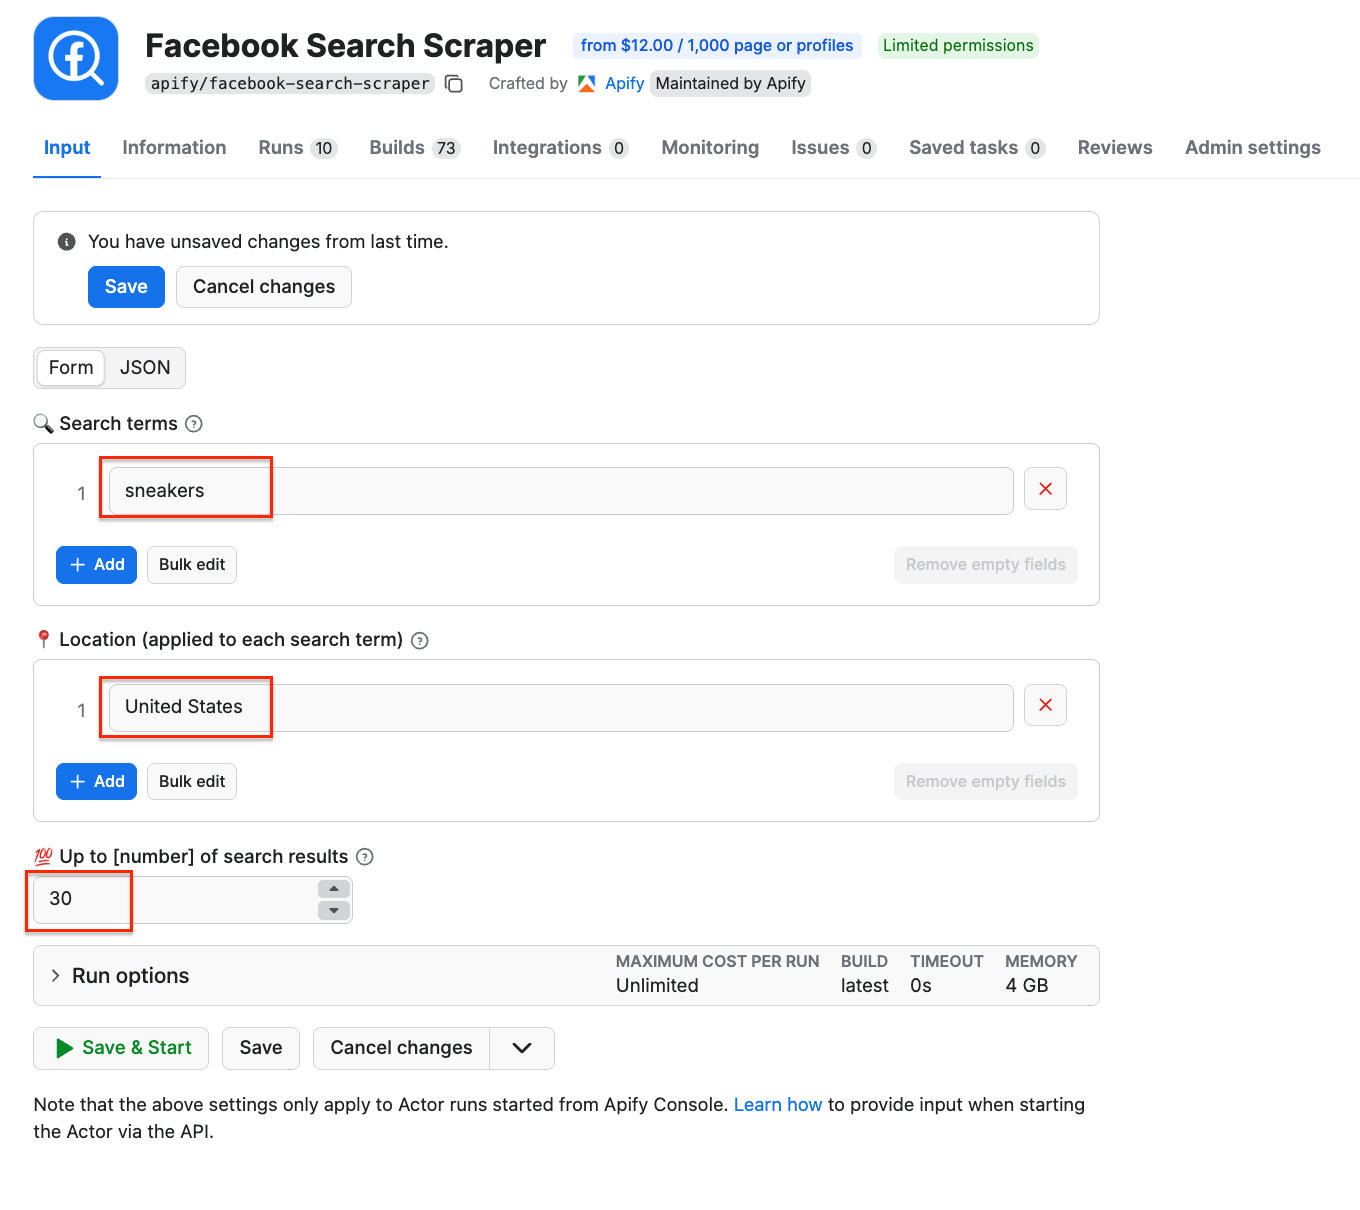
Go to Facebook Search Scraper and adjust the scraping session to your needs using the UI. The scraper uses search terms as input - we’ll go with sneakers to find shoe sellers in the US. You can use multiple search terms, but only one location. You can also limit the number of results.
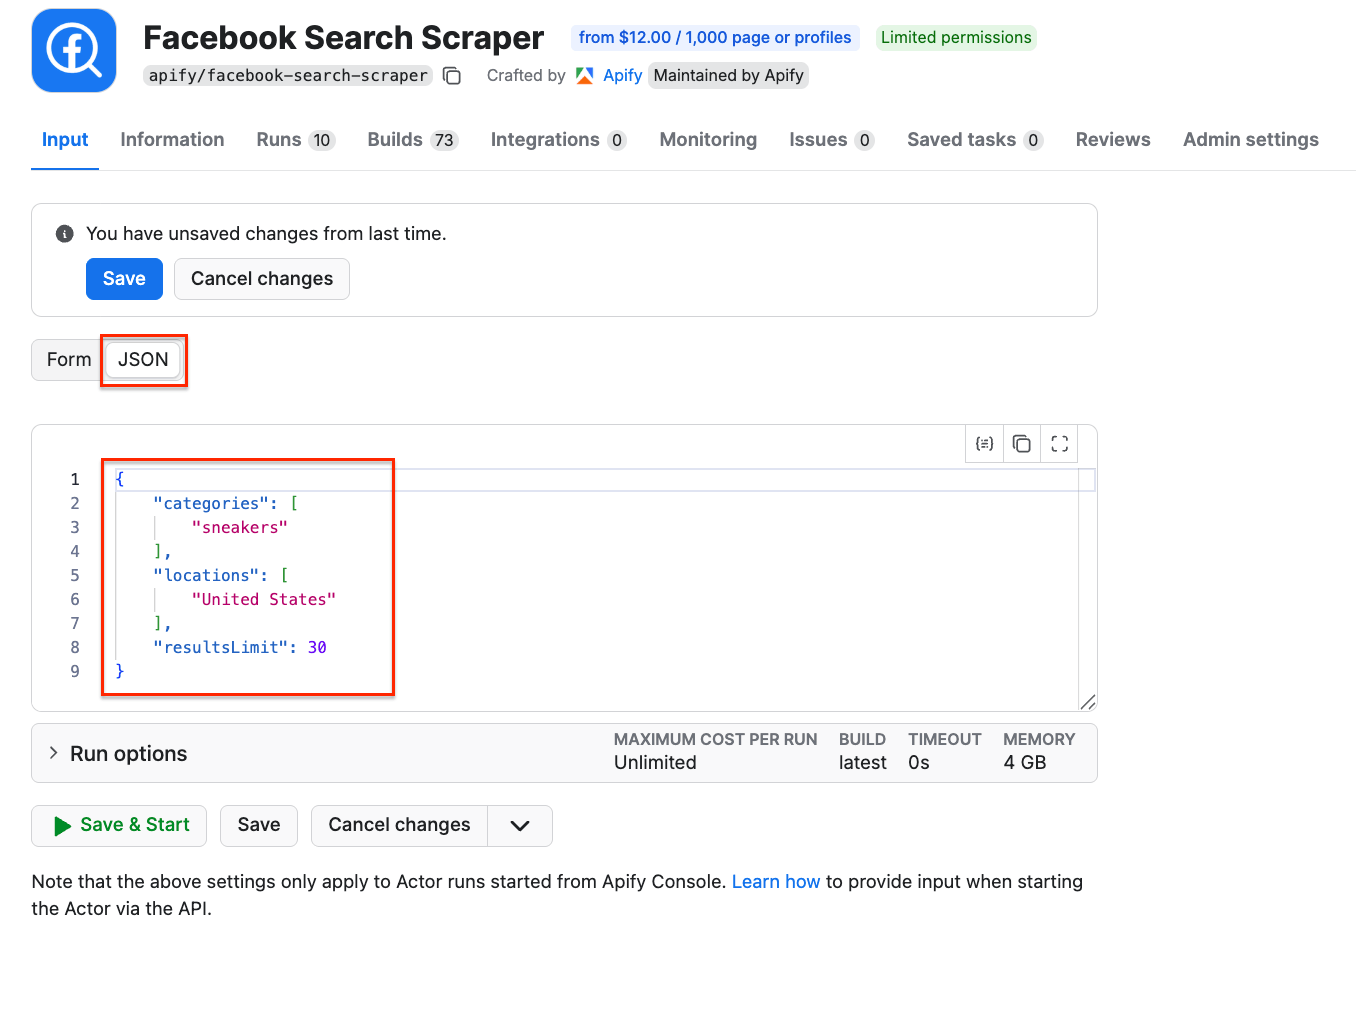
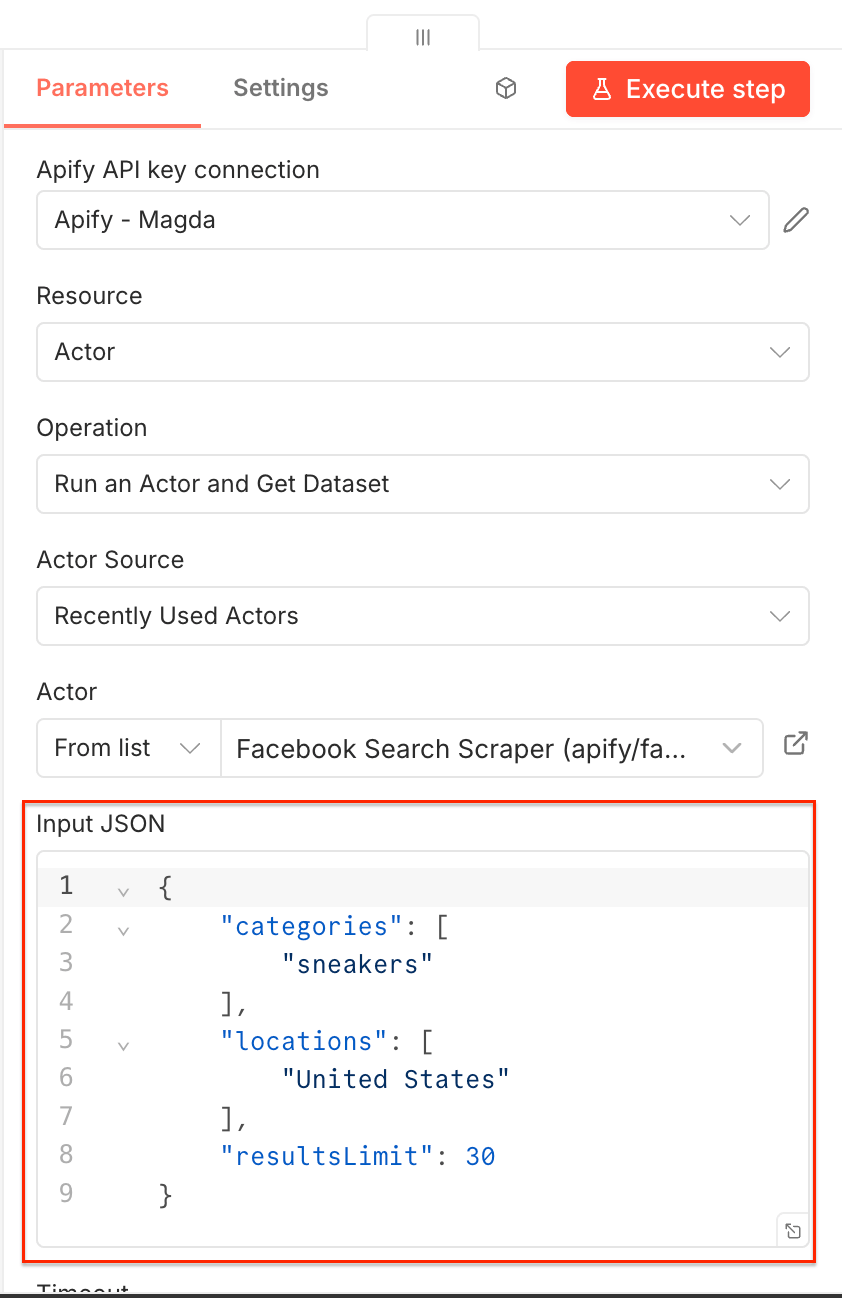
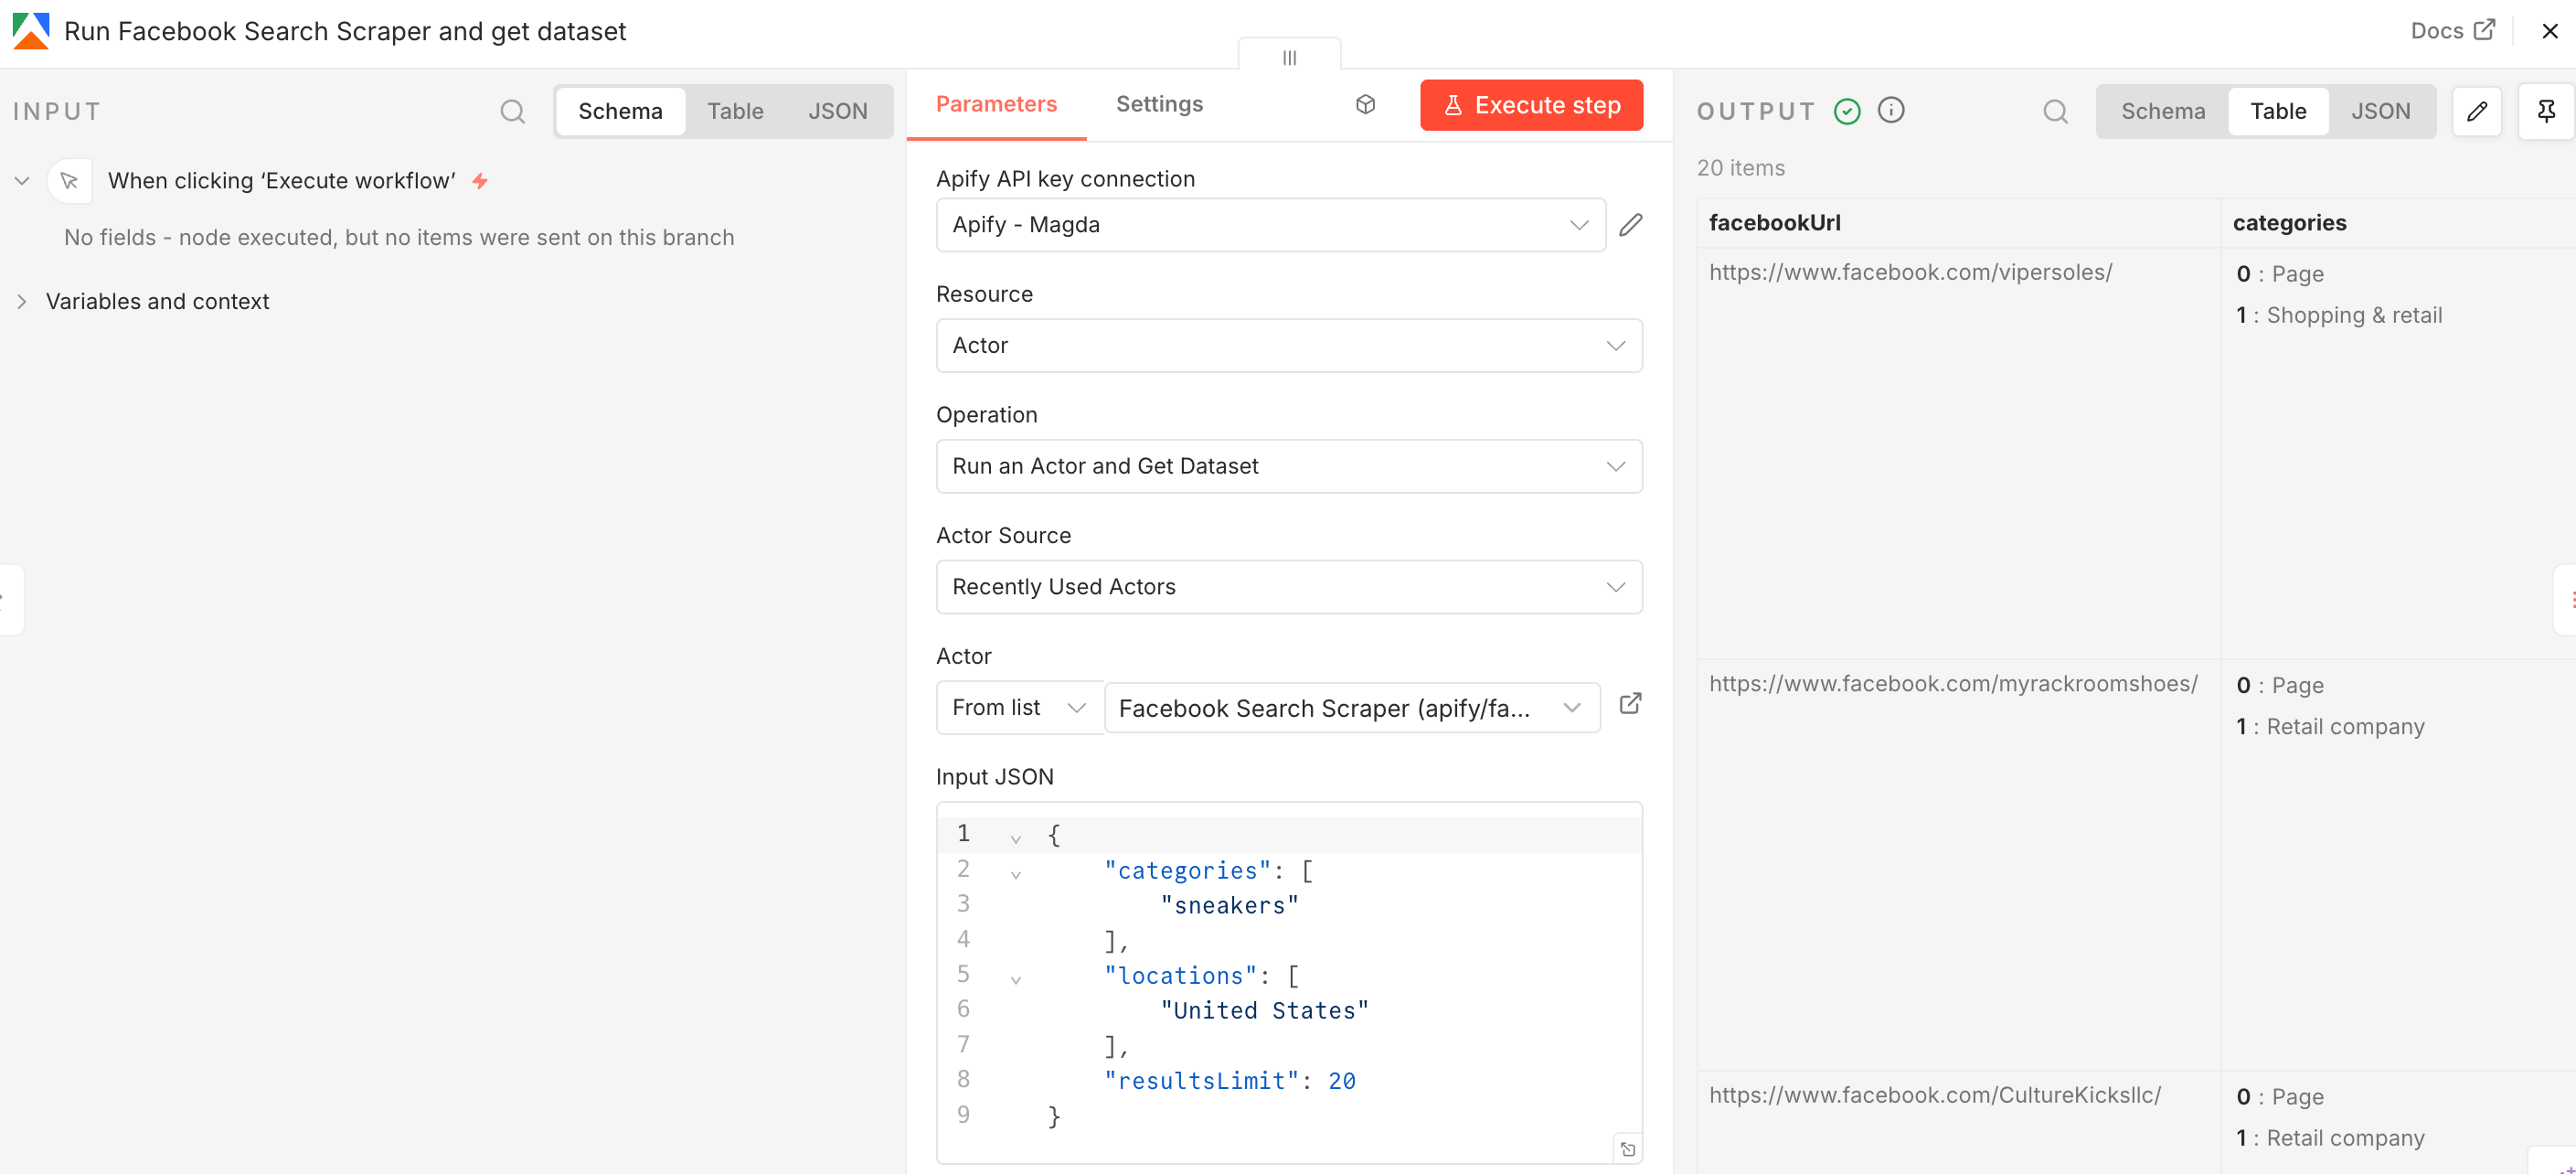
Once you’re happy with your configuration, switch to the JSON view and copy the JSON input. Go back to the n8n node, select the source for the Actor (Apify Store Actors), choose Facebook Search Scraper from the list, and paste the JSON input into the Apify node:
Now you can test it by clicking Execute step at the top. You can also check the Runs in Apify Console to see the Actor executing the scraping session:
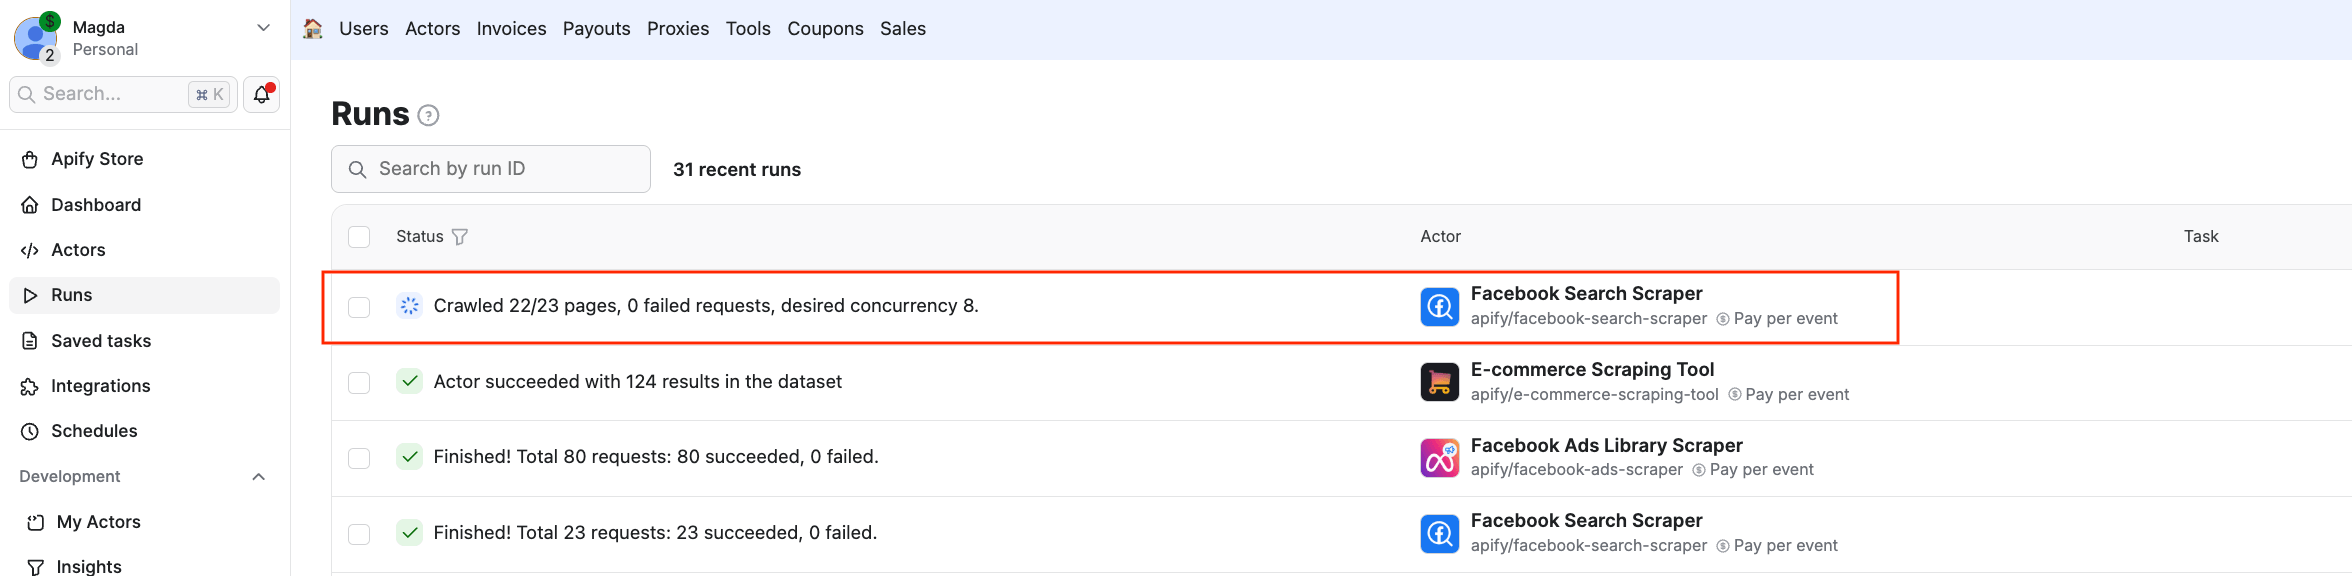
Once the Actor finishes running, you’ll see its output displayed as JSON next to the node. In this case, a list of Facebook URLs:
Step 2: Adjust results to feed another Apify Actor
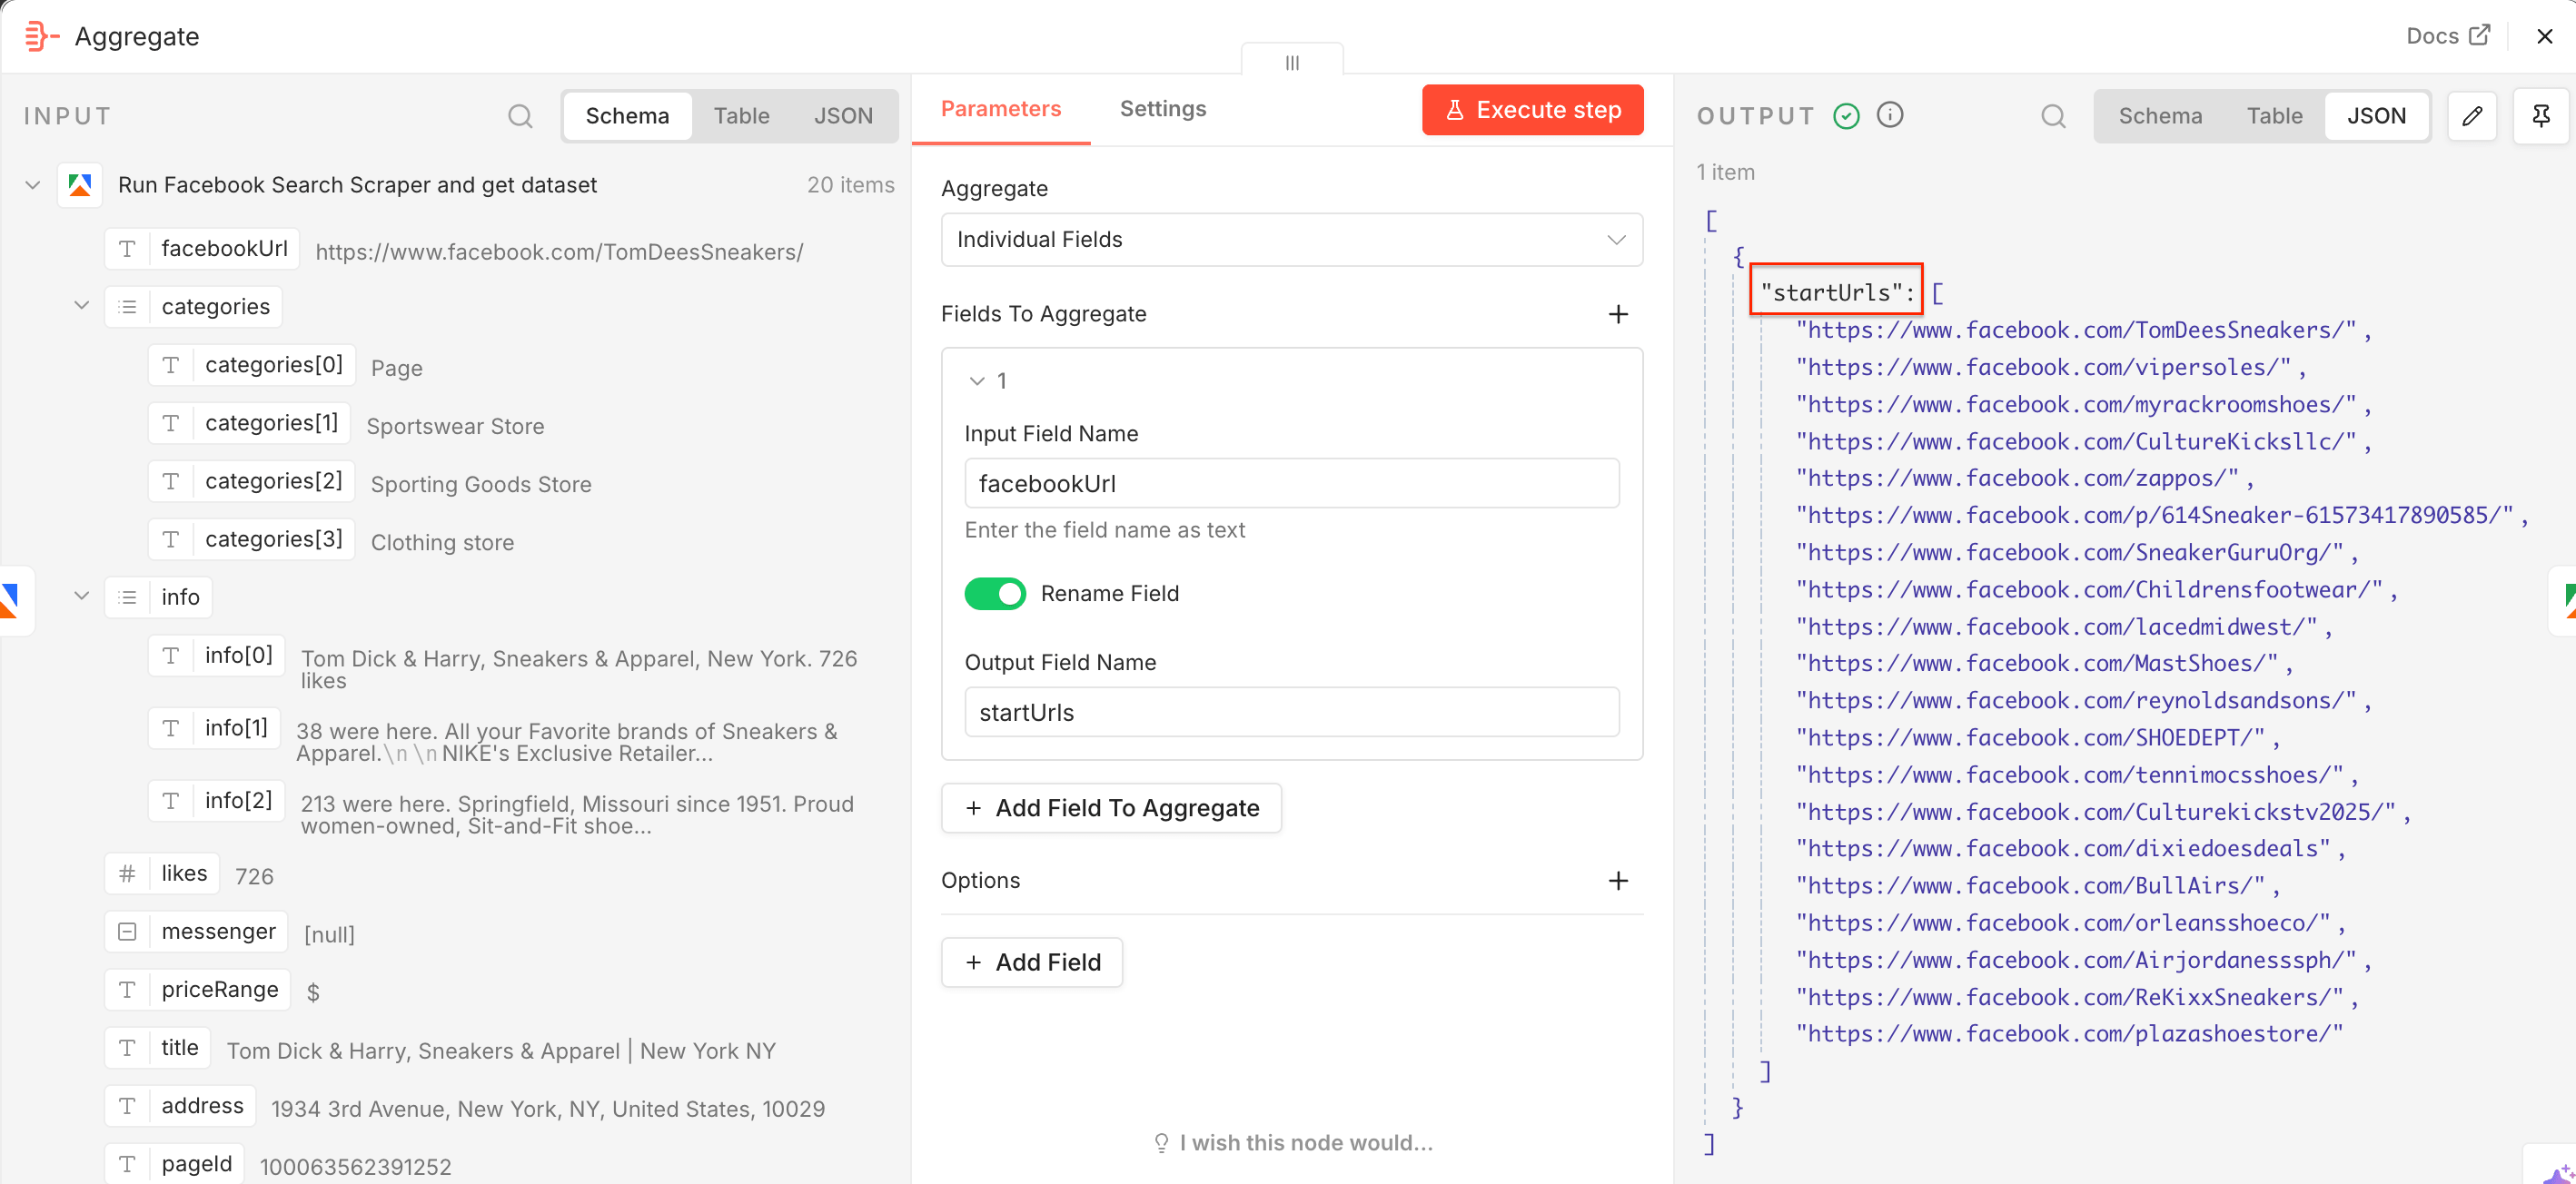
Facebook Search Scraper found the relevant Facebook pages we need to scrape Meta ads. To feed the URLs directly to another Actor - Facebook Ads Library Scraper - we need the Aggregate node. Add it to the workflow.
Now we need to add the extracted Facebook URLs to the startUrls input field, used by the second scraper. In the node, drag and drop the facebookUrl field to the Input Field Name, switch on the Rename Field toggle, and type in the Output Field Name - startUrls. Once you execute the step, you’ll notice the JSON output is already correctly renamed.

Step 3: Get ad data and product URLs
Now that we have the competitors’ Facebook pages, we can check what ads they’re currently running. To do this, we’ll use Facebook Ads Library Scraper, an Actor able to scrape ads across all Meta platforms.
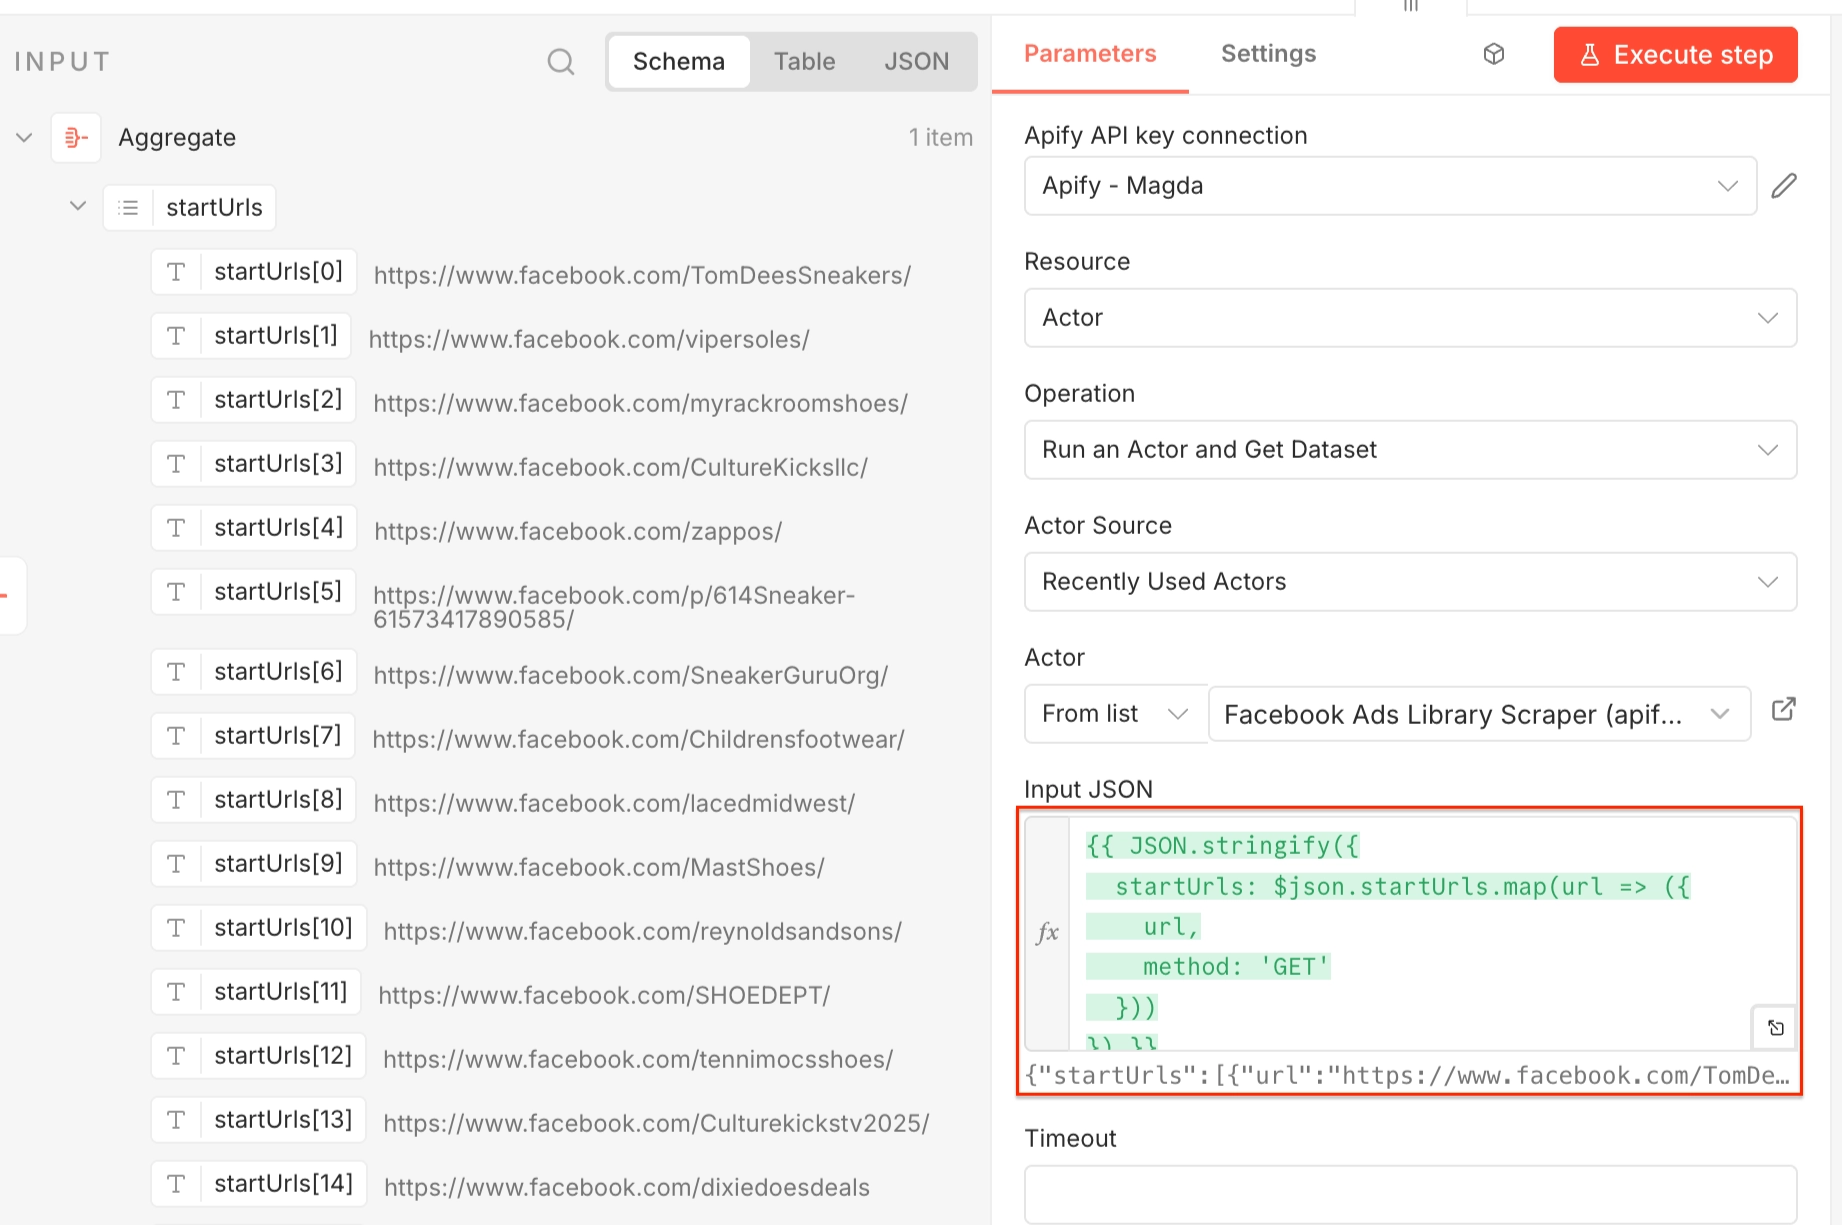
Select the Run an Actor and get dataset step and set it up as before: Make sure your Apify account is connected, and choose a relevant scraper - this time, Facebook Ads Library Scraper.
This Actor expects startUrls as input, so in the Input JSON select Expression and use the following:
{{ JSON.stringify({
  startUrls: $json.startUrls.map(url => ({
    url,
    method: 'GET'
  }))
}) }}
This converts the array of Facebook page URLs into the structure expected by the scraper.
Again, you can test the workflow by executing it.
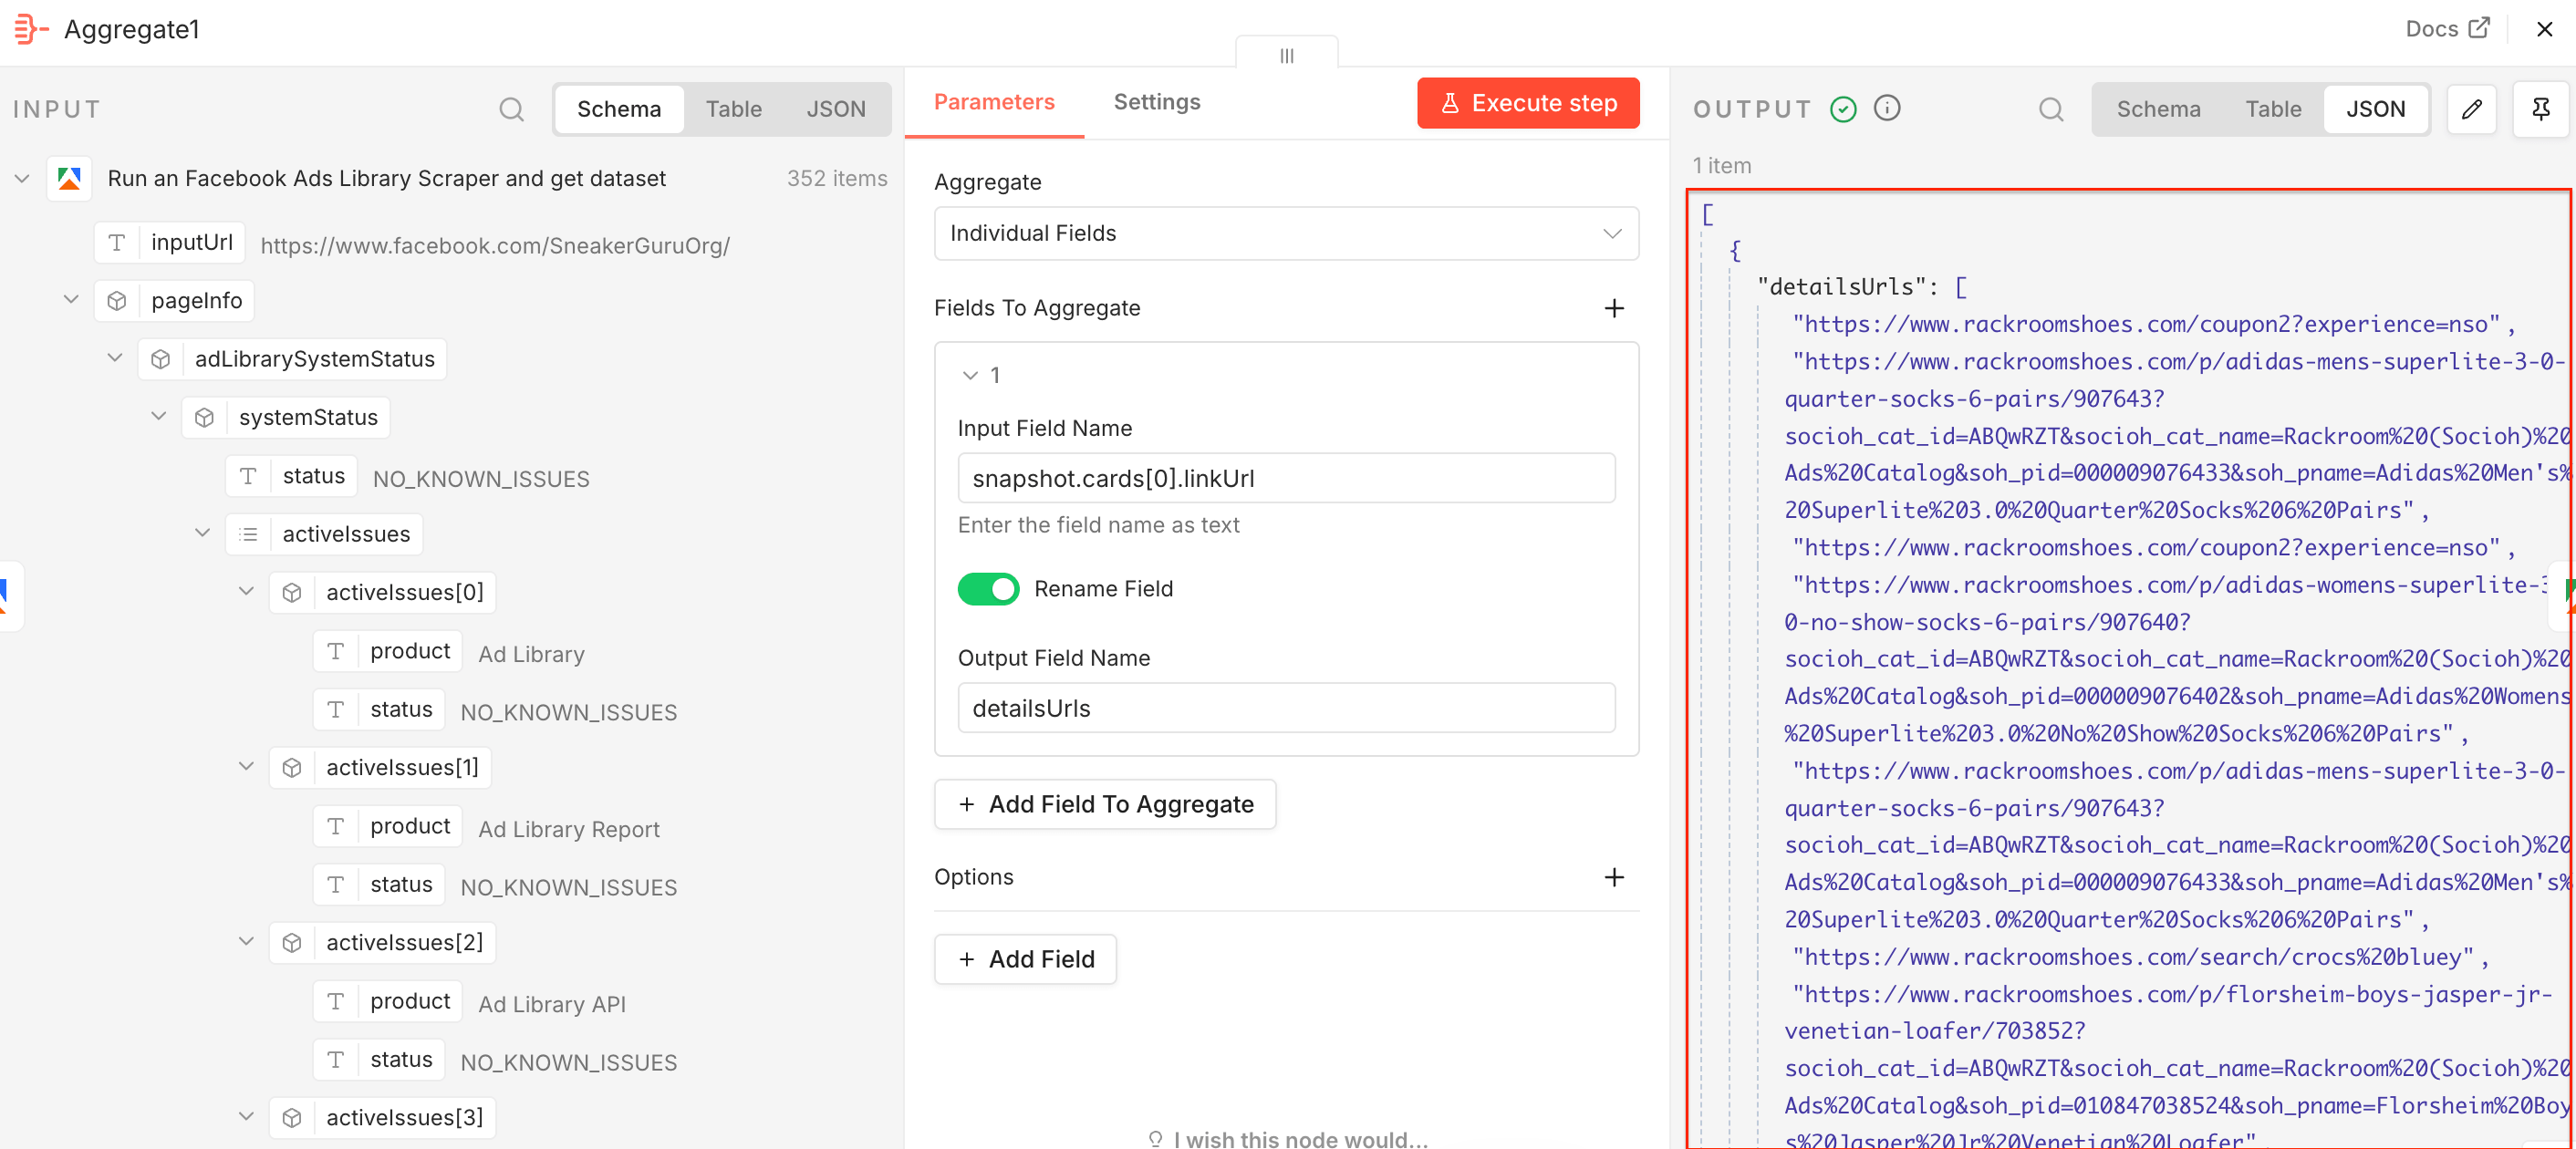
Step 4: Aggregate the product links
Add a second Aggregate node. Facebook Ads Library Scraper extracted ad information along with the advertised product URLs, so we can send them to E-commerce Scraping Tool to get detailed product and pricing data. This time drag and drop the snapshot.cards[0].linkUrl field to the Input Field Name, switch on the Rename Field toggle, and type in the Output Field Name - detailsUrls. Once you execute the step, you’ll notice the JSON output is already correctly renamed.
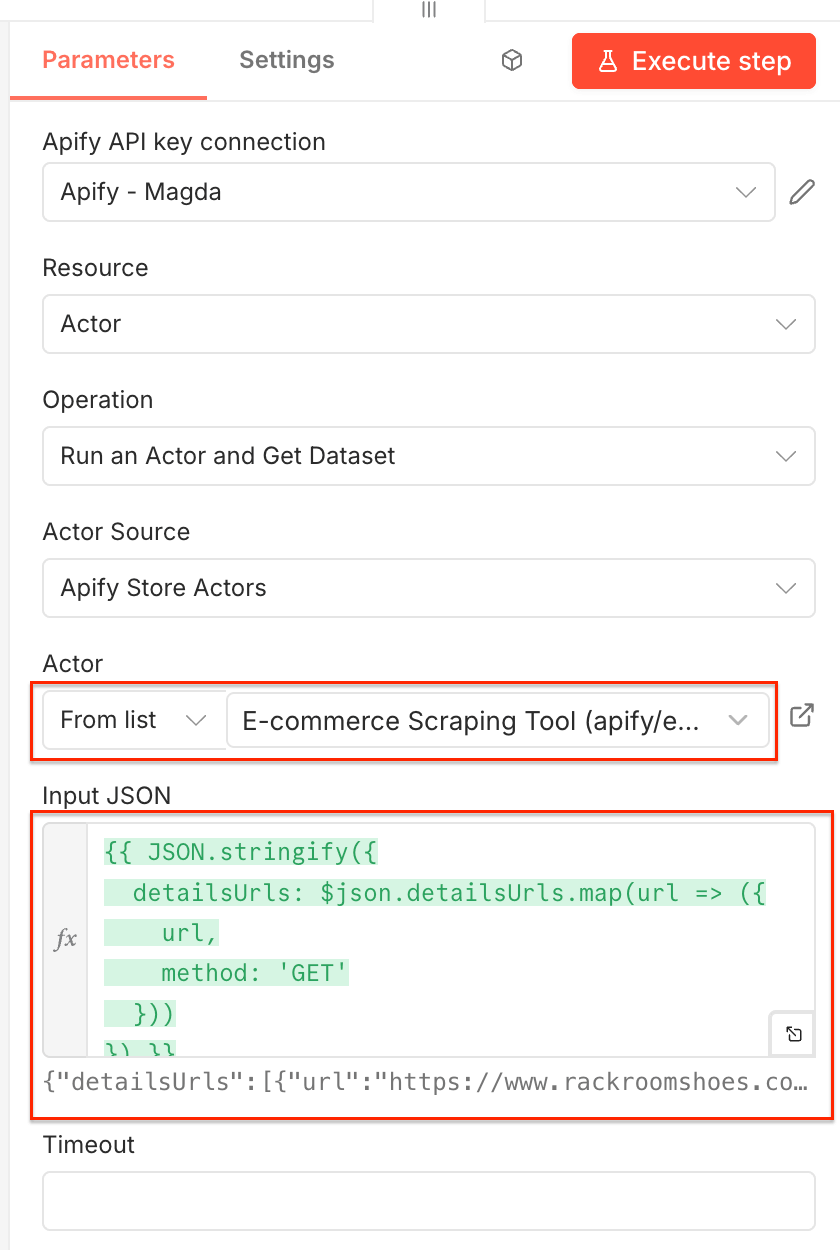
Step 5: Get prices with E-commerce Scraping Tool
Add a third Apify node - Run actor and get dataset - and configure it as before. Select E-commerce Scraping Tool from the Actor list.
In the JSON input use the following Expression:
{{ JSON.stringify({
  detailsUrls: $json.detailsUrls.map(url => ({
    url,
    method: 'GET'
  }))
}) }}
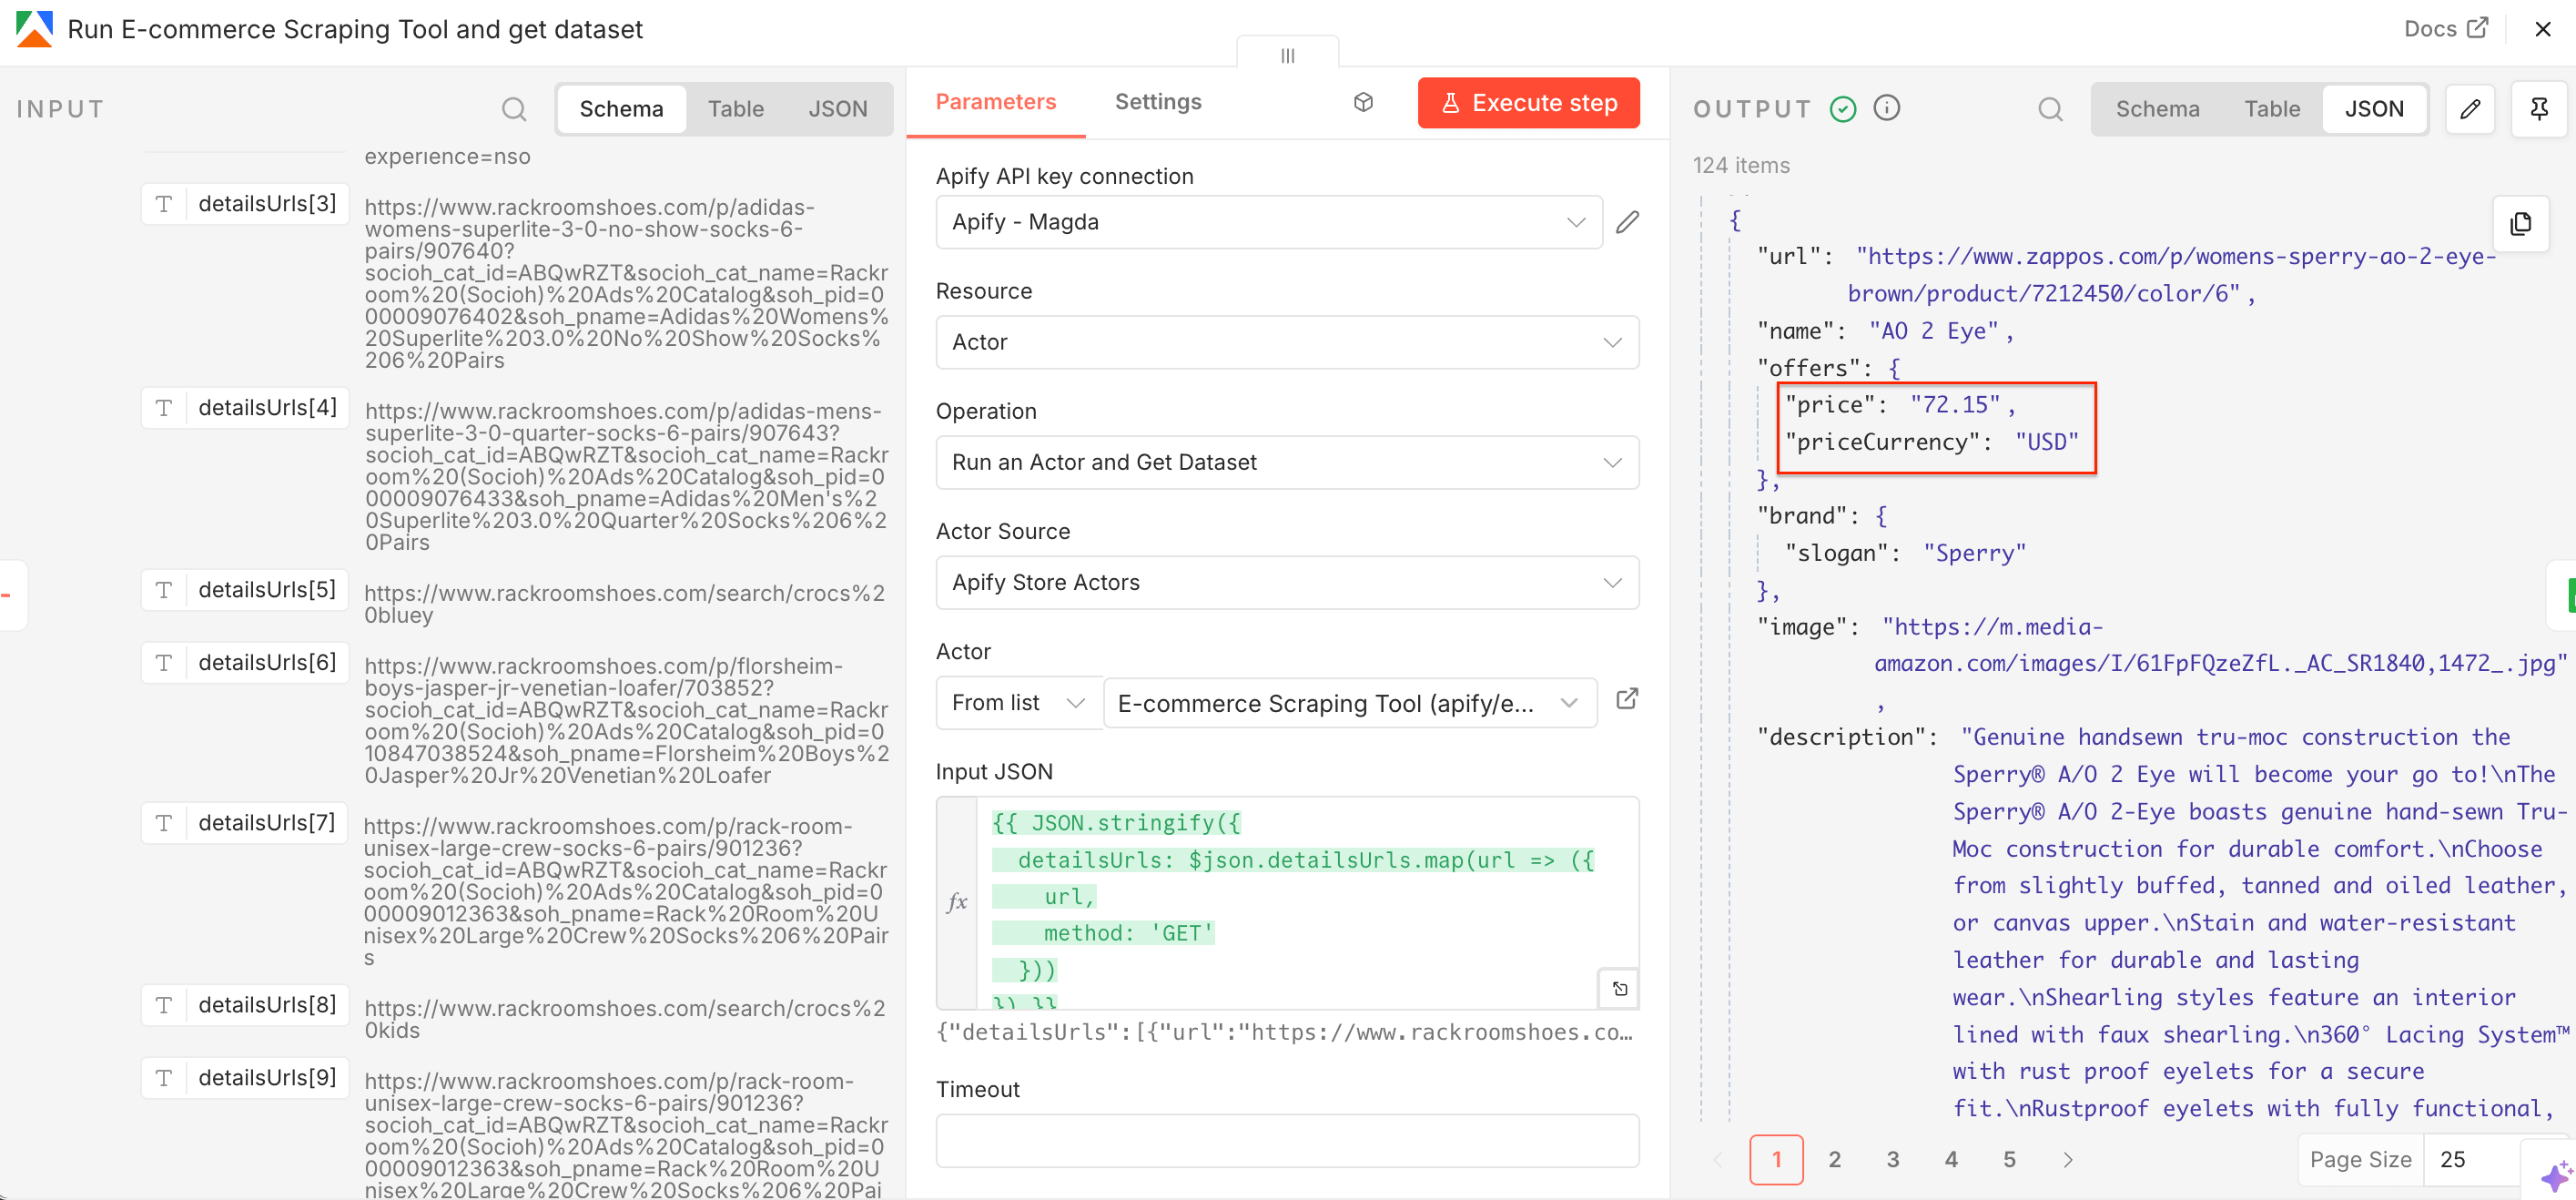
Once this Actor runs, it returns structured product data together with a price and currency.
Next, we’ll create a Google Sheets file for the scraped prices.
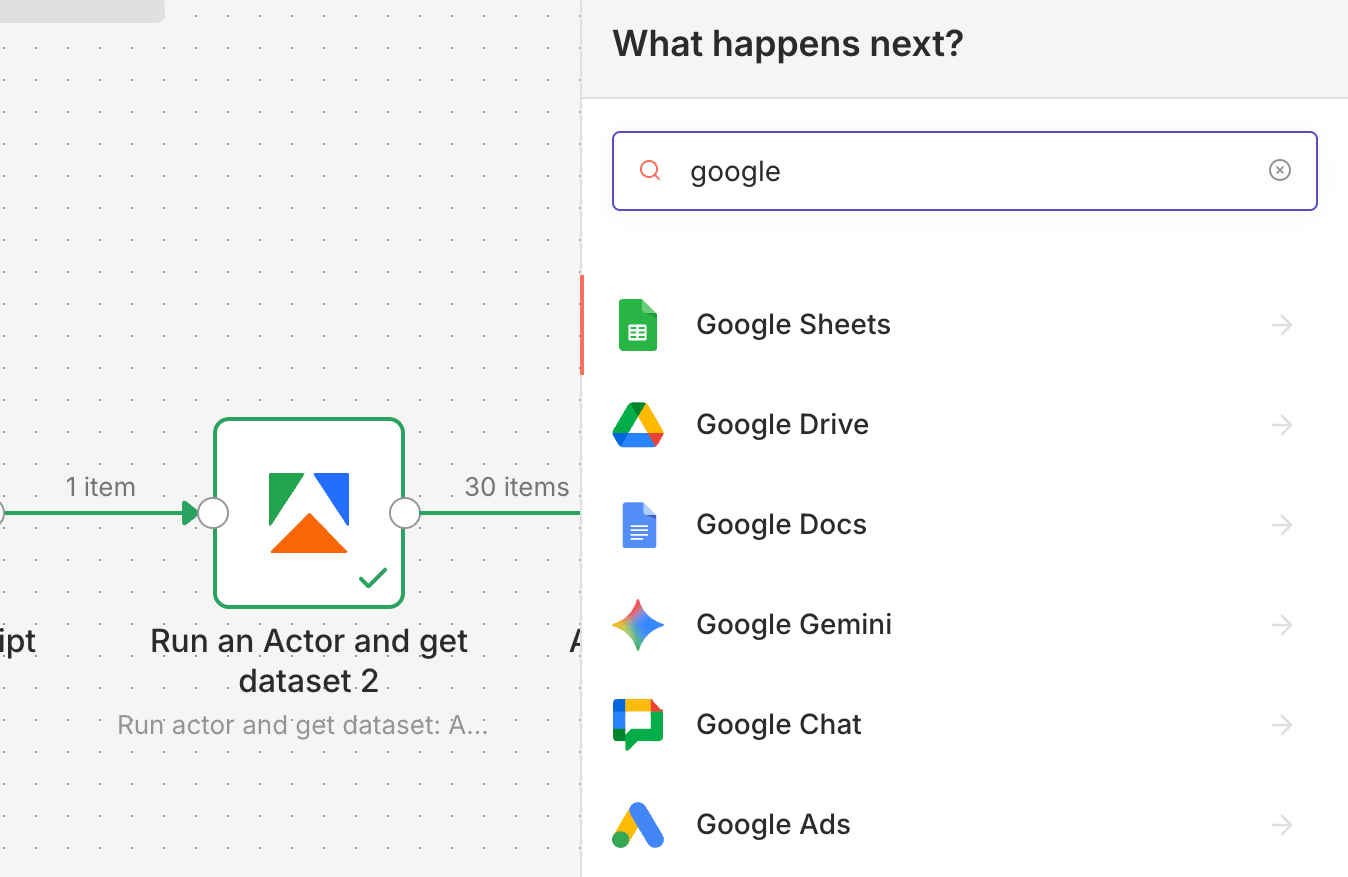
Step 6: Send data to Google Sheets
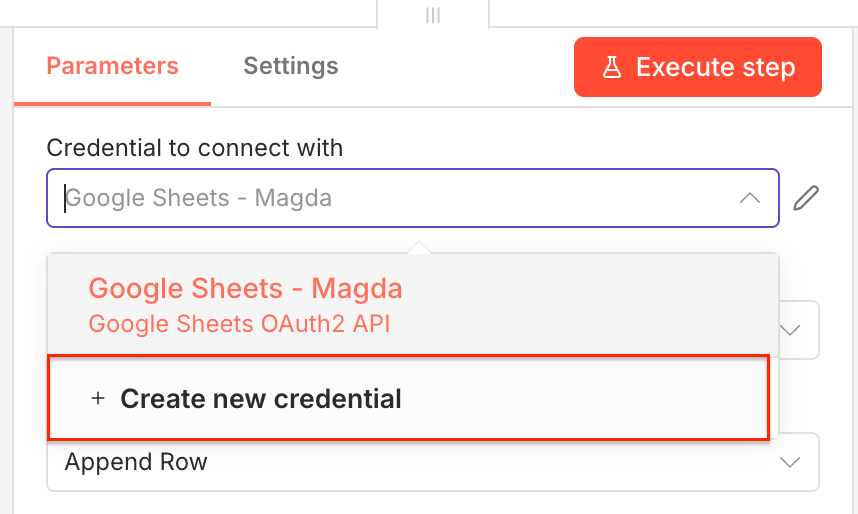
To send pricing data directly to Google Sheets, create one more (and final) n8n node. Find the Google Sheets node and select it. Create a new credential to connect your Google account.
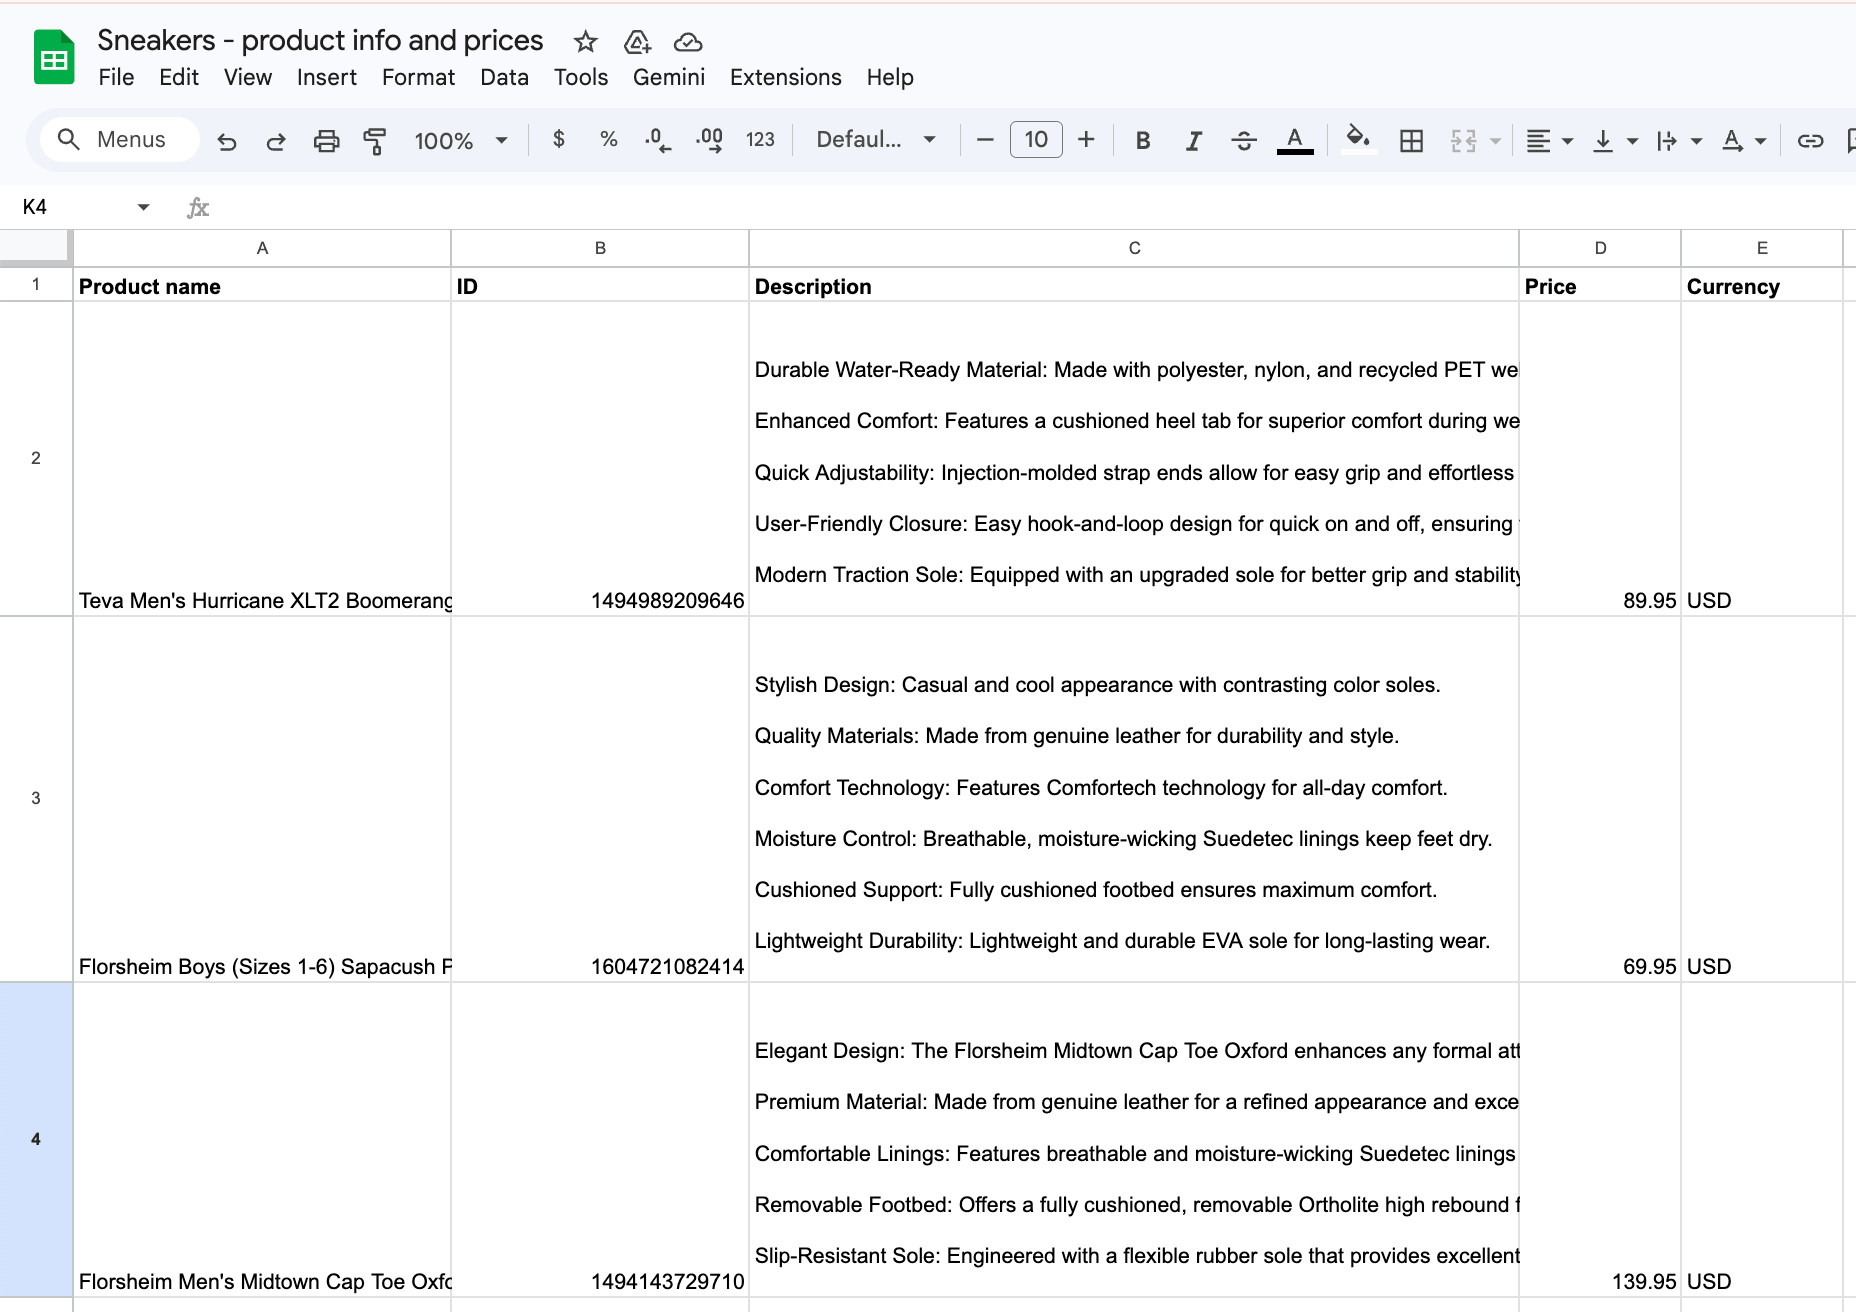
Next, create a Google Sheets file in your Google Drive and prepare columns for your data. We created a spreadsheet with five columns: Product name, ID, Description, Price, and Currency.
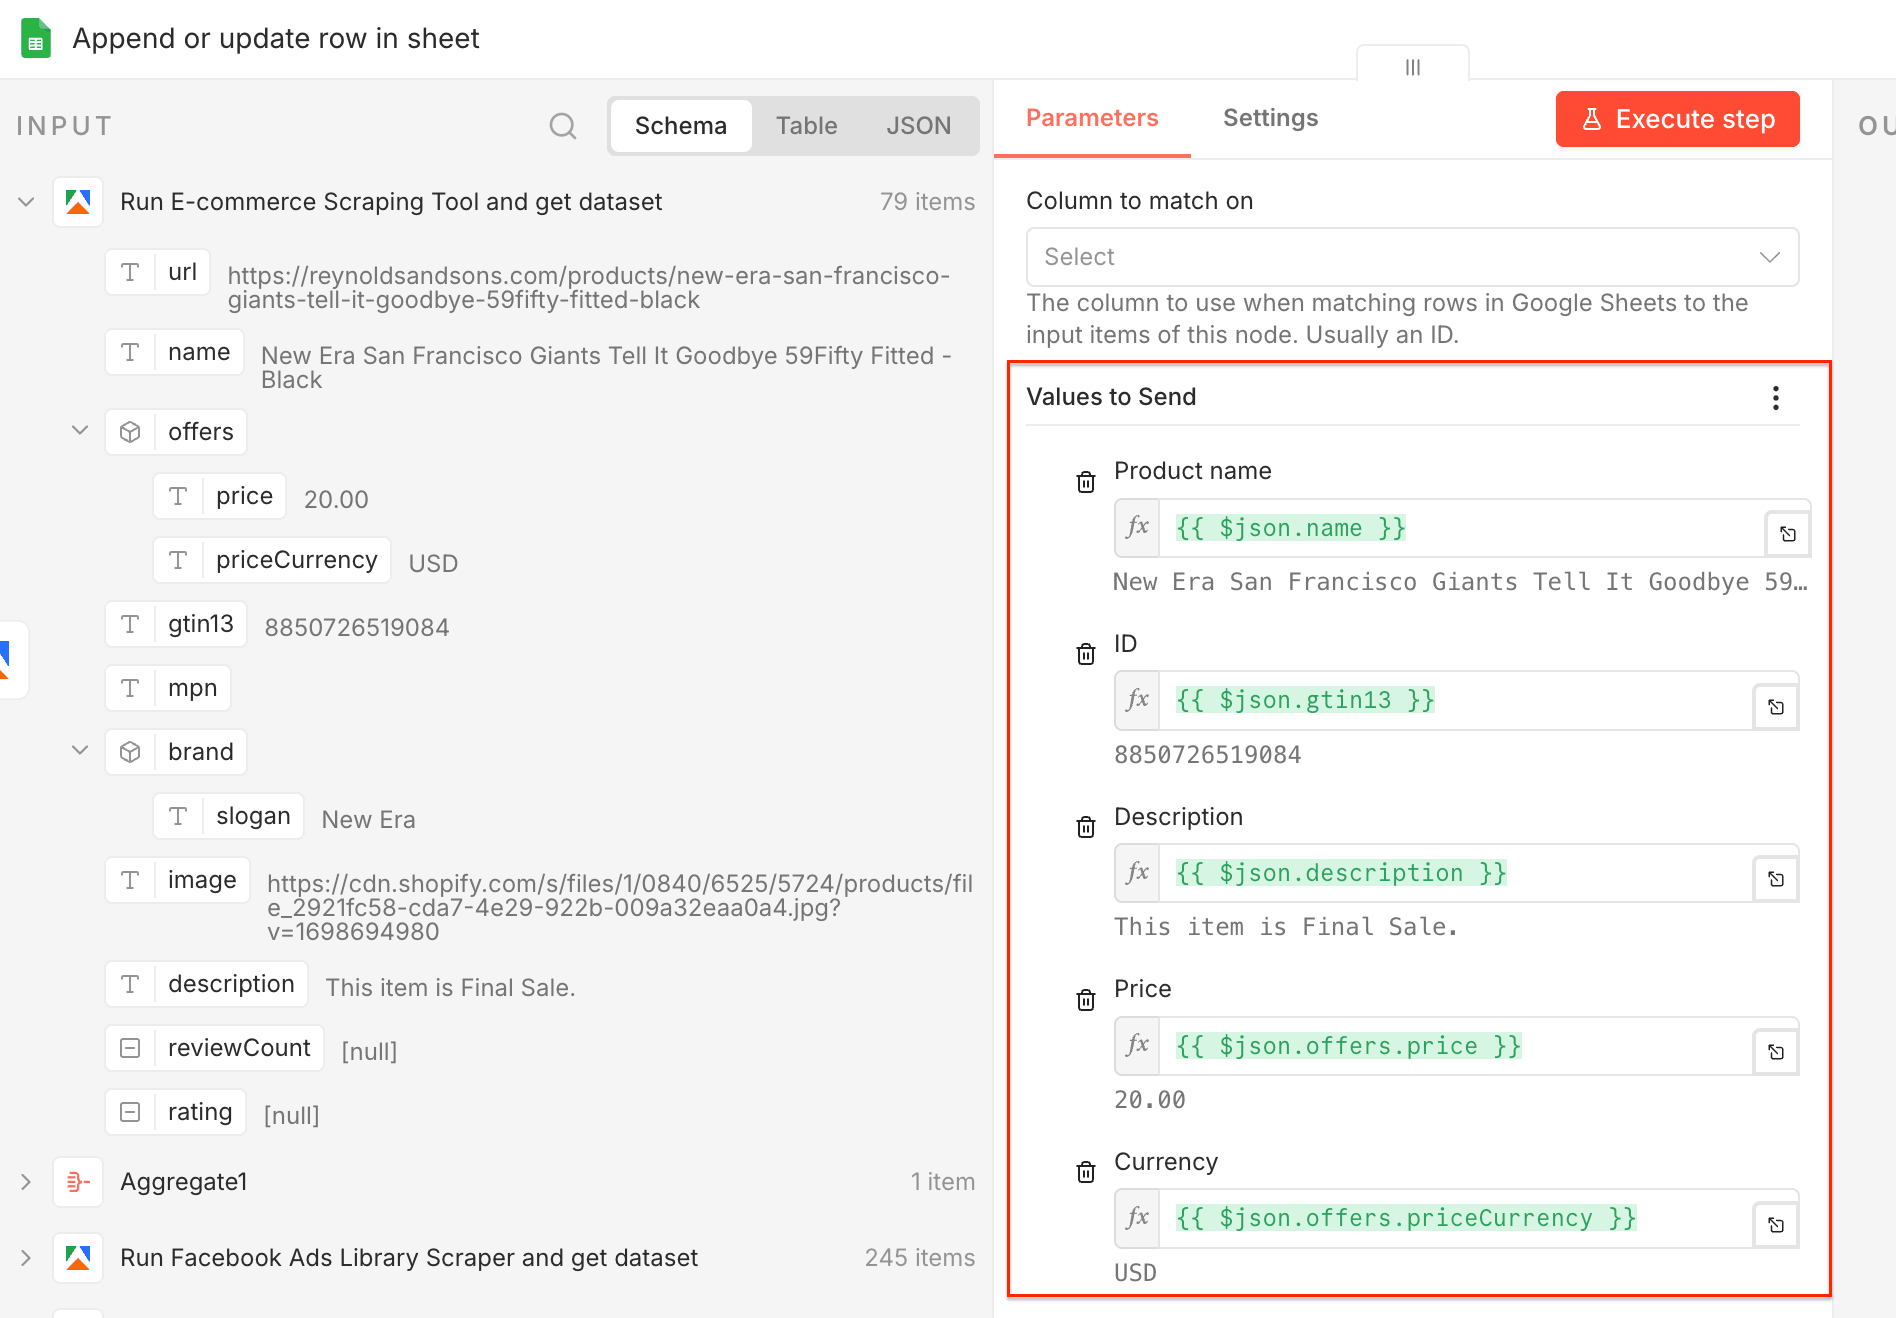
Now let’s configure the data flow. Choose the operation type as Append or update row in sheet, select your spreadsheet from Google Drive, pick the sheet the data will flow into, and select mapping mode as Map Each Column Manually.
Thanks to the manual mapping, you can choose individual values from the dataset and map them to your columns - e.g. name → Product name, priceCurrency → Currency.
Once you map your columns, you can test the entire workflow - execute it and watch the clean output flow directly into Google Sheets.
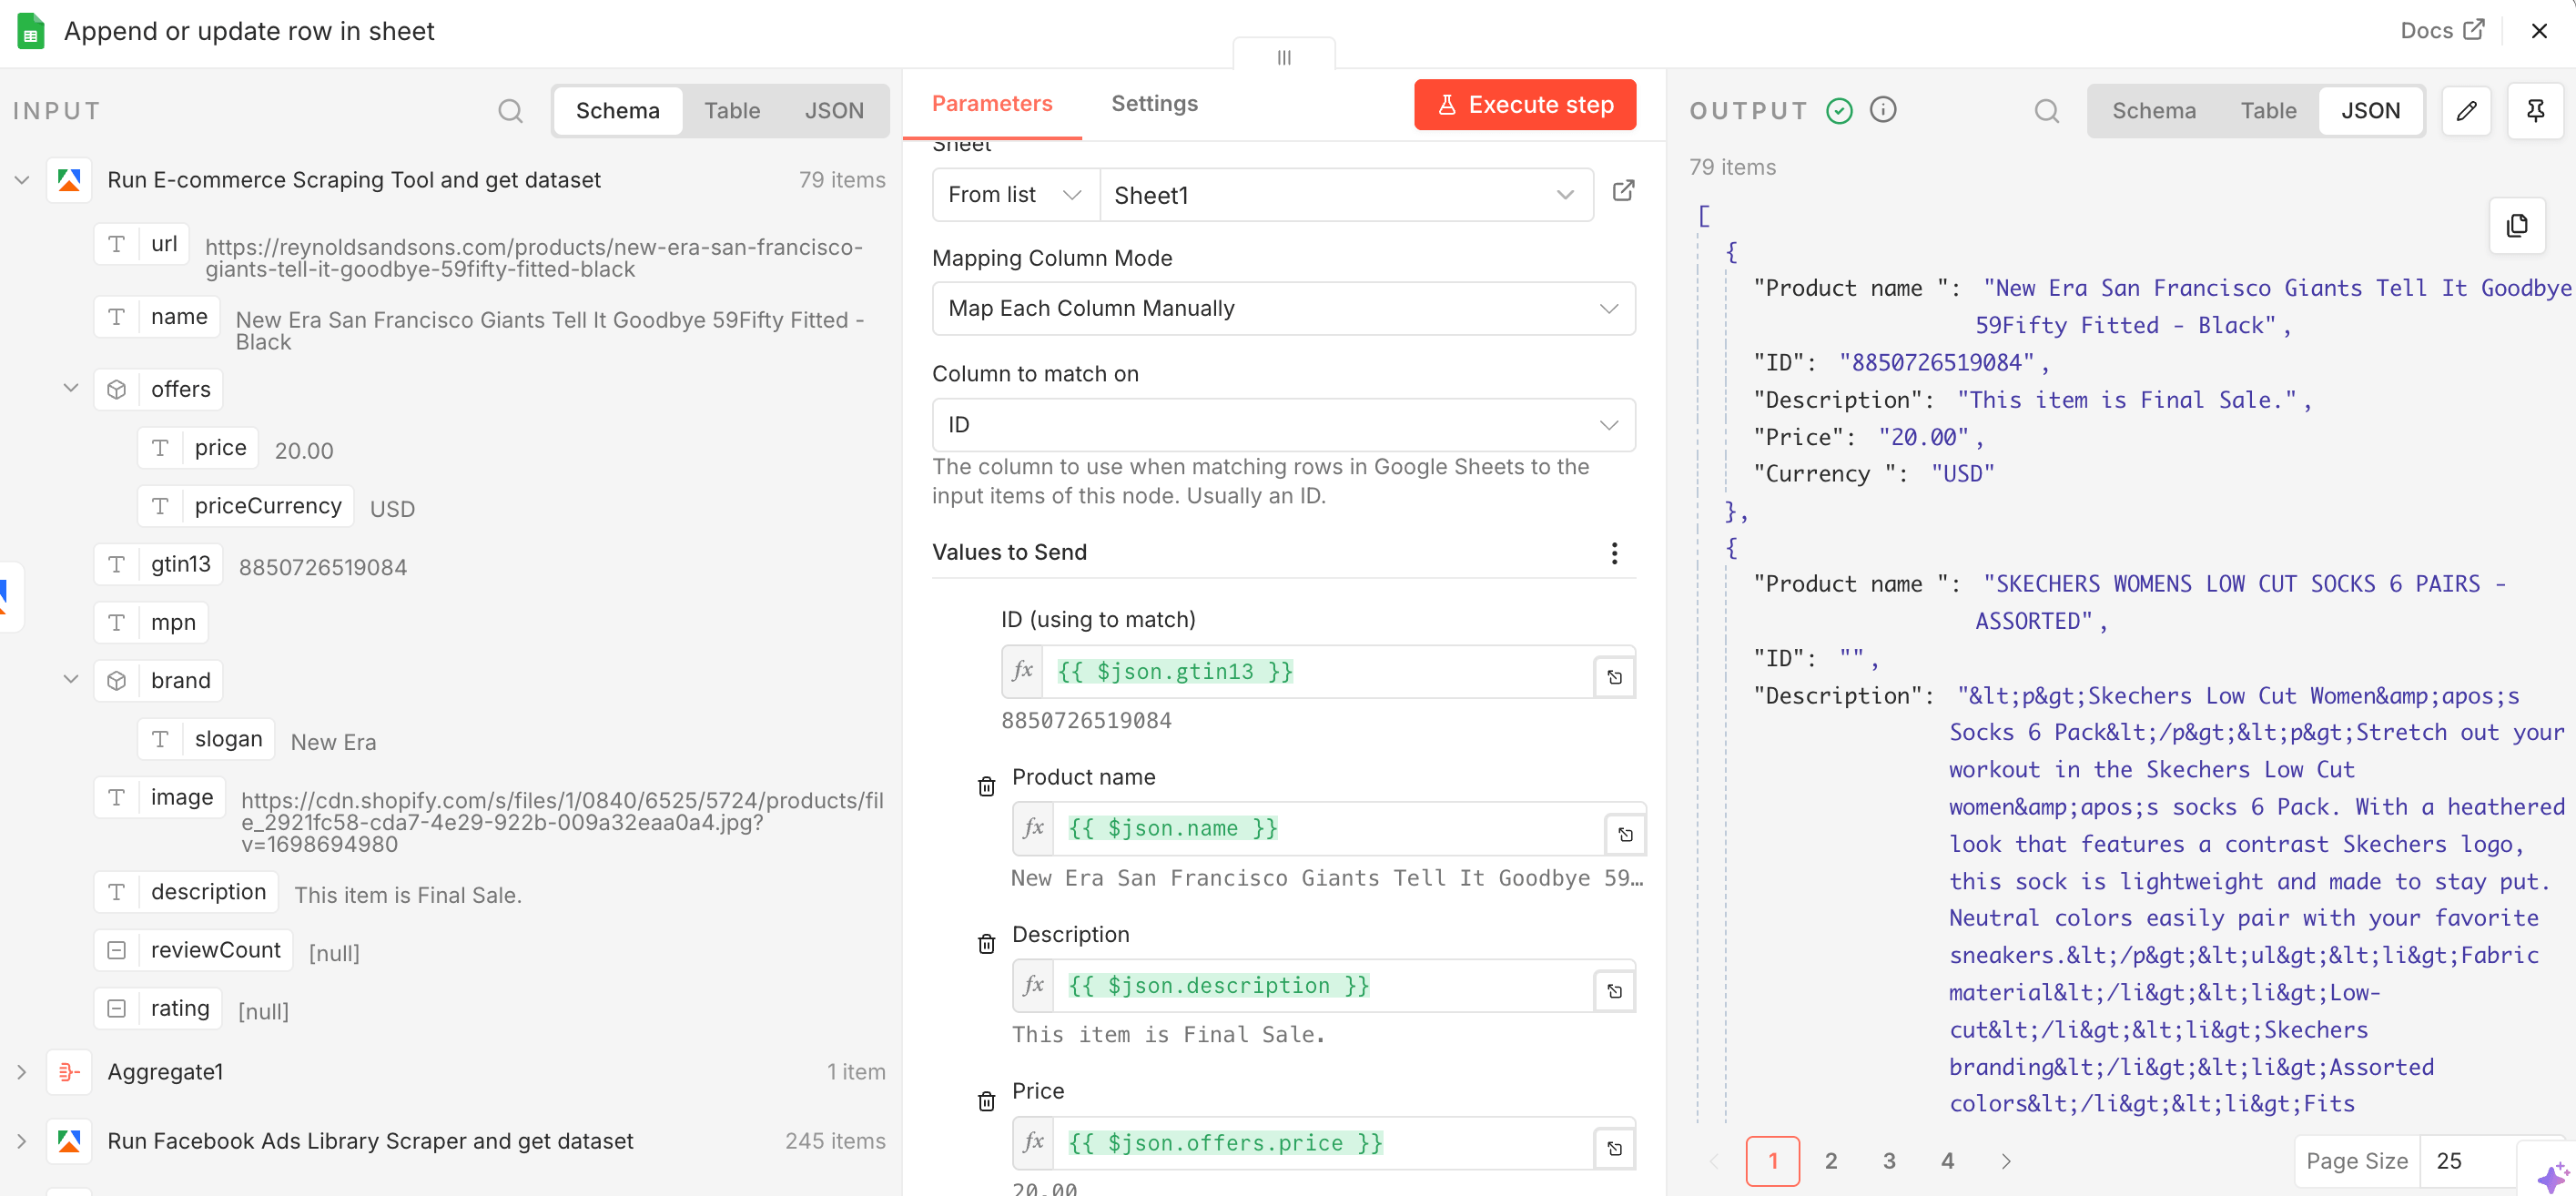
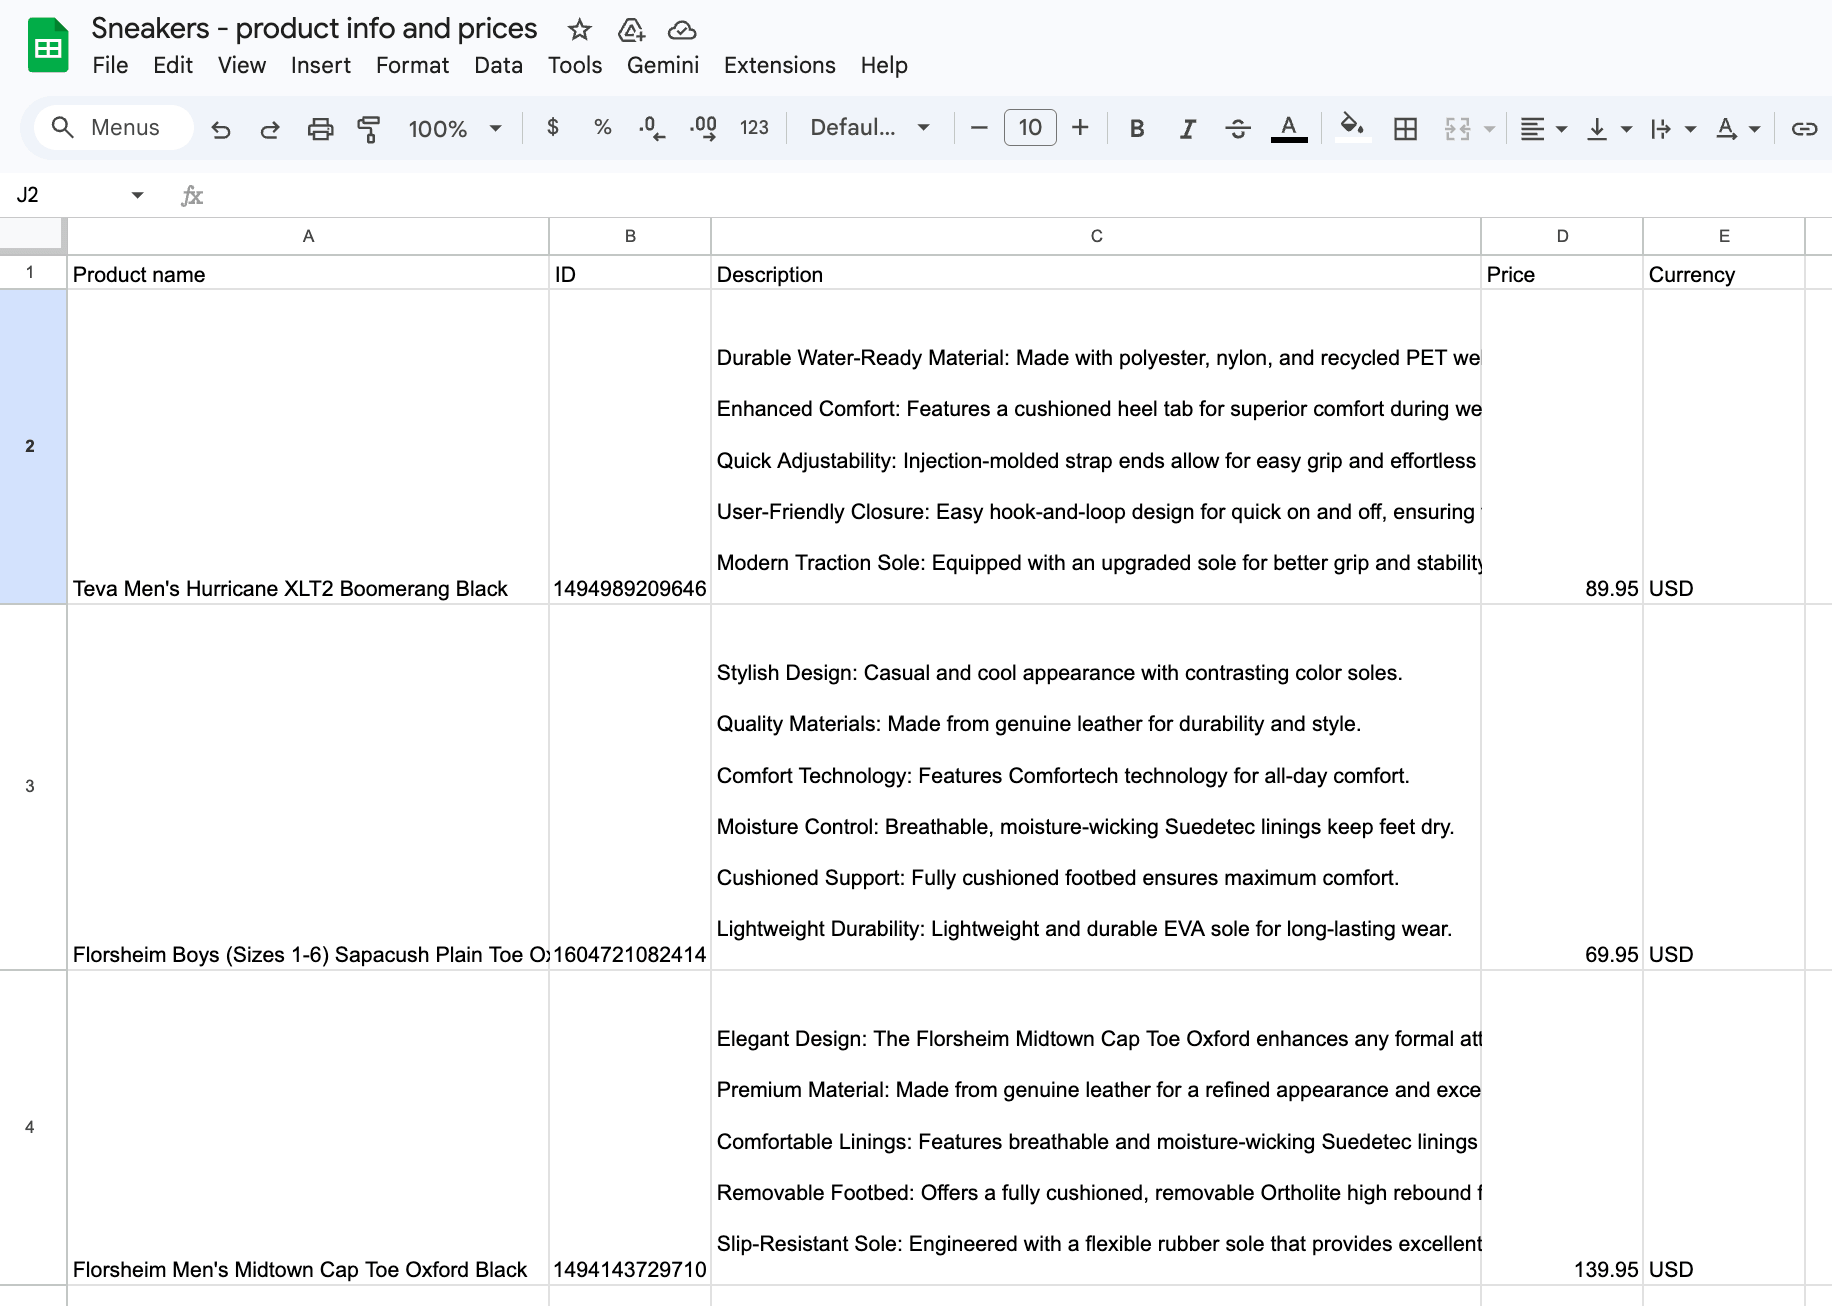
Results in JSON shown in the n8n node and in Google Sheets
That’s it! You’ve built a workflow that can automatically scrape Facebook in search of relevant business pages, extract ads, and pricing information. It works with a single click, can run as often as you need (with the Schedule Trigger in n8n), and can be adjusted to match your sales goals.
Interested in other integration options? See how to achieve the same using MCP:
Map the market before you spend
Active ads are a strong signal of what a brand considers worth spending on, and this workflow helps surface the products competitors are betting on, not just the products sitting in the catalog.
With this workflow in place, competitor monitoring stops being a scattered manual task and becomes a repeatable system that reveals the full market picture.
The same setup also works beyond ongoing monitoring. You can use it to map a new niche, explore a new geography, or validate a market before committing budget.