Hey, we're Apify, a full-stack web scraping and browser automation platform. If you're interested in using Python for web scraping, this detailed article provides you with guidance on how to use a proxy with Python Requests for data extraction.
Have you ever encountered a situation where you've attempted to access content from a website only to be met with restrictions immediately or after a few tries?
This is a common issue for many internet users, especially those engaged in web scraping or accessing geo-restricted content. Proxies often solve these challenges, as they serve as intermediaries between your device and the internet.
This article shows you how to use a proxy with Python requests.
What are proxies and how do they work?
A proxy functions as a bridge between your device and the internet. When you send a request to a website via a proxy, the request is directed to the proxy server. This server then forwards your request to the intended website. The website sees the proxy's IP address instead of your device's, which can help you maintain anonymity and bypass blocks, especially if you're scraping data.
Why do I need proxies for web scraping?
Proxies are widely used for web scraping because they can help you avoid getting blocked or banned by websites that may have strict rate limits or security measures in place. If a website detects unusual activity from a single IP address, it might block access to that IP. You can use proxies to distribute your requests across various IP addresses to bypass these restrictions.
Can I use free proxies for web scraping?
While there are paid proxy services that offer reliability and additional features, free proxies can also be used. They're often easier to find and replace, making them a good starting point for those not wanting to invest in a paid service. However, they may not be as reliable or long-lasting as their paid counterparts.
What types of proxies are there?
Proxies come in different forms, each serving specific needs based on the type of traffic they handle and the level of security required. Here's a breakdown of the three main types of proxies:
- HTTP proxies (designed to handle HTTP traffic)
- HTTPS proxies (these extend support to HTTPS traffic)
- SOCKS proxies (capable of handling any type of traffic)
Pros and cons of free vs. paid proxies
When deciding between free and paid proxies, it is important to consider the benefits and drawbacks of each option to determine what aligns best with your needs. This comparison will help you make an informed decision:
Free proxies: pros
- Accessible: Free proxies are widely available. It's easy to find them through quick searches on search engines or mobile app stores.
- Cost-effective: Since they're free, users can avoid the initial investment required to use paid proxy services.
- Suitable for testing: They're ideal for testing and small-scale projects where there's a need for high reliability.
Free proxies: cons
- Performance issues: Free proxies often suffer from slow speeds and frequent downtime, which can significantly impact your ability to access websites or use them for scraping or automation tasks.
- Limited support: Users must rely on community forums for help, as there's no direct customer support.
- Security risks: There's a higher risk of malware or privacy breaches due to the lack of control over free proxies.
Paid proxies: pros
- Reliability and speed: Paid proxies offer better performance, faster connection speeds, and fewer downtime issues.
- Advanced features: They have advanced features like caching, server selection, and dedicated support.
- Security and privacy: Paid proxies offer superior privacy and security features, including greater encryption and customer support for any issues.
Paid proxies: cons
- Cost: With paid proxies, the main downside is the expense, with prices varying based on the service's quality and features.
- Maintenance: While paid proxies offer better support, they may still require some effort on your part to maintain and troubleshoot issues.
Why use Python Requests with proxies?
Using Python Requests with proxies offers several benefits, including:
- Enhanced anonymity: You effectively mask your IP address by routing your Python requests through a proxy. This protects your privacy and helps avoid detection by websites.
- Bypassing rate limits and access controls: Proxies help you to avoid getting blocked by websites that impose rate limits or restrict access based on IP addresses. By rotating through multiple proxy IPs, you can extend the duration of your web scraping activities without interruption.
- Geo-targeting and access to restricted content: By routing your Python requests through a proxy, you can simulate requests from different geographical server locations and access content that might be restricted to certain regions.
- Load distribution and scalability: By distributing your requests across multiple proxy servers, you can simultaneously manage a higher volume of requests. This helps make your scraping applications more scalable.
- Increased security and privacy: Proxies add an extra layer of security to your online activities. They can help protect your data by encrypting your requests. This makes it harder for third parties to intercept and read your data. Additionally, by hiding your IP address, proxies can prevent your online activities from being traced back to you.
- Testing and development: Proxies allow developers to inspect and analyze the network data exchanged between their scripts and the target servers. This can help troubleshoot and resolve issues more efficiently.
Setting up Python Requests to use proxies
This guide assumes you're using Python 3.12.1, as Python 2 is now outdated and may not be compatible with some of the commands and syntax used here.
Ensure that Python and the Requests library are installed on your system. The Requests library should already be included if you're working with Python 3.12.0 or later. However, if for any reason you find it's missing, you can easily install it with the command:
pip install requestsStep-by-step guide to using proxies with Python Requests
Setting up a proxy with Python Requests is a straightforward process that allows developers to route their requests through an intermediate server. This section will guide you through the steps to set up a proxy with Python Requests.
Step 1: Import the Requests library
The first step is to import the requests library into your Python script. You can do this by adding the following line of code at the beginning of your script:
import requestsBy importing the requests library, you gain access to methods like requests.get(), which you'll use to make requests through your proxy.
Step 2: Define proxy settings
Next, you need to define your proxy. There are different types of proxies available, such as HTTP, HTTPS, and SOCKS proxies. To set up an HTTP proxy, define your proxy settings in a Python dictionary. Your code will look like this:
proxies = {

'http': 'http://198.199.86.11:8080',

}

---

And for an HTTPS proxy:

proxies = {

'https': 'https://47.243.205.1:3128',
Or, you can specify both types of proxies at the same time:
proxies = {

'http': 'http://198.199.86.11:8080',

'https': 'https://47.243.205.1:3128'

}
Step 3: Make a request with a proxy
With your proxy settings defined, Use the requests.get() method, passing in the website URL you want to access and the proxies dictionary you defined earlier.
response = requests.get('http://www.httpbin.org/ip', proxies=proxies)
Step 4: Check the response
After making the request, you can check the response to verify that the request was successful and that it was indeed routed through the proxy.
print(f'Response status code : {response.status_code}')
You'll get the following response:
Response status code : 200
That means the website of the target server responded with an HTTP 200 status code, indicating a successful request!
Full code
Here's how the full code looks when put together:
import requests

# Define your proxy settings

proxies = {

'http': 'http://proxy_IP:proxy_port',

'https': 'https://proxy_IP:proxy_port'

}

# Make a request with proxy

response = requests.get('http://www.httpbin.org/ip', proxies=proxies)

# Check the response

print(f'Response status code : {response.status_code}')
proxy_IP and proxy_port with the appropriate values.Setting up SOCKS proxies
For more complex setups, such as using SOCKS proxies, you need to adjust the proxy settings accordingly. If you're working with SOCKS5 proxies, for example, you need to install the requests[socks] package and adjust the proxy URLs to use the socks5 scheme:
pip install requests[socks]On macOS or Linux, when installing the requests[socks] package via pip, you should be aware that the square brackets ([]) are interpreted by the shell in a special way. To avoid this, you should enclose the package name in quotes to prevent the shell from misinterpreting them:
pip install "requests[socks]"This command ensures that the shell treats requests[socks] as a single string, avoiding any pattern-matching issues.
Once installed, adjust your proxies dictionary to include the socks5 as follows:
proxies = {

'http': 'socks5://proxy_IP:proxy_port',

'https': 'socks5://proxy_IP:proxy_port',

}
This setup allows you to use SOCKS proxies for more versatile and secure connections. Remember to replace proxy_IP and proxy_port with the appropriate values.
Proxy authentication with Python Requests
If your proxy requires authentication, you include the username and password in the proxy URL as seen below:
proxies = {

'http': 'http://username:password@proxy_IP:proxy_port',

'https': 'http://username:password@proxy_IP:proxy_port',

}

response = requests.get('URL', proxies = proxies)
Using sessions with proxies
When making multiple requests with the same proxy configuration, it's more efficient to use a session. In cases where you need to keep the same session (e.g. when you need to log in to a website), it's best to keep the same proxy and so the IP address.
Sessions allow you to maintain state, such as cookies, across multiple requests, which is crucial for interactions that require authentication or session-based data. These are the steps to set up and use a session with proxies:
Step 1: Create a session object
Create a session object using the requests.Session() method. This session object will be used to maintain the proxy settings across multiple requests.
import requests

session = requests.Session()
Step 2: Define proxy settings for the session
Define your proxy settings for the session in a dictionary.
session.proxies = {

'http': 'http://proxy_IP:proxy_port',

'https': 'https://proxy_IP:proxy_port',

}
http://proxy_IP:proxy_port and https://proxy_IP:proxy_port with the actual proxy URLs you're using.Step 3: Making requests with the session
You can now make requests using this session. All requests made using this session will automatically use the proxy settings you have defined.
response = session.get('http://www.httpbin.org/ip')
Step 4: Close the session
Once you've completed your tasks with the session, It is important to close the session to free up resources.
session.close()
Rotating proxies to avoid IP bans and rate limits
To prevent being blacklisted or rate-limited by websites, it's essential to implement proxy rotation. This strategy involves changing your IP address for each request, making it appear that multiple users are accessing the website. Here's how to implement proxy rotation in Python using the requests library:
Step 1: Create a list of proxies
First, compile a list of proxies you wish to rotate through. Each proxy in the list should be in the format username:password@proxyIPaddress:proxyport._
# List of proxies for rotation

proxies = [

"username:password@Your_proxy_IP_Address:Your_proxy_port1",

"username:password@Your_proxy_IP_Address:Your_proxy_port2",

"username:password@Your_proxy_IP_Address:Your_proxy_port3",

"username:password@Your_proxy_IP_Address:Your_proxy_port4",

"username:password@Your_proxy_IP_Address:Your_proxy_port5",

]
This list contains multiple proxies that will be used to distribute your requests, helping to avoid detection and blocks.
Step 2: Define a function to rotate proxies
Next, define a function randomly selecting a proxy from your list for each request. Hence simulating a new user for each request.
import random

# Method to rotate your proxies

def get_proxy():

# Choose a random proxy from the list

proxy = random.choice(proxies)

return {'http': proxy}
The get_proxy() function selects a random proxy from the list for each request, ensuring that your requests appear from different users.
Step 3: Use the function in your requests
Use the get_proxy() function to randomly select a proxy for each request.
url = "your_target_url"

response = requests.get(url, proxies=get_proxy())
This approach ensures that your requests are distributed across multiple IP addresses, reducing the risk of being blocked or rate-limited.
Troubleshooting proxies and Python Requests
When working with proxies in Python Requests, you may encounter various issues that require troubleshooting. This section will demonstrate setting up environment variables for proxies, identifying common errors, and tips for debugging to ensure smooth operation.
Setting up environment variables for proxies
To avoid repeating proxy settings in your Python scripts, you can set them as environment variables. To set up environment variables for proxies, open your terminal and use the export command to define HTTPPROXY and HTTPSPROXY variables:
export HTTP_PROXY="http://Your_proxy_IP_Address:Your_proxy_port"

export HTTPS_PROXY="http://Your_proxy_IP_Address:Your_proxy_port2"
Common errors and issues
Common errors that can arise when setting up proxies include connection errors, proxy authentication errors, and performance issues. To troubleshoot these issues, it's important to check the proxy settings, test the connection, and inspect the response.
- Connection errors
Connection errors can arise from incorrect proxy settings, network issues, or server problems. To debug, verify that the proxy address and port are correct. You can use the requests.get() function to send a test request to a known URL and check if it's successful. If the connection fails, examine the error message for clues on the cause.
- Proxy authentication errors
If your proxy requires authentication, ensure the username and password are correct. Attempt a test request with the authentication credentials to confirm acceptance.
- Proxy performance issues
To address performance issues, you can use the ‘timeit’ module to compare response times with and without the proxy. Trying different proxies can also help determine if the issue is specific to one proxy or type.
Using third-party services with Python Requests
Third-party proxy services provide users with a pool of proxies that can be used to route requests. These services often offer features like automatic proxy rotation, authentication, support for different proxy types, and dedicated customer support.
Benefits of using third-party proxy services
Using third-party proxy services can offer several benefits. One of the main advantages is scalability, allowing you to increase your proxy usage as your needs grow easily.
Another benefit is reliability, as third-party services often have redundant proxies to ensure high availability.
Additionally, these services offer ease of use as they often provide a simple API for integrating with your scraping projects.
Using Apify proxies
Apify is a reliable third-party proxy service that provides a range of features to make web scraping simpler and more efficient. It offers a large pool of proxies, automatic rotation, and support for various proxy types, which can be very helpful for web scraping projects.
Apify's suite of web scraping tools and services is designed to enhance the efficiency and effectiveness of web scraping projects, making it a useful resource for those in need of these services.
To integrate Apify Proxy with Python Requests, follow these steps:
- Navigate to Apify Console and click “Proxy” in the sidebar. This will take you to your proxy settings, where you can manage your proxy configuration.
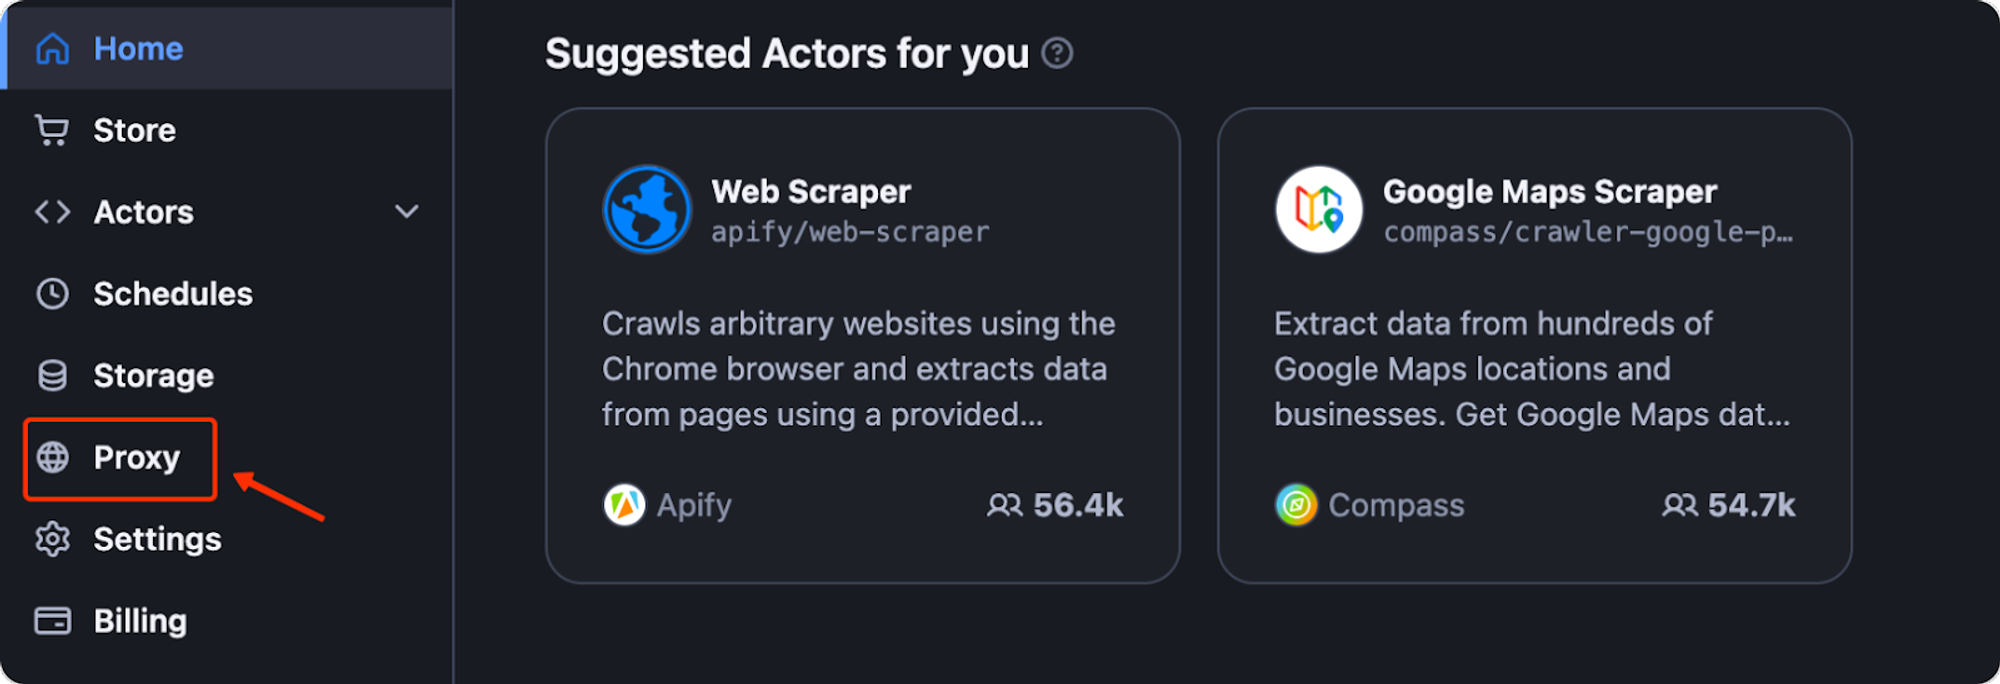
- In the Proxy section, generate a proxy URL. This URL will include your Apify Proxy Password and is formatted as follows - “http://YourApifyProxyUser:YourApifyProxyPassword@proxy.apify.com:8000”.
Apify offers proxy groups shared across multiple customers or dedicated ones assigned to you, and only you can use them. To set up a datacenter proxy, you can either select a proxy group or use auto mode:
http://auto:<password>@proxy.apify.com:8000
You can find your proxy password on the Proxy access page of the Apify Console. Connecting to a residential proxy works the same way as a datacenter proxy, with two major differences:
- You must specify the “groups” parameter in the username as “groups-RESIDENTIAL”.
- You can specify the country from which your proxies will be pooled.
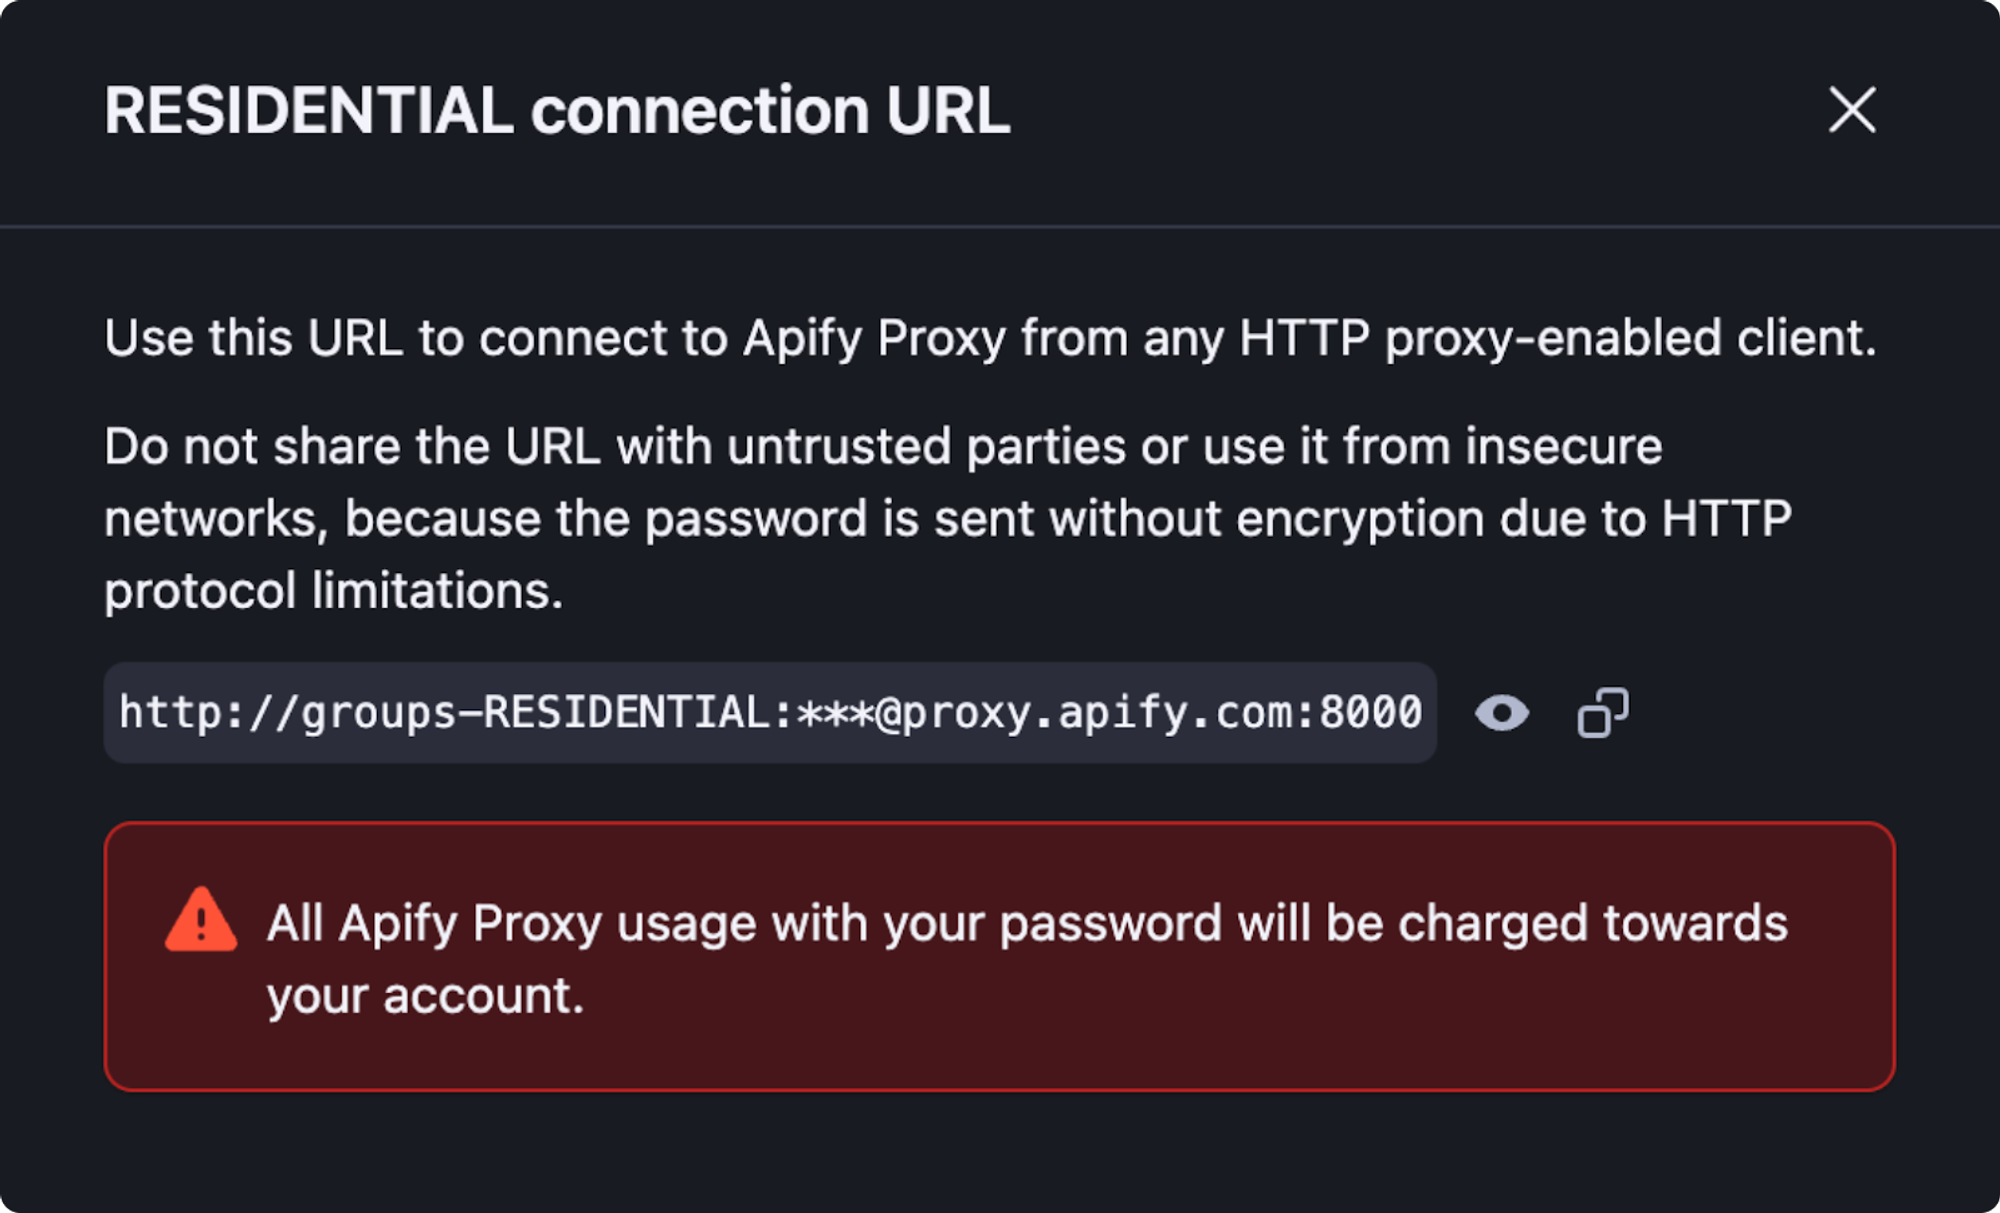
Residential proxies help you achieve a higher level of anonymity by using IP addresses assigned by internet service providers to the homes and offices of actual users. To set up a Residential proxy, configure your proxy URL as follows:
proxy_url = ‘http://groups-RESIDENTIAL:<password>@proxy.apify.com:8000>’
To set a proxy country, specify the “country” parameter in the username as “country-COUNTRY-CODE”. For example:
- Use the generated proxy URL in your Python Requests code.
import requests

# Replace 'Your_Apify_Proxy_Password' with your actual Apify Proxy Password

proxy_url = 'http://Your_Apify_Proxy_User:Your_Apify_Proxy_Password@proxy.apify.com:8000'

proxies = {

'http': proxy_url,

}

url = 'https://httpbin.org/ip'

response = requests.get(url, proxies=proxies)

print(f'Response status code : {response.status_code}')
By following these steps, you can integrate Apify Proxy with Python Requests. Be sure to adjust the code to meet your project needs.
Refer to our article on web scraping with Beautiful Soup and Requests for more details on integrating the proxy with your web scraping project.