We're Apify, a full-stack web scraping and browser automation platform. Check out the Apify SDK for Python. This tutorial will show you how to use Python Requests to post JSON data.
Introduction
Developers frequently interact with APIs, and one of the most common API tasks is sending data to the server in JSON format. When you submit a form on a website, the browser typically sends a POST request with the form data encoded as JSON to the server, which can be used to create a new entry in a database or update an existing one.
Python offers a powerful and easy-to-use requests library for making HTTP requests, including sending JSON data. JSON is a lightweight data interchange format. JSON is often preferred over other formats like XML due to its simplicity and smaller payload size.
This article guides you through using the requests library in Python to send a POST request with JSON data. We'll cover everything from sending a POST request to handling the server's response and potential errors. We'll also share tips for making POST requests with Requests and build two real-life projects.
Deploy any scraper to Apify
Making a POST request with Python Requests
Making a POST request is very simple using the Requests library. It provides the post() method to send data to a server via a POST request. For this tutorial, we'll be using the website http://httpbin.org/post.
Prerequisites
Before you start, make sure you’ve all the following requirements:
- Python: Download the latest version from the official Python website. This article uses Python 3.12.2.
- Requests library: Install using the command
pip install requests==2.31.0. This article uses version 2.31.0. - Code editor: Choose one that suits your needs, such as Visual Studio Code, PyCharm, or Jupyter Notebook.
Send a basic POST request
You can easily send a POST request using the post() method of the requests library.
import requests
response = requests.post("http://httpbin.org/post")
Send a POST request with JSON data
In the previous example, we didn't send any data with the post() method. To send JSON data, we first create a dictionary containing the data. Then, we convert this dictionary to JSON format using the json.dumps() function. Remember to import the json module to use this function.
import requests
import json

data = {"name": "Jane Smith", "email": "janesmith@example.com", "job": "Data Scientist"}

json_data = json.dumps(data)

response = requests.post("http://httpbin.org/post", data=json_data)
print(response.text)
The output is:
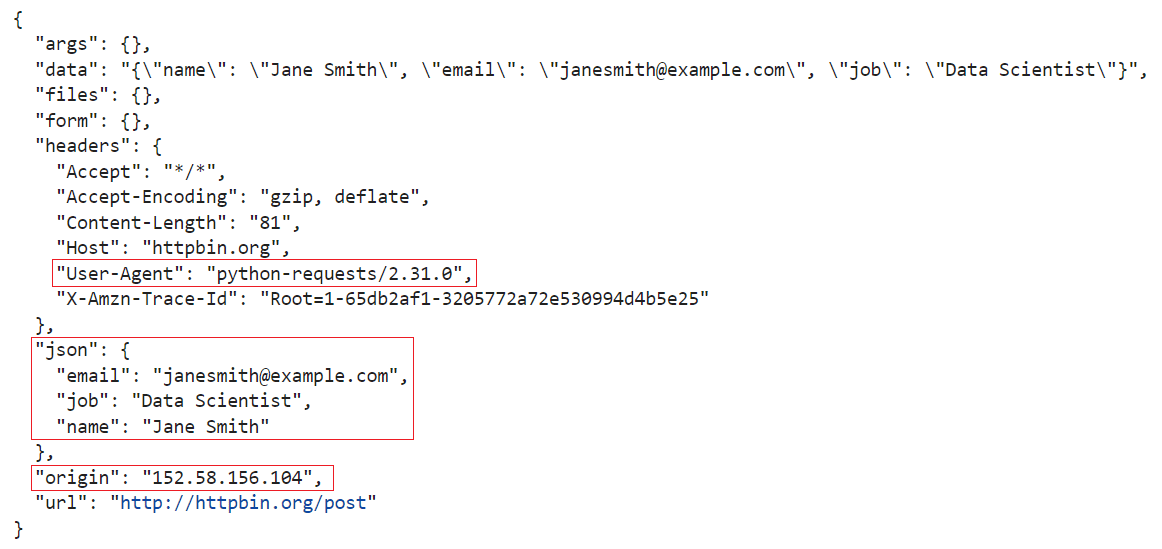
The output displays three main details:
- Origin: The IP address from which the request originated.
- Data: The JSON data you sent in the request.
- User Agent: Information about the tool used to send the request. In this case, the User-Agent header (
python-requests/2.31.0) indicates it was sent using a Python program leveraging therequestslibrary in version 2.31.0.
Send headers with POST request
Our above JSON example isn't going to work in a real-world scenario. With many APIS and services, we'll likely get a 400 (Bad Request) HTTP status code due to the absence of the Content-Type header.
Without setting Content-Type to application/json, the server might not understand the data format and interpret it incorrectly, potentially leading to a 400 Bad Request error.
import requests
import json
data = {"name": "Jane Smith", "email": "janesmith@example.com", "job": "Data Scientist"}
headers = {"Content-Type": "application/json"}
json_data = json.dumps(data)
response = requests.post("http://httpbin.org/post", data=json_data, headers=headers)
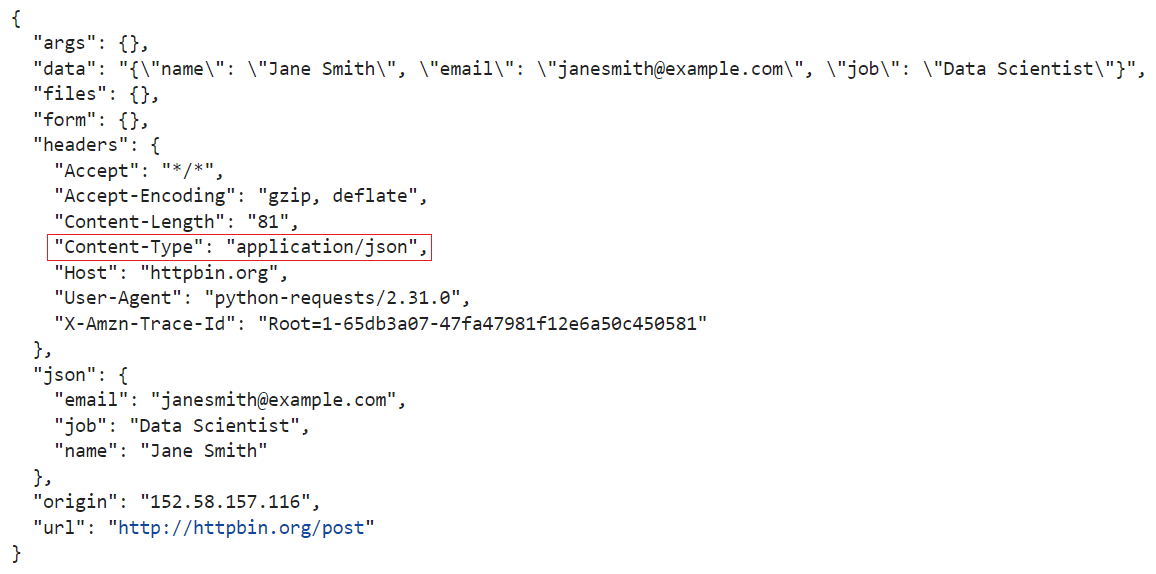
print(response.text)
The output is:
Send a POST request using json parameter
While the above code examples may seem long and complex, the Requests library simplifies them by using the json parameter. Simply provide a json argument containing data, and the Requests library will automatically set the correct headers and encode the string for you.
import requests

data = {"name": "Jane Smith", "email": "janesmith@example.com", "job": "Data Scientist"}

response = requests.post("http://httpbin.org/post", json=data)

print(response.text)
The output is:
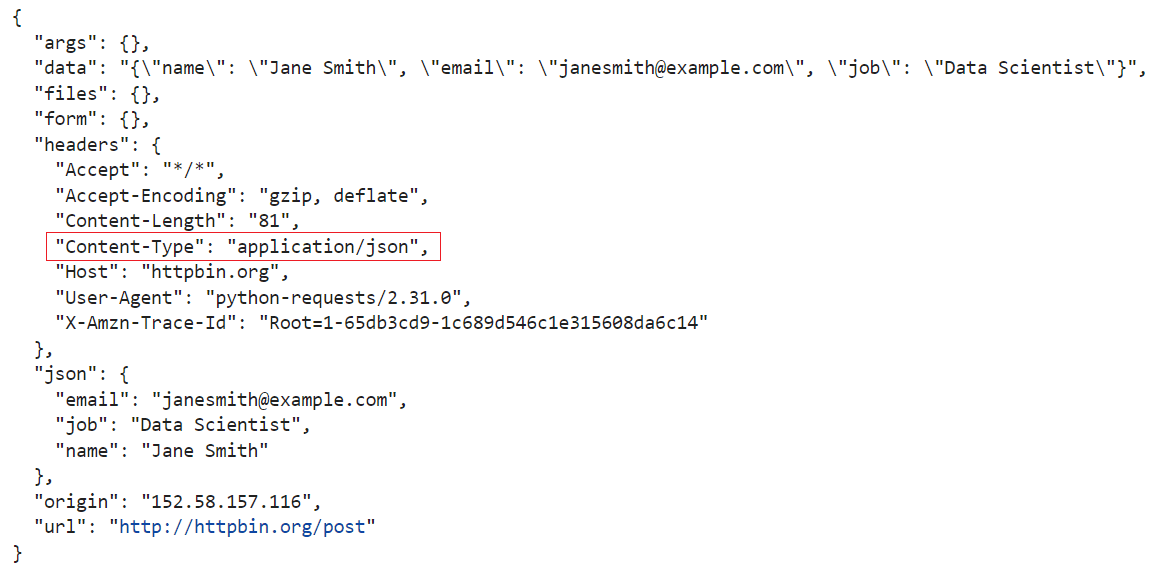
Great! The JSON data has been sent with the proper content type. This makes sending JSON data with Python Requests a straightforward process.
Send FORM data with POST request
If you need to extract data from a website that has a basic form with a username and password input, you can bypass this form by using POST requests. To do this, you need to set the correct content type. In most cases, the value of the Content-Type header is application/x-www-form-urlencoded when submitting a form.
import requests

form_data = {
    "name": "Jane Smith",
    "email": "janesmith@example.com",
    "job": "Data Scientist",
}

headers = {"Content-Type": "application/x-www-form-urlencoded"}

response = requests.post("http://httpbin.org/post", data=form_data, headers=headers)
print(response.text)
The output is:
The simpler approach is to include the form data directly in the request using the data parameter of a POST request.
import requests
form_data = {
"name": "Jane Smith",
"email": "janesmith@example.com",
"job": "Data Scientist",
}
response = requests.post("http://httpbin.org/post", data=form_data)
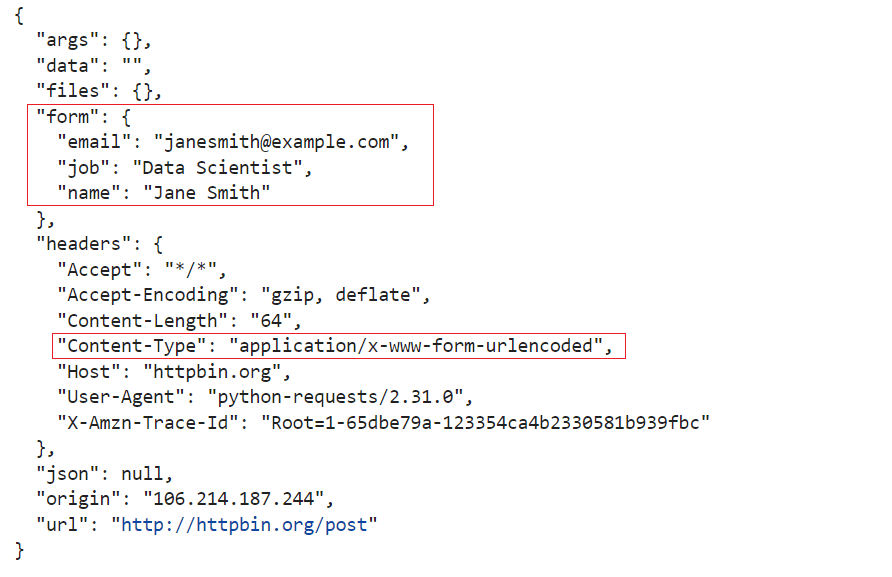
print(response.text)
The output is:
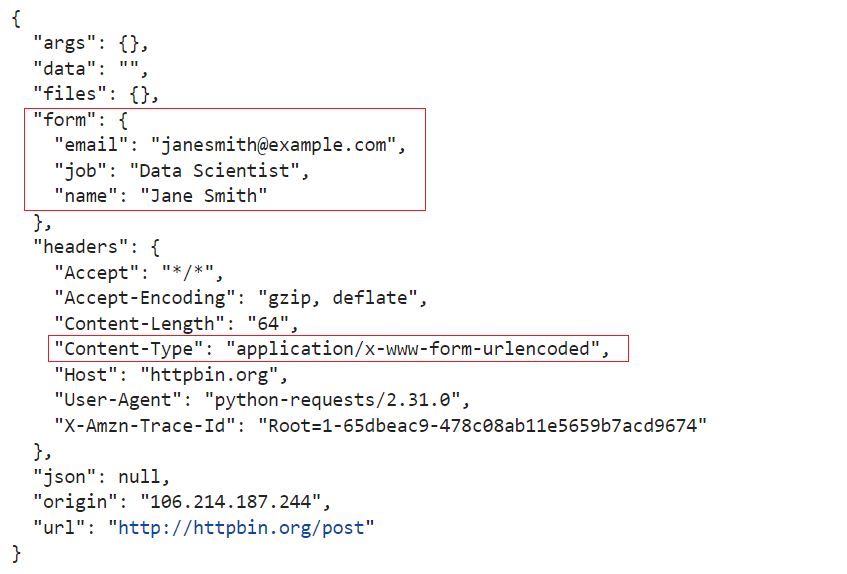
The content type is automatically set to a specific type, and the data is sent as form data. Look for the keyword "form" in the output for confirmation.
Upload files with POST request
If you’ve ever needed to send files to a server using a POST request, you’ve probably come across multipart/form-data. This is a media type that enables you to send binary or text data in separate parts within a single request.
Fortunately, the Requests library provides an easy way to upload files. You can simply use the files parameter, and it will automatically set the necessary Content-Type header to multipart/form-data for file uploads.
import os
import requests

script_dir = os.path.dirname(__file__)
file_name = "sample.txt"
file_path = os.path.join(script_dir, file_name)
url = "http://httpbin.org/post"

with open(file_path, "rb") as file_obj:
    files_dict = {"file": file_obj}
    response = requests.post(url, files=files_dict)

print(response.text)
The output is:

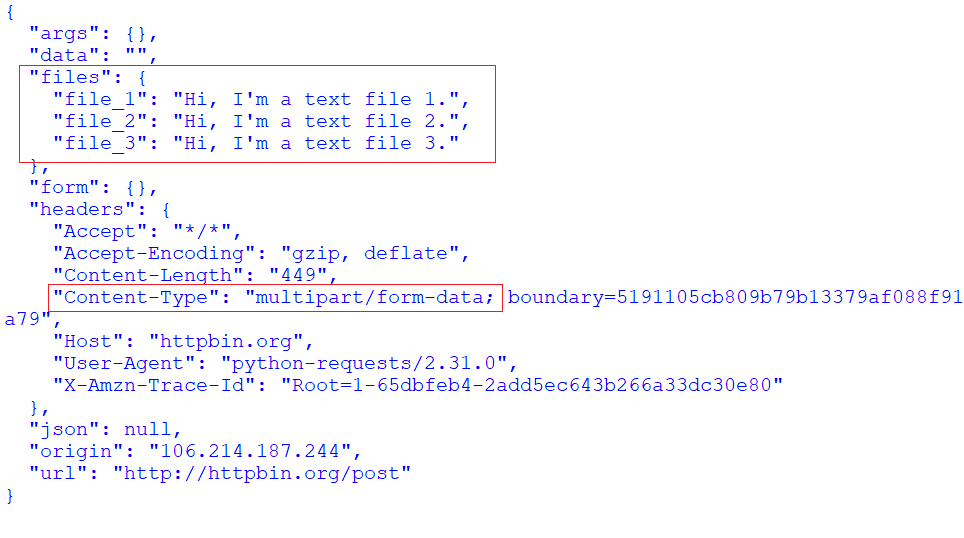
Uploading multiple files is similar to uploading a single file. Instead of a single file object, you need to create a list. In this list, each element is a tuple with two values:
- Key: Name of the form field.
- Value: File content in bytes.
import os
import requests

url = "http://httpbin.org/post"
script_dir = os.path.dirname(__file__)

files_to_upload = [
    ("file_1", open(os.path.join(script_dir, "test_file_1.txt"), "rb")),
    ("file_2", open(os.path.join(script_dir, "test_file_2.txt"), "rb")),
    ("file_3", open(os.path.join(script_dir, "test_file_3.txt"), "rb")),
]

response = requests.post(url, files=files_to_upload)
print(response.text)
The output is:
Send POST request within a session
You can use a requests session object if you need to maintain a state across multiple requests, such as keeping a user logged in or handling cookies. In this example, we'll demonstrate how to log in to Hacker News and submit some form data for login using the session functionality of Requests.
Before executing the below code, make sure to install the bs4:
pip install beautifulsoup4==4.12.3
Before running the script, set the USERNAME and PASSWORD environment variables with your credentials. Open a command prompt or terminal:
On Windows:
set USERNAME=<username>
set PASSWORD=<secret-password>
On Unix/Linux/Mac:
export USERNAME=<username>
export PASSWORD=<secret-password>
Here’s the code:
from bs4 import BeautifulSoup
import requests
import os

session = requests.Session()

# Perform login
login_credentials = {"acct": os.environ.get(
    "USERNAME"), "pw": os.environ.get("PASSWORD")}
login_response = session.post(
    "https://news.ycombinator.com/login", data=login_credentials)

soup = BeautifulSoup(login_response.text, "html.parser")

username_element = soup.find("a", id="me")
if username_element:
    logged_in_username = username_element.text.strip()
    print(f"Logged in as: {logged_in_username}")
else:
    print("Unable to find username element. Login status uncertain.")
The output is:
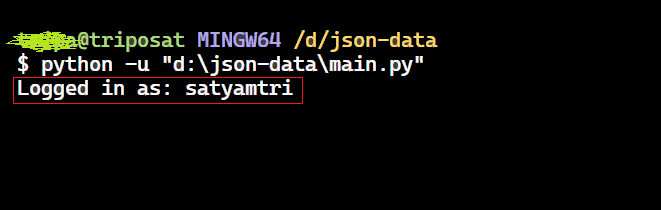
The session.post() method returns a Response object. You can extract the username from the response data to check if the login was successful. The username is typically located within an anchor tag (<a>) with the ID "me".
Handling the response
Gracefully handling the response is crucial. The response indicates whether the request was successful, encountered an error, or resulted in any other outcome. If the request was successful, the response.ok returns True, otherwise, False.
import requests

data = {"name": "Jane Smith",
        "email": "janesmith@example.com", "job": "Data Scientist"}

response = requests.post("http://httpbin.org/post", json=data)

# Check if the request was successful
if response.ok:
    print(response.text)
else:
    print("Error:", response.status_code)
To handle potential errors gracefully, let's modify the code with a try-except block. Wrap the code within the try-except section to catch any exceptions that might occur during the request.
import requests

data = {"name": "Jane Smith", "email": "janesmith@example.com", "job": "Data Scientist"}

try:
    response = requests.post("http://httpbin.org/post", json=data)
    response.raise_for_status()  # Raises an HTTPError for 4xx and 5xx status codes
except requests.RequestException as e:
    print("Request failed:", e)
else:
    print(response.text)
We can handle the response while uploading files using a try...except block. This will catch various exceptions that might occur during the process:
requests.exceptions.RequestException: Handles any errors that occur during the request itself.FileNotFoundError: Catches situations where the specified file is not found at the providedfile_path.Exception(optional): This catches any unexpected errors that weren't explicitly handled above.
import requests
import os

script_dir = os.path.dirname(__file__)
file_name = "sample.txt"
file_path = os.path.join(script_dir, file_name)
url = "http://httpbin.org/post"

try:
    with open(file_path, "rb") as file_obj:
        files_dict = {"file": file_obj}
        response = requests.post(url, files=files_dict)

    response.raise_for_status()  # Raise exception for any HTTP error status codes
    print("Request successful. Response:")
    print(response.text)

except requests.exceptions.RequestException as e:
    print("An error occurred:", e)

except FileNotFoundError:
    print("File not found at the specified path:", file_path)

except Exception as e:
    print("An unexpected error occurred:", e)
Tips on using the Requests library to make POST requests
The Python Requests library is widely used for making HTTP requests. Here are some tips for making effective POST requests:
Sending data
- Sending JSON data: The best way to send JSON data is to use the
jsonparameter of therequests.post()function. - Uploading files: To upload files, use the
filesargument of therequests.post()function. - Sending form data: If you need to send JSON form data, use the
dataparameter of therequests.post()function.
Handling responses
- Response object: The
requests.post()function returns aResponseobject. This object contains various attributes, such as status codes, response headers, and the response body. - Checking success: Use the
response.okto check if the request was successful. - Accessing content: Access the response content using the
textorjsonmethods of theResponseobject.
Error handling and optimization
- Error handling: Wrap your POST request code in a
try-exceptblock to handle potential errors. - Multiple requests: For making multiple requests to the same server, consider using a
Sessionobject. - Timeout: Use the
timeoutparameter ofrequests.post()to set a maximum wait time for the server response.
Examples of POST requests with Python Requests
We've seen various approaches to making POST requests with data. Now that you’ve a solid understanding of sending POST requests with JSON data, let's explore a practical scenario where it's useful.
Example 1
Let's interact with the GitHub API to:
- Create a new repository via a POST request with JSON data specifying the name and description.
- Fetch information about the newly created repository using a GET request.
- Extract the user's existing repositories.
To interact with the GitHub API, you'll need to create a personal access token. For more information about interacting with the GitHub API using HTTP methods like GET, POST, PATCH, and DELETE, you can refer to How to use the GitHub API in Python.
Here’s the code:
import requests
base_url = "https://api.github.com"
# Replace with your GitHub access token
access_token = "<YOUR_GITHUB_ACCESS_TOKEN>"
def create_repo(session, repo_name, repo_descr=None):
url = f"{base_url}/user/repos"
data = {
"name": repo_name,
"description": repo_descr,
}
response = session.post(url, json=data)
if response.status_code == 201:
repo_data = response.json()
return repo_data
def get_repo_details(session, owner, repo_name):
url = f"{base_url}/repos/{owner}/{repo_name}"
response = session.get(url)
if response.status_code == 200:
repo_details = response.json()
print(f"\nDetails of {owner}/{repo_name}:")
print("Description:", repo_details["description"])
print("Creation Date:", repo_details["created_at"])
print("Number of Stars:", repo_details["stargazers_count"])
else:
print(f"Failed to fetch details for {owner}/{repo_name}.")
def list_user_repos(session, username):
url = f"{base_url}/users/{username}/repos"
response = session.get(url)
if response.status_code == 200:
repositories = response.json()
print(f"\nList of repositories for user {username}:")
for repo in repositories:
print(repo["name"])
else:
print(f"Failed to fetch repositories for user {username}.")
# Create a session object
session = requests.Session()
# Set the authorization header in the session
session.headers.update({"Authorization": f"token {access_token}"})
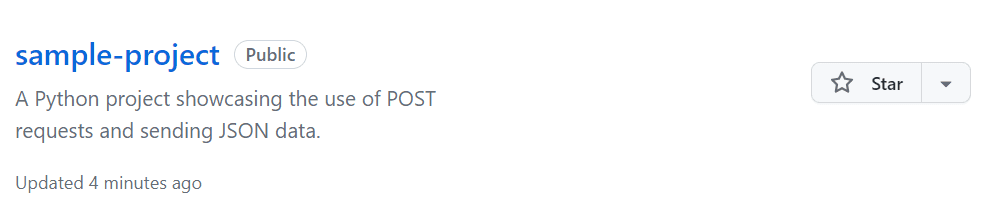
repo_name = "sample-project"
repo_descr = (
"A Python project showcasing the use of POST requests and sending JSON data."
)
# Create a new repository
new_repo = create_repo(session, repo_name, repo_descr)
if new_repo:
print("\nNew public repo created successfully!")
# Fetch details of the newly created repository
owner = new_repo["owner"]["login"]
repo_name = new_repo["name"]
print(f"\nFetching details of {owner}/{repo_name}")
get_repo_details(session, owner, repo_name)
# List all repositories of the user who created the new repository
print(f"\nFetching repositories of user {owner}")
list_user_repos(session, owner)
else:
print("\nFailed to create a new repo.")
The output is:
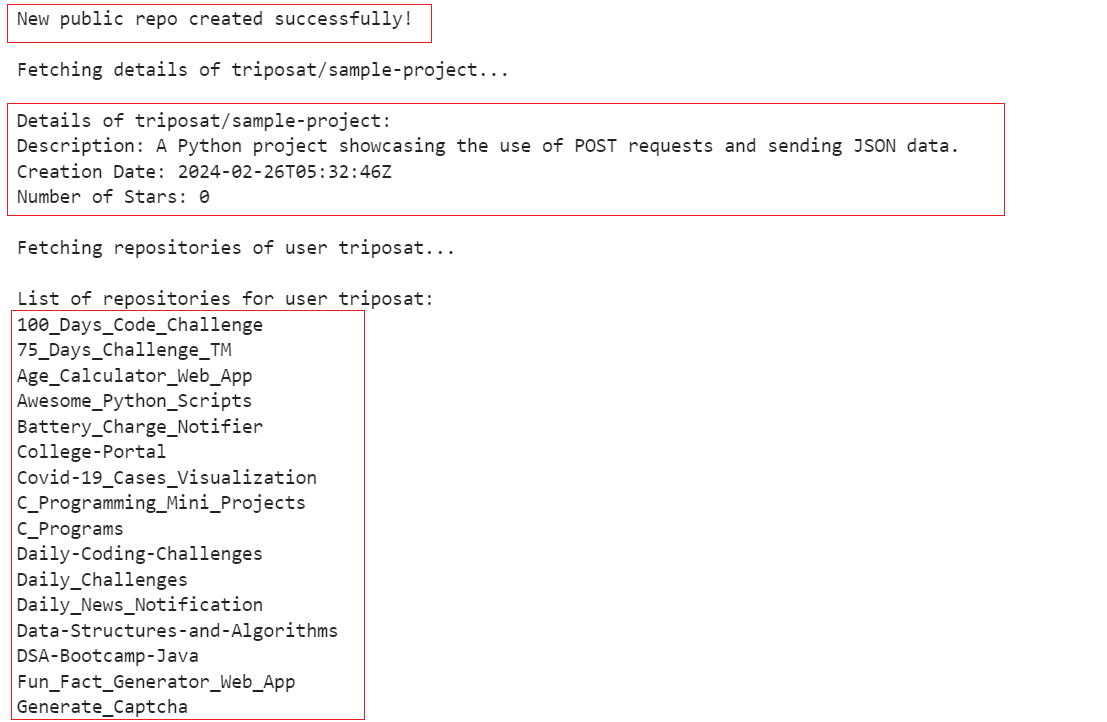
The previous output shows that a new repository has been created, details of the newly created repository have been fetched, and all the user's repositories have been fetched.
To view the new repository, navigate to the "Repositories" tab on your GitHub profile.
Example 2
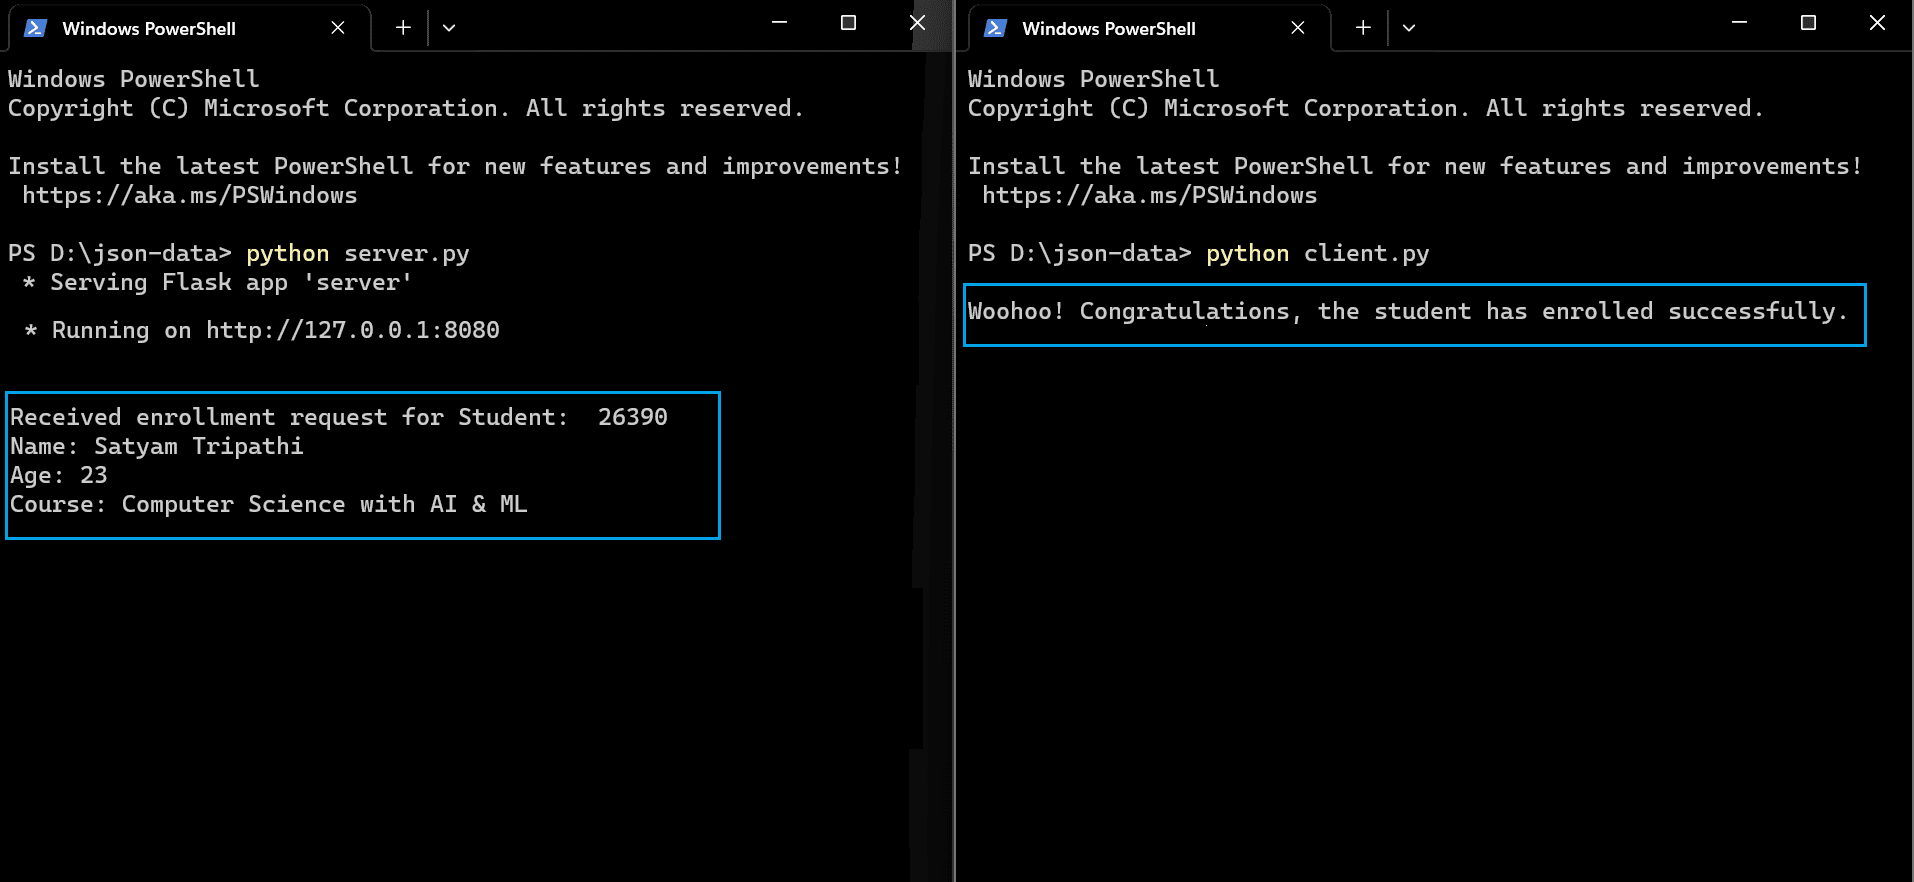
Let's create a basic Flask application where the client sends a POST request with student enrollment data, and the server responds with a confirmation message. The application is divided into two Python files: client.py and server.py. Make sure to execute client.py first, followed by server.py.
Install the Flask:
pip install Flask==3.0.2
client.py
import requests

server_url = "http://127.0.0.1:8080/enroll"

student_data = {
    "student_id": "26390",
    "name": "Satyam Tripathi",
    "age": 23,
    "course": "Computer Science with AI & ML",
}

try:
    response = requests.post(server_url, json=student_data)

    if response.status_code == 200:
        print("\nWoohoo! Congratulations, the student has enrolled successfully.")
    else:
        print(
            "\nFailed to enroll student. Server responded with status code:",
            response.status_code,
        )
        print("Response from server:", response.text)
except requests.ConnectionError:
    print("\nFailed to connect to the server. Please make sure the server is running.")
except requests.Timeout:
    print(
        "\nRequest timed out. Please check your internet connection or try again later."
    )
except Exception as e:
    print("\nAn error occurred:", e)
server.py
from flask import Flask, request

app = Flask(__name__)

@app.route("/enroll", methods=["POST"])
def process_student_data():
    student_data = request.json
    if student_data:
        student_id = student_data.get("student_id")
        name = student_data.get("name")
        age = student_data.get("age")
        course = student_data.get("course")

        print("\nReceived enrollment request for Student: ", student_id)
        print(f"Name: {name}")
        print(f"Age: {age}")
        print(f"Course: {course}")

        return "Cool", 200
    else:
        print("\nNo data received.")
        return "Bad request", 400


if __name__ == "__main__":
    app.run(debug=False, port=8080)
The output is:
Conclusion
This guide explained how the Requests library simplifies making HTTP requests. We learned how straightforward sending JSON data is using parameters like 'data', 'json', or 'files'. We also covered handling the server's response (including status code and data extraction). Finally, we explored potential errors in POST requests with JSON data, followed by valuable tips and two real-life projects.