When automating online actions or scraping data from websites, developers frequently need to interact with forms, buttons, and inputs. Google’s Puppeteer is a great solution for doing all of these things. In this article, we'll look at how we can use it to deal with forms that were originally designed for humans.
What is Puppeteer?
Puppeteer is a Node.js library that provides a high-level API for dynamically controlling headless Chrome or Chromium browsers. It enables developers to perform browser automation tasks such as page navigation, DOM interaction, snapshot capture, and PDF generation.
Puppeteer is an ideal solution for browser automation and web scraping thanks to its direct integration with Chrome. Unlike other tools like Selenium, which require additional drivers, Puppeteer communicates directly with the browser, resulting in faster execution. While Selenium offers multi-browser support, Puppeteer's specialized focus on Chrome and its seamless experience in handling tasks like page navigation and DOM interaction makes it a preferred choice for many developers.
Puppeteer controls Chrome in headless mode. Headless browsers are web browsers without a graphical user interface (GUI) and they're perfect for automated tasks and web testing where no user is involved. Unlike traditional browsers, they operate in the background, rendering pages without visible display, making them faster and more resource-efficient.
Setting up Puppeteer
You must have Node.js installed to get started with Puppeteer. If you don’t already have it, go to the official Node.js website and get the most recent stable version.
Installing Puppeteer is simple once you have Node.js. Use npm to install Puppeteer in your terminal or command prompt:
npm install puppeteer
With Puppeteer installed, you’re ready to go!
Interacting with inputs and buttons in Puppeteer
Puppeteer provides a set of powerful methods to handle inputs and buttons on web pages. Let’s explore a few of the essential methods and see how they work:
1. Type method: The type method allows you to simulate user input by typing text into input fields. It’s perfect for automating form-filling. In the example below, we will try to enter an email and password into the input field on the login page. Without performing any further action, we will close the browser. This action was possible because we were able to target the input field using its input type attributes on the type method.
import puppeteer from 'puppeteer';

const browser = await puppeteer.launch({ headless: false });

const page = await browser.newPage();
await page.goto('https://warehouse-theme-metal.myshopify.com/account/login');

// Find the input field by its ID selector and type some text into it.
await page.type('input[id*="customer"]', 'demo@username.com');
await page.type('input[type=password]', 'demo_password');

await browser.close();
2. Click method: The click method allows you to simulate a click on a particular button or element. This is essential for interacting with elements like buttons, links, or checkboxes. In the previous example above, we simulate user input by getting the input field type using it ID and typing in some text. To complete the action, we will click on the Login button using the click method.
// Assuming we are already on the selected page
page.click('.form__submit.button--full')
If you want to look at the code in more detail, you can see the whole implementation on GitHub.
Now let's move on to form inputs.
Handling form inputs in Puppeteer
Forms can contain various input elements, such as text fields, dropdowns, and checkboxes. Puppeteer makes it easy to interact with these elements programmatically. Let’s see how to handle each of them:
1. Text fields: As seen in the previous example, you can use the type method to fill in text fields.
2. Dropdowns: To interact with dropdowns, you can use the select method, which takes a selector for the dropdown element and the value you want to select:
await page.select('#country-dropdown', 'USA');
3. Checkboxes: For checkboxes, you can use the click method as demonstrated above.
How to make Puppeteer click
Adding click functionality in Puppeteer will help you automate web interactions. Here are three simple ways to do it:
1. CSS selector method
Use CSS selectors to find elements for clicking. This is the easiest and most common way.
await page.click('button.submit');
2. XPath method
XPath expressions help you find elements more precisely. They're useful for complex pages.
const [button] = await page.$x('//button[contains(text(), "Submit")]');
await button.click();
3. Text method
Click elements based on their visible text. This is great when CSS selectors change often.
await page.evaluate(() => {
        const link = Array.from(document.querySelectorAll('a')).find(
            (el) => el.textContent === 'Example link'
        );
        if (link) link.click();
    });
Advanced Puppeteer clicking
Delays and multiple clicks
Add delays and click multiple times for more advanced interactions.
const numberOfClicks = 5; // Number of times you want to click
const delayBetweenClicks = 1000; // Delay in milliseconds

for (let i = 0; i < numberOfClicks; i++) {
    await page.click('button.submit');
    if (i < numberOfClicks - 1) { // Avoid waiting after the last click
        await page.waitForTimeout(delayBetweenClicks);
    }
}
Handling form submissions
Make sure to handle form submissions properly by waiting for navigation.
await Promise.all([
  page.click('button.submit'),
  page.waitForNavigation()
]);
Invisible elements
Make sure elements are visible before clicking.
await page.waitForSelector('button.submit', { visible: true });
await page.click('button.submit');
Intercepting dialogs
Handle pop-up dialogs that might block clicks.
page.on('dialog', async dialog => {
  await dialog.dismiss();
});
Clicking on coordinates
Sometimes you need to click on specific coordinates, like for canvas elements or custom controls.
await page.mouse.click(100, 200);
Clicking within an iframe
To click elements inside an iframe, first get the iframe context.
const frame = await page.frames().find(f => f.name() === 'iframeName');
await frame.click('button.submit');
Custom click actions
For more complex interactions, simulate a series of mouse actions.
await page.mouse.move(100, 200);
await page.mouse.down();
await page.mouse.up();
Wait for elements to be ready
Always make sure elements are ready for interaction.
await page.waitForSelector('button.submit', { visible: true });
Use strong selectors
Avoid selectors that may change often.
await page.click('button[data-test="submit"]');
Log actions for debugging
Log your actions to help debug issues.
console.log('Clicking submit button');
try {
    await page.click('button.submit');
    console.log('Successfully clicked the submit button');
} catch (error) {
    console.error(`Error clicking the submit button: ${error.message}`);
}
Checking if element exists
Sometimes elements may not be present, so check first.
const button = await page.$('button.submit');
if (button) {
  await button.click();
}
Conditional clicking based on state
Click only if certain conditions are met, like visibility.
const isVisible = await page.evaluate(() => {
  const button = document.querySelector('button.submit');
  return button && button.offsetParent !== null;
});

if (isVisible) {
  await page.click('button.submit');
}
Waiting for events
Wait for specific events to finish before or after clicking.
await Promise.all([
  page.waitForResponse(response => response.url().includes('submit') && response.status() === 200),
  page.click('button.submit')
]);
Chaining multiple clicks
Chain multiple clicks with appropriate waits between them for complex interactions.
await page.click('button#step1');
await page.waitForSelector('button#step2', { visible: true });
await page.click('button#step2');
Interacting with shadow DOM elements
Shadow DOM elements need special handling to access and interact with.
// Evaluate JavaScript within the page context
await page.evaluate(
    (shadowHostSelector, elementSelector) => {
        // Find the shadow host element using its selector
        const shadowHost = document.querySelector(shadowHostSelector);
        // Access the shadow root of the shadow host
        const shadowRoot = shadowHost.shadowRoot;
        // Find the target element within the shadow DOM using its selector
        const shadowElement = shadowRoot.querySelector(elementSelector);
        if (shadowElement) {
            // Log the text content of the found element
            console.log(shadowElement.textContent);
        } else {
            // Log an error if the element is not found
            console.error('Element within shadow DOM not found');
        }
    },
    shadowHostSelector, // The selector for the shadow host element
    elementSelector // The selector for the target element within the shadow DOM
);
That gives you an overview of ways to get Puppeteer to click and how to handle different elements. Let's move on to using clicks to interact with forms.
How to submit forms in Puppeteer
Form submission is a critical aspect of web automation. Puppeteer offers various methods to submit forms and handle subsequent actions:
1. Clicking buttons: To submit a form, you typically need to click a button of type “submit.” As illustrated earlier, you can use the click method to click the submit button:
await page.click('#submit');
2. Dealing with dialog boxes: Sometimes, when you submit a form, a dialog box may appear, asking for confirmation. Puppeteer allows you to handle such scenarios using the dialog event:
page.on('dialog', async (dialog) => {
  console.log('Dialog message:', dialog.message());
	// To accept the dialog, or use dialog.dismiss() to cancel it.
  await dialog.accept();
});
3. Waiting for navigation: After submitting a form, the page may undergo navigation. To wait for the navigation to complete, you can use the waitForNavigation method:
await Promise.all([

// The promise resolves after the navigation has finished
page.waitForNavigation(),

// Clicking the submit button triggers the navigation
page.click('#submit'),
]);
Puppeteer tutorial: simple form submission
Now that we’ve covered the individual aspects of handling forms, buttons, and inputs, let’s put it all together and create a complete form submission tutorial:
In this tutorial, we’ll walk through the process of automating the form submission using Puppeteer. We’ll cover filling in text fields and clicking a button to handle form submissions on a sample website.
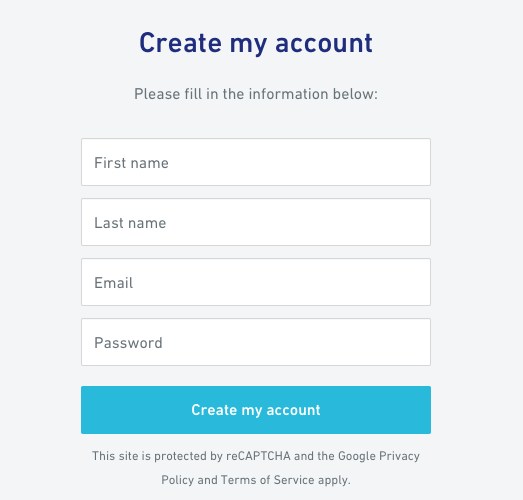
The goal of this tutorial is to fill out the create my account form automatically and click the button. If the form is completed and the button is clicked, we can consider this a success.
For this example, we'll work with the registration form on a Shopify template store that allows us to register and log in with a non-existent email.
Step 1: Setting up Puppeteer
Remember, you need to have Node.js installed on your system. If you don't, download and install it from the official Node.js website. Once Node.js is installed, create a new directory for our project and initialize a new Node.js project:
mkdir puppeteer-tutorial
cd puppeteer-tutorial
npm init -y
Follow all the prompts and fill in the details where necessary.
Now, let’s install Puppeteer:
npm install puppeteer
Step 2: Creating the Puppeteer Script
Create a new file named signup.js in your project directory, and let’s start writing our Puppeteer script:
// signup.js
import puppeteer from "puppeteer";

// Launch a browser
const browser = await puppeteer.launch({ headless: false });

// Create a new page
const page = await browser.newPage();

// Navigate to the login page
await page.goto('https://warehouse-theme-metal.myshopify.com/account/register');

// Wait for the form to be visible on the page
await page.waitForSelector('#create_customer');

// Fill in the form inputs
await page.type('input[autocomplete^="given"]', 'john');
await page.type('input[autocomplete^="family"]', 'doe');
await page.type('input[autocomplete^="email"]', 'demo@username.com');
await page.type('input[type=password]', '123456');

// Submit the form by clicking the login button
await Promise.all([
    // Wait for navigation to complete
    page.waitForNavigation(),
    page.click('.form__submit.button--full'),
]);

// Verify registration by checking if the URL contains 'challenge'.
// This is a ReCaptcha challenge checking if you're a bot.
// We will teach you how to work around it in another tutorial.
const signUpUrl = await page.url();
if (signUpUrl.includes('challenge')) {
    console.log('successful!');
} else {
    console.log('failed!');
}

// Close the browser
await browser.close();
While interacting with an element uniquely on a page, you can locate the element usingpage.locator(locator value). You can utilize a variety of locators, including but not limited to,ID(#),class(.),attributes(type), and you can learn more here on the documentation page. Understanding CSS selectors will also be beneficial; learn more about CSS selectors here.
Step 3: Run the script
Save the signup.js file and then run the script using Node.js:
node signup.js
The script will launch a Chrome browser and navigate to the signup form page. It will fill in the form fields with the provided values and click the Create my account button. After a successful page load, it will print “Signup successful!” or “Signup failed” if the page fails to load within a limited timeframe on the console.
Click here for the GitHub code.
Advanced form handling in Puppeteer
The example we’ve covered so far deals with a basic form submission. However, other websites can have more complex forms with various scenarios. Here are some advanced techniques you may encounter:
- Dealing with CAPTCHAs: CAPTCHAs are designed to prevent automation. Consider avoiding using
Puppeteer Stealthor using third-party services that can solve CAPTCHAs for you in such cases. Examples are2Captchaandpuppeteer-extra-plugin-recaptcha. - Multi-step forms: If the form spans multiple pages, use Puppeteer’s navigation events and
waitForNavigationmethod to handle each step. - File uploads: To handle file uploads, you can use the
input[type="file"]element and set its value:
const input = await page.$('input[type="file"]');
await input.uploadFile('/path/to/file.pdf');
Troubleshooting and dealing with problems
As with any development task, you may encounter issues while using Puppeteer. For instance, a common error like navigation timeout exceeded can occur if a page takes too long to load. Adjusting the timeout settings can help with this.
Here are some common troubleshooting tips:
- Ensure you have the correct selectors for the elements you want to interact with.
- Add the appropriate waiting mechanisms (e.g.,
waitForSelector,waitForTimeout) to handle dynamic content loading. - Use
try``catchblocks to catch and handle any errors easily. - Make use of Puppeteer’s built-in debugging features, such as
headless: falseorslowMo, to observe the automation process step by step.
Remember, each website may have its own unique form submission process, so adapt the code accordingly to handle specific scenarios.
Web scraping with Puppeteer: practical uses for handling forms
Puppeteer is a robust tool that enables developers to automate operations, interact with forms, buttons, and inputs, and rapidly scrape data from the web. Because it's so good at automating interactions with web pages, Puppeteer is often used for web scraping. If you're interested in using it for that, check out our latest comprehensive guide to web scraping with Puppeteer.
Puppeteer is a great automation tool, but you should also consider looking into Playwright, which is a more modern headless browser driver. If you’re wondering which tool is better for your specific use case, read our comparison of Puppeteer vs. Playwright.