

Hi! We're Apify, a full-stack web scraping and browser automation platform. If you're interested in using Python for web scraping, this article shows you 3 ways to use cURL with Python.
cURL is a powerful tool used for transferring data with URLs. This article will guide you through cURL in Python using three different approaches: the PycURL library, Python's subprocess module, and the Requests library. Each method has its advantages and applications, which we'll explore in detail.
What is cURL?
cURL stands for Client URL, a lightweight command line tool for making network requests from the client side. It's suitable for many use cases, like making HTTP requests and testing APIs. It provides support for using different network protocols such as HTTP, HTTPS, FTP, and many more.
Let's say we have different endpoints of an API, and we want to test those endpoints. Rather than using web-based API calls, we can just use cURL to hit those endpoints and test our APIs.
Using cURL in Python
We’re going to show three different approaches to using cURL in Python:
- The PycURL library
- Python's subprocess module
- The Requests library
These methods will allow you to make network requests in Python effectively.
Comparing different approaches to using cURL in Python
| Method | Description | Use Case |
|---|---|---|
| PycURL | A Python interface to libcurl, the library cURL is based on. | When you need low-level control over your requests. |
| subprocess | Runs cURL commands as subprocesses. | When you prefer using cURL directly within Python. |
| Requests | A high-level library for making HTTP requests in Python. | When you need a simple and intuitive interface. |
Each method has its own strengths: PycURL offers detailed control, subprocess allows direct use of cURL, and Requests provides an easy-to-use API.
How to use cURL in Python with PycURL
1. Setting up the environment for cURL requests in Python
Before making cURL requests in Python, make sure you have Python and pycURL installed.
You can easily download Python from the official Python website. Once you've downloaded the Python installer, you can install Python and check the version by entering the following command on the command line.
python3 --version
You'll see the version of Python that's installed on your system.
python3 here because we've downloaded the latest version, which uses the syntax of python3 instead of simple python.2. Installing the PycURL library
Now that you have Python installed on your system, you can install pycurl using Python's package manager pip3.
pip3 install pycurl
Once the command is executed, confirm the installation by simply running the following command:
pip3 show pycurl
This should print the name of the library with other information. Once you're done with the installation, you're ready to make your requests using PycURL.
pip. If you're using Python 3 or above, you need to use pip3 with that. Otherwise, things might go wrong, like version issues.3. How to make a GET request with PycURL
Before making GET requests, let's first see how a basic GET request works. When we make a GET request, we basically ask a server to give us a specific resource. The resource could be a file, an HTML page, a JSON object, or other data. It's called a GET request because it gets a resource from the server.
You can make GET requests with the pycurl library by following a series of steps. Don't worry. We'll go through everything in detail.
Let's see the code first.
import pycurl
from io import BytesIO
# Create a Curl object
curl = pycurl.Curl()
# Create a BytesIO object to store the response
responseBuffer = BytesIO()

# Set the URL
curl.setopt(curl.URL, 'https://www.google.com')
# Set the option to write the response to the buffer
curl.setopt(curl.WRITEDATA, responseBuffer)
# Make the request
curl.perform()
# Fetch the response body
response = responseBuffer.getvalue()

# Print the response
print(response.decode('utf-8'))
# Close the Curl object
curl.close()
# Close the buffer
responseBuffer.close()
In the code above, we first create a curl object using pycurl.Curl().
Then we set the URL we want to fetch using curl.setopt(curl.URL, 'https://www.google.com').
We can also set other options using curl.setopt(), such as storing the response data in the responseBuffer object.
We then perform the request using curl.perform(). This sends the HTTP request to the URL and retrieves the response.
We can get the response body using curl.getvalue(), which returns a bytes object.
We decode this response using response.decode('utf-8') to convert it to a string.
Finally, we close the curl and buffer objects using curl.close() and responseBuffer.close() respectively.
While executing this code on MacOS, you may encounter an error due to different versions of curl or ssl. You can try the following solution:
# Uninstall curl
brew uninstall curl
# Uninstall the openssl
brew uninstall OpenSSL
# Uninstall curl-openssl
brew uninstall curl-openssl
# Install openssl
brew install openssl
# Install curl
brew install curl
echo 'export PATH="/usr/local/opt/openssl@1.1/bin:$PATH"' >> ~/.zshrc
echo 'export PATH="/usr/local/opt/curl/bin:$PATH"' >> ~/.zshrc
source ~/.zshrc
source ~/.virtualenvs/foo_venv/bin/activate # or whichever venv you're using
export PYCURL_SSL_LIBRARY=openssl
export LDFLAGS="-L/usr/local/opt/curl/lib"
export CPPFLAGS="-I/usr/local/opt/curl/include"
# The below command will give you the location where the ssl is installed
brew --prefix openssl
# For example,/usr/local/opt/openssl@3, You have to write yours
ls -la /usr/local/opt/openssl@3
# Specify the location at the end of the next command as well, We have mentioned there
pip3 install --no-cache-dir --compile --ignore-installed --install-option="--with-openssl" --install-option="--openssl-dir=/usr/local/opt/openssl@1.1" pycurl
The PycURL library provides a low-level interface to cURL, giving us more control and flexibility. As we get closer to any computer system, we attain more control, but the syntax gets harder and less readable for humans.
The steps we saw above, like importing
BytesIO, creating objects, and decoding responses are necessary because PycURL operates at a lower level and provides us with direct access to the raw HTTP response.4. How to make a POST request with PycURL
The POST request is similar to the GET request. The only difference is that we just add the data we want to send through the request. But the data is encoded first. Let's see how that works.
import pycurl
# Import the urllib for encoding
import urllib.parse
from io import BytesIO

# Create a Curl object
curl = pycurl.Curl()
responseBuffer = BytesIO()
# Set the URL
curl.setopt(curl.URL, 'http://httpbin.org/post')
# Set the method to POST
curl.setopt(curl.POST, True)

# Data
data = {'name': 'John', 'age': '30'}
# Encode the data
dataString = urllib.parse.urlencode(data)
# Add data as POSTFIELDS
curl.setopt(curl.POSTFIELDS, dataString)
# Set the variable that will store data
curl.setopt(curl.WRITEDATA, responseBuffer)

# Make the request
curl.perform()
# Get the responseCode
responseCode = curl.getinfo(curl.RESPONSE_CODE)
print('Response Code:', responseCode)
# Get the responseBody
responseBody = responseBuffer.getvalue()
print('Response Body:', responseBody.decode('utf-8'))
# Close the object
curl.close()
# Close the buffer
responseBuffer.close()
We first create a curl object, and then we set the URL.
We set the request method to POST using curl.setopt(curl.POST, True).
After that, we set the data using a dictionary and encode it using urllib.parse.urlencode() method.
We set the encoded data as the request body using curl.setopt(curl.POSTFIELDS, dataString).
After performing the request, we print the response code and the request body.
Finally, we close the curl and buffer objects.
We've covered some basic concepts of the PycURL library and how it works. Now, let's cover some more advanced topics, including adding custom headers, handling redirects, authenticating requests, and handling errors.
How to add headers in the cURL request using Python
We can send additional information about the requests using the headers, like user agent, content type, or authorization credentials. As we have already mentioned that the .setopt() of PycURL allows us to add additional information about the requests, so we will use this method to add headers as well. Let's see how it's done.
import pycurl
from io import BytesIO

# Create a new Curl object
curl = pycurl.Curl()
# Create a BytesIO object
responseBuffer = BytesIO()

# Set the URL to fetch
curl.setopt(curl.URL, 'https://httpbin.org/headers')

# Set custom headers
customHeaders = ['Authorization: Bearer mytoken', 'User-Agent: MyCustomAgent']
curl.setopt(curl.HTTPHEADER, customHeaders)

# Set the WRITEFUNCTION option to redirect the response body to the responseBuffer
curl.setopt(curl.WRITEFUNCTION, responseBuffer.write)

# Make the request
curl.perform()

# Get the HTTP response code
responseCode = curl.getinfo(curl.RESPONSE_CODE)
print('Response Code:', responseCode)

# Get the response body from the response_buffer
responseBody = responseBuffer.getvalue()

# Print the body of the response
print('Response Body:', responseBody.decode('utf-8'))

# Close the Curl object and the response_buffer
curl.close()
responseBuffer.close()
We set two custom headers (Accept-Language and User-Agent) by setting the curl.HTTPHEADER option to a list of strings containing the header names and values. We then perform the request and retrieve the response body as before.
How to handle redirects in cURL requests with Python
An HTTP redirect is a way to tell a browser to request a different URL instead of the one originally requested. In simple words, when a user tries to access a specific URL, the server automatically takes the user to an alternative URL.
This happens when the owner of the website changes the URL or wants the user to see a better version. In the case of alternative URLs, the website is accessible through both the new and old URLs.
pycurl does not automatically follow the URL redirects. We can configure pycurl to follow these redirects using the curl.setopt() method.
import pycurl
from io import BytesIO

# Create a new Curl object
curl = pycurl.Curl()
# Create a BytesIO object
responseBuffer = BytesIO()

# Set the URL to fetch and follow redirects
curl.setopt(curl.URL, 'http://httpbin.org/redirect-to?url=https%3A%2F%2Fwww.google.com')
curl.setopt(curl.FOLLOWLOCATION, 2)
# Write the data in the responseBuffer
curl.setopt(curl.WRITEDATA, responseBuffer)

# Perform the request
curl.perform()
# Get the response body
response = responseBuffer.getvalue()
# Print the response
print(response.decode('utf-8'))

# Close the Curl object
curl.close()
# Close the buffer
responseBuffer.close()
We set the curl.FOLLOWLOCATION option to True to instruct cURL to follow redirects. We also set the curl.REDIRECT_LIMIT option to 2, which limits the number of redirects that it will follow.
How to handle cookies in cURL requests with Python
Cookies are small pieces of text that are used to save a user's state or information about the user. Pycurl provides us with an easy way to manage them. We just need to set a text file using the setopt() method and utilize two methods, COOKIEJAR and COOKIEFILE.
COOKIEFILE tells the pycurl to read cookies from a file before making a request.
If you use COOKIEJAR, pycurl will save the cookies to a file received in the response.
import pycurl
from io import BytesIO
# Create a Curl object
curl = pycurl.Curl()
# Create a buffer object
responseBuffer = BytesIO()
# Set the URL
curl.setopt(curl.URL, 'https://stackoverflow.com/')
# Set the buffer to receive data
curl.setopt(curl.WRITEDATA, responseBuffer)
# Save cookies to a file
curl.setopt(curl.COOKIEJAR, 'cookies.txt')
# Load cookies from a file
curl.setopt(curl.COOKIEFILE, 'cookies.txt')

# Perform the request
curl.perform()

# Read cookies
cookies = curl.getinfo(pycurl.INFO_COOKIELIST)

# Print the cookies
print("Cookies are:")
for cookie in cookies:
    print(cookie)

# Close the Curl object
curl.close()
# Close the buffer
buffer.close()
In this example, we are specifying a file through setopt() . If the file is not created, it will create a new file and save cookies into it. We get the cookies using the pycurl.INFO_COOKIELIST method and print them.
Authenticating cURL requests with Python
While working with websites and requests, we may encounter some websites that require authentication and credentials to use the content. PycURL provides a way to handle this situation as well through the .setopt() method. We add the credentials through encoding and make the POST request.
Let’s see the code in detail.
import pycurl
from io import BytesIO
from urllib.parse import urlencode

# Create a new Curl object
curl = pycurl.Curl()

# Create a buffer object
responseBuffer = BytesIO()

# Enable cookie handling
curl.setopt(curl.COOKIEJAR, 'cookies.txt')
curl.setopt(curl.COOKIEFILE, 'cookies.txt')

# Set the login URL
curl.setopt(curl.URL, 'https://newsapi.org/login')

# Set the request method to POST
curl.setopt(curl.POST, 1)

# Add the data
postData = {'email': 'yourEmail', 'password': 'yourPassword'}
# Encode the data
postfields = urlencode(postData)
# Add the post fields
curl.setopt(curl.POSTFIELDS, postfields)

# Add the buffer variable
curl.setopt(curl.WRITEDATA, responseBuffer)
# Perform the login request
curl.perform()

# Get the HTTP response code
responseCode = curl.getinfo(curl.RESPONSE_CODE)
print('Response Code:', responseCode)

# Clear the response buffer
responseBuffer.truncate(0)
responseBuffer.seek(0)

# Set the URL to the home page
curl.setopt(curl.URL, 'https://newsapi.org/account')

# Make the request to the home page
curl.perform()

# Fetch the response body
responseBody = responseBuffer.getvalue()

# Print the body of the response
print('Response Body:', responseBody.decode('utf-8'))

# Close the Curl object, and the responseBuffer
curl.close()
responseBuffer.close()
In the code above, we're using an extra module urlencode for encoding the credentials. Then, we have cookies to store the session, and we are saving them in a file.
This curl.setopt(curl.POSTFIELDS, postfields) line of code is adding the credentials to the required fields.
After that, we make the POST request and get the response that would be 200.
After clearing the responseBuffer, we are again making a GET request to get the home page of the account.
How to handle errors in cURL requests with Python
While writing code, you might not always be sure whether a piece of code will work. For example, when making a request or reading a file, it's possible that the file isn't available. At that point, we get an error.
To handle such situations, we use try except blocks in pycurl.
Here's an example of using a try except block to perform a curl request.
import pycurl
# Create a new Curl object
curl = pycurl.Curl()
# Set the URL
curl.setopt(curl.URL, 'https://www.googlecom')
try:
   # Perform the request
   curl.perform()
except pycurl.error as error:
  # Handle the error
  errorNumber, errorString = error.args
  print('Error: %s %s' % (errorNumber, errorString))
# Close the Curl object
curl.close()
In this example, we have intentionally set an invalid URL to demonstrate how to handle errors.
We've used a try except block to catch any pycurl.error exceptions that may be raised during the request.
We then extract the error number and error string from the exception using error.args and print an error message.
We've covered some pretty advanced stuff, but let's go a step further. In this next section, we'll cover some even more advanced topics in cURL requests with Python, including performing file uploads and working with SSL/TLS certificates.
How to perform file uploads in cURL requests with Python
We may need to upload a file along with our HTTP request, such as when working with file storage or API endpoints that accept file uploads. PycURL provides us with an easy way to upload files using the same method setopt().
We just need to set our request to POST and specify the path of the file with its type, and we're good to go.
Let's see how easy this process is.
import pycurl
from io import BytesIO

# Create a new Curl object
curl = pycurl.Curl()
# Create a buffer
responseBuffer = BytesIO()
# Set the URL for the file upload
curl.setopt(curl.URL, 'https://httpbin.org/post')
# Set the file to be uploaded and other options
curl.setopt(curl.HTTPPOST, [('file', (curl.FORM_FILE, '/content/cookies.txt'))])
# Specify the buffer to receive response
curl.setopt(curl.WRITEDATA, responseBuffer)
# Apply the try block
try:
    # Perform the request
    curl.perform()
except pycurl.error as error:
    # Handle the error
    errorNumber, errorString = error.args
    print('Error: %s %s' % (errorNumber, errorString))
# Close the Curl object
curl.close()
# Decode and print the response
response = responseBuffer.getvalue().decode('utf-8')
print(response)
# Close the buffer
responseBuffer.close()
Our code is mostly the same, and we've already explained the code pretty extensively in the previous examples.
The line that requires explanation here is just 13, where we're specifying the method to POST and giving the file name.
curl.HTTPPOST sets the method the HTTP method to POST and the next argument is a list that includes information about the file.
file is the name of the form field on the server side that will receive the uploaded file.
(curl.FORM_FILE, '/content/cookies.txt') is a tuple that specifies the type of the form field and the file to be uploaded.
How to handle SSL/TLS certificates in PycURL
There are two common methods for creating secure connections over the internet. Secure Sockets Layer (SSL) and Transport Layer Security (TLS).
These methods make the connections between the browser and server by encrypting the data transferred between them. These certificates are issued by an organization called a Certificate Authority (CA) to websites that ensure that a website is owned by an organization and is trustworthy.
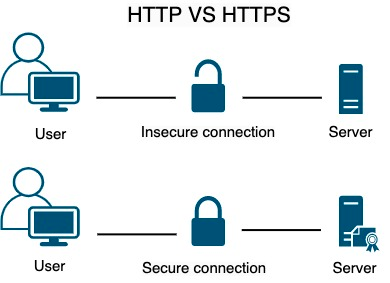
When we visit a website with an SSL/TLS, our web browser checks the SSL/TLS certificate that acts as a digital stamp of approval that verifies the authenticity and trustworthiness of the website.
As certificates change over time, PycURL doesn't provide such support.
We can also add certificates from our local directory, but if we don't have one, we can use the certifi Python package.
Before using this package, let’s install it with following command.
pip3 install certifiNow, we can use this package in our code.
import pycurl
import certifi
# Create a Curl object
curl = pycurl.Curl()
# Set the URL
curl.setopt(curl.URL, 'https://blog.apify.com/')
# Check the CA certificates through certifi
curl.setopt(curl.CAINFO, certifi.where())
# Perform the request
curl.perform()
# Retrieve the response code
responseCode = curl.getinfo(curl.RESPONSE_CODE)
print(f'Response code: {responseCode}')
# Close the Curl object
curl.close()
In the code above, we're using an additional package that confirms the certificate of any website.
The curl.CAINFO sets the Curl to check for a CA certificate of a website and certifi.where() extracts the path to the default certificates provided by the package.
We've covered the basics and some advanced concepts of cURL combined with the simplicity and ease of use of Python. This combination allows you to perform complex web operations with fewer lines of code and provides better control over HTTP requests.
Let’s put everything we’ve learned so far together and look at a script that covers most aspects.
Final code
In this script, we'll also use Beautiful Soup to parse and extract information from the content we get through our requests.
If you’re not familiar with it, you should read more about web scraping with Beautiful Soup.
Install by entering the command pip install beautifulsoup4 and run the script below.
import pycurl
import certifi
from io import BytesIO
# Import BeautifulSoup
from bs4 import BeautifulSoup
# Make a new curl object
curl = pycurl.Curl()
# Make a new Buffer
responseBuffer = BytesIO()
# Set the URL
curl.setopt(curl.URL, "https://blog.apify.com/")
# Check the certificates
curl.setopt(curl.CAINFO, certifi.where())
# Allow redirections
curl.setopt(curl.FOLLOWLOCATION, 3)
# Save the response data
curl.setopt(curl.WRITEDATA, responseBuffer)
# Make the request
curl.perform()
# Decode the response
htmlResponse = responseBuffer.getvalue().decode('utf-8')
# Add the information to the parser
soup = BeautifulSoup(htmlResponse, 'html.parser')
# Extract articles
articles = soup.find_all('div', class_='post-info-wrap')  # Use class_ instead of class
# Loop through all the articles
for article in articles:
    title = article.find('h2', class_='post-title').text.strip()  # Use class_ instead of class
    author = article.find('a', class_='post-author').text.strip()  # Use class_ instead of class

    print("Title:", title)
    print("Author:", author)
    print("-" * 25)

curl.close()
responseBuffer.close()
In this script, we're making a GET request to the Apify Blog and using setopt() to check the SSL/TLS certificate and apply redirection.
In the end, we're using Beautiful Soup to parse the HTML response.
First, we retrieve posts on the website, and then we extract the Title and Author of each post.
How to use cURL in Python with subprocessor
We've covered PyCURL. Now for a much more concise explanation of the second method of using cURL in Python: with Python's subprocesser module.
Using the subprocess module allows you to run cURL commands directly within your Python code. This is quick and straightforward for those familiar with the cURL command line.
import subprocess

response = subprocess.run(
    ['curl', 'http://example.com'],
    capture_output=True,
    text=True
)

print(response.stdout)
This approach is useful when you want to use existing cURL commands in a Python script without translating them into another library's syntax.
How to use cURL in Python with Requests
Finally, the third way to use cURL in Python: Requests.
The Requests library is a popular, high-level library for making HTTP requests in Python. Its advantage over the previous methods is that it provides a simple and intuitive interface.
Here are a few examples of using cURL with the Requests library.
1. Making a GET request with Requests
import requests

response = requests.get('http://example.com')
print(response.text)
2. Making a POST request with Requests
import requests

response = requests.post('http://example.com', data={'key': 'value'})
print(response.text)
3. Adding headers to a request with Requests
import requests

headers = {'Content-Type': 'application/json'}
response = requests.get('http://example.com', headers=headers)
print(response.text)
4. Handling redirects with Requests
Requests handles redirects automatically, but you can disable this feature if needed:
response = requests.get('http://example.com', allow_redirects=False)
print(response.status_code)
5. Managing cookies with Requests
Requests makes cookie management straightforward:
import requests

response = requests.get('http://example.com')
print(response.cookies)

cookies = {'session_id': '12345'}
response = requests.get('<http://example.com>', cookies=cookies)
print(response.text)
6. Authenticating with Requests
Requests supports various authentication methods:
from requests.auth import HTTPBasicAuth

response = requests.get('http://example.com', auth=HTTPBasicAuth('username', 'password'))
print(response.text)
7. Handling errors with Requests
Requests raises exceptions for various errors:
import requests

try:
    response = requests.get('http://example.com')
    response.raise_for_status()
except requests.exceptions.HTTPError as err:
    print(f'HTTP error occurred: {err}')
except Exception as err:
    print(f'Other error occurred: {err}')
8. Uploading files with Requests
Uploading files is straightforward with Requests:
import requests

files = {'file': open('file.txt', 'rb')}
response = requests.post('http://example.com', files=files)
print(response.text)
9. Handling SSL/TLS certificates with Requests
Requests verifies SSL certificates by default:
import requests

response = requests.get('https://example.com', verify='/path/to/cacert.pem')
print(response.text)
Frequently asked questions
What is cURL in Python?
cURL in Python refers to using Python libraries or modules to make network requests similar to the command-line tool cURL. This can be achieved using libraries such as PycURL, subprocess, or Requests, which provide various levels of control and simplicity.
Can you use cURL in Python?
Yes, you can use cURL in Python through several methods. PycURL, subprocess, and the Requests library are popular ways to execute cURL commands or perform equivalent network requests in Python, each offering different features and levels of abstraction.
What is the Python equivalent of cURL?
Python equivalents of cURL are PyCURL and the Requests library. Requests offers a simple and user-friendly API for making HTTP requests, similar to cURL. For more complex or specific needs, PycURL provides a direct interface to the cURL library.
What is the difference between Python Requests and cURL?
Python Requests is a high-level library for making HTTP requests, known for its simplicity and ease of use. cURL is a command-line tool and library for transferring data with URLs, offering more low-level control and features. Requests abstracts many complexities of cURL.
Conclusion
We've covered using cURL in Python in three different ways:
- PycURL
- Python's subprocess module
- Requests
Use the PycURL library if you want detailed control over requests.
Use the subprocess module for direct use of cURL commands.
Use the Requests library if you want an intuitive, high-level interface.