If you're working on automating web tasks or web scraping, you know that unexpected elements like popups can throw a wrench into your workflow. In this guide, we'll get hands-on with Selenium to show you how to handle popups. From basic alert boxes to more complex elements, we'll cover the methods and tricks you need to keep your automation running smoothly.

What is a popup?
Popups are those small boxes that suddenly appear on websites, either to share some info or to ask for yours. They can be a hiccup in automated tasks, like web scraping or form filling, because they demand a response before you can proceed. But don't worry, Selenium has plenty of tools to handle these popups, ensuring your automation scripts don't miss a beat. If you're building a website and want to add engaging popups without coding, you could use Claspo pop-up software, which offers a code-free way to create and manage them.
Using Selenium's switch_to.alert to handle popups
Selenium's switch_to.alert is our go-to method when dealing with popups. With it, we can manage JavaScript alerts, confirmations, and prompts.
After switching to alert, we can interact with it using the following Selenium methods:
- Accept the alert
- Dismiss the alert
- Enter text into the prompt
alert.accept()
alert.dismiss()
alert.send_keys('some text')
Let’s put together what we’ve learned so far in a practical example.
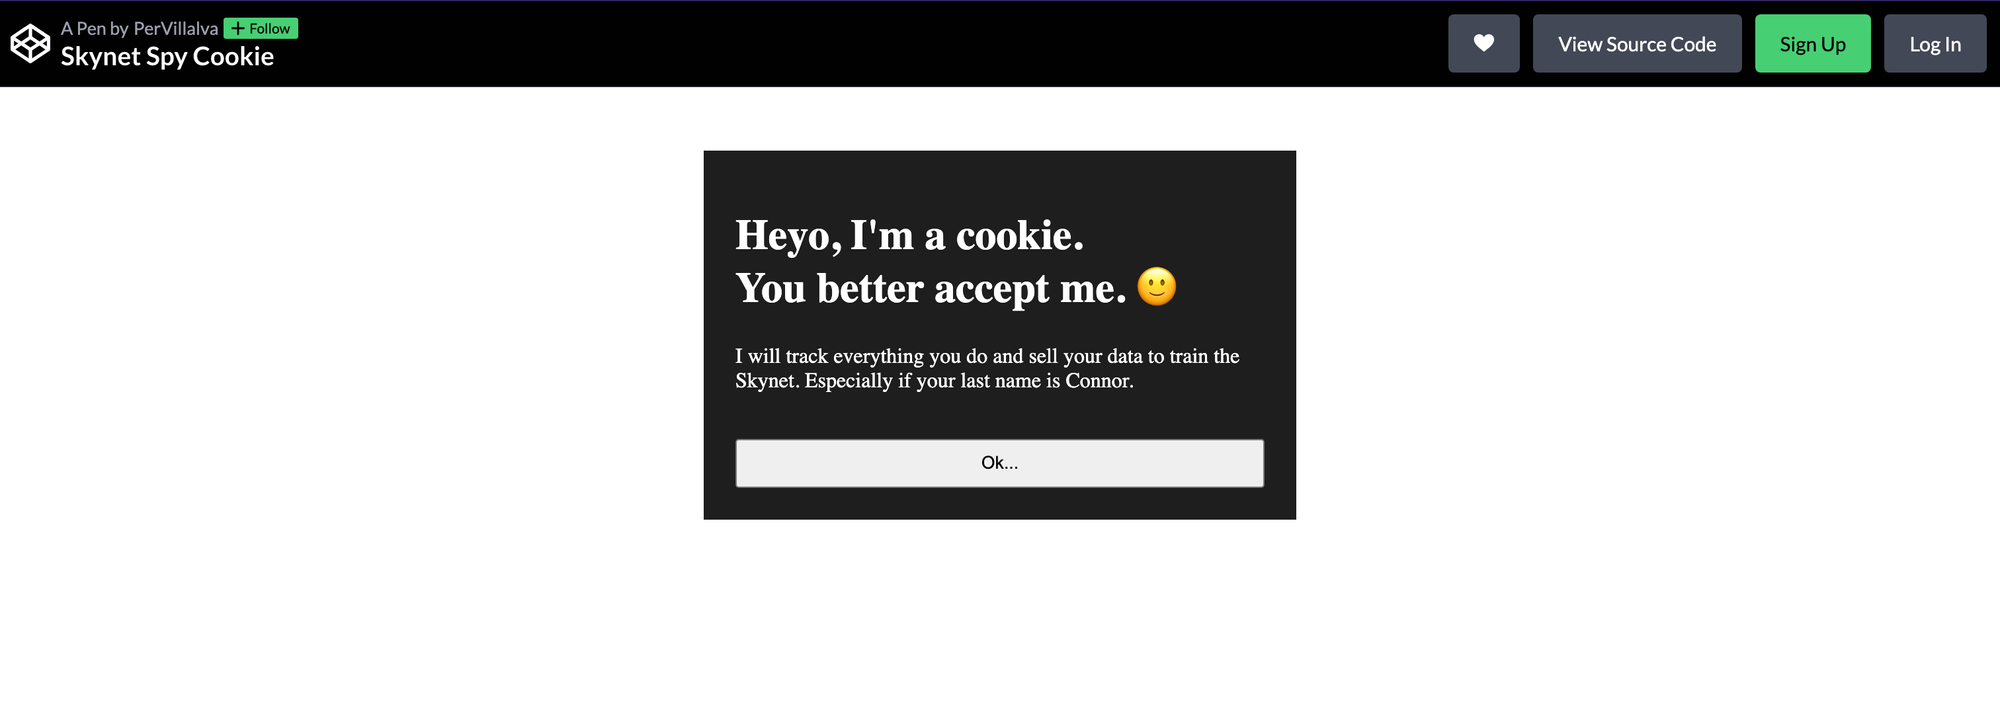
The target CodePen will trigger a prompt alert as soon as we load the page. Our goal is to fill in the prompt, accept it and then interact with the dummy cookie that will show up right after.
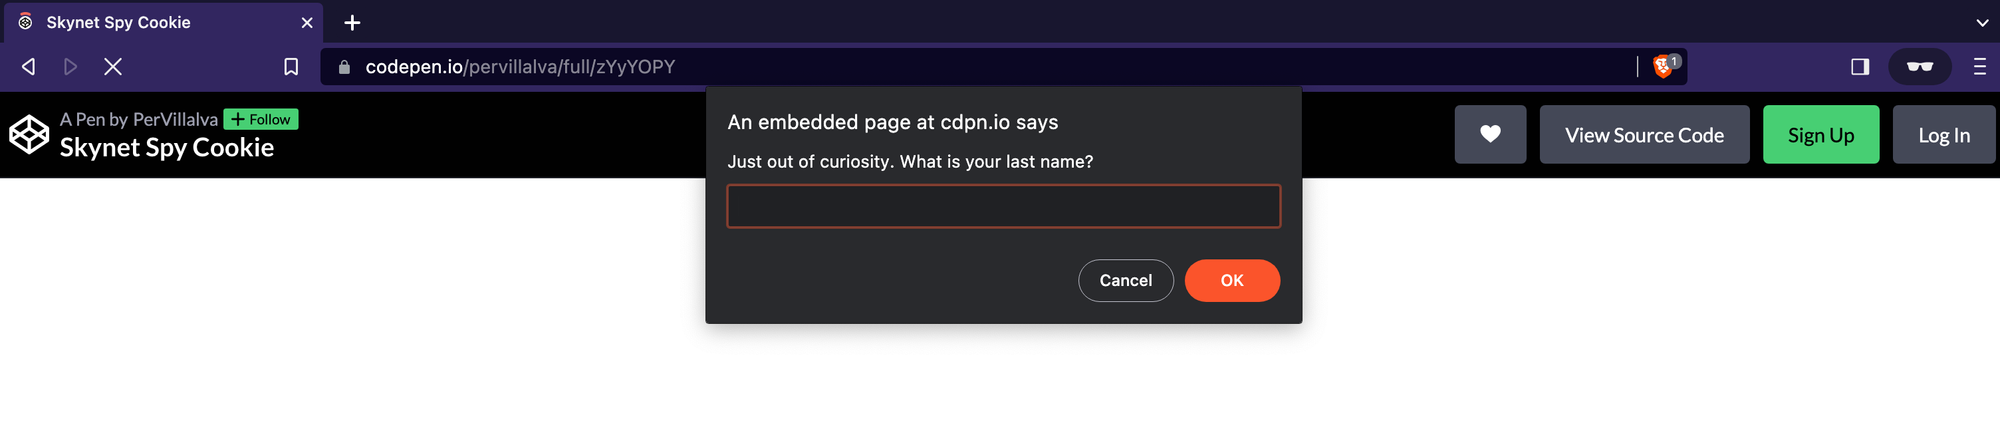
Be aware that the cookie will be inside an iframe, so make sure you know how to handle iframes in Selenium so that you can change frames to interact with them.
from selenium import webdriver
from selenium.webdriver.common.by import By
from selenium.webdriver.support.wait import WebDriverWait
from selenium.webdriver.support import expected_conditions
from time import sleep

driver = webdriver.Chrome()

# Navigate to the target webpage
driver.get("https://codepen.io/pervillalva/full/zYyYOPY")

# Wait for the alert to be displayed
WebDriverWait(driver, 15).until(expected_conditions.alert_is_present())

# Target the alert
prompt_alert = driver.switch_to.alert

alert_text = prompt_alert.text
print('Prompt question:', alert_text)

# Send your desired text to the alert
prompt_alert.send_keys("Connor");

# Wait a few seconds to see the script running
sleep(3)

# Accept the alert prompt
prompt_alert.accept();

# Wait a few seconds
sleep(3)

# Switch to the iframe with the ID of "result"
driver.switch_to.frame('result')

# Print the cookie's text
cookie_text = driver.find_element(By.CSS_SELECTOR,".cookie p").text;
print("Cookie's terms and conditions:", cookie_text)

# Accept the cookie
driver.find_element(By.CSS_SELECTOR,"button.accept-cookie").click();
After running the script above and watching our automation work, we can expect to have the following results printed to the terminal:

Before we finish up, you might have noticed that we used a couple of special tricks in the last script, namely WebDriverWait and expected_conditions. Let’s take a brief look over the line of code where we used them and see why is that:
# Wait for the alert to be displayed
WebDriverWait(driver, 15).until(expected_conditions.alert_is_present())
WebDriverWait(driver, 15): This sets up a WebDriverWait instance, a special Selenium mechanism that allows us to wait for specific conditions to be met on a web page. In this case,driveris the instance of the WebDriver (e.g., ChromeDriver) that we're using, and15is the maximum amount of time in seconds thatWebDriverWaitwill wait for the desired condition..until(expected_conditions.alert_is_present()): This part of the code specifies the condition that WebDriver should wait for.expected_conditionsis a module within Selenium that provides various predefined conditions we can use to wait for specific events on a page. In this case,alert_is_present()is a condition that waits for an alert to be present on the page.
Putting it all together, this code creates a WebDriverWait instance that waits for up to 15 seconds for an alert to be displayed on the web page controlled by the WebDriver (driver). Once the alert is detected, the code will continue execution.
Handling popups in Selenium: what's next?
You've now learned the essentials of dealing with popups using Selenium, setting you up for more advanced web automation tasks. Popups are still all over the internet, so you can't ignore them if you want to interact with websites successfully.
If you've enjoyed finding out how to use Selenium to handle popups, you might like to learn more about how Selenium compares to Puppeteer or learn how to scrape the web with Selenium and Python.