Your brand just got named in a Reddit thread. Maybe it's a complaint that's gaining upvotes. Maybe it's a comparison where you lose. Maybe it's a question a competitor is about to answer instead of you. Before you realize, the thread already has 400 comments.
Brand monitoring SaaS tools that catch this for you cost hundreds of dollars a month. The Reddit brand monitoring tool you’ll build in this guide does the same thing for under $11, using Apify to pull Reddit data, OpenAI to score sentiment, and n8n to connect the workflow together.
By the end, you'll have a workflow that runs every 8 hours, notifies you instantly on urgent mentions, and a detailed cost breakdown of what I spent to build it.
The workflow at a glance
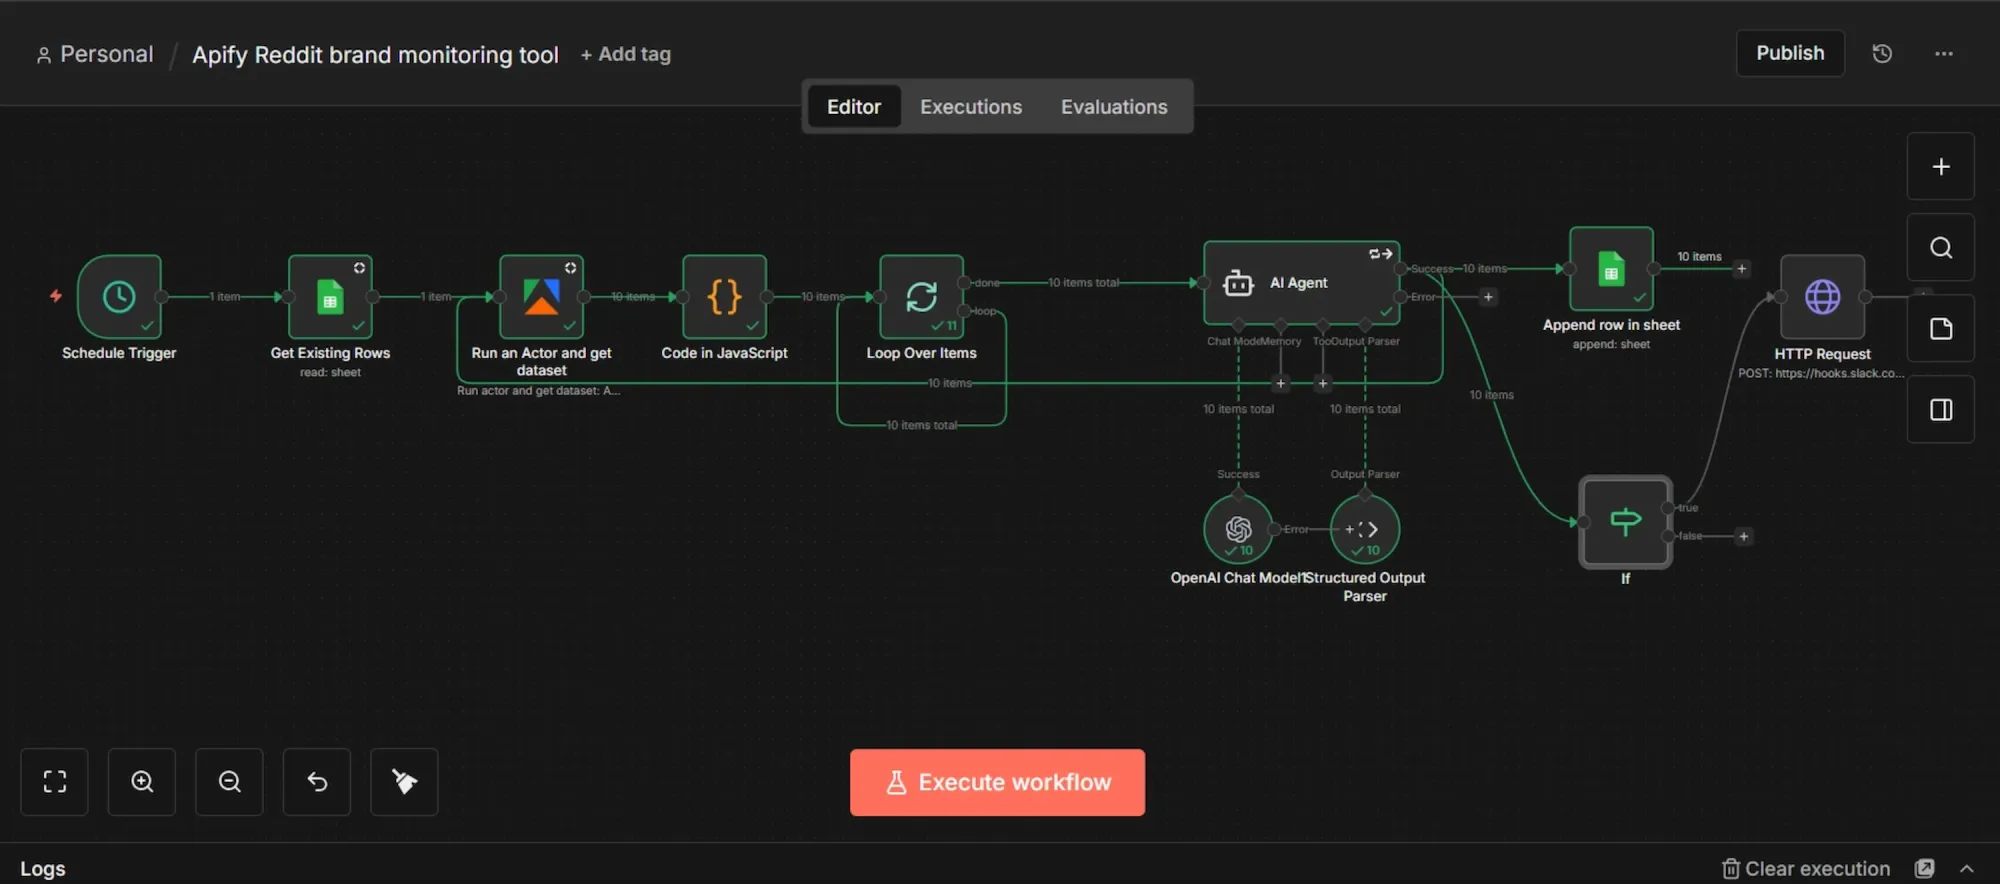
This workflow automatically extracts brand mentions from Reddit using an Apify scraper, cross-referencing existing Google Sheet data and using custom code to filter out any duplicates.
Once the dataset is prepared, the mentions are looped individually through an AI agent. Acting as the system's brain, this agent retains context to carefully analyze each post and outputs the insights as structured JSON data.
After the AI completes its analysis, the final results transfer directly into your Google Sheets for tracking and optimization.
Finally, a conditional (IF) logic evaluates the processed data against your custom thresholds, such as negative sentiment or specified priority level, and instantly triggers a Slack alert whenever an urgent response is needed.
Prerequisites
- Apify account.
- OpenAI API key.
- Self-hosted n8n instance via Docker (skip if you prefer n8n’s cloud tier).
- Google account for Sheets.
- A Slack account or any notification option of your choice (email, Discord, Telegram, etc.)
Phase 1: Accounts setup
Below you’ll find detailed instructions for setting up the prerequisite accounts and accessing API keys:
Step 1: Grab your Apify API token
- Sign up or log in at apify.com.
- Go to the Apify Console.
- On the left-hand sidebar menu, click on "Settings", then navigate to the "API & Integrations" tab.
- Under "Personal API tokens," copy your default token or click "Add new token" to create a new one, then give it a name.
- Click the copy icon to copy the token and save it somewhere temporary
Step 2: Generate an OpenAI API key
- Go to https://platform.openai.com/ and log in or sign up.
- On the left sidebar, navigate to "API keys".
- Click "Create new secret key", name it, and leave the permissions as they are.
- Copy the key immediately and save it alongside your Apify token.
- OpenAI API operates on a pre-paid system, so make sure you have at least $5 in your credit balance.
Step 3: Set up Slack incoming webhook
If you don't have a Slack account, or prefer Telegram, here's a video that explains how to set up a Telegram connection on n8n in under 2 minutes. If you're okay with using Slack, follow the steps below:
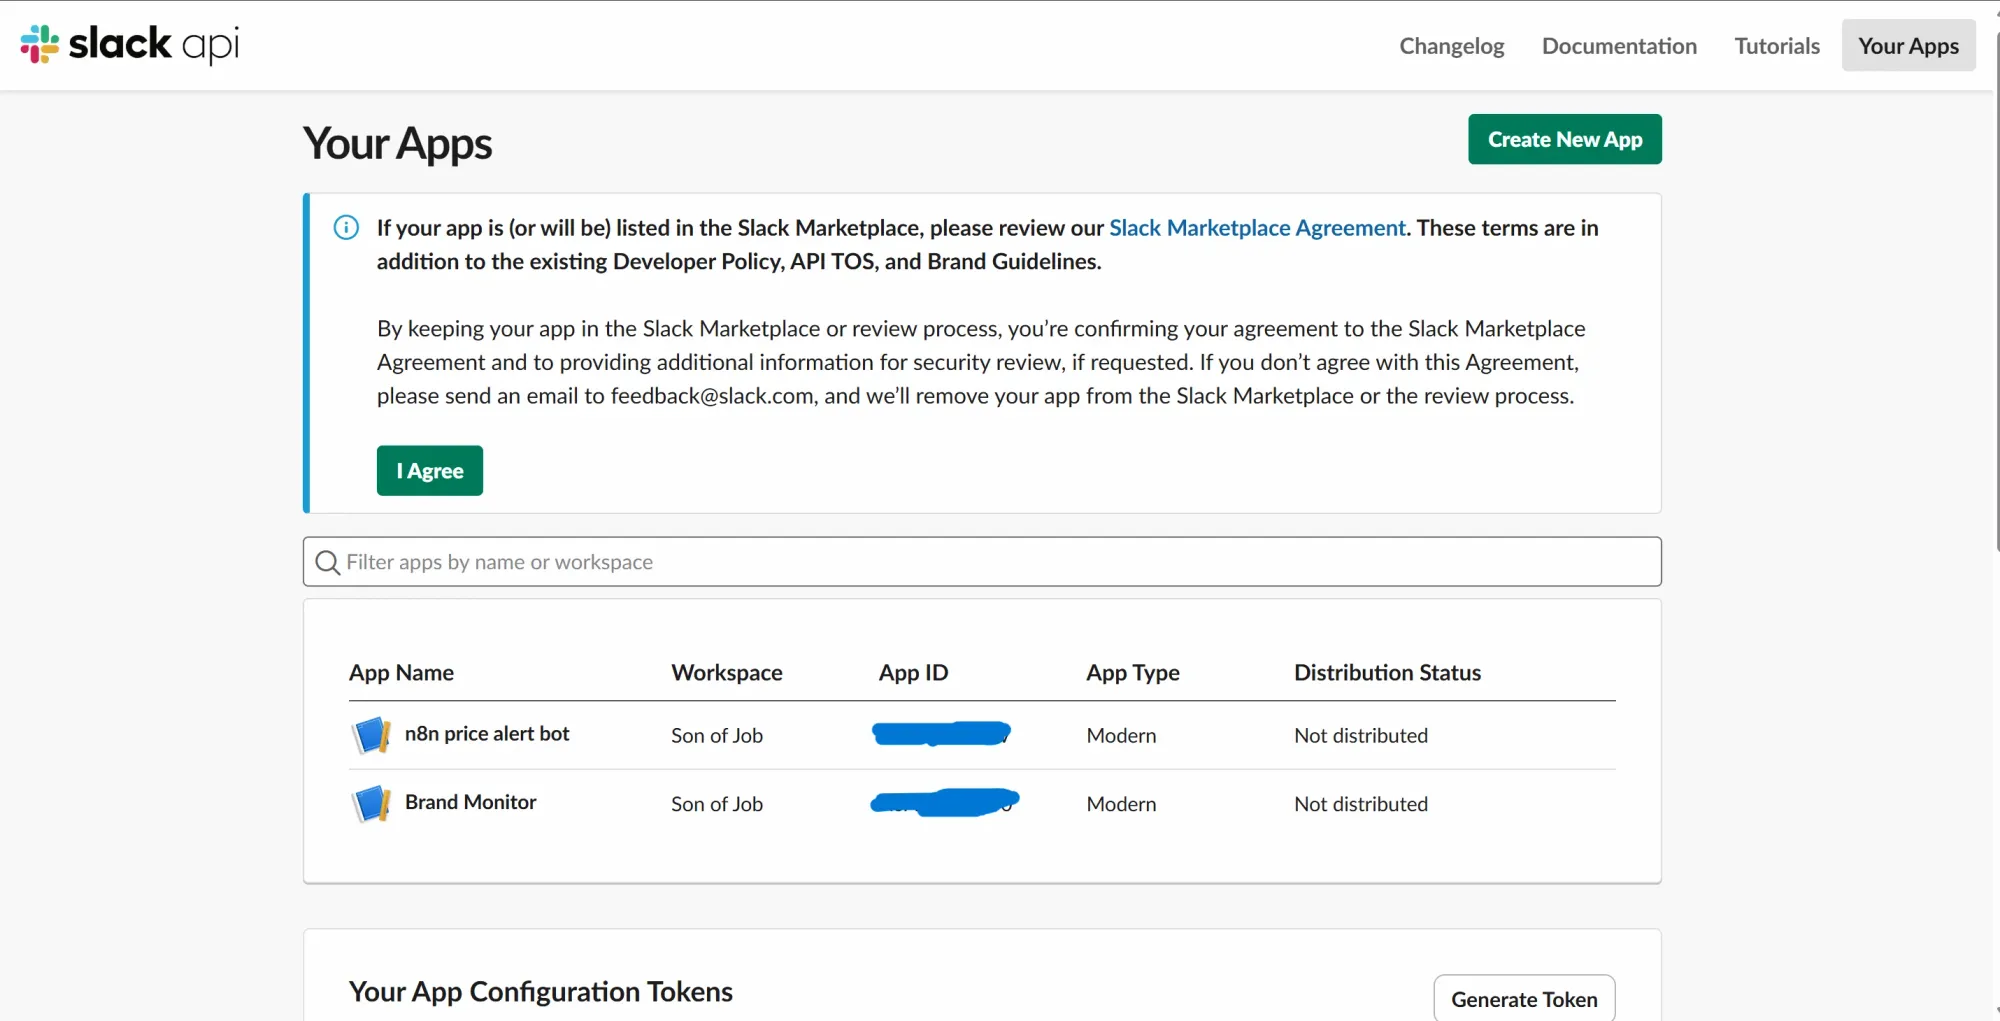
- Log in to https://api.slack.com/apps/
- Click "Create New App" → "From scratch."
- Name it and pick your existing Slack workspace.
- Click "Create App."
- In the app's left sidebar, click "Incoming Webhooks."
- Toggle "Activate Incoming Webhooks" to ON.
- Scroll down and click "Add New Webhook to Workspace."
- Pick the channel where you want alerts or create one if you don't have.
- Click "Allow."
- You'll see a webhook URL under "Webhook URLs for Your Workspace". Copy it and save alongside your other tokens.
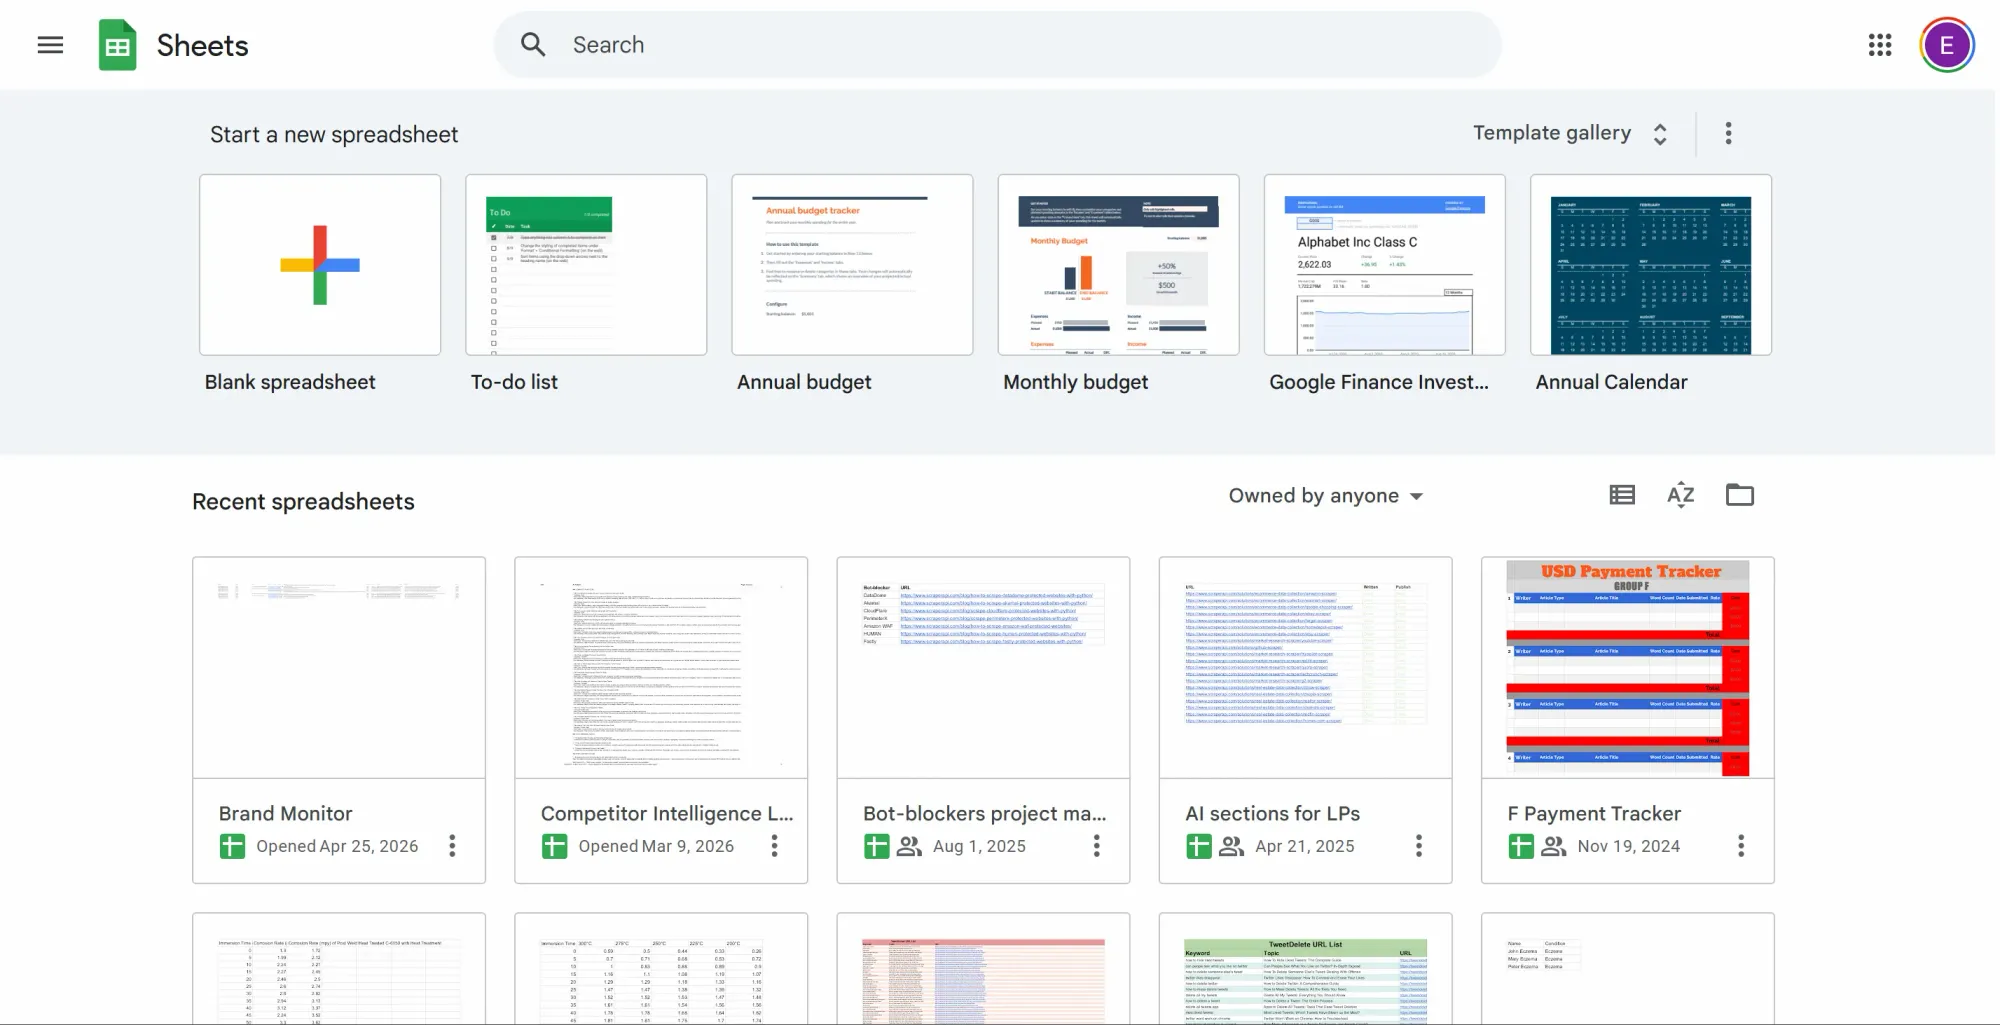
Step 4: Prepare the Google Sheet
- Go to https://sheets.google.com/ and create a new blank spreadsheet.
- Create and name a document (you’ll search for this exact name in n8n later).
- Inside the first row in your sheet, add these 12 column headers, one per column from A to L:
timestamp,subreddit,post_title,post_url,author,post_body,sentiment,intent,summary,urgency,reasoning,post_id - Save it.
Step 5: Create Google Cloud OAuth credentials for Sheets
Using Google Sheets on a self-hosted n8n instance requires a Google Cloud OAuth app; you need one for Google to let you send data into a Google sheet account via external sources. Here’s how to configure it:
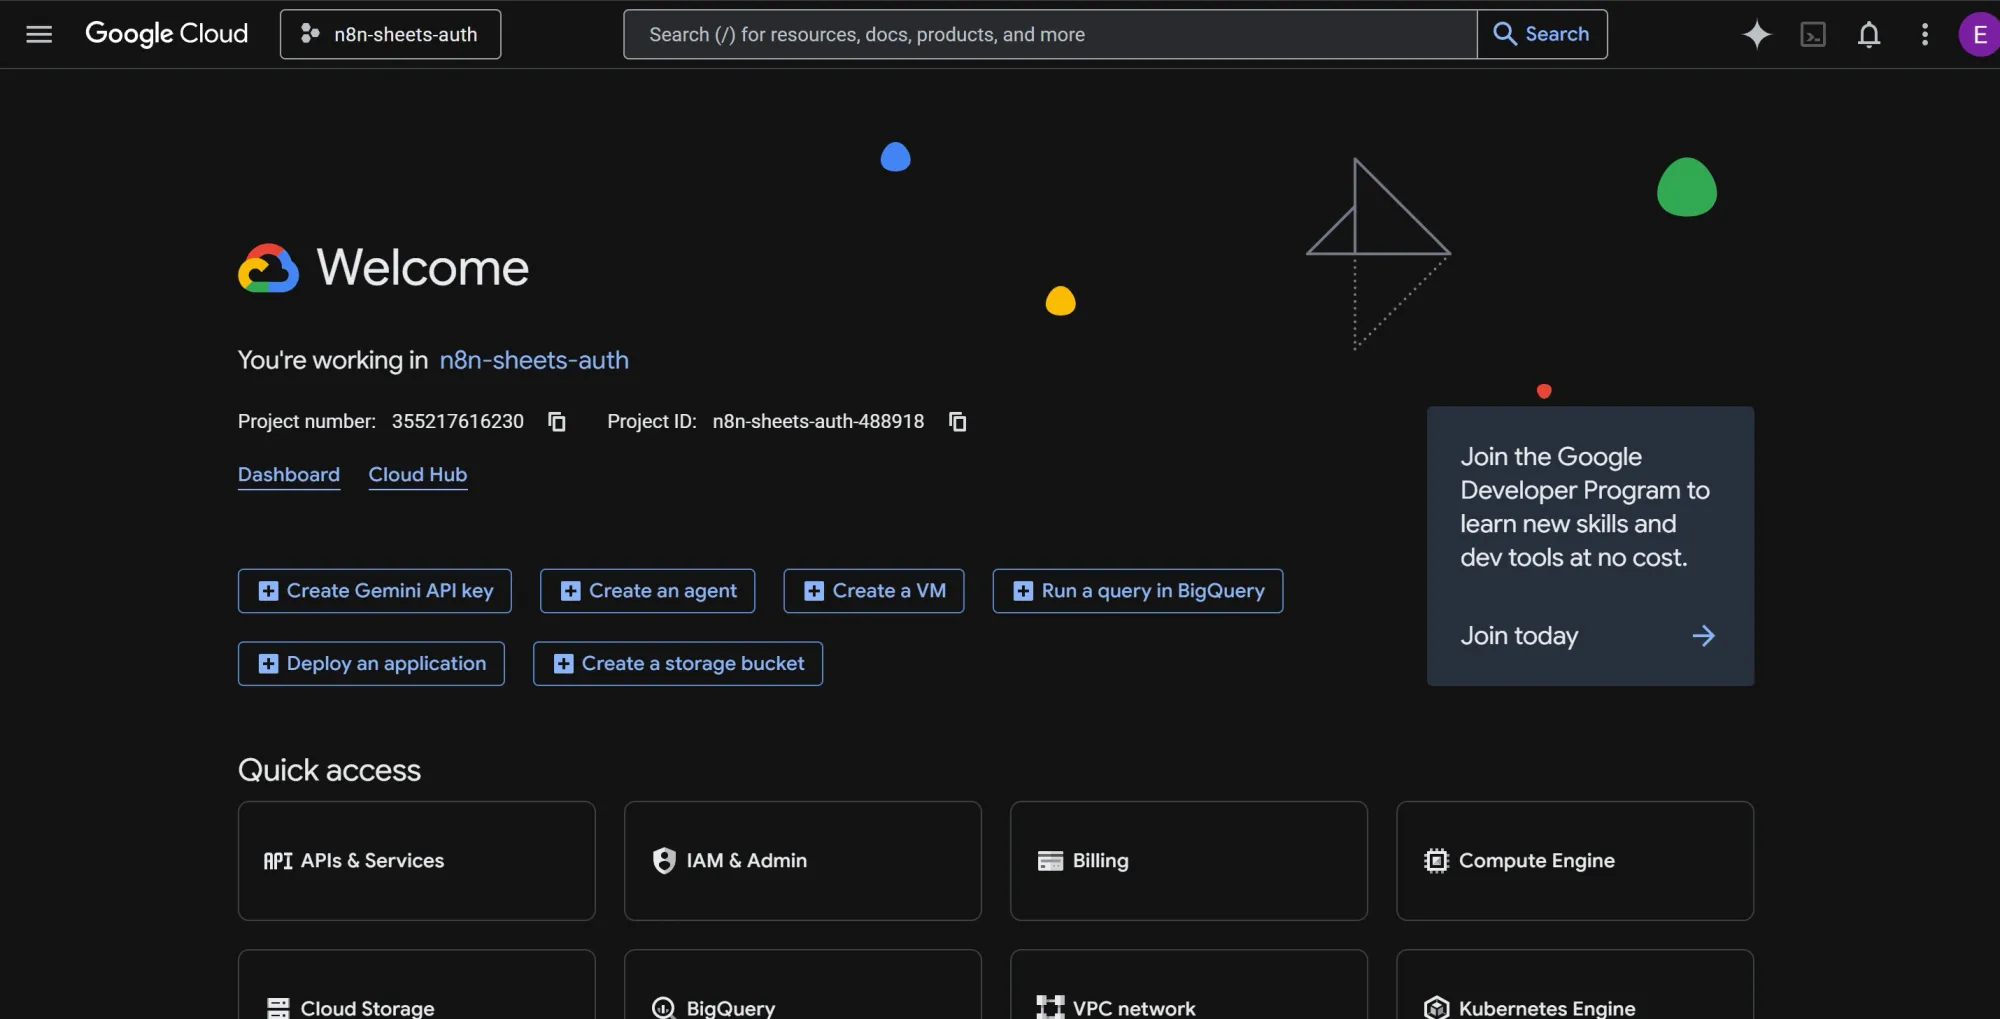
- Go to https://console.cloud.google.com/
- Create a new project, maybe call it
n8n-sheets-auth. - In the project's top search bar, find and enable two specific APIs: "Google Sheets API" and "Google Drive API."
- On the left sidebar, go to "APIs & Services" → "OAuth consent screen". Choose "External" and click Create.
- Fill in the app name (e.g., "n8n Brand Monitor"), your email as the support email, and your email again for the developer contact.
- Click "Save and Continue" through the remaining screens without making any changes.
- On the "Test users" page, click "Add Users" and explicitly add your own Google email address.
- Go back to the left sidebar and click "APIs & Services" → "Credentials".
- Click "Create Credentials" at the top → "OAuth client ID."
- Choose "Web application" from the dropdown and name it "n8n Sheets client."
- Under "Authorized redirect URIs," you'll add a specific URL in a moment, so just leave this browser tab open for now.
Phase 2: Install and set up n8n
Self-hosting n8n allows you to build and run an unlimited number of workflows for free, with total control over your data privacy. But, if you don't want to manage your own infrastructure, the n8n cloud tier works fine.
Step 1: Install Docker Desktop
- Download and install Docker Desktop for your OS.
- Confirm it's running by opening your terminal and running:
docker --version
- You should see a version number. If you see "command not found," Docker isn't in your PATH yet, so restart your terminal or reboot.
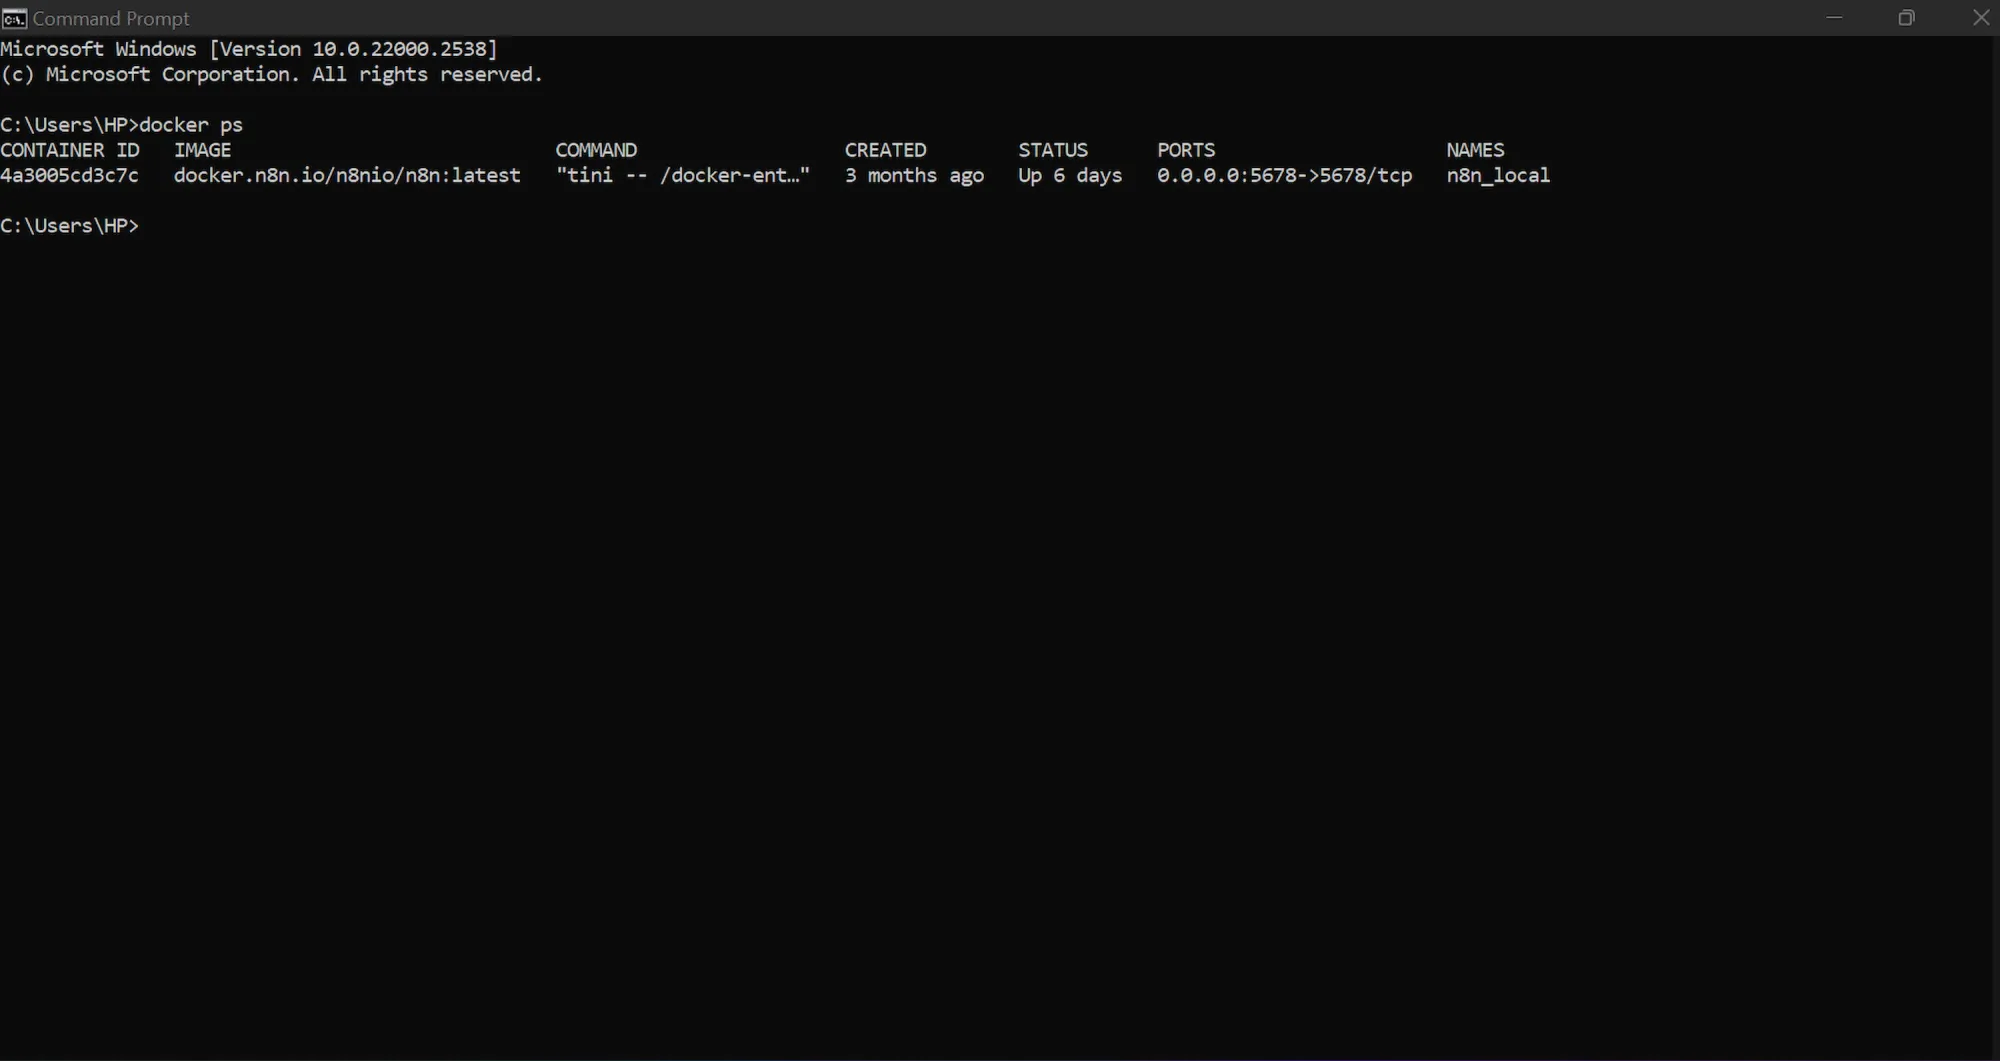
- Afterwards, confirm the engine is running by typing:
docker ps
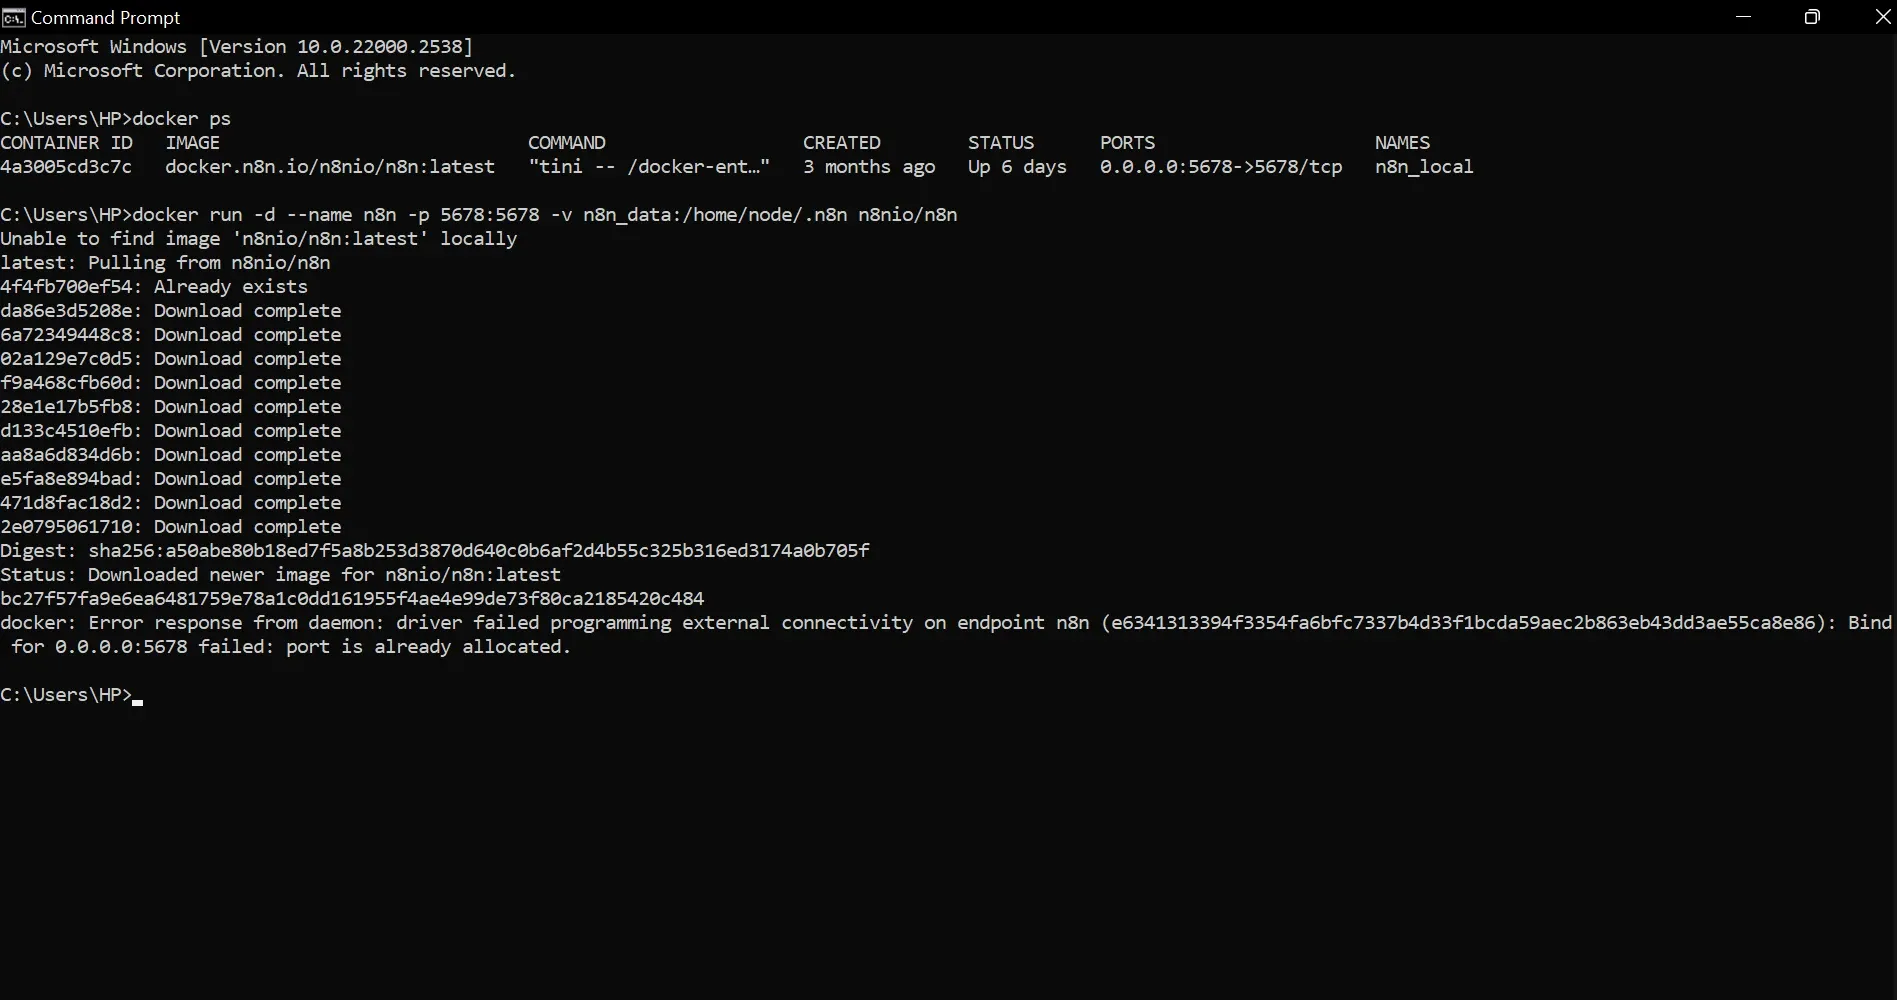
Step 2: Run n8n in Docker
- Open your terminal.
- Run the command below to pull and start n8n:
docker run -d --name n8n -p 5678:5678 -v n8n_data:/home/node/.n8n n8nio/n8n
- The first time you run this command, Docker will pause to pull the official n8n image from the internet. After downloading, it will assign and print your Container ID.
- Open a browser and go to
http://localhost:5678. - You'll see n8n's initial setup screen. Create an owner account with your email and a password.
Step 3: Install the Apify community node
n8n doesn't feature the Apify node natively. You’ll need to install it as an official community node before you can use it. Here’s how to do that:
- In your n8n workspace, at the bottom of the left sidebar, click "Settings", then navigate to "Community Nodes" and click “Install”.
- In the npm package field, paste exactly this:
@apify/n8n-nodes-apify - Check the risk acknowledgment box and click "Install".

Step 4: Complete the Google OAuth redirect URI
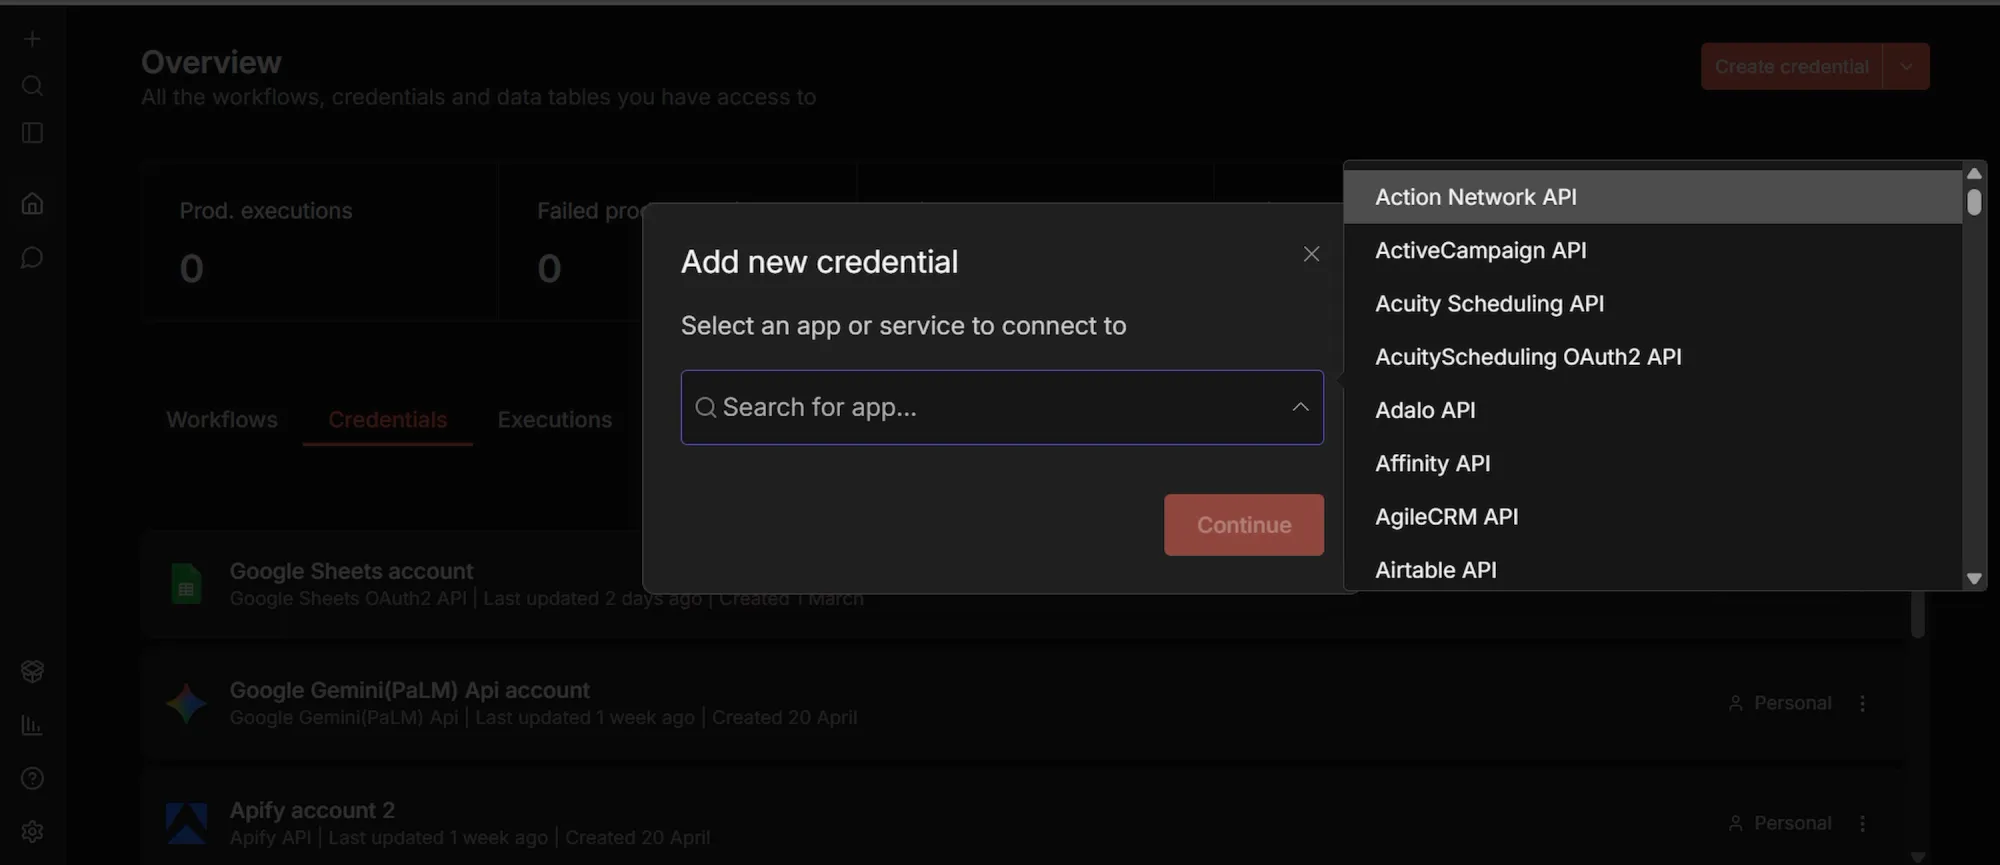
- Click the small + icon at the top-left sidebar, select "Credentials" → "Add Credential" and search for "Google Sheets OAuth2 API".
- In the credential setup window, n8n will display your unique "OAuth Redirect URL". Copy it.
- Go back to the Google Cloud tab you left open in phase 1.
- Under "Authorized redirect URIs," click "Add URI" and paste that exact string.
- Click "Create".
- A pop-up will appear containing your "Client ID" and "Client Secret". Copy both of these immediately.
- Finally, go back to your n8n tab, paste the Client ID and Client Secret into the credential window, and click "Sign in with Google" to finish the setup.
Step 5: Add your remaining API credentials
While you’re in the Credentials tab, set up your last two connections:
- Search for "Apify API", select it. Paste your Apify token. Name the credential and click "Save".
- Similarly, search for "OpenAI API", select it. Paste your OpenAI API key. Name it and click "Save".
Phase 3: Building the workflow
The images in this section are visual representations of the results from the exact steps taken below. You’ll notice how data flows from the “INPUT” section on the left-hand side of each node’s dashboard to the “OUTPUT” section on the right-hand side. This way, you can see your results as they move along the workflow and can visually spot when there’s an error and where it’s coming from.
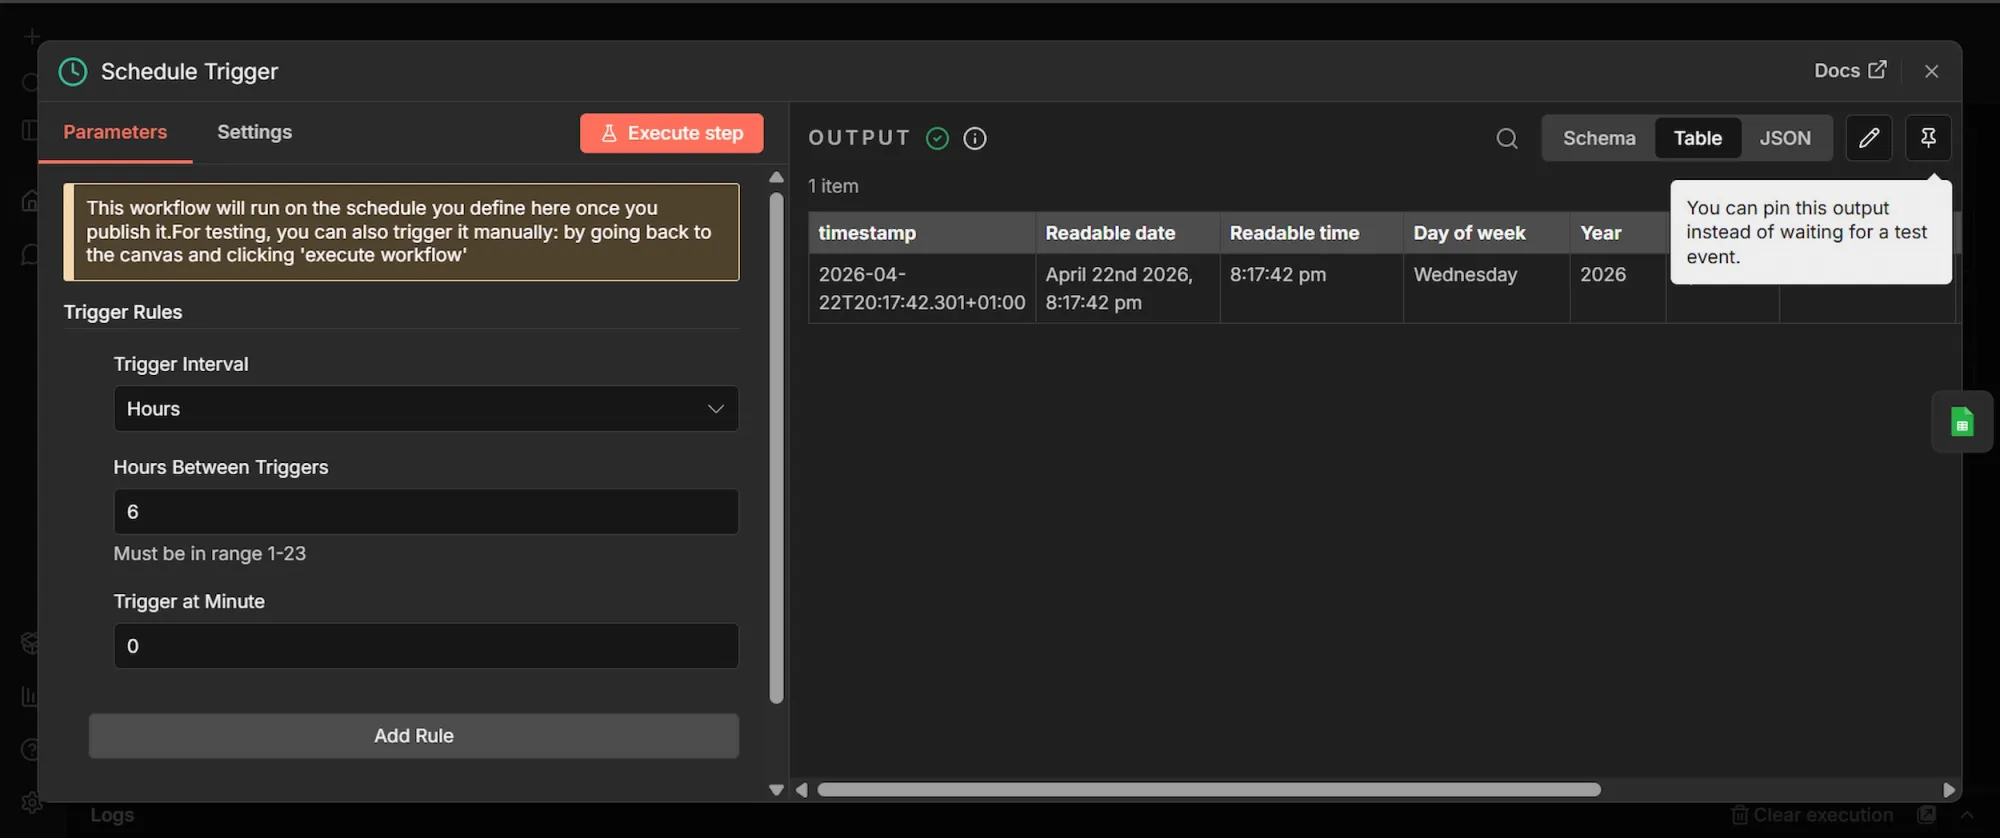
Step 1: Schedule Trigger node
- Click the + icon (Add first step…) to add the first node.
- Search for "Schedule Trigger" and select it.
- Set Trigger Interval to "Hours," and Hours Between Triggers to 8. This will trigger the workflow every 8 hours automatically, once activated.
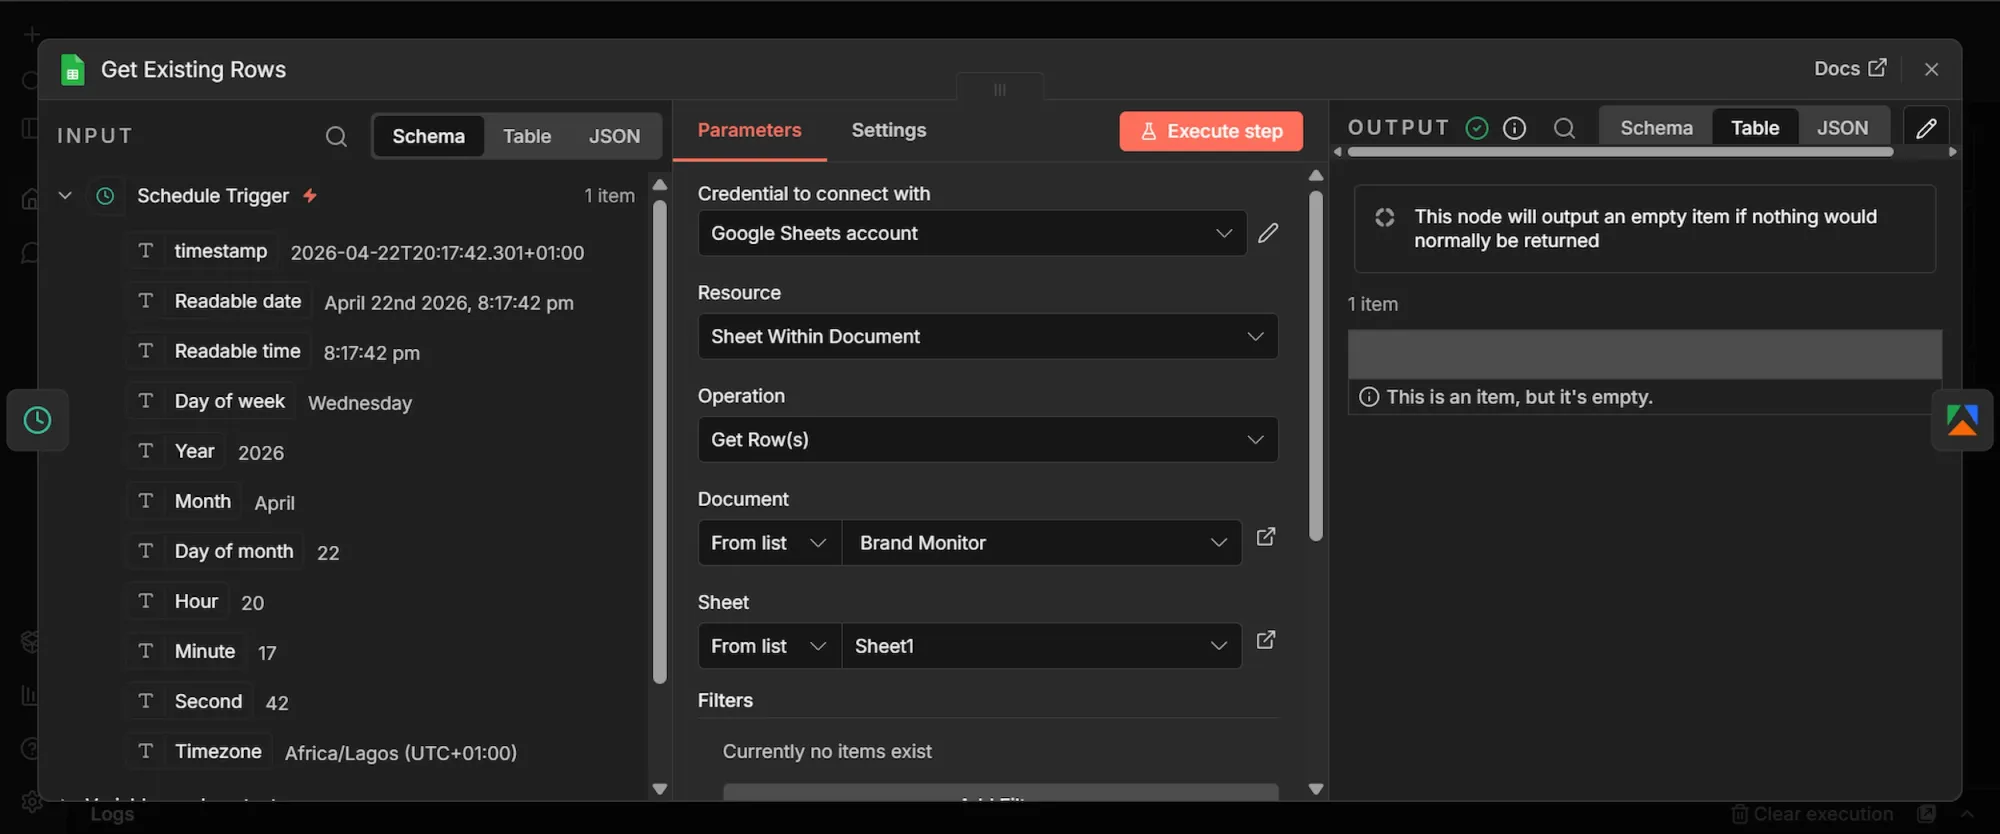
Step 2: Get Existing Rows (Google Sheets) node
- From the Schedule Trigger's output, click + to add a new node.
- Search "Google Sheets", select “Get Row (s) in sheets”, and add it.
- Rename this node to "Get Existing Rows".
- Under the "Document" field, choose "From list" and select the spreadsheet you created earlier. Then, under the "Sheet" field, select Sheet1.
- Click the "Settings tab" at the top of the node. Enable "Always Output Data" to ON.
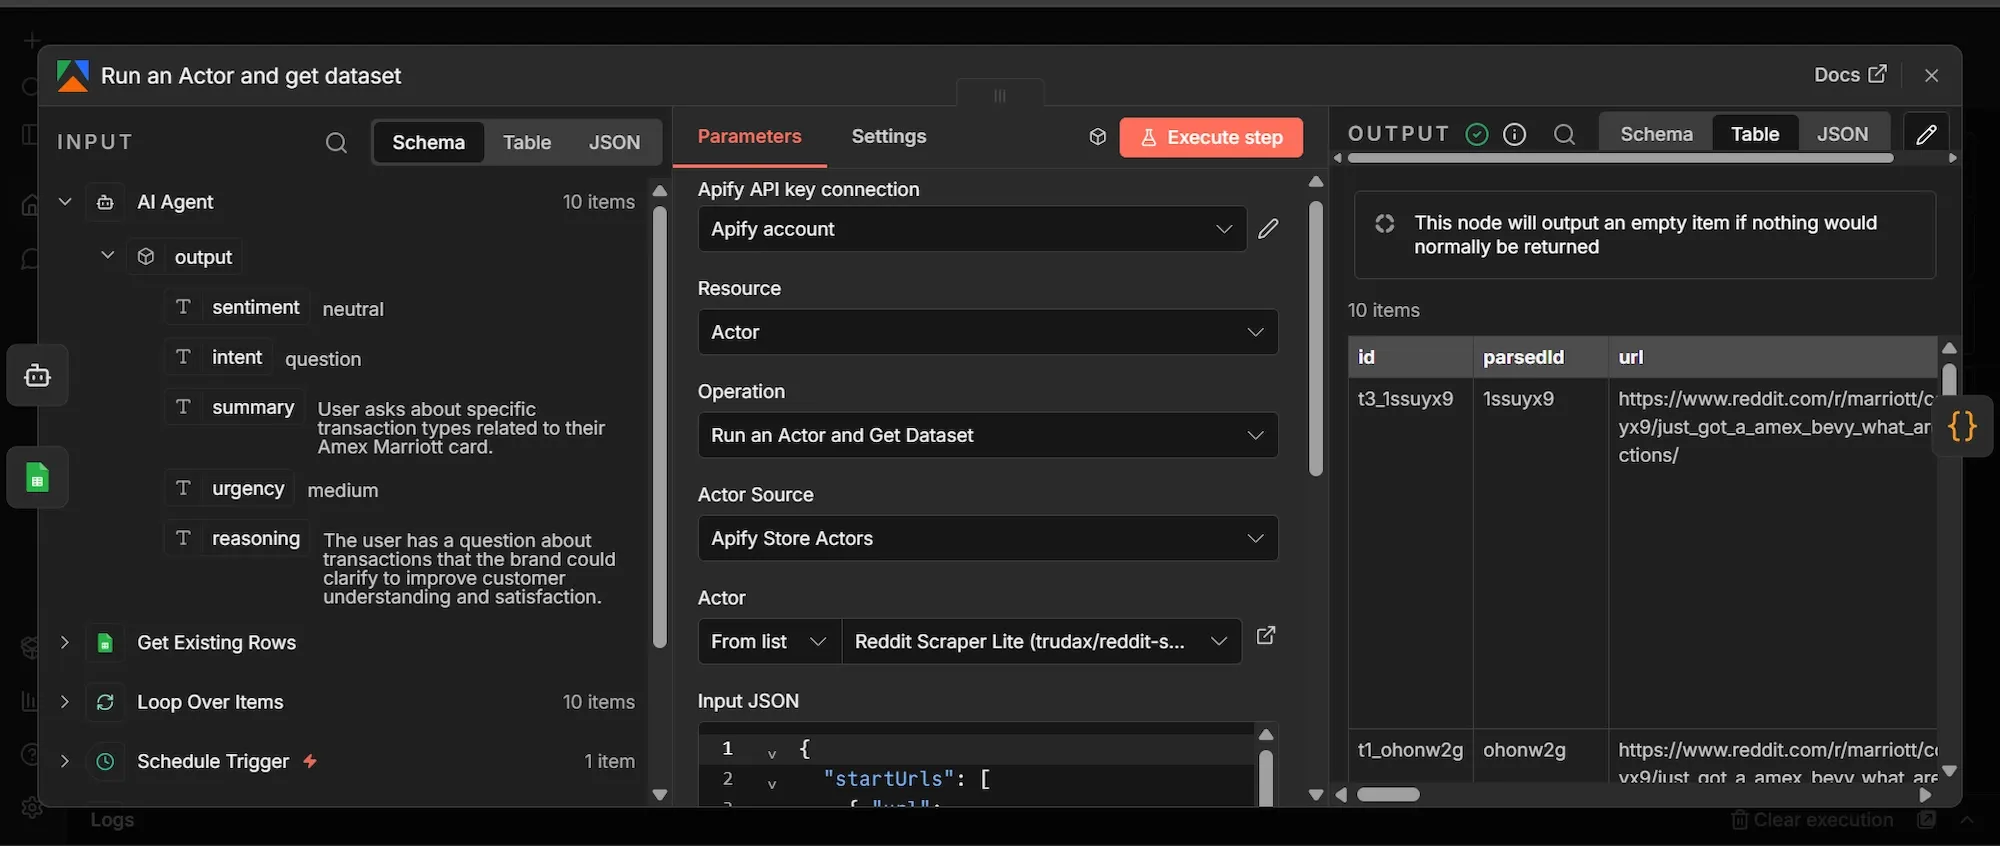
Step 3: Apify Reddit Actor node
- From the Get Existing Rows' output, click + to add a new node.
- Search for and click "Apify" and select “Run an Actor and get dataset” node.
- Under the Credential dropdown, select your Apify account connection.
- Change the Actor Source to Apify Store Actors, then search for and select
trudax/reddit-scraper-litein the Actor field. - Let’s test the workflow using the Marriott hotel as the brand to monitor for, so in the "Input JSON" field, paste this exact JSON:
{
  "startUrls": [
    { "url": "https://www.reddit.com/r/marriott/new/" },
    { "url": "https://www.reddit.com/r/awardtravel/search/?q=Marriott&restrict_sr=1&sort=new&t=day" },
    { "url": "https://www.reddit.com/r/churning/search/?q=Marriott&restrict_sr=1&sort=new&t=day" },
    { "url": "https://www.reddit.com/r/travel/search/?q=Marriott&restrict_sr=1&sort=new&t=day" },
    { "url": "https://www.reddit.com/r/TalesFromTheFrontDesk/search/?q=Marriott&restrict_sr=1&sort=new&t=week" }
  ],
  "searches": ["Marriott", "Marriott Bonvoy"],
  "searchPosts": true,
  "searchComments": true,
  "searchCommunities": false,
  "searchUsers": false,
  "sort": "new",
  "time": "day",
  "maxItems": 10,
  "maxComments": 3,
  "maxCommunitiesCount": 2,
  "maxUserCount": 2,
  "proxy": { "useApifyProxy": true },
  "debugMode": false
}- Go to the Settings tab of the Apify node and toggle "Always Output Data" ON.
The ‘start urls’ tell the Apify Actor exactly where on Reddit to begin looking for data. To monitor a brand in a different industry, replace "Marriott" in the URLs with your brand's name (use a + for spaces, like Burger+King ), and replace the subreddit names in the URLs (as in r/travel or r/churning) with communities relevant to your specific niche (e.g, r/gaming or r/streetwear).
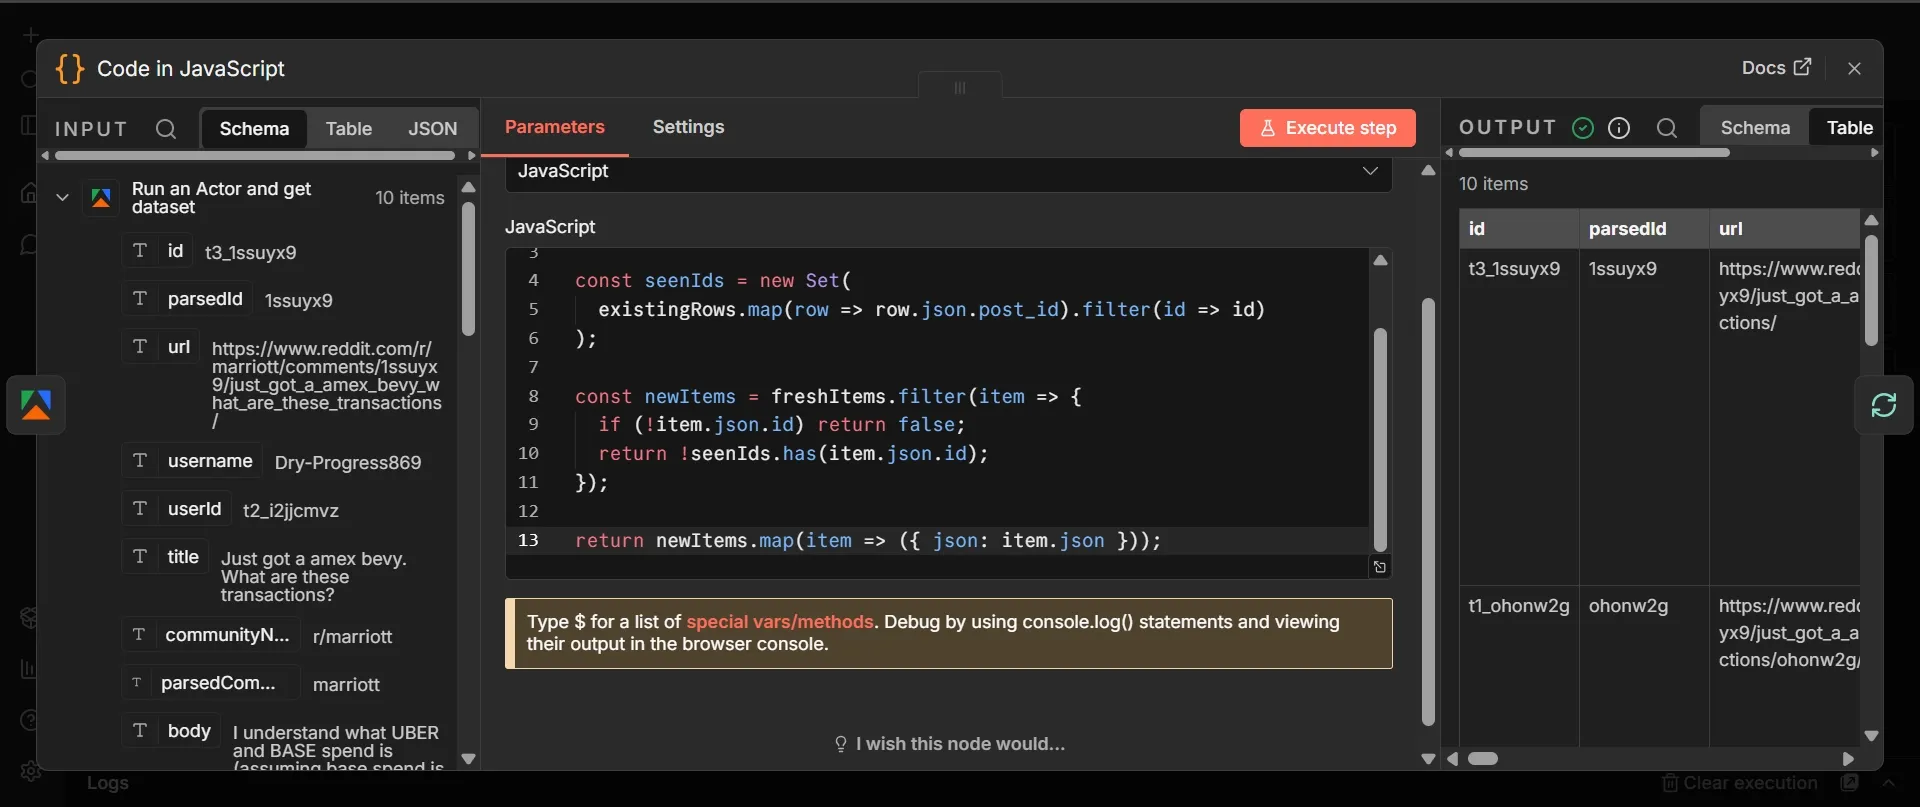
Step 4: Code node
- From Apify's output, click + and add a "Code node in JavaScript".
- Leave mode as “Run Once for All Items”, select JavaScript as “Langauge”
- Paste this code:
const freshItems = $input.all();
const existingRows = $('Get Existing Rows').all();

const seenIds = new Set(
  existingRows.map(row => row.json.post_id).filter(id => id)
);

const newItems = freshItems.filter(item => {
  if (!item.json.id) return false;
  return !seenIds.has(item.json.id);
});

return newItems.map(item => ({ json: item.json }));
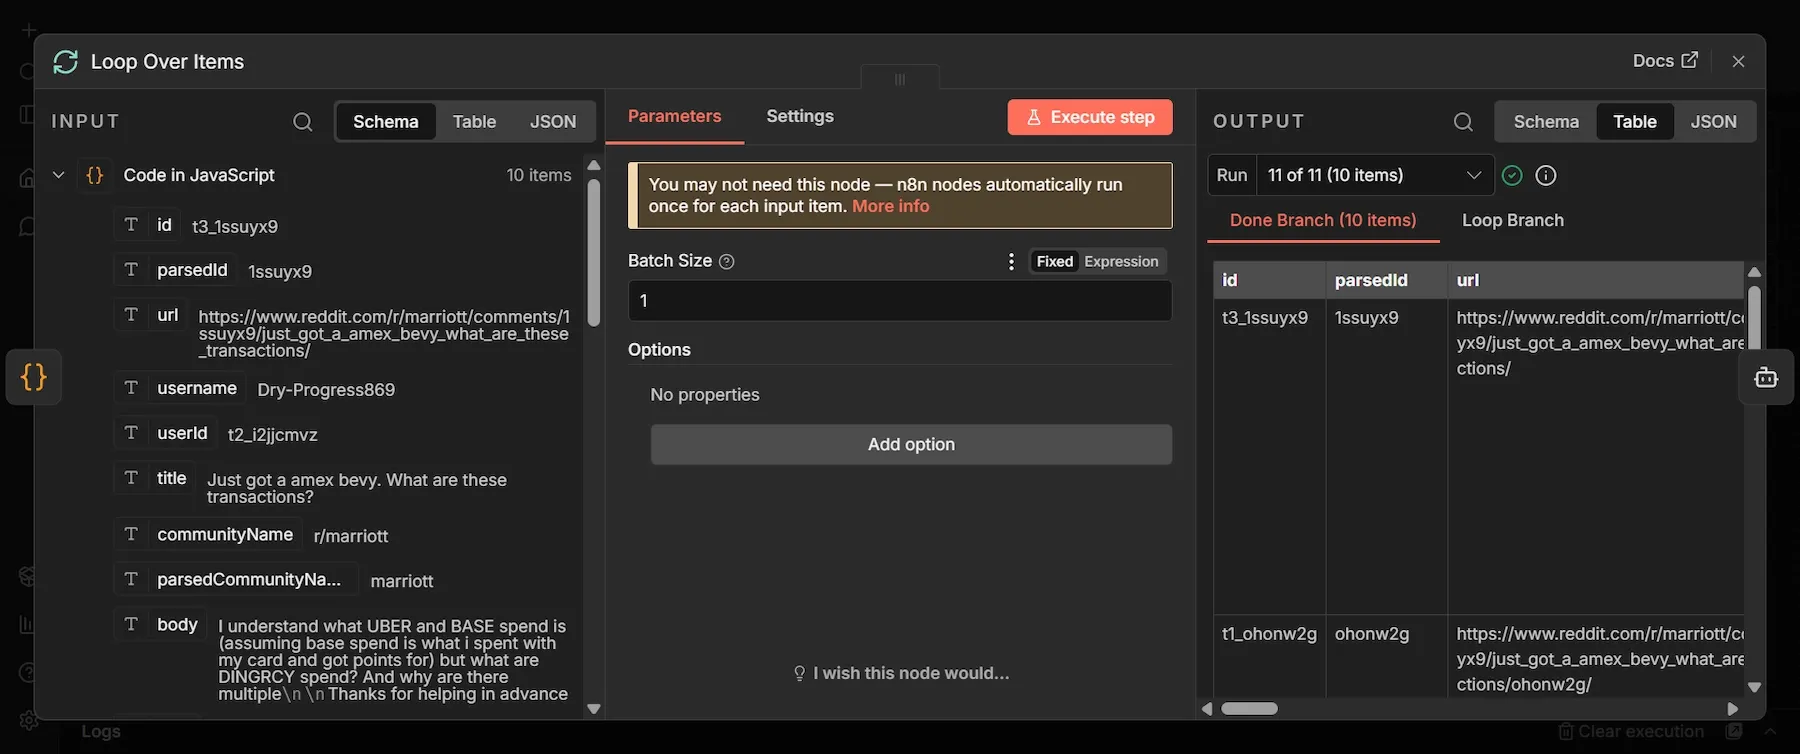
Step 5: Loop Over Items node
This node gives you control over batching that n8n’s default per-item iteration doesn't. It’s useful in cases like isolating errors per-item or pacing API calls for when you hit rate limits at scale. Here’s the setup:
- From the Code node's output, click + and add a "Loop Over Items" node.
- Set Batch Size to 1 and leave everything else default. Save.
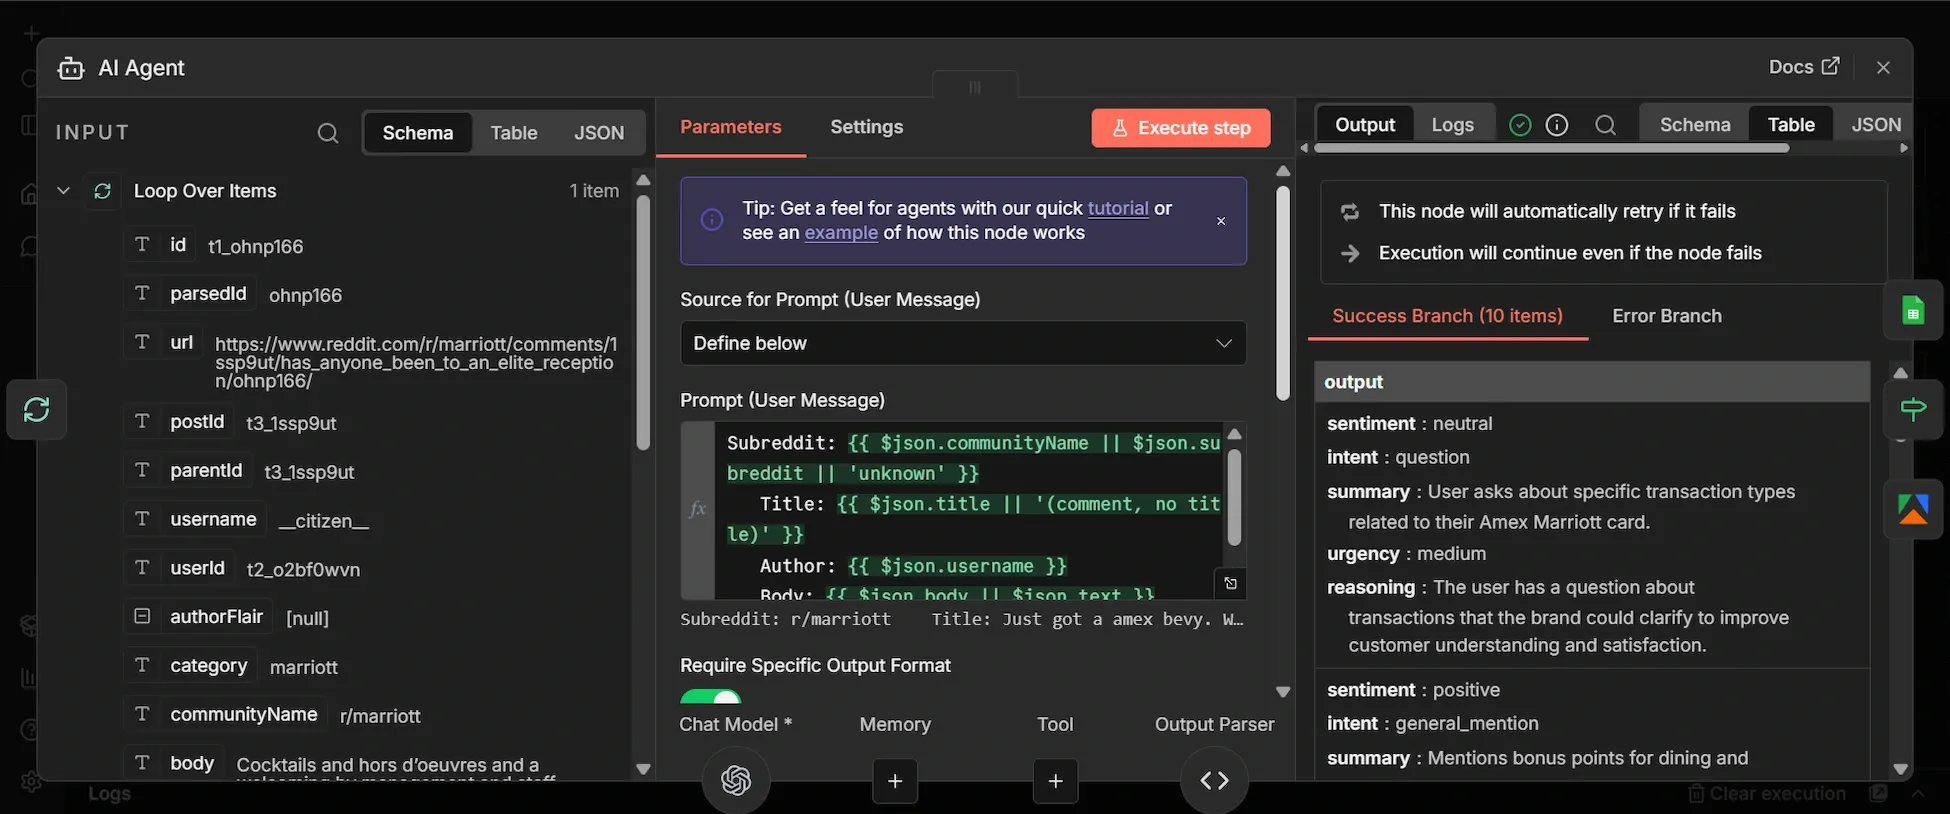
Step 6: AI Agent node
The AI Agent needs clean text to reason over. Below you’ll include a User Message column that trims each item down to five fields: where it was posted, what was said, who said it, link, and formats them as a labeled block the LLM can easily process:
- From "Loop Over Items" main loop output, click + and add an "AI Agent" node.
- In the User message column, select “Define below”.
- Input this into the User Message column (toggle to Expression mode and paste):
Subreddit: {{ $json.communityName || $json.subreddit || 'unknown' }}
Title: {{ $json.title || '(comment, no title)' }}
Author: {{ $json.username }}
Body: {{ $json.body || $json.text }}
URL: {{ $json.url }}
- Toggle "Require Specific Output Format" to ON.
- In the Options section, click “Add Option”, select System Message and paste this:
You are a brand monitoring analyst. For each Reddit post or comment I give you, analyze how the brand is being discussed and return a structured assessment.

Your fields:

- sentiment: "positive", "negative", or "neutral". Judge the poster's attitude toward the brand specifically, not toward the topic overall.

- intent: "complaint", "recommendation", "question", "comparison", or "general_mention". Pick the single best fit.

- summary: one sentence, max 20 words, describing what is actually being said about the brand. Factual, not interpretive.

- urgency: "high", "medium", or "low". Mark HIGH for: unresolved customer complaints, viral threads, direct competitor comparisons where the brand loses, accusations of misconduct, anything that looks like a PR issue needing a same-day response. Mark MEDIUM for: questions the brand could answer to win a customer, mixed feedback, feature requests with traction. Mark LOW for: casual mentions, neutral references, historical mentions.

- reasoning: one sentence explaining why you assigned that urgency level.

Be strict about urgency. Most mentions are LOW. Only flag HIGH when a human genuinely needs to look today.
- Go to the "Settings tab", set Retry On Fail to ON, Max Tries to 3, and On Error to Continue.
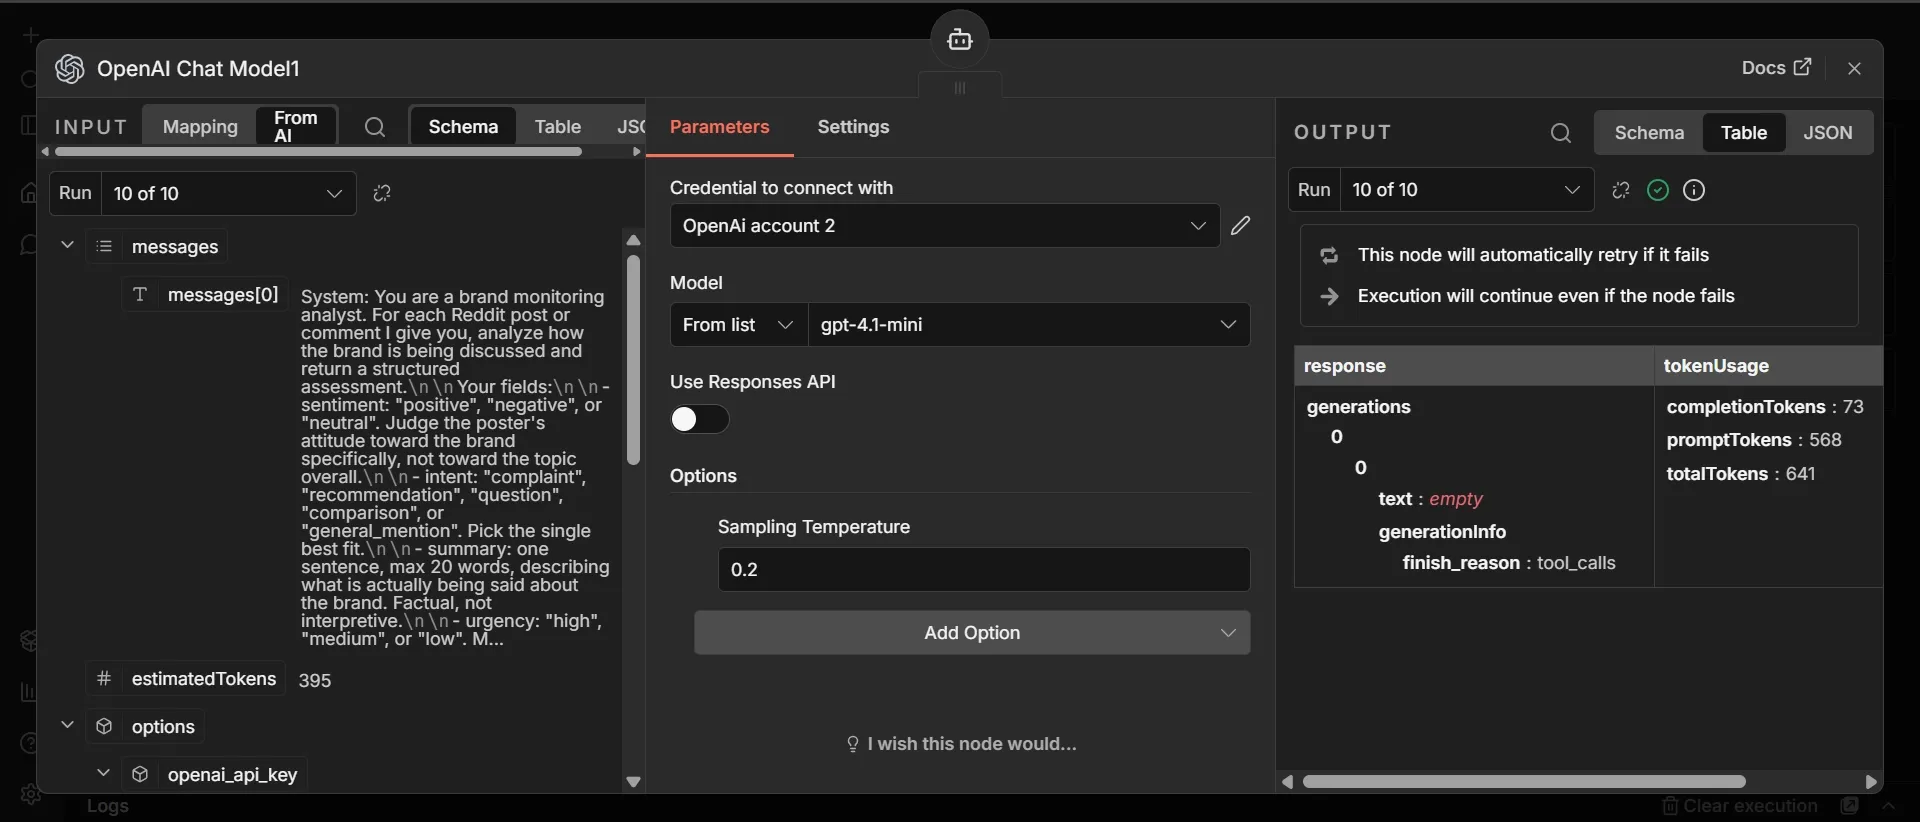
Step 7: Chat Model sub-node (OpenAI)
- Below the AI Agent, click the "Chat Model." sub-node.
- Search "OpenAI Chat Model" and add it.
- Your OpenAI credentials will automatically be updated, select gpt-4.1-mini as the model and toggle off “Use Responses API”.
- Under Options reduce “Sampling Temperature” to 0.2.
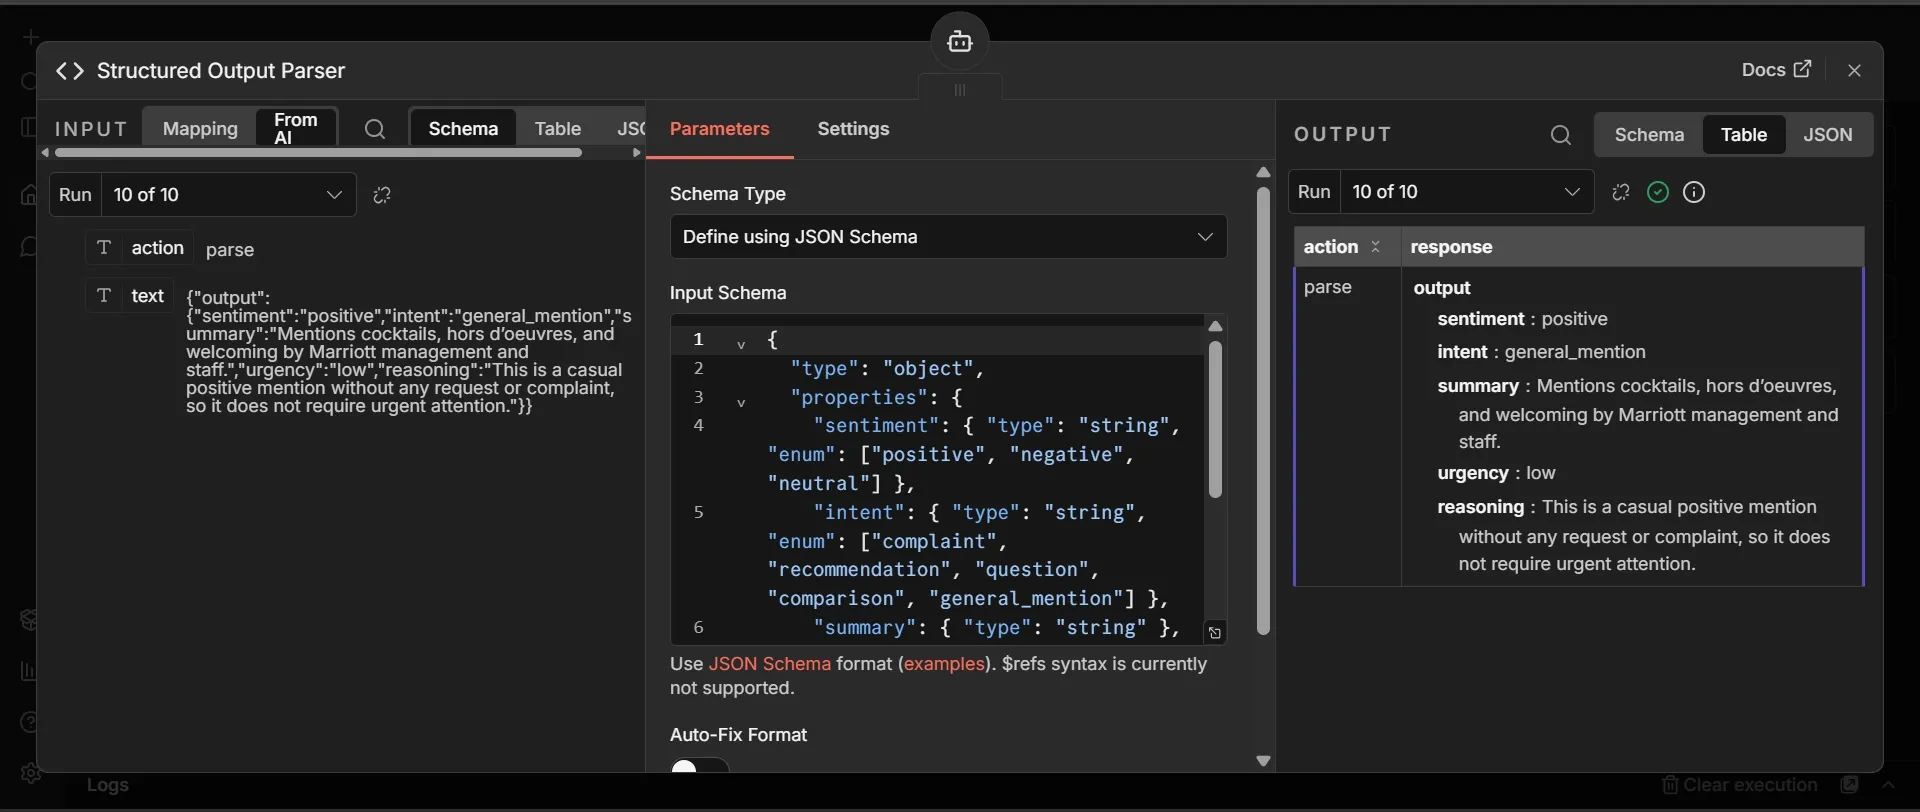
Step 8: Output Parser sub-node
The Output Parser forces the AI Agent's response into a strict, direct, response shape instead of free-form text that may sound like ‘guessing” instead of fact. This is the data that populates your Google sheet:
- Below the AI Agent, click the + under "Output Parser." Search "Structured Output Parser" and add it.
- Set Schema Type to "Define using JSON Schema" and paste this:
{
  "type": "object",
  "properties": {
    "sentiment": { "type": "string", "enum": ["positive", "negative", "neutral"] },
    "intent": { "type": "string", "enum": ["complaint", "recommendation", "question", "comparison", "general_mention"] },
    "summary": { "type": "string" },
    "urgency": { "type": "string", "enum": ["high", "medium", "low"] },
    "reasoning": { "type": "string" }
  },
  "required": ["sentiment", "intent", "summary", "urgency", "reasoning"]
}
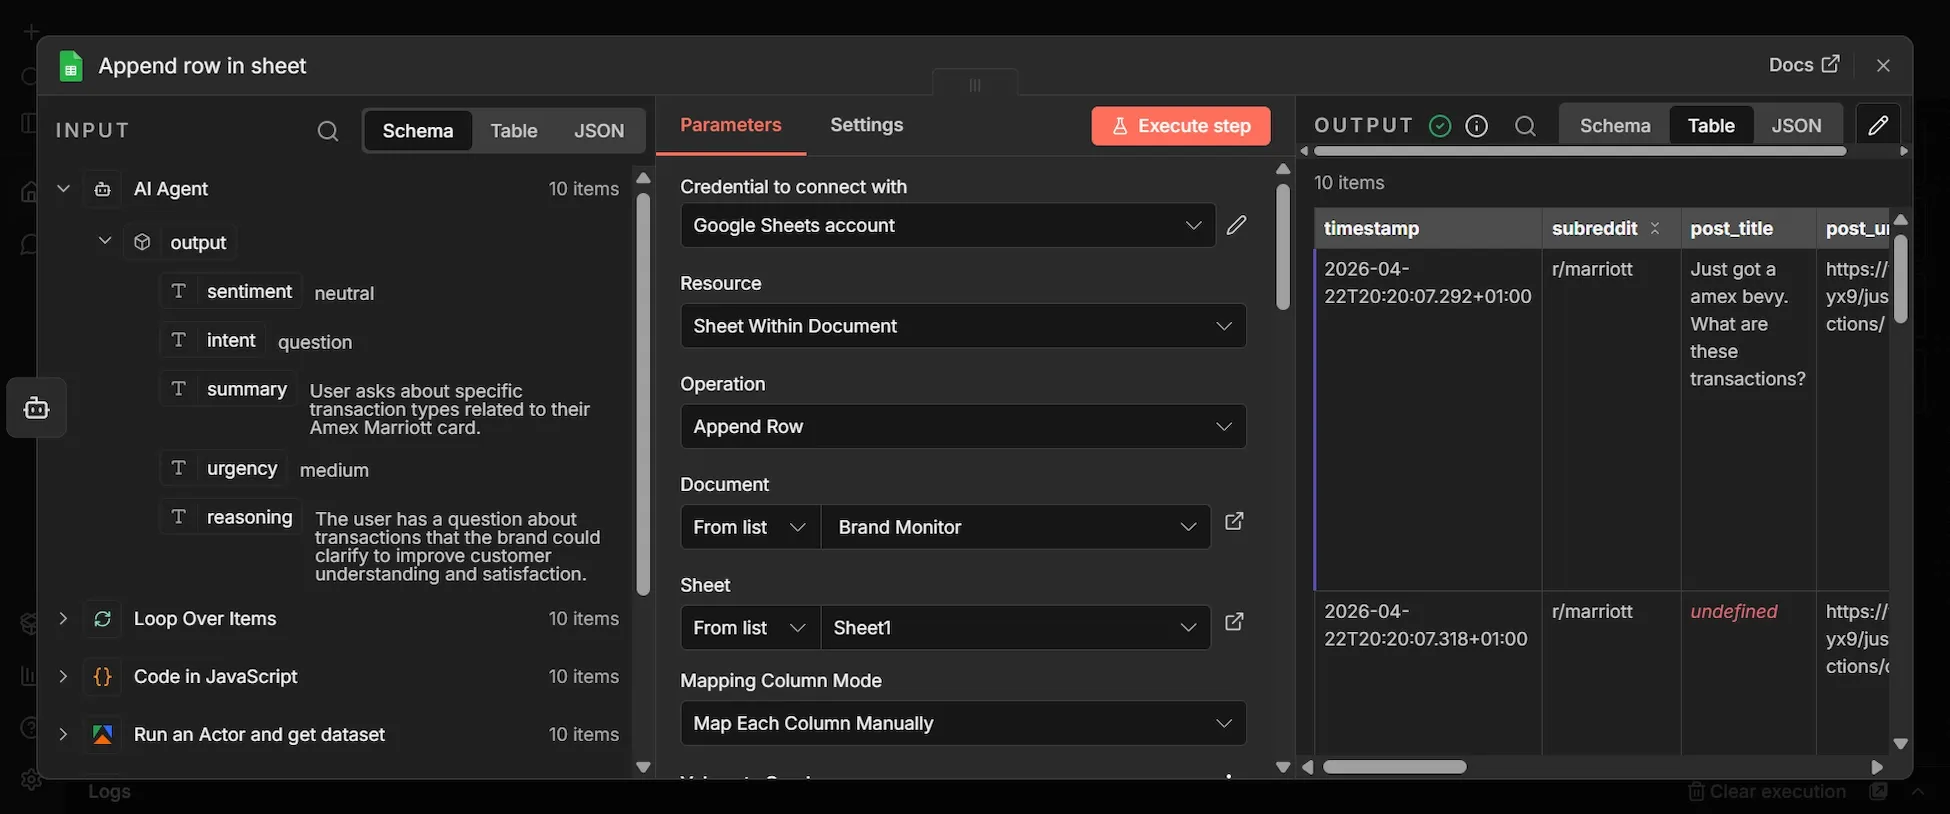
Step 9: Append Row (Google Sheets)
- From the AI Agent's output, click + and add a "Google Sheets" node.
- Choose Append row in sheet, select your file from the Document and Sheet dropdowns, and set Mapping Column Mode to Map Each Column Manually.
- Each of the 12 columns needs a specific expression. For each field, toggle it from
- Fixed to Expression mode and paste the exact code below:
| Column | Expression |
|---|---|
| timestamp | {{ $now.toISO() }} |
| subreddit | {{ $('Loop Over Items').item.json.communityName }} |
| post_title | {{ $('Loop Over Items').item.json.title }} |
| post_url | {{ $('Loop Over Items').item.json.url }} |
| author | {{ $('Loop Over Items').item.json.username }} |
| post_body | {{ $('Loop Over Items').item.json.body }} |
| sentiment | {{ $json.output.sentiment }} |
| intent | {{ $json.output.intent }} |
| summary | {{ $json.output.summary }} |
| urgency | {{ $json.output.urgency }} |
| reasoning | {{ $json.output.reasoning }} |
| post_id | {{ $('Loop Over Items').item.json.id }} |
- In the "Settings tab" of this node, enable Retry On Fail with Max Tries set to 3, and Wait Between Tries set to 5000ms.
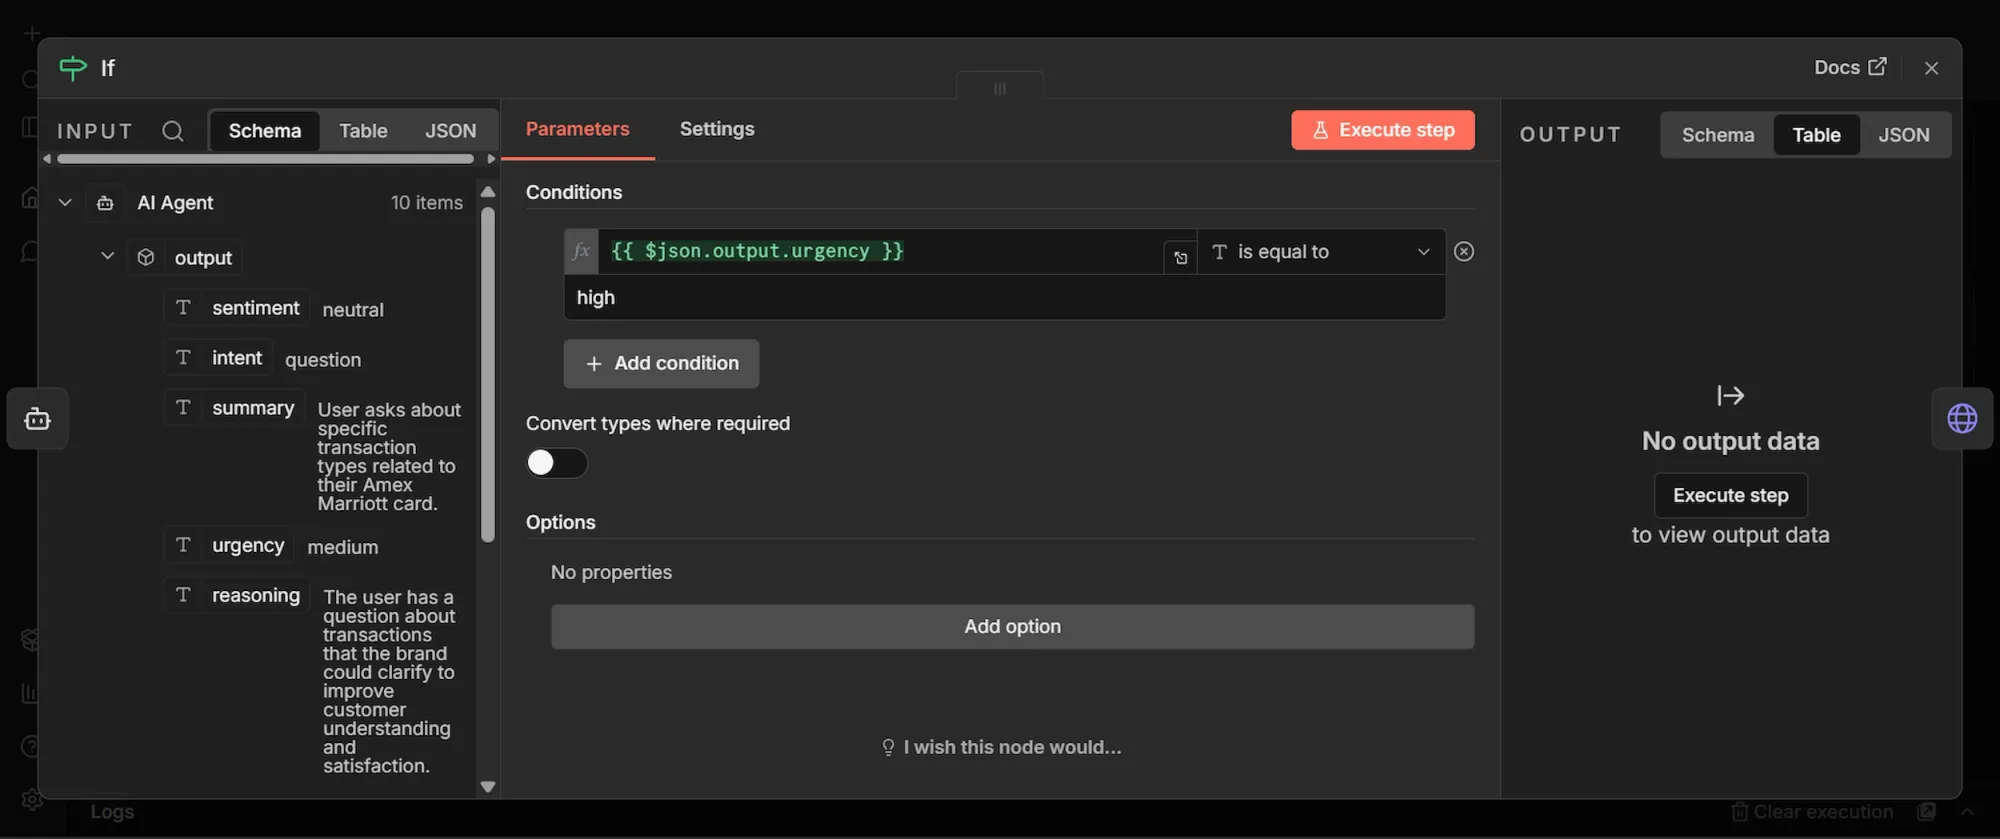
Step 10: IF node
Not every Reddit mention is worth sending an immediate alert, so the IF node checks the AI's urgency field and routes only the high-urgency ones to your Slack, while everything else still gets logged to Google Sheets for the record:
- From the AI Agent's output, add a second connection to an "IF" node.
- Configure the top left value as
{{ $json.output.urgency }}, Operator asString is equal to, and bottom right value ashigh.
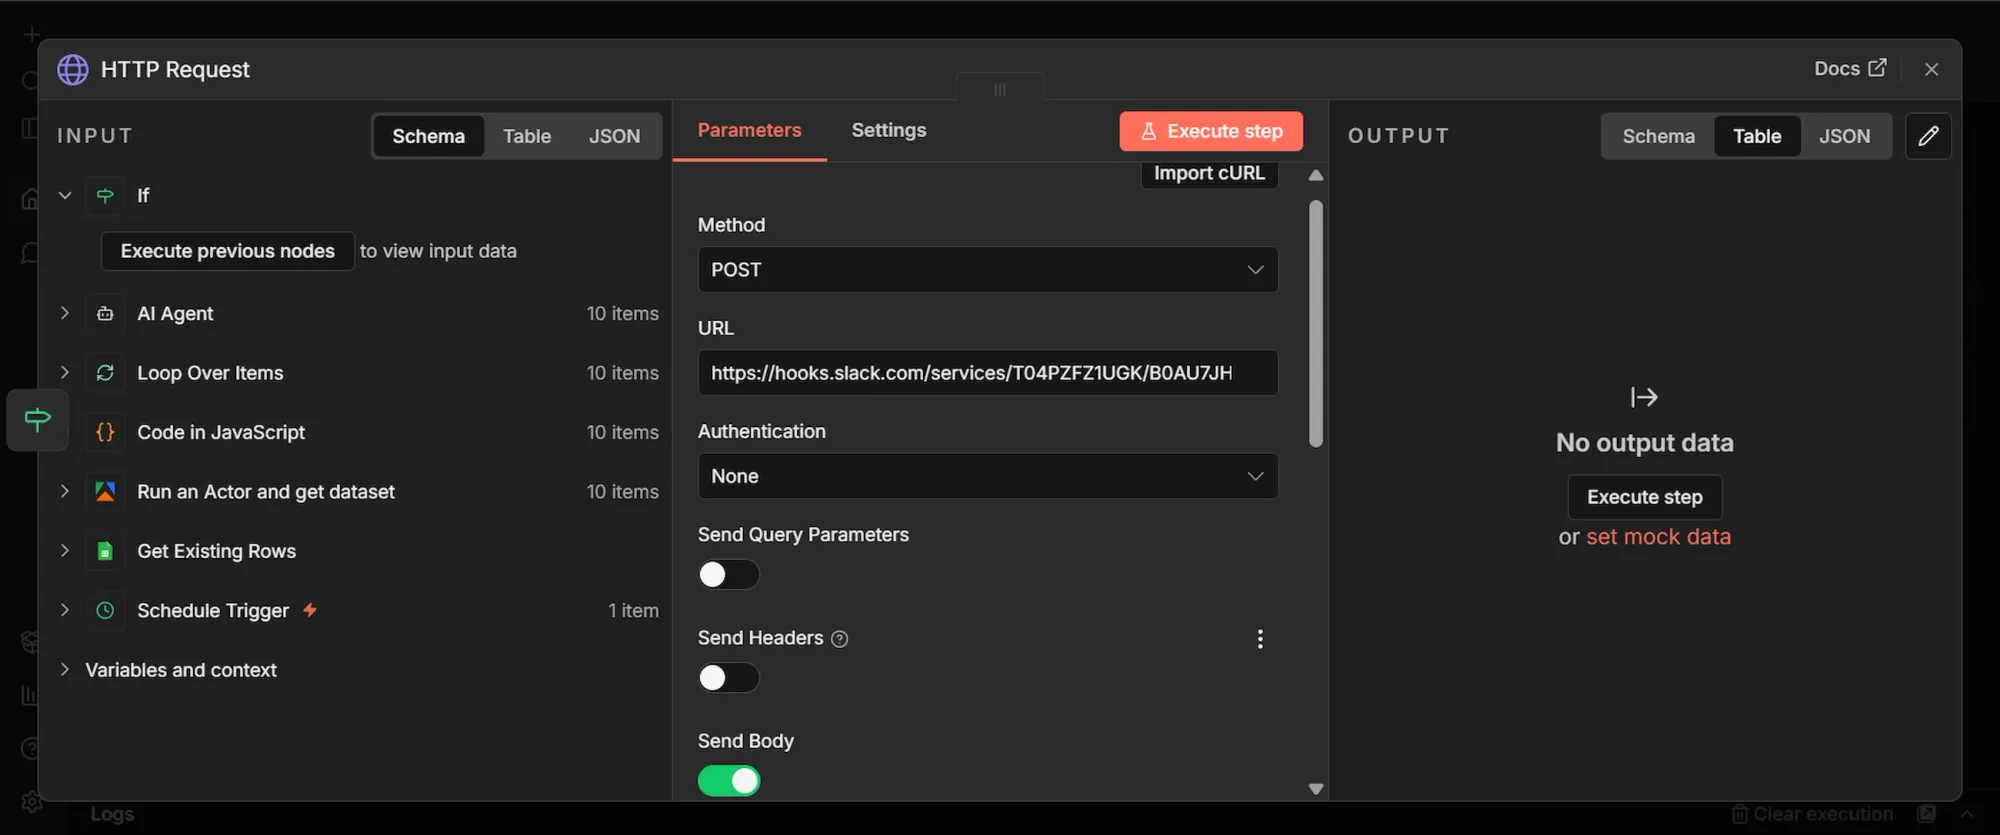
Step 11: HTTP Request (Slack) node
- From the IF node's output, click + and add an HTTP Request node.
- Set the Method to POST
- Paste your Slack webhook URL directly into the ‘URL” section
- Keep Authentication as None.
- Toggle “Send Body” ON, and “Body Content Type” to JSON
- In the JSON field, toggle to Expression mode and paste:
{
  "text": " !!! Brand mention flagged as HIGH urgency\\n\\nWhere: r/{{ $('Loop Over Items').item.json.communityName }}\\nTitle: {{ $('Loop Over Items').item.json.title }}\\nSummary: {{ $json.output.summary }}\\nWhy flagged: {{ $json.output.reasoning }}\\nLink: {{ $('Loop Over Items').item.json.url }}"
}
Phase 4: Execute, test, and publish
- Click "Execute Workflow" to run the sequence and watch the nodes turn green.
- Open your Google Sheet, and you should see 10 new rows, corresponding to the "maxItems" number you set in the Actor’s JSON.
- Once you confirm the data in all the rows, and can see all nodes appear green, it means the test is successful.
- You should notice the color around the Actor node spinning (means it’s preparing for the next scrape in 8 hours time).
- Click on “Publish” at the top right of the canvas to officially launch your workflow.

Workflow cost breakdown
Running this workflow every 8 hours at 10 items per run costs around $5 a month end to end. Apify alone costs $4.50 which falls completely within its $5 free monthly credit. OpenAI charges you directly but stays under fifty cents.
The only meaningful cost will be $4-6 spent keeping n8n running 24/7 via cloud hosting services.
| Service | Monthly cost | Notes |
|---|---|---|
| Apify Reddit Scraper Lite | ~$4.50 | ~$0.05 per 10-item run × 90 runs/month. Fully covered by Apify's $5 monthly free credit. |
| OpenAI (gpt-4.1-mini) | ~$0.11 | Billed directly by OpenAI. $0.000456 per mention analyzed (depending on the model). |
| n8n cloud hosting (VPS) | $4–6 | DigitalOcean ($4), Hetzner (~$5), or Railway/Render hobby tiers. |
| Google Sheets API | $0 | Within free tier. |
| Slack incoming webhook | $0 | Free. |
| Total | ~$11/month | VPS (virtual private server) hosting is the biggest cost. |
Apify
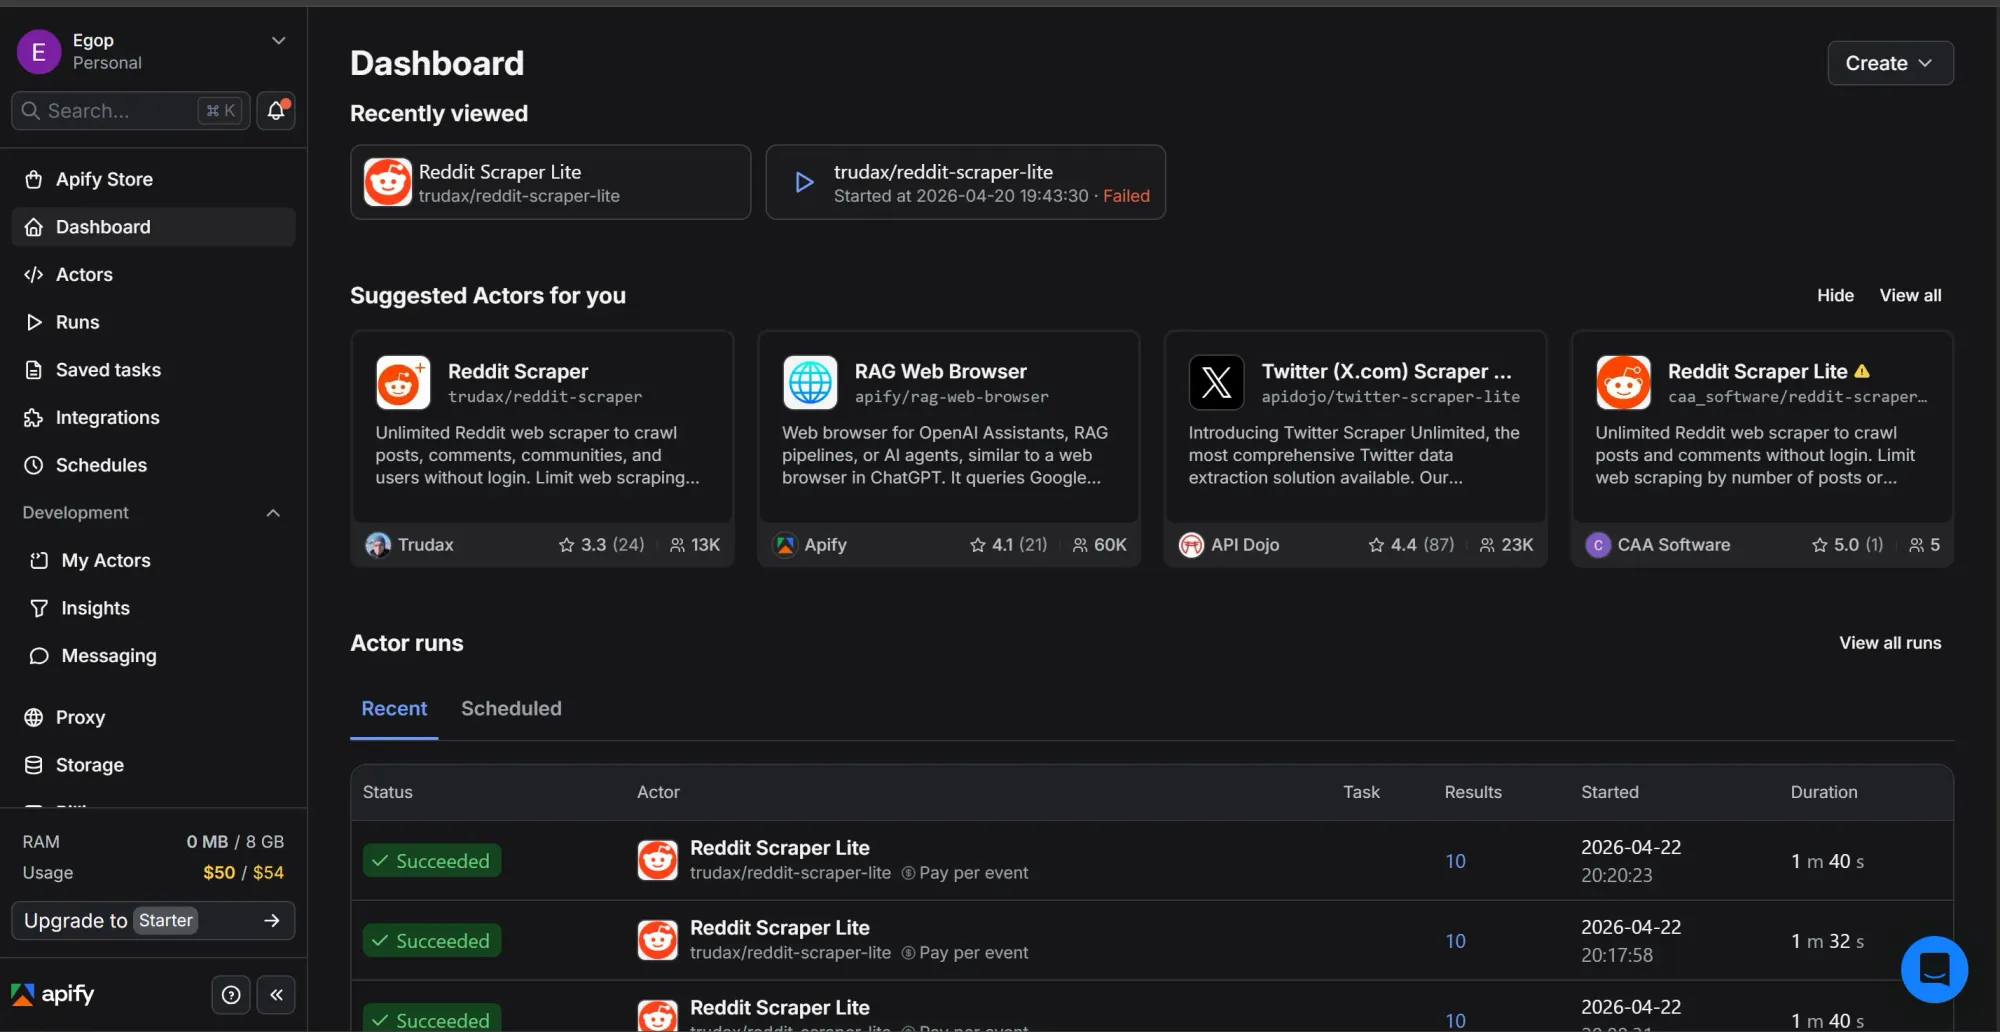
The Reddit Scraper Lite Actor uses pay-per-result pricing at $3.40 per 1,000 results, plus a small compute charge per run. In practice, most runs land between $0.04 and $0.05. Here's a slice of my actual run history during testing:
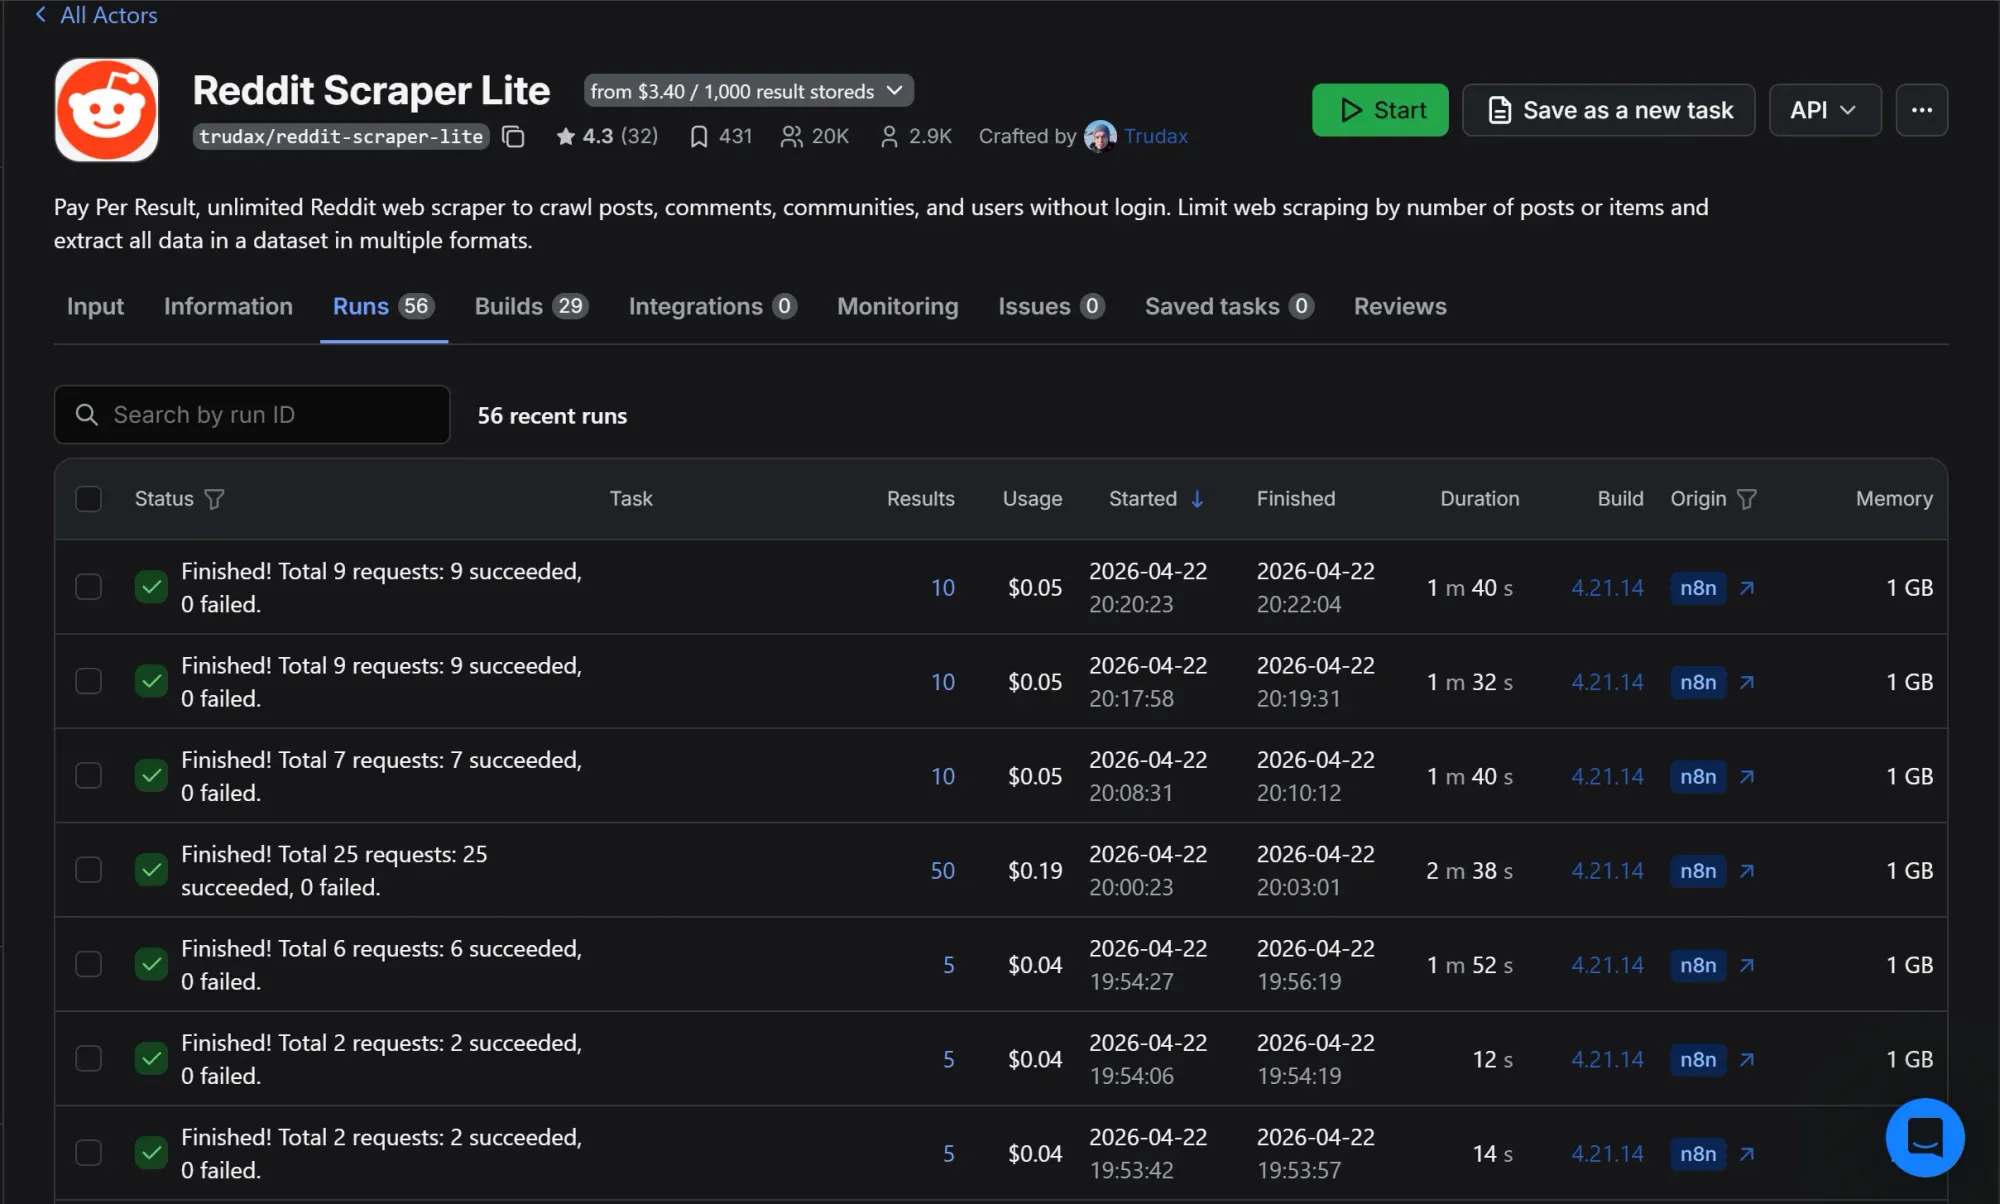
The pattern is consistent. Runs pulling 5 to 10 items cost $0.04 to $0.05 each. The single outlier at $0.19 was a test with maxItems set to 50.
Something to note about Apify’s free plan is once you hit the $5 free tier limit, your runs are blocked until the next billing cycle when it automatically renews. So, it might be best to upgrade your limit to prevent a break in transmission.
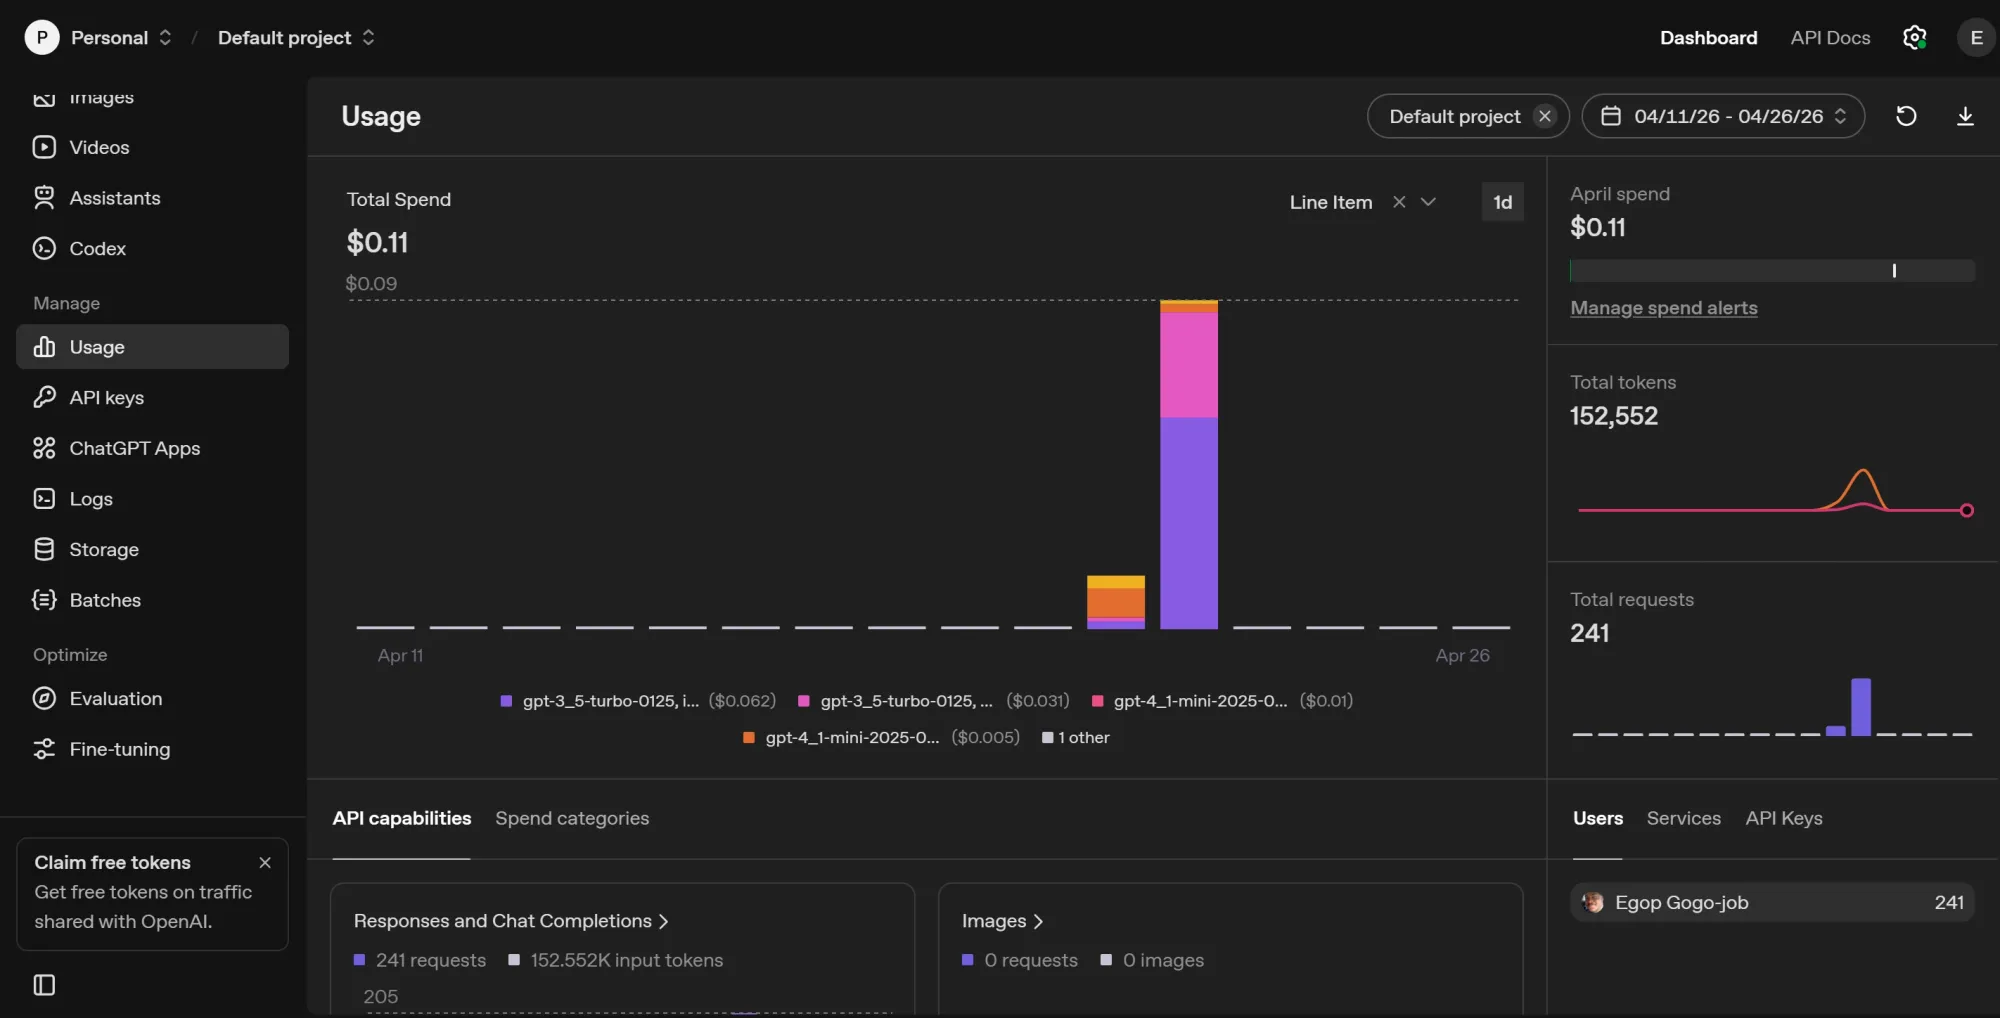
OpenAI
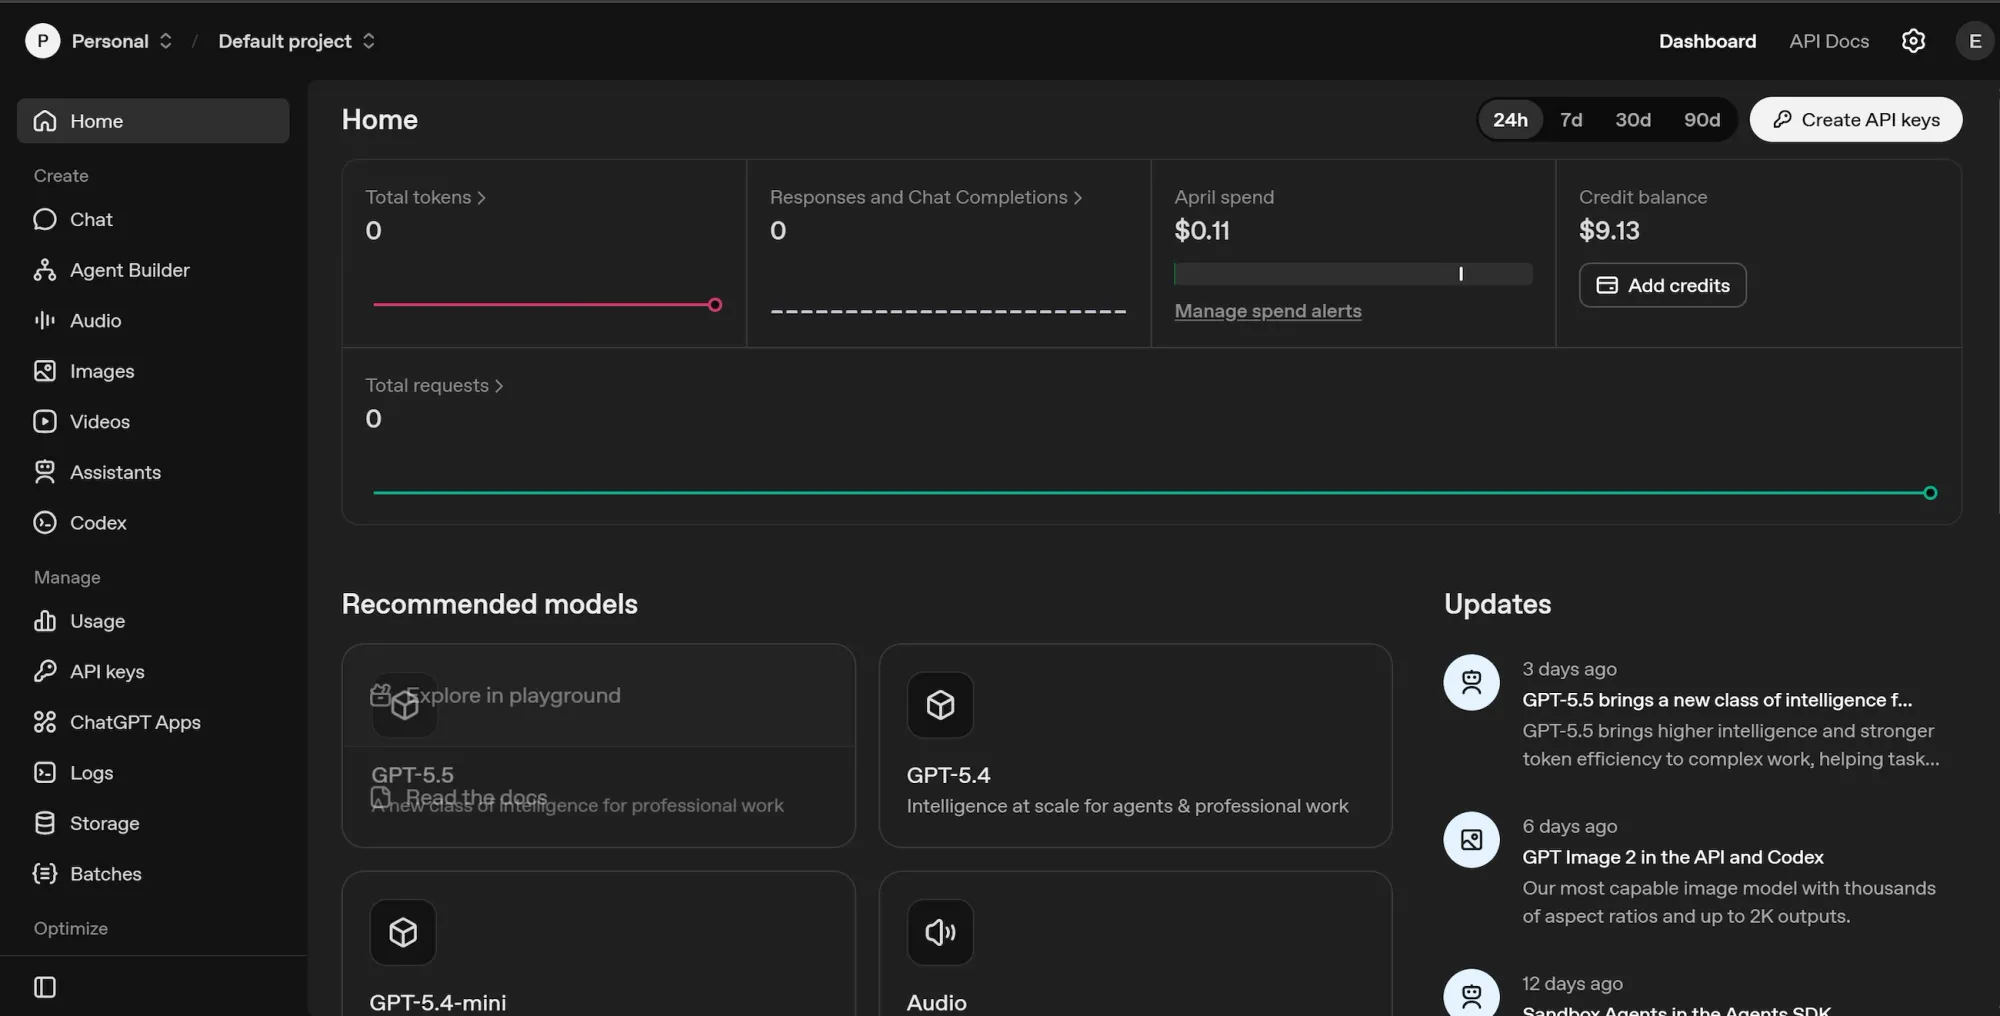
This is the cheapest layer in the stack partly because i used gpt-4.1-mini and gpt-3.5-turbo at temperature 0.2. A major reason why the cost is so low is due to the code node that filters out duplicate incoming data so it doesn’t have to burn tokens analyzing the same data recurrently. After 241 requests, my total OpenAI spend was $0.11:
Scaling costs
Hosting and Apify are the costs that grow with usage. OpenAI stays negligible until you're analyzing tens of thousands of mentions a month. Hosting only changes if you outgrow a small VPS, which won't happen for this workflow at any reasonable scale.
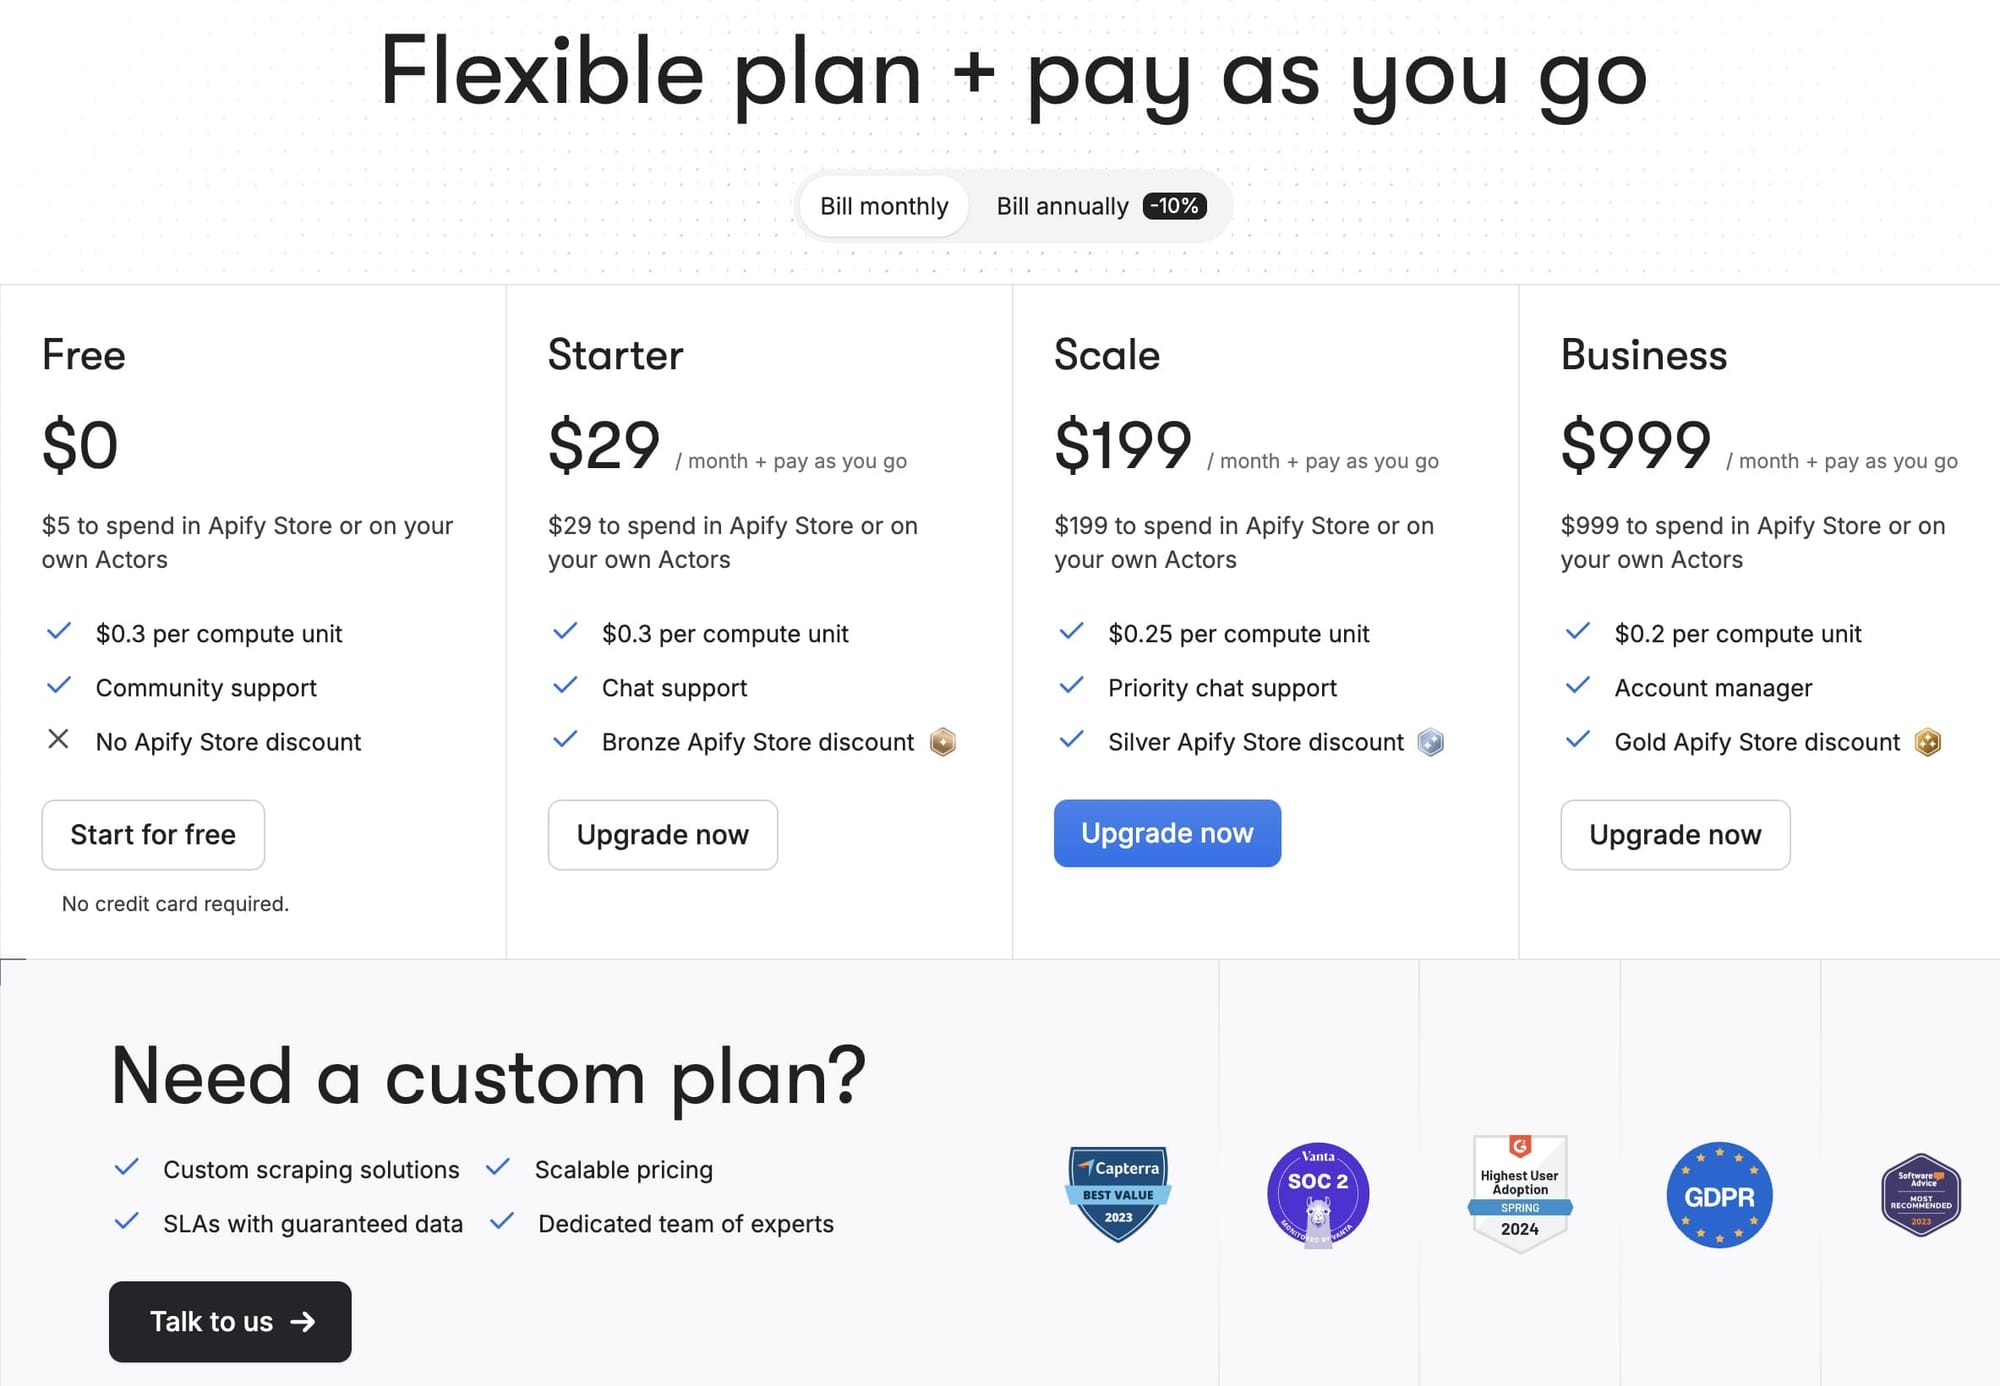
Once you cross the $5 monthly free credit on Apify, the next step up is the Starter plan at $29/month

Conclusion
Using the Marriott hotel as the brand keyword for this project was to create a template. Swap the subreddits in startUrls and the keywords in searches, and you have a Reddit brand monitoring tool ready for any niche.
To track other platforms, you can connect multiple Apify Actors for Google AI mode, ChatGPT, Perplexity, Twitter (X), Hacker News, or YouTube comments and route the output through the same AI Agent.
Sign up for a free Apify account and test the Reddit Scraper Lite Actor on your brand now.
Frequently asked questions
Why self-host n8n instead of using the cloud tier?
Self-hosting is free for unlimited workflows and gives you full control over your data. The trade-off is the $4 to $6 a month VPS bill and the operational responsibility of keeping the container running.
Why not scrape using Reddit's official API?
Reddit's API works for small-scale tracking but has strict rate limits and requires you to handle authentication and pagination yourself. Apify Actors instead give you clean structured data on the first run, which matters when you're wiring it into n8n.
Is it legal to scrape Reddit?
Scraping publicly visible Reddit data is generally permitted under the precedent set by hiQ Labs, Inc. v. LinkedIn Corp., which established that scraping public info does not violate federal hacking laws. For more on the subject, check out this primer about the legality of web scraping.