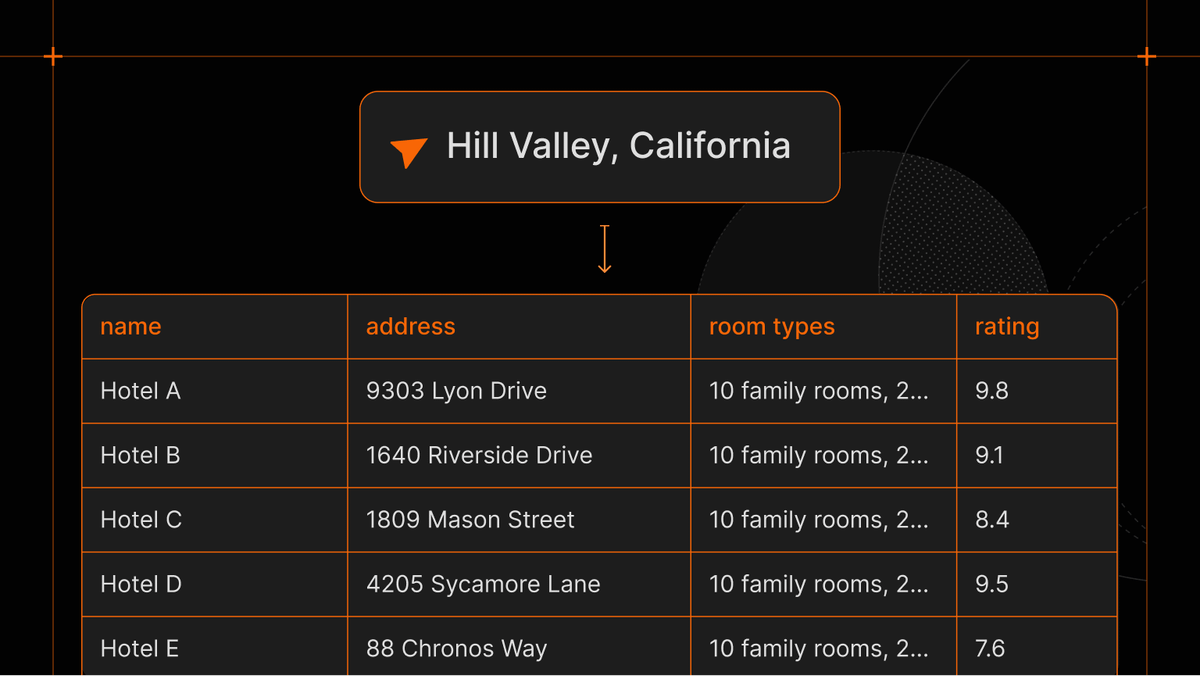
Google Flights might be the most popular flight aggregator, but it doesn't always guarantee the best deals. In this tutorial, you’ll build an automated flight price tracker using Apify, n8n, and Telegram.
It will source data from seven flight aggregators (including global sources like Google Flights and Kiwi), return the lowest fares for your chosen routes, organize the data into a Google Sheet, and notify you of price drops via Telegram.
Overview of the flight price tracker workflow on n8n
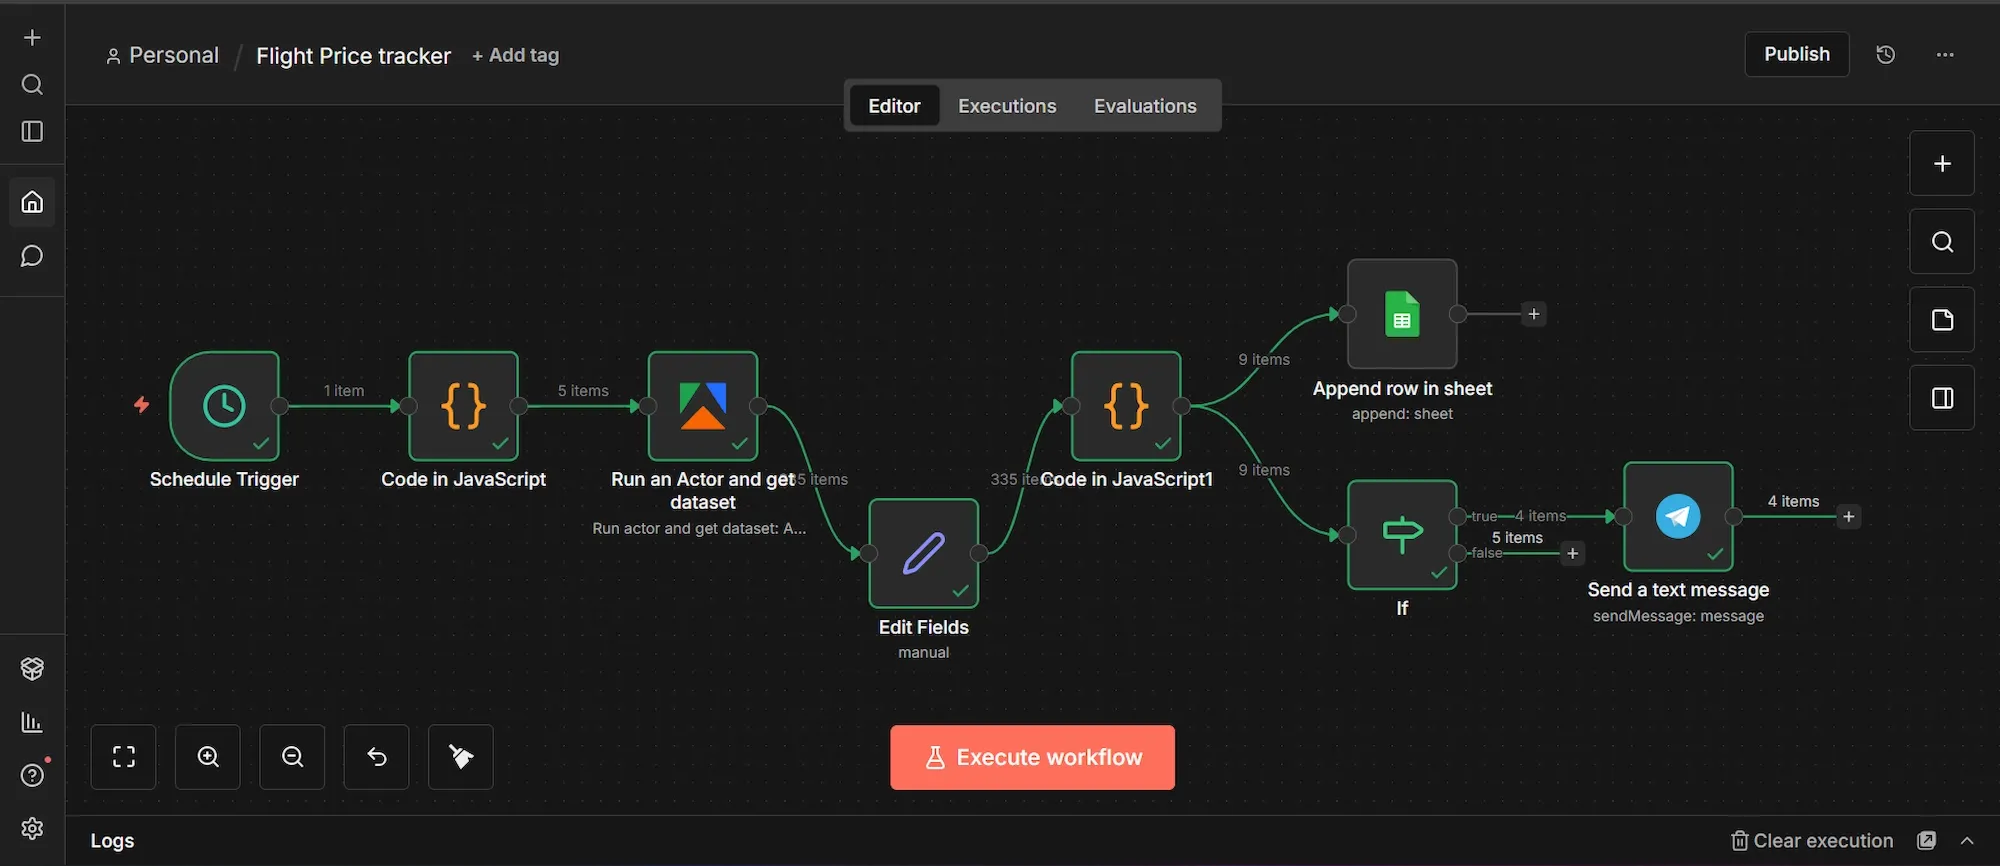
Triggered on a schedule, this workflow uses the Skyscanner Flight Scraper API Actor to scrape flight data based on custom JavaScript parameters. After filtering and formatting the extracted dataset, the flight details are appended directly into a Google Sheet for tracking.
Simultaneously, the conditional (IF) logic node evaluates incoming data against custom thresholds, such as a specific price drop percentage or range, and instantly sends a Telegram alert whenever those conditions are met.
Prerequisites
- Apify account.
- Self-hosted n8n instance via Docker (skip if you prefer n8n’s cloud tier).
- Google account for Sheets.
- A Telegram account or any notification option of your choice (email, Discord, Slack, etc.)
Phase 1: Accounts setup
Below you’ll find detailed instructions for setting up the prerequisite accounts and accessing API keys:
Step 1: Grab your Apify API token
- Sign up at apify.com if you don't already have an account.
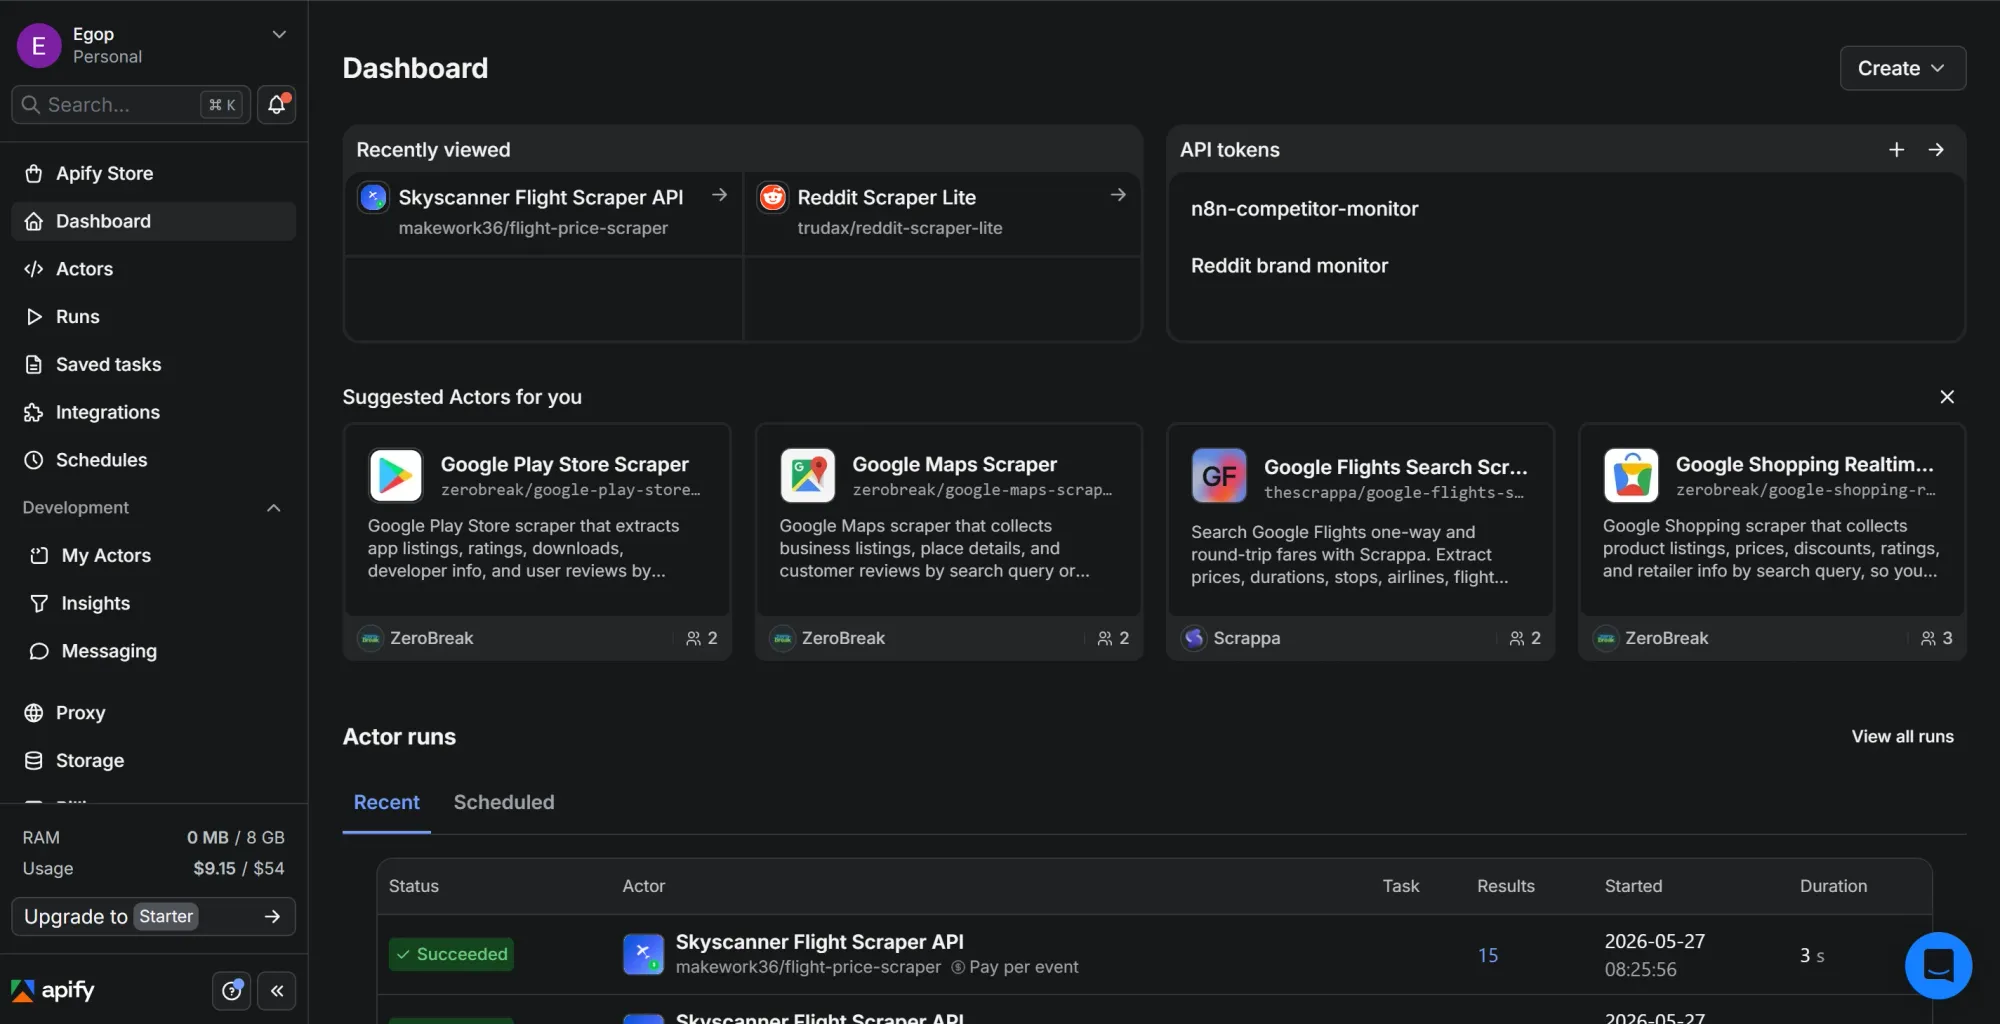
- Go to Apify Console.
- On the left-hand sidebar menu, click on Settings, then navigate to the API & Integrations tab.
- Under "Personal API tokens," copy your default token or click "Add new token" to create a new one, then give it a name.
- Click the copy icon to copy the token and save it somewhere temporary
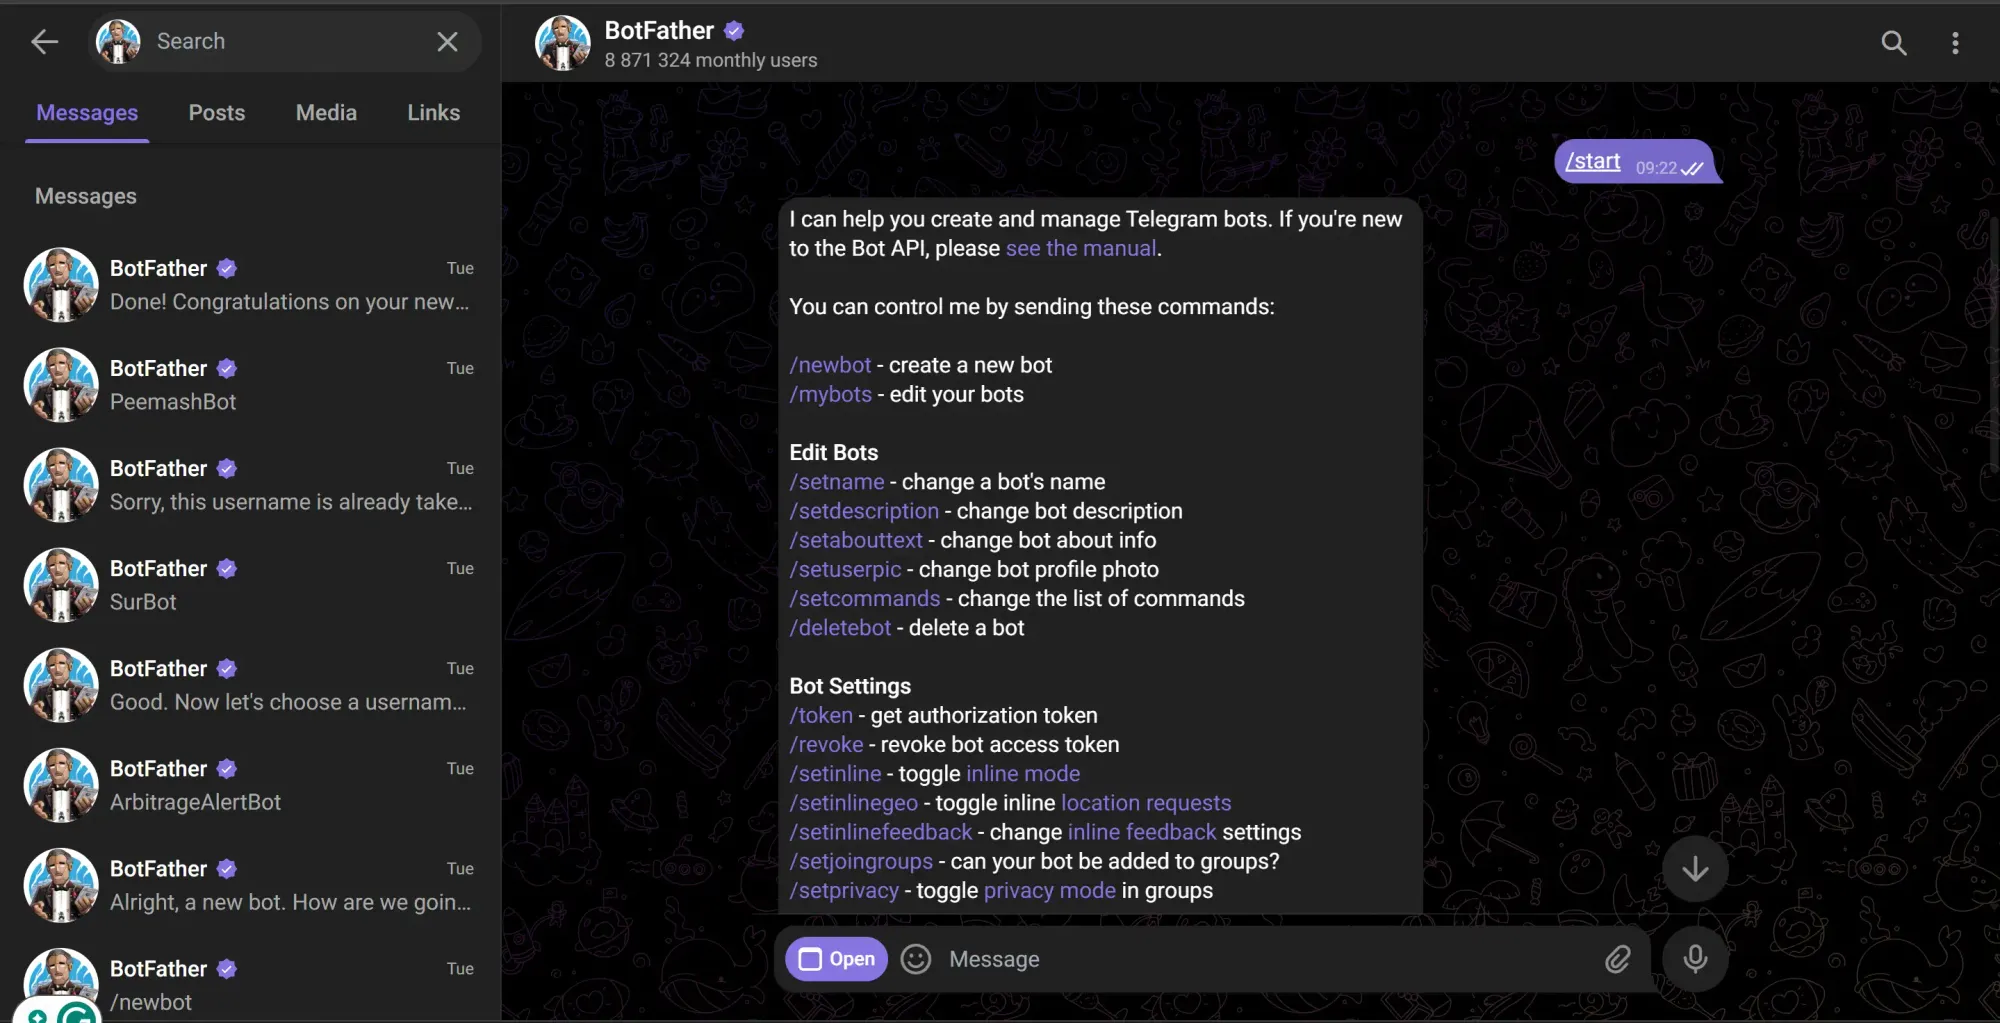
Step 2: Set up Telegram Messenger
- Search Telegram for the official @BotFather (with the blue checkmark) and type in
/newbotcommand to create your bot and follow further process instructions. - Copy your Bot Token that BotFather returns; you will need this to authenticate your n8n Telegram credential.
- Create a new Telegram group, add your bot, and immediately promote it to Administrator in the group settings so Telegram's privacy mode doesn't block it from reading messages.
- Type a quick test command like
/startinto your new group chat and hit send. - Open your web browser and navigate to
https://api.telegram.org/bot<YOUR_TOKEN>/getUpdates, ensuring the wordbotis attached directly to the front of your token with no spaces. - Locate the
"chat"object in the resulting text, find the"id", and copy that exact negative number; you’ll need it to configure your Telegram node on n8n.
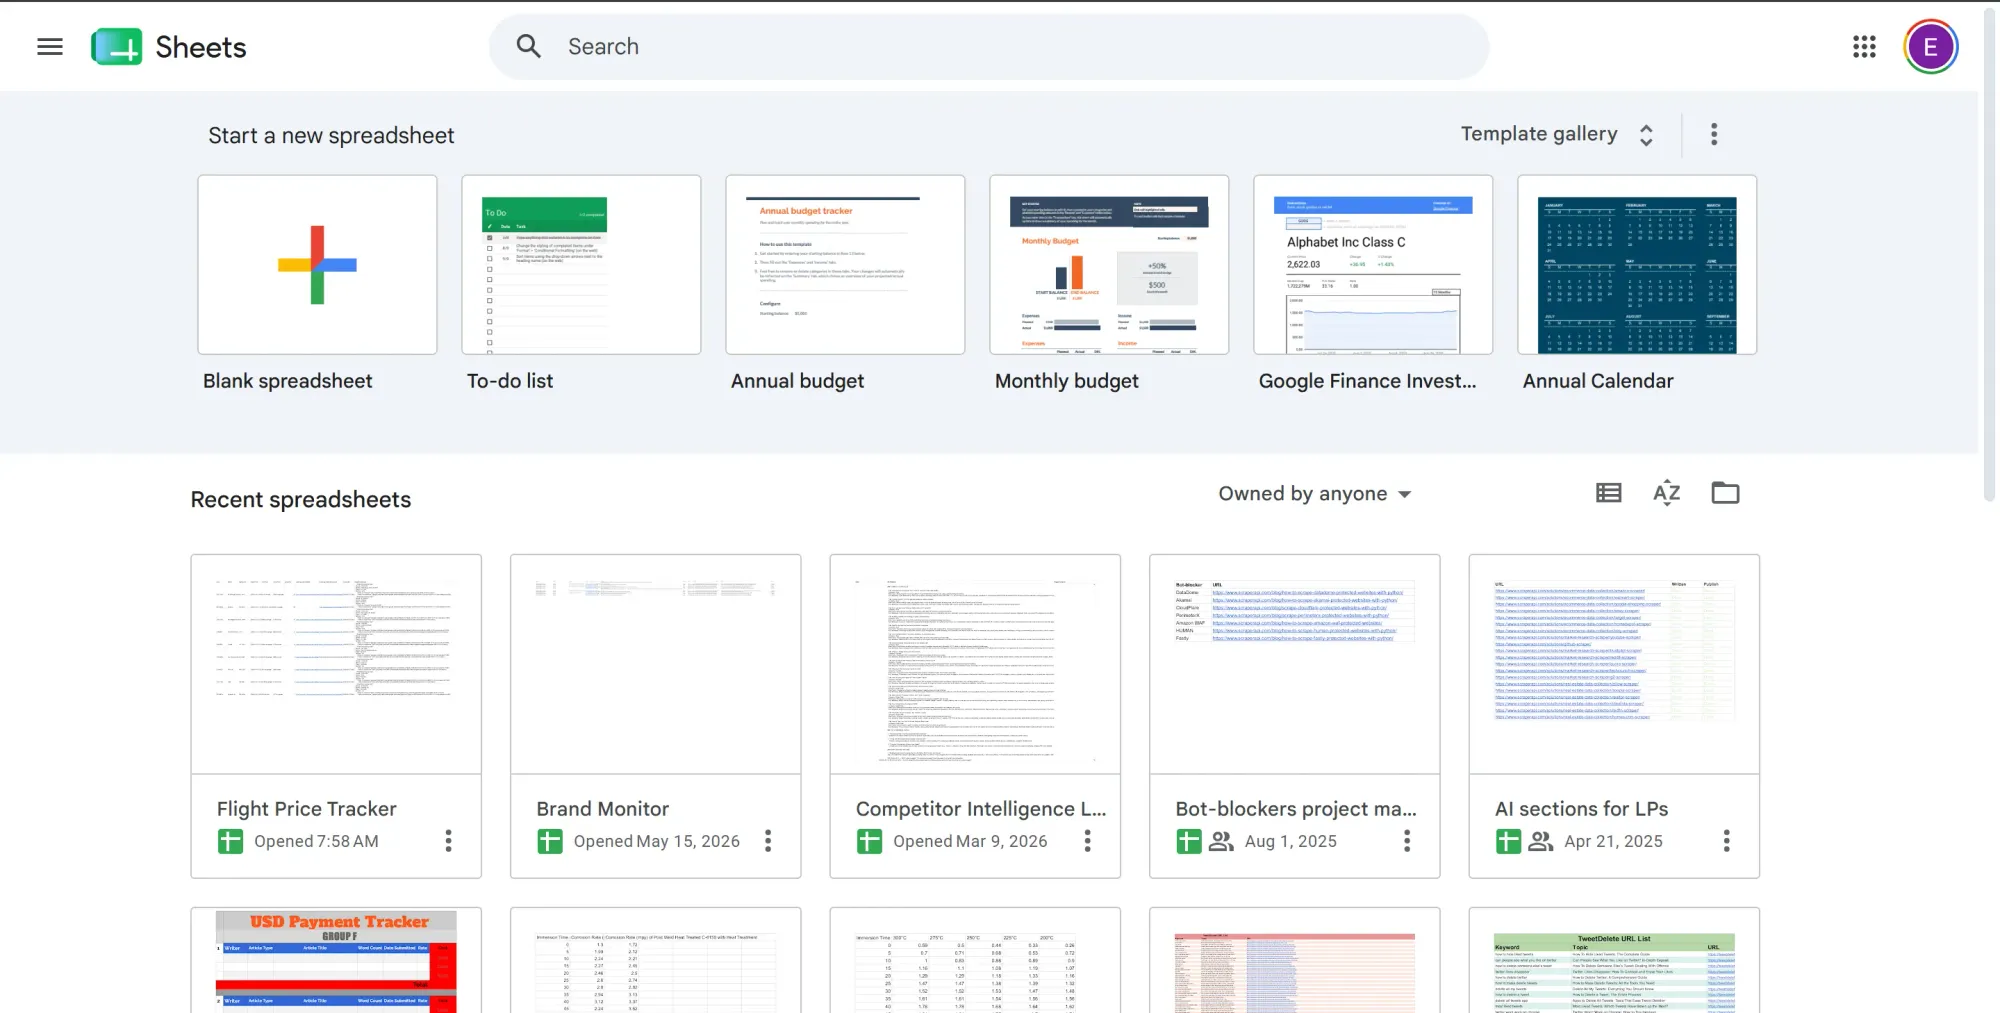
Step 3: Prepare the Google Sheet
- Go to https://sheets.google.com/ and create a new blank spreadsheet.
- Create and name a document (you’ll search for this exact name in n8n later).
- Inside the first row in your sheet, add these 11 column headers, one per column from A to K:
route,airline,flightCode,departTime,bestPrice,worstPrice,spreadPct,bookingLinkCheapest,bookingLinkMostExpensive,scrapedAt,telegramMessage - Save it.
Step 4: Create Google Cloud OAuth credentials for Sheets
Using Google Sheets on a self-hosted n8n instance requires a Google Cloud OAuth app; you need one for Google to allow you to send data to a Google Sheets account from external sources. Here’s how to configure it:
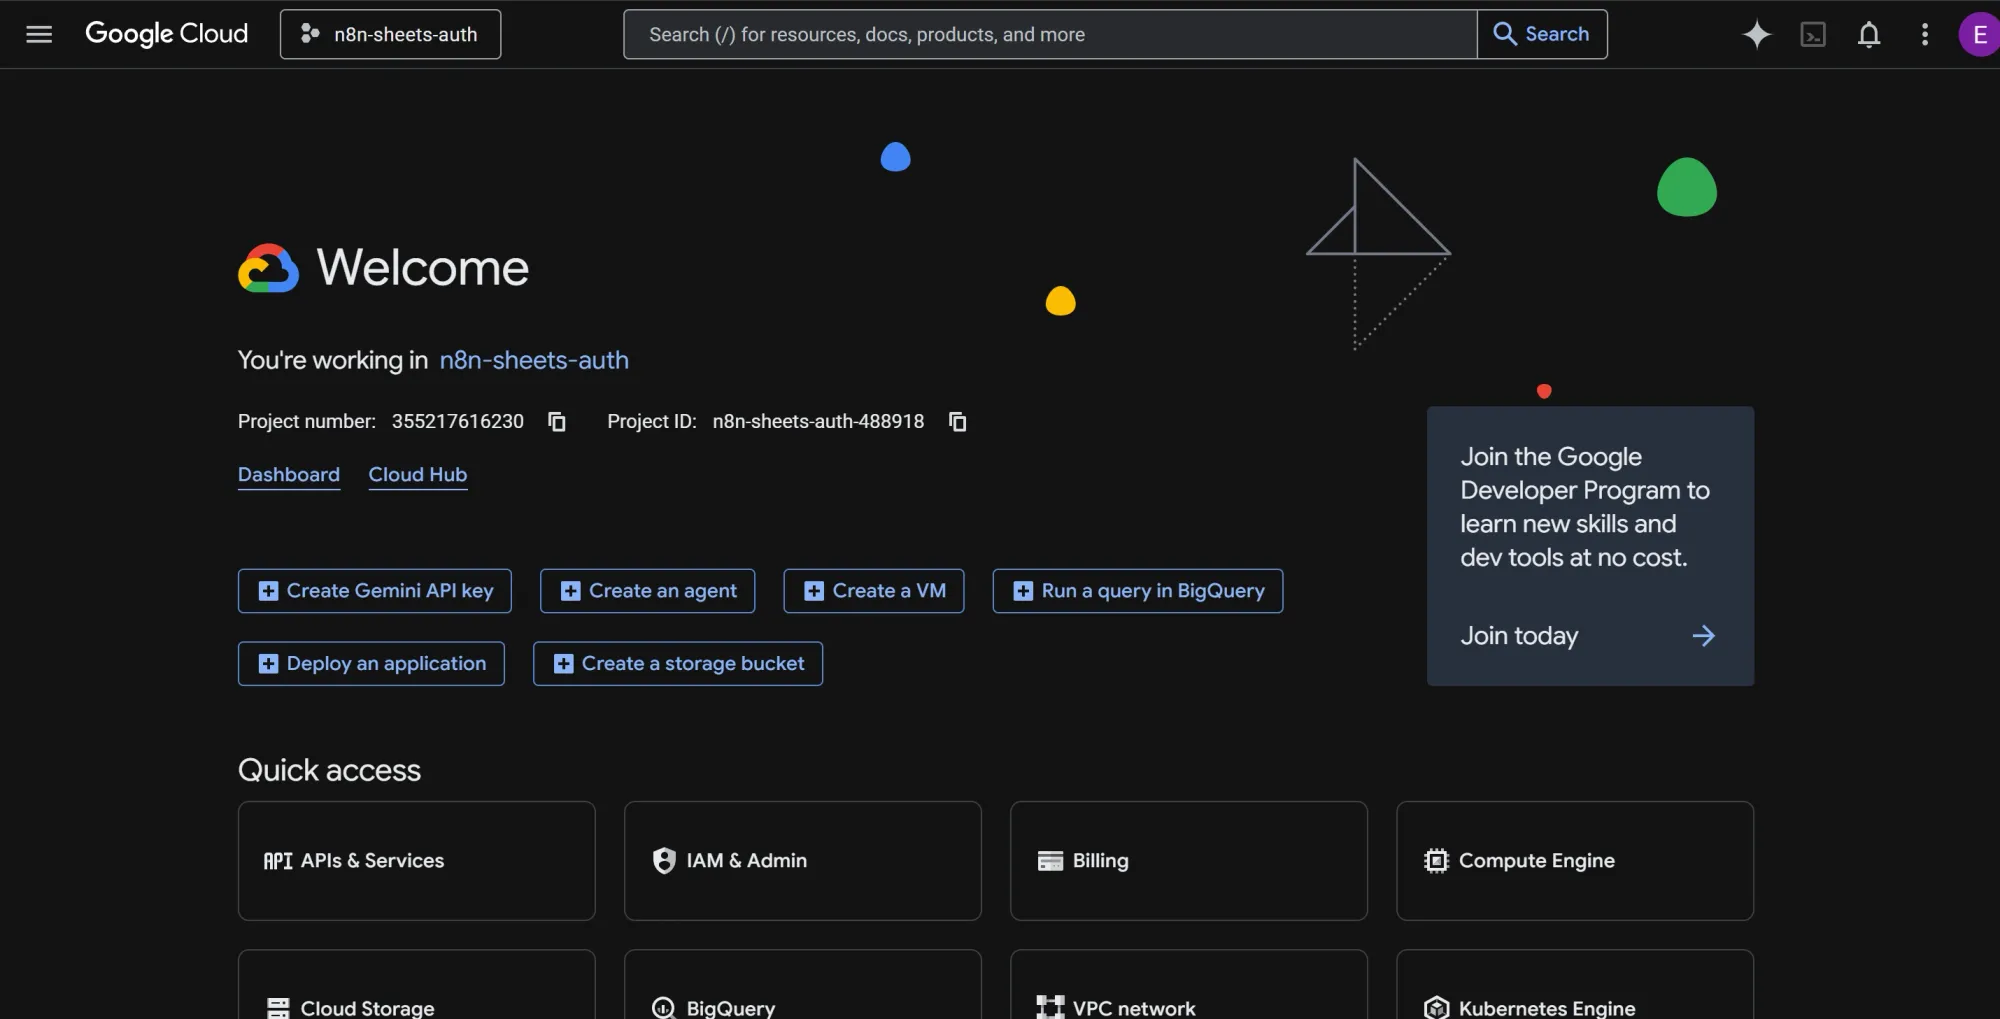
- Go to https://console.cloud.google.com/
- Create a new project, maybe call it
n8n-sheets-auth. - In the project's top search bar, find and enable two specific APIs: "Google Sheets API" and "Google Drive API."
- On the left sidebar, go to APIs & Services → OAuth consent screen. Choose "External" and click Create.
- Fill in the app name (e.g., "n8n Flight Tracker"), your email as the support email, and your email again for the developer contact.
- Click "Save and Continue" through the remaining screens without making any changes.
- On the Test users page, click "Add Users" and explicitly add your own Google email address.
- Go back to the left sidebar and click APIs & Services → Credentials.
- Click "Create Credentials" at the top → "OAuth client ID."
- Choose "Web application" from the dropdown and name it "n8n Sheets client."
- Under "Authorized redirect URIs," you'll add a specific URL in a moment, so leave this browser tab open for now.
Phase 2: Install and set up n8n
Self-hosting n8n lets you build and run unlimited workflows for free, with full control over your data privacy. But, if you don’t want to manage your own infrastructure, the n8n cloud tier works fine.
Step 1: Install Docker Desktop
- Download and install Docker Desktop for your OS.
- Confirm it's running by opening your terminal and running:
docker --version
- You should see a version number. If you see "command not found," Docker isn't in your PATH yet, so restart your terminal or reboot.
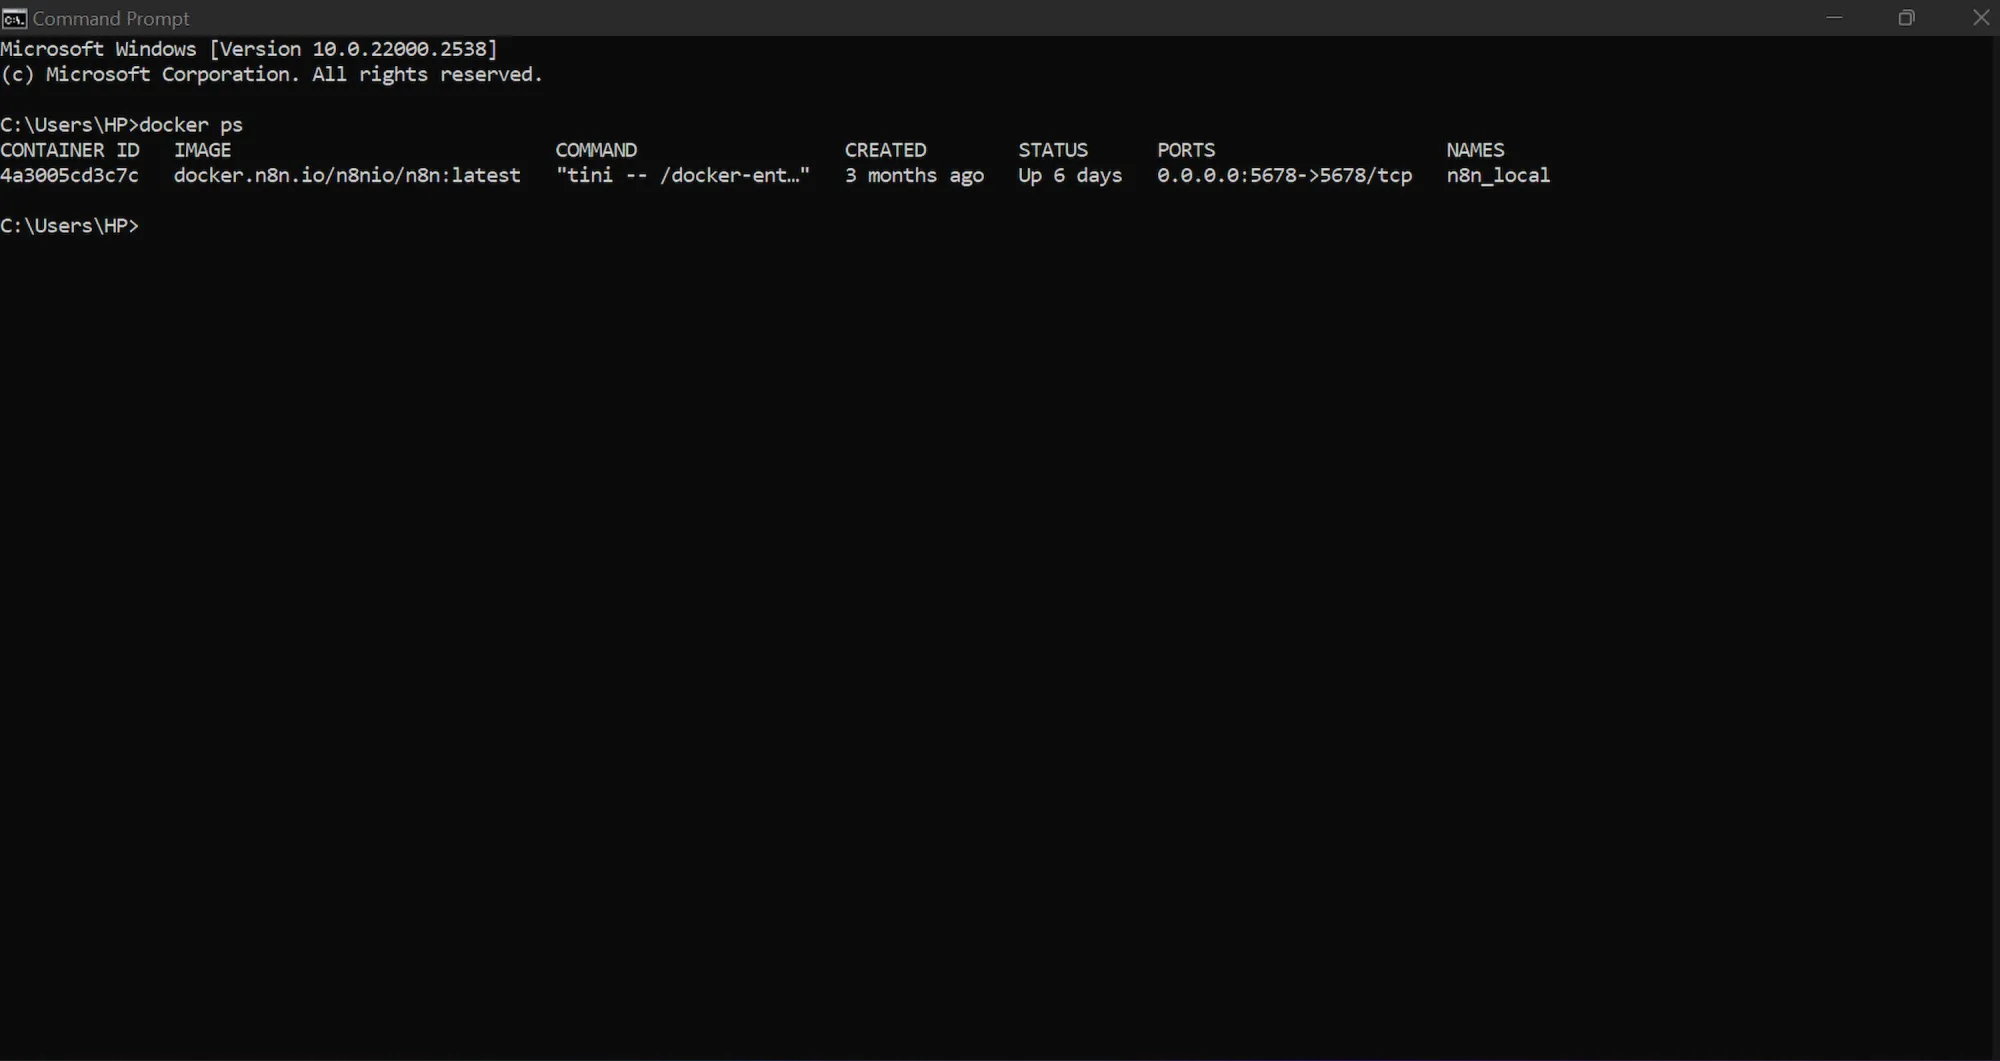
- Afterward, confirm the engine is running by typing:
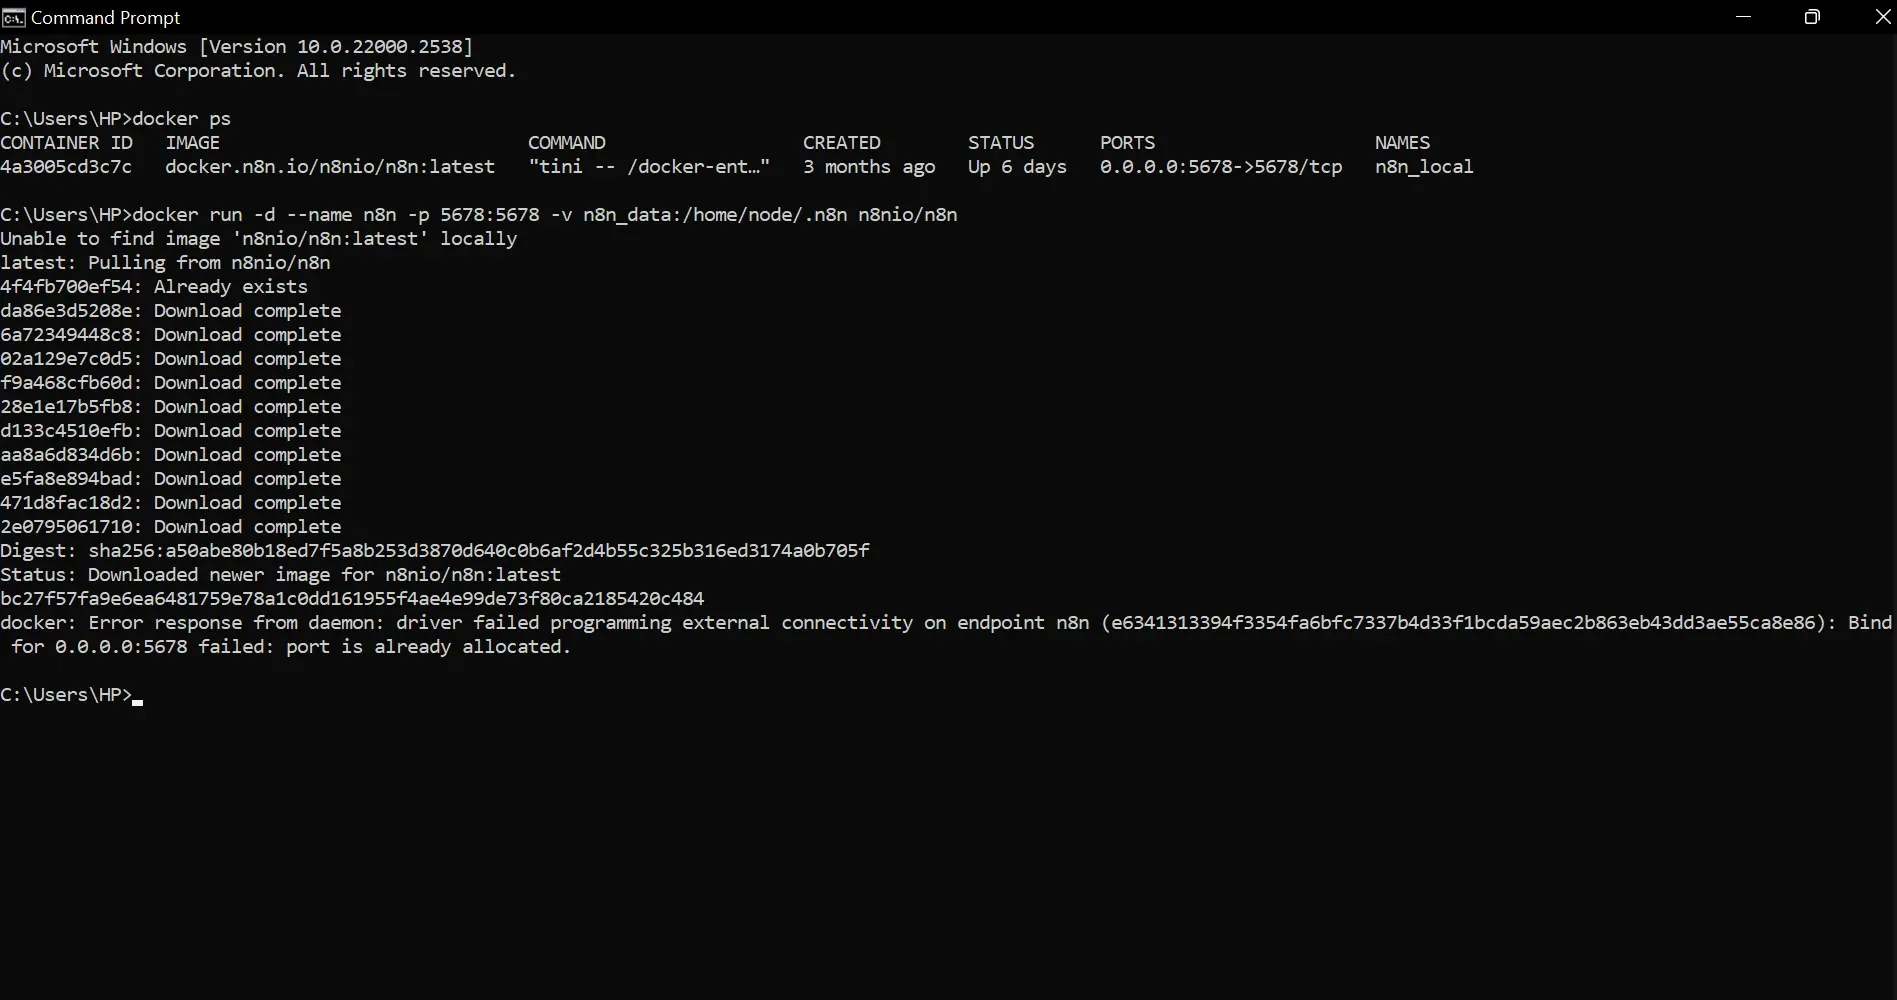
docker ps
Step 2: Run n8n in Docker
- Open your terminal.
- Run the command below to pull and start n8n:
docker run -d --name n8n -p 5678:5678 -v n8n_data:/home/node/.n8n n8nio/n8n
- The first time you run this command, Docker will pause to pull the official n8n image from the internet. After downloading, it will assign and print your Container ID.
- Open a browser and go to
http://localhost:5678. - You'll see n8n's initial setup screen. Create an owner account with your email and a password.
Step 3: Install the Apify community node
n8n doesn't feature the Apify node natively. You’ll need to install it as an official community node before you can use it. Here’s how to do that:
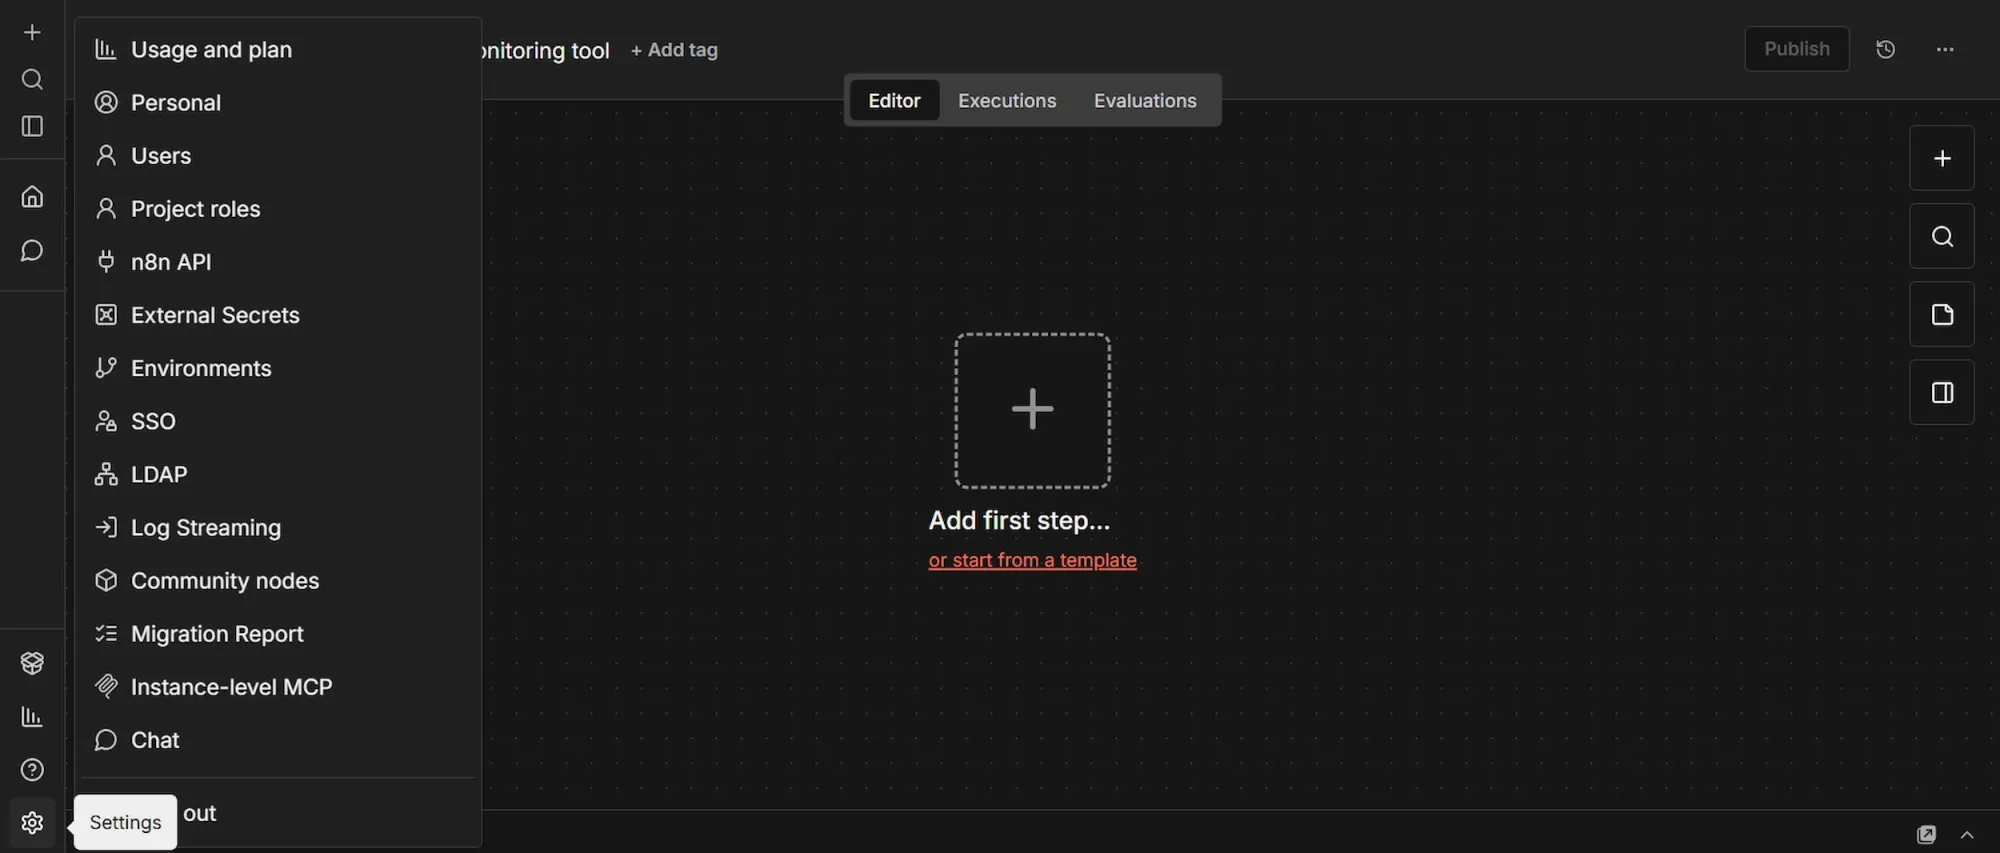
- In your n8n workspace, at the bottom of the left sidebar, click Settings, then navigate to Community Nodes and click “Install”.
- In the npm package field, paste exactly this:
@apify/n8n-nodes-apify - Check the risk acknowledgment box and click Install.
Step 4: Complete the Google OAuth redirect URI
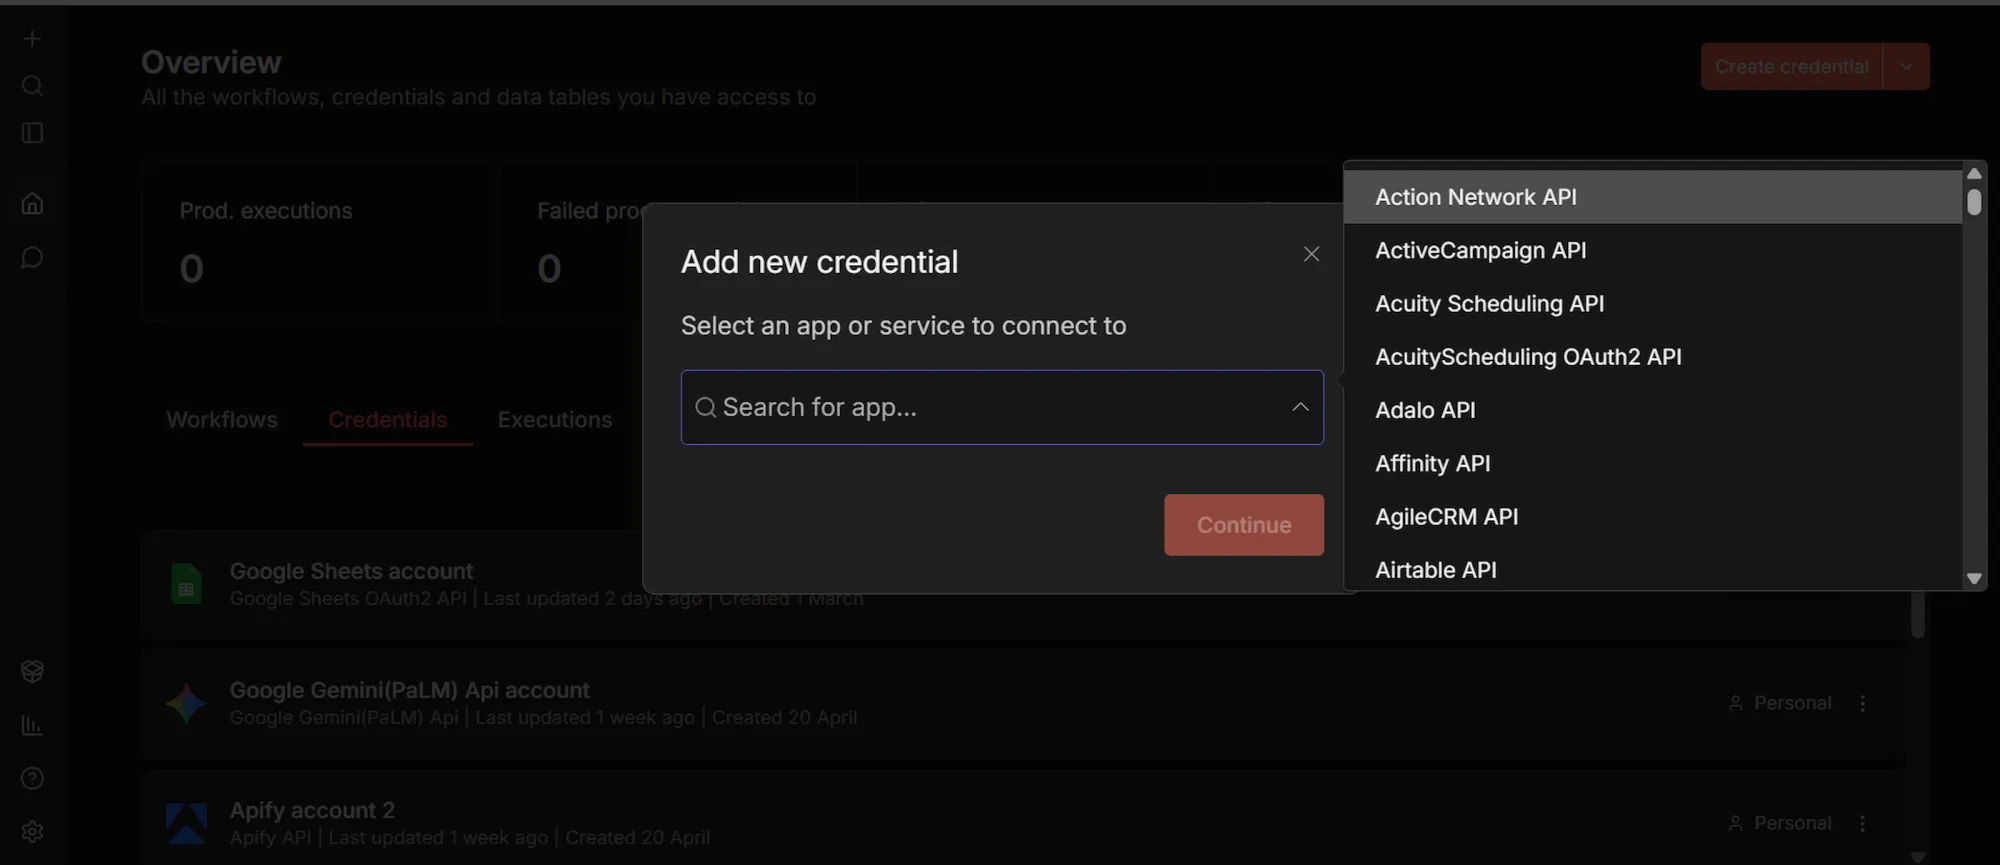
- Click the small + icon at the top-left sidebar, select Credentials → Add Credential and search for "Google Sheets OAuth2 API".
- In the credential setup window, n8n will display your unique OAuth Redirect URL; copy it.
- Go back to the Google Cloud tab you left open in phase 1.
- Under "Authorized redirect URIs," click "Add URI" and paste that exact string.
- Click Create.
- A pop-up will appear containing your Client ID and Client Secret. Copy both of these immediately.
- Finally, go back to your n8n tab, paste the Client ID and Client Secret into the credential window, and click "Sign in with Google" to finish the setup.
Phase 3: Building the flight price tracker workflow
Step 1: Schedule Trigger node
- Click the + icon (Add first step…) to add the first node.
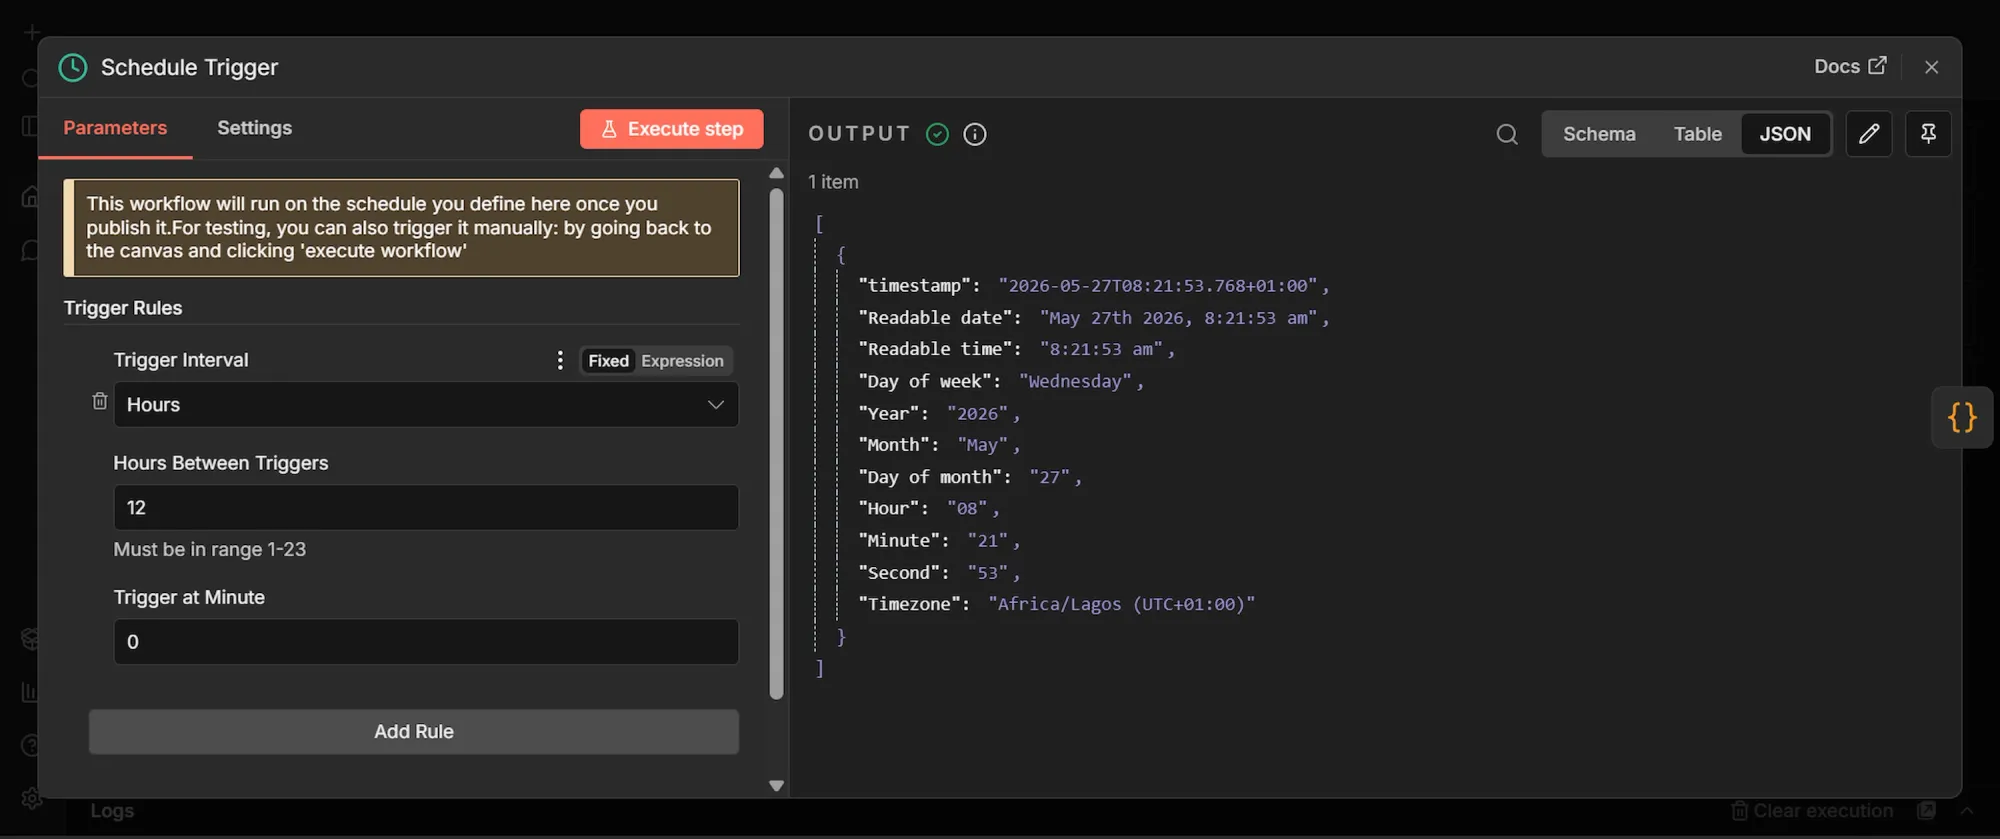
- Search for "Schedule Trigger" and select it.
- Set Trigger Interval to "Hours," and Hours Between Triggers to 12.
- Set Trigger at Minute to 0.
The essence of this node is to automatically kickstart the workflow every 12 hours after activation. Airlines update fares throughout the day, but the price variance you're hunting for is stable enough that two daily samples capture the morning and evening recalibrations without burning Apify credits.
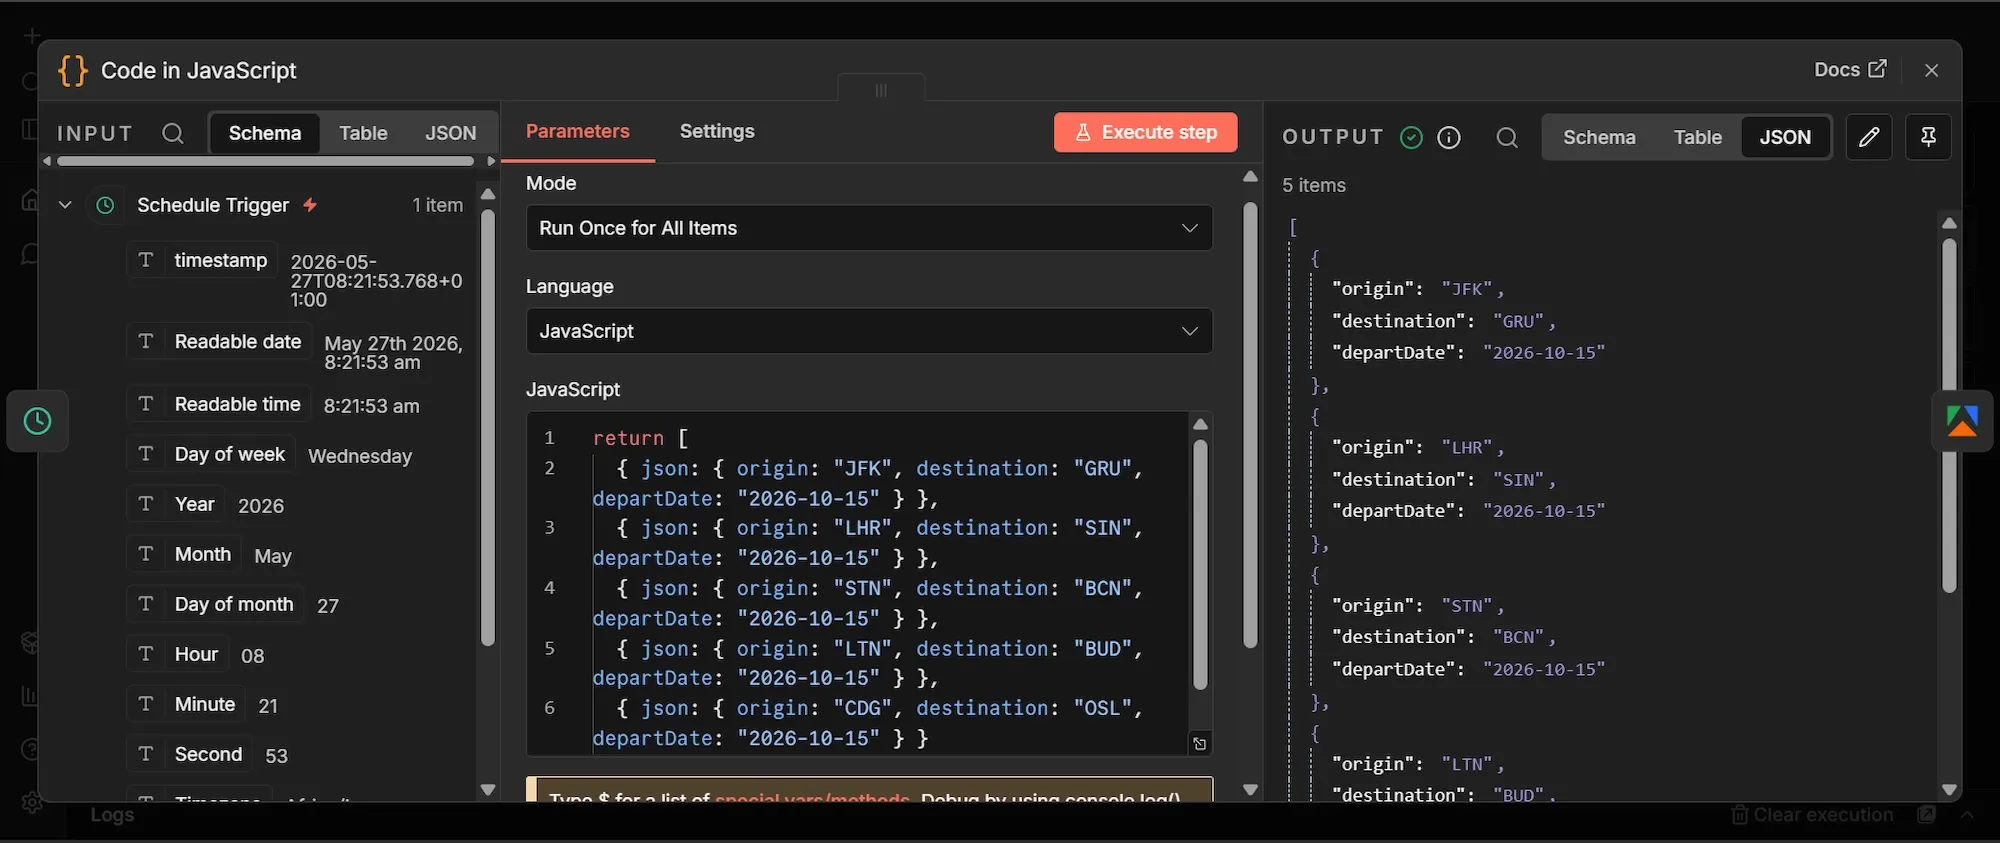
Step 2: Code in JavaScript node
- From the Schedule Trigger's output, click + to add a new node.
- Search "Code", select "Code," and add it.
- Set Mode to "Run Once for All Items" and Language to "JavaScript".
- Delete the boilerplate in the editor and paste the code below:
return [
  { json: { origin: "JFK", destination: "GRU", departDate: "2026-10-15" } },
  { json: { origin: "LHR", destination: "SIN", departDate: "2026-10-15" } },
  { json: { origin: "STN", destination: "BCN", departDate: "2026-10-15" } },
  { json: { origin: "LTN", destination: "BUD", departDate: "2026-10-15" } },
  { json: { origin: "CDG", destination: "OSL", departDate: "2026-10-15" } }
];
Each pair above is a route defined by IATA airport codes, from origin to destination. JFK→GRU is New York to São Paulo; STN→BCN is London Stansted to Barcelona. The remaining three are intra-European routes served by airlines such as Ryanair, EasyJet, Wizz Air, and Norwegian (all trackable sources from the Apify Actor). You can add or opt for different routes you want to target within this section of the project.
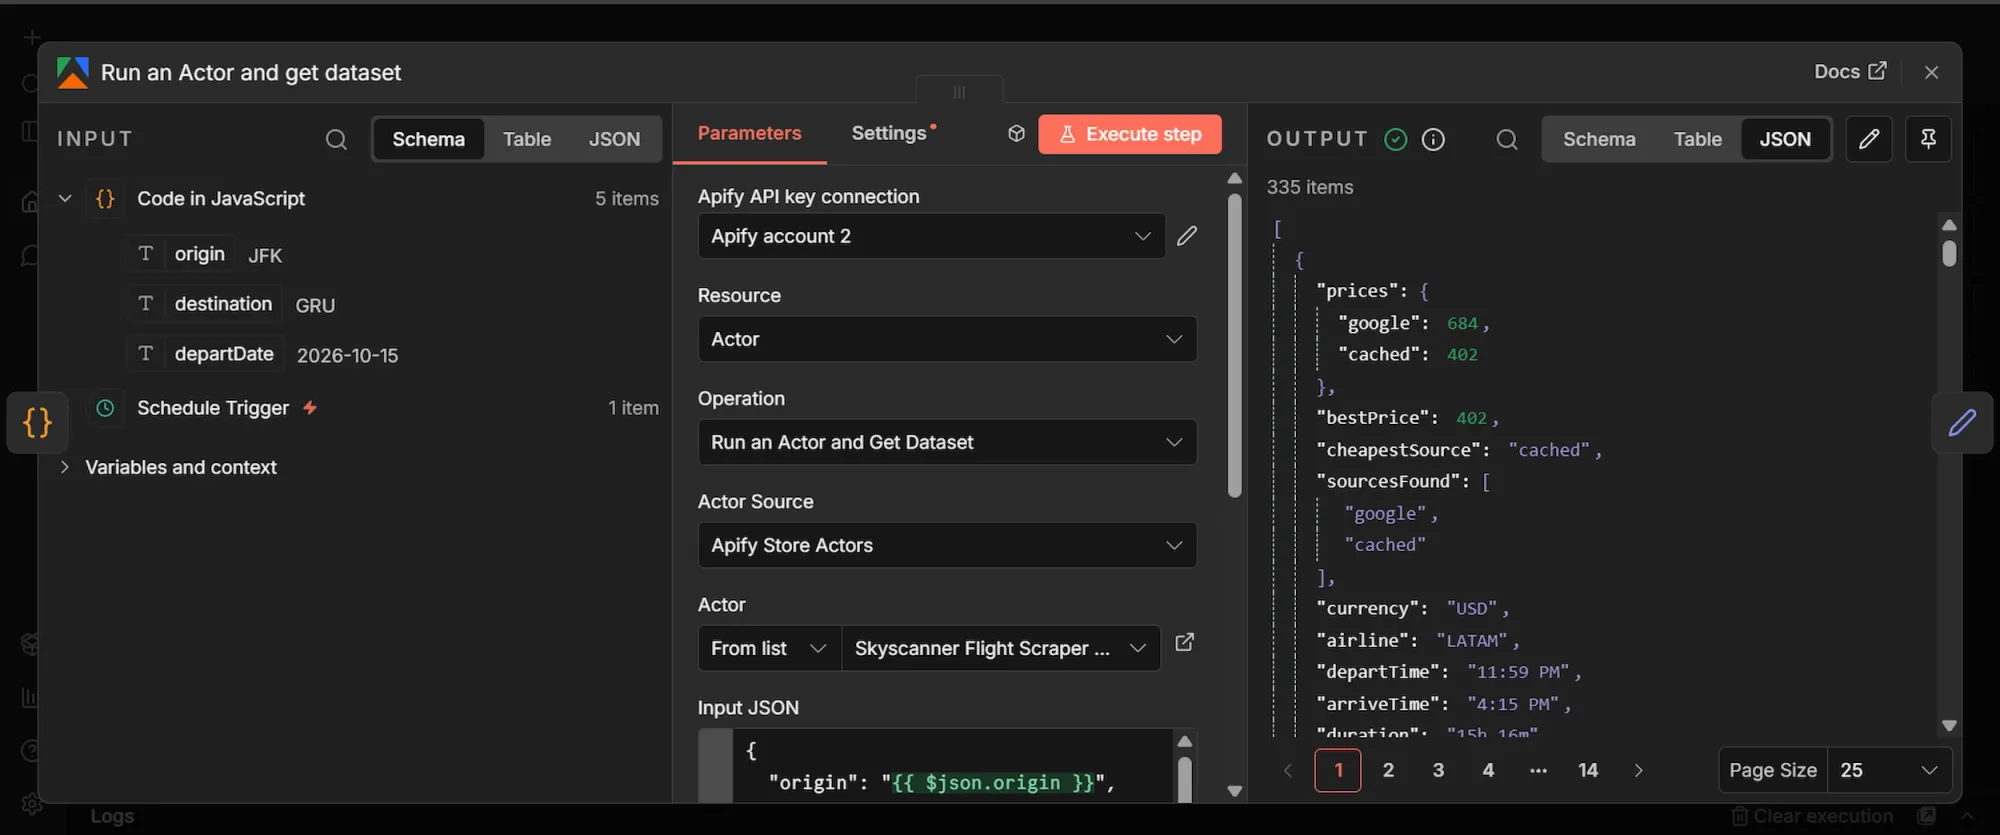
Step 3: Run an Actor and get dataset (Apify) node
- From the Code node's output, click + to add a new node.
- Search "Apify", select "Run an Actor and get dataset" and add it.
- Under Credential to connect with, click "Create New Credential", paste your Apify API token, and save.
- Set Resource to "Actor" and Operation to "Run an Actor and Get Dataset".
- Under Actor, choose "From list" and select "Skyscanner Flight Scraper API" (
makework36/flight-price-scraper). - In the Input JSON field, paste the configuration below.
{
  "origin": "{{ $json.origin }}",
  "destination": "{{ $json.destination }}",
  "departDate": "{{ $json.departDate }}",
  "adults": 1,
  "cabinClass": "ECONOMY",
  "currency": "USD",
  "maxFlights": 15
}
Most flight scrapers on the Apify Store query one source. But Skyscanner Flight Scraper queries seven sources in parallel (Google Flights, Kiwi, Travelpayouts cached, Ryanair, EasyJet, Wizz Air, and Norwegian) and returns a deduplicated, merged feed in which each row includes a price map showing what each source charged for that exact flight. If you want more luxurious cabin classes, swap “ECONOMY” with your preferred tier; you’ll still get competitive results.

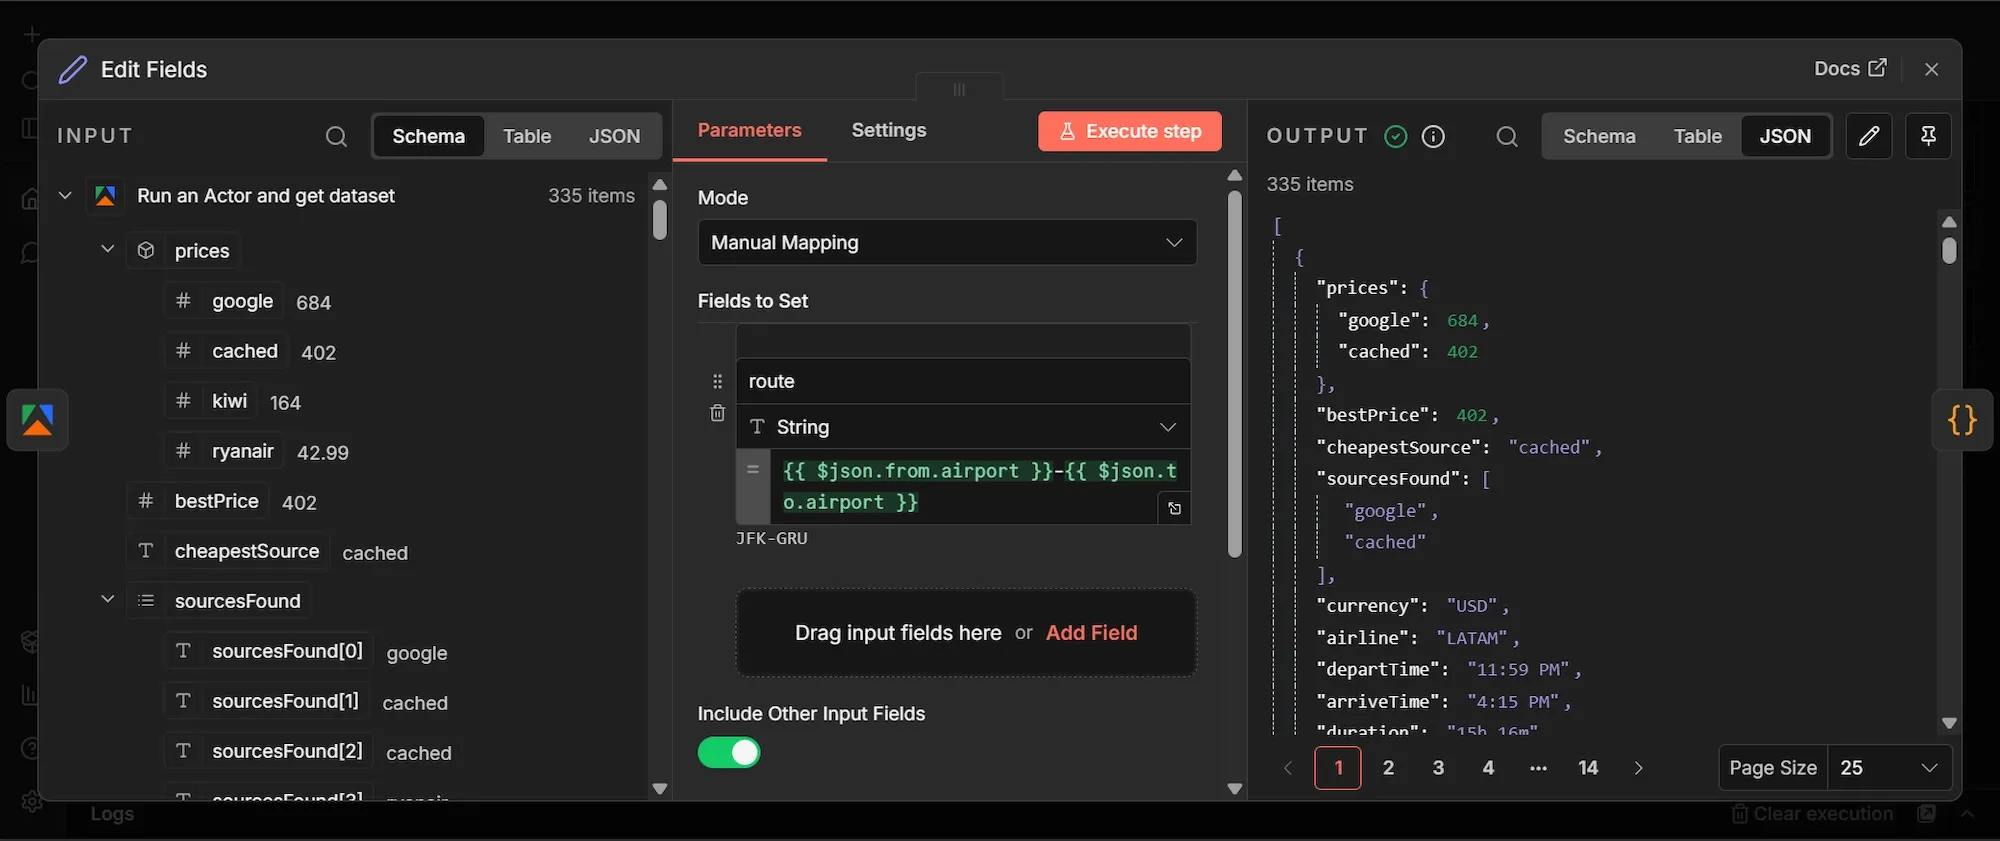
Step 4: Edit Fields node
- From the Apify node's output, click + to add a new node.
- Search "Edit Fields", select "Edit Fields (Set)" and add it.
- Set Mode to "Manual Mapping".
- Under Fields to Set, add one field. Name it
route, set the type to "String", and set the value to:
{{ $json.from.airport }}-{{ $json.to.airport }}
- Scroll down, and toggle Include Other Input Fields to ON.
The JSON expression builds the route from the flight's own from.airport and to.airport fields, which the Apify Actor returns on every flight after scraping the routes the Code node fed it. It reads from the flight item rather than referencing the Code node directly because when you pull from the Code node, every flight gets tagged with all five routes, but this way, each flight's own airport fields, and the data tags themselves.
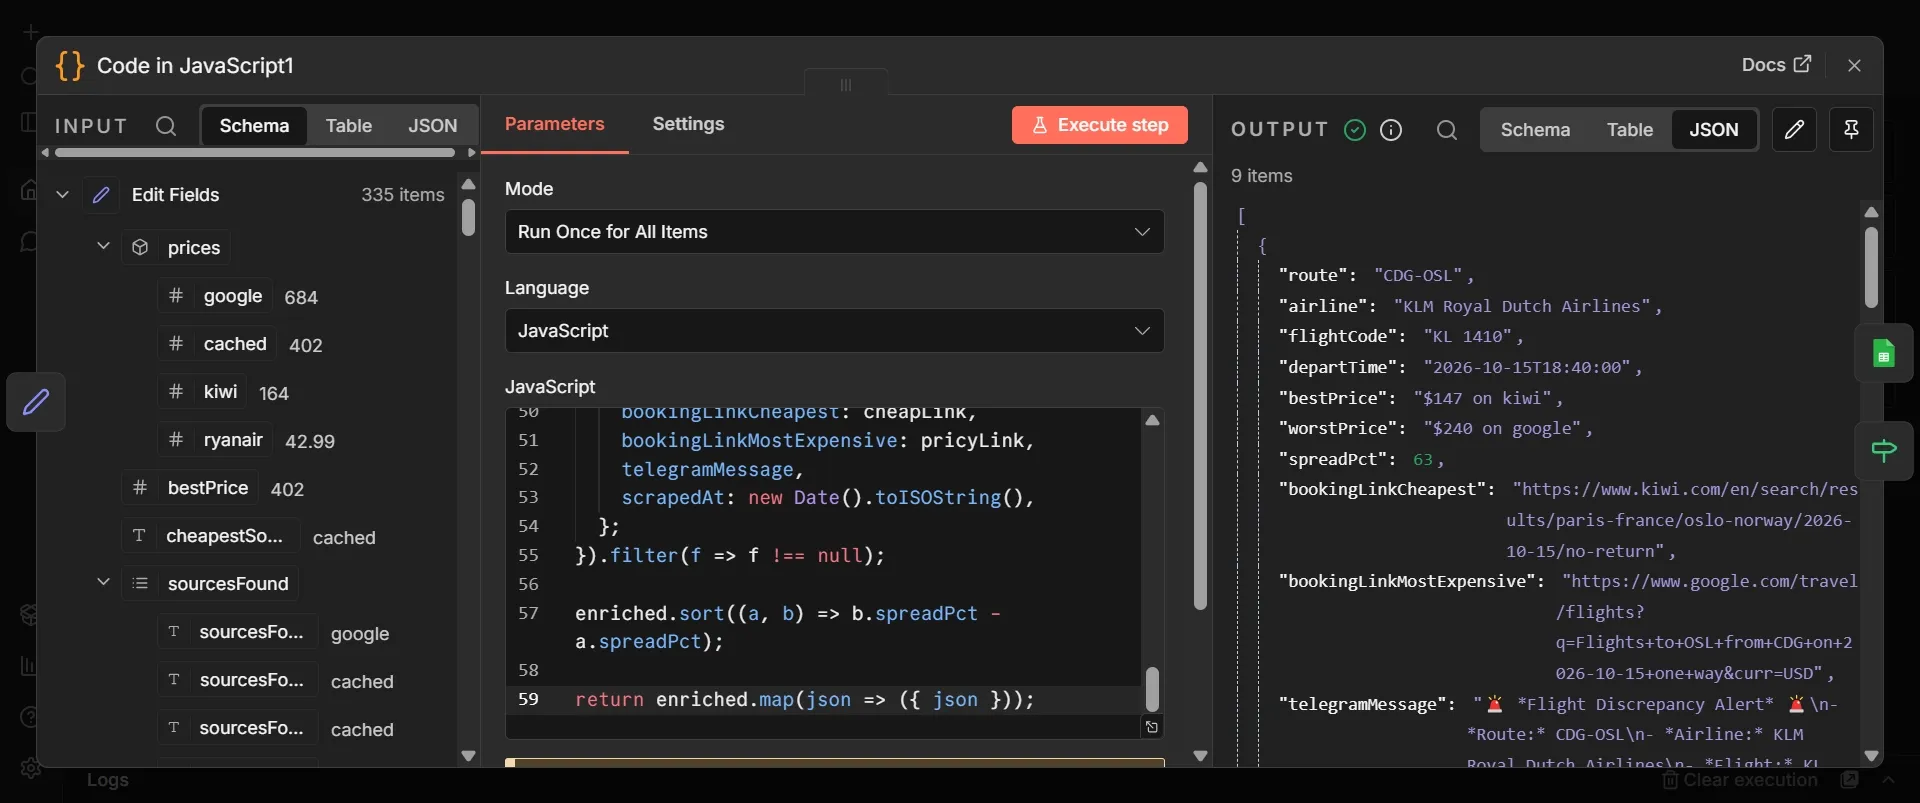
Step 5: Code in JavaScript node1 (analysis node)
- From the Edit Fields node's output, click + to add a new node.
- Search "Code", select "Code" and add it. Rename this node to "Analyze Spreads".
- Set Mode to "Run Once for All Items" and Language to "JavaScript".
- Delete the boilerplate and paste the analysis code below:
const rawFlights = $('Edit Fields').all().map(i => i.json);
const THRESHOLD = 20;

const seen = new Set();
const allFlights = [];
for (const f of rawFlights) {
  const key = `${f.route}|${f.airline}|${f.departTime}`;
  if (!seen.has(key)) {
    seen.add(key);
    allFlights.push(f);
  }
}

const linkFor = (links, source) => {
  if (!links) return null;
  return links[source] || links[`${source}Flights`] || null;
};

const enriched = allFlights.map(f => {
  const livePrices = { ...f.prices };
  delete livePrices.cached;

  const entries = Object.entries(livePrices).filter(([_, v]) => typeof v === 'number');
  if (entries.length < 2) return null;

  entries.sort((a, b) => a[1] - b[1]);
  const [cheapSource, cheapPrice] = entries[0];
  const [pricySource, pricyPrice] = entries[entries.length - 1];
  const spreadPct = Math.round(((pricyPrice - cheapPrice) / cheapPrice) * 100);
  const flightCode = f.segments?.[0]?.flightCode || 'N/A';
  const cheapLink = linkFor(f.links, cheapSource);
  const pricyLink = linkFor(f.links, pricySource);

  const telegramMessage = `🚨 *Flight Discrepancy Alert* 🚨
- *Route:* ${f.route}
- *Airline:* ${f.airline}
- *Flight:* ${flightCode}
- *Spread:* ${spreadPct}%
- *Book on cheapest:* [${cheapSource}.com](${cheapLink || '#'})
- *Verify on expensive:* [${pricySource}.com](${pricyLink || '#'})`;

  return {
    route: f.route,
    airline: f.airline,
    flightCode,
    departTime: f.departTime,
    bestPrice: `$${cheapPrice} on ${cheapSource}`,
    worstPrice: `$${pricyPrice} on ${pricySource}`,
    spreadPct,
    bookingLinkCheapest: cheapLink,
    bookingLinkMostExpensive: pricyLink,
    telegramMessage,
    scrapedAt: new Date().toISOString(),
  };
}).filter(f => f !== null);

enriched.sort((a, b) => b.spreadPct - a.spreadPct);

return enriched.map(json => ({ json }));
Think of the script above as the workflow's brain, handling five steps in order: First, it removes duplicate flights based on route, airline, and departure time. Next, it omits cached prices, so you're only looking at real fares you can actually book.
Then it calculates the main metric, which is the price spread between the highest and lowest live quotes. After that, it builds the Telegram alerts directly in the code for consistency before forwarding results.
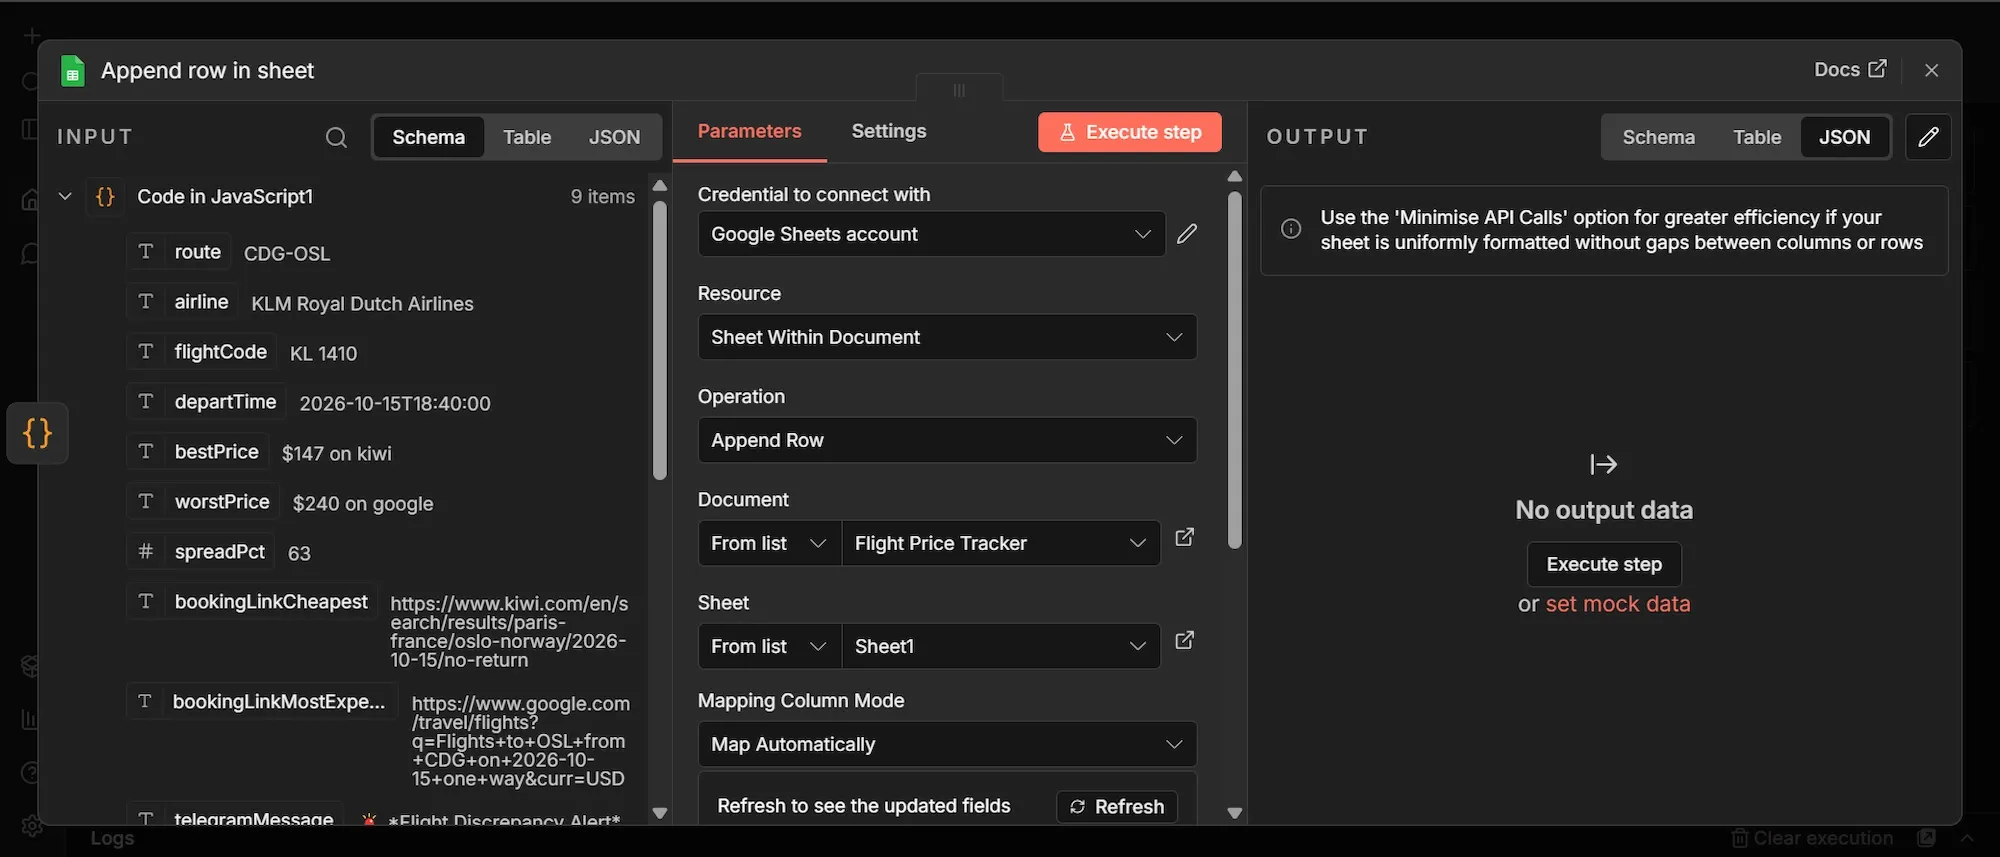
Step 6: Append Row in Sheet node
- From the Code in JavaScript node1 output, click + to add a new node.
- Search "Google Sheets", select "Append Row in Sheet" and add it.
- Under Credential to connect, select the credential you already created.
- Set Resource to "Sheet Within Document" and Operation to "Append Row".
- Under the Document field, choose "From list" and select your Flight Price Tracker spreadsheet. Under Sheet, select "Sheet1".
- Set Mapping Column Mode to "Map Automatically".
- Before this runs, make sure row 1 of your sheet has these exact headers:
route,airline,flightCode,departTime,bestPrice,worstPrice,spreadPct,bookingLinkCheapest,bookingLinkMostExpensive,scrapedAt,telegramMessage
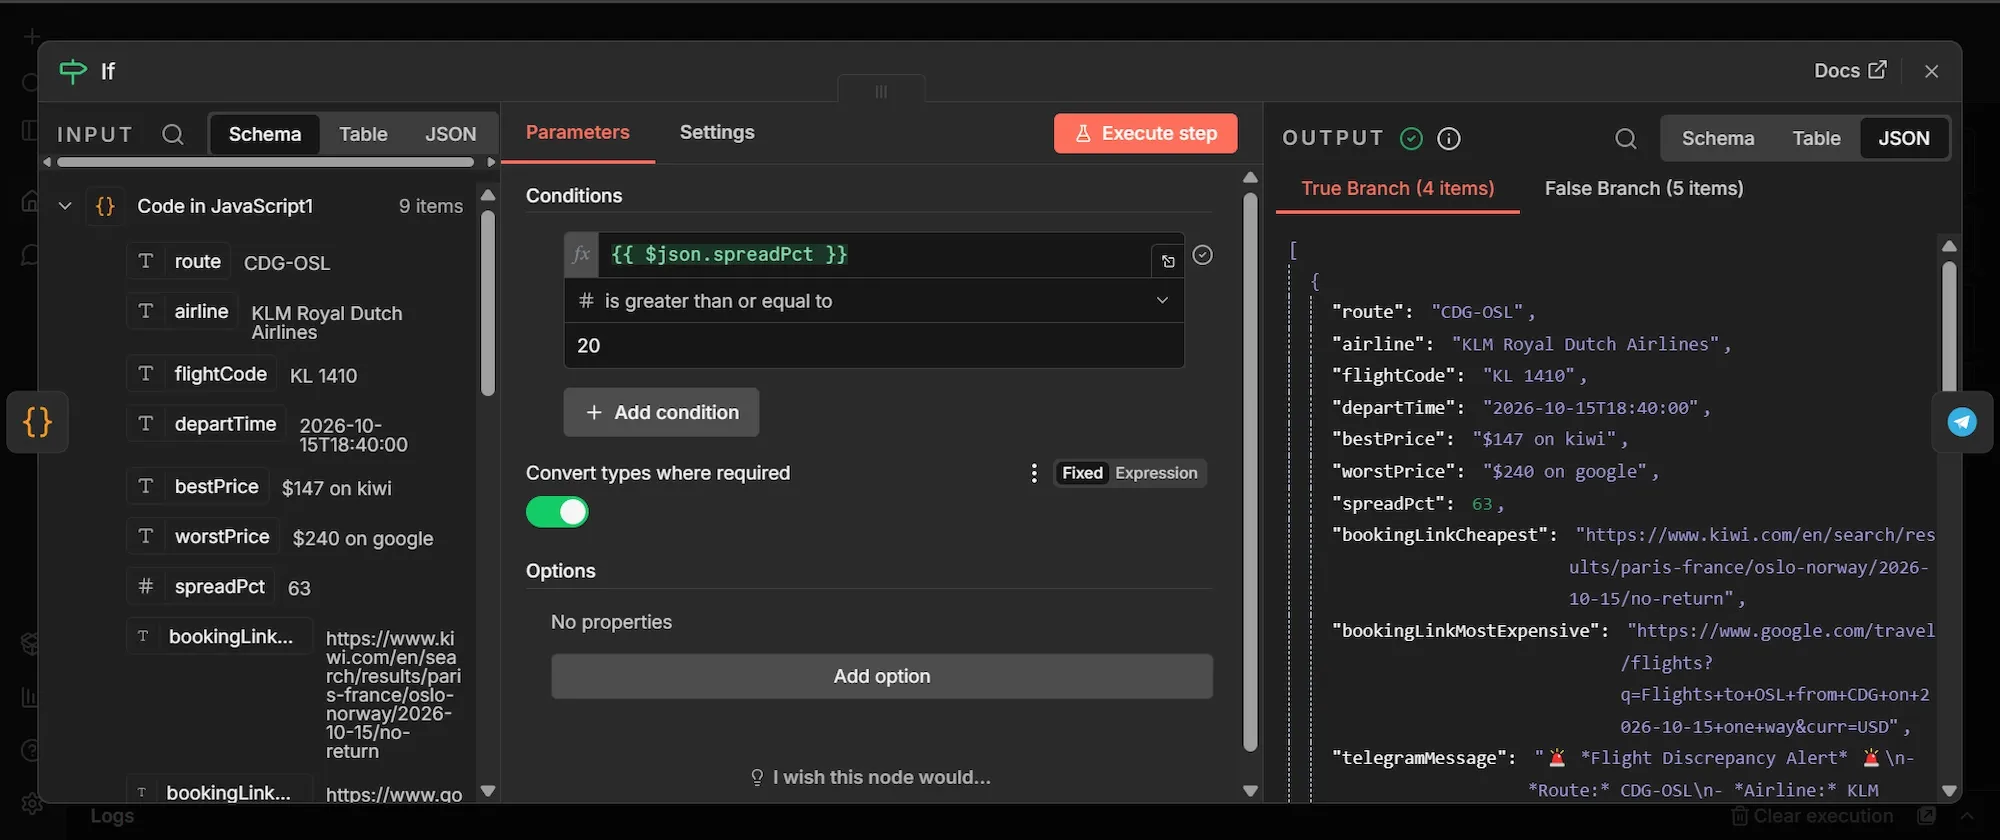
Step 7: If node
- Go back to the Code in JavaScript node1 and click the + on its output a second time to create a parallel branch.
- Search "If", select "If" and add it.
- Under Conditions, set Value 1 to
{{ $json.spreadPct }}. - Set the type selector to "Number".
- Set the operation to "is greater than or equal to".
- Set Value 2 to
20. - Toggle Convert types where required to ON.
The node sets a price-difference threshold on flights, routing fares with a 20%+ spread across aggregators for the same route to the true branch, while the rest go to the false branch. So you only get alerts when there’s a price drop opportunity greater than 20%.
Step 8: Send a Text Message (Telegram) node
- From the If node's true branch, click + to add a new node.
- Search "Telegram", select "Send a text message" and add it.
- Under Credential to connect with, click "Create New Credential", paste your Telegram bot token, and save.
- Set Operation to "Send Message".
- In the Chat ID field, paste your group's chat ID (the negative integer from your getUpdates response).
- In the Text field, enter
{{ $json.telegramMessage }}. - Click Add Field at the bottom, select Parse Mode, and set it to "Markdown (Legacy)".
- Once the workflow executes completely, check your Telegram group chat; an alert should appear immediately.

Phase 4: Execute, test, and publish
- Click "Execute Workflow" to run the sequence and watch the nodes turn green.
- Open your Google Sheet, and you should see 10-15 new rows, corresponding to the "maxFlights" number you set in the Actor’s JSON.
- Once you confirm the data in all rows and see all n8n nodes turn green, the test is successful.
- Click on “Publish” at the top right of the canvas to launch your workflow officially.
Summary
The tool you’ve built is especially useful for travel agencies and corporate teams looking to buy bulk tickets at the best rates across economy, premium, and first-class cabins.
Skyscanner Flight Price Scraper API is exclusive to Apify Store. You can test it out now with $5 in free monthly credits.
Don’t forget, if you have ideas for your own Actor under this niche or any other, you can build, share, and monetize it on Apify, the largest marketplace of tools for web data and AI.