I often need to keep an eye on something on the web, fully automatically. Not just content changes, but changes across whole listings: any number of entries, on any website. Maybe it's keeping up with specific tech news, monitoring pricing on products I care about, or tracking new real estate listings. I wanted to be able to set it up once using a universal interface and never think about it again until it pings me back with updates. I didn't want to rely on the patchwork of watchlist features that individual websites offer. There was no such solution on Apify, so I built one: Monocle: The Monitor 🧐
Primary objectives
I wanted this to be useful for me first, and potentially for the public. The features needed to achieve that were:
Automated monitoring:
- Watch content for individual pages or lists of items
- Detect changes in lists and page content + new items in lists
Automated comparison:
- Against static rules (content = 'value')
- Against the previous state (content in records)
Automated filtering:
- Based on static keywords (simple default)
- Based on static rules (value greater than a threshold, e.g. x > 3)
- Based on dynamic rules (value less than previous value, i.e. (x, y) → y < x)
Monitoring intervals:
- Scheduled checks (Apify scheduler, periodic)
- Continuous watcher (time-sensitive monitoring)
Notification on changes:
- Email (for low priority)
- Mobile (for high priority)
What the solution needed to do:
- Provide a universal interface for basic input (URL and options)
- Process the input into unified internal logic
- Use the internal logic to parse websites
- Support login for monitoring private content
- Attempt to revisit identical website states (proxy, sessions...)
- Extract the current version of content from the target website
- Store the content in a dataset as a reference for later comparison
- Parse and initialize optional comparison rules and filters
- Match content against records and identify new or updated items
- Compare the content with the previous dataset counterpart if it exists
- Trigger actions or dispatch optional notifications on changes
- Store the new or updated information in the records dataset
- Rinse and repeat on a regular schedule or continuous watch mode (for important and time-sensitive changes)
Architecture overview
Crawlee was the obvious base to build on, since it's designed for crawling arbitrary websites and extracting data from them. It also handles the parts that make generic access reliable across wildly different sites: proxies, session management, and other access tooling.
For this reason, it was also much safer to start with a full browser crawler, with the option to switch to using a lighter parser later. I chose Playwright crawler as the basis for the project. We can always switch to something like JSDOM or Cheerio when the time comes to optimize, thanks to the flexibility of Crawlee.
To keep setup quick and easy, and usable even for non-technical users, the entry barrier had to be low. The most minimal setup should only require users to define a preferred notification channel, which website elements to monitor, and optional keywords or filters. The Actor should then handle everything else automatically, including optional scrolling on websites with infinite-scroll listings. For listings with manual pagination, the user also provides a pagination selector, so the list can be iterated through in full or up to a set limit. None of these forces the user to touch code or custom specifications.
I started with a monolithic structure, then realized it made sense to separate extraction from comparison. It also lets the comparison module run standalone against content extracted by other means: for example, taking datasets from existing crawlers in Apify Store and using the monitor to compare changes and send notifications about items in those external datasets. It made sense to split the project at that time and then combine the two parts in a modular implementation internally. Here is a rough overview of the parts involved in the Actor:
Crawler
- Proxy configuration
- Login (optional authentication)
- Hooks (traffic filters, cookie injection...)
- Options (browser, headless...)
- Retries (automated on errors)
- Sessions (for persistent state)
- Error handlers (debug buffers, alerts...)
Parsers
- Input (actor JSON schema)
- Config (monitoring setup)
Extraction
- Batching logic (for listing items)
- Auto-scroll (for infinite pagination)
- Transformers (convert results between formats, zip the results from listings...)
Comparison
- Probe results (apply filters, keywords, decorators) and produce the difference
- Store updates in both the default dataset of Actor run and the named dataset of records
- Alert notification channels with the updated data and attach optional signatures
- Print a structured report in the log about the number of results and items on record
Universal definition
For more advanced use cases, my goal was to come up with the simplest possible format to encode the monitoring configuration for specific target websites. This led to a bonus goal: website-specific presets you can share and reuse. Create a site preset once, then reuse it indefinitely.
How to make the solution truly generic and usable with most websites out there? There was nothing to latch onto besides pure web standards like DOM selectors and common pagination patterns. I needed some way to define what should be monitored and what it means when something has changed. On the other hand, I also wanted to keep things simple and minimal, to keep the barrier to entry as low as possible, even for non-technical users. The absolute bare minimum is to define a DOM selector for the page elements of interest.
Extracting and comparing the text content of selected elements is enough most of the time, but not always. Sometimes you need a link's URL instead of its text. It was also necessary to provide an option to define a custom extraction function for the content of interest. I settled on the most bare-bones format possible to achieve such flexibility:
{
  selectors: Array | String,
  extractor: Function
}
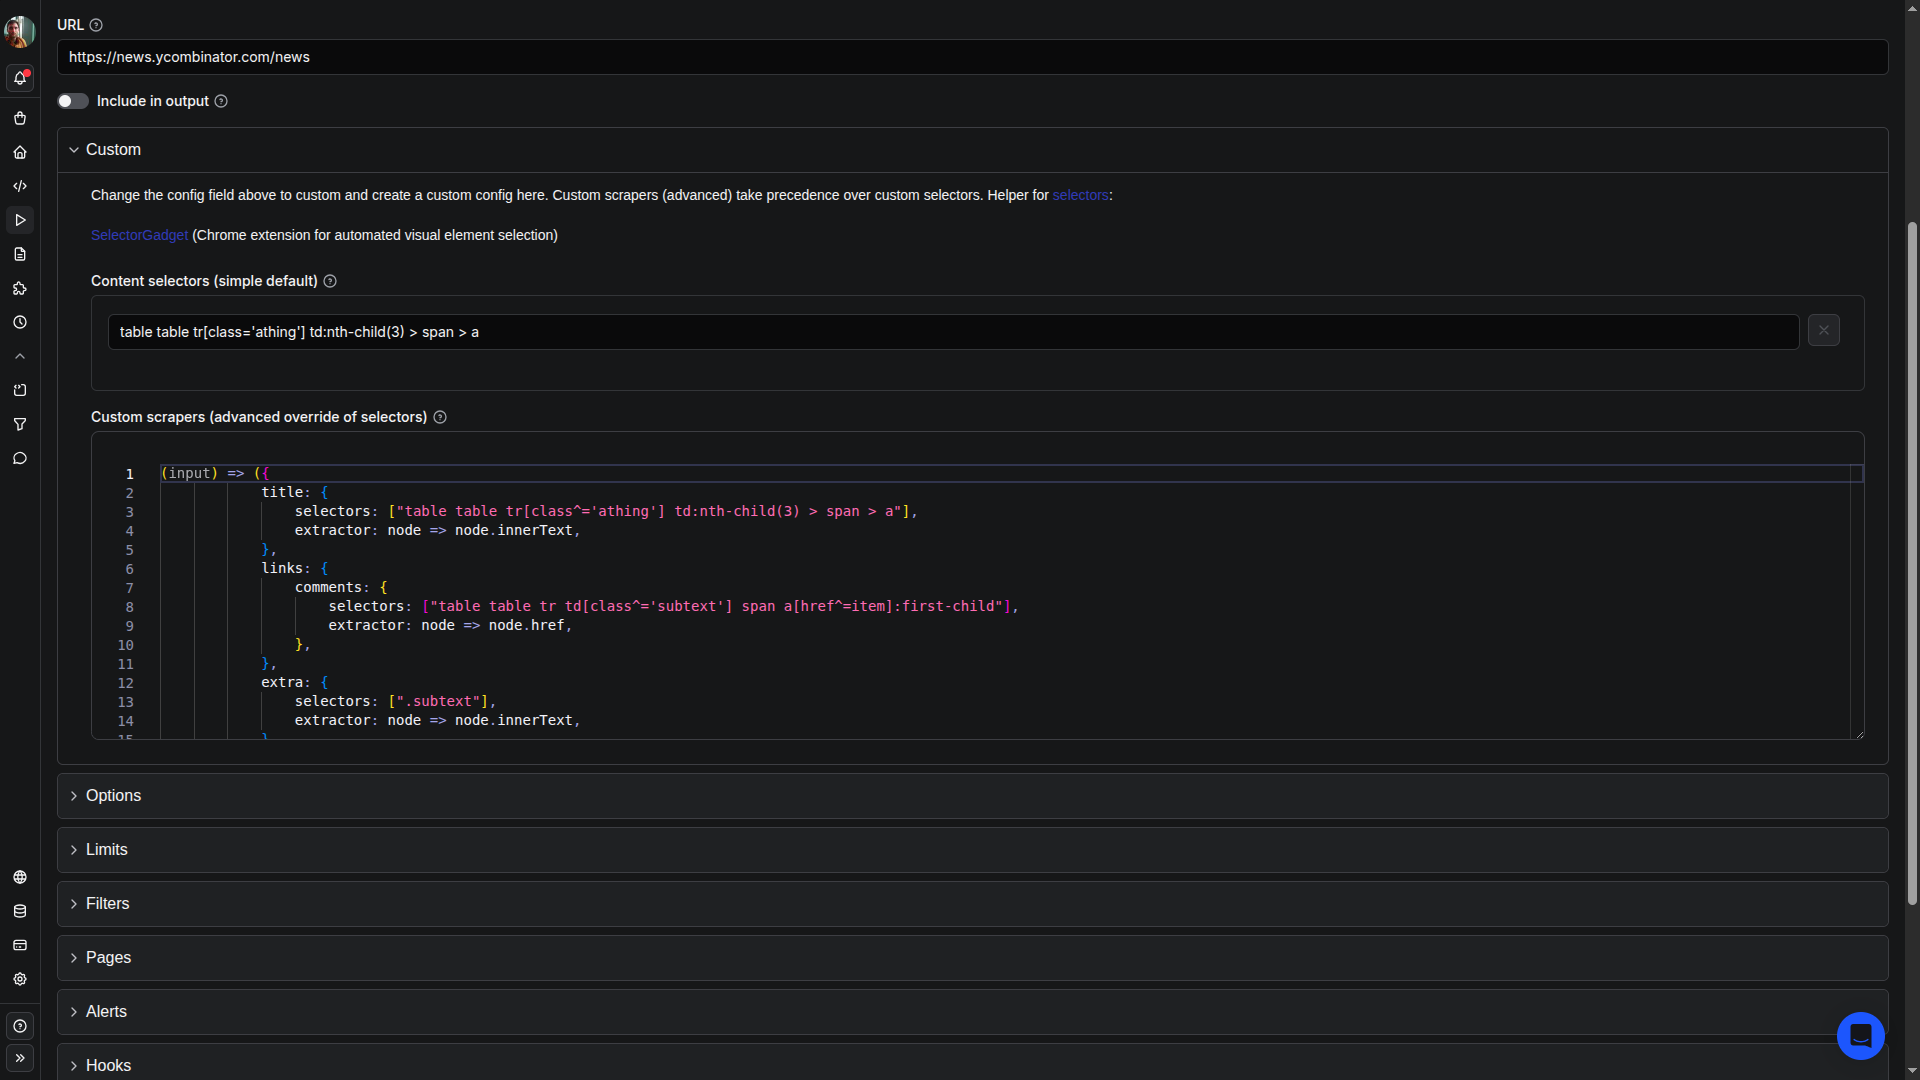
Both array and string work for the selector definition since DOM queries also support multiple comma-separated selectors.
Unique identification
I had to ensure that the website state would match for every pass of the monitoring check in order to compare the states of the target website as "apples to apples". It does not take much for this to fail on some trivial issue, like getting stuck on a cookie consent modal or comparing the state before and after authentication. There were several IDs and labels that had to match:
Dataset
Everything in the comparison module revolves around Apify datasets as its data source. It compares the current state of the website against its previous state stored in a dataset. I needed to reliably identify the correct dataset for each monitoring target, so I wrote this helper. It generates unique dataset names on the fly from sanitized website host names:
/**
 * @param {string} url
 */
export const getDatasetName = url => {
  const {host, pathname} = new URL(url);
  const nonWordReplacer = '-';
  const name = `monocle-${host.replace(/\W/g, nonWordReplacer)}`;
  log.info('Records dataset: ', name);

  if (name.length < 63)
    return name;

  const slice = name.slice(0, 63);
  return slice.slice(0, slice.split('').findLastIndex((letter, index, array) => index <= 63 && letter === nonWordReplacer) + 1);
};
We can then use these unique identifiers to match existing records with the website we are monitoring. The fixed number is just the maximum length for dataset names on the Apify platform.
Session
Similarly, to restore the target website as close as possible to its state at the previous check, and to support sites that require authentication, I had to handle session management. For this, it was easy to use SessionPool to store and then reuse state from a session.
I did apply a few unusual options to make the sessions last very long by default. All parameters are maxed out to keep the session active more or less indefinitely.
const sessionStorage = await SessionPool.open({
  persistStateKeyValueStoreId: getName('sessions'),
  maxPoolSize: Number.POSITIVE_INFINITY,
  sessionOptions: {
    maxUsageCount: Number.MAX_SAFE_INTEGER,
    maxAgeSecs: Number.POSITIVE_INFINITY,
    expiresAt: new Date(8640000000000000),
  },
});
getName derives an ID from the target website's URL so the session lands in the correct store.
You can now store sessions with a custom ID in the session pool. A helper like this does that:
/**
 * Create a session with custom ID in the session pool and return the created session
 * @param {{sessionPool: SessionPool, sessionId: string, options?: object}}
 */
export const addSession = async ({sessionPool, sessionId, options}) =>
  sessionPool.addSession({
    ...options,
    id: sessionId,
  }).then(() => sessionPool.getSession(sessionId));
Now we can store the post-authentication website state in the session bound to this host. First, we store the browser storage state after login by exporting it:
console.log('Export website session for later use.');
const [context] = browserController.browser.contexts();
session.userData.storageState = await context.storageState();
We can access the browser context from within browserController as it's part of the default PlaywrightCrawler context (or crawlingContext). Then we need to restore the state during initialization. For that purpose, we can use the BrowserPool hooks within the configuration of BrowserPool options:
const crawler = new PlaywrightCrawler({
  ...
  browserPoolOptions: {
    prePageCreateHooks: [
      async (pageId, browserController, pageOptions) => {
        if (!useSession) return;
        const {storageState} = session.userData;
        if (pageOptions && storageState)
          pageOptions.storageState = storageState;
      },
    ],
    useFingerprints: !!setup.options?.useFingerprints,
  }
  ...
});
This hook also reads an input option that decides whether to enable auto-generated fingerprints for a given site configuration, which can improve access reliability.
Improving performance
I used another type of hook in the PlaywrightCrawler options to improve performance. It filters out bloat traffic like media downloads, which this Actor doesn't need, and can restore website state from cookies exported elsewhere and passed on input:
const crawler = new PlaywrightCrawler({
  ...
  preNavigationHooks: [
    async (crawlingContext, gotoOptions) => {
      const {page} = crawlingContext;
      if (setup.options?.useTrafficBlocker) {
        await page.route('**/*', route => {
          return blockRouteTypes.includes(route.request().resourceType())
            ? route.abort()
            : route.continue().catch(error => console.warn(error.message));
        });
      }
    },
  ]
  ...
});
Using these options reduces traffic and loading times during the monitoring checks and makes it possible to import custom cookies from an external source (e.g. exported from an external browser).
Improving reliability
We can also improve reliability by detecting and closing cookie consent modals, and by accepting external cookies on input (for example, exported from a local browser). That enables monitoring of non-public content without authenticating at runtime.
const crawler = new PlaywrightCrawler({
  ...
  preNavigationHooks: [
    async (crawlingContext, gotoOptions) => {
      if (!Array.isArray(input.cookies))
        return;
      await page.context().addCookies(input.cookies.map(cookie => ({...cookie, sameSite: 'None'})));
    },
  ],
  postNavigationHooks: [
    async (crawlingContext, gotoOptions) => {
      await crawlingContext.closeCookieModals();
    },
  ]
  ...
});
Debugging problems
Finally, we want error investigation to be easier when things go wrong and monitoring fails at the network level: access issues, the site being down, and so on. Luckily, the crawler comes with a handy hook to do just that:
const crawler = new PlaywrightCrawler({
  ...
  failedRequestHandler: async ({page}, error) => {
    await debug(page)(error);
  }
  ...
which we can leverage with a custom error handler:
export const debug = page => async error => {
  const screenBuffer = await page.screenshot();
  await KeyValueStore.setValue(`DEBUG-${Date.now()}-SNAP`, screenBuffer, {contentType: 'image/png'});
  const contentBuffer = await page.content();
  await KeyValueStore.setValue(`DEBUG-${Date.now()}-HTML`, contentBuffer, {contentType: 'text/html'});
};
The production version has more handlers, but this is a useful start, giving us a screenshot and the content of the website at the time of the error, which offers valuable insight into the problem. The user can then adjust the Actor's parameters to try to solve it.
Complexity explosion
Supporting all these features at once proved tricky due to the various transformations involved and the need to consistently compare identical formats across passes, checks, and serializations. I introduced new features progressively, which sometimes broke the comparison logic and required rewriting the sequence of operations a couple of times to get things in the correct order.
For example, introducing the option to add the original input URL to the output items meant every item had to have that URL added before the comparison ran, not after. In the end, it came down to making things follow the right sequence, which is beyond the scope of this article. It would have been better to consider all the additional features up front, had they been known. Even though comparison and extraction are separate, both depend on (and stay compatible with) the same data structure.
The whole infrastructure around all this comes down to core compatibility between these parts:
const collectResults = async (page, {input, setup}) => {
  const groups = await recurseScrapers(page)(setup.scrapers, extractContents);
  const results = zipObjects(groups);
  return input.includeUrl ?
    results.map(result => ({...result, url: page.url()})) :
    results;
};
Extraction
const records = this.#records || await getDatasetRecords(datasets.records);
const updates = results.map(getResult(decorators)).filter(excludeRecords(records));
const outputs = filters || keywords ? filterUpdates({updates, filters, keywords}) : updates;
Comparison
As mentioned above, the matching process has to run after any decorators, so items are compared in the same format. Otherwise you get false positives, and identical items already in the dataset never get filtered out.
In future updates, I want to lean more on the crawler's existing features and hand more of the custom iteration over to the request queue. That should mean cleaner, more efficient request handling across every case: single pages, infinite scroll, and traditional pagination.
However, user-facing features and making the Actor actually useful and user-friendly have a higher priority.
Monitoring examples
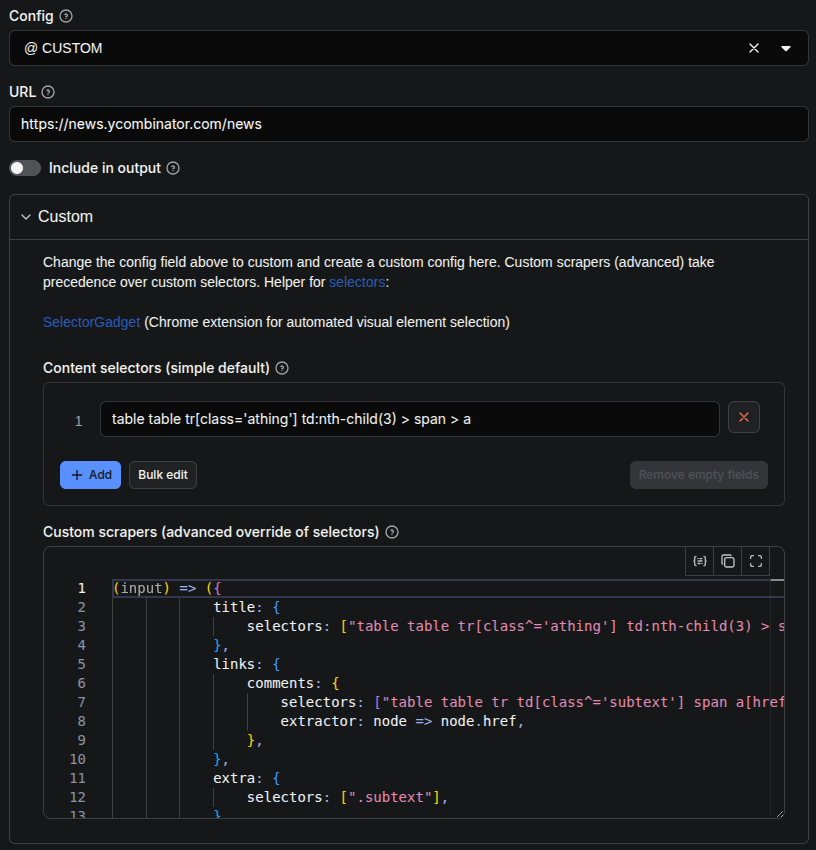
Here are some basic examples using a built-in config preset. You can easily create and share your own configs for other websites.
Setup walk-through
- Identify the content on the page or listing we want to monitor
- Inspect elements in developer tools (right-click > dev tools > inspect)
- Extract selector using extension or manual process (element > copy > selector)
- Confirm selector works and selects desired content or adjust (e.g. remove non-unique or unstable parts)
- Use the selector after switching to "CUSTOM" config and paste it into the "Custom" section of the Actor (follow examples given)
Optional:
- Define a channel to receive update notifications via email or mobile (ntfy)
- Define filters to narrow down the results (keywords or custom static/dynamic filters)
- Enable listing pagination (automatic for infinite scroll or selector-based for manual pagination)
- Adjust limits for the maximum desired number of results and notifications, toggle other options for websites blocking access (headless mode, stealth mode, etc.)
Example configs
eBay articles
Let's say we want to monitor price changes for a specific item on eBay.
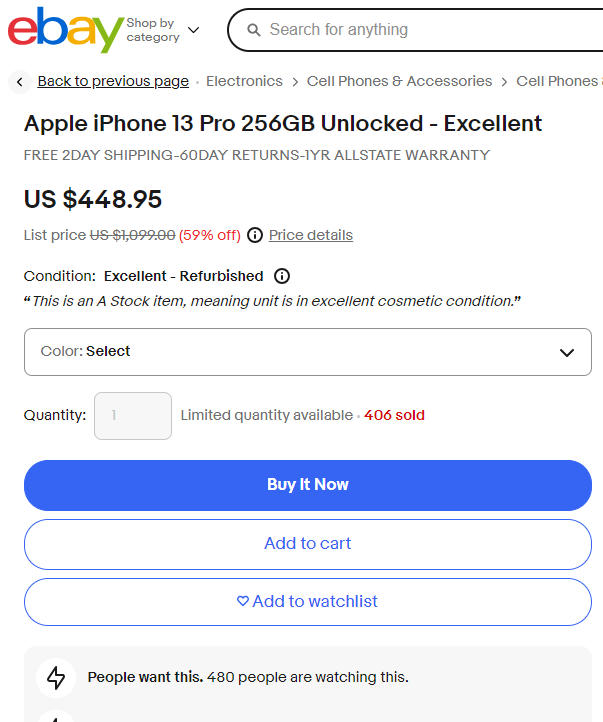
Here is all the setup we need along with the product URL:
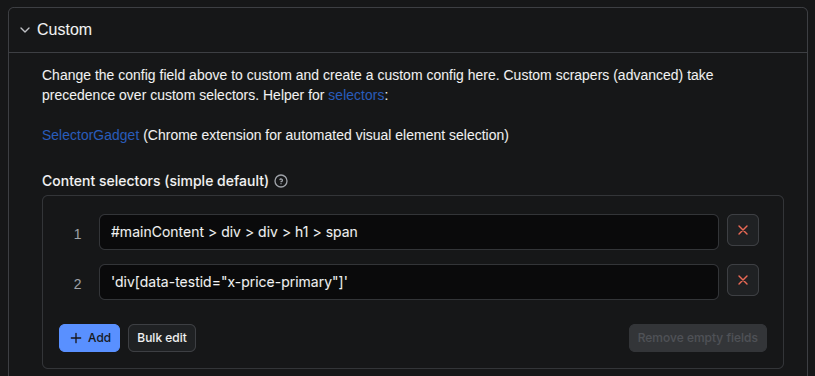
Here is what that looks like using the more advanced notation although in this case there's no need for it since we only use the default text extractor (no links):
title: {
  selectors: '#mainContent > div > div > h1 > span', // string or array
},
price: {
  selectors: ['div[data-testid="x-price-primary"]'], // string or array
}
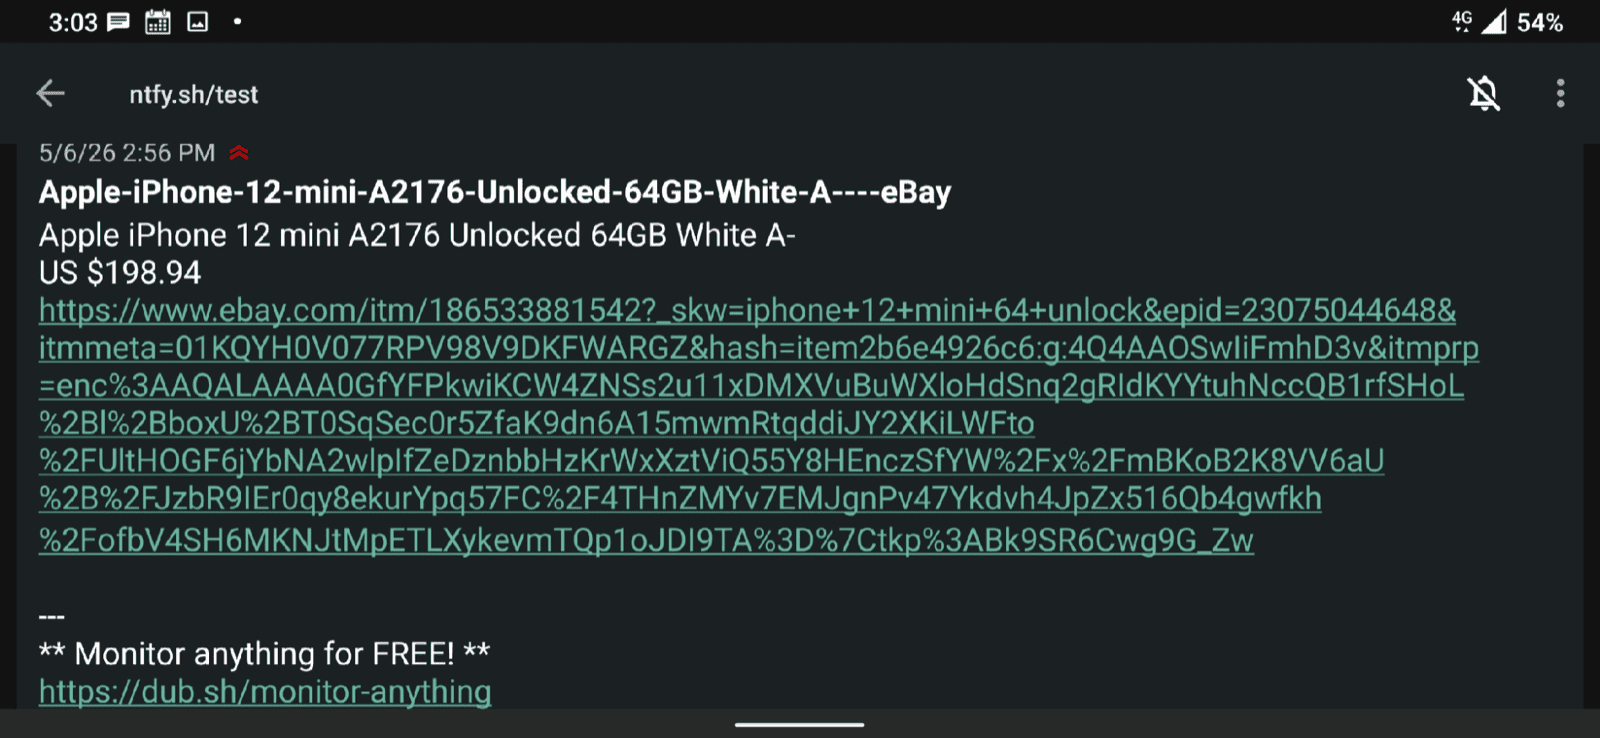
Enabling the 'include original URL' option adds a click-through link to both the result and the alert.
Notification on a price change (any change from the previous value, or one that matches your custom filters):
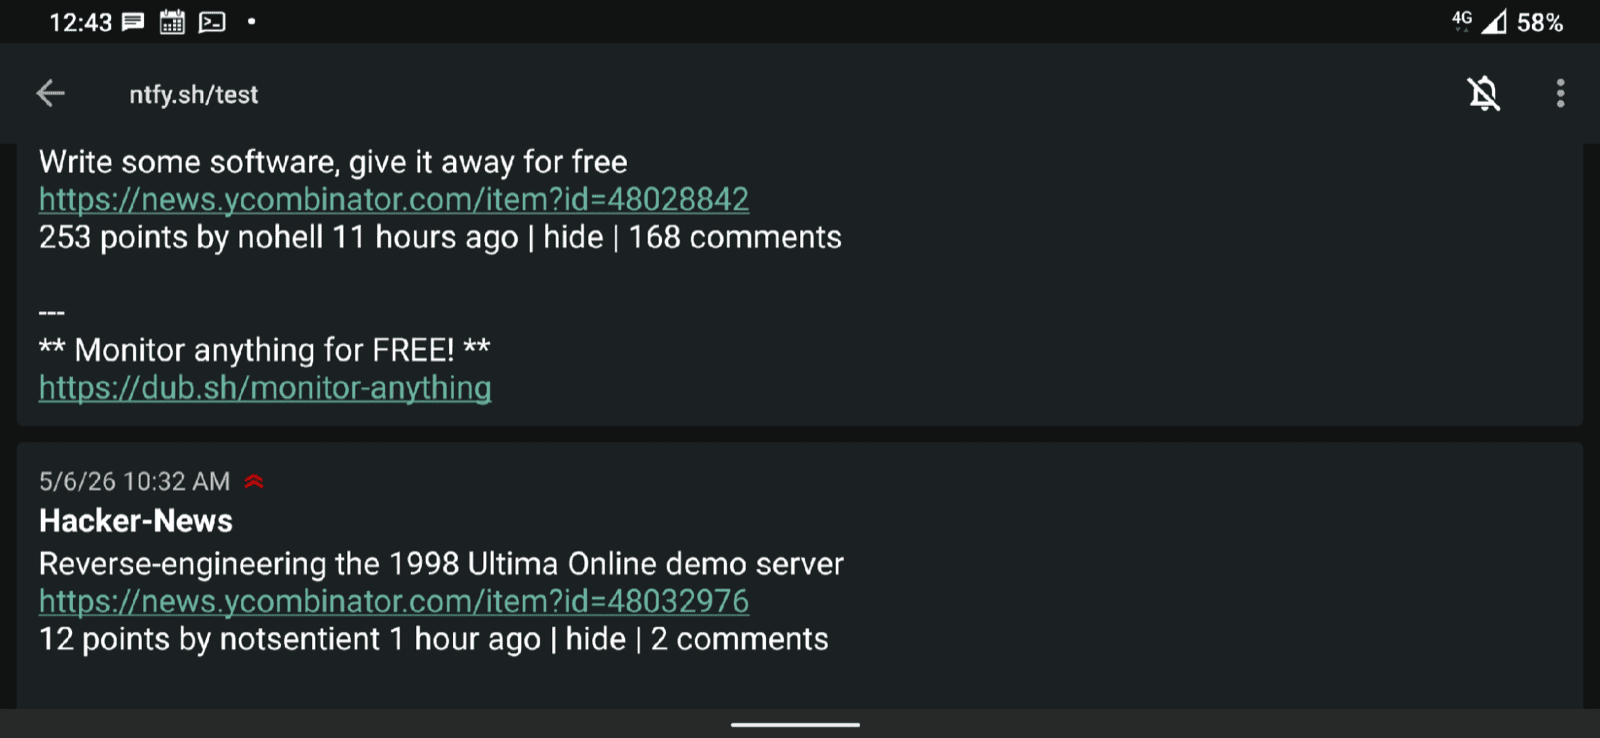
Hacker News
Like to follow tech news? I do... from time to time.

Here is all the configuration we need to monitor all new listings on this website:
title: {
  selectors: "table table tr[class^='athing'] td:nth-child(3) > span > a",
},
links: {
  selectors: ["table table tr td[class^='subtext'] span a[href^=item]:first-child"],
  extractor: node => node.href,
},
stats: {
  selectors: ".subtext",
}
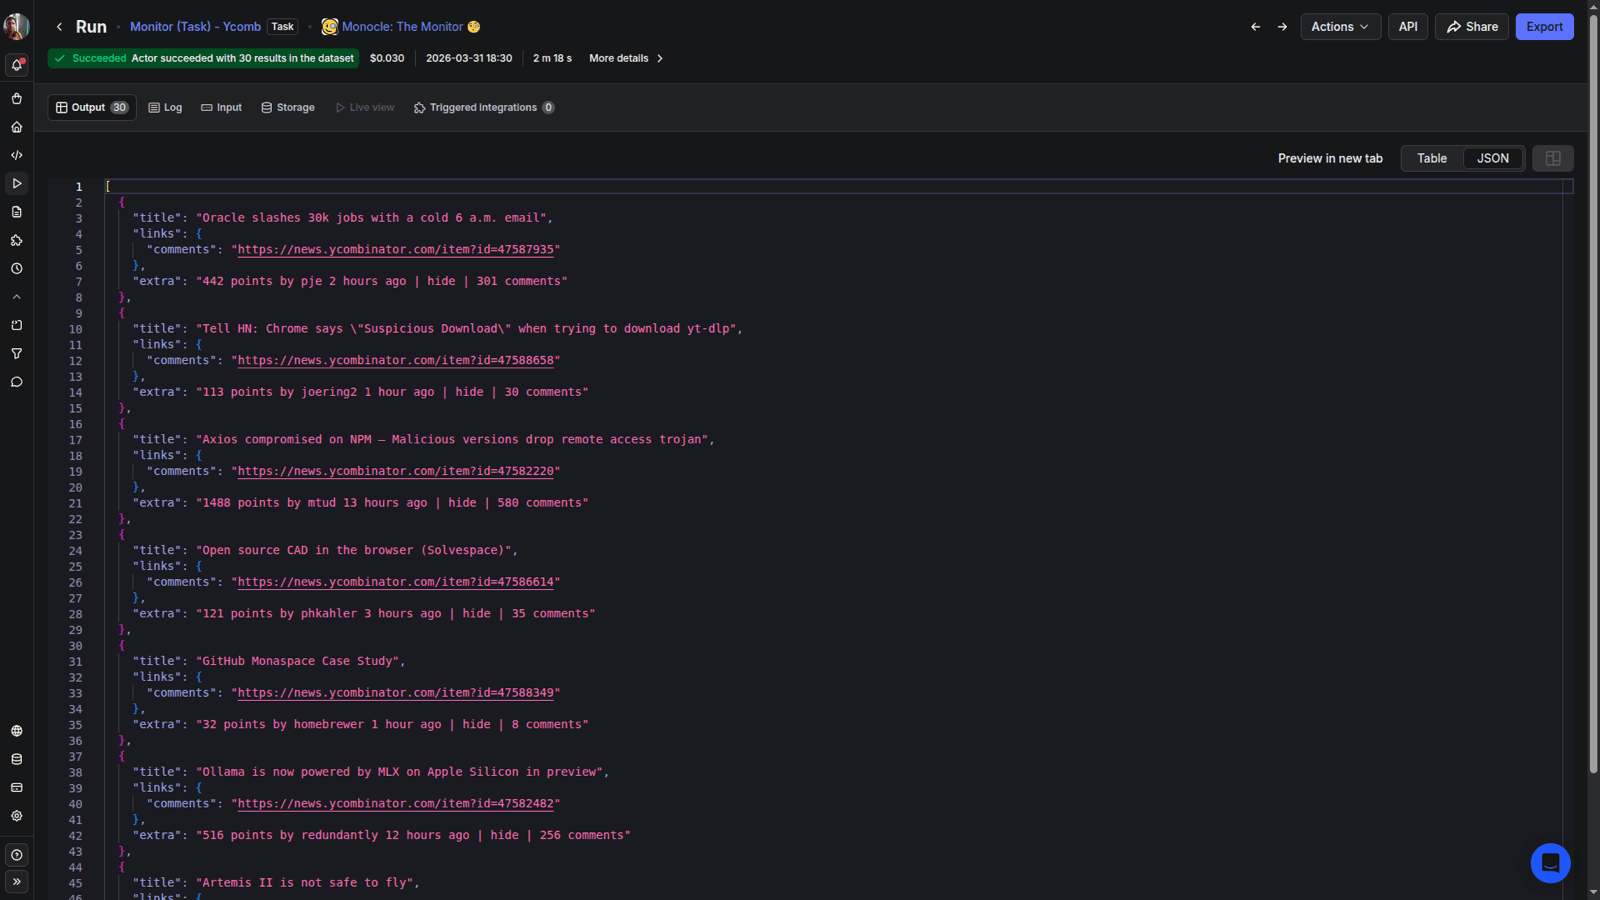
Notification on any news items added to the list:
Freelancer
Need to watch out for new jobs on a marketplace?
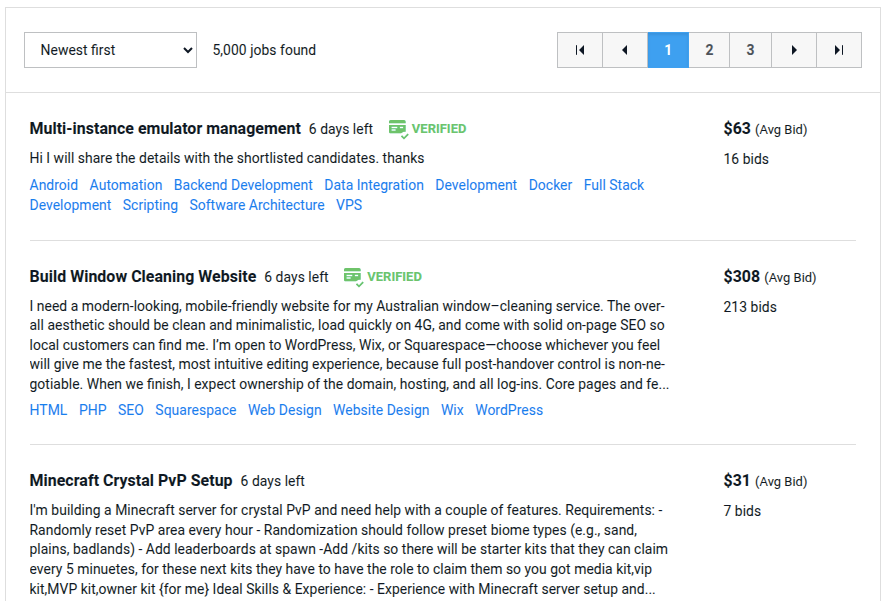
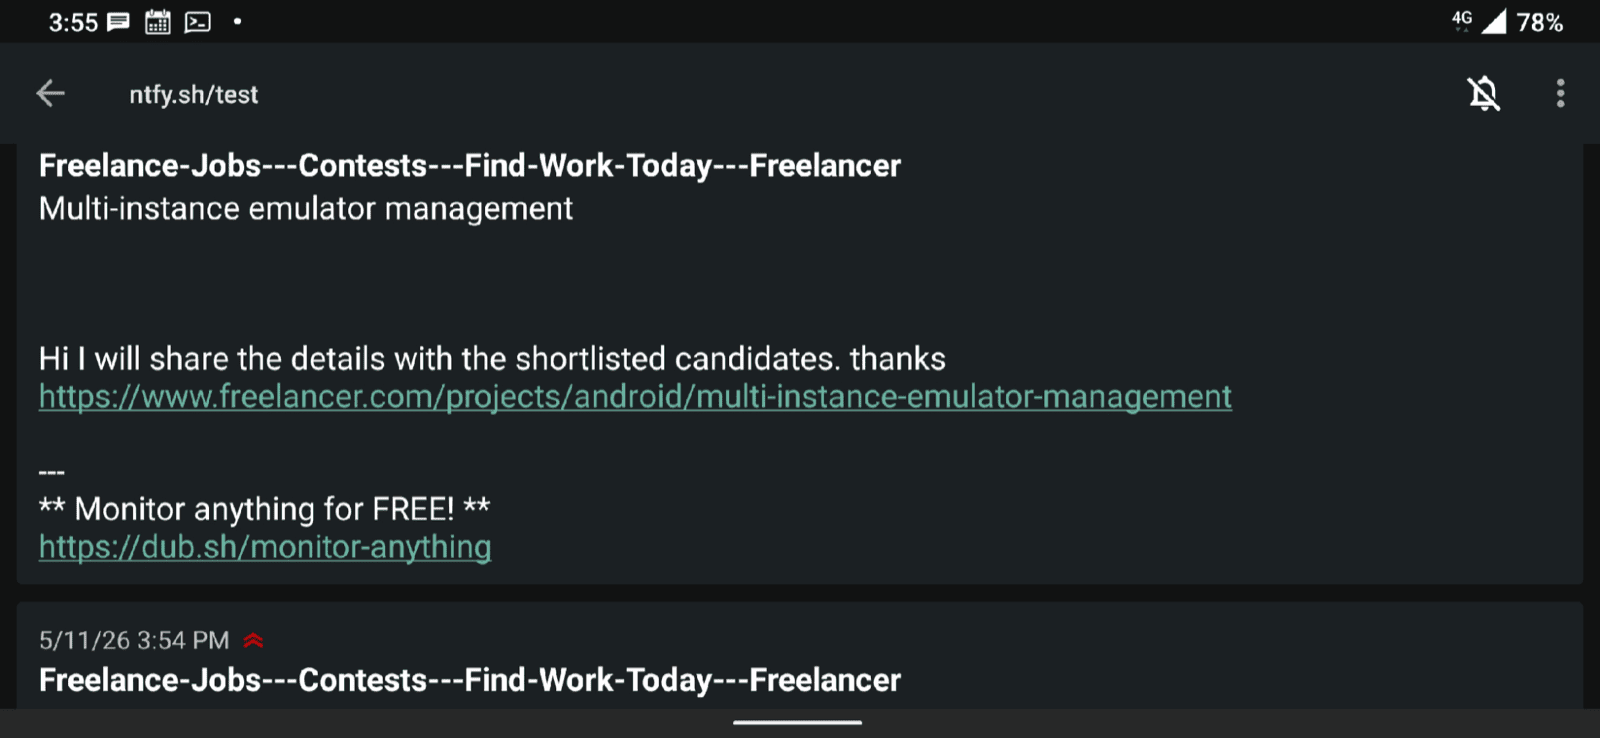
Here is how we can do it using this configuration:
title: {
  selectors: ['#project-list > div > div > div.JobSearchCard-primary > div.JobSearchCard-primary-heading > a'],
},
text: {
  selectors: ['#project-list > div > div > div.JobSearchCard-primary > p'],
},
link: {
  selectors: ['#project-list > div > div > div.JobSearchCard-primary > div.JobSearchCard-primary-heading > a'],
  extractor: node => node.href,
}
Notification on any new items in the listing:
By the way, all of these configs are included in the Actor out of the box!
We can get much more fancy with other features like keywords and filters to narrow down the results, but that's outside the scope of this article.
Technical challenges
I didn't expect this to grow into much complexity when starting the project as a personal watchdog honestly.
Notable technical challenges on this project included:
- Parsing and sanitizing URLs into automatic dataset labels
- Parsing and converting data and config variations recursively
- Custom backoff logic for errors during automatic listing pagination
- Zipping and stitching multiple sets of data from listing items into a coherent dataset recursively
- Matching identical items in their various forms and shapes (e.g. before and after custom decorators, serialization, etc.)
Learning opportunities
I learned a lot on this project, including:
Input validation
I wanted to implement input validation using simple static rules initially, but soon realized it was too naive. Providing many different input and configuration options increases the complexity of handling their combinations dramatically. I didn't use a validation library. Instead, I wrote custom validation code to catch the most common errors and missing properties or dependencies. I no longer think the project could support all its options and features with template-based validation alone.
Static type checking
I wanted to avoid a build step at any cost, while still having type checking available. Therefore, the project was initially set up for type checking and uses types in JSDoc. Adding new features often meant a significant restructure. The hard part was doing it without breaking how serialized configs and records get parsed and matched, since they take different shapes at runtime. Constantly running into type errors when all I wanted to do was move fast and implement ideas while they were fresh was really painful at times. But type checks saved me from many silly typos and obscure errors I'd have missed otherwise. There were weaker moments where working around the type system on complex issues seemed acceptable, but in general, I believe it really pays off in the end to stick with it and endure the initial pain.
Separation of concerns
I saw a chance to abstract the comparison logic (the part that matches and compares new data against previous records in the datasets), since I could reuse it later for planned higher-level integration projects. So I split it out into its own codebase. This project uses that library internally, and things worked out fine. But over time, much tighter coupling surfaced between the two than I'd like, and tighter than I realized at the start. Actually splitting them cleanly without too many shared dependencies is quite tricky, and it may have been better to postpone all this effort until the time it was actually needed for future projects.
Contracts and composability
The internal mechanics of the input parsers and data transformers use a lot of recursion and currying to compose different transformation pipelines. Together with types that define the input/output contracts, these are powerful concepts I'd like to explore and use more. There's serious liberation in defining contracts verified by type checks and then knowing exactly what to expect on both ends without necessarily understanding the full complexity of the underlying implementation at all times. This is very useful, especially when returning to a project after a long period of time to make some changes.
Extended invitation
Try this Actor on your own. You can just select any of the existing presets and launch. The real power is that once you create a config, you can include it in the Actor and share it with everyone. To set up your own, the easiest way is to give a website URL, one or more selectors to watch, and a channel or email for notifications. You can also trigger custom actions on the monitoring results, using the integration options available on the Apify platform.
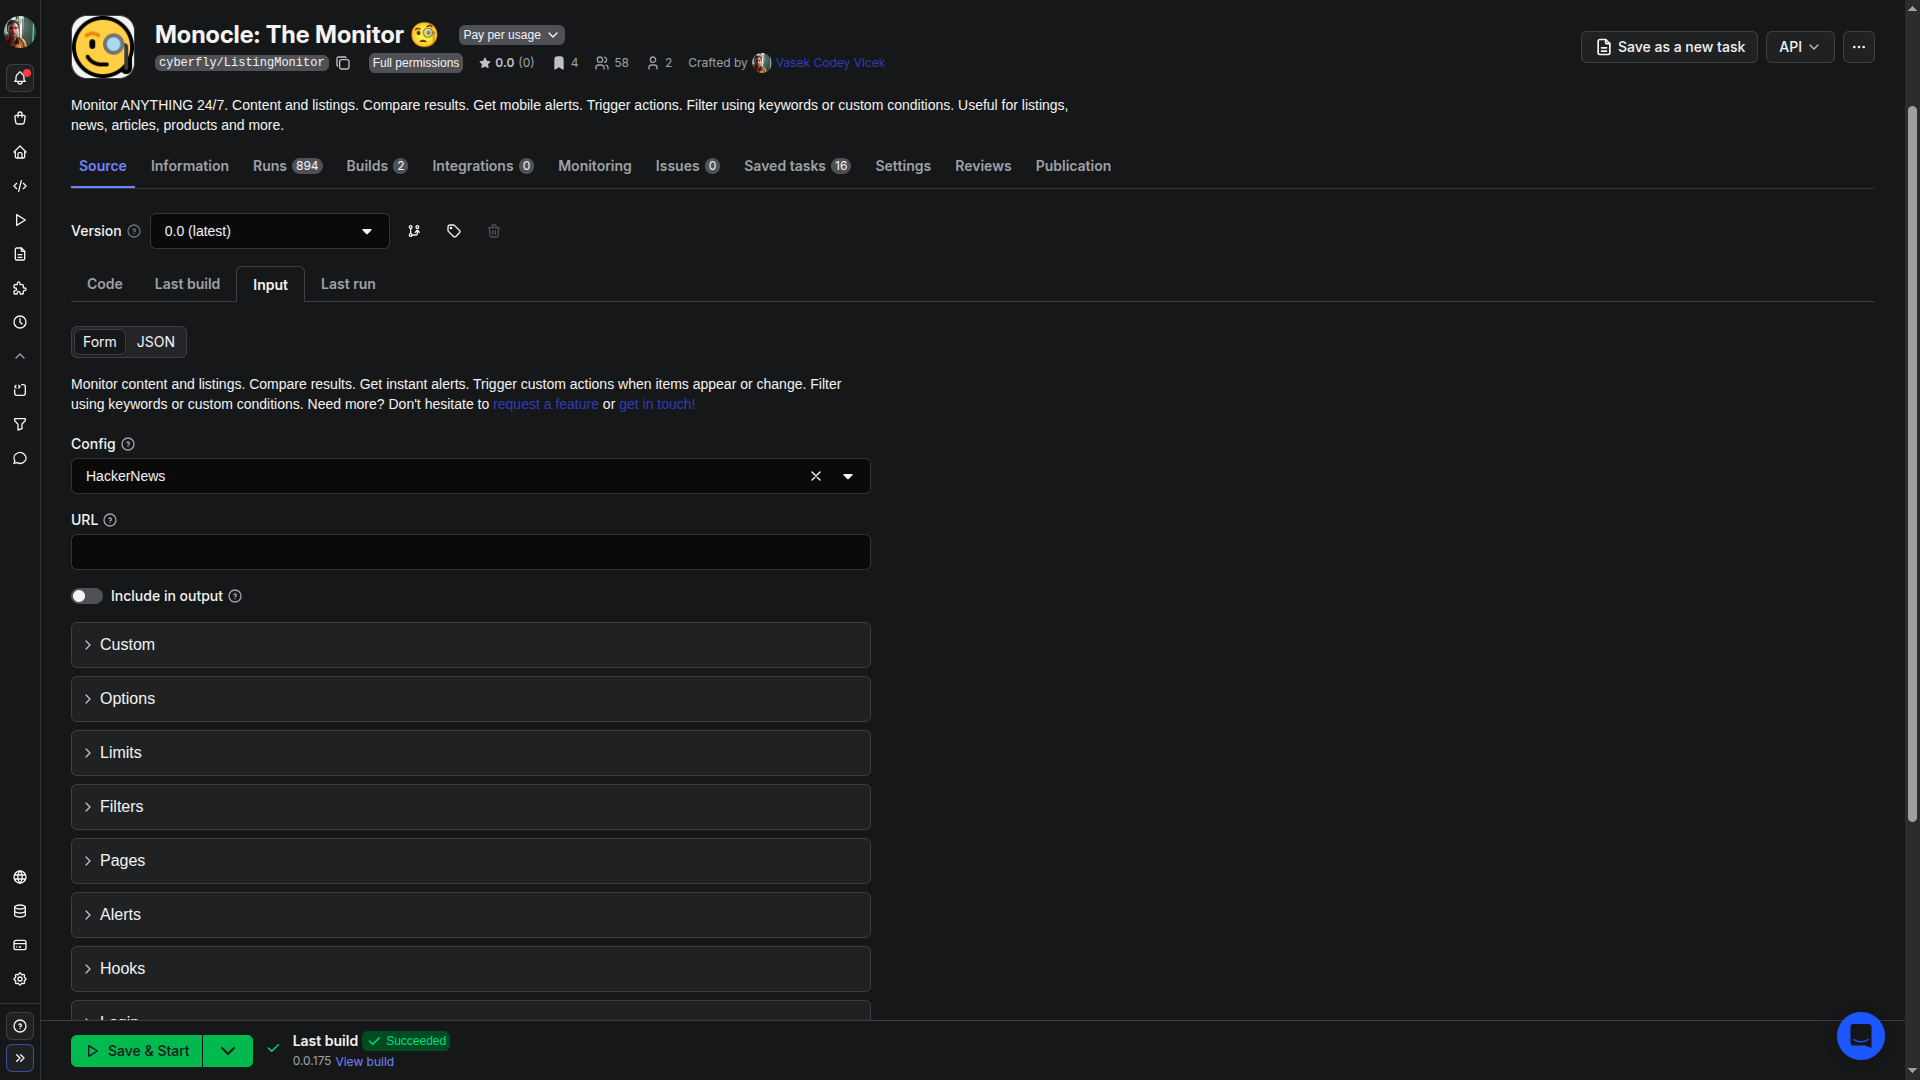
Inside the setup described above, this is what happens during the Actor runtime:
- Parse input and process config (evaluate input strings, flatten objects, etc.)
- Parse the target website host name and recreate all IDs, labels, and sessions
- Check for an existing dataset with the same identifier and load the data
- Parse and extract the current website state based on input or existing preset
- Apply any keyword or functional filters from the input or config to the new data
- Pass the current state through the filters and exclude any non-matching items
- Pass both the filtered data and the original dataset to the comparison module
- Apply optional decorators to extend each record and ensure consistent format
- JSON stringify items one by one from each pool and detect any changes in them
- Store updated items in both the named global dataset and the Actor default dataset
- Send an optional notification to email or mobile channels or trigger any integrations
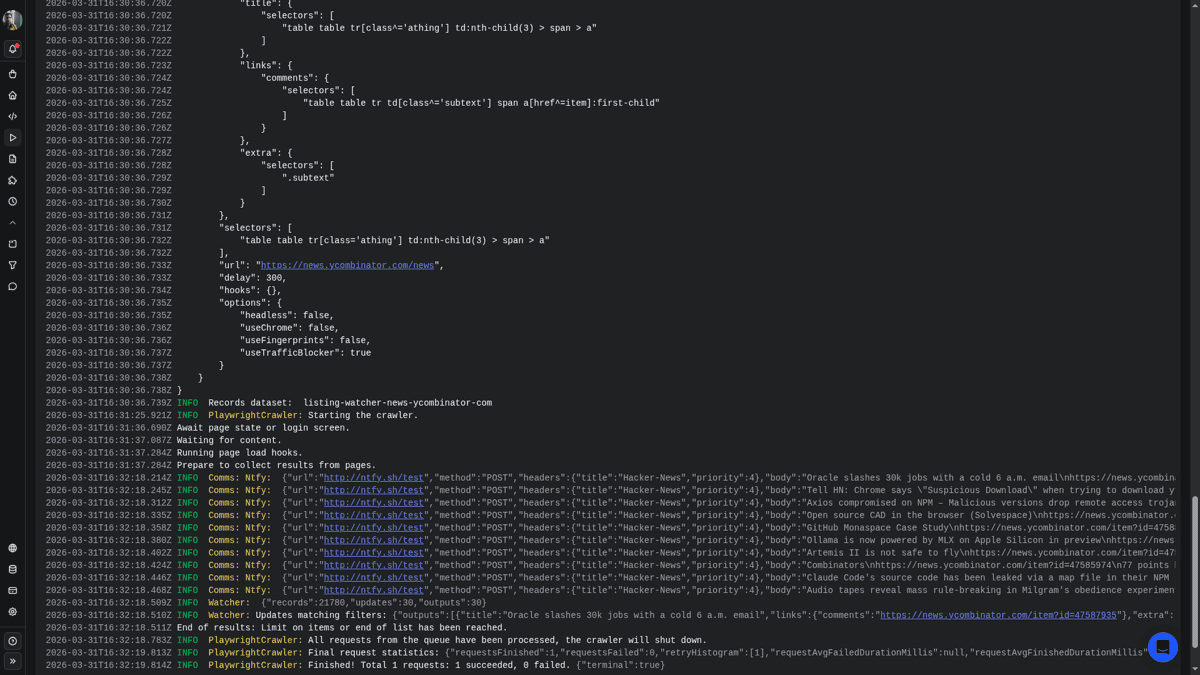
Security considerations
Be careful and responsible about handling credentials and monitoring websites that require authentication to access content:
- Keep all activity within the limits of normal use and avoid excessive automation.
- Comply with each site's terms of service, and only access private data you're permitted to.
- Follow the laws on intellectual property and personal data (GDPR).
- Use the secret, encrypted input field for passwords (decrypted at runtime, never stored in plain text).
Further improvements
I see some limitations still worth addressing. We still have to use complex, fragile selectors to pinpoint website elements to include in the monitoring. I've tried to make the Actor as user-friendly as the Apify input schema allows while still supporting advanced use cases, but it's not ideal that this complexity remains a major part of the process.
The suggested SelectorGadget extension makes it easier, but it's still an extra step. Building a standalone bookmarklet or similar tool natively into the project could further improve adoption and ease of use. How would you go about this? Do you notice any crucial missing features you would like to see? Really curious to know if you have an unusual use case. 🧐