
Content
Introduction to lxml
Python offers a powerful toolkit for data extraction, with libraries like Scrapy, Beautiful Soup, and Selenium. Each library caters to specific use cases and requirements. When it comes to efficient XML and HTML processing, lxml stands out due to its simplicity, efficiency, and flexibility.
This blog post dives deep into Python's lxml library. We'll cover setup for different operating systems, explore its key features, and learn how to extract website content using lxml and Requests. Each step comes with practical Python lxml examples.
Without further ado, let’s get started!
Getting started with lxml
lxml is one of the fastest and most feature-rich libraries for handling XML and HTML documents in Python. With the Python lxml library, you can easily create, parse, and query XML and HTML document
Main features of LXML:
- This library is essentially a wrapper over the C libraries libxml2 and libxslt. It is unique in that it combines the speed of these libraries with the simplicity of Python.
- Provides ElementTreeAPI and XSLT support.
- One of the best aspects of lxml is its efficient memory usage. So, it’s great for when you need to parse complex and large documents.
- It offers great flexibility and can parse nearly any XHTML or HTML document.
However, lxml isn’t suitable for every parsing task. The library may encounter difficulties if your target web page has poorly written or broken HTML. In this case, it includes a fallback to Beautiful Soup.
The recommended way to install lxml on your system is using the pip package manager. Run the following command in your terminal (Linux/Mac) or command prompt (Windows):
pip install lxml
To use the lxml library in your program, import it first.
from lxml import etree
This will import the etree module, the module of our interest from the lxml library. etree follows the ElementTree API as much as possible, building it on top of the native libxml2 tree.
Let's now get our hands dirty and see what cool things can be done using this library.
Understanding the element class
The Element class is the primary component for representing and handling elements in an XML tree using etree. It offers methods for accessing and modifying element attributes, text content, and child elements. This class is the main container object, and most of the XML tree functionality is accessed through it.
Before proceeding, make sure to create a Python file (in my case main.py) and begin writing the code.
Creating an element
To create an element, instantiate the Element class, and pass the tag name as an argument:
root = etree.Element("root")
Adding child elements
Child elements can be added using the subElement factory function. The subElement function requires the names of both the root node and the child node to be created.
child1 = etree.SubElement(root, "child1")
child2 = etree.SubElement(root, "child2")
Alternatively, you can directly create elements and append them as children:
child3 = etree.Element("child3")
root.append(child3)
Putting together the above code snippets:
from lxml import etree

# Create an element with the tag 'root'
root = etree.Element("root")

# Add a child element with the tag 'child1'
child1 = etree.SubElement(root, "child1")

# Add another child element with the tag 'child2'
child2 = etree.SubElement(root, "child2")

# Create a new element
child3 = etree.Element("child3")

# Append the new element to the root
root.append(child3)
This XML document can be serialized and printed to the terminal using the tostring() function. It takes one required argument, the root of the document. You can optionally set pretty_print to True for better readability. The tostring()function returns bytes, which can be converted to a string using decode().
Add the below line to the code:
print(etree.tostring(root, pretty_print=True).decode())
The result is:
<root>
  <child1/>
  <child2/>
  <child3/>
</root>
Modifying attributes
Let’s see how you can set, access, and remove attributes.
Setting attributes for the root element:
root.set("attr1", "val1")
root.set("attr2", "val2")

etree.dump(root)
Note that here we used etree.dump() instead of calling etree.tostring(). Unlike etree.tostring(), it doesn't return a value but writes the output directly to the console. tostring() is for serialization, returning a string you can store or write to a file. We use etree.dump() for debugging purposes only.
The result is:
<root attr1="val1" attr2="val2">
  <child1/>
  <child2/>
  <child3/>
</root>
Accessing attributes:
attr_value = root.get("attr1")
print(attr_value)  # Output: val1
Removing an attribute:
root.attrib.pop("attr2")
etree.dump(root)
The result is:
<root attr1="val1">
  <child1/>
  <child2/>
  <child3/>
</root>
Adding text content
Text content can be added or modified using the .text attribute.
child1.text = "This is child 1"
child2.text = "This is child 2"

etree.dump(root)
The result is:
  This is child 1
  This is child 2
Removing elements
Elements can be removed using the .remove() method.
root.remove(child2)
etree.dump(root)
The result is:
This is child 1
Great! Now you have a good understanding of creating and manipulating XML files.
Here's the complete code for creating an XML file using lxml.
from lxml import etree

# Create the root element
database = etree.Element("Database")

# Add BlogPost elements with Author and Title nested elements
post1 = etree.SubElement(
    database, "BlogPost", attrib={"id": "1", "category": "Programming"}
)
author1 = etree.SubElement(post1, "Author")
author1.text = "Doe John"
title1 = etree.SubElement(post1, "Title")
title1.text = "Introduction to Python Programming"

post2 = etree.SubElement(
    database, "BlogPost", attrib={"id": "2", "category": "Web Development"}
)
author2 = etree.SubElement(post2, "Author")
author2.text = "Smith Jane"
title2 = etree.SubElement(post2, "Title")
title2.text = "Understanding JavaScript Closures"

# Print the XML structure
etree.dump(database)
The result is:
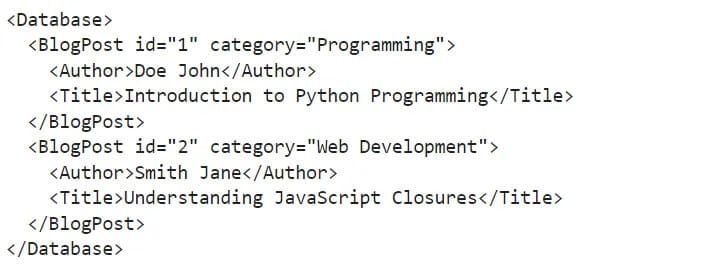
Now, let’s make some modifications to the above XML file.
from lxml import etree
# Create the root element
database = etree.Element("Database")
# Add BlogPost elements with Author and Title nested elements
post1 = etree.SubElement(
database, "BlogPost", attrib={"id": "1", "category": "Programming"}
)
author1 = etree.SubElement(post1, "Author")
author1.text = "Doe John"
title1 = etree.SubElement(post1, "Title")
title1.text = "Introduction to Python Programming"
post2 = etree.SubElement(
database, "BlogPost", attrib={"id": "2", "category": "Web Development"}
)
author2 = etree.SubElement(post2, "Author")
author2.text = "Smith Jane"
title2 = etree.SubElement(post2, "Title")
title2.text = "Understanding JavaScript Closures"
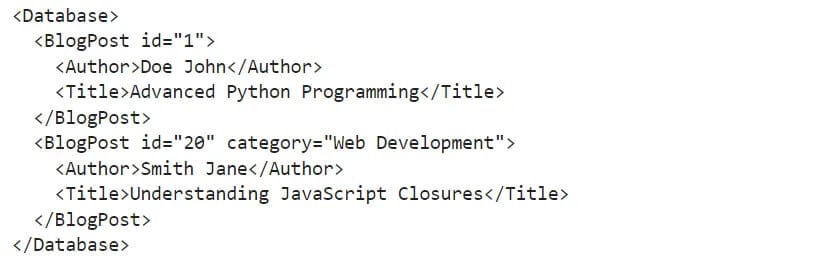
# Perform modifications...
# Remove the category attribute from the first BlogPost
post1.attrib.pop("category")
# Modify the id attribute of the second BlogPost
post2.set("id", "20")
# Change the text of the Title element for the first BlogPost
title1.text = "Advanced Python Programming"
# Print the updated XML structure
etree.dump(database)
The result is:
Add the following lines at the bottom of the snippet, and run it again. This will save the contents to blogs.xml in the same folder where you are running the script.
with open("blogs.xml", "wb") as f:
    f.write(
        etree.tostring(
            database, pretty_print=True, xml_declaration=True, encoding="UTF-8"
        )
    )
Basic XML parsing with lxml
So far, we've covered creating new elements, assigning attributes, and so forth. Now, let's see how to parse an existing HTML or XML file to extract specific information.
Parsing XML files and strings
You can use lxml to parse XML data from both strings and files. Parsing will convert the XML data into an ElementTreeobject, allowing for easy navigation and manipulation of the XML content. Before we continue, save the following snippet as blogs.xml.
<Database>
    <BlogPost id="1" category="Programming" tags="Python, Basics, Tutorial">
        <Date>05/20/24</Date>
        <Author>Doe John</Author>
        <Title>Introduction to Python Programming</Title>
        <Content
    >Learn the basics of Python programming, including variables and control structures.</Content>
    </BlogPost>

    <BlogPost
    id="2"
    category="Web Development"
    tags="JavaScript, Closures, Advanced"
  >
        <Date>04/18/24</Date>
        <Author>Smith Jane</Author>
        <Title>Understanding JavaScript Closures</Title>
        <Content
    >Explore how closures work in JavaScript and their practical applications.</Content>
    </BlogPost>
</Database>
XML content can be stored in a file system or as a string. Use the parse method to load it from a file, which returns an ElementTree object. To access the root element, call the getroot method.
from lxml import etree

tree = etree.parse("blogs.xml")
root = tree.getroot()
etree.dump(root)  # prints file contents to console
The lxml.etree module offers another method for parsing XML content from a valid XML string: fromstring(). It directly returns the root element of the parsed XML tree. Therefore, there's no need to call getroot().
from lxml import etree

xml = """
<Database>
    <BlogPost id="1">
        <Author>Doe John</Author>
        <Title>Introduction to Python Programming</Title>
    </BlogPost>

    <BlogPost id="2">
        <Author>Smith Jane</Author>
        <Title>Understanding JavaScript Closures</Title>
    </BlogPost>
</Database>
"""
root = etree.fromstring(xml)
etree.dump(root) # prints XML content to console
Navigating through an XML tree
Once you have the root of the XML tree, you can navigate through the tree using element tags, attributes, and text content.
Accessing elements by tags:
To access elements by tags using the lxml library in Python, you can use the findall and find methods provided by the etree module. Here's how you can do it:
from lxml import etree

tree = etree.parse("blogs.xml")
root = tree.getroot()

for blog in root.findall("BlogPost"):
    author = blog.find("Author").text
    title = blog.find("Title").text
    print(f"Author: {author}, Title: {title}")
The result is:

Accessing attributes:
To access attributes of elements in XML using the lxml library in Python, you can use the get method along with the element object. Here's how you can do it:
from lxml import etree

tree = etree.parse("blogs.xml")
root = tree.getroot()

for blog in root.findall("BlogPost"):
    blog_id = blog.get("id")
    blog_cat = blog.get("category")
    blog_tags = blog.get("tags")
    print(f"Blog ID: {blog_id}, Category: {blog_cat}, Tags: {[blog_tags]}")
The result is:

Using XPath to find elements and text
XPath is a powerful language for querying XML documents, and lxml supports XPath expressions. Use the .xpath()method to find elements.
from lxml import etree

tree = etree.parse("blogs.xml")
root = tree.getroot()

# Find all blogpost titles
title = root.xpath("//BlogPost/Title/text()")
print(title)

# Find the title of the blogpost with id=1
title_id_1 = root.xpath('//BlogPost[@id="1"]/Title/text()')
print(title_id_1)
The result is:

Advanced lxml features for XML parsing
The lxml library offers advanced features for XML processing, including XPath expressions, namespace handling, schema validation, and efficient parsing of large files using iterparse.
Advanced XPath expressions
XPath expressions can be powerful for querying complex XML documents. It offers a rich set of functions, including contains(), starts-with(), and more, to navigate and extract data precisely.
from lxml import etree

tree = etree.parse("blogs.xml")
root = tree.getroot()

# Find the title of the blog post with the tag "Python"
python_post_title = root.xpath("//BlogPost[contains(@tags, 'Python')]/Title/text()")
print(python_post_title)

# Find the title of the blog post in the "Web Development" category
web_dev_post_title = root.xpath("//BlogPost[@category='Web Development']/Title/text()")
print(web_dev_post_title)

# Find the title of the blog post that starts with "Introduction"
intro_post_title = tree.xpath("//BlogPost[starts-with(Title, 'Introduction')]/Title/text()")
print(intro_post_title)
The result is:

Handling namespaces
XML documents often use namespaces to avoid element name conflicts. Here's how you can handle namespaces with lxml.
- Create a dictionary mapping namespace prefixes to their URIs for reference.
- Use namespace prefixes in XPath queries or methods (
find(),findall()). - Pass the namespace map as the
namespacesargument when querying or parsing XML.
from lxml import etree

xml_string = """
<root>

<h:table xmlns:h="<http://www.example.com/html>">
  <h:tr>
    <h:td>Oranges</h:td>
    <h:td>Grapes</h:td>
  </h:tr>
</h:table>

<f:table xmlns:f="<https://www.example.com/furniture>">
  <f:name>Modern Dining Table</f:name>
  <f:width>100</f:width>
  <f:length>150</f:length>
</f:table>

</root>
"""

# Parse the XML
root = etree.fromstring(xml_string)

# Define namespace map
ns_map = {"h": "<http://www.example.com/html>", "f": "<https://www.example.com/furniture>"}

# Use XPath to find elements
h_td_elements = root.xpath("//h:table/h:tr/h:td/text()", namespaces=ns_map)
f_name_element = root.xpath("//f:table/f:name/text()", namespaces=ns_map)

print(h_td_elements) # Output: ['Oranges', 'Grapes']
print(f_name_element) # Output: ['Modern Dining Table']
Schema validation
You can use XML Schema validation to ensure that an XML document adheres to a specified schema.
from lxml import etree

# Updated XML document
xml_data = """
<BlogPost id="1" category="Programming" tags="Python, Basics, Tutorial">
    <Date>05/20/24</Date>
    <Author>Doe John</Author>
    <Title>Introduction to Python Programming</Title>
    <Content
  >Learn the basics of Python programming, including variables and control structures.</Content>
</BlogPost>
"""

# XML schema
xml_schema = """
<xs:schema xmlns:xs="<http://www.w3.org/2001/XMLSchema>">
  <xs:element name="BlogPost">
    <xs:complexType>
      <xs:sequence>
        <xs:element name="Date" type="xs:string" />
        <xs:element name="Author" type="xs:string" />
        <xs:element name="Title" type="xs:string" />
        <xs:element name="Content" type="xs:string" />
      </xs:sequence>
      <xs:attribute name="id" type="xs:string" />
      <xs:attribute name="category" type="xs:string" />
      <xs:attribute name="tags" type="xs:string" />
    </xs:complexType>
  </xs:element>
</xs:schema>
"""

# Parse schema and document
schema_root = etree.XML(xml_schema)
schema = etree.XMLSchema(schema_root)
xml_root = etree.fromstring(xml_data)

# Validate XML against schema
is_valid = schema.validate(xml_root)

if is_valid:
    print("XML is valid against the schema.")
else:
    print("XML is not valid against the schema.")
Parsing large XML files with iterparse
Traditional methods of parsing large XML files can be memory-intensive because they build the entire tree in memory. lxml's iterparse function offers a memory-efficient alternative. It iterates over XML elements as encountered, processing them incrementally and reducing memory usage for large files.
from lxml import etree

def process_blogpost(blog_element):
    # Extract information from the BlogPost element
    blog_id = blog_element.get("id")
    author = blog_element.find("Author").text
    title = blog_element.find("Title").text
    date = blog_element.find("Date").text

    print(f"Blog ID: {blog_id}")
    print(f"Author: {author}")
    print(f"Title: {title}")
    print(f"Date: {date}")
    print()

# Open the XML file for parsing
with open("blogs.xml", "rb") as f:
    # Iterate over XML elements as they are parsed
    for event, element in etree.iterparse(f, events=("end",), tag="BlogPost"):
        # Process only 'BlogPost' elements
        if event == "end":
            # Process the BlogPost element
            process_blogpost(element)
            # Clear the element from memory to free resources
            element.clear()
The result is:

This code parses the XML file incrementally, processing each element it encounters. The process_blogpost function extracts information and prints it to the console. Finally, it clears each element from memory to conserve resources. Make sure to replace 'blogs.xml' with the actual path to your XML file.
Lxml in web scraping and data extraction
Now that you've learned how to parse and find elements in an XML document, let's explore how to extract content from a website using lxml and the Python Requests library.
By combining Python's requests library with lxml, you can extract and parse website content. Requests send an HTTP request (like GET) to a website's URL, retrieving the HTML response. Lxml then parses the raw HTML from requests, transforming it into a structured element tree.
This tree allows you to easily navigate and manipulate the HTML elements using CSS selectors or XPath within lxml to locate specific elements.
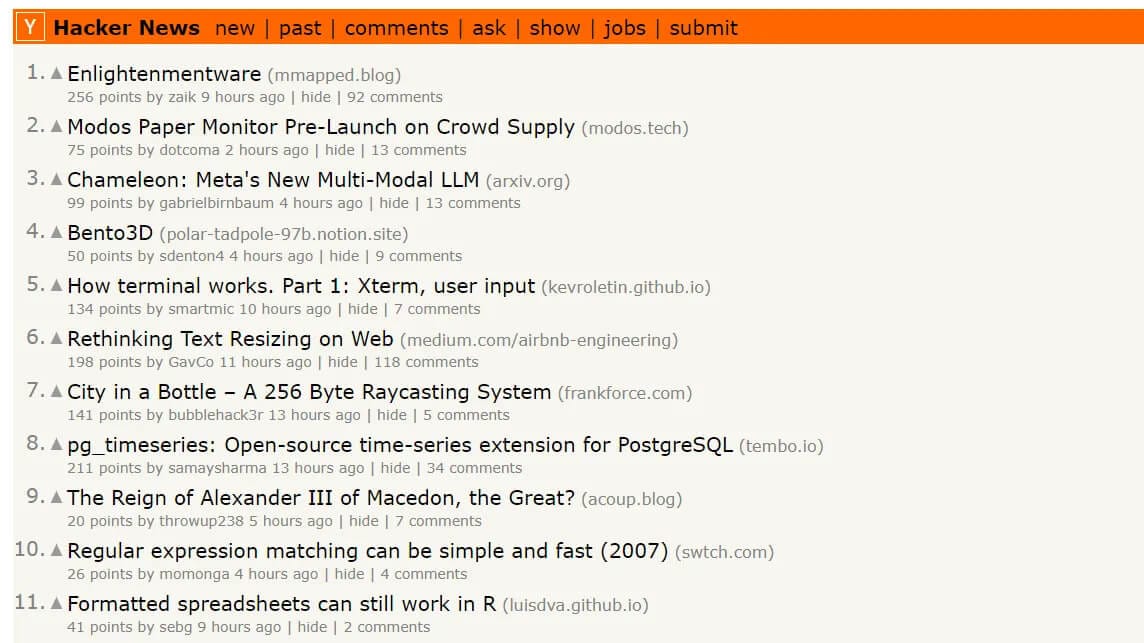
We'll build a Hacker News scraper to extract the rank, URL, and title of articles posted on HN.
Install requests using the following command:
pip install requests
Let's fetch the HTML of the website.
import requests

# open the target website and fetch the HTML
response = requests.get("https://news.ycombinator.com")

# validate the response status
if response.ok:
    # print the HTML if successful
    print(response.text)
else:
    print(f"{response.status_code}, unable to process request")
The code outputs the HTML content of the website:

Great! Now that we are properly targeting the page's HTML code, it's time to use lxml to parse the code and extract the specific data we want.
Let's use lxml to parse the HTML data and scrape the contents from all the articles on the first page of Hacker News.
import requests

response = requests.get("https://news.ycombinator.com")
html = response.text

# Use lxml to parse the HTML
tree = html.fromstring(html)
Next, let's use the xpath() method to select all elements with the "athing" class and save them to a variable named articles.
from lxml import html
import requests

response = requests.get("https://news.ycombinator.com")
html_content = response.text

# Use lxml to parse the HTML
tree = html.fromstring(html_content)

articles = tree.xpath('//tr[@class="athing"]')
We'll again use the xpath() method to grab the values we want to extract from an HTML page. We'll focus on extracting each article's URL, title, and rank and organize the obtained data in a Python dictionary.
from lxml import html
import requests
response = requests.get("https://news.ycombinator.com")
html_content = response.text
# Use lxml to parse the HTML
tree = html.fromstring(html_content)
articles = tree.xpath('//tr[@class="athing"]')
data = []
# Extract data from each article on the page
for article in articles:
# Extract rank
rank = article.xpath('.//span[@class="rank"]/text()')[0].strip()
# Extract title and URL
title = article.xpath('.//td[@class="title"]//a/text()')[0].strip()
url = article.xpath('.//td[@class="title"]//a/@href')[0].strip()
# Append extracted data to the list
data.append({"rank": rank, "title": title, "url": url})
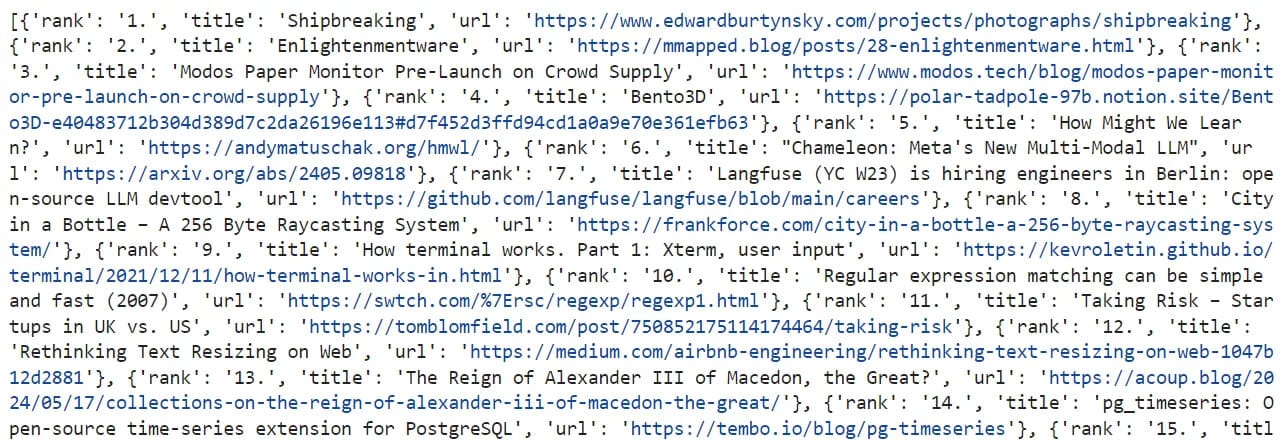
print(data)
The result is:
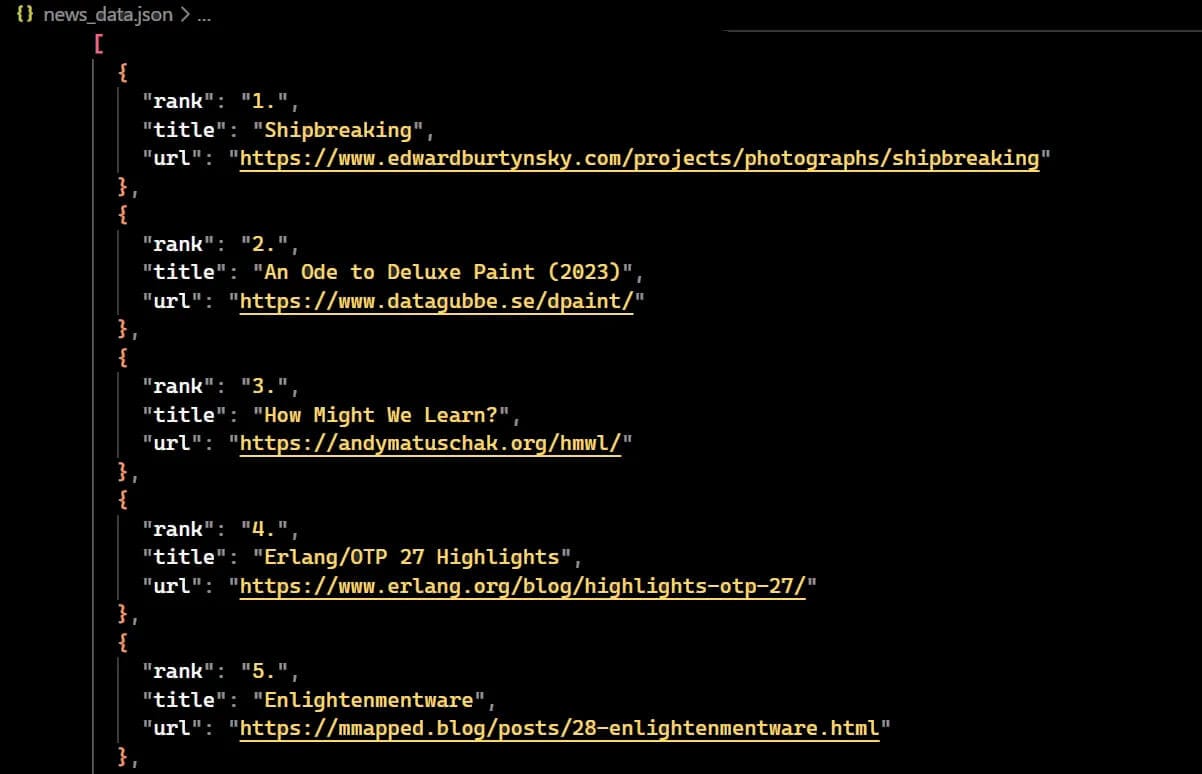
Finally, to make the data more presentable, let’s use the json library to save our output to a JSON file. Here is what our code looks like:
from lxml import html
import requests
import json

response = requests.get("https://news.ycombinator.com")
html_content = response.text

# Use lxml to parse the HTML
tree = html.fromstring(html_content)

articles = tree.xpath('//tr[@class="athing"]')
data = []

# Extract data from each article on the page
for article in articles:
    # Extract rank
    rank = article.xpath('.//span[@class="rank"]/text()')[0].strip()

    # Extract title and URL
    title = article.xpath('.//td[@class="title"]//a/text()')[0].strip()
    url = article.xpath('.//td[@class="title"]//a/@href')[0].strip()

    # Append extracted data to the list
    data.append({"rank": rank, "title": title, "url": url})

print("Saving output data to JSON file.")
save_output = open("news_data.json", "w")
json.dump(data, save_output, indent=2, ensure_ascii=False)
save_output.close()
The result is:
If you want to use CSS selectors instead of XPath, you can use the cssselect method provided by lxml.
import requests
from lxml import html

response = requests.get("https://news.ycombinator.com")
html_content = response.text

tree = html.fromstring(html_content)

# Extract articles data using CSS selectors
articles = tree.cssselect("tr.athing")
data = []

for article in articles:
    rank = article.cssselect("span.rank")[0].text.strip()
    title = article.cssselect("td.title a")[0].text.strip()
    url = article.cssselect("td.title a")[0].get("href").strip()

    data.append({"rank": rank, "title": title, "url": url})
Best practices and tips for using lxml
You can make using lxml more efficient and effective by following some best practices and tips:
- XPath/CSS selectors: lxml supports XPath and CSS selectors for element selection in HTML or XML documents. XPath offers a powerful and concise way to navigate the tree and extract data.
- Incremental parsing (large files): To reduce memory usage with large files, use
iterparse()to process data in chunks. - Error handling: Implement proper exception handling (using try-except blocks) to manage unexpected data or invalid structures gracefully.
- Choose the right parser: Use
lxml.etreefor XML andlxml.htmlfor HTML. - Control output format: Use
etree.tostringfor string serialization with format control. Useetree.dumpfor quick visualization of the XML structure during development/debugging.
Conclusion and next steps
The tutorial began with a basic introduction to the lxml library, explaining its purpose and uses. We then covered installation on various environments like Windows and other operating systems. Next, we explored functionalities for traversing XML/HTML trees. We also discussed web scraping capabilities, particularly when combined with the requests library.
The next step is to try parsing various XML and HTML documents, explore the methods covered, and see how they can apply to your projects. Consider building a simple web scraper, but ensure you understand web scraping basics first. Check the further reading section for more information.