The term serverless refers to an architecture design pattern that lets you deploy and run applications without having to bother with servers and infrastructure. That doesn't mean no servers are involved, but it does mean that you don't have to worry about managing, scaling, and maintaining your servers and infrastructure; instead, you can focus on writing code and shipping it.
In this article, you’ll learn about serverless architecture and some of its benefits and how to perform web scraping on any website using AWS Lambda services and deploy your scrapers to AWS.
Serverless overview
Serverless computing allows you to deploy your application without worrying about configuring servers to scale or setting up an infrastructure for your application; your cloud service provider handles all of this for you.
Amazon Web Services (AWS) is one such provider, and they offer serverless computing via their Lambda functions as Function as a Service (FaaS).
How an AWS Lambda function works
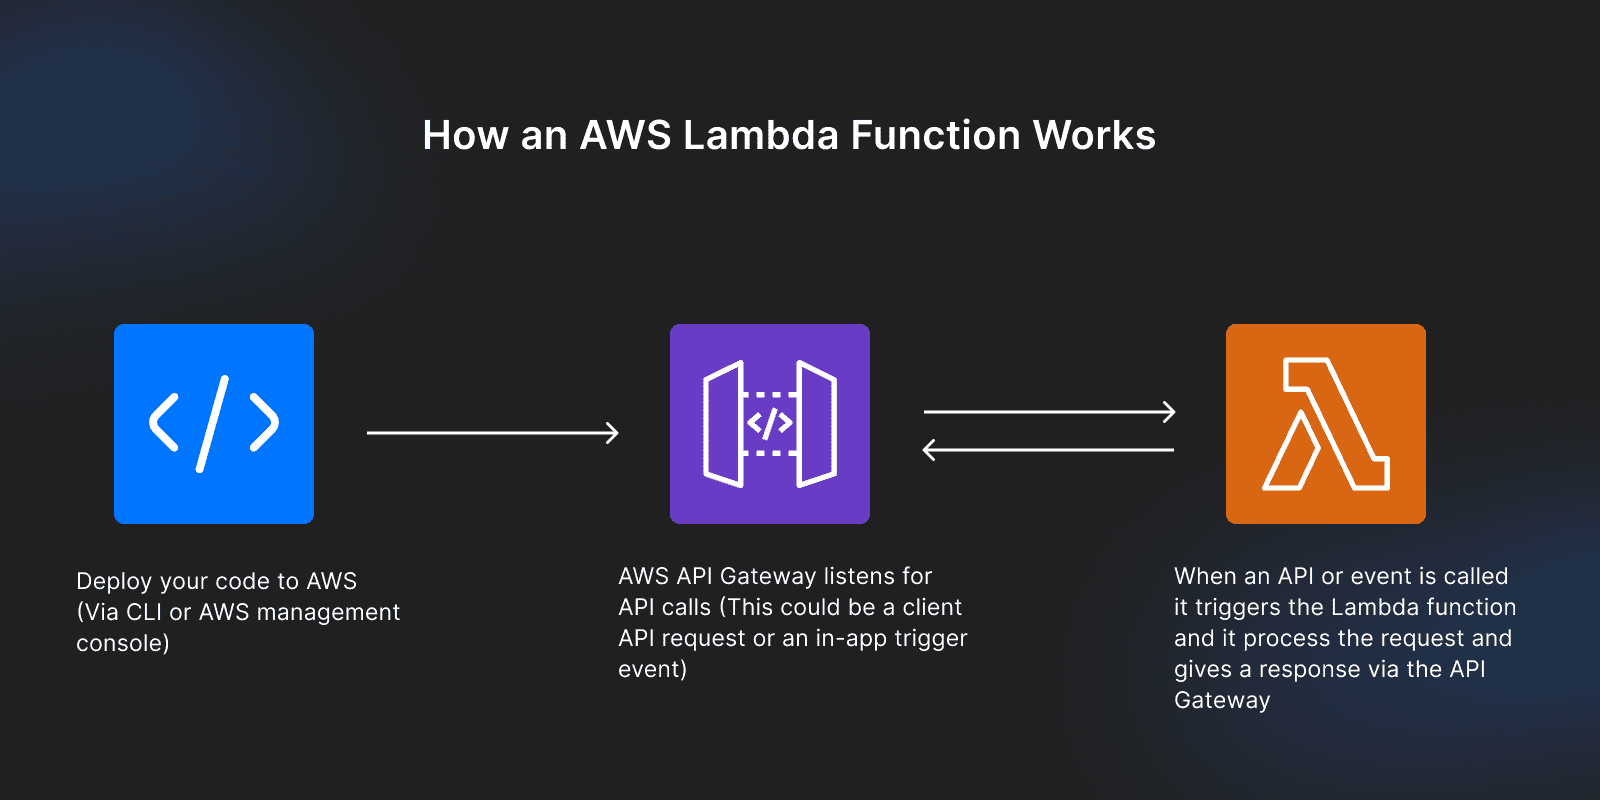
Unlike other traditional hosting services, where you upload your whole application and keep everything running, with serverless, you upload parts as functions, and these functions run and respond to events and requests only when triggered via the AWS API Gateway.
What that means is you can deploy functions for your application to perform specific operations on AWS Lambda, and the function listens for any events or calls via the AWS API Gateway. When triggered, it provides a response to that event or call.
These functions can be deployed independently for a single purpose or operation.
Pros of serverless architecture
- Scalability: AWS Lambda can automatically scale effectively to respond to high volumes of incoming requests by scaling up or down when needed. For example, suppose your web scraper applications usually respond to 100 requests, and at some point, that number increases to 1,000 requests. The Lambda function will spin up the resources it needs to handle those requests effectively and shut down resources when there's a reduced number of requests coming in.
- Reduced cost: since Lambda functions only run when needed and are modeled on a pay-as-you-use service, you pay only for the resources you consume. This means that on days when traffic to your application is low, your costs are also low.
- Rapid development and deployment: you don't have to worry about setting up a server or resolving scalability issues; your cloud service provider takes care of everything. Instead, you’re more focused on the development and delivery of your software.
Cons of serverless architecture
- Vendor lock-in: each cloud service provider has a slightly different process of deployment and management, so migration from one cloud provider to another can be challenging.
- Cold start: inactive functions take a while to spin back up when called. This can cause some additional latency in your application.
- Loss of control: since you're not in charge of maintaining the servers and infrastructure, you're less able to fully customize the servers to meet your needs.
TypeScript and web scraping
Typescript is a superset of JavaScript and enables you to write code that is predictable and scalable. It converts JavaScript from a loosely typed language to a strictly typed programming language by adding static type checking, ensuring your variable declarations, values, objects, and functions always return the exact kind of data type you’d expect them to return.
What are the benefits of using Typescript over JavaScript?
- Since it’s a superset of JavaScript, TypeScript contains all the capabilities of JavaScript along with static type checking in your code.
- TypeScript enables you to write predictable and readable code that is not only easy to understand but also performs as expected during production, as all your data type checks are done during build time (compile time).
- With TypeScript, you can catch errors at build time and avoid numerous bugs that usually occur during runtime.
You can read more about the differences between web scraping with TypeScript and JavaScript here.
Building a web scraper
Prerequisites
Before you begin this section, you need the following knowledge and tools:
- Node.js installed on your machine,
- A basic understanding of TypeScript or JavaScript
- An Amazon Web Service account (AWS)
- AWS CLI installed on your machine (you can follow the official guide here)
- AWS Serverless Application Model (SAM) CLI installed
1. User account setup on AWS
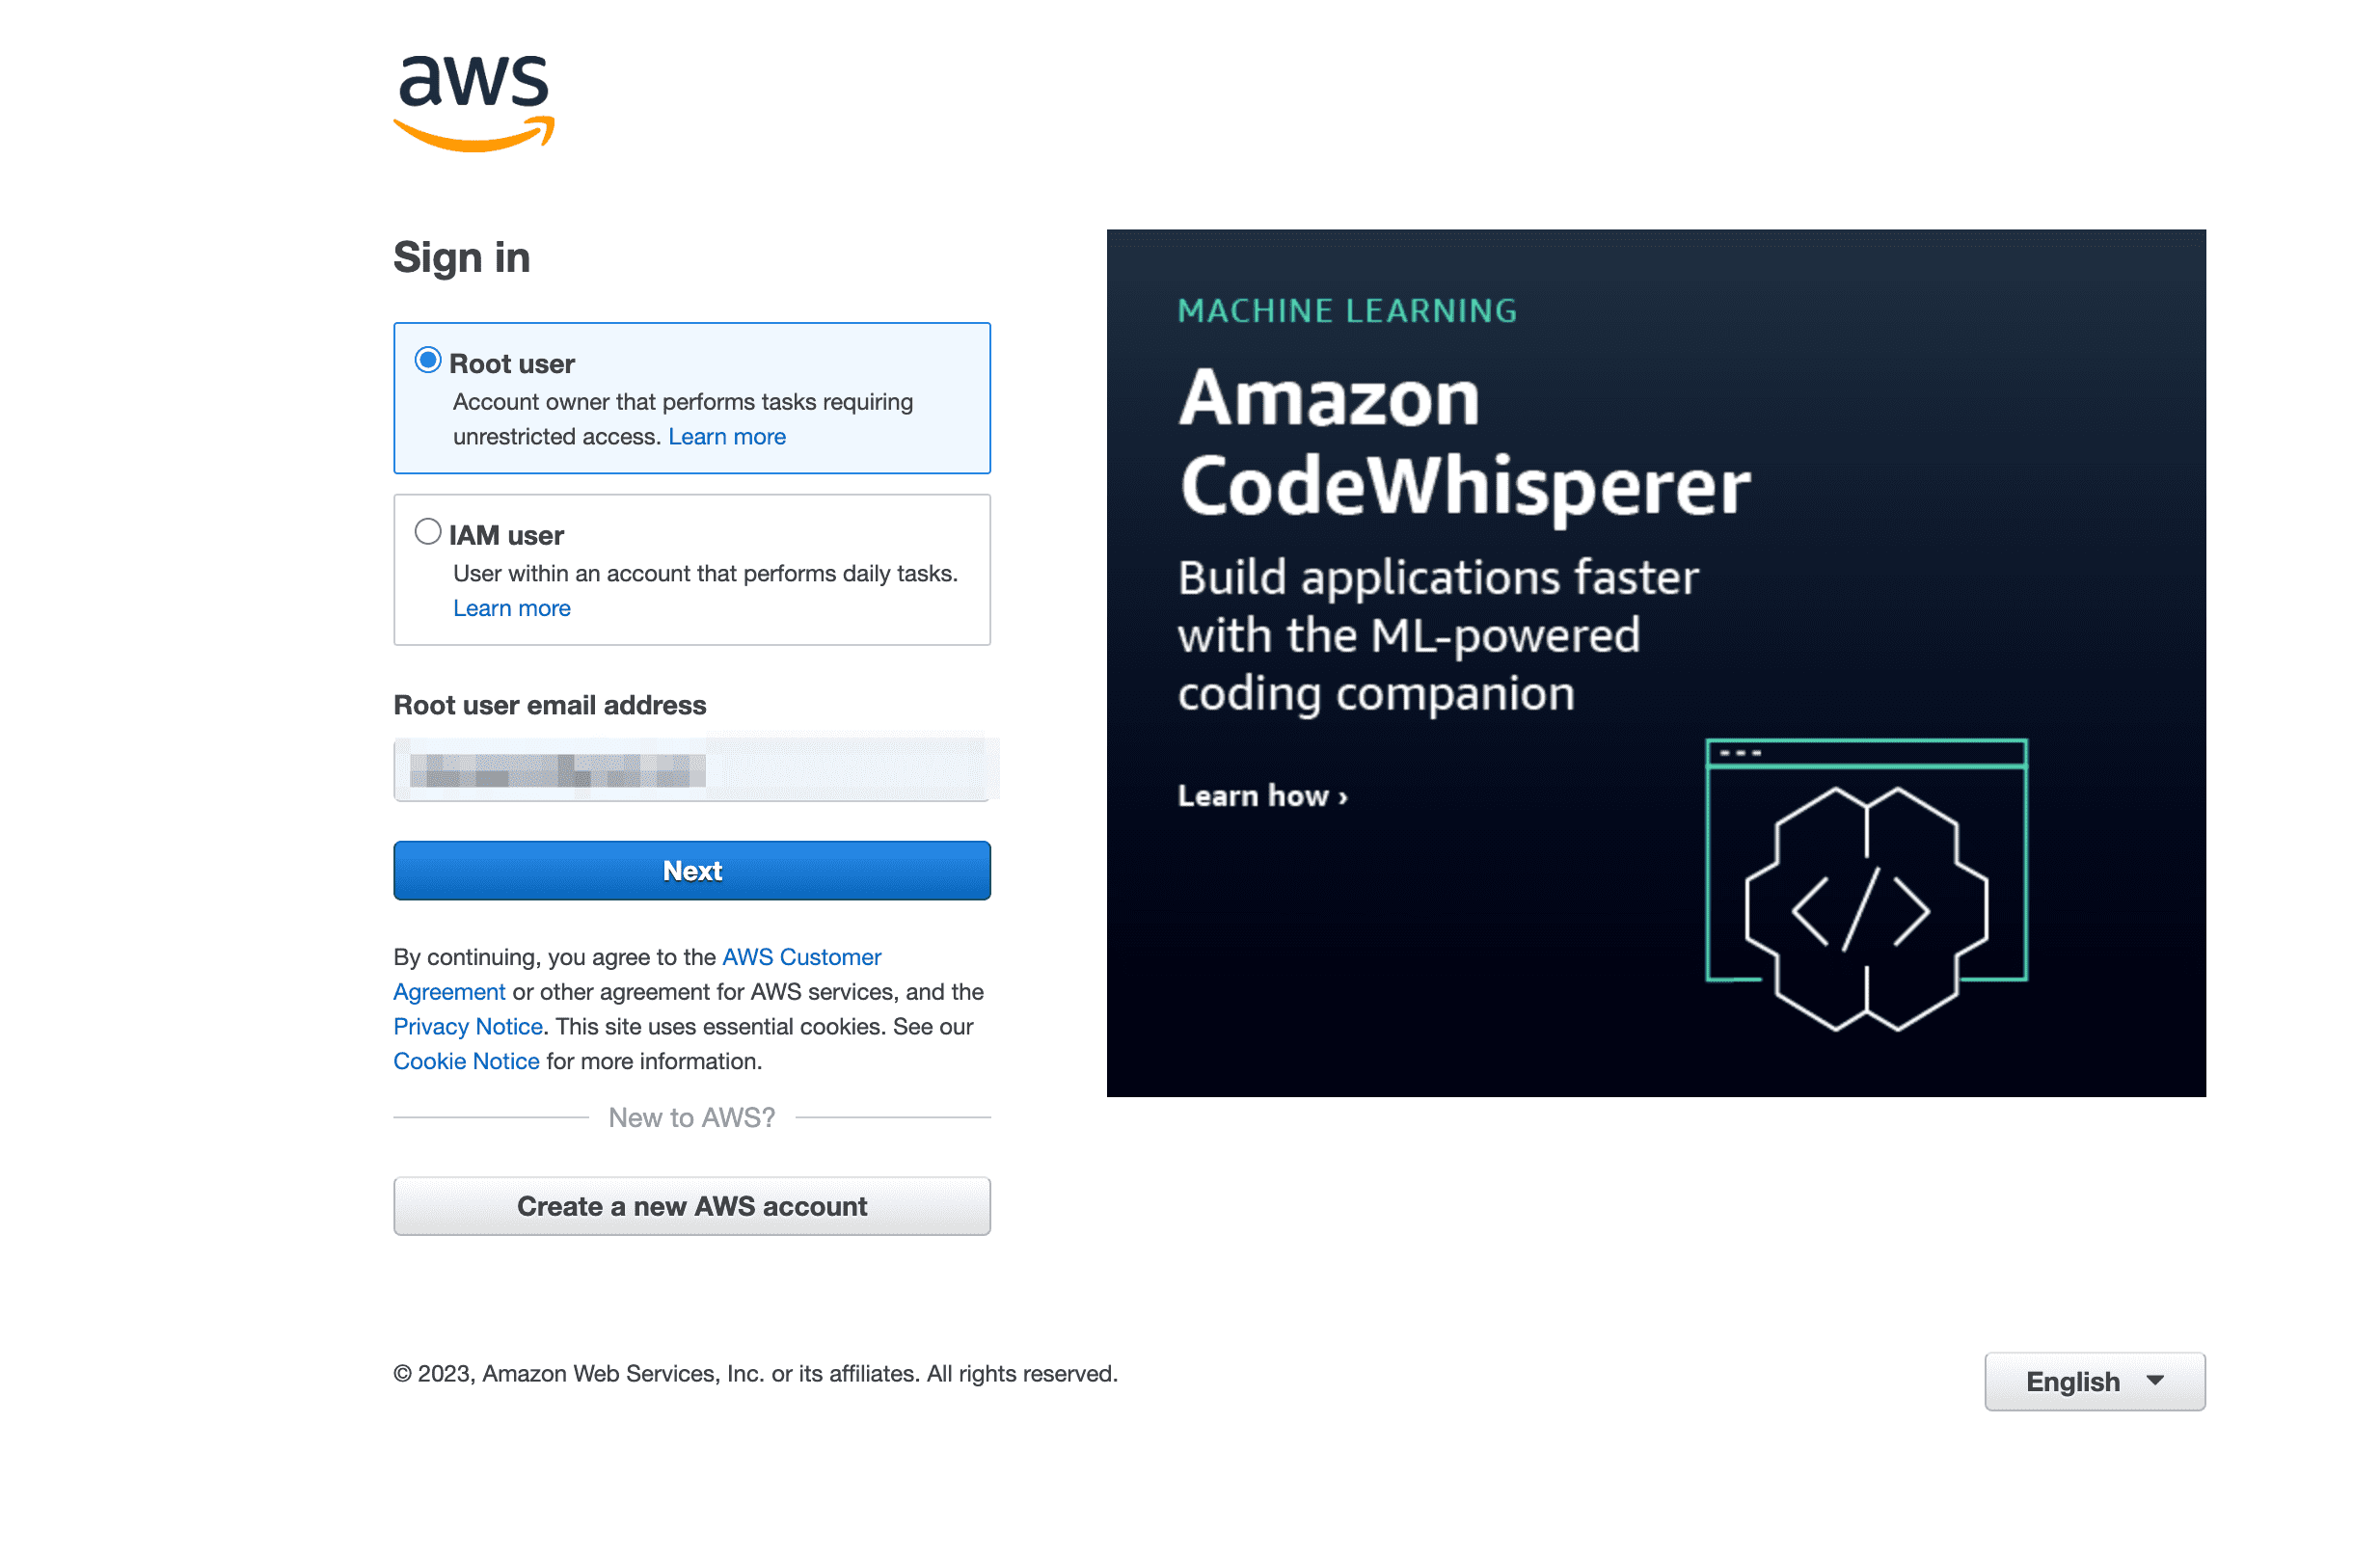
With your AWS account, log in as a root user to AWS to create a new user that can perform specific operations.
After logging in, navigate to the Identity and Access Management (IAM) page on your dashboard console. Here you'll find a list of all the users, groups, roles, and rights you can assign to anyone to access your AWS account.
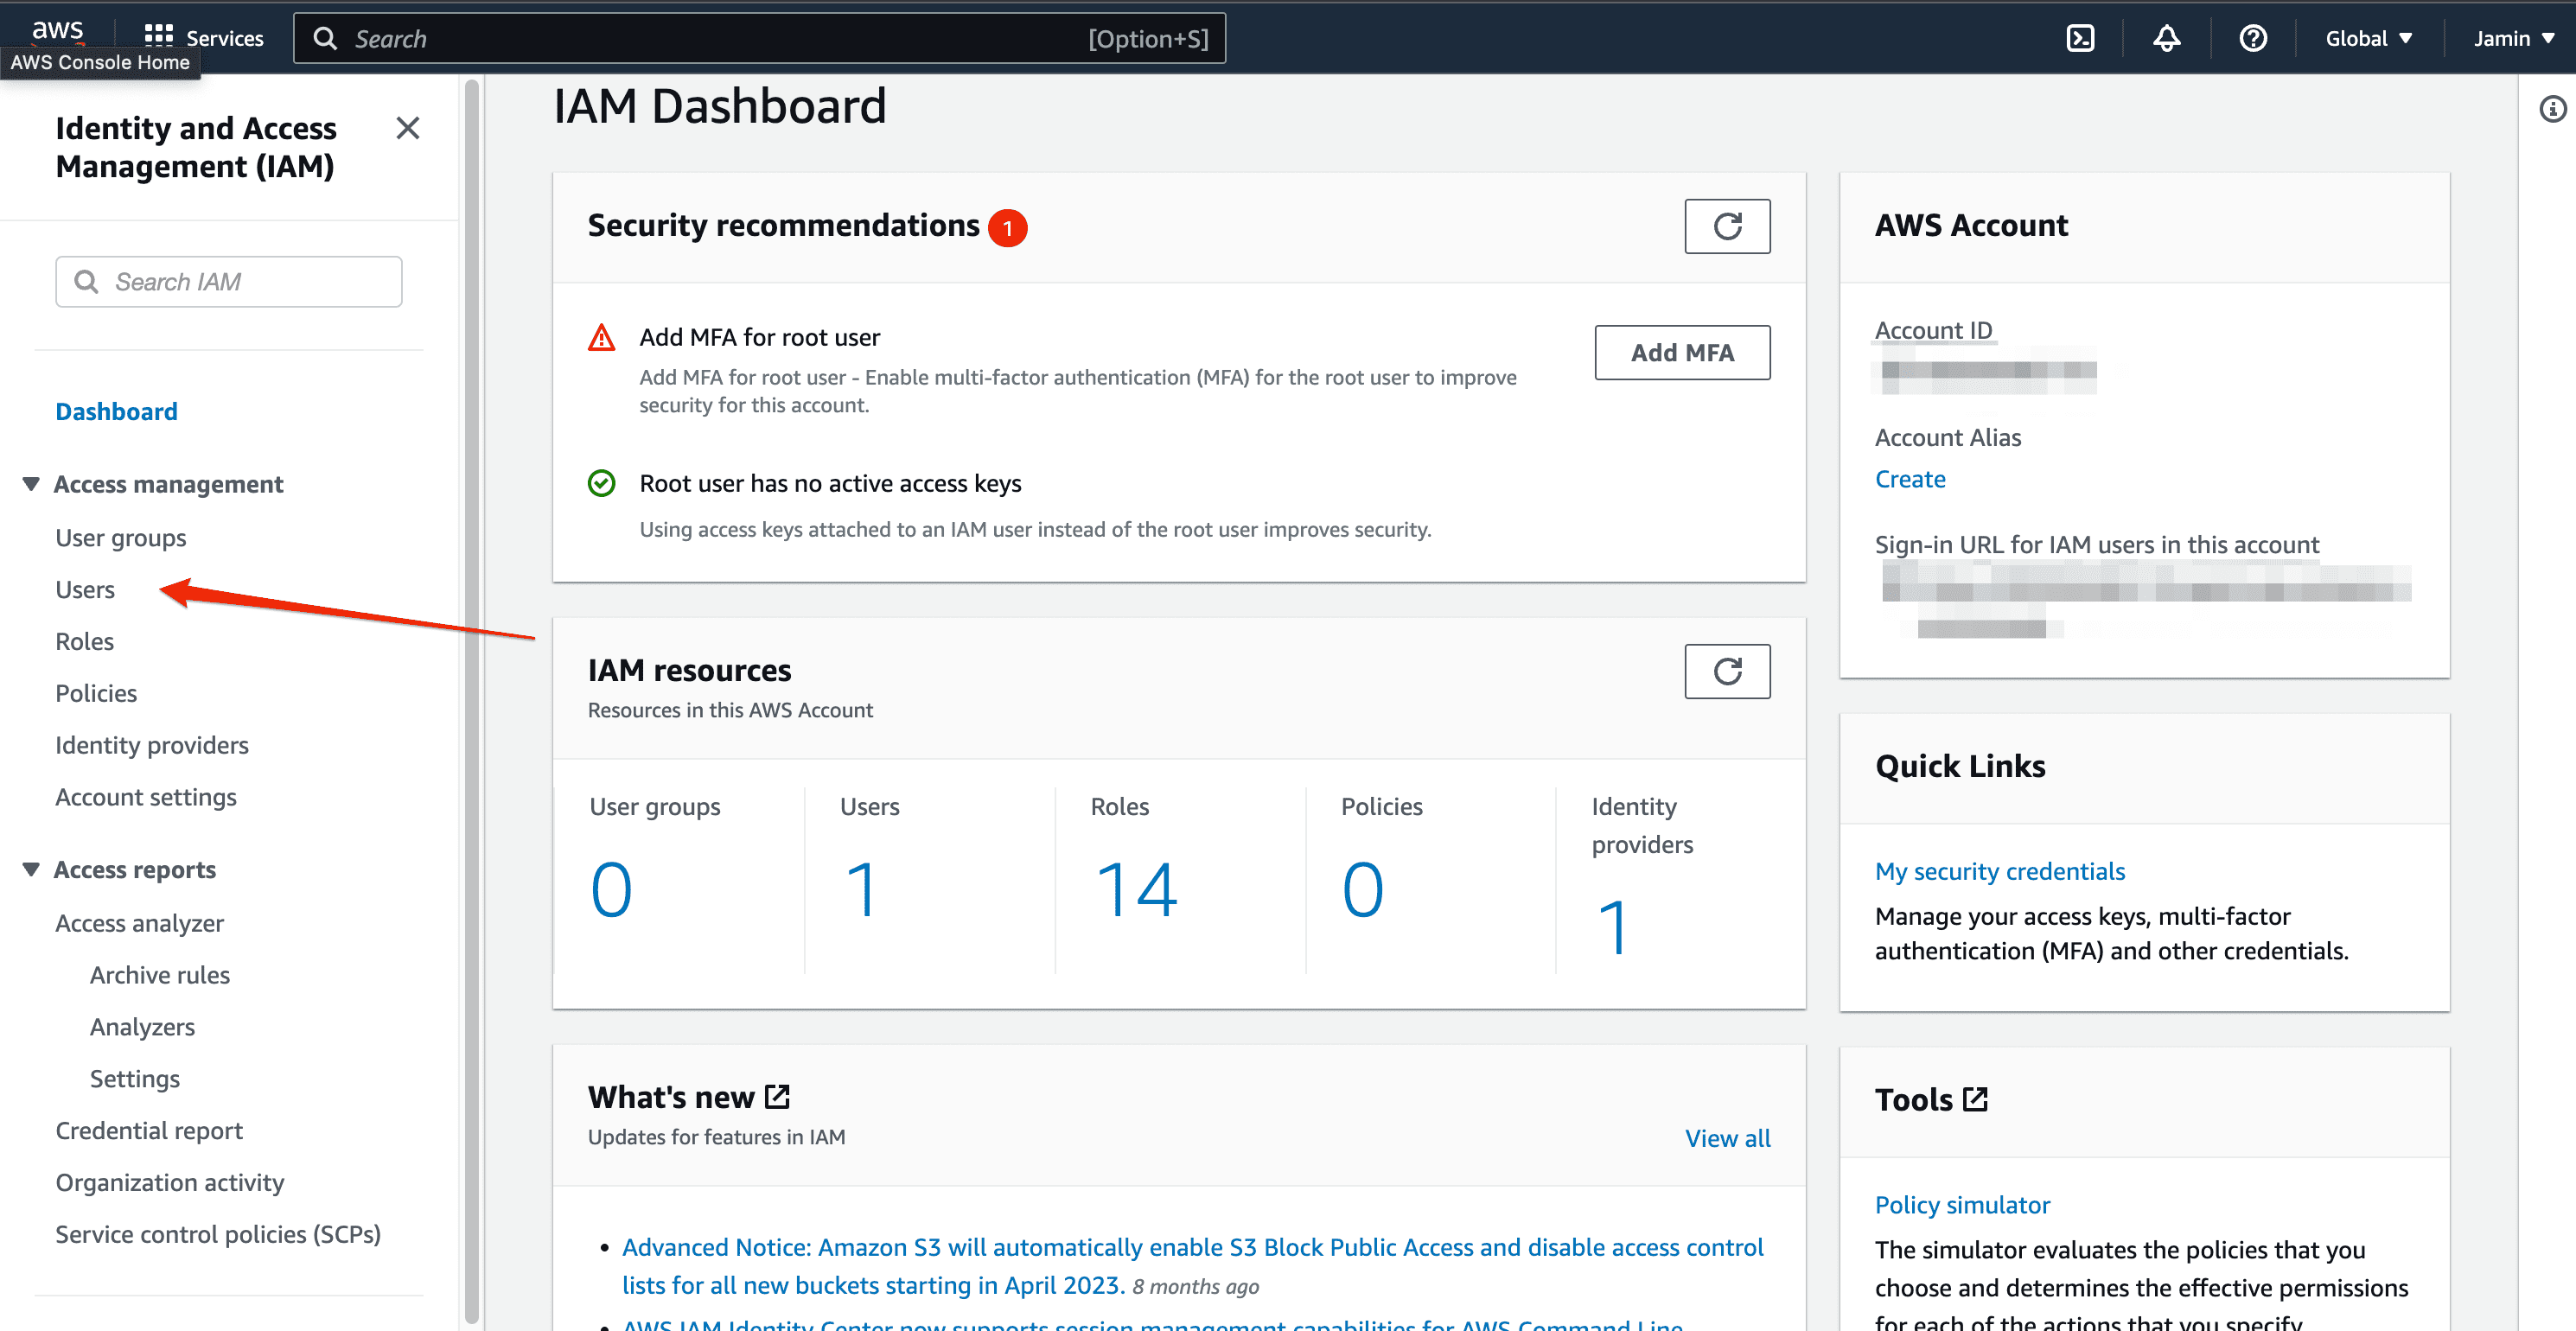
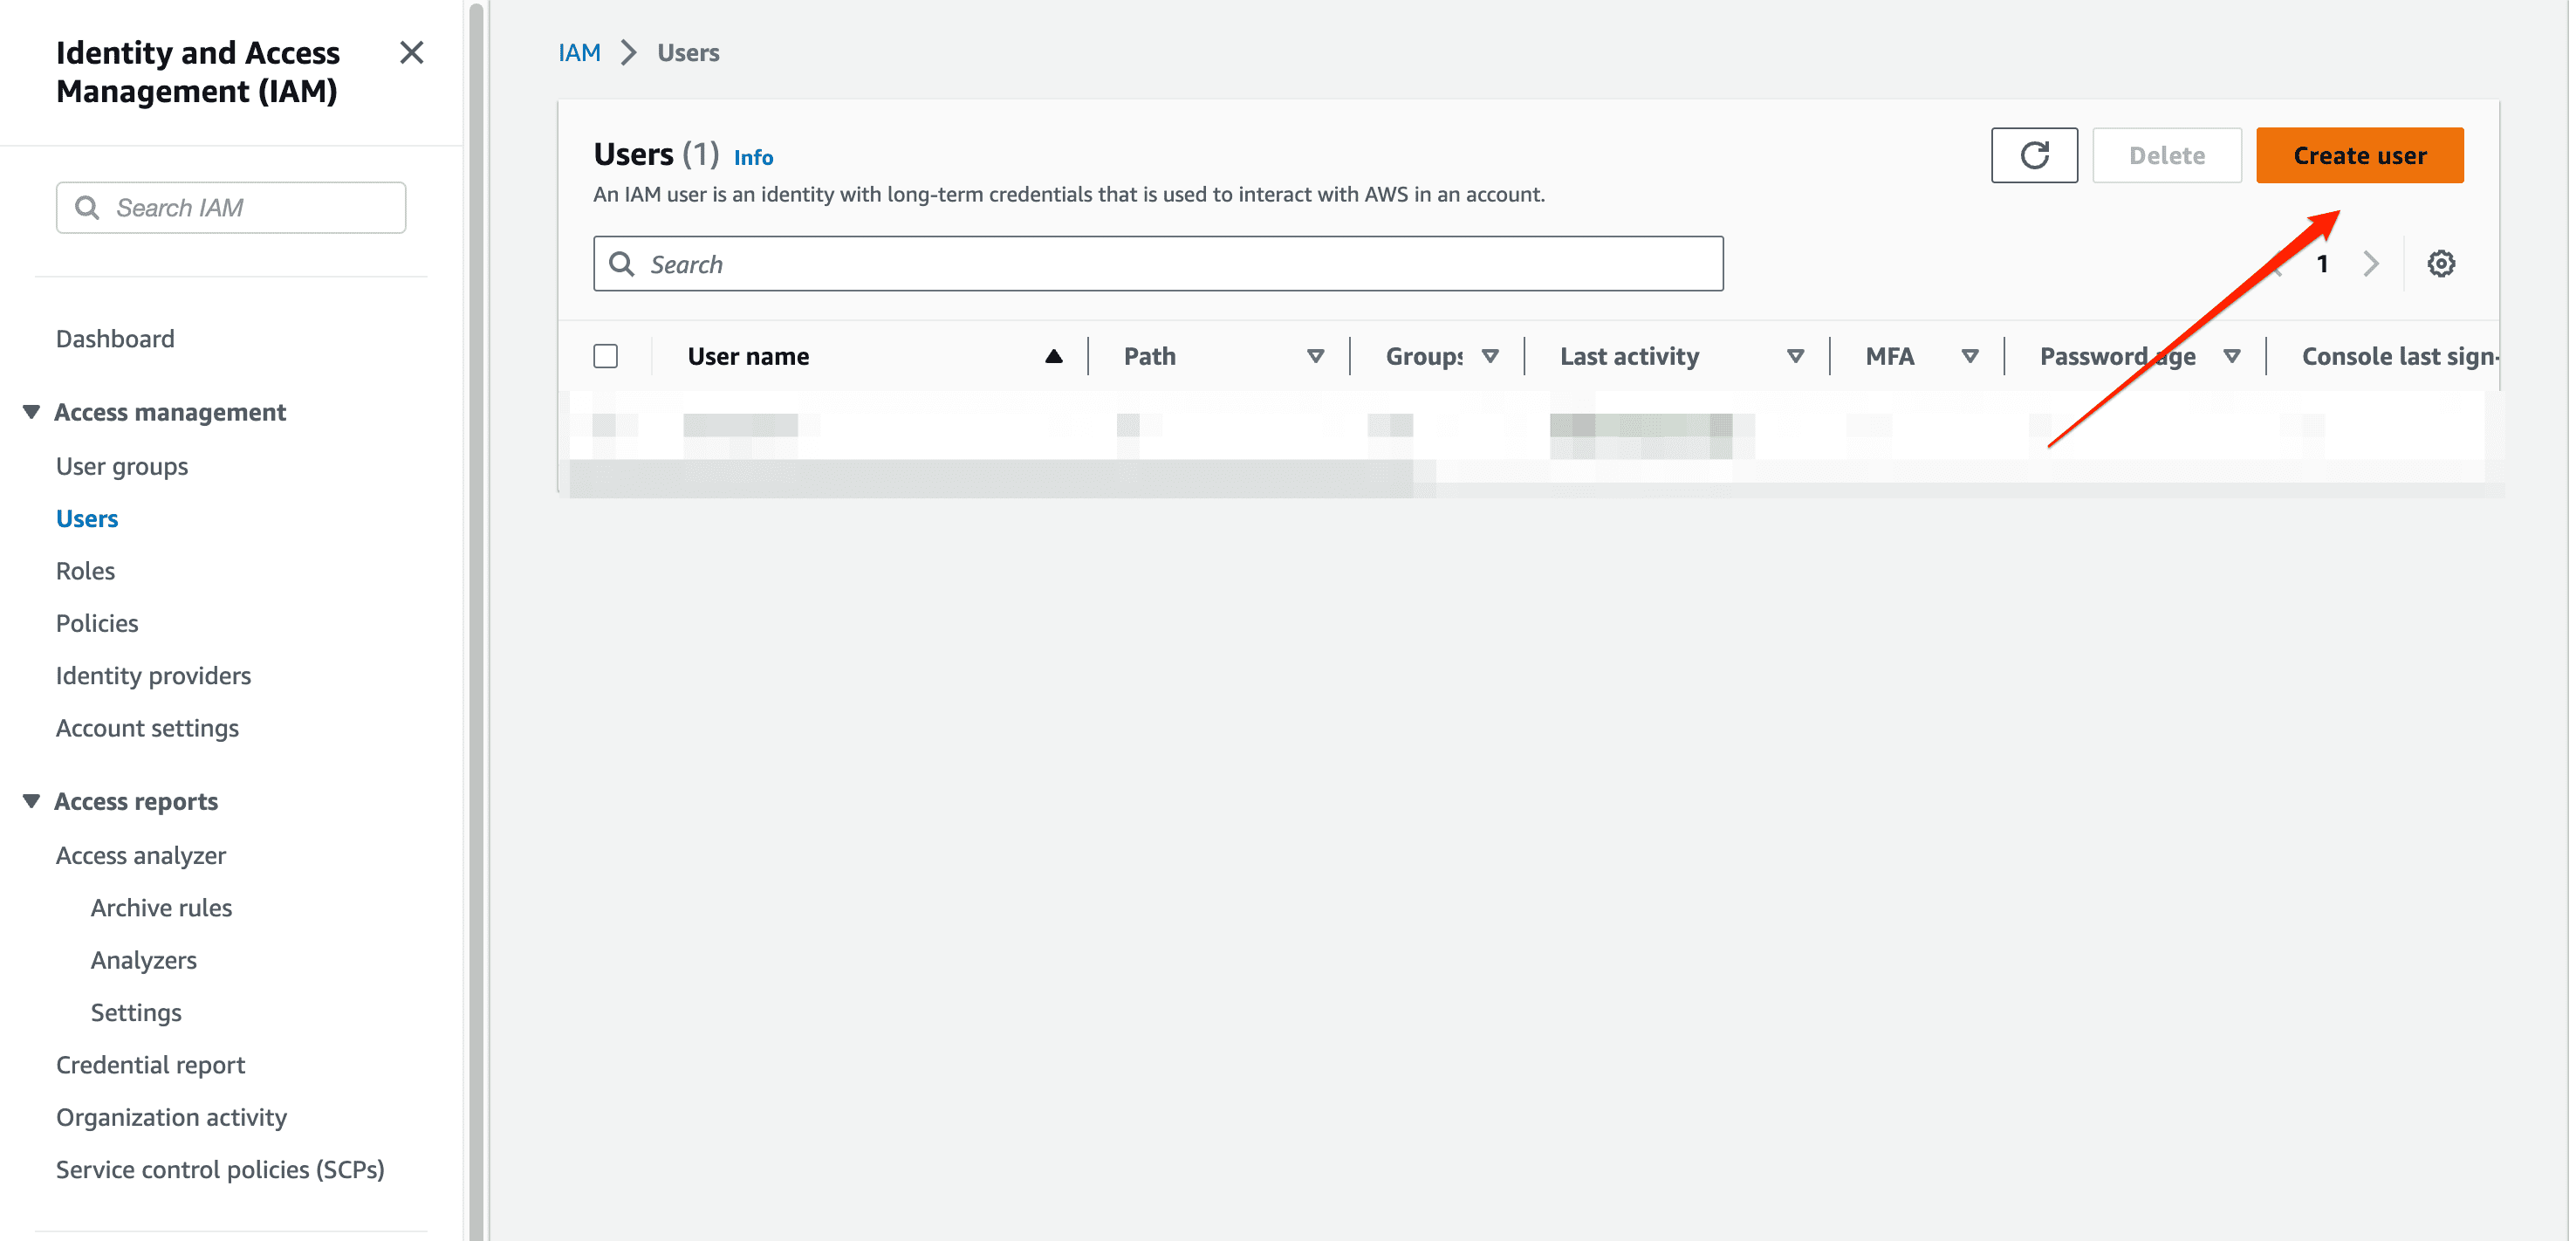
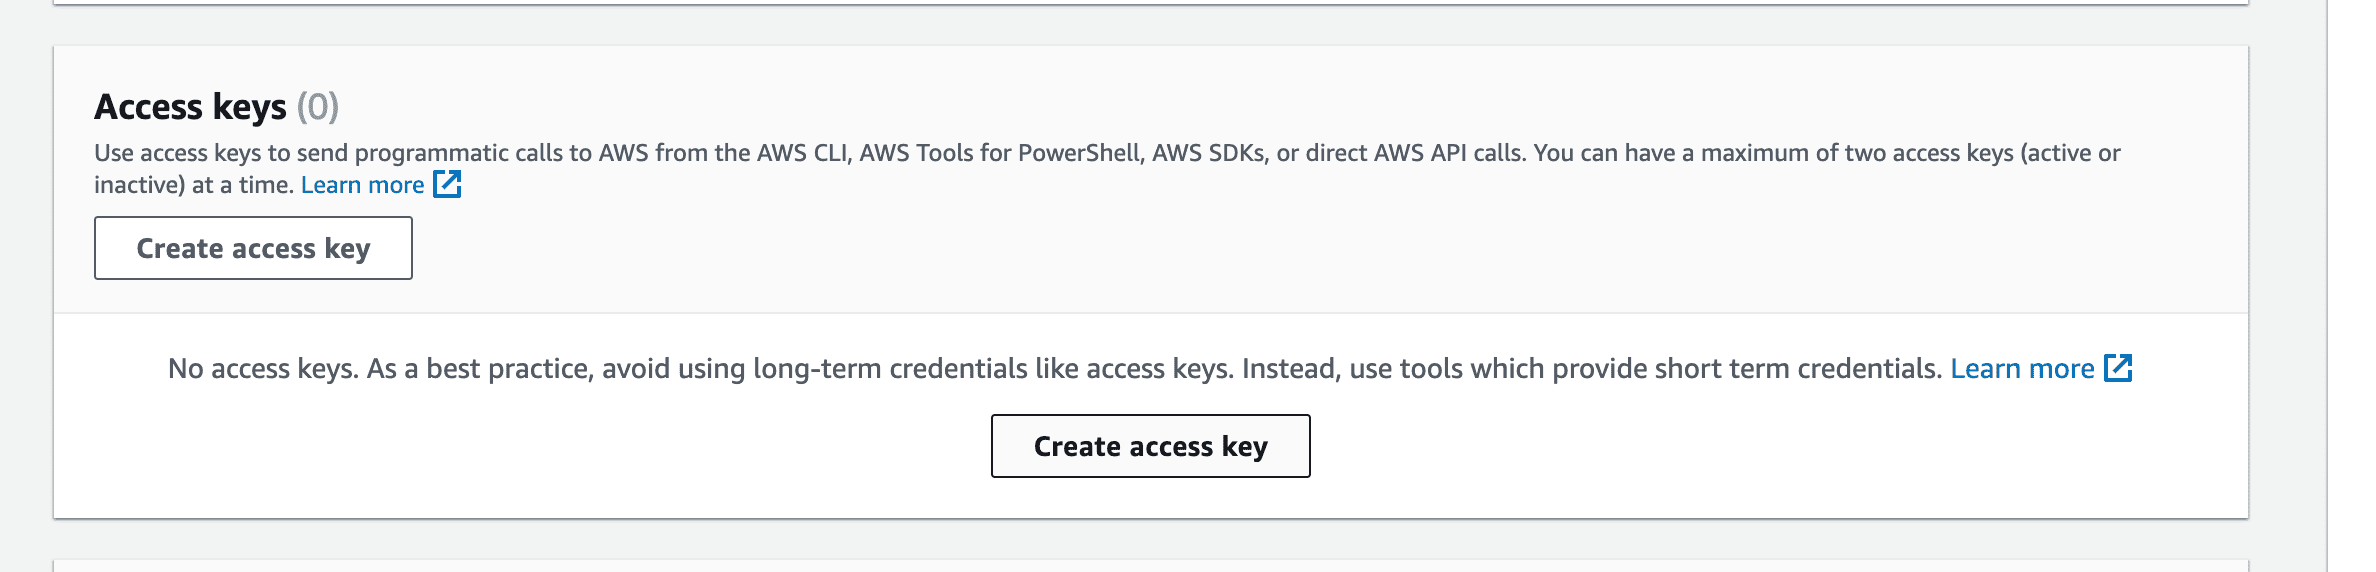
Click on the user's tab to view all users, and you'll find a button to create a new user and assign permissions to them.
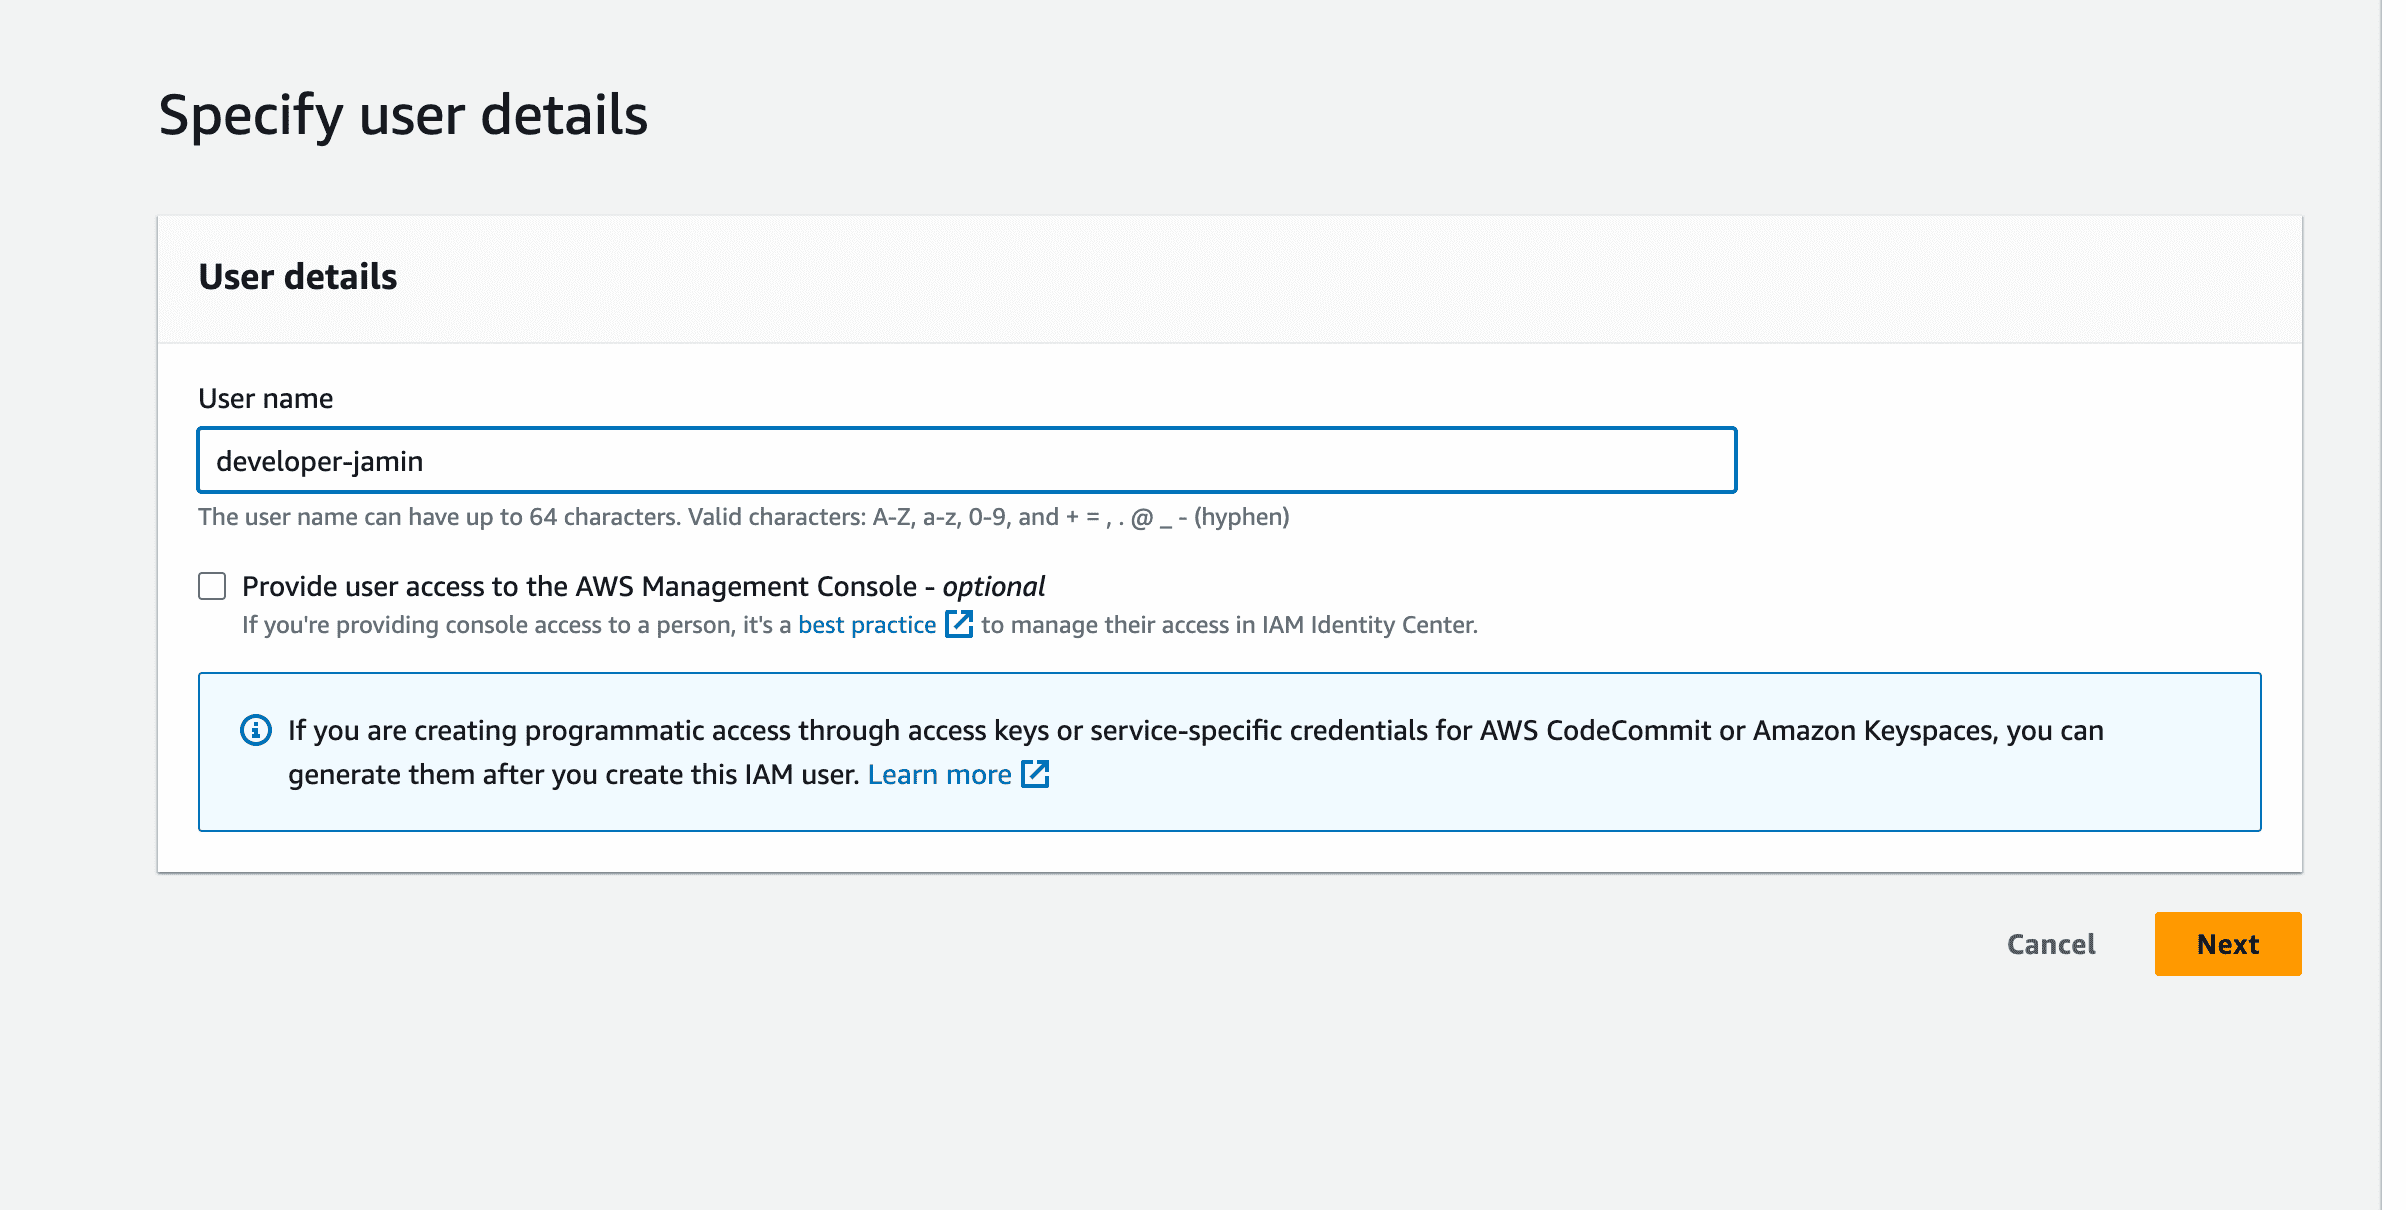
Give your new user a username and leave the check box for “provide user access to the AWS Management Console” since you'll be providing your user with programmatic access to perform operations from the terminal.
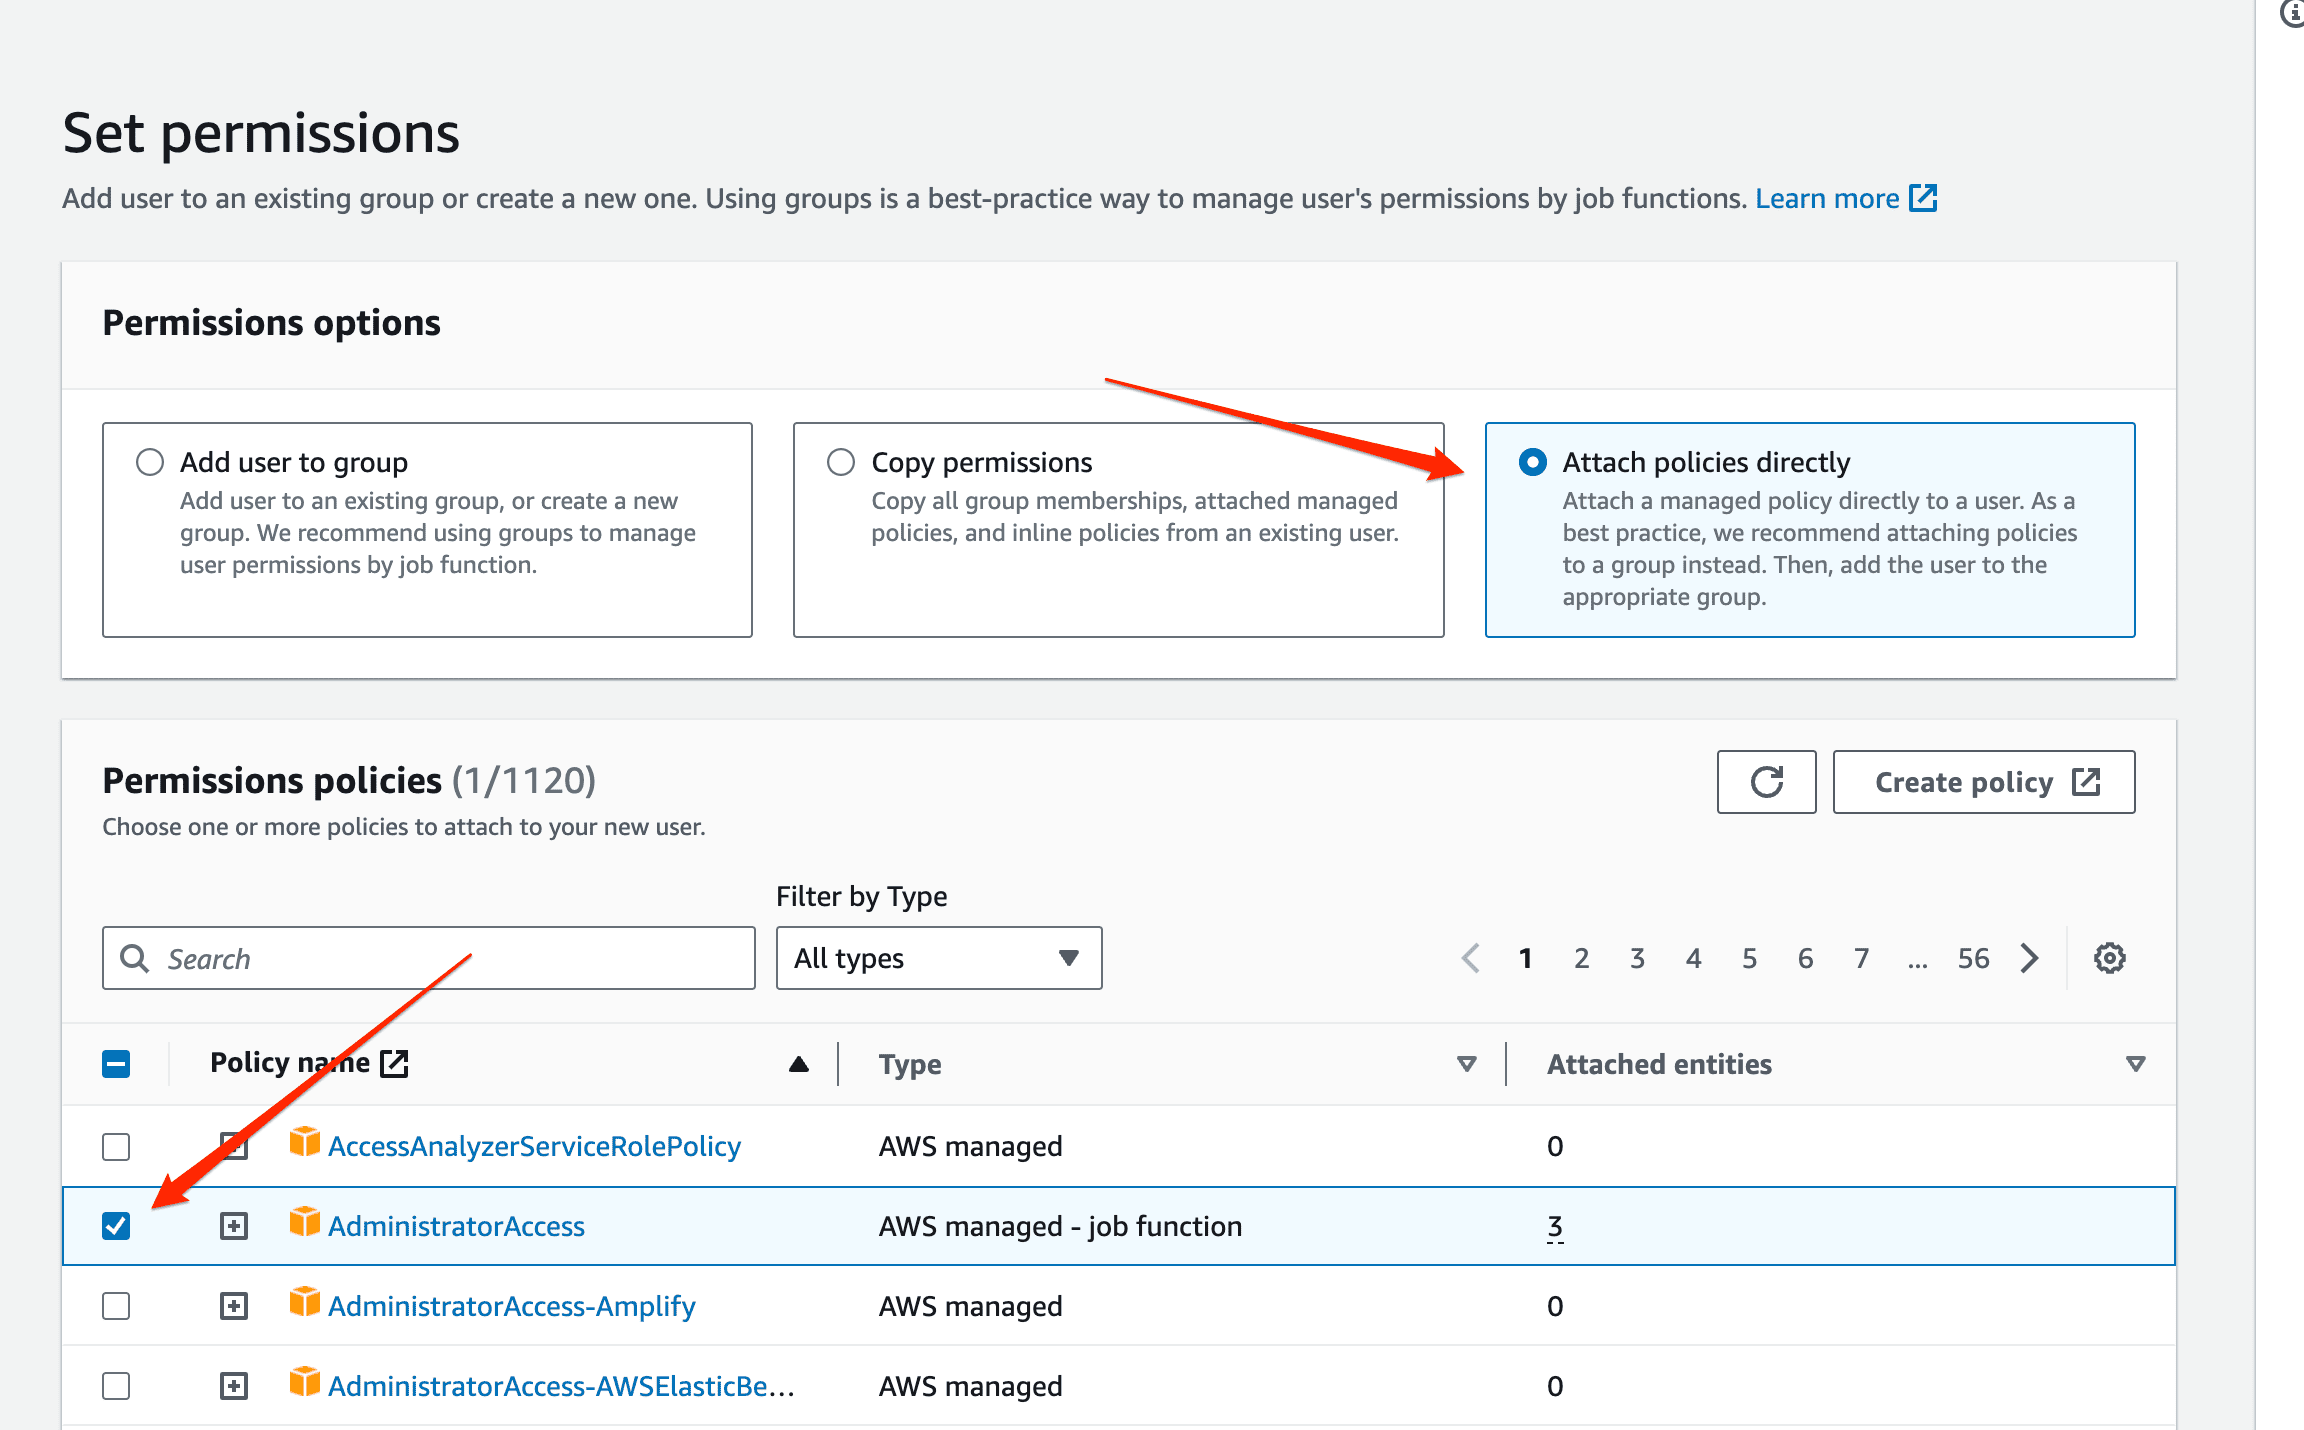
On the next page, you’ll see three tabs. Click on “attach policies directly” and check the box that says “Administrator Access,” as this will give your user admin access to perform operations via the terminal.
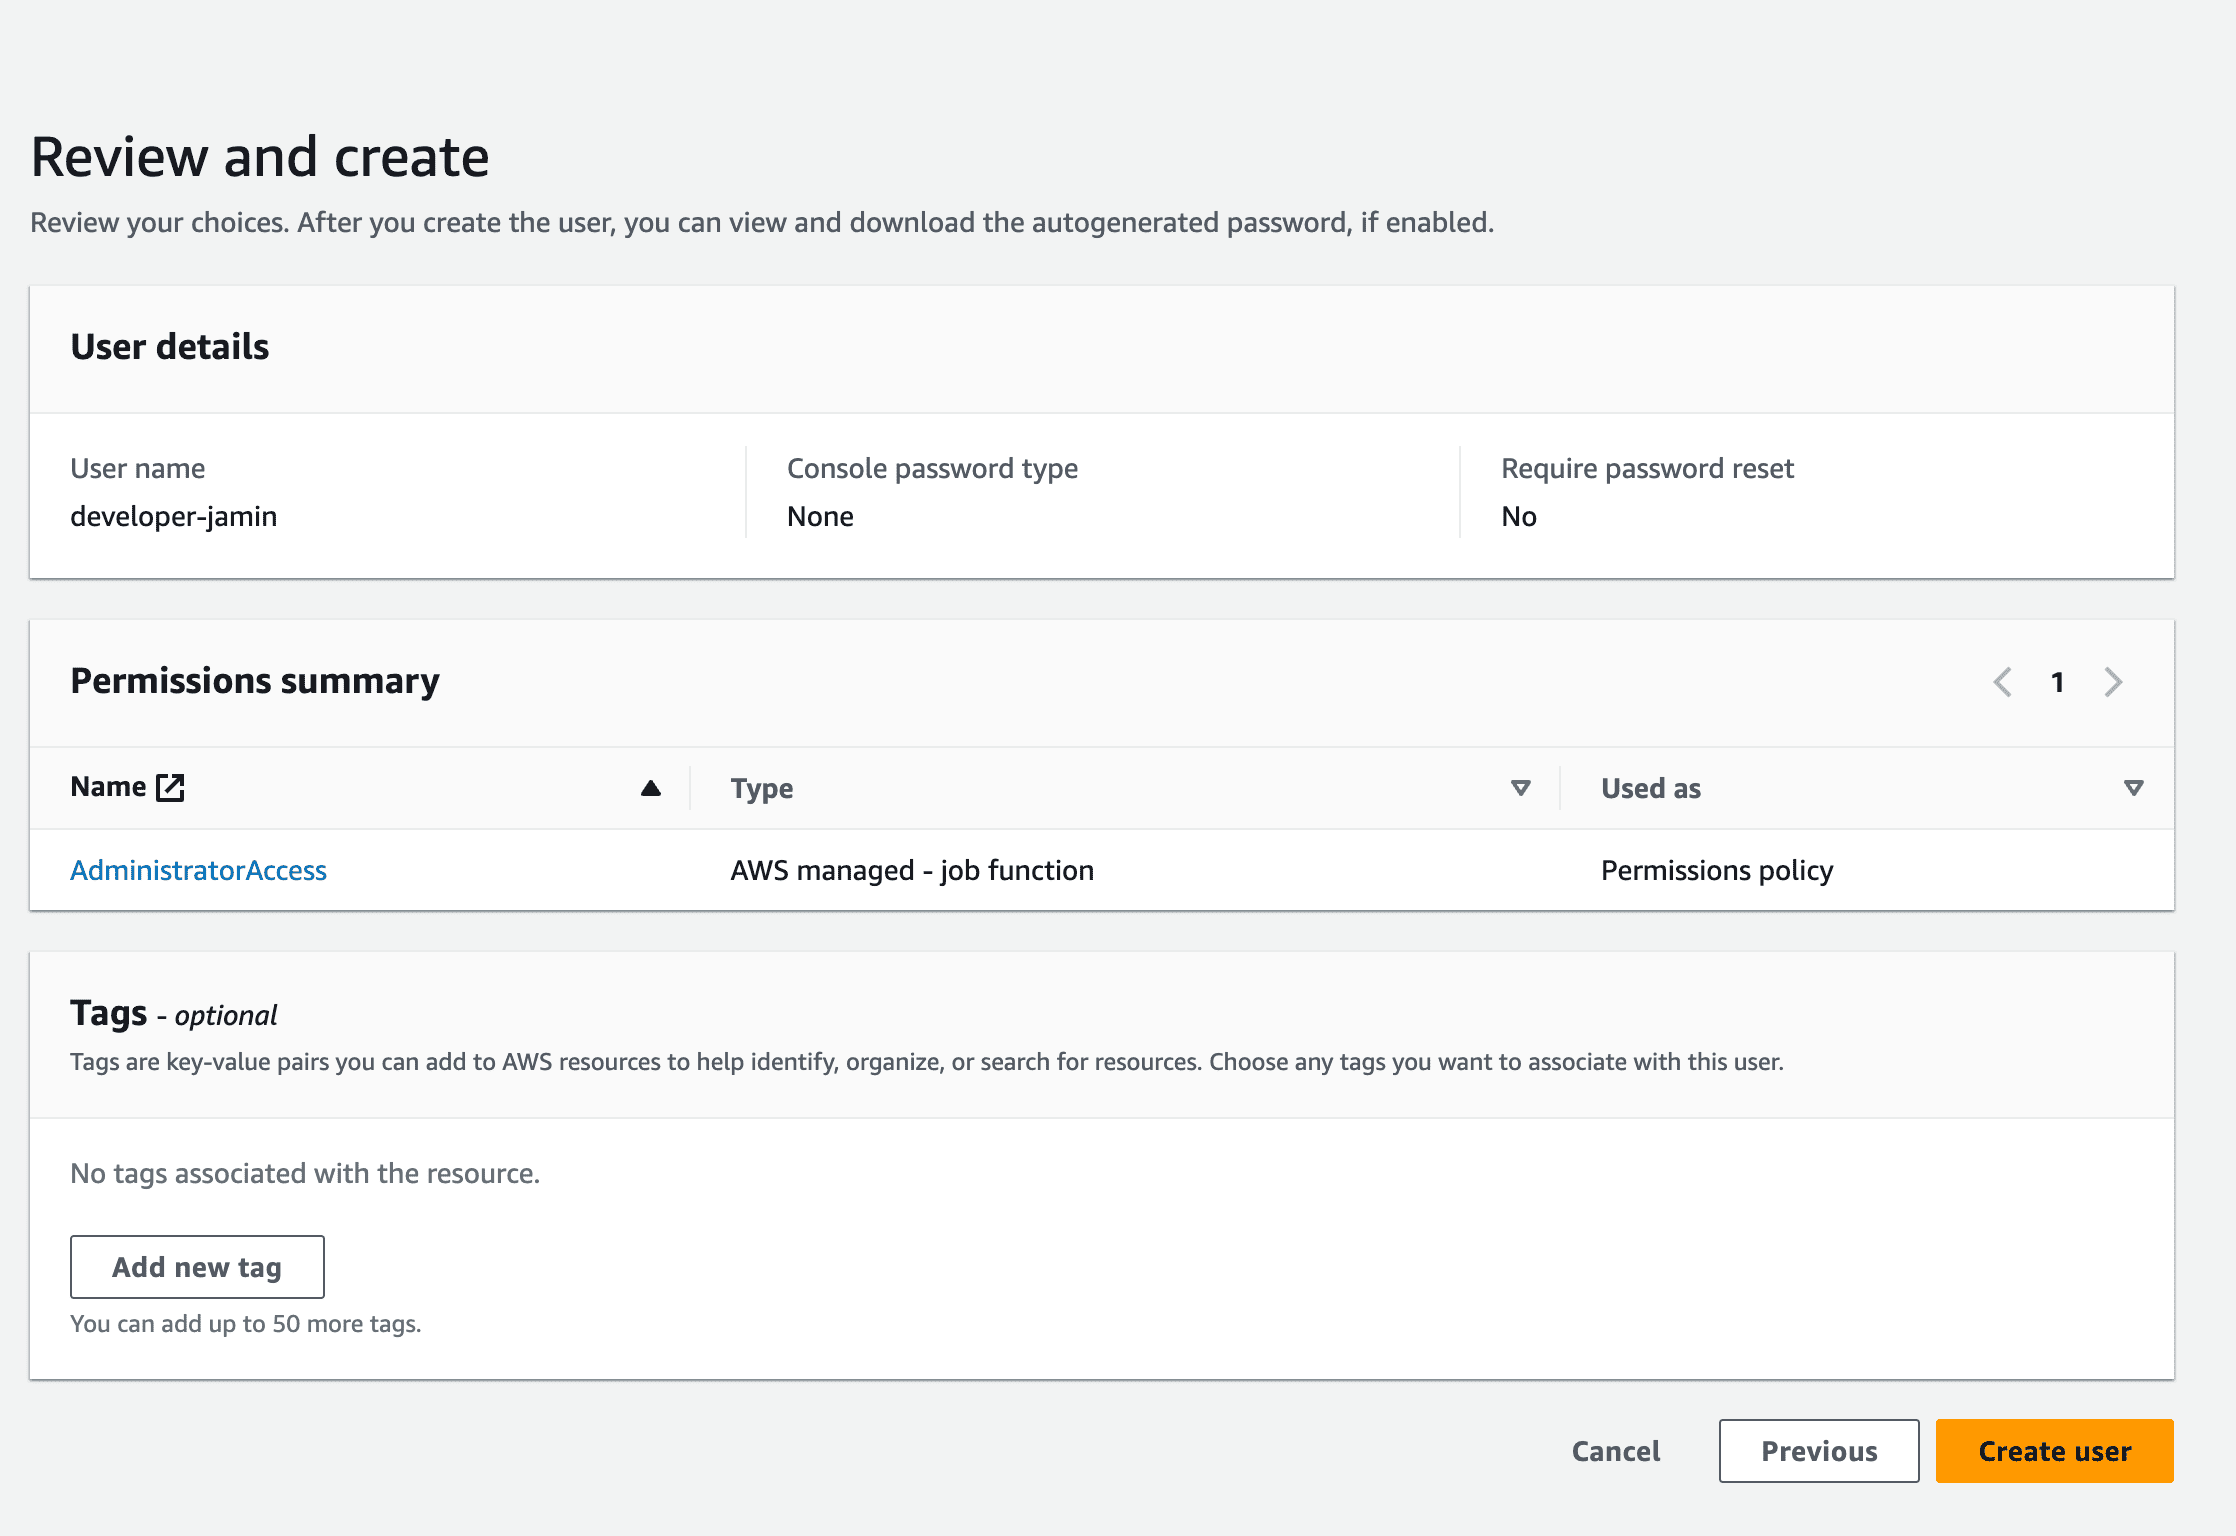
On the final page, you’ll be asked to review all the details you provided for creating a new user. If everything looks good, click on the “create user” button.
This will redirect you back to the dashboard with a message that you’ve succeeded in creating a new user. Click on the “view user” button to retrieve the user's details.

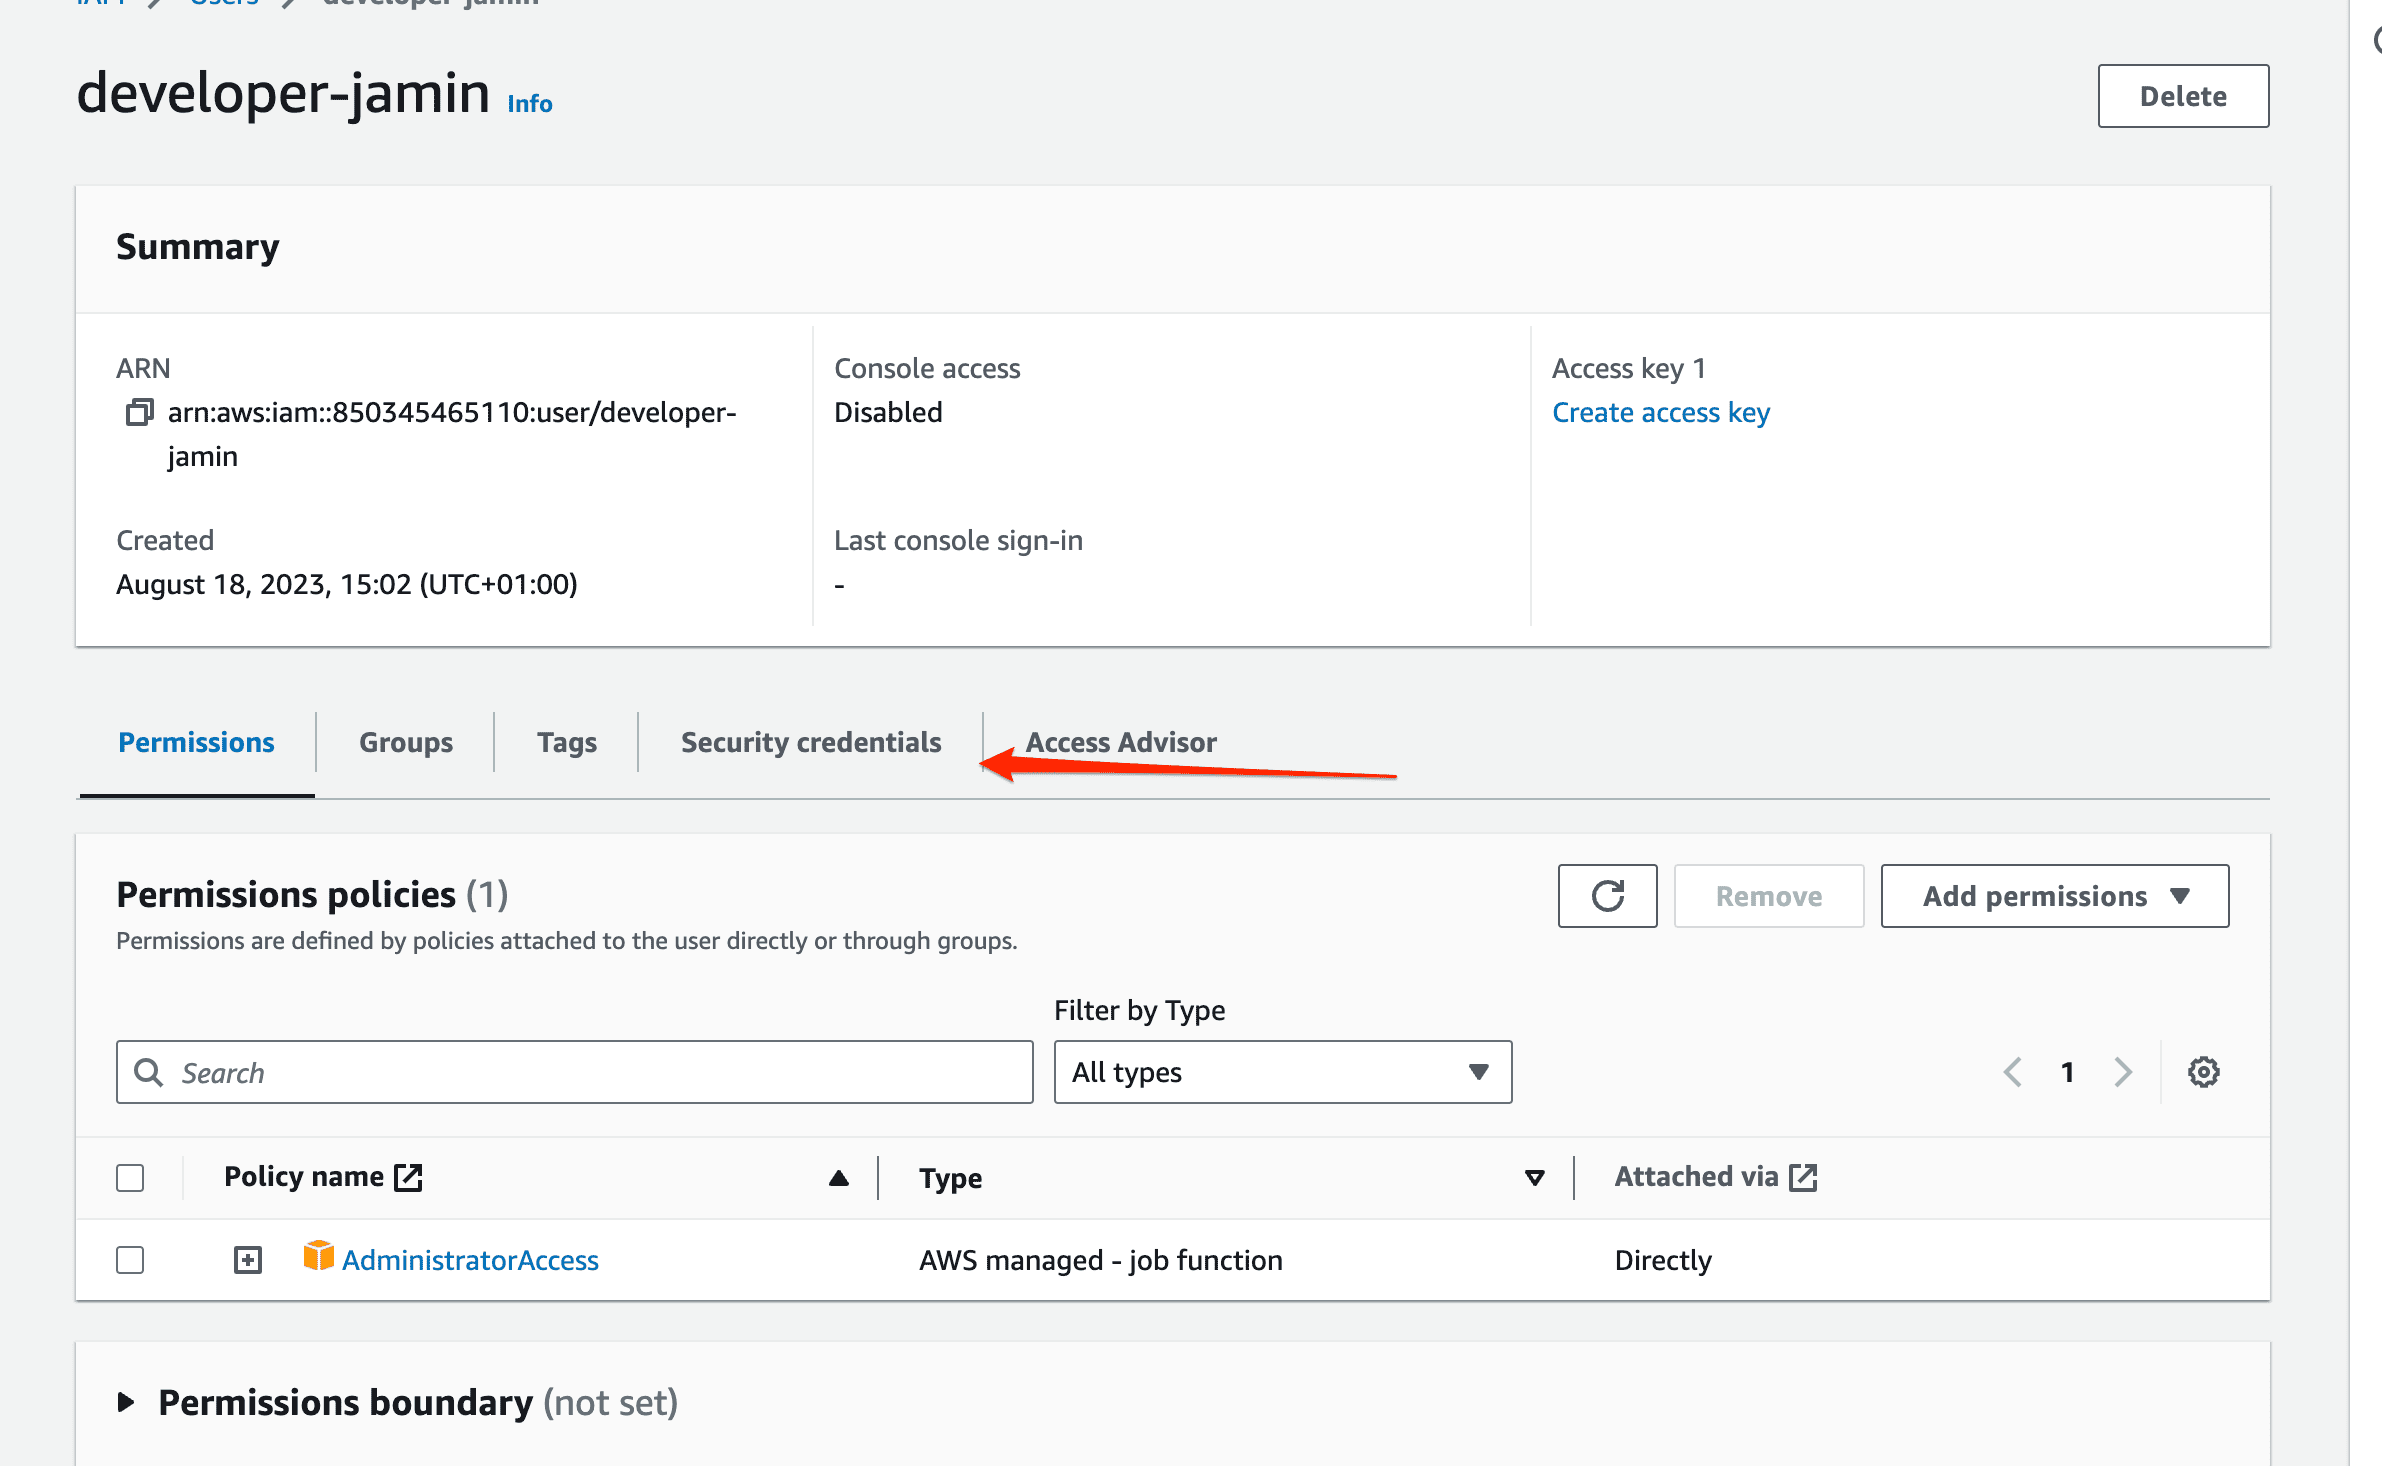
On the user details page, click on the security credentials tab to create a new access key.
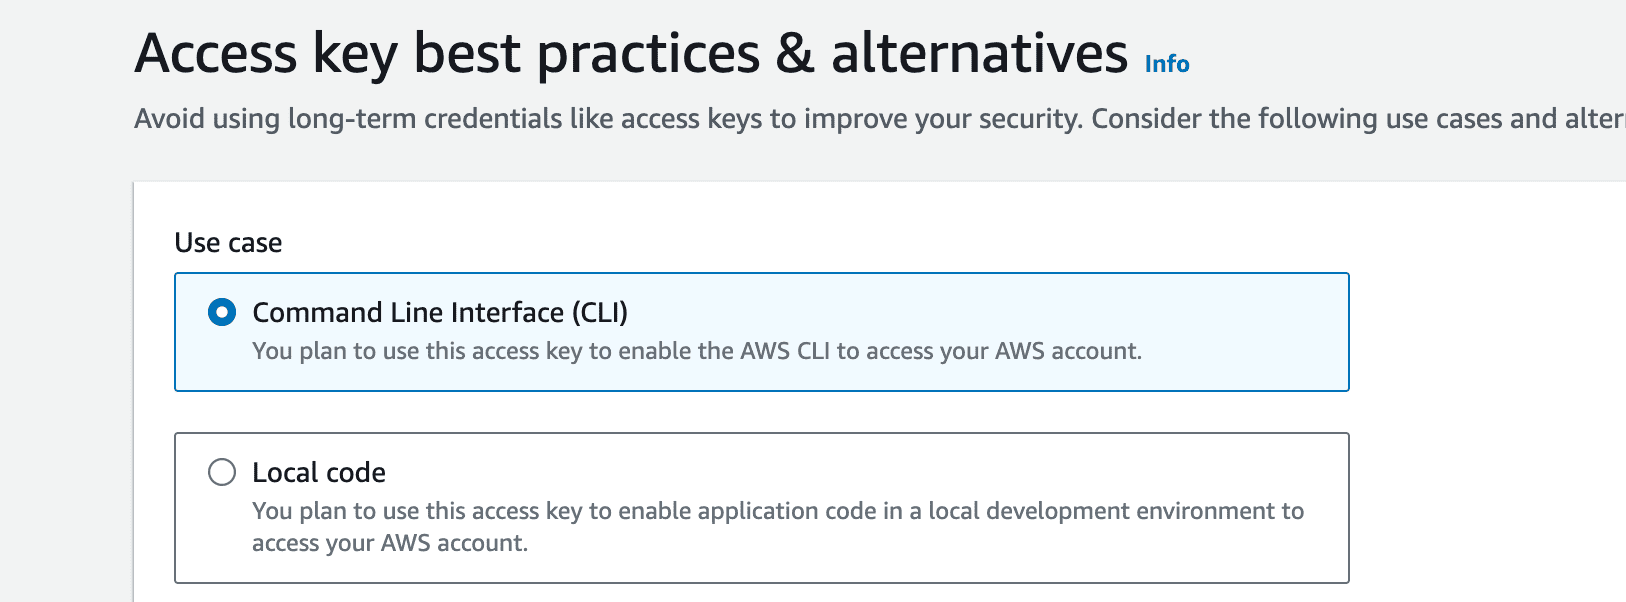
This will take you to a page asking what you need the access key for. Select the use case for the Command Line Interface (CLI) and go to the next page.
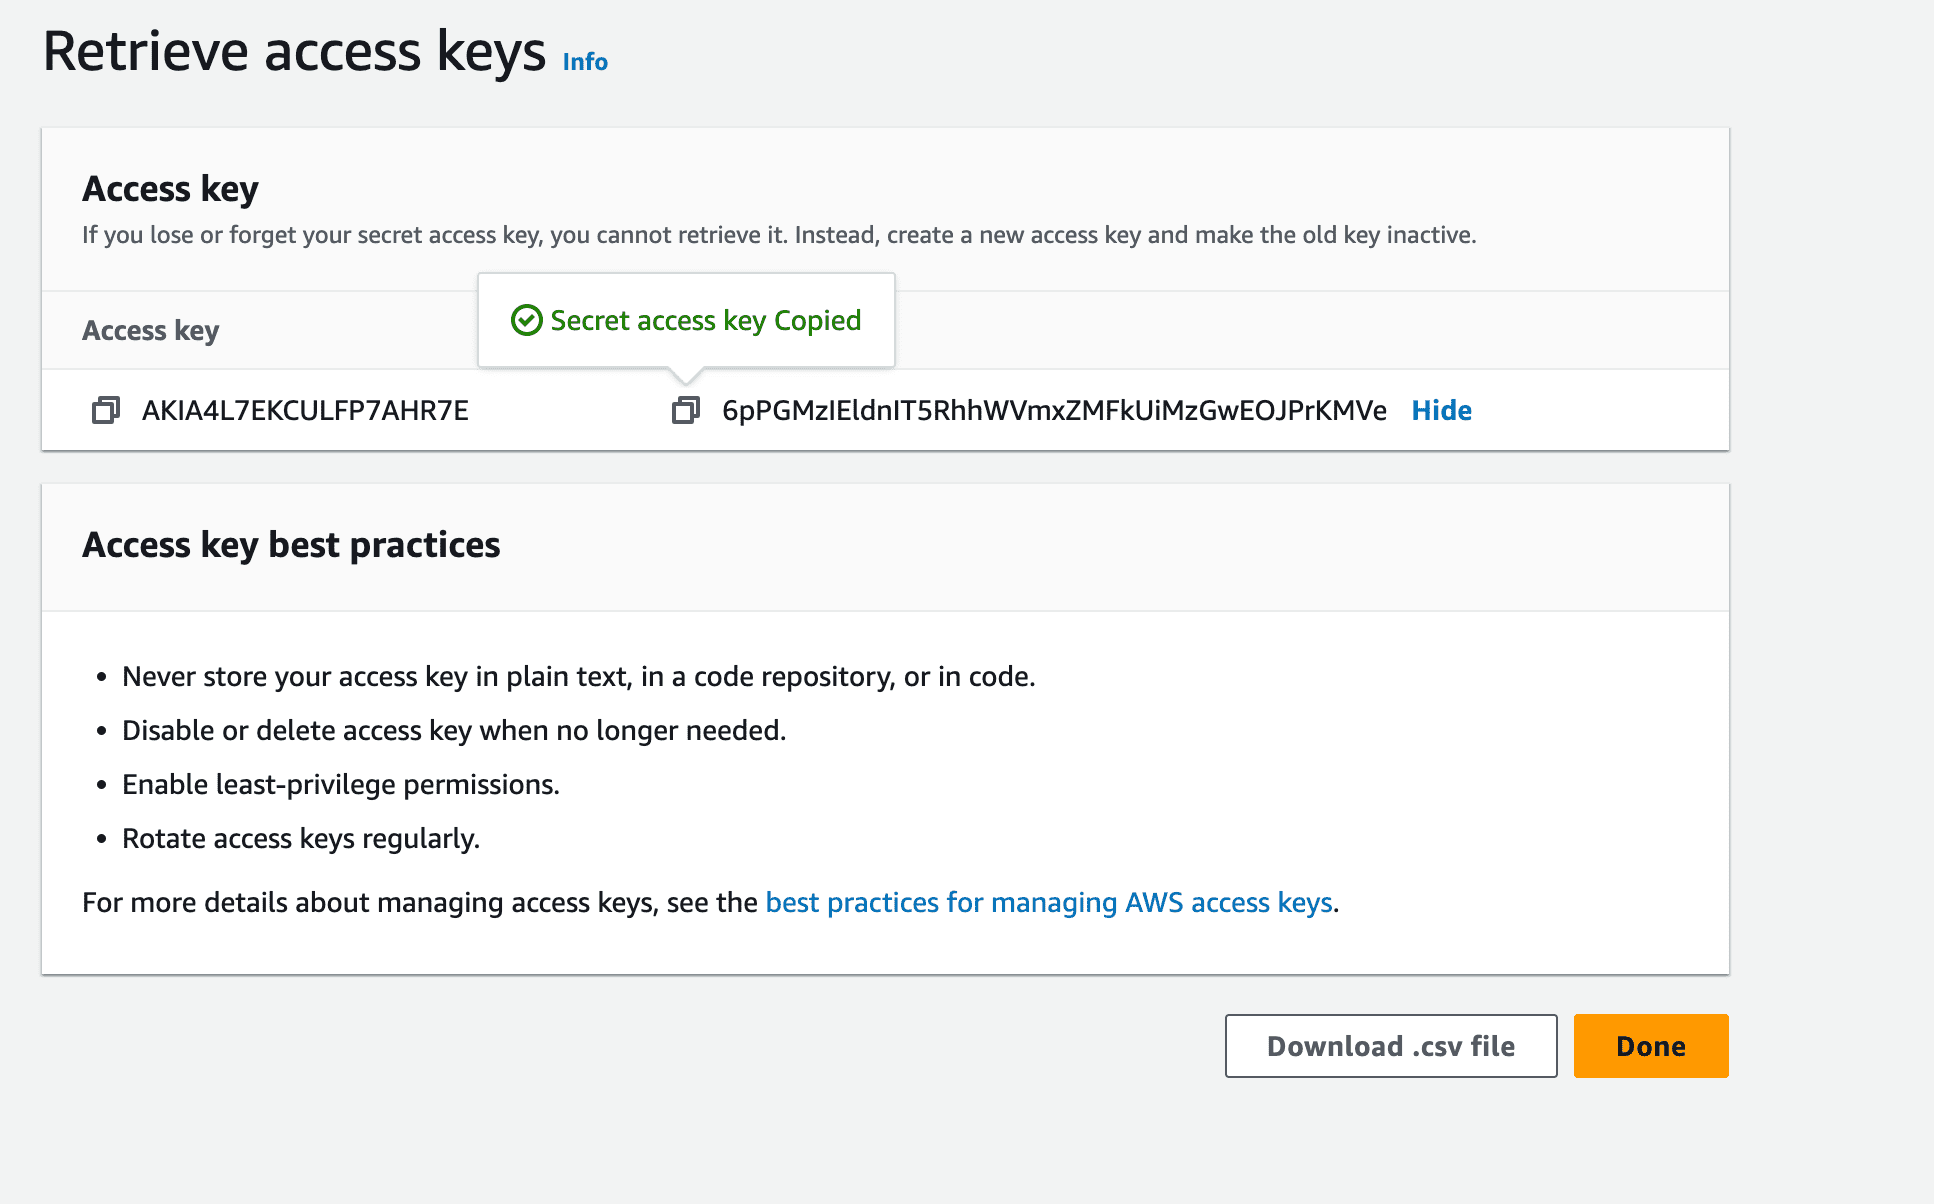
On this page, you’ll be asked to set an optional description tag for your access key. After that, click on the create access key button to create an access key.

After creating a new access key, you can copy it. Think of your access key as a unique username and password needed to log in to AWS CLI.
Now that you’ve set up a user account configure the AWS CLI to use the details you created by running:
aws configure
This would request the following information:
AWS Access Key ID :
AWS Secret Access Key:
Default region name:
Default output format [json]:
Congratulations 🥳 You've just successfully configured AWS CLI with your user details. You can now deploy applications directly from your terminal to AWS.
2. Create a TypeScript application
Let’s start by creating a new directory for your project called scraper
mkdir scraper && cd scraper
Inside of the scraper directory, create a src directory and initialize a new npm project
mkdir src && cd src

npm init -y
This will create a package.json file with the information below, You can update the name to be scraper and the description to be simple web scraper with TypeScript

Then install the following dependencies, as you'll be needing them for production.
npm i axios cheerio aws-lambda esbuild
Next, let’s install TypeScript and the type definitions for the dependencies.
npm i @types/aws-lambda @types/cheerio @types/node ts-node typescript -D
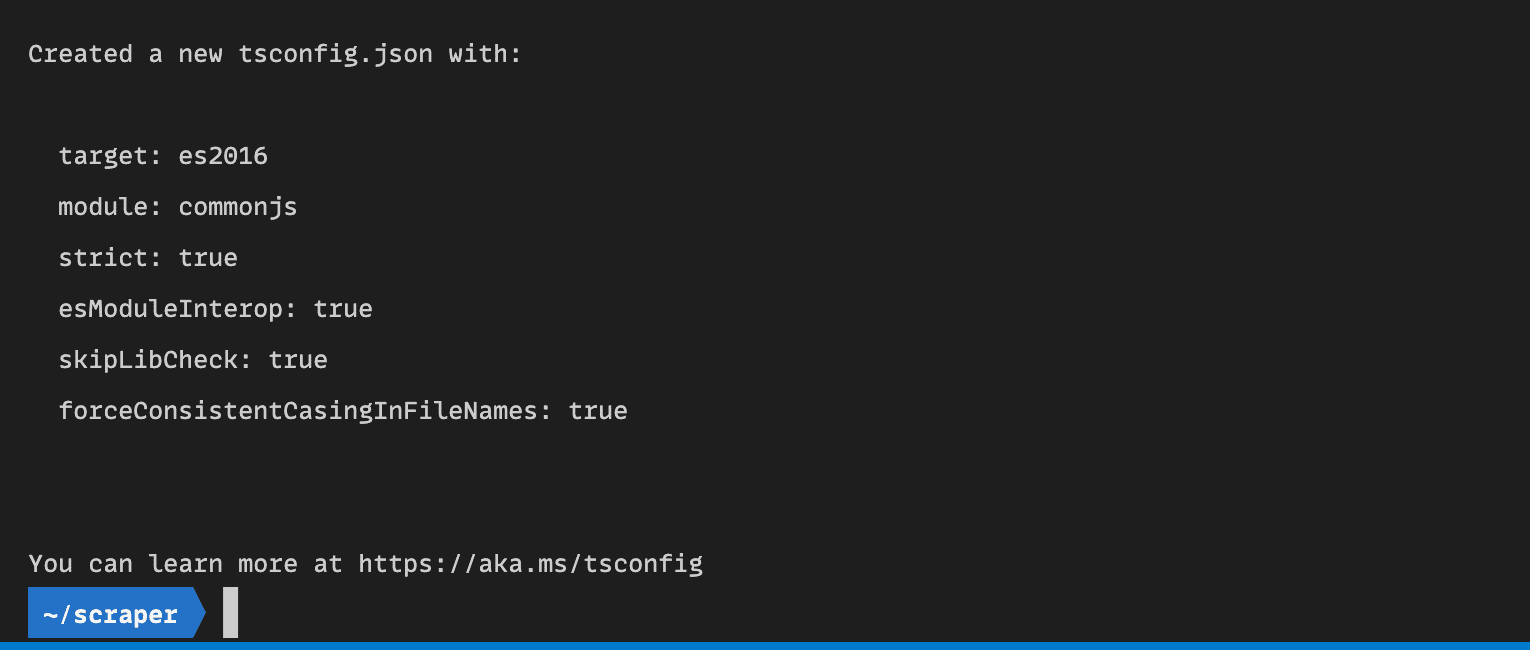
Configure a TypeScript compiler for the project using the command:
npx tsc --init
This will create a ts.config.json file with some default settings you need.
Next, create a TypeScript file in a src folder and open the project in your preferred text editor.
mkdir src && cd src && touch index.ts
cd ../
In the index.ts file, create a simple web scraper using the function below.
The web scraper uses cheerio and axios to scrap the title and description information from Apify’s homepage.
import axios from 'axios';
import * as cheerio from 'cheerio';

export async function lambdaHandler() {
    try {
        const response = await axios.get('<https://apify.com/>');
        const $ = cheerio.load(response.data);
        const title = $('title').text();
        const description = $('meta[name="description"]').attr('content');
        console.log({ title, description });

    } catch (err) {
        console.log(err);

    }
};
lambdaHandler()
To run the code, use this command:
npx ts-node src/index.ts
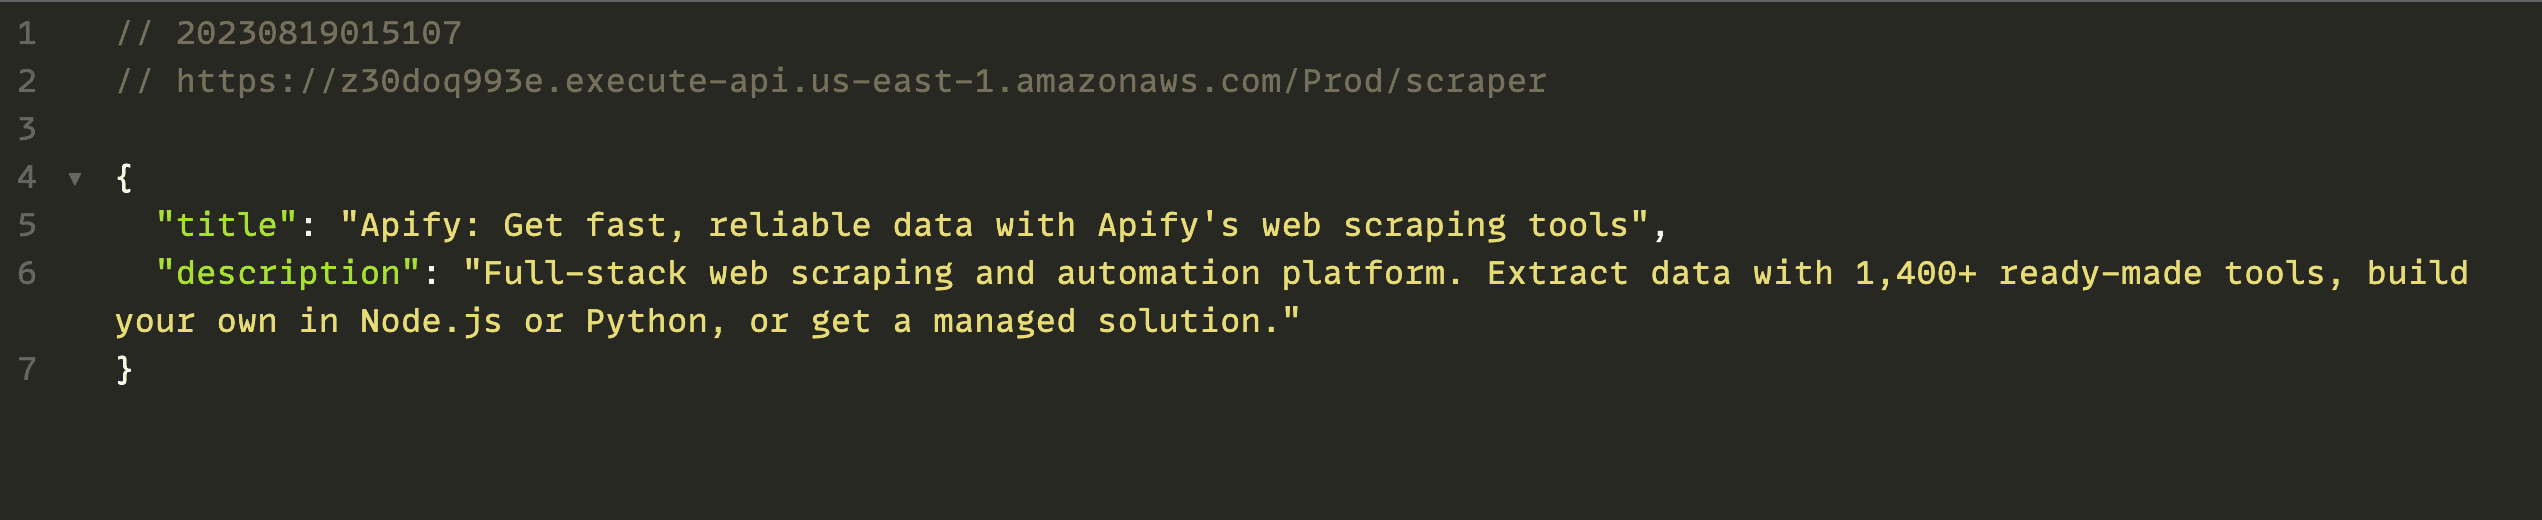
##Output
{
title: "Apify: Get fast, reliable data with Apify's web scraping tools",
description: 'Full-stack web scraping and automation platform. Extract data with 1,400+ ready-made tools, build your own in Node.js or Python, or get a managed solution.'
}
Hurray 🥳 You've just created a web scraper that scrapes data from Apify. Now let’s look at how you can deploy your web scraper function to AWS as a Lambda function.
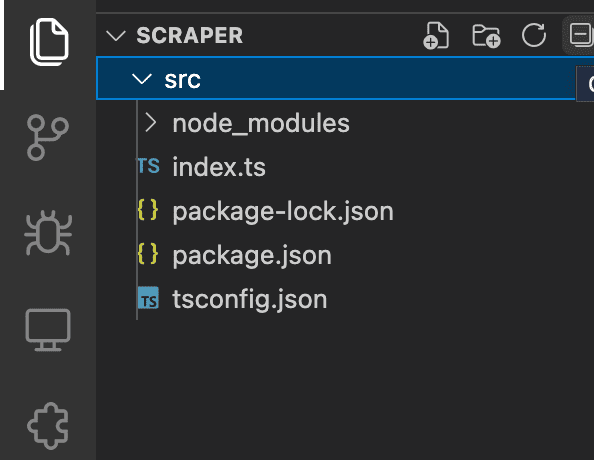
At the moment, this is what the project directory looks like:
Deploying to AWS as a Lambda Function
To deploy the function as a Lambda function, you need to make a few changes to the code.
import { APIGatewayProxyResult } from 'aws-lambda';
import axios from "axios";
import * as cheerio from "cheerio";

export async function lambdaHandler(): Promise<APIGatewayProxyResult> {
    try {
        const response = await axios.get('<https://apify.com/>');
        const $ = cheerio.load(response.data);

        const title = $('title').text();
        const description = $('meta[name="description"]').attr('content');
        return {
            statusCode: 200,
            body: JSON.stringify({
                title,
                description,
            }),
        };
    } catch (err) {
        console.log(err);
        return {
            statusCode: 500,
            body: JSON.stringify({
                message: 'some error happened',
            }),
        };
    };
};
Rather than print the results of the scraper in the console, the function should return the results as an APIGatewayProxyResult response from AWS whenever the function is run. The function should also return an error if something goes wrong when scraping the data from apify.com
Deploying to AWS using AWS SAM
To deploy the function using AWS SAM: in the root folder of your project (not src folder), create a file called template.yaml with the contents below.
This provides AWS with some information about what you want to deploy and where you want to deploy it. Also, since AWS doesn’t support TypeScript natively, AWS SAM will convert your code to JavaScript using esbuild before typing it.
AWSTemplateFormatVersion: '2010-09-09' #Provide a description of the application as well as a template format version and AWS SAM version to use.
Transform: AWS::Serverless-2016-10-31
Description: >
  scraper

  Simple web scraper with typescript and AWS Lambda functions
Globals:
  Function:
    Timeout: 10 # Means  each Lambda function will have a timeout of 10 seconds

    Tracing: Active  #X-ray tracing will be enabled for all Lambda functions
  Api:
    TracingEnabled: true
Resources: #Defines the AWS resources you want to create and use
  WebScraperFunction: #name of the function that will be deployed
    Type: AWS::Serverless::Function #specify that you are using the AWS serverless function resource
    Properties:
      CodeUri: src/ #specify the source folder for the function
      Handler: index.lambdaHandler #name of the function handler
      Runtime: nodejs18.x #nodejs version to use
      Architectures:
      - x86_64
      Events: #events for the function to listen to in this case, none
        ScraperApi: # name of the Api
          Type: Api #tells aws that the event source is an API
          Properties:
            Path: /scraper #the endpoint for the API that will be created
            Method: get #http method to hit the API
    Metadata: # Manage esbuild properties this is what will build our ts code to js
      BuildMethod: esbuild
      BuildProperties:
        Minify: true
        Target: es2020
        Sourcemap: true
        EntryPoints:
        - index.ts #entry point for the function
Also, create a samconfig.toml file with the following contents:
version = 0.1 #indicates the version

[default]
[default.global.parameters]
stack_name = "scraper" #default name for CloudFormation to use

[default.build.parameters] #tells AWS to use cached builds by default
cached = true
parallel = true

[default.validate.parameters]
lint = true

[default.deploy.parameters] # Allows CloudFormation to create and update IAM roles programmatically
capabilities = "CAPABILITY_IAM"
confirm_changeset = true
resolve_s3 = true #Automatically determines or creates an S3 bucket to use for deployment
s3_prefix = "scraper"
region = "us-east-1" #region to deploy to
disable_rollback = true
image_repositories = []

[default.package.parameters]
resolve_s3 = true

[default.sync.parameters]
watch = true

[default.local_start_api.parameters]
warm_containers = "EAGER"

[default.local_start_lambda.parameters]
warm_containers = "EAGER"
With these two files, you can now deploy your function using AWS SAM.
To build and compile the project, run the command:
sam build
This will build the project and convert your TypeScript code to JavaScript using esbuild, You should receive a response on your terminal like this:

Create a deployment using the command:
sam deploy --guided
This will create a prompt screen on the CLI to guide you and collect some information on deploying the Lambda function.
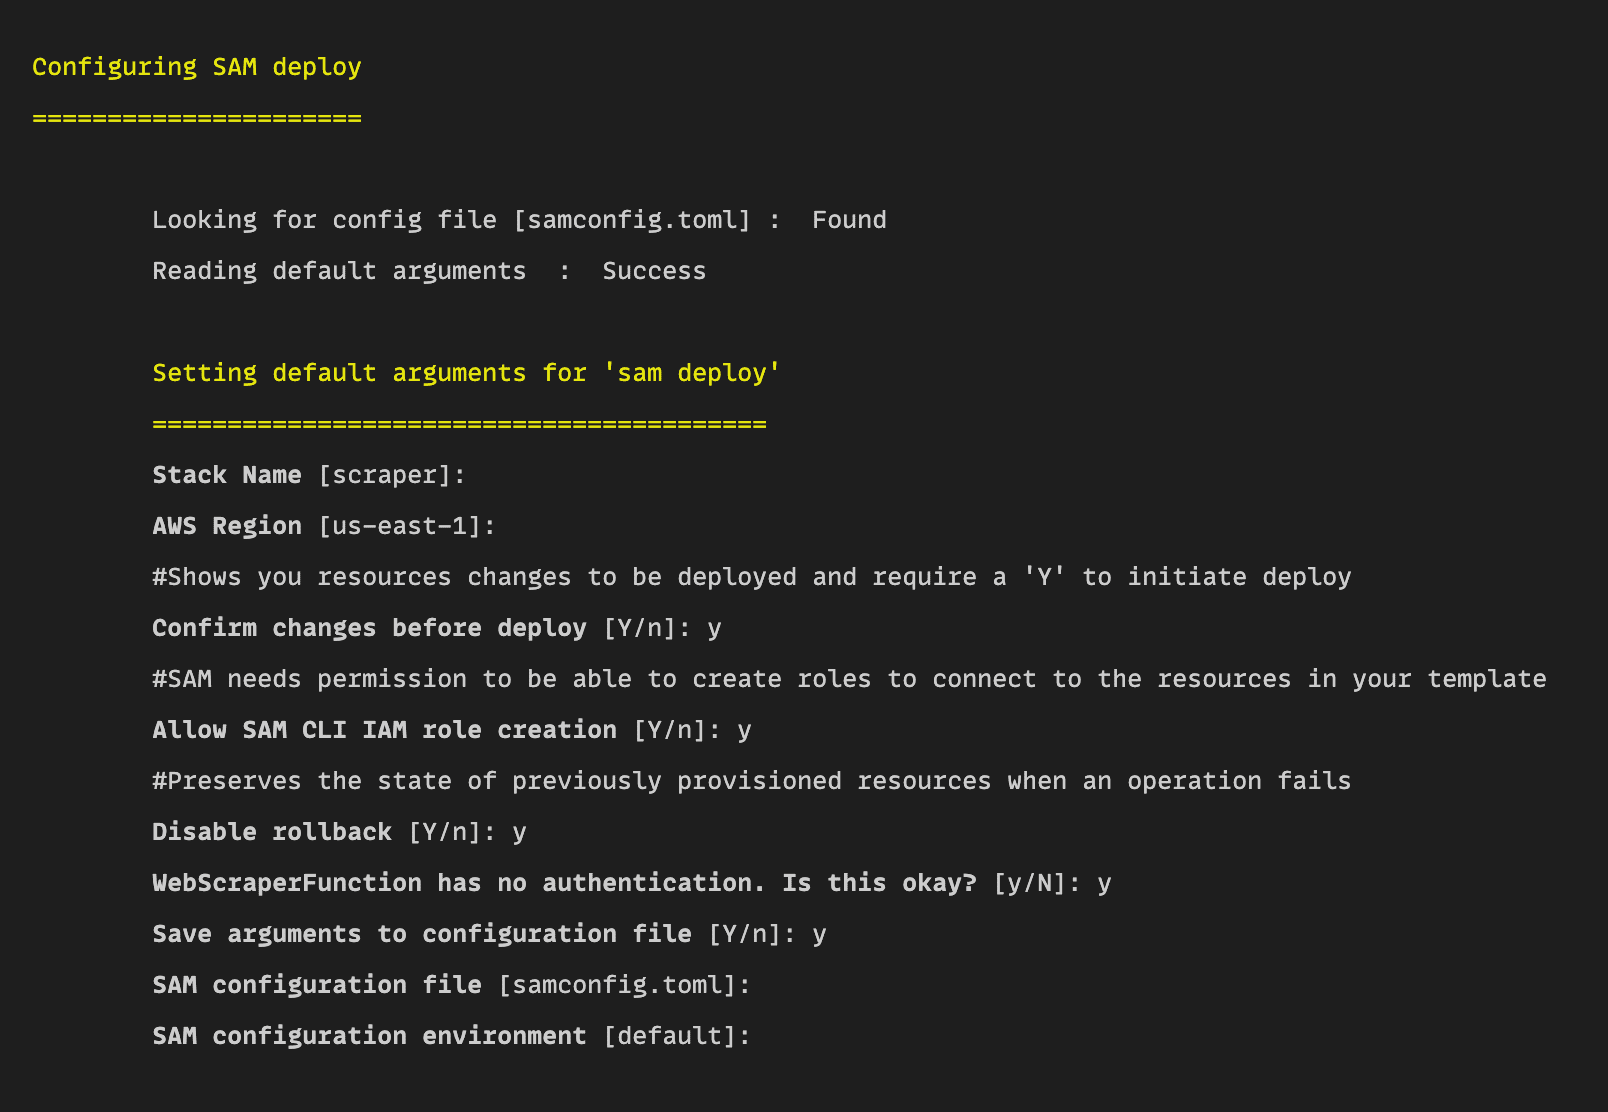
Confirm the information by typing y and leave the configuration files and environment empty. Enter these as you set them previously.
The next screen will run a series of operations to AWS and prepare the project for deployment. It will also create the API gateway and ask if you want to deploy it to AWS.

Confirm by typing y and this will deploy the changes to AWS. To confirm your function was successfully deployed, you should receive a message like the one below and a success message.
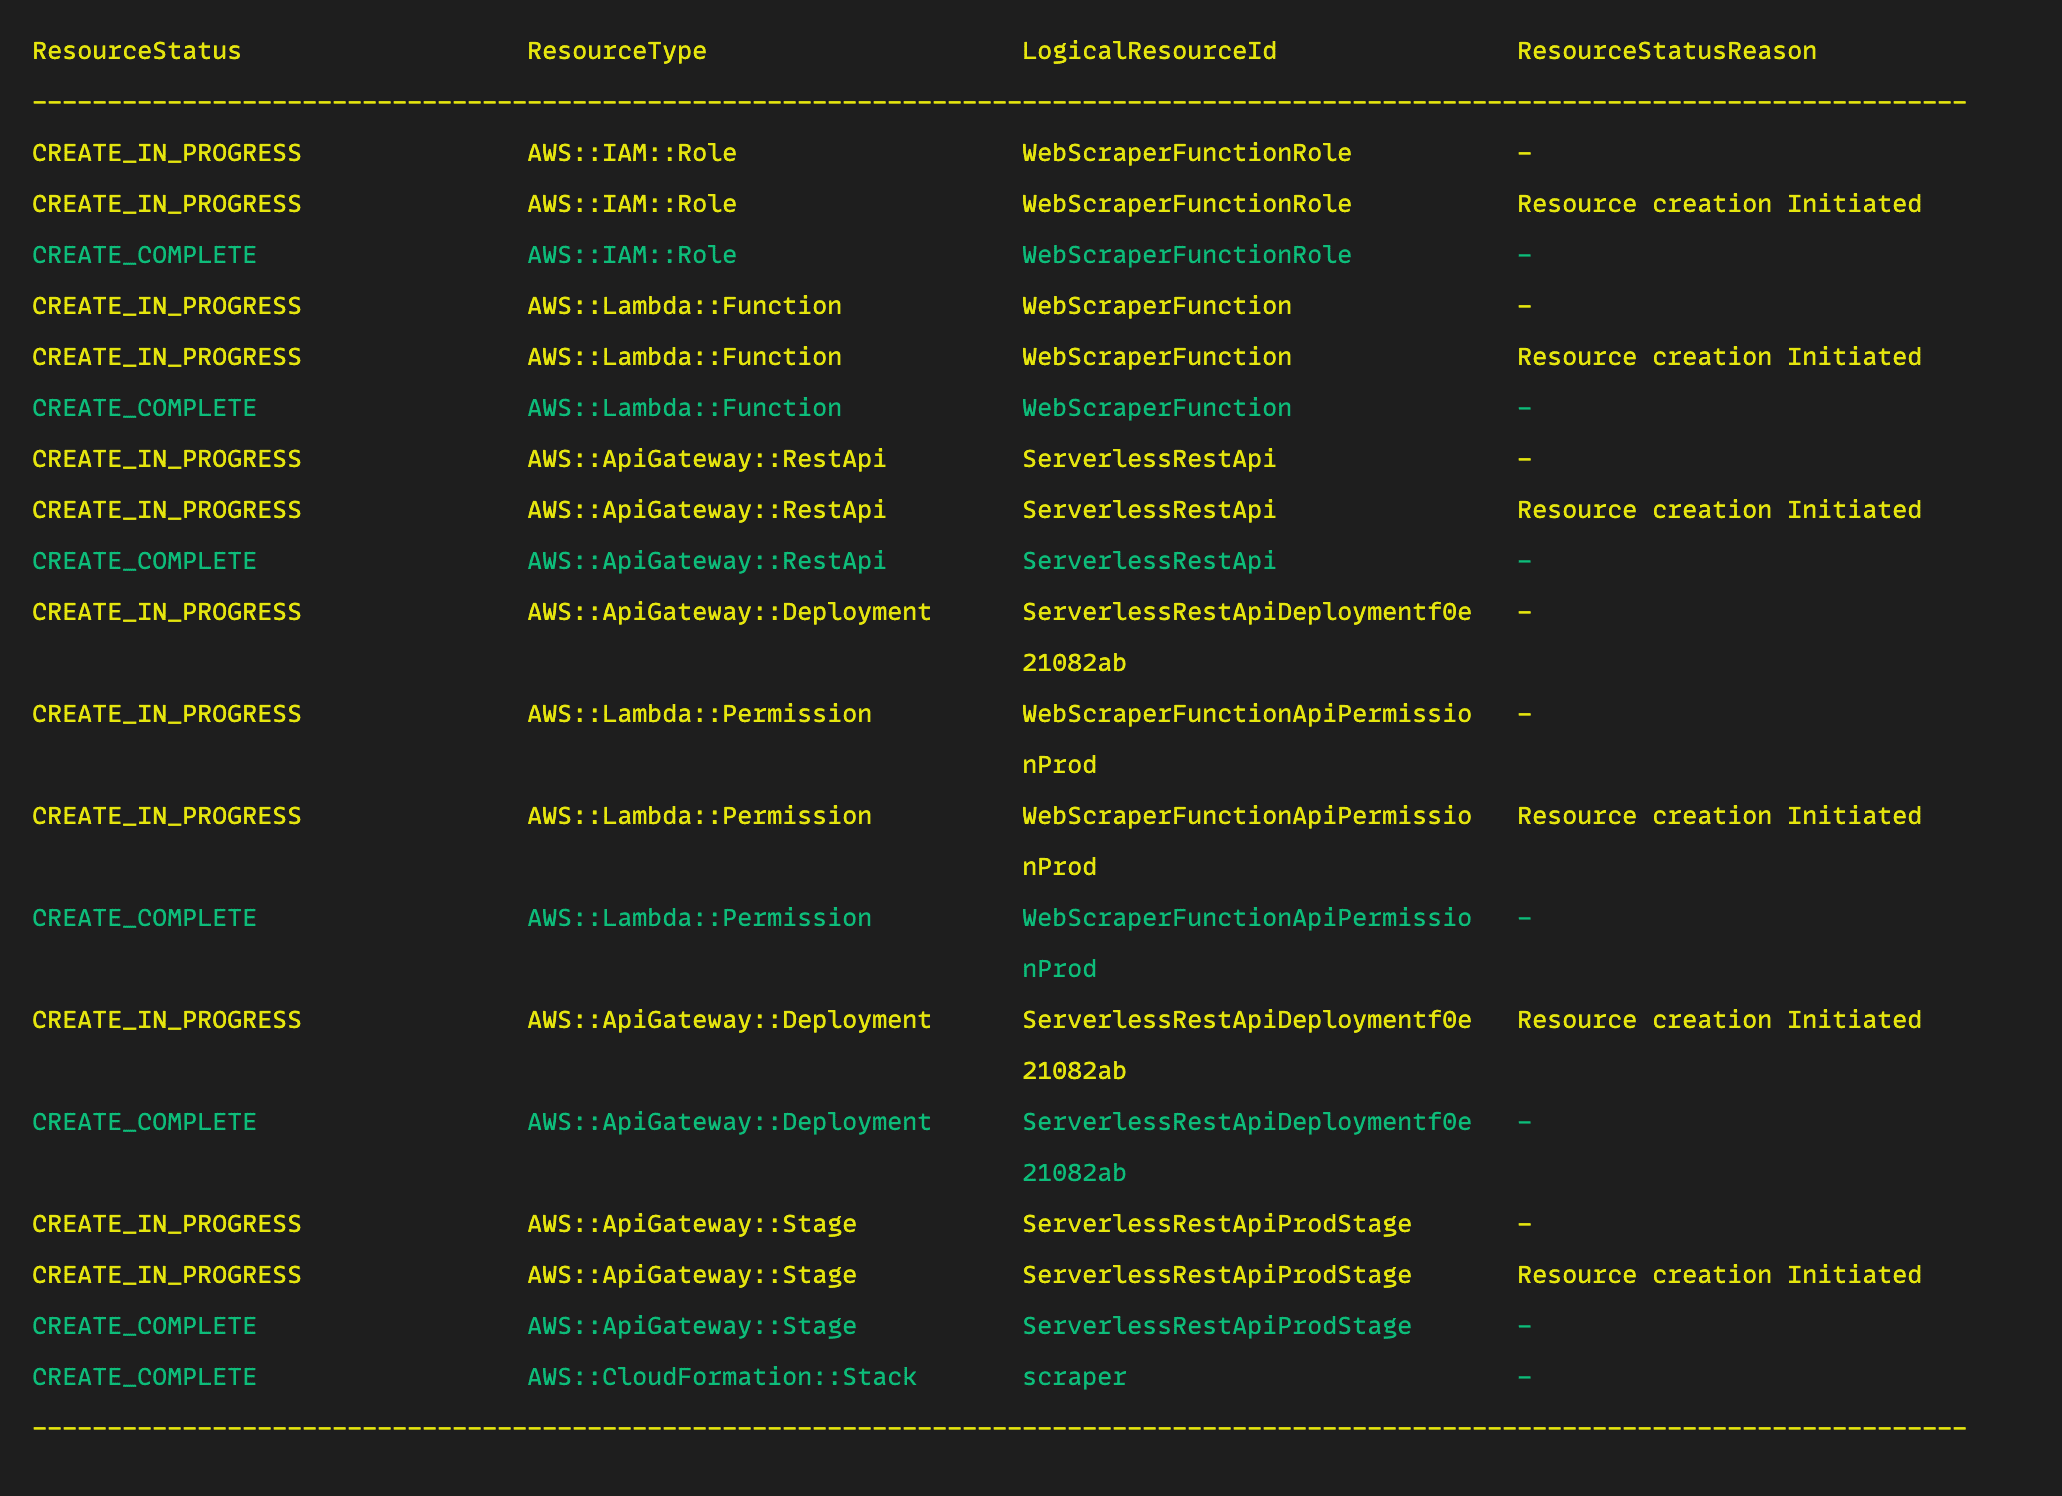
From the picture above, you can see that our configuration does a few things:
- Creates an Identity Access Management (IAM) role on your behalf.
- Creates a Lambda function
WebScraperFunction. - Creates an AWS API Gateway
ServerlessRestApithat should give a response whenever your Lambda function is called. - Gives permission to the
WebScraperFunctionApiPermissionProdto invoke the Lambda function in production. - An ApiGateway
ServerlessRestApiProdStageis also created to invoke the Lambda function during the development/staging environment.
Testing the Lambda function
To test your recently deployed Lambda function, head over to the Lambda function page, and you should see your recently deployed functions.
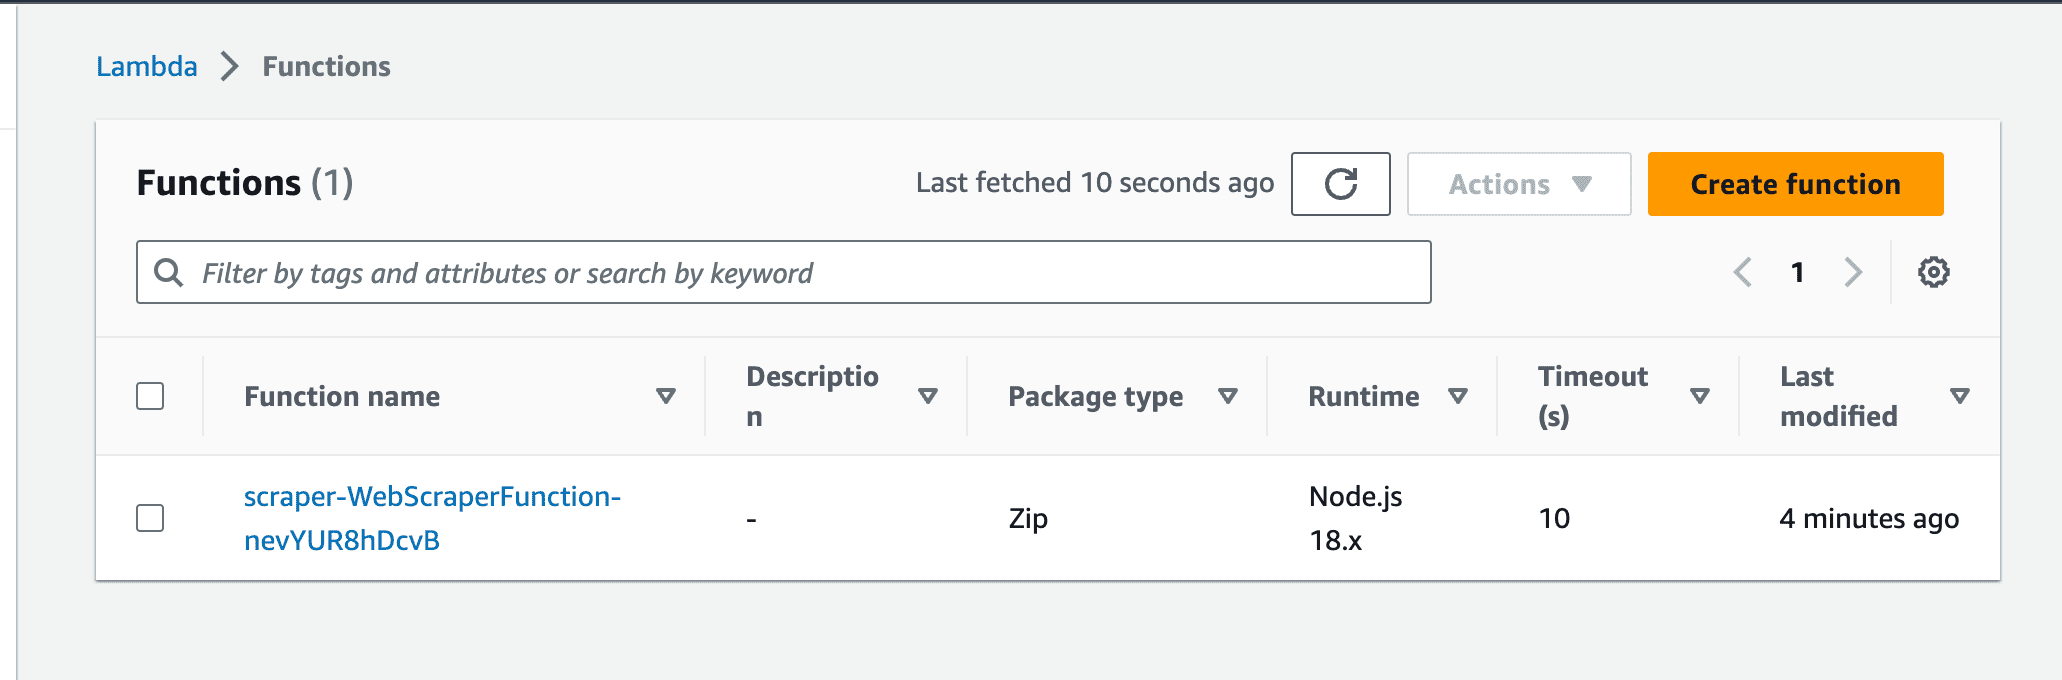
Clicking on the function will show you more details about it.
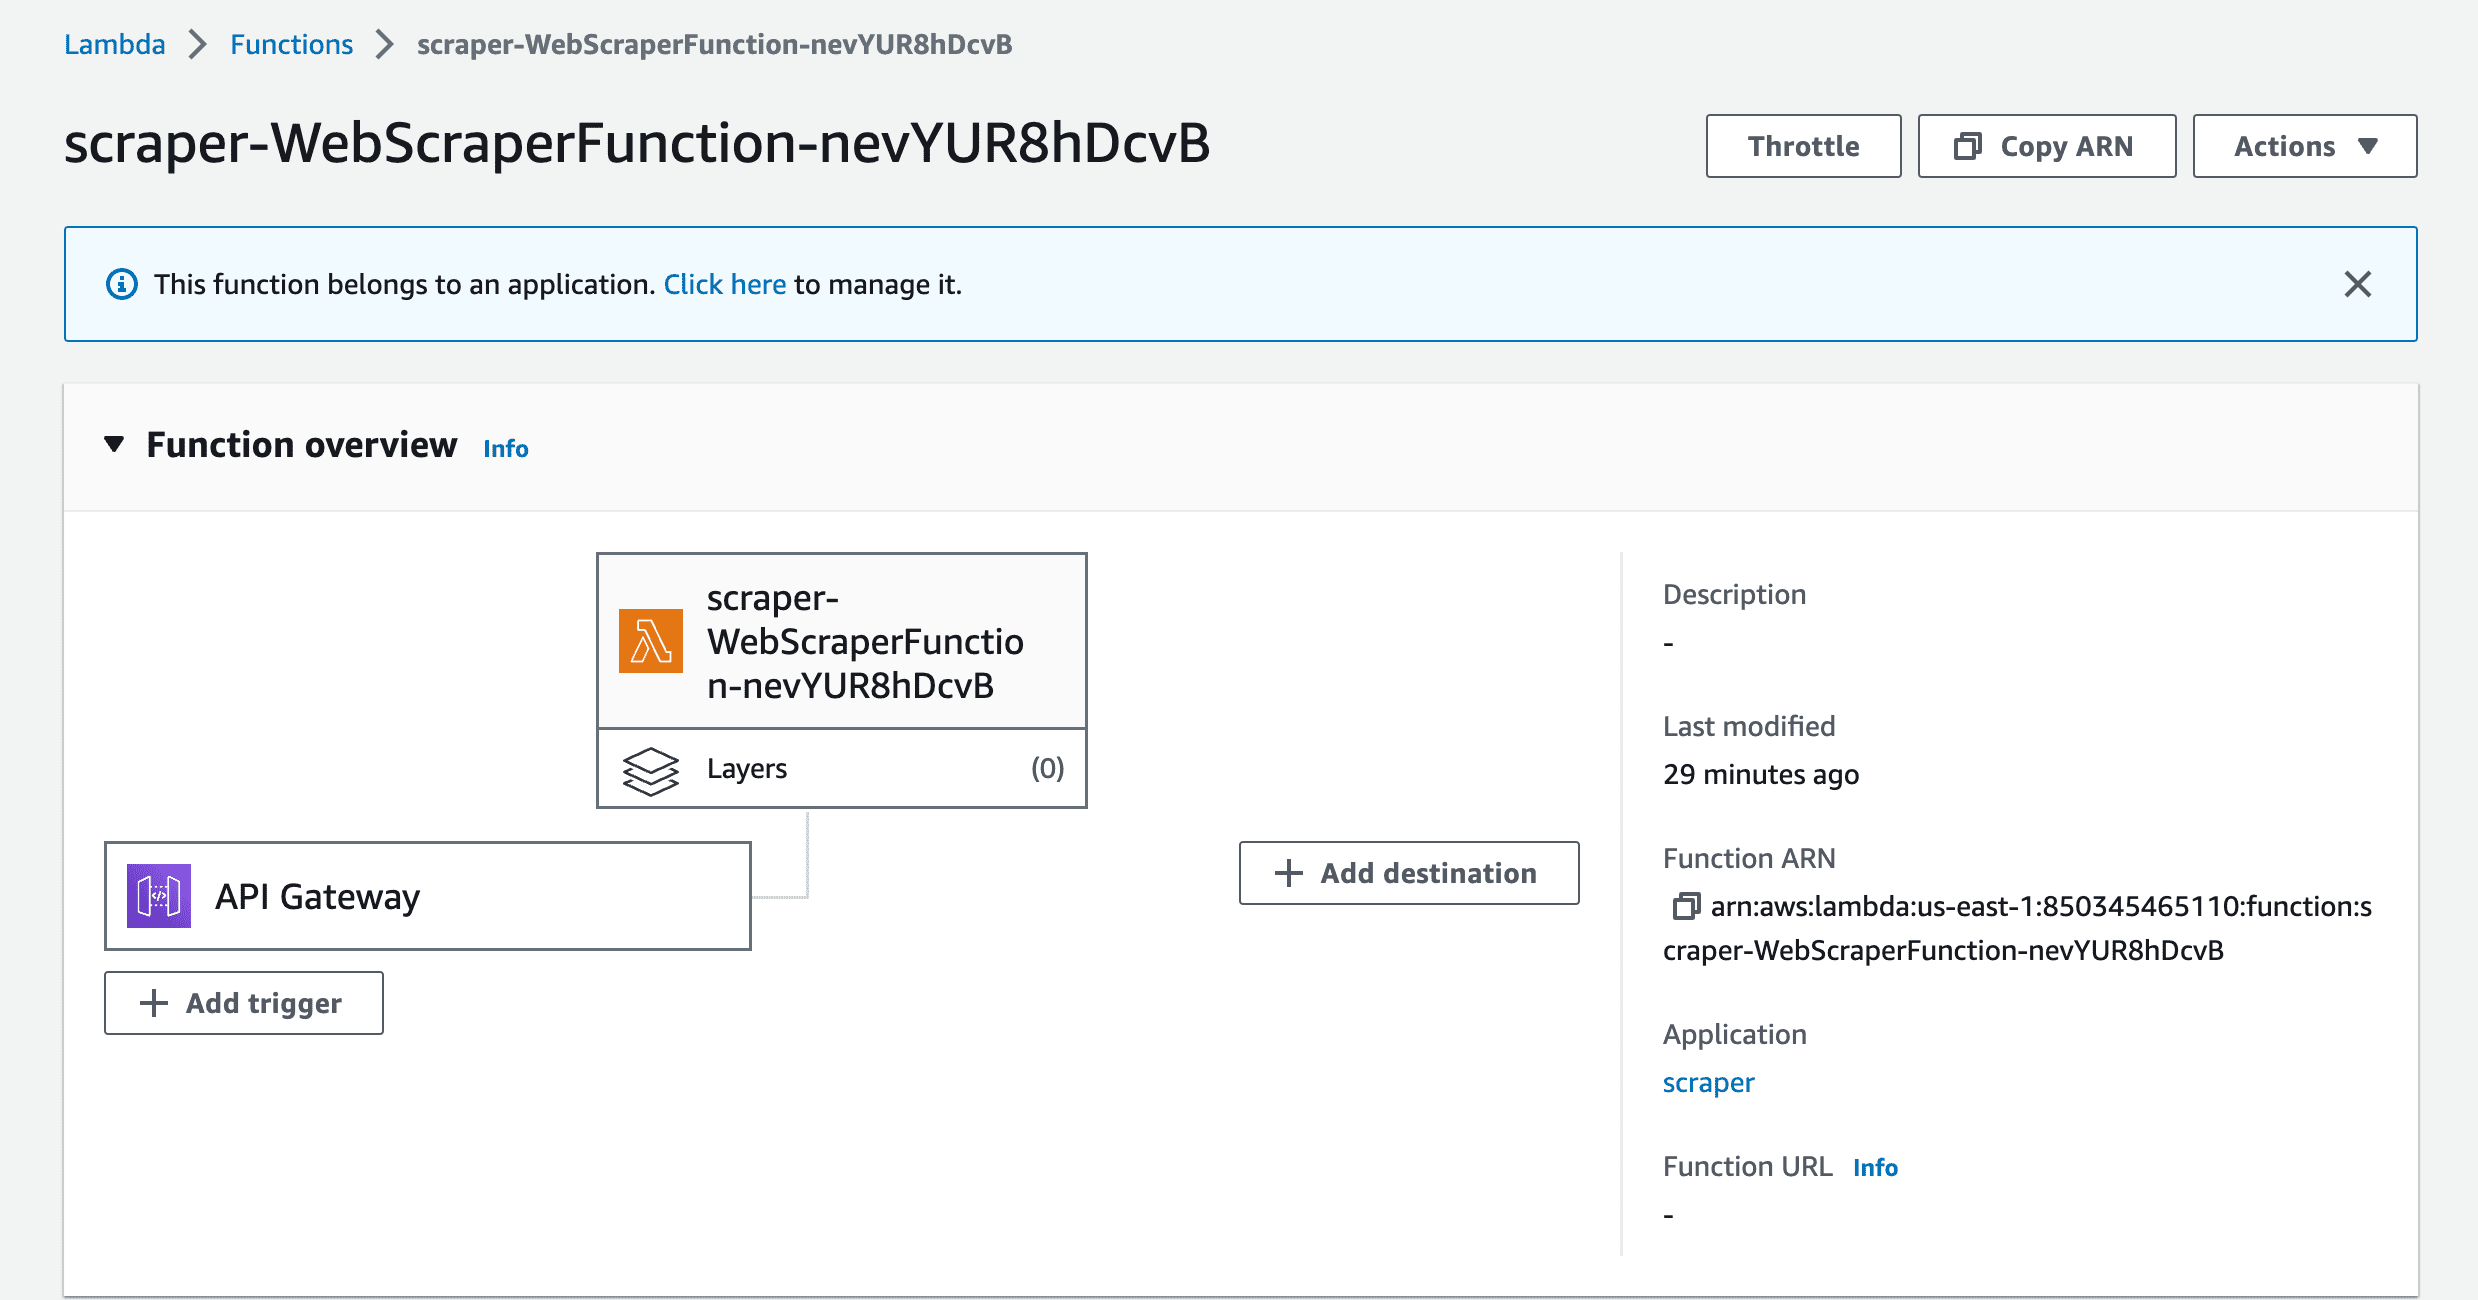
Click on the API Gateway to reveal the API to invoke the function.
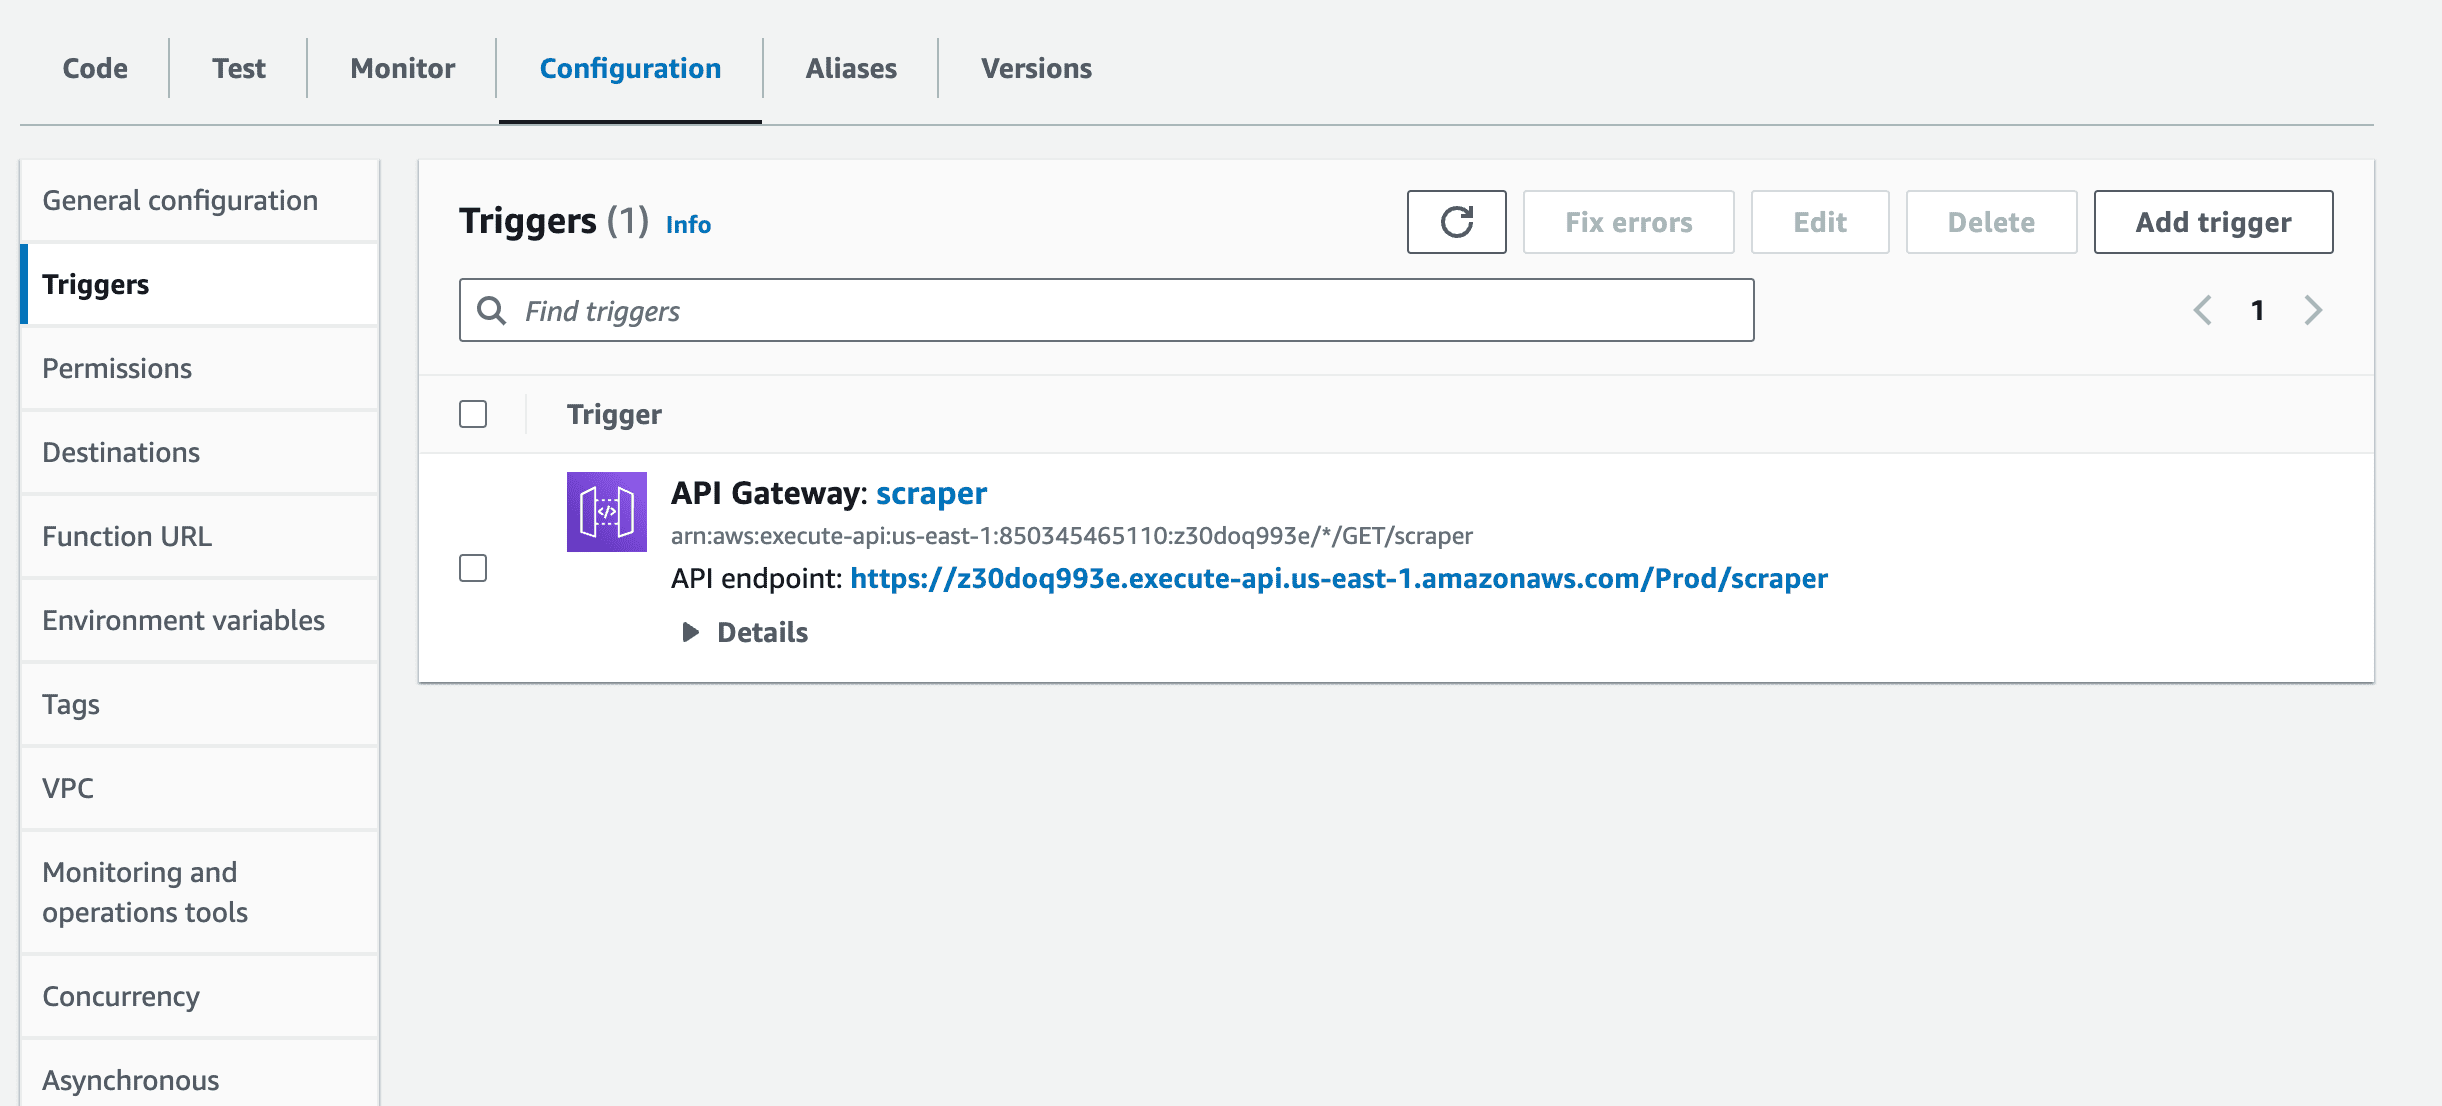
Clicking on the API endpoint will trigger the Lambda function and provide a response.
Best practices for web scraping with Lambda functions
Now for some tips on web scraping with Lambda functions:
Handle errors properly
Make sure you properly handle errors in your application and throw the right errors when an error occurs. Enabling X-ray tracing in AWS can help you easily trace where your errors are coming from in your function.
Monitor your scraper
You can use an AWS service like CloudWatch to monitor your application and functions and to log and check for issues.
Set a rate limit
If your application scrapes data very often, consider setting a rate limit to scrape data at intervals. AWS CloudWatch can also help you to set event intervals to call your Lambda function.
Set IP rotation
Consider setting up IP rotation to serve as a proxy to avoid getting your server’s IP address banned.
Respect robots.txt files
Before scraping a website, check its robots.txt content to avoid any legal and ethical issues.
Wrapping up
Combining AWS Lambda functions with TypeScript can greatly improve the quality and abilities of your web scraper applications. We’ve covered how Lambda functions work, how to deploy a TypeScript web scraper application via the CLI to AWS Lambda function, and learned some best practices, ethical procedures, and proper error handling when building web scrapers with TypeScript.