Anthropic’s Model Context Protocol (MCP) has quickly become one of the hottest topics in AI engineering circles. Despite all the buzz, the core idea behind MCPs is actually pretty straightforward, and far from new in software engineering. The goal is to create a standardized way for AI apps and agents to connect with external tools and data sources, similar to how REST APIs structure backend communication or how Language Server Protocols (LSPs) let IDEs talk to language-specific tools.
As simple as it sounds, MCP facilitates the building and integration of powerful AI-powered apps that benefit developers, tool creators, end users, and enterprises, making the whole AI integration process much more scalable and accessible.
Prefer video? Learn how to build and monetize MCP on Apify
How MCP fits into Apify
Apify is uniquely positioned to take full advantage of MCP, as it offers over 5,000 public tools, available as Actors on Apify Store, that can be exposed to LLM applications through an MCP server. To better understand how Apify fits into the MCP architecture, take a look at the diagram below.
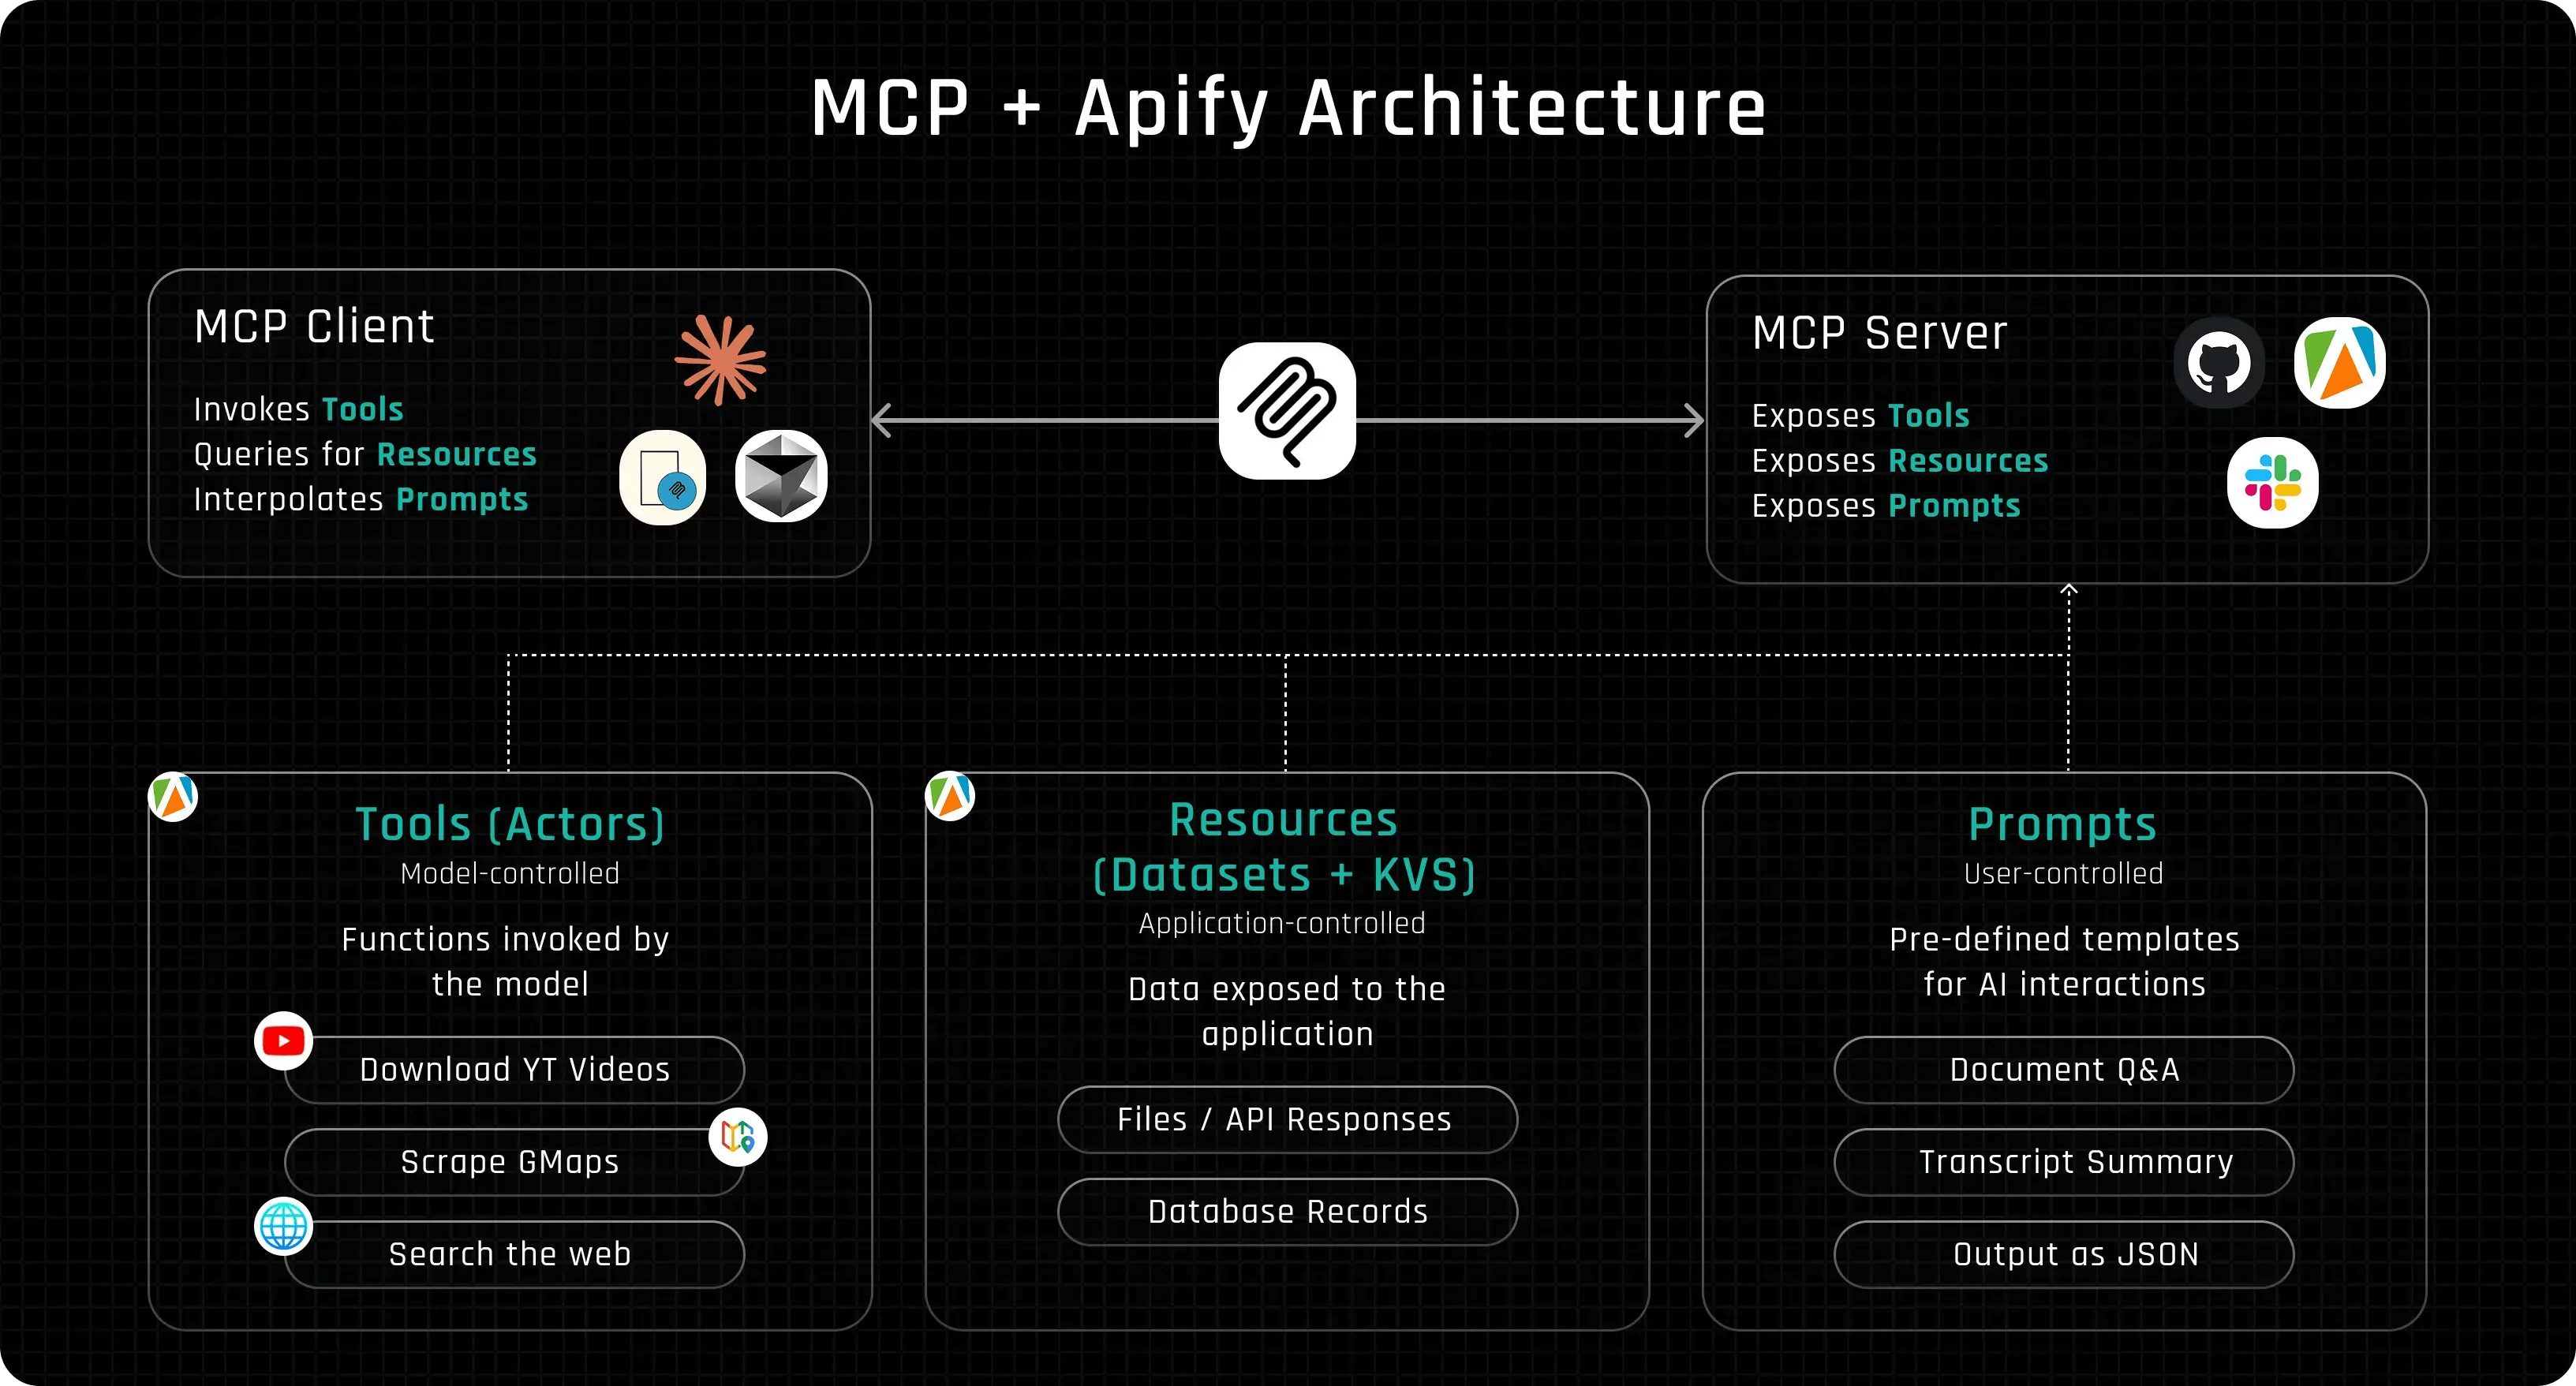
From the diagram, you can see that Apify wears a few different hats in the MCP architecture, and this is only possible because of the flexibility provided by the Apify Actors. Here is how to interpret this diagram:
MCP clients
An MCP client is essentially the part of an AI system that knows how to discover and call tools using the MCP format. It might sound fancy, but you’re probably already using one daily, like the Claude desktop app, the Cursor IDE, or the Apify Tester MCP Client.
MCP servers
An MCP server exposes tools, resources, or prompts to an LLM client in a way that the client can understand and interact with.
Practically anything can be an MCP server if it follows the protocol. Apify can expose its Actors through the Apify MCP Server, Slack could offer chat and workspace actions, and GitHub could wrap its API for things like creating issues or reviewing pull requests. If it can describe its capabilities and handle structured tool calls, it can plug into the MCP ecosystem.
Tools (Apify Actors)
Tools are external functions or capabilities, like APIs, scripts, or automations, that an LLM can call to get things done.
Herein lies the true value of Apify: MCP makes it possible to expose thousands of public Actors as tools that the LLM can use. That means giving an LLM the ability to scrape structured data from nearly any website and automate workflows like sending emails, downloading YouTube videos, or searching the web.
Plus, you’re not limited to existing tools: you can build your own Actors and make them accessible to LLMs through the MCP protocol.
Resources (Datasets and Key Value Stores)
In MCP, resources are data objects that tools can read from or write to. Basically, they’re how tools share or persist information across calls.
In the case of Apify, resources map directly to things like Datasets and Key-Value Stores. A Dataset can hold structured data, like the results of a web scraping run, while a Key-Value Store is useful for storing config files, inputs, or intermediate results.
By exposing these through MCP, LLMs can not only call tools but also interact with the data that those tools generate, making workflows more dynamic and stateful.
Prompts
Finally, we have prompts, which act as predefined text templates that provide guidance to the LLM on how to use a specific tool or handle its output. They act as built-in instructions or examples that help the model understand when and how a tool should be used within a larger task.
For example, a prompt might tell the LLM how to phrase a query, what kind of input to provide, or how to interpret the results it receives. By exposing prompts through the MCP server, developers can fine-tune the model’s behavior dynamically, without modifying the LLM itself, making tool usage more reliable, contextual, and flexible.
Now that we’ve covered how Apify fits into the MCP ecosystem, let’s jump into how you can actually use Apify Actors as tools through MCP in practice.
How to use MCP with Apify Actors: Tester MCP Client
In this section, we’ll use Apify’s Tester MCP Client, which is the easiest way to test and validate how a client interacts with tools.
- Tip: Apify MCP Server now also supports DXT file. To install the Apify MCP Server in Claude for Desktop with one click, download and run the latest Apify MCP Server DXT file.
We’re starting with the Apify Tester MCP Client because it gives us a clear view of each step in the MCP architecture we discussed earlier, helping you understand how everything works together to give your LLM its capabilities.
After that, we’ll look at how to set up the same functionality in the Claude Desktop App or any other MCP-compatible client.
To get started, open the Tester MCP Client and hit Try for free. You don’t even need an LLM API key, if you’re on Apify’s free plan, you get $5 in credits every month, which the client will use automatically. Once you’re logged into your Apify account, you’ll see a UI that looks like this:
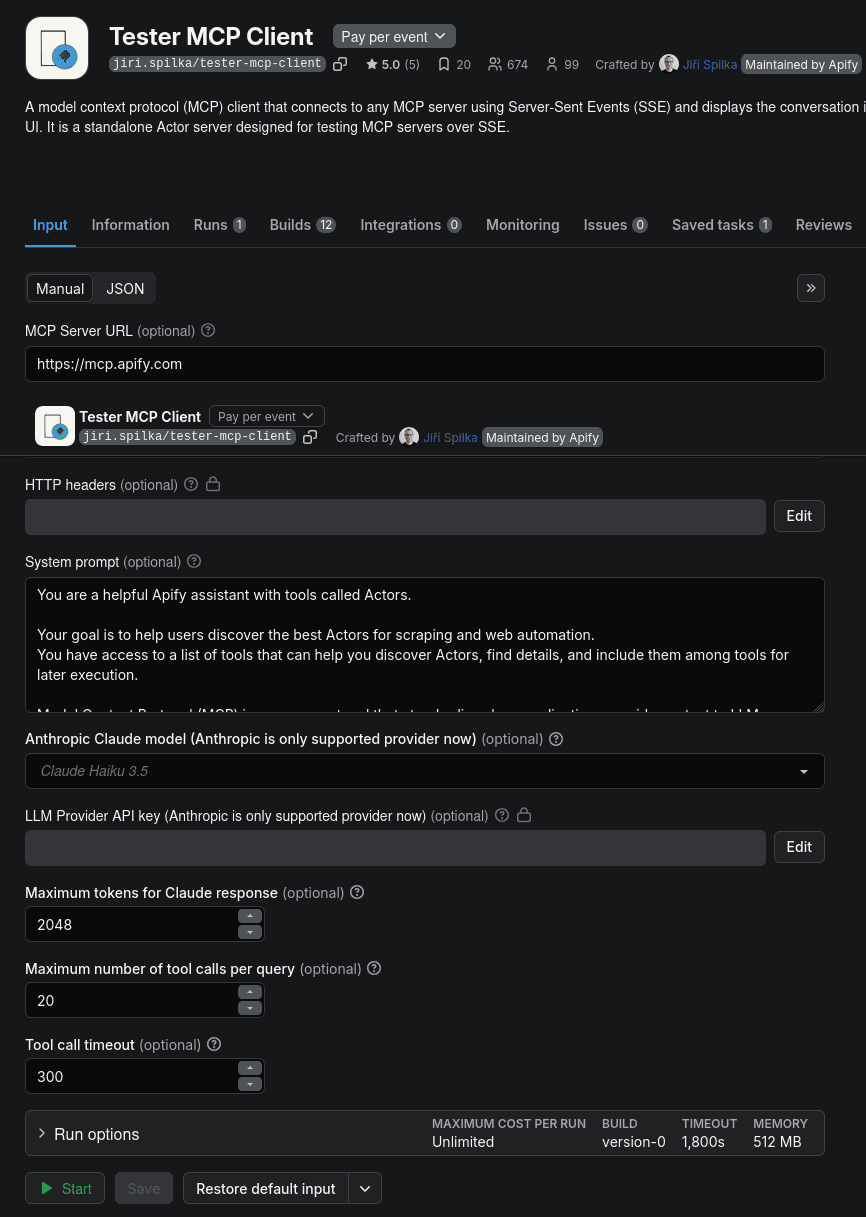
Here, you’ll already notice one of the MCP components we talked about earlier: the prompt, specifically the system prompt. Just like how a lead scoring system evaluates prospects based on defined criteria, the system prompt sets the tone and expectations, guiding the AI's behavior from the start.
This initial prompt sets the overall context, behavior, or persona for the AI’s responses. The Tester MCP Client lets you customize this prompt before starting the server, so feel free to tweak it however you like. Once you’re ready, just click “Start.”
After that, you’ll be taken to the Log tab, where you can see the system prompt that was sent to the LLM along with a generated URL that links to the client’s chat UI.
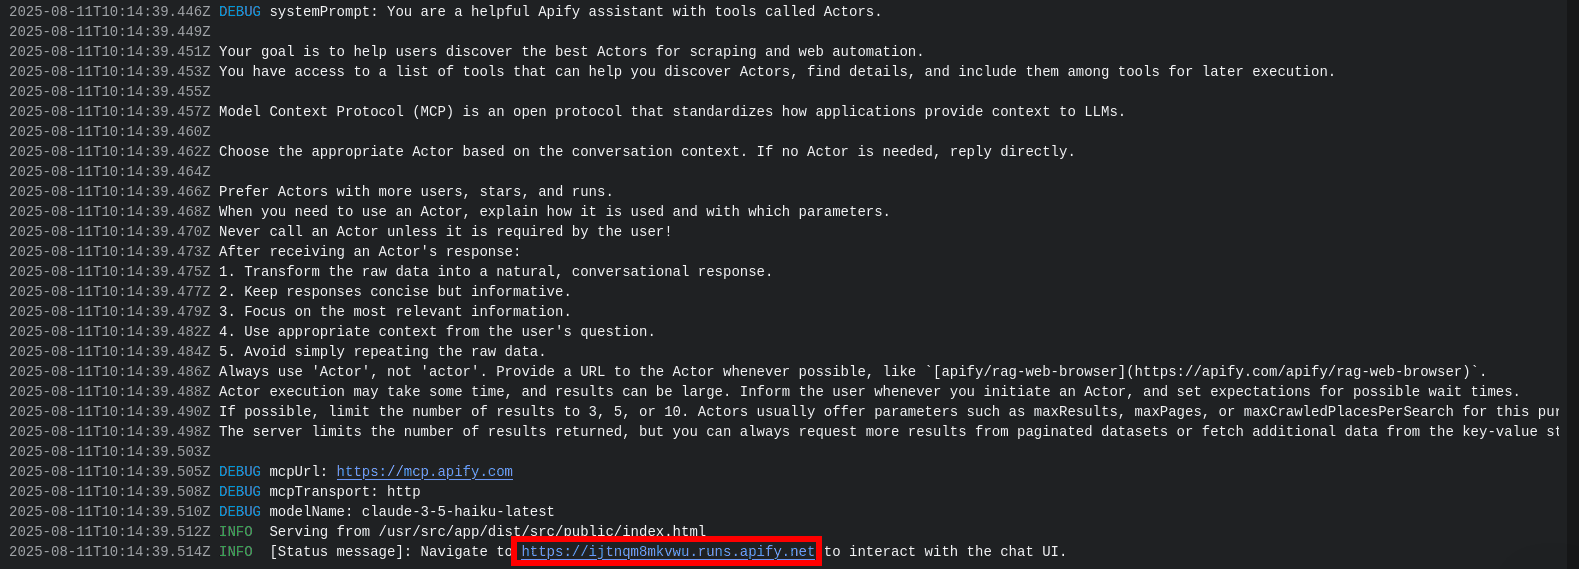
For this test run, I’ll ask the LLM to create a list of 10 cafes in Boston with at least 4 stars from Google Maps.
Notice that we're not telling it which tool to use or how to complete the task. Instead, the client will automatically check which tools are available from the server - in this case, all 5,000+ Actors on Apify Store - and choose the one that best fits the request.
- Note: This dynamic tool search feature needs to be supported by the MCP client; not all clients support this feature as of now. If your client does not support this feature, that means the LLM adds the tool and then cannot actually call it and starts acting weirdly. You need to preload the Actor tool manually using the
actorsparameter of the MCP server configuration - we'll be using this in the LangGraph example. For more details about theactorsparameter, visit the Apify MCP integration documentation.

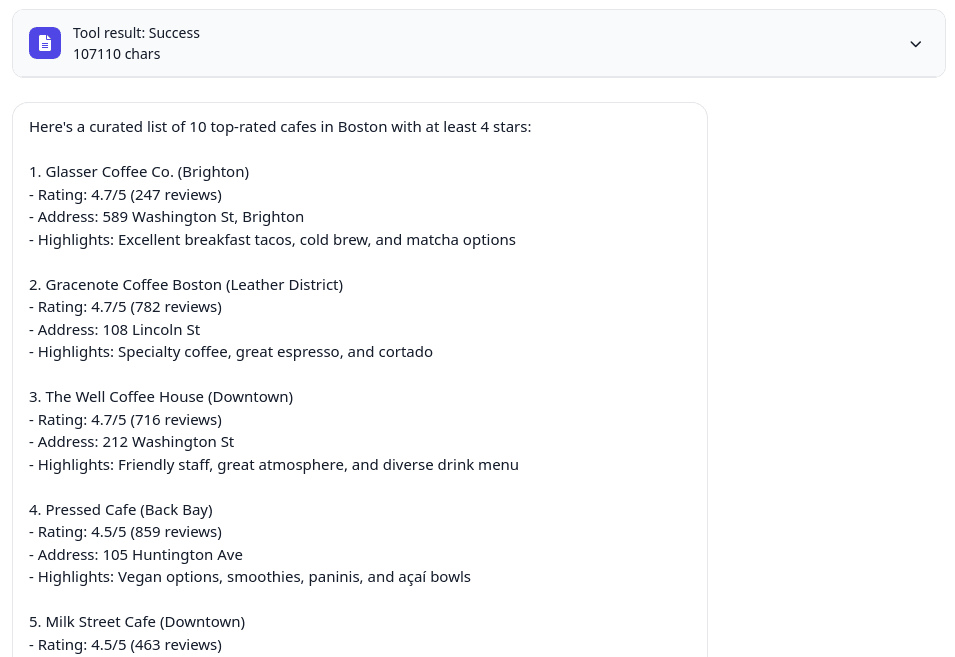
The LLM ended up selecting one of the Google Maps Scraper Actors to complete the task. You can clearly see which tool it used in the UI. After a couple of minutes, it returned an up-to-date and fairly accurate list of the cafes in Boston - something that wouldn’t have been possible without access to external tools.
Using Actors with any MCP Client with Apify MCP Server
You might have noticed that while using the Tester MCP Client, we didn’t mention one of the key parts of the MCP architecture: the server.
That’s because the Tester MCP Client is already preconfigured to connect to the Apify MCP Server, so there’s no setup required on your end.
However, if you want to give other MCP clients the same capabilities we just demonstrated, you’ll need to connect them to the Apify MCP Server yourself. Fortunately, thanks to the standardized MCP protocol, this is now a pretty straightforward process.
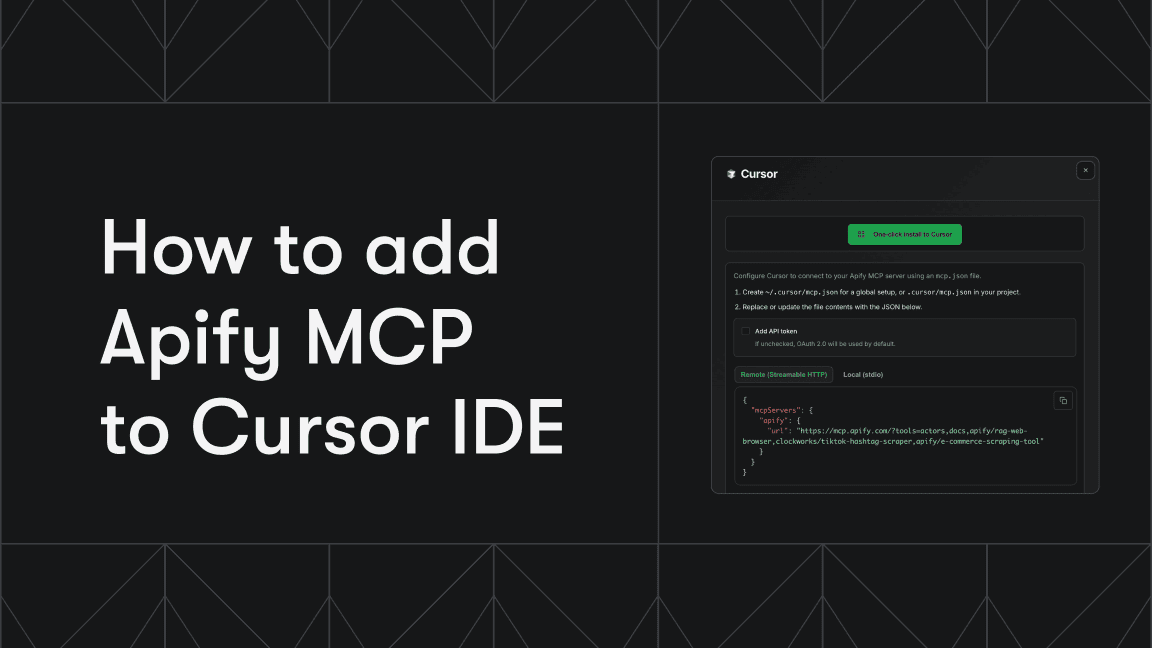
Visit the Apify MCP Server homepage for how to configure the Apify MCP server in your MCP client.
After configuring the MCP and then restarting your Claude application, you should see the Actors defined in the Actors MCP Server listed as available tools.
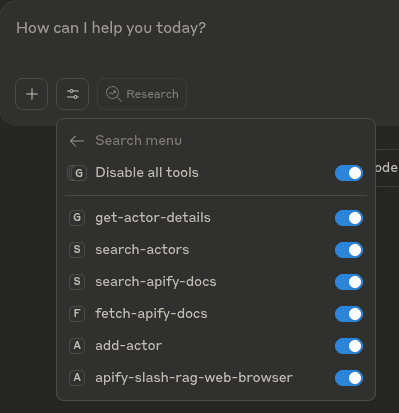
Remember, MCP was created to standardize how tools are made available to clients. That means the process we just followed will work the same way for any other MCP-compatible client. All you need to do is locate the client’s configuration file and paste in the JSON MCP configuration.
Using Apify Actors with LangGraph MCP Adapters
Finally, several AI agent frameworks are starting to adopt the MCP protocol and provide built-in support for accessing MCP servers directly from your code.
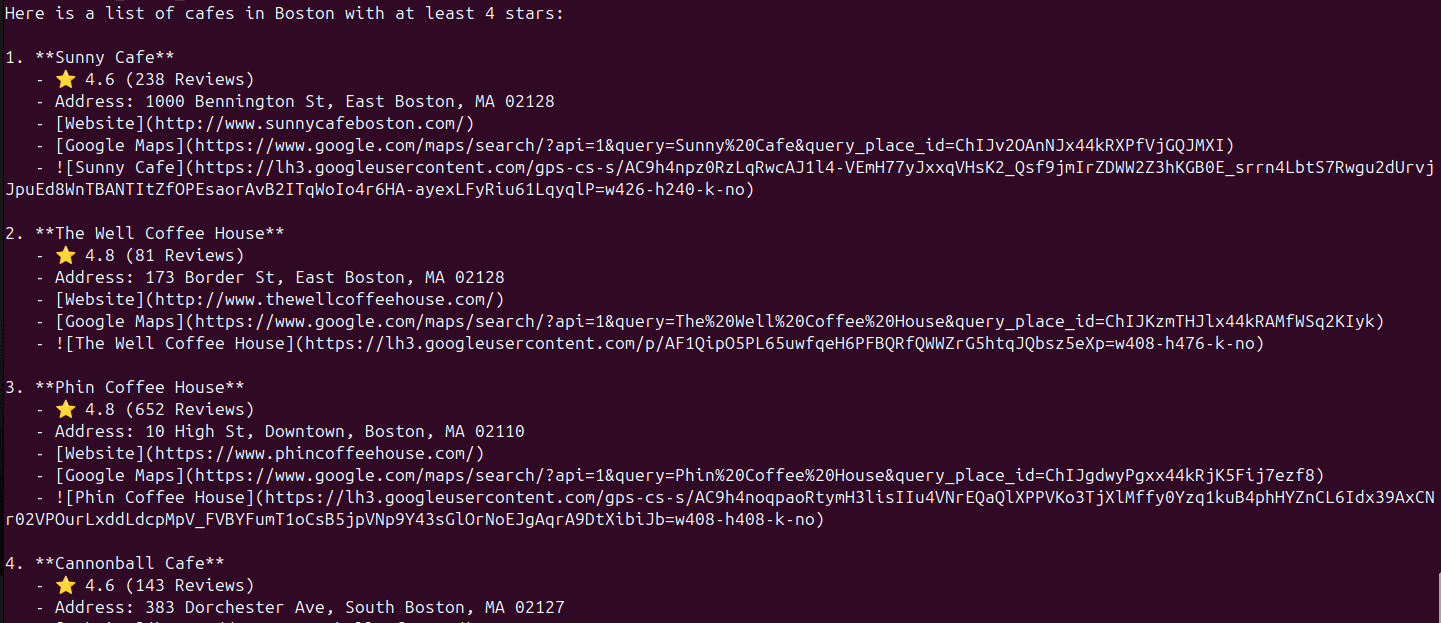
In the example below, we’re using LangGraph to initialize an MCP client, connect to the Actors MCP Server, and generate a list of the 10 cafes in Boston with at least 4 stars in Google Maps using the available Actor tools. Here’s how it’s implemented:
import dotenv
import os
import asyncio
from pathlib import Path

from langgraph.prebuilt import create_react_agent
from mcp import ClientSession, StdioServerParameters
from mcp.client.stdio import stdio_client
from langchain_mcp_adapters.tools import load_mcp_tools
from langgraph.prebuilt import create_react_agent
from langchain_openai import ChatOpenAI

# Load environment variables from .env file
dotenv.load_dotenv()

# Make sure to set your APIFY_TOKEN in the environment or .env file
APIFY_TOKEN = os.getenv("APIFY_TOKEN")
if APIFY_TOKEN is None:
    raise ValueError("APIFY_TOKEN environment variable must be set.")

# Initialize the model
# Note: You can use any model from langchain_openai
model = ChatOpenAI(model="gpt-4o")

# Initialize the server parameters
# Note: You can use any server parameters from mcp
server_params = StdioServerParameters(
    command="npx",
    args=["-y", "@apify/actors-mcp-server",
          "--actors", "compass/google-maps-extractor"],

    env={
        "APIFY_TOKEN": APIFY_TOKEN
    },
)

# Initialize the MCP client, load tools, and create an agent
async def main():
    async with stdio_client(server_params) as (read, write):
        async with ClientSession(read, write) as session:
            # Initialize the connection
            await session.initialize()

            # Get tools
            tools = await load_mcp_tools(session)

            # Create and run the agent
            agent = create_react_agent(model, tools)
            agent_response = await agent.ainvoke(
                {
                    "messages": "Give me a list with 10 cafes in Boston with at least 4 stars from google maps."
                }
            )

            # Get the response content
            response_content = agent_response["messages"][-1].content
            print(agent_response["messages"][-1].content)

            # Save the response to a markdown file
            output_dir = Path("results")
            output_dir.mkdir(exist_ok=True)
            filename = f"agent_response.md"
            file_path = output_dir / filename

            # Write to file
            with open(file_path, "w") as f:
                f.write(response_content)

            print(f"\\nResults saved to {file_path}")

# Run the async main function
asyncio.run(main())
As you can see, the server configuration uses the same parameters we used when setting it up in Claude Desktop.
server_params = StdioServerParameters(
    command="npx",
    args=["-y", "@apify/actors-mcp-server",
          "--actors", "compass/google-maps-extractor"],
    env={
        "APIFY_TOKEN": APIFY_TOKEN
    },
)
Also note that in this example, we’re using GPT-4o instead of Claude. Although MCP was introduced by Anthropic, it’s an LLM-agnostic protocol and works with any frontier model that supports it.
Once the code runs, the LLM’s response will be saved to a file named agent_response.md.
Conclusion
The introduction of the Model Context Protocol marks a major step forward in the evolution of AI tooling. It brings much-needed standardization and pushes the ecosystem closer to maturity. And if Apify alone can expose over 6,000 tools through a single MCP server, imagine the scale and variety of tools that will become available as MCP adoption continues to grow.
This article is just a starting point for using Apify Actors to improve your AI applications. The space is evolving at a breakneck pace, and we're committed to matching this pace by continuously pushing new solutions, so we encourage you to keep exploring on your own. In particular, check out more code examples of the Actors MCP Server implementation using different transport methods (like Streamable HTTP and Stdio) on GitHub:
And don’t forget to join the Apify Discord to connect with other AI developers and stay up to date with what we’re building!
Learn more about MCP and AI agents
- How to build and deploy MCP servers in minutes with a TypeScript template - Transform any stdio MCP server into a scalable, cloud-hosted service.
- Best MCP servers for developers - 7 of the best servers to automate repetitive tasks, improve development workflow, and increase productivity.
- The state of MCP - The latest developments in Model Context Protocol and solutions to key industry challenges.
- What are AI agents? - The Apify platform is turning the potential of AI agents into practical solutions.
- How to build an AI agent - A complete step-by-step guide to creating, publishing, and monetizing AI agents on the Apify platform.
- AI agent orchestration with OpenAI Agents SDK - Learn to build an effective multiagent system with AI agent orchestration.
- AI agent workflow - building an agent to query Apify datasets - Learn how to extract insights from datasets using simple natural language queries without deep SQL knowledge or external data exports.
- 5 open-source AI agents on Apify that save you time - These AI agents are practical tools you can test and use today, or build on if you're creating your own automation.
- 11 AI agent use cases (on Apify) - 10 practical applications for AI agents, plus one meta-use case that hints at the future of agentic systems.
- 10 best AI agent frameworks - 5 paid platforms and 5 open-source options for building AI agents.
- AI agent architecture in 1,000 words - A comprehensive overview of AI agents' core components and architectural types.
- 7 real-world AI agent examples in 2025 you need to know - From goal-based assistants to learning-driven systems, these agents are powering everything from self-driving cars to advanced web automation.
- LLM agents: all you need to know in 2025 - LLM agents are changing how we approach AI by enabling interaction with external sources and reasoning through complex tasks.
- 7 types of AI agents you should know about - What defines an AI agent? We go through the agent spectrum, from simple reflexive systems to adaptive multi-agent networks.


