I published my first Apify Actor at the end of 2024 after several years of building scrapers and automation tools in Go. Go is my most productive language, and most of my side projects are already written in it.
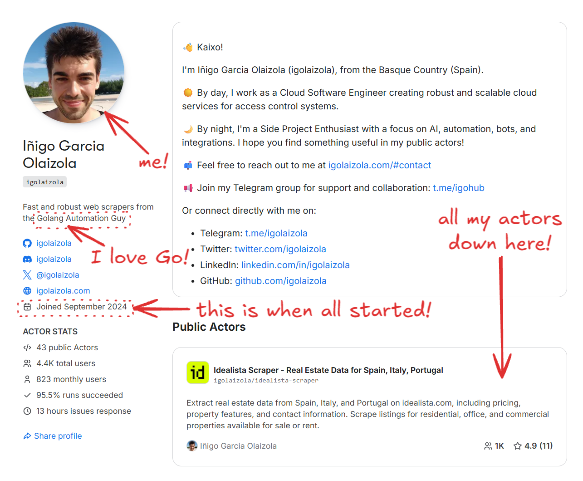
I knew Apify’s JavaScript and Python SDKs were the standard path. But my starting point was simple: I really wanted to build the Actor in Go. The side effects of that choice were lower memory usage, smaller Docker images, and full control over every API call. To support that workflow, I built a thin Go client on top of the Apify API, and this approach now underpins all the Actors in the private GitHub repository, where I manage them. The repo is private, but I’ll share the core patterns, trade-offs, and a few self-contained snippets you can reuse. I’ll include the snippets inline, and you can also browse them in this GitHub Gist.
This article is a practical walkthrough of that setup: how I structure Go-based Apify Actors, how I interact with the Apify API directly, and how I package small Docker images that reliably fit into the 128 MB Apify tier. I’ll use my Facebook (Meta) Ad Library Scraper Actor as a concrete example and reference real code from one of my Actors.
If you already know Apify and want a Go-first workflow with tight resource budgets, this is the approach that has worked well for me.
Project context
I keep all my Actors in a single monorepo. Each Actor lives under actors/<name>, while shared Apify-related logic sits in pkg/apify. This lets me reuse the same API client, logging conventions, and output logic across dozens of Actors without copy-pasting.
I chose to work directly with the Apify API for two main reasons:
- I wanted full control over runtime cost and memory usage. A thin client means no hidden buffers, no background workers, and no extra dependencies.
- Go is my default language. I iterate faster in a language I already know well than by learning a new SDK surface.
The downside is obvious: I own the edge cases and any API changes. I’ll come back to those trade-offs later.
Architecture overview
Repository layout
This is a simplified version of the core structure:
actors/
  fbads/
    cmd/fbads/
    fbads.go
    .actor/
pkg/
  apify/
    client.go
    apify.go
    saver.go
Dockerfile
Makefile
Each Actor has its own cmd/<actor> entrypoint and a package under actors/<actor> containing the business logic. Shared Apify interaction code lives in pkg/apify, which includes:
- a small HTTP client for Apify API calls (
client.go,apify.go) - an output saver that writes to the Apify dataset or to a local JSON file (
saver.go) - helpers for input parsing and key-value store access
This keeps Actor-specific code small and makes it easy to roll out improvements across all Actors.
The dual-mode runtime
Every Actor runs in two modes:
- Local mode, for development and debugging
- Apify mode, when running on the platform
The Actor decides which mode it’s in by checking environment variables. I use ACTOR_RUN_ID as the switch:
var apifyClient *apify.Client
if os.Getenv("ACTOR_RUN_ID") == "" {
    // Local mode: read input from file or CLI, write JSON to a file
} else {
    // Apify mode: read input from Apify KV store, write to dataset
    apifyClient, err = apify.NewActor(cfg.Debug)
}
This single check keeps both execution paths aligned and avoids the common problem where “local mode” slowly diverges from how the Actor behaves on Apify.
Building a Go Actor with the Apify API
Input handling and schema alignment
When running on Apify, I fetch the input directly from the key-value store. The client performs a simple GET request:
func (c *Client) GetInput(ctx context.Context, v any) error {
    u := fmt.Sprintf("v2/key-value-stores/%s/records/INPUT", c.key)
    if _, err := c.do(ctx, "GET", u, nil, v); err != nil {
        return fmt.Errorf("apify: couldn't get input: %w", err)
    }
    return nil
}
The input schema maps directly to a Go struct. For facebook-ad-library-scraper, it looks like this:
type Input struct {
    ProxyConfiguration apify.ProxyConfiguration `json:"proxyConfiguration"`
    MaxItems           int                      `json:"maxItems"`
    Query              string                   `json:"query"`
    Advertisers        []string                 `json:"advertisers"`
    Country            string                   `json:"country"`
    Category           string                   `json:"category"`
    MediaType          string                   `json:"mediaType"`
    MinDate            string                   `json:"minDate"`
    MaxDate            string                   `json:"maxDate"`
    ActiveStatus       string                   `json:"activeStatus"`
}
In local mode, I reuse the same struct but load it from a JSON file or a raw JSON string. This keeps local tests tightly aligned with real Apify input and avoids surprises when deploying.
Output handling and dataset writes
For output, I push items to the default dataset when running on Apify and write to a local JSON file in local mode. This logic is centralized in pkg/apify/saver.go:
func (s *Saver[T]) Save(ap *Client, output string, current []T) error {
    ctx, cancel := context.WithTimeout(context.Background(), time.Minute)
    defer cancel()

    if ap != nil {
        if ap.MaxChargeReached() {
            return errors.New("apify: max charge reached")
        }
        if err := ap.SaveItems(ctx, current); err != nil {
            return err
        }
        if ap.isPPE {
            if err := ap.AddCharge(ap.resultEvent, len(current)); err != nil {
                return err
            }
        }
        return nil
    }
    // Otherwise append to a local JSON file
}
Some of the logic here is specific to pay-per-event (PPE) Actors, which I’ll cover later. Under the hood, SaveItems is just a direct API call to the dataset endpoint:
func (c *Client) SaveItems(ctx context.Context, v any) error {
    u := fmt.Sprintf("v2/datasets/%s/items", c.dataset)
    if _, err := c.do(ctx, "POST", u, v, nil); err != nil {
        return fmt.Errorf("apify: couldn't put items: %w", err)
    }
    return nil
}
Centralizing this logic keeps behavior consistent across all Actors, both locally and on the platform.
Proxies
Proxy configuration comes from input. I support both Apify Proxy and external proxies.
When Apify Proxy is requested, I resolve proxy groups and country settings into a concrete proxy URL. The part I care about most is how the username is constructed from proxy groups and country:
username := "auto"
var parts []string
if len(cfg.ApifyProxyGroups) > 0 {
    parts = append(parts, fmt.Sprintf("groups-%s", strings.Join(cfg.ApifyProxyGroups, "+")))
}
if cfg.ApifyProxyCountry != "" {
    parts = append(parts, fmt.Sprintf("country-%s", strings.ToUpper(cfg.ApifyProxyCountry)))
}
if len(parts) > 0 {
    username = strings.Join(parts, ",")
}
proxyURL, err := url.Parse(fmt.Sprintf("http://%s:%s@%s:%s", username, password, host, port))
if err != nil {
    return nil, fmt.Errorf("couldn't parse proxy URL: %w", err)
}
This gives me predictable proxy behavior without relying on SDK abstractions.
Pay-per-event (PPE) Actors
Some of my Actors run in PPE mode. My Zillow Actor is a good example of this.
PPE is toggled by the APIFY_PPE environment variable. On startup, the client detects PPE mode:
if os.Getenv("APIFY_PPE") == "1" {
    slog.Info("This actor is running in pay-per-event (PPE) mode")
    c.isPPE = true
}
When PPE is enabled, Saver.Save charges per result and I also guard the main loop against exceeding the configured cap. In actors/zillow, the Actor stops early when the cap is reached like this:
if apify != nil && apify.MaxChargeReached() {
    slog.Warn("⚠️ Reached the max charge limit, stopping the actor")
    break
}
The cap check itself is a small helper:
func (c *Client) MaxChargeReached() bool {
    return c.isPPE && c.maxCharge > 0 && c.charged >= c.maxCharge
}
This keeps PPE behavior explicit: the Actor can keep streaming results, but it won’t exceed the configured budget. The cap logic is intentionally simple: keep a running charged total in USD and stop when it reaches ACTOR_MAX_TOTAL_CHARGE_USD (if that env var is set).
c.isPPEis enabled whenAPIFY_PPE=1c.maxChargecomes fromACTOR_MAX_TOTAL_CHARGE_USD(optional)c.chargedstarts with the automatic "actor start" charge from the Actor pricing config and increases as I callAddCharge(...)for result events
The AddCharge method that gets triggered on each save is just a thin wrapper around the Apify charge endpoint, plus local accounting to track the total charged amount. Default dataset item events are charged automatically by Apify, so I only call the charge endpoint for custom events.
func (c *Client) AddCharge(event string, count int) error {
    // Default dataset item events are charged automatically by Apify
    if event != DatasetItemEvent {
        u := fmt.Sprintf("v2/actor-runs/%s/charge", c.runID)
        req := &chargeRequest{
            EventName: event,
            Count:     count,
        }
        if _, err := c.do(context.Background(), "POST", u, req, nil); err != nil {
            return fmt.Errorf("apify: couldn't add charge: %w", err)
        }
    }

    // Update the charged amount
    if price, ok := c.prices[event]; ok {
        c.charged += price * float64(count)
    }
    return nil
}
Building tiny, fast Docker images
Multi-stage build
The root Dockerfile uses a multi-stage build: one Go builder stage and one minimal Alpine runtime stage. The final image contains only a single binary.
# builder image
FROM golang:alpine as builder
COPY . /src
WORKDIR /src
RUN apk add --no-cache make bash git

ARG ACTOR=""
RUN set -eux; \
    if [ -z "$ACTOR" ]; then \
      if [ -n "$ACTOR_PATH_IN_DOCKER_CONTEXT" ]; then \
        ACTOR="$(basename "$ACTOR_PATH_IN_DOCKER_CONTEXT")"; \
      else \
        echo "Set --build-arg ACTOR=<name> (or ACTOR_PATH_IN_DOCKER_CONTEXT)"; exit 1; \
      fi; \
    fi; \
    make build ACTOR="$ACTOR"

# running image
FROM alpine
WORKDIR /home
COPY --from=builder /src/bin/app /bin/app

ENTRYPOINT [ "/bin/app" ]
The final image doesn’t include the Go toolchain, source code, or build caches. It’s just the binary.

Makefile and reproducible builds
I use a Makefile to produce static, reproducible binaries with CGO disabled:
GOOS=$$os GOARCH=$$arch GOARM=$$arm CGO_ENABLED=0 \
go build \
  -a -x -tags netgo,timetzdata -installsuffix cgo -installsuffix netgo \
  -ldflags " \
    -X main.version=$(VERSION) \
    -X main.commit=$(COMMIT_SHORT) \
    -X main.date=$(shell date -u +'%Y-%m-%dT%H:%M:%SZ') \
  " \
  -o "$$out" \
  ./actors/$(ACTOR)/cmd/$(ACTOR)
The netgo tag and CGO_ENABLED=0 produce a fully static binary. The timetzdata tag embeds timezone data so I don’t need to install tzdata in the runtime image.
Memory footprint and runtime cost
My target is the 128 MB Apify tier. I design these Actors to stay comfortably under that limit:
- I avoid headless browsers unless unavoidable
- I stream results in small batches instead of buffering everything
- The runtime image is minimal and contains no extra libraries
The first version of this setup routinely crossed 128 MB and was killed mid-run. The culprit was a slice accumulating parsed results before flushing to the dataset. Switching to smaller batches and clearing slices after each save brought peak memory usage back under 50 MB.
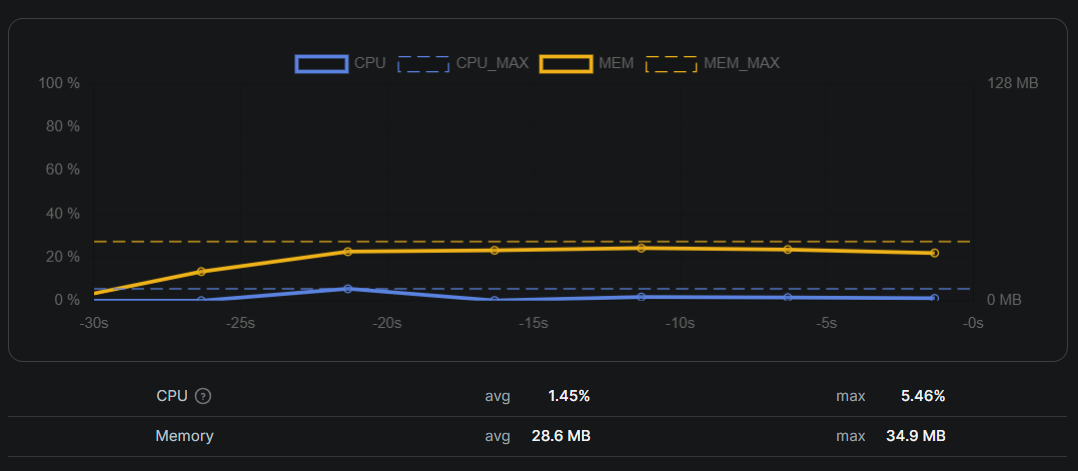
I use the memory graph in the Apify run stats as my feedback loop. If I see a spike, it’s almost always caused by buffering too much data or holding large strings longer than intended.
Debugging and local workflow
I run every Actor locally with a JSON input file before deploying. My usual flow is:
- Prepare an input JSON file matching the Apify input schema
- Run the binary directly (no Docker) for fast iteration
- Write output to a local JSON file and inspect it
In Facebook (Meta) Ad Library Scraper, I store debug artifacts under a logs directory and validate input early. The dual-mode runtime is the biggest time saver: one codebase, two environments, and no debug-only branches that later drift.
Trade-offs and lessons learned
This approach isn’t perfect:
- No SDK means I own the API surface. When Apify changes an endpoint, I update my client.
- No SDK helpers. I re-implemented dataset writes, input parsing, retries, and PPE logic.
- Docs matter more. I keep the Apify API docs open when adding features.
For quick one-off scrapers, the official SDKs are still the better tool. For long-running, cost-sensitive Actors, this setup has paid off for me.
If I were starting today, I’d still build the same way, but I’d invest earlier in tests around the API client and add a small CI check against a mocked Apify API.
Conclusion
Using Go and the Apify API directly has been the best setup for my workload. It keeps resource usage predictable, makes local debugging fast, and lets me run Actors in the smallest Apify tier without surprises.
If you’re a Go developer and want fine-grained control over how your Actors behave, I’d recommend trying this approach. Start with a single Actor, keep the client minimal, and only add abstractions when they earn their place.