Your Skyscanner alert emails are for routes you’ve already booked. Honey Droplist only works on a select number of participating stores. The Rightmove tab you keep refreshing has been open for nine days. The thing you actually want is one alert that watches everything you care about, and the thing nobody is selling is the version you can build yourself in an afternoon.
Why generic price alerts fall short
Most of the price-tracking tools you’ll find on the first page of Google are tied to a single category. Honey’s Droplist, CamelCamelCamel, and PriceBlink only watch a fixed list of retailers. Skyscanner alerts cover flights but not the hotel for the same trip. The moment your wishlist includes a Steam game, a flat in Lisbon, and a Booking.com hotel, you need three separate tools.
The few universal alternatives, like Visualping and Distill.io, work on any URL but charge by tier, with each tier capping the number of pages you can watch and the check frequency. Visualping’s cheapest paid plan starts at $10/month, while Distill.io’s starts at $15/month. Both get expensive quickly as you add URLs or shorten the check interval.
The approach in this tutorial avoids both limitations. You set up the workflow once in n8n, point it at any Apify Actor for the site you want to watch, and route the alert to whichever channel suits the use case. The same skeleton becomes a wishlist watcher, a flight deal tracker, or a property alert.
What you’ll be building
A scheduled n8n workflow that reads a list of products you want to track from a Google Sheet, pulls the current price from Amazon through Amazon Product Scraper, compares each result against your target price, and fires a Telegram alert when something drops below the threshold.
The Amazon wishlist is a worked example. Once it’s built, the last sections of this tutorial show how to swap two nodes to turn it into a flight deal alert or a real estate alert. You can also download the finished workflow JSON and import it directly into n8n if you’d rather work backward from a working version.
Prerequisites
- Apify account (free tier is enough for the demo)
- n8n instance (self-hosted or n8n cloud)
- Google account
- Telegram account
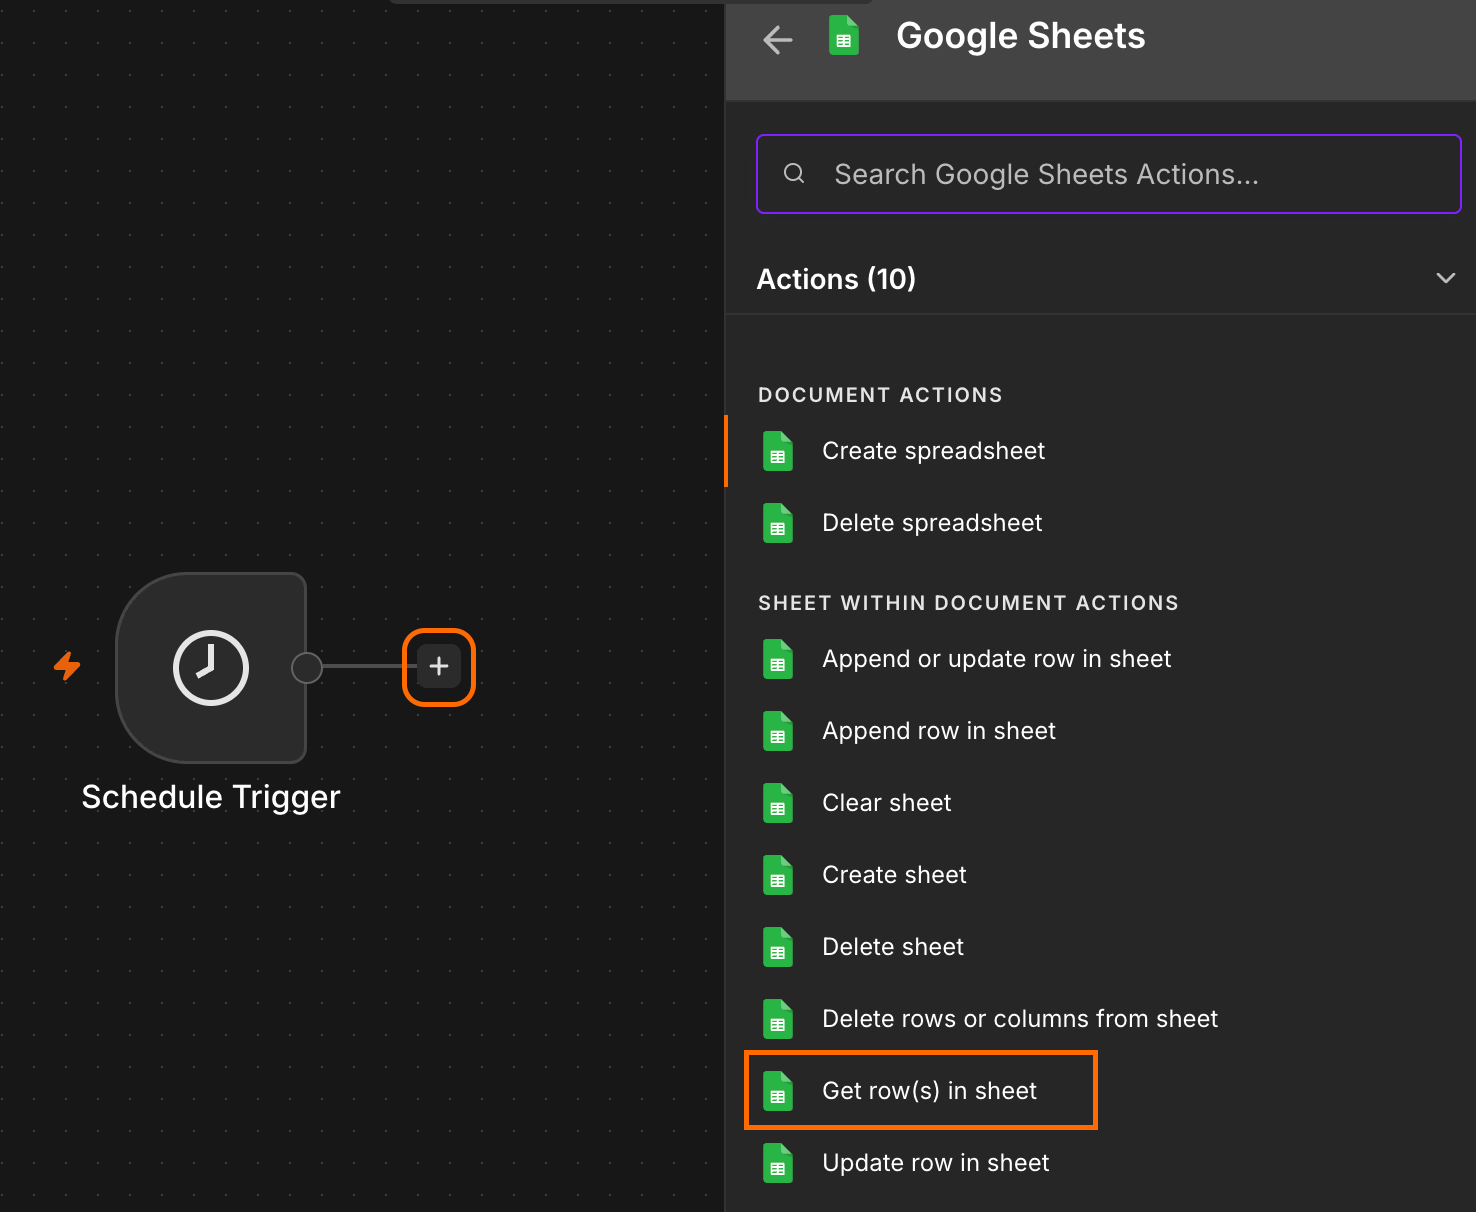
Build an Amazon wishlist price drop alert
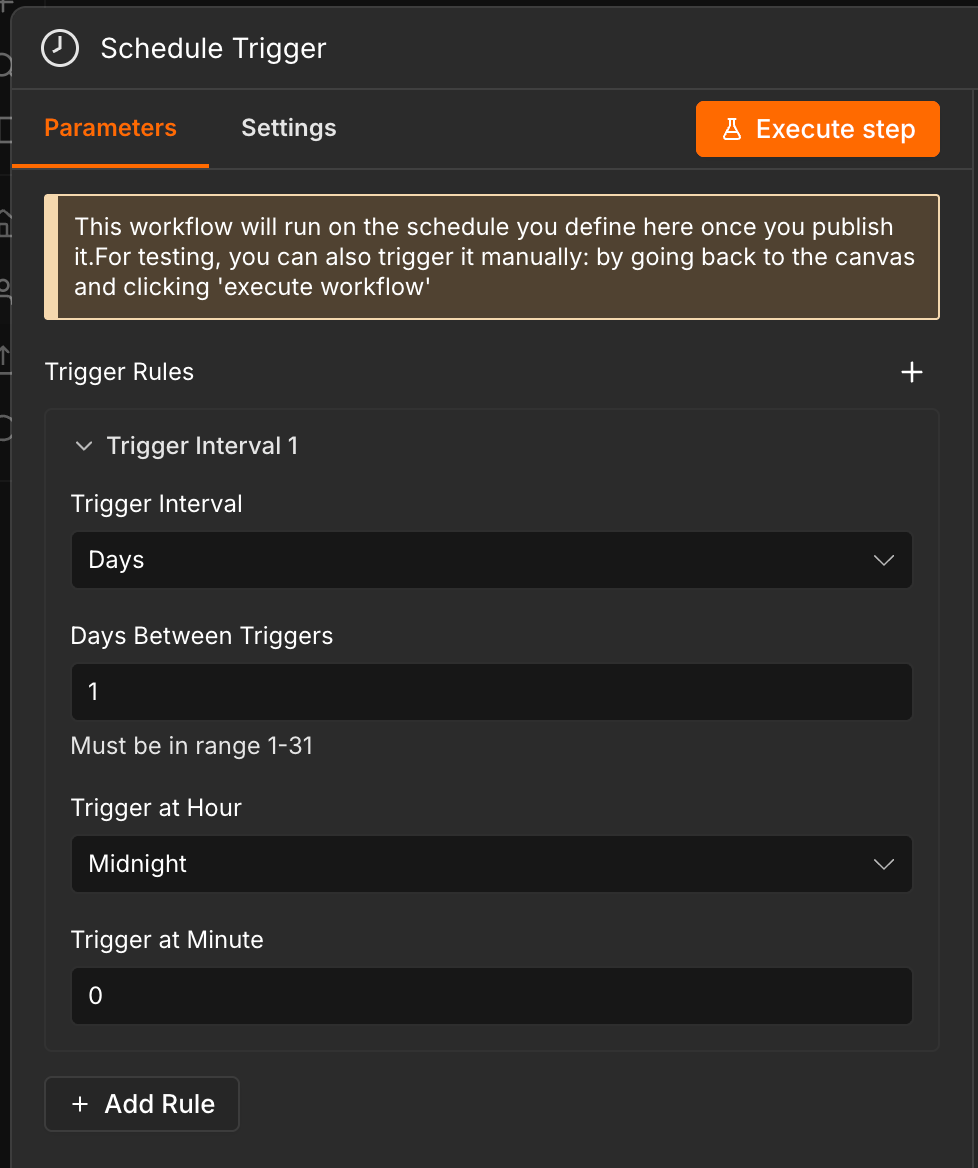
Step 1: create a schedule trigger
Open n8n, create a new workflow, and select a scheduled trigger as the first step. The schedule defines how often the workflow runs. Once every few days is a sensible default for most wishlists; you can shorten the interval later if you’re watching flight prices or anything that moves quickly.
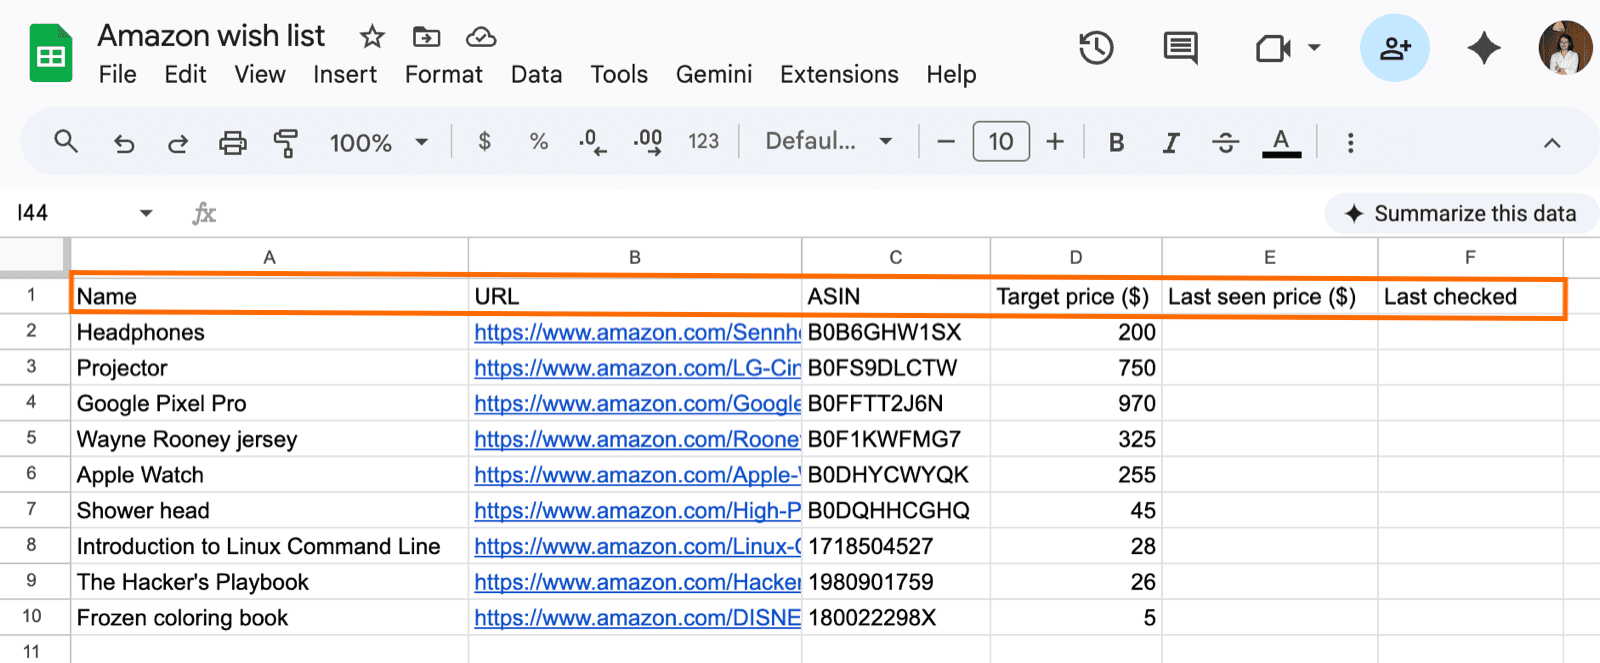
Step 2: set up the wishlist sheet
Your wishlist is just a Google Sheet. The workflow reads each row, looks up the current price, and writes the result back to the same row.
Create a new sheet with the following columns:
- Name - the name of the wishlist item.
- URL - the product listing URL from Amazon.
- ASIN - the Amazon product ID, which is the string in the URL after
dp/. This is what n8n will use to match the Actor’s output back to the correct row. - Target price - the threshold at which you want to be alerted.
- Last seen price and Last checked - empty placeholder columns that n8n will populate on each run.
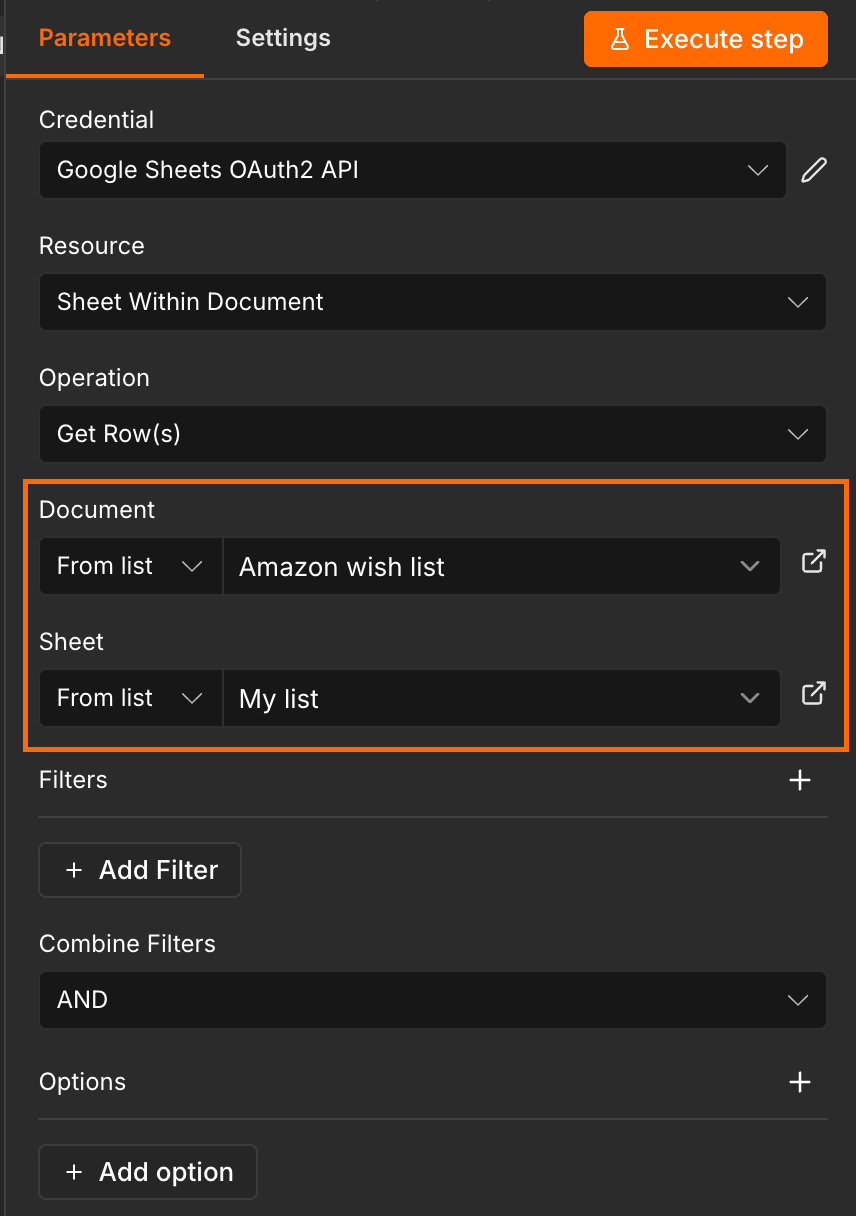
Step 3: connect n8n to the sheet
Connect the Schedule Trigger to a Get row(s) in sheet node. Connect your Google account, then select the wishlist sheet from the previous step.
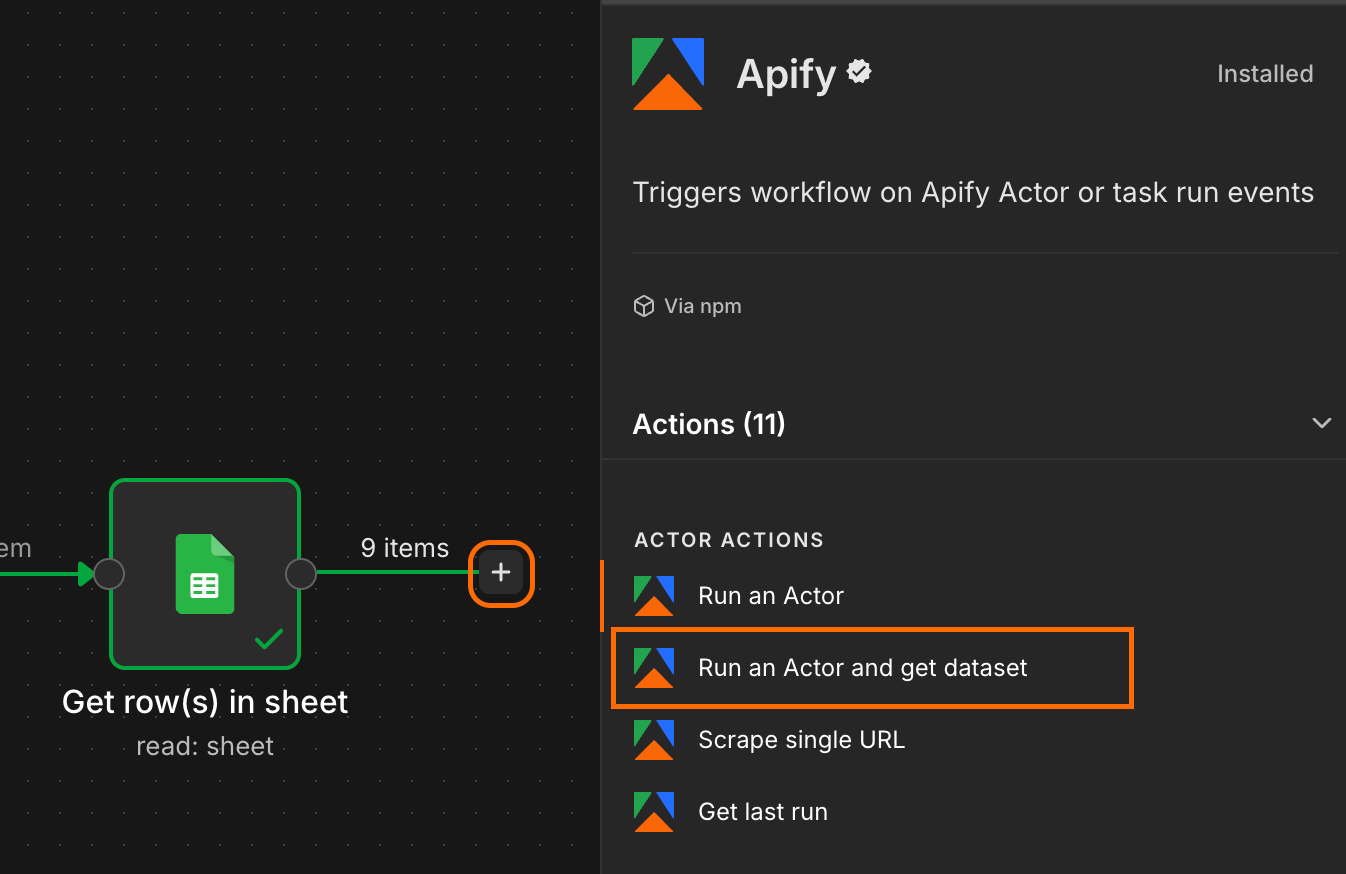
Step 4: fetch current prices from Apify
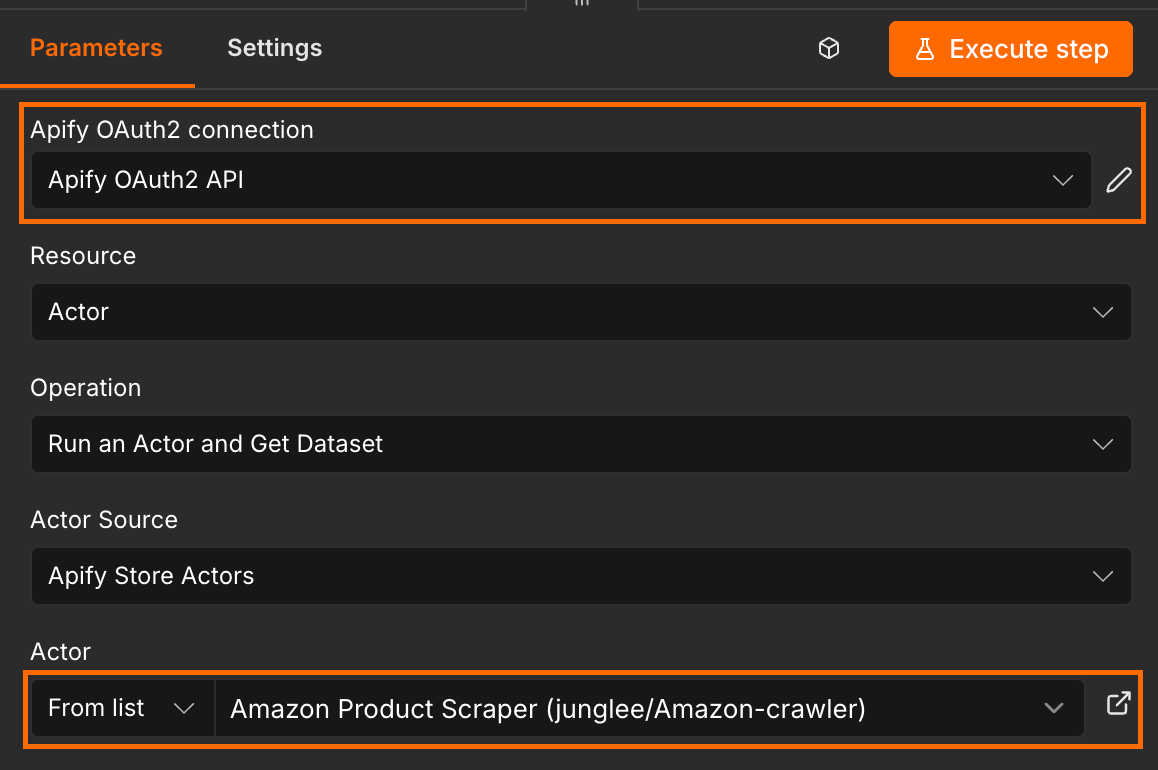
Search for the Apify node in your canvas and install it if you haven’t already. Connect the Google Sheets node to a Run and Actor and get dataset node.
Next, connect n8n to your Apify account. You can use OAuth2, or paste your Apify API key from Apify Console under Settings → API & Integrations. Once connected, select Amazon Product Scraper from the Actor list.
The next step is to initialize the Actor’s input. The safest option is to view the Actor in Apify Console, enter your first URL, and switch to the JSON tab. You can then copy the exact input JSON to your clipboard.
The cleanest way to fill in the Actor’s input is to copy the schema directly from Apify Console rather than hand-coding it. Open the Actor in Console, enter one test URL, switch to the JSON tab, and copy the input to your clipboard.
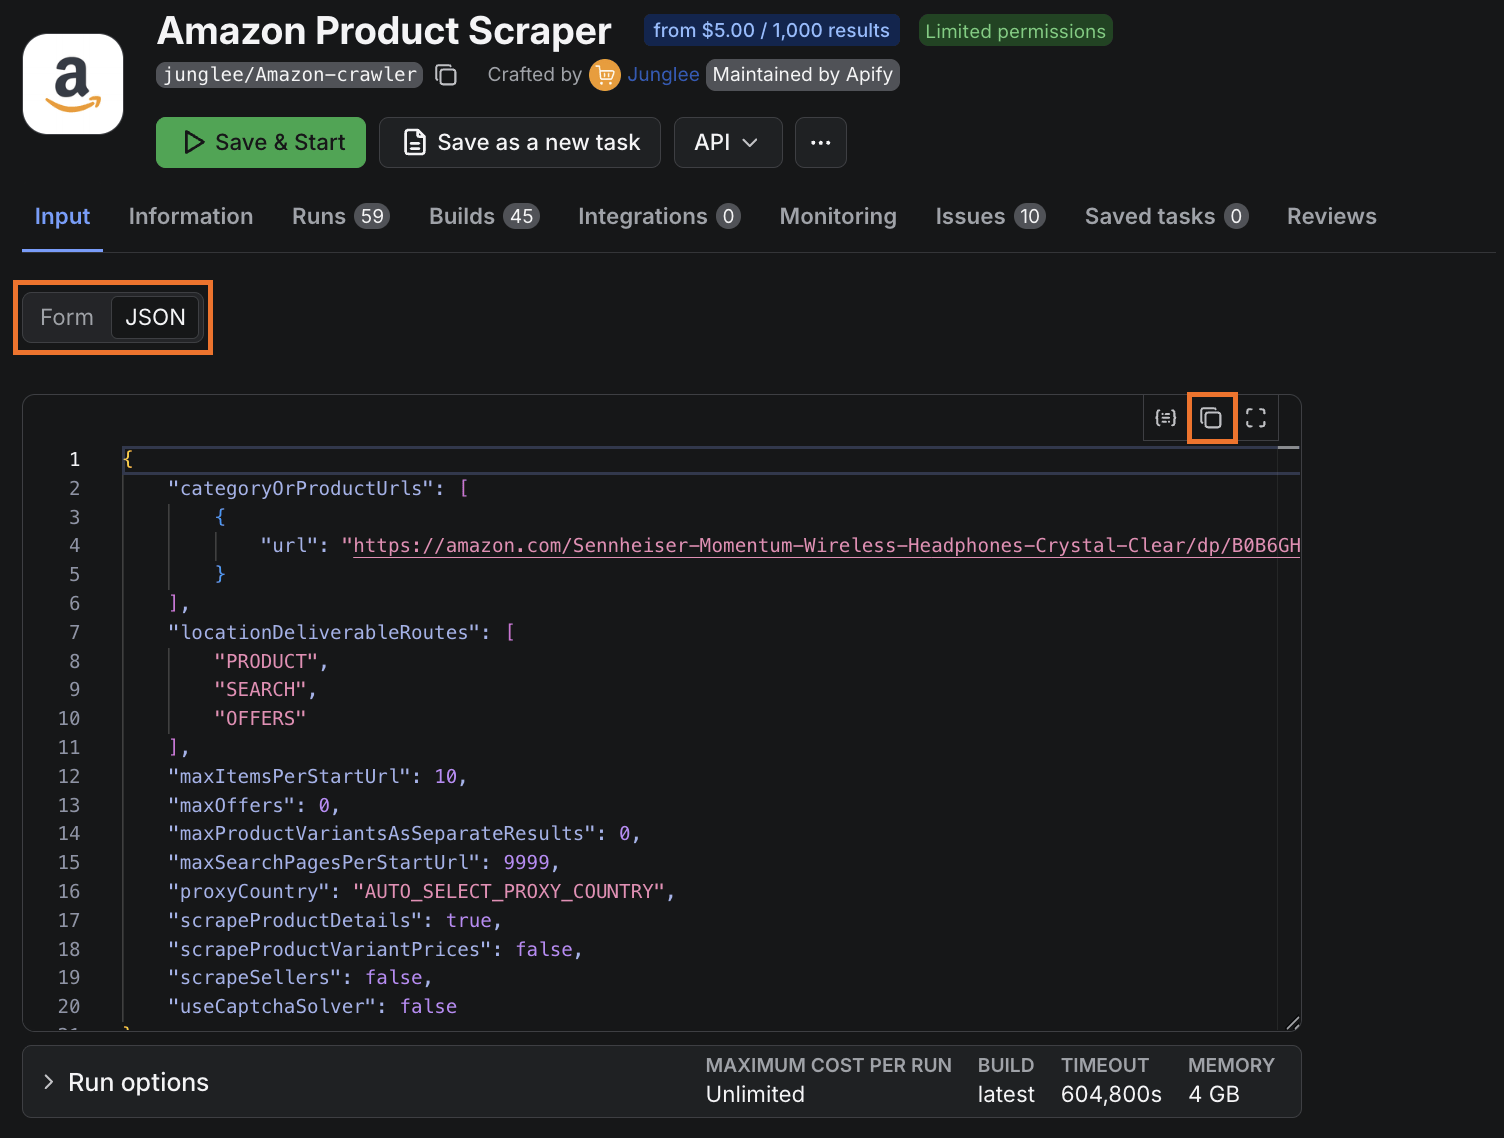
Paste the input JSON into the corresponding field in n8n, then replace categoryOrProductUrls with the following so each row’s URL gets passed in dynamically:
"categoryOrProductUrls":[{ "url": "{{ $json.URL }}"}]
There’s no need for a loop, since n8n auto-iterates for each row from the Google Sheet.

Run the workflow once at this point. It won’t do anything useful yet, but it forces n8n to capture the Actor’s output schema, which gives the next steps a field list to drag and drop from.
Step 5: compare and flag drops
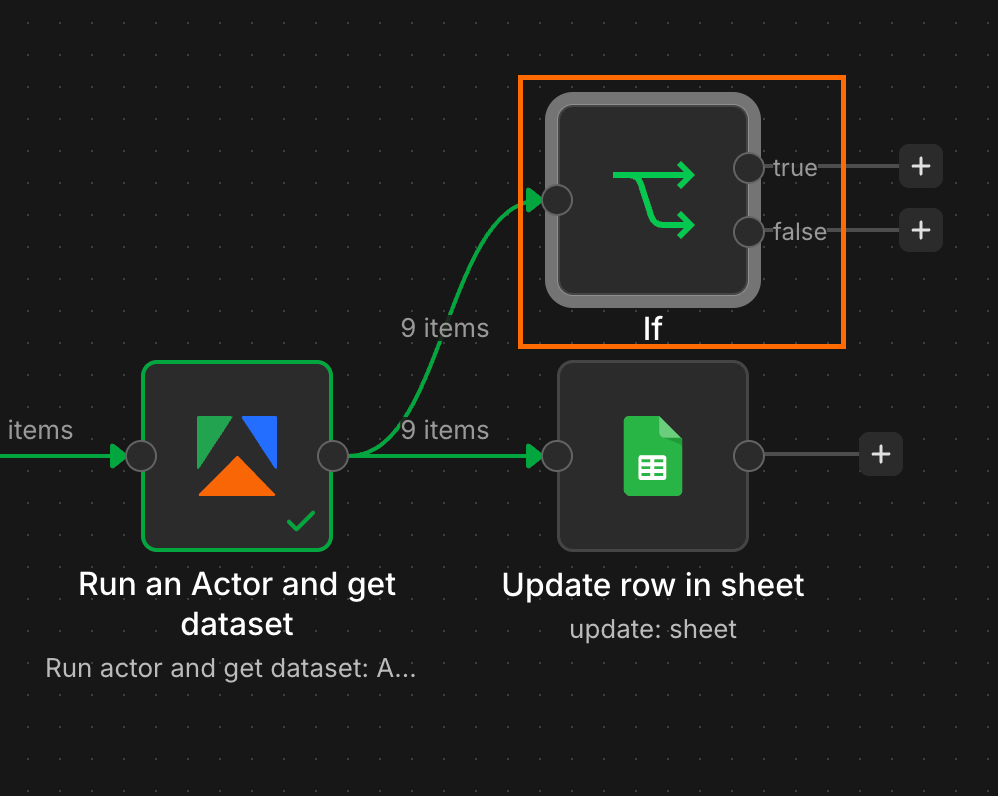
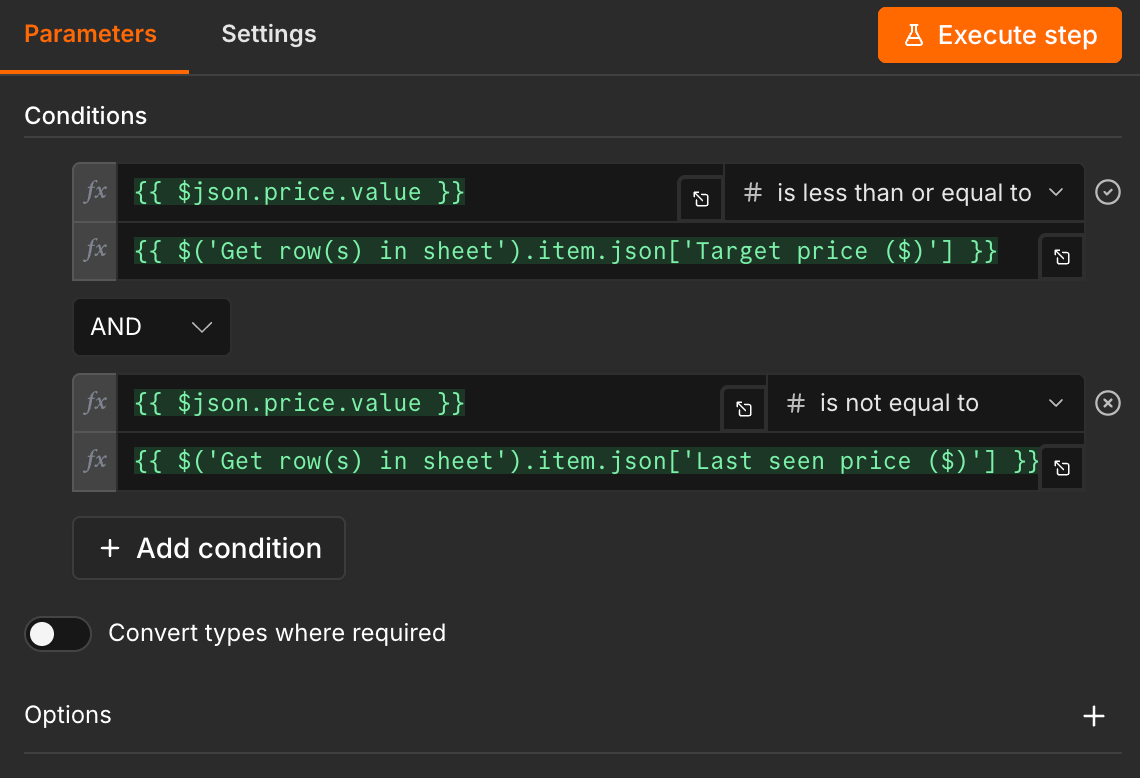
Now we add the logic that decides whether something has actually dropped. Add an If node downstream of the Actor with two conditions, joined with an AND:
- The scraped price is less than or equal to the target price.
- The scraped price is not equal to the last seen price.
Drag the fields from the Actor output and the Google Sheet rows into the corresponding slots.
The first condition is fairly clear. The second exists to prevent duplicate alerts. Without it, every run while the price stays below your target would re-fire the notification. By only alerting when the scraped price differs from the last seen value, you get one ping per genuine change.
Step 6: update the wish list
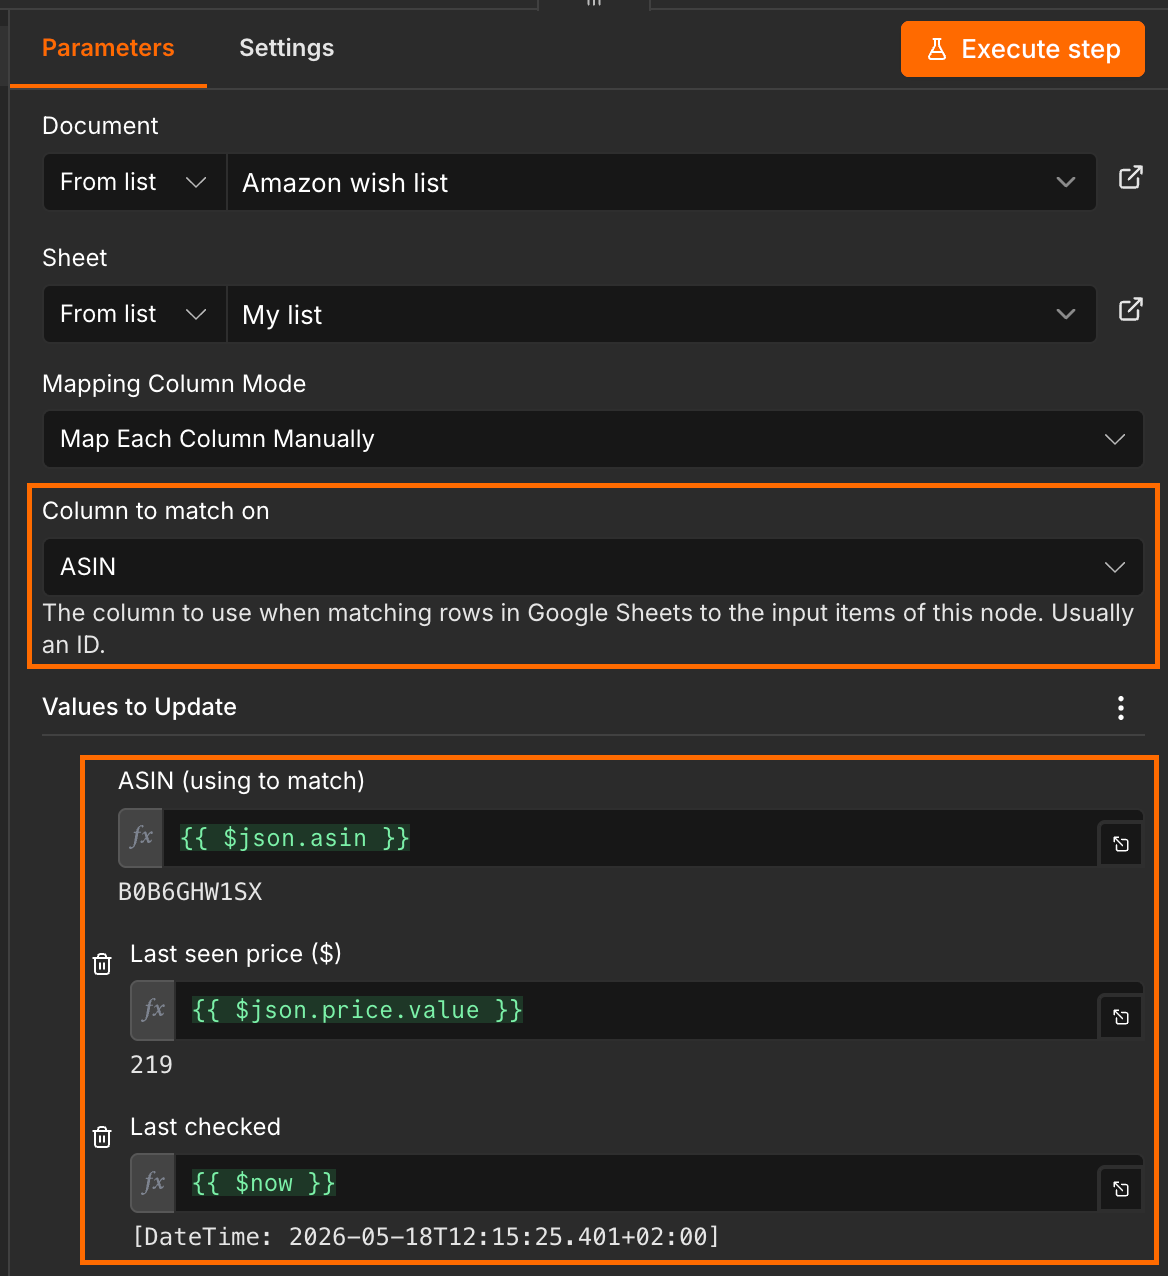
After every run, the sheet needs the latest scraped price and a fresh timestamp so the next run has something to compare against.
Add an Update row in sheet node and connect it to the Actor node. Map the scraped price to Last seen price, and use ASIN as the column to match on so each result lands in the correct row. For the Last checked column, use n8n’s built-in expression for the current timestamp:
{{ $now }}
Step 7: set up a Telegram bot
Telegram needs two things from you before n8n can send messages: a bot token and a chat ID.
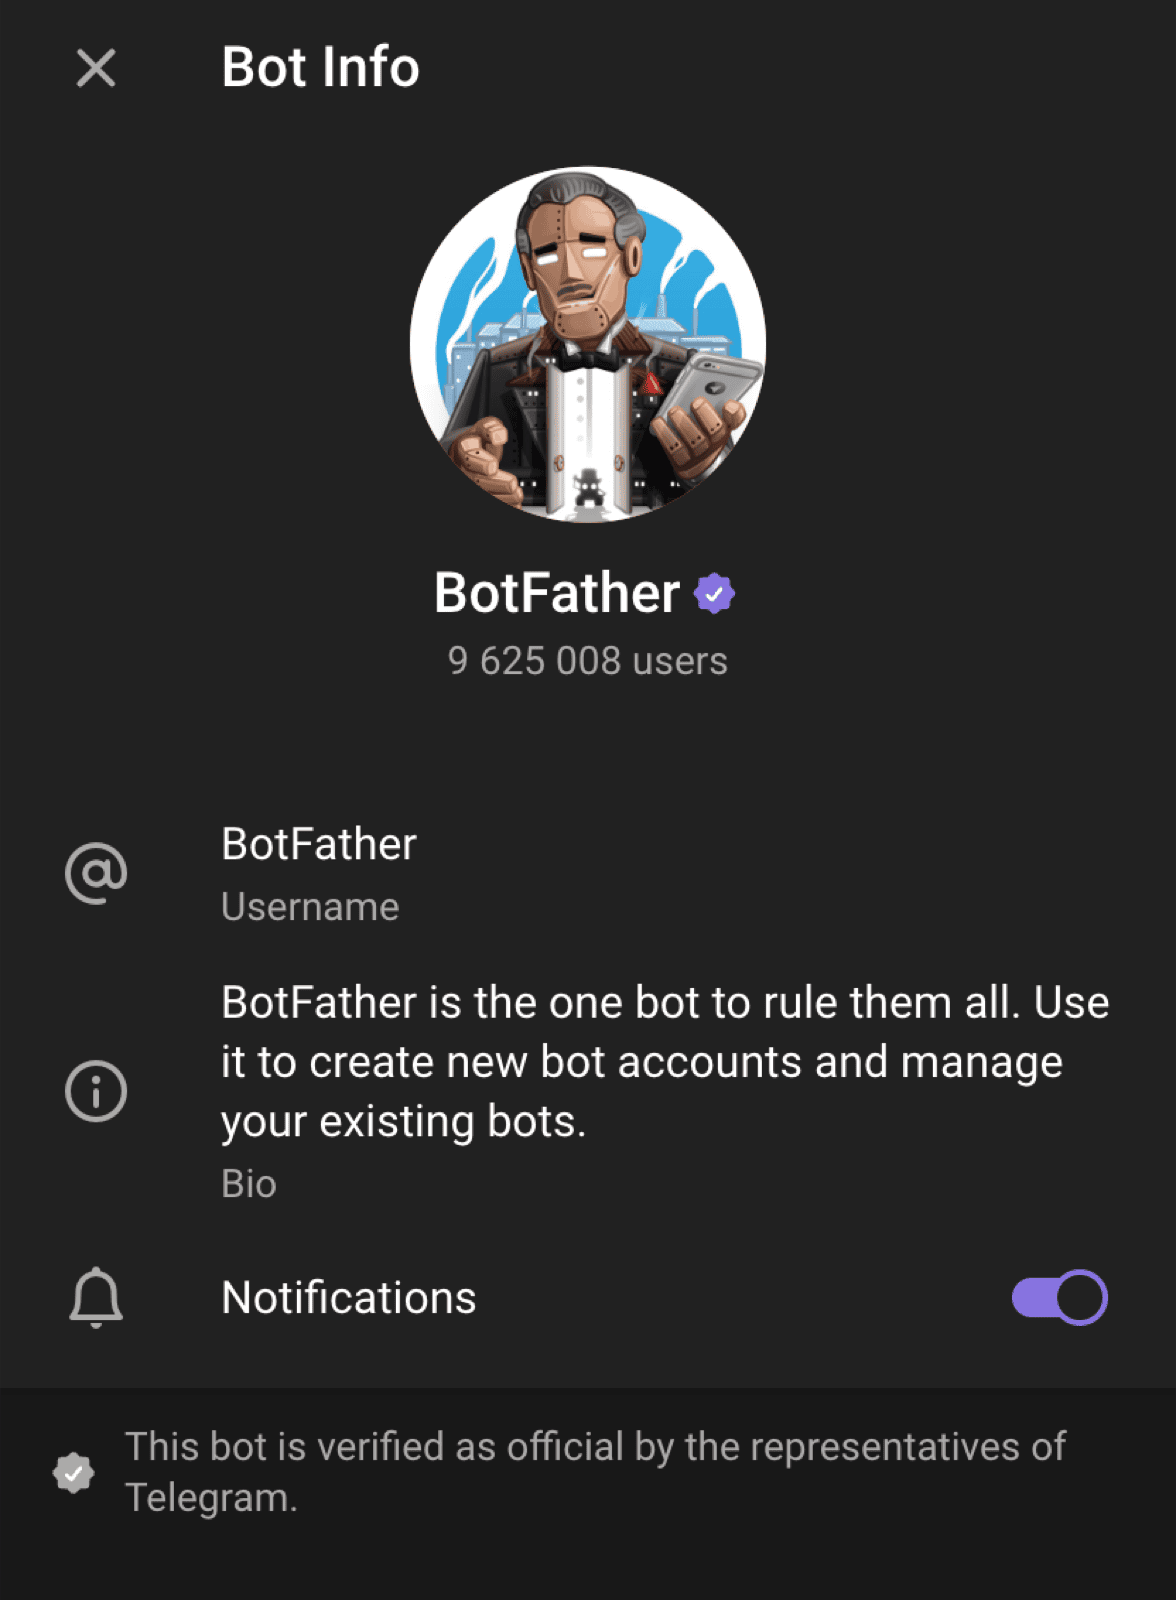
Open the Telegram app, log in, and start a chat with the official BotFather. Send /newbot and follow the on-screen prompts to give your bot a name and a unique username. BotFather will then generate and display your Bot API Token.
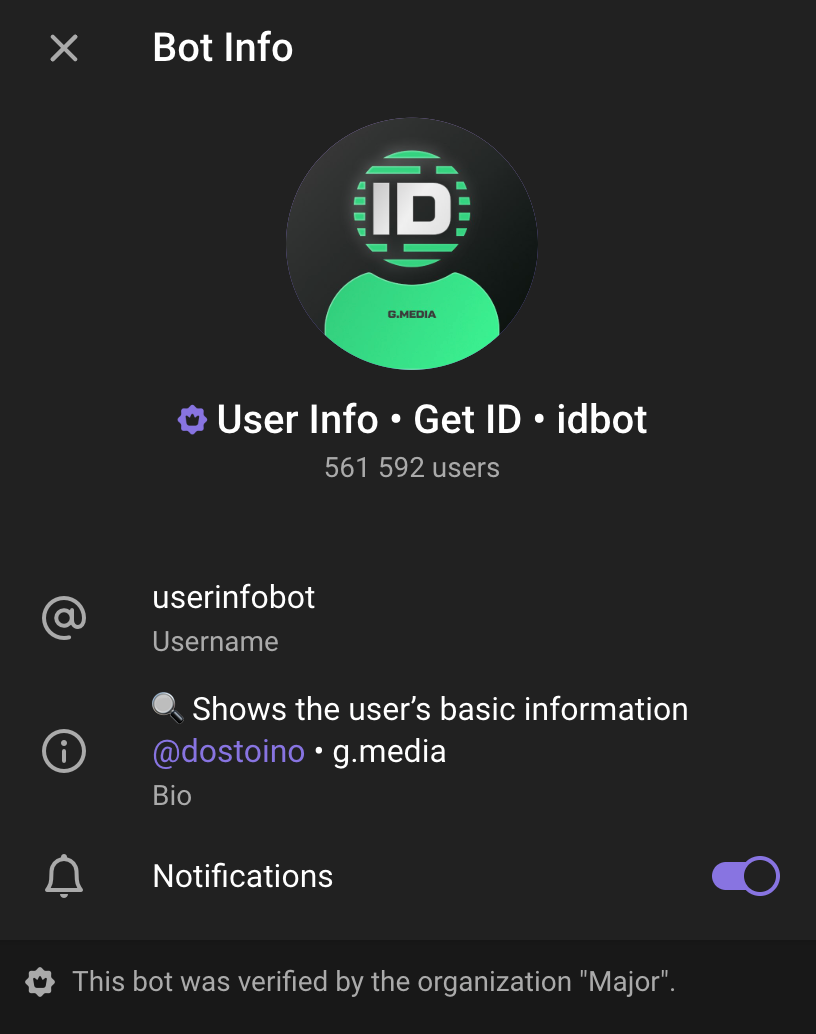
n8n also requires your Chat ID. The easiest way to find it is to message userinfobot, which replies with your ID immediately.
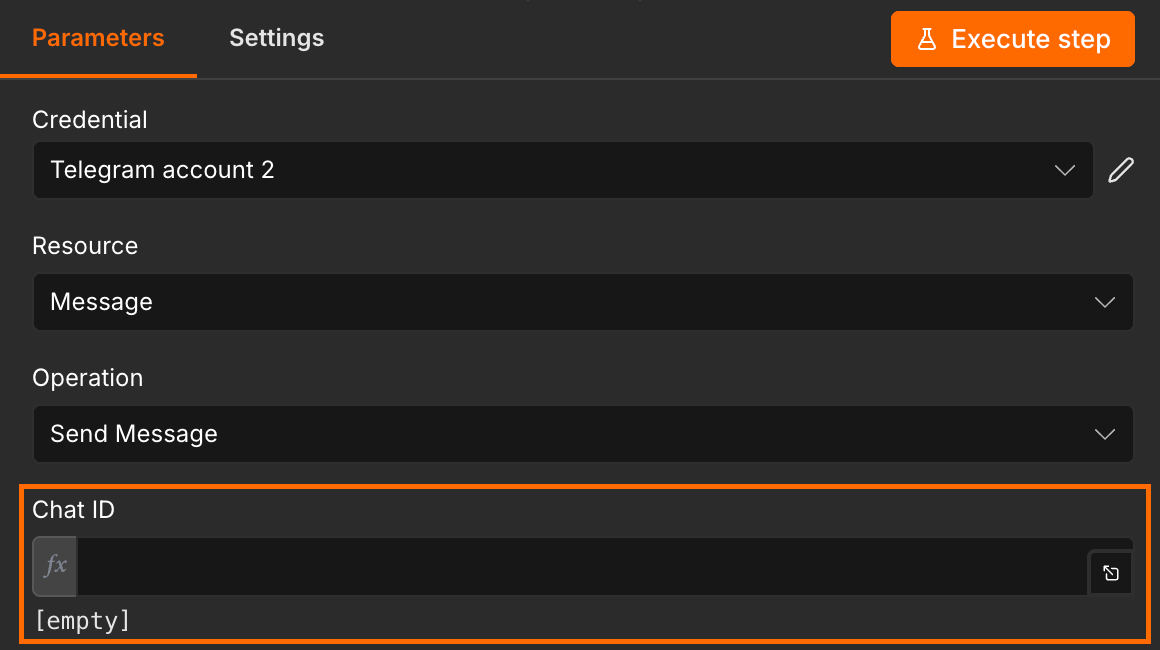
Step 8: send the Telegram alert
Map the true output branch of the If node to a Telegram Send a text message node.
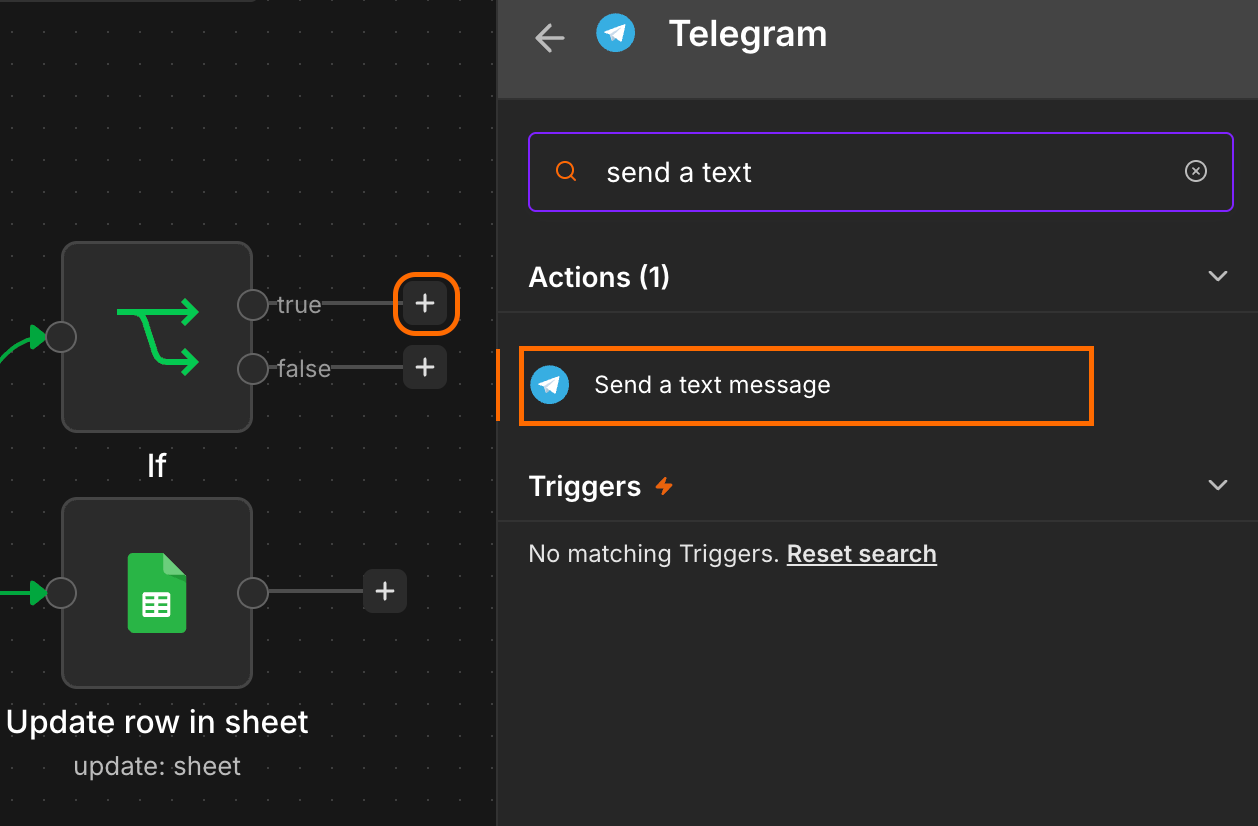
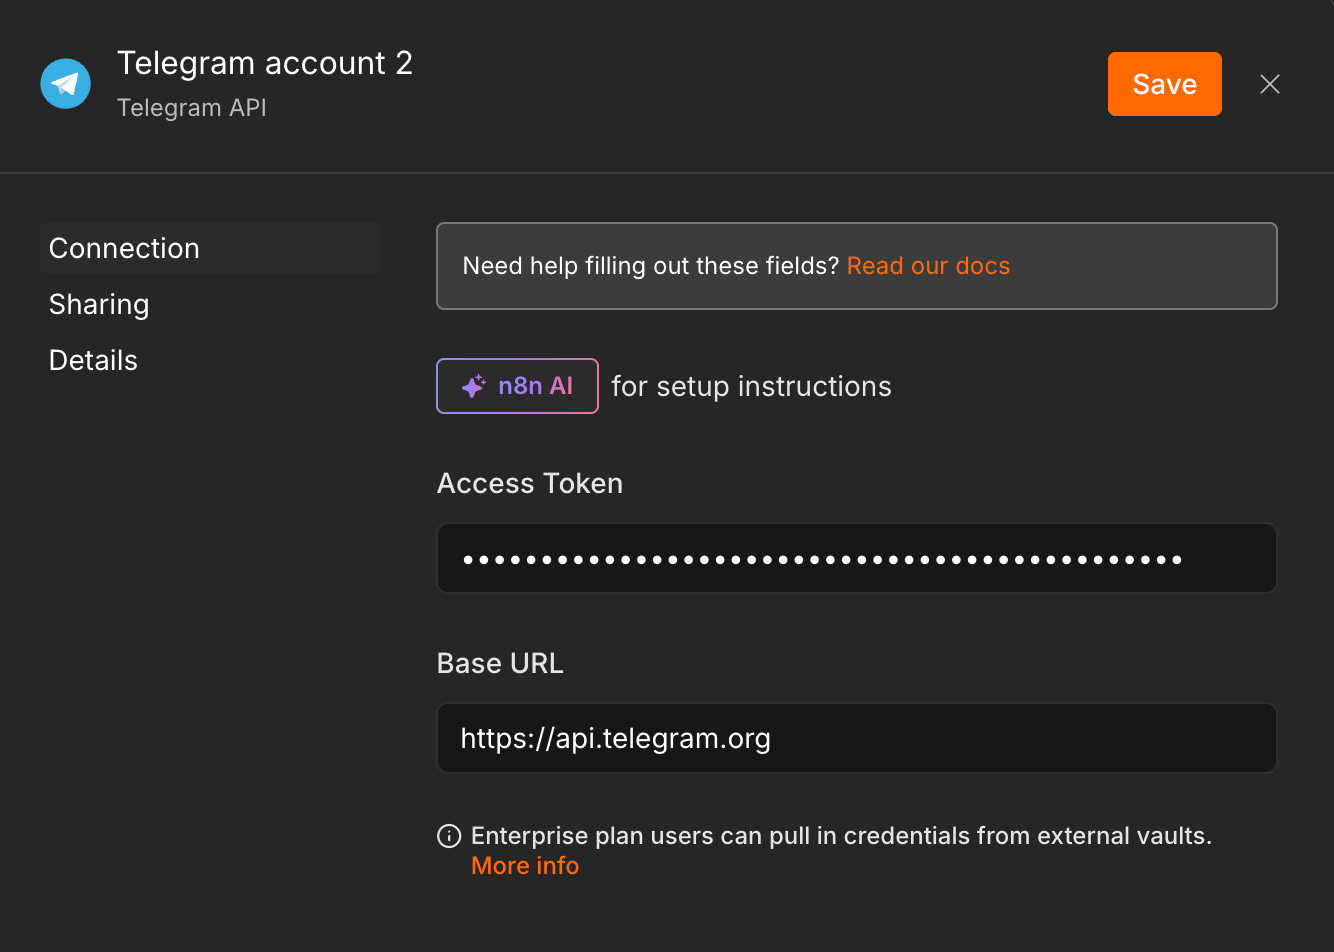
Set up your credentials using the bot API token from the previous step, and enter your Chat ID.
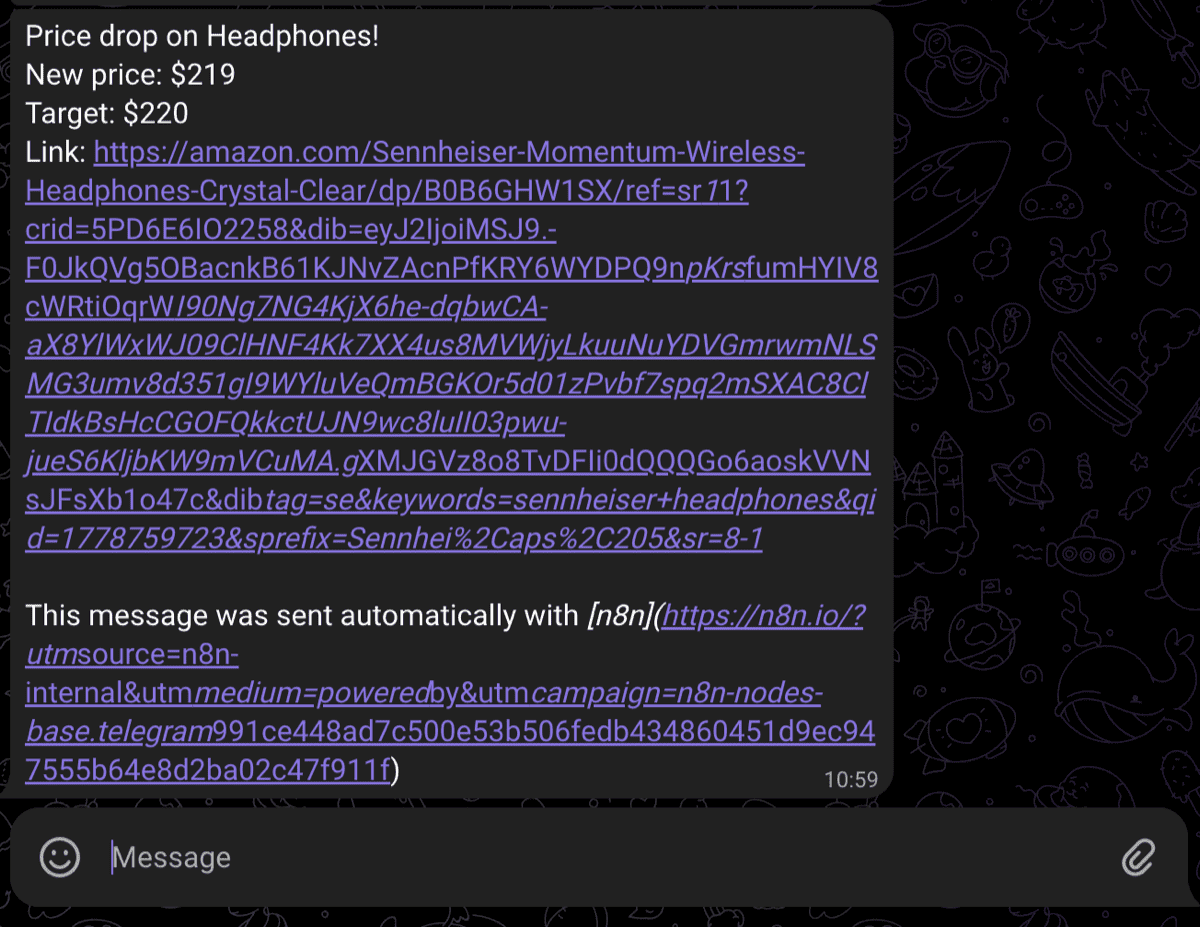
Now write the alert message. Each variable in the template below pulls from a specific upstream node: Get row(s) in sheet for the item metadata, and the Apify node for the live price.
Price drop on {{ $('Get row(s) in sheet').item.json.Name }}!
New price: ${{ $json.price }}
Target: ${{ $('Get row(s) in sheet').item.json['Target price'] }}
Link: {{ $('Get row(s) in sheet').item.json.URL }}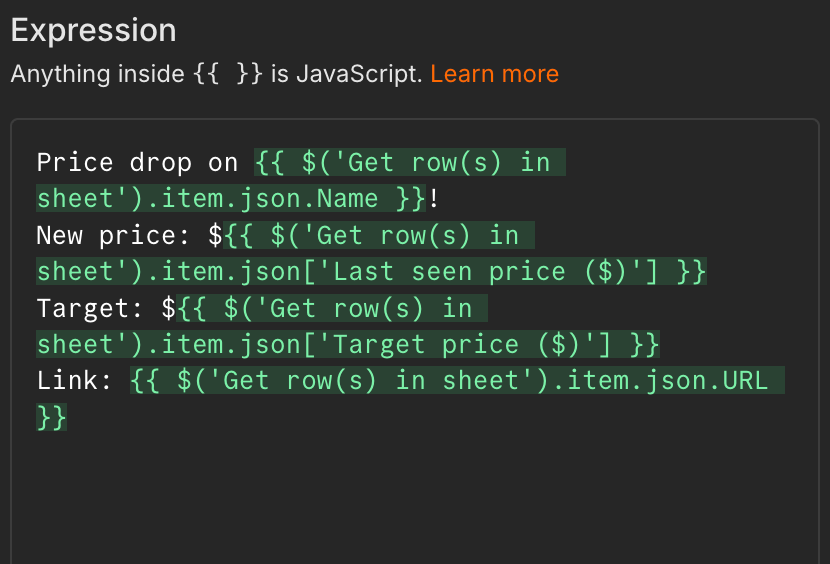
Step 9: run a test
Time to confirm everything wires up correctly. Go back to your Google Sheet, clear the Last seen price column, and manually raise one target price above the current scraped price. Execute the workflow. Telegram should fire, and the sheet should update with the new last seen price and timestamp. Run the workflow a second time, without changing anything, and confirm that no duplicate alert fires.
Adapt the pattern for other use cases
The whole point of building the workflow this way is that everything except the catalog sheet, the Actor, and the alert channel stays the same. The schedule trigger, the comparison logic, and the row update don’t need to change when you point the workflow at a different site.
Flight deal alerts (email instead of Telegram)
For flights, the catalog sheet columns change to Origin, Destination, Depart date, Return date, and Target fare. Swap Amazon Product Scraper for Google Flights Scraper, and update the Actor input to reference the new columns. The If node’s logic is identical, just pointed at the fare field instead of the price field.
For the alert side, swap Telegram for an n8n Email node. Flight deals are something you want sitting in your inbox alongside the booking confirmation, not buried in a chat app.
One important caveat: flight prices can fluctuate significantly, sometimes by hundreds of dollars within the same afternoon. If you’re serious about catching deals, shorten the schedule trigger to every two or three hours, and budget for the extra Actor runs accordingly.
Real estate alerts
For property listings, replace the ASIN column from the worked example with ZPID (the 8-digit code in the URL before _zpid/).
Swap Amazon Product Scaper for Zillow Detail Scraper for US listings, or Rightmove Scraper for the UK. The comparison logic remains the same.
For the alert, swap Telegram for a Slack node so the notification lands in a channel you share with whoever else is involved in the decision. Property hunting tends to be a two-person job; routing the alert somewhere shared saves you from forwarding it manually.
Other use cases the same pattern covers
The same skeleton works for almost anything you can find on a URL and any field you can extract from it. A few similar extensions:
- Steam wishlist drops with Steam Store Scraper
- eBay watched items with eBay Scraper
- Concert ticket resale prices on StubHub or Viagogo
- Car listings on AutoTrader
- Booking.com hotel prices with Booking Scraper
- Idealista property listings with Idealista Scraper
- Crypto and stock tickers through any market data Actor
What it costs
Amazon Product Scraper charges $5.00 per 1,000 results. A 20-item wishlist checked once a day yields roughly 600 results per month, or about $3.00 - well within Apify’s $5 monthly free credit. The universal SaaS alternatives are priced very differently. Visualping’s free tier caps at five monitored pages and 150 checks per month, which doesn’t cover the example workflow. Its cheapest paid plan starts at $14 per month. Distill.io’s free tier covers only five cloud monitors at six-hour intervals; to track 20 URLs you need the Starter plan at $15 per month. Both scale up to $35 to $80 a month as you add URLs or shorten the check interval.
Conclusion
One workflow, one Actor swap, one alert channel swap, and you’ve got a watcher for almost anything online. The wishlist build above is the longest version of this tutorial you’ll need to read. Every variation after it is a two-node change on top of the same skeleton.
If you’ve got a list of things you’ve been refreshing manually, this is the afternoon to stop.