Bypassing Cloudflare with Cloudscraper
Getting detected by Cloudflare Bot Management while web scraping is a common challenge that can slow down or completely halt your scraping process. With over 7.5 million active websites using Cloudflare globally and more than 3,280 of the top 10,000 most popular sites relying on it, the need to bypass Cloudflare's robust protection is clear.
In this article, we'll explore how to use Cloudscraper, an open-source Python library designed to bypass Cloudflare's anti-bot measures, allowing you to scrape data from websites protected by Cloudflare.
What is Cloudflare?
Cloudflare is a web infrastructure and security company that provides content delivery network services (CDN), DDoS mitigation, internet security, and distributed domain name server services. Websites use it to protect against DDoS attacks, malicious software, and other online threats.
Since Cloudflare can restrict access to a webpage's content, web scraping often requires bypassing these restrictions.
Ondra Urban of Apify explaining how to bypass Cloudflare restrictions at WebExpo
Common Cloudflare errors
When attempting to scrape websites protected by Cloudflare, several specific HTTP status codes frequently occur, notably 403 (the most common), 401, 429, and 502.
These codes can help us understand what's going on and bypass Cloudflare errors.
There are several different error messages that indicate we have failed to bypass Cloudflare:
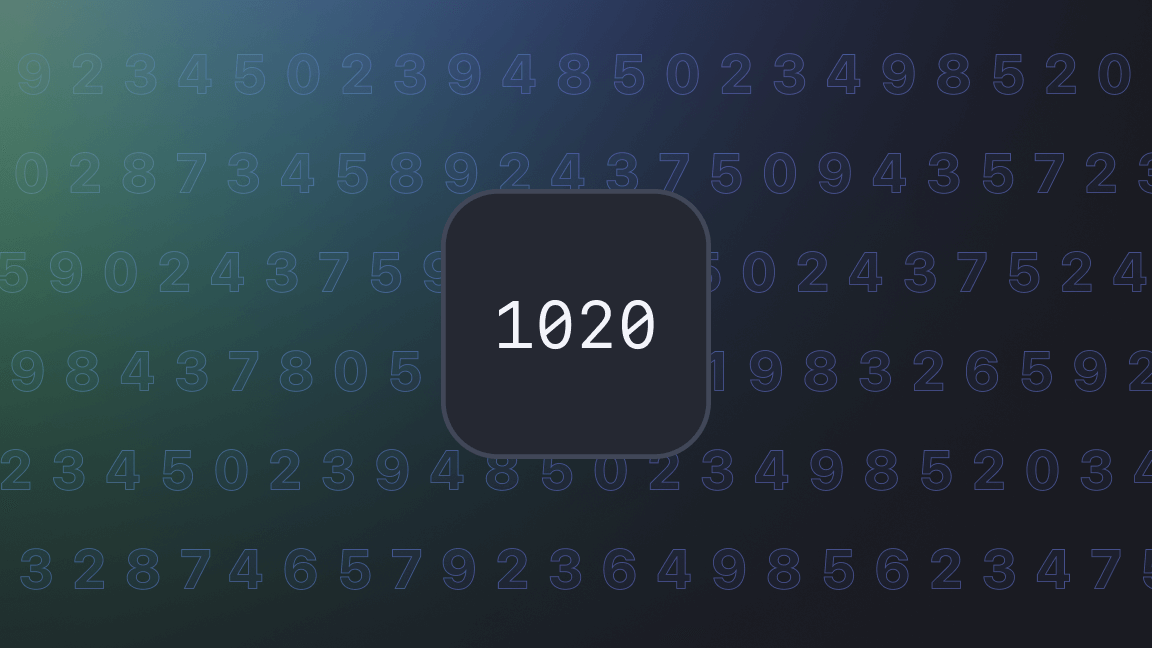
#1. Cloudflare error: Access Denied
This is one of the most commonly encountered errors when scraping Cloudflare, which doesn't indicate the exact cause. So, to bypass Cloudflare 1020, full scraper fortification is needed.
#2. Cloudflare error 1009
This error indicates a geographic restriction, where access is denied based on the user's IP country or region. Using proxies from permitted regions, such as a U.S. proxy for a U.S.-restricted site, can overcome this error.
#3. Cloudflare error 1015
Rate Limiting - Indicates that the scraping activity is too frequent or too rapid. Adjusting the rate of requests or distributing them through various channels, like multiple proxies or different browser sessions, can help mitigate this issue.
These are usually accompanied by a Cloudflare 403 Forbidden HTTP response status code.
What is Cloudscraper?
Cloudscraper is built on the Python Requests library and is specifically designed to bypass Cloudflare's anti-bot protection systems. Cloudflare employs a variety of browser fingerprinting challenges and checks to determine whether incoming requests are from genuine users or automated bots.
How does Cloudscraper work?
Cloudscraper works by impersonating a real web browser, using optimized browser headers and a JavaScript engine/interpreter to solve JavaScript challenges posed by Cloudflare. This enables the extraction of data from websites that have their content hosted on Cloudflare's CDN.
Furthermore, Cloudscraper supports integrating with CAPTCHA-solving services to bypass CAPTCHA verifications. It also supports using proxies to distribute requests and avoid IP blocking. This can be useful for scraping websites that block requests from specific IP addresses.
Note: It's important to remember that Cloudscraper, while effective at bypassing many of Cloudflare's anti-bot challenges, may not always be able to evade all of Cloudflare's detection methods. As an open-source project, Cloudscraper's techniques are publicly available, and Cloudflare may adapt its defenses over time. We'll explore this further later in the article.
How to use Cloudscraper to scrape Cloudflare-protected websites
One of the major advantages of Cloudscraper is its simplicity. Bypassing Cloudflare protection can be complex, but Cloudscraper requires just a few lines of code.
Let's explore how to set up a Cloudscraper project to scrape articles at a low scale from the Nginx tech blog, a website known to utilize Cloudflare’s services.
Prerequisites
This guide assumes you have Python 3.9 installed on your machine, but newer versions will also work as well.
To begin using Cloudscraper for your web scraping projects, you must install both Cloudscraper and BeautifulSoup for parsing HTTP responses.
Installing these libraries is a straightforward process using pip:
pip install cloudscraper beautifulsoup4
If you don't already have it, you should also install Node.js. You can do that by downloading it on your machine and then installing it accordingly.
Once installed, you can create a Cloudscraper instance and make a request to a Cloudflare-protected website.
Step 1. Import Cloudscraper and other dependencies
Start by importing the required libraries, namely cloudscraper and BeautifulSoup:
from bs4 import BeautifulSoup

import cloudscraper
cloudscraper handles the requests to the Cloudflare-protected site, while BeautifulSoup extracts data from the HTML content returned.
Step 2: Create a Cloudscraper instance and define Your target website
Next, create a Cloudscraper instance. This involves calling the create_scraper method from the Cloudscraper library and specifying the URL of Nginx’s tech blog that we want to scrape data from:
scraper = cloudscraper.create_scraper()

url = "https://www.zillow.com/homes/"
By creating a Cloudscraper instance, we’re preparing to make requests to the website. The url variable simply stores the address of Nginx’s tech blog, which we will use in the subsequent steps to make requests and extract information.
Step 3: Access the website to retrieve its data
With the Cloudscraper instance created, you can now make a request to the Nginx tech articles page to retrieve its data. Similar to using requests.get() in the Python Requests library, Cloudscraper provides the scraper.get() method to make HTTP GET requests:
info = scraper.get(url)

print(info.status_code)
And that’s it! This code sends a GET request to the specified URL and prints the status code of the response:
200
A status code of 200 indicates that the request was successful, and the response from the server is stored in the info variable. To further demonstrate how to use the data from the response, you can print the retrieved HTML using the code below:
print(info.text)
This helps verify that the correct page was accessed and gives a glimpse of the content that you will be working with for further data extraction.
Step 4. Use Cloudscraper's advanced options
Cloudscraper offers a wide range of configurable options that allow for more sophisticated and customized scraping tasks. Let's explore some of these advanced features.
Cloudscraper allows you to simulate different browser environments, making it appear as if requests are originating from various devices and operating systems. This can be achieved by defining the browser attribute when creating your scraper instance.
For example, to emulate a Windows device running Chrome on a desktop:
import cloudscraper

scraper = cloudscraper.create_scraper(

    browser={

        'browser': 'chrome',

        'platform': 'windows',

        'desktop': True,

        'mobile': False,

    }

)
Similarly, you can configure the scraper to emulate a mobile device running a specific operating system like iOS:
import cloudscraper

scraper = cloudscraper.create_scraper(

    browser={

        'browser': 'chrome',

        'platform': 'ios',

        'desktop': False,

        'mobile': True,

    }

)
The browser attribute accepts several parameters, including:
- browser (
chromeorfirefox) - mobile (
TrueorFalse) - desktop (
TrueorFalse) - platform (
linux,windows,darwin,android,ios), and - custom (for setting a custom user-agent).
This level of customization adds another layer of realism to your scraping activity, making it more difficult for Cloudflare to detect and block your requests.
Beyond predefined browser profiles, Cloudscraper also allows you to set your own custom user-agents. This gives you greater control over how your scraper presents itself to the target website.
You can define a custom user-agent string within the browser attribute:
import cloudscraper

scraper = cloudscraper.create_scraper(

    browser={

        'custom': 'MyCustomUserAgent/1.0',

    }

)
Cloudscraper will attempt to match this user-agent string with known device and browser combinations. If a match is found, it will configure the scraper's headers and ciphers accordingly. If not, it will use a generic set of headers and ciphers.
When creating a Cloudscraper instance, you can specify the JavaScript engine used to execute the anti-bot challenges presented by Cloudflare. In our script, we used nodejs, so you should install it and use it like this:
scraper = cloudscraper.create_scraper(interpreter="nodejs")
The Cloudflare IUAM (I'm Under Attack Mode) challenge typically requires a browser to wait for approximately 5 seconds before submitting the challenge answer.
Cloudscraper accounts for this by incorporating a default delay. However, you can override this delay using the delay parameter:
scraper = cloudscraper.create_scraper(delay=10)
Here, we set the delay to 10 seconds.
Step 5: Parse the HTML content
After retrieving the data from the website, the next step is to parse the HTML content to extract the information you need. This is where Beautiful Soup comes into play.
soup = BeautifulSoup(info.text, "lxml")
This code creates a BeautifulSoup object, which you can then use to navigate and search the returned HTML content. The info.text contains the HTML content retrieved by the Cloudscraper instance and html.parser specifies the parser library to be used by BeautifulSoup.
Step 6: Extract the articles
First, we use Beautiful Soup's find_all() method to locate all the property listing elements on the page with the class StyledCard-c11n-8-101-0_sc-1w6p0lv-0.
These elements represent individual property listings on Zillow:
listings = soup.find_all("div", class_='StyledCard-c11n-8-101-0__sc-1w6p0lv-0')
The listings variable now holds a list containing all the listing elements, which we can iterate through to extract specific details.
Step 7: Extract individual article details
We create an empty list called all_listings to store the extracted information for each listing. Then, we loop through each listing element and extract the price, address, beds, baths, and square footage:
all_listings = []

for listing in listings:

# Dictionary to store information of each listing

listing_info = {}

price = listing.find(class_='PropertyCardWrapper__StyledPriceLine-srp-8-101-0__sc-16e8gqd-1 dZqidi')

address = listing.find('address', {'data-test': 'property-card-addr'})

beds_baths_sqft = listing.find_all('li')

beds = beds_baths_sqft[0].find('b') if len(beds_baths_sqft) > 0 else None

baths = beds_baths_sqft[1].find('b') if len(beds_baths_sqft) > 1 else None

sqft = beds_baths_sqft[2].find('b') if len(beds_baths_sqft) > 2 else None

listing_info['price'] = price.get_text(strip=True) if price else "N/A"

listing_info['address'] = address.get_text(strip=True) if address else "N/A"

listing_info['beds'] = beds.get_text(strip=True) if beds else "N/A"

listing_info['baths'] = baths.get_text(strip=True) if baths else "N/A"

listing_info['sqft'] = sqft.get_text(strip=True) if sqft else "N/A"

all_listings.append(listing_info)
Within the loop, we use Beautiful Soup's find method to locate specific elements within each listing tag based on their HTML tags and class attributes.
For example, the price is extracted from the element with the class PropertyCardWrapperStyledPriceLine-srp-8-101-0sc-16e8gqd-1 dZqidi, while the address is found within an address tag with the data-test attribute set to property-card-addr.
The extracted text is then stripped of any leading or trailing whitespace using the strip() method.
Each listing's data is stored as a dictionary with keys corresponding to the extracted information (price, address, beds, baths, and square footage). This dictionary is then appended to the all_listings list.
Step 8: Print the extracted data
Finally, we iterate through the all_listings list and print the information for each listing:
# Print all listings

for listing in all_listings:

print(listing)

# Push each listing to the dataset

await Actor.push_data(listing)
The Actor.push_data() function will append each listing dictionary to the dataset and store the results in the ./storage/datasets directory, making it ready for further analysis or processing.
This will display a neatly formatted output showcasing the extracted price, address, beds, baths, and square footage for each property listing on Zillow.
{'price': '$325,000', 'address': '110 Hillvue Ln, Butler, PA 16001', 'beds': '4', 'baths': '2', 'sqft': '2,038'}

{'price': '$455,000', 'address': '6413 Titan Ct, Las Vegas, NV 89108', 'beds': '3', 'baths': '3', 'sqft': '1,734'}

{'price': '$305,000', 'address': '34 Dale Rd, Enfield, CT 06082', 'beds': '4', 'baths': '1', 'sqft': '1,440'}
Note: One advantage of Cloudscraper is its ability to automatically adapt to different website configurations. If you use Cloudscraper on a website that doesn't have Cloudflare protection, it intelligently detects the absence of Cloudflare's anti-bot measures and avoids unnecessary delays. This means you can confidently use Cloudscraper to scrape various websites. It will only activate its Cloudflare bypassing capabilities when necessary.
Integrating proxies with Cloudscraper
Integrating proxies with CloudScraper is straightforward, similar to using proxies with Python Requests. This comes in handy when dealing with websites that implement IP-based blocking or rate limiting.
To use proxies with Cloudscraper, simply incorporate the proxies attribute within your get() or post() requests:
proxies = {

    'http': 'http:_//your_proxy_address:port',

    'https': 'https:_//your_proxy_address:port'

}

response = scraper.get(url, proxies=proxies)
Remember to replace your_proxy_address and port with the specific details of your proxy server.
Note: Ensure that you utilize the same proxy within a given Cloudscraper session to avoid triggering Cloudflare's defenses. Cloudflare expects the IP address that solved the initial challenge to remain consistent with subsequent requests from the same session.
Bypassing CAPTCHAs with Cloudscraper
Cloudscraper has built-in support for several third-party CAPTCHA solvers. This is handy when your requests are redirected to a captcha page.
For instance, you can easily integrate 2captcha as your CAPTCHA solution provider:
scraper = cloudscraper.create_scraper(

captcha={

    'provider': '2captcha',

    'api_key': 'your_2captcha_api_key'

  }

)
By including this configuration, Cloudscraper will automatically use 2captcha to solve any CAPTCHAs encountered during the scraping process, ensuring uninterrupted data extraction.
Note: Since 2captcha is a paid third-party solver, it's independent of Cloudscraper. You would need to sign up for a 2captcha account and obtain your API key.
Cloudscraper also supports various CAPTCHA services, including 2captcha, anticaptcha, CapSolver, CapMonster Cloud, deathbycaptcha, and 9kw.
You can check out the most up-to-date list of supported CAPTCHA solvers and refer to the documentation for detailed integration methods for each CAPTCHA solver.

Deploying the Cloudscraper script to Apify Cloud
Deploying your Cloudscraper script to a cloud-based platform like Apify is an excellent solution for elevating your scraping operations to a more robust and scalable level. Apify Cloud enables you to run your scraper continuously without the limitations of local infrastructure and provides convenient tools for managing your scraping tasks.
#1. Set up the environment
First, you need to install the Apify CLI to manage and deploy your Actors on the Apify cloud platform. The Apify CLI facilitates creating, developing, and managing Apify actors, which are essentially your scraping scripts running on the Apify platform.
Install the Apify CLI globally using npm:
npm i -g apify-cli
#2. Log In to Apify
After installing the CLI, log in to the Apify platform using your Personal API Token. Retrieve the token from the Integrations section under your account settings on Apify Console.
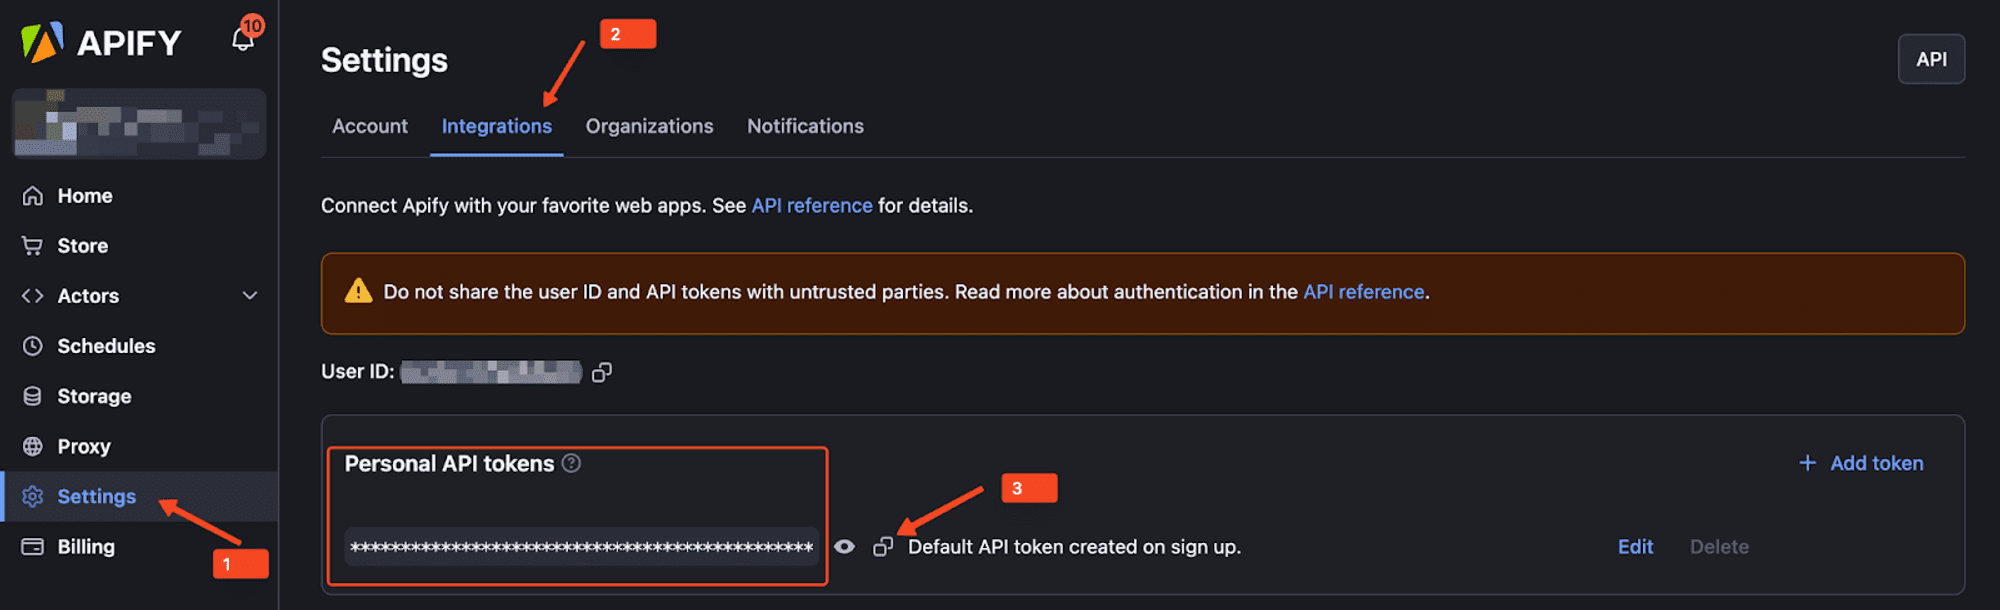
Use the command below to log in:
apify login -t YOUR_TOKEN_HERE
If successful, you’ll see a message confirming your login

#3. Create and run an Actor
Create a new Actor using the Python template:
apify create my-actor -t python_empty
Navigate to your new Actor directory and run it locally:
cd my-actor

apify run
#4. Write your scraping code
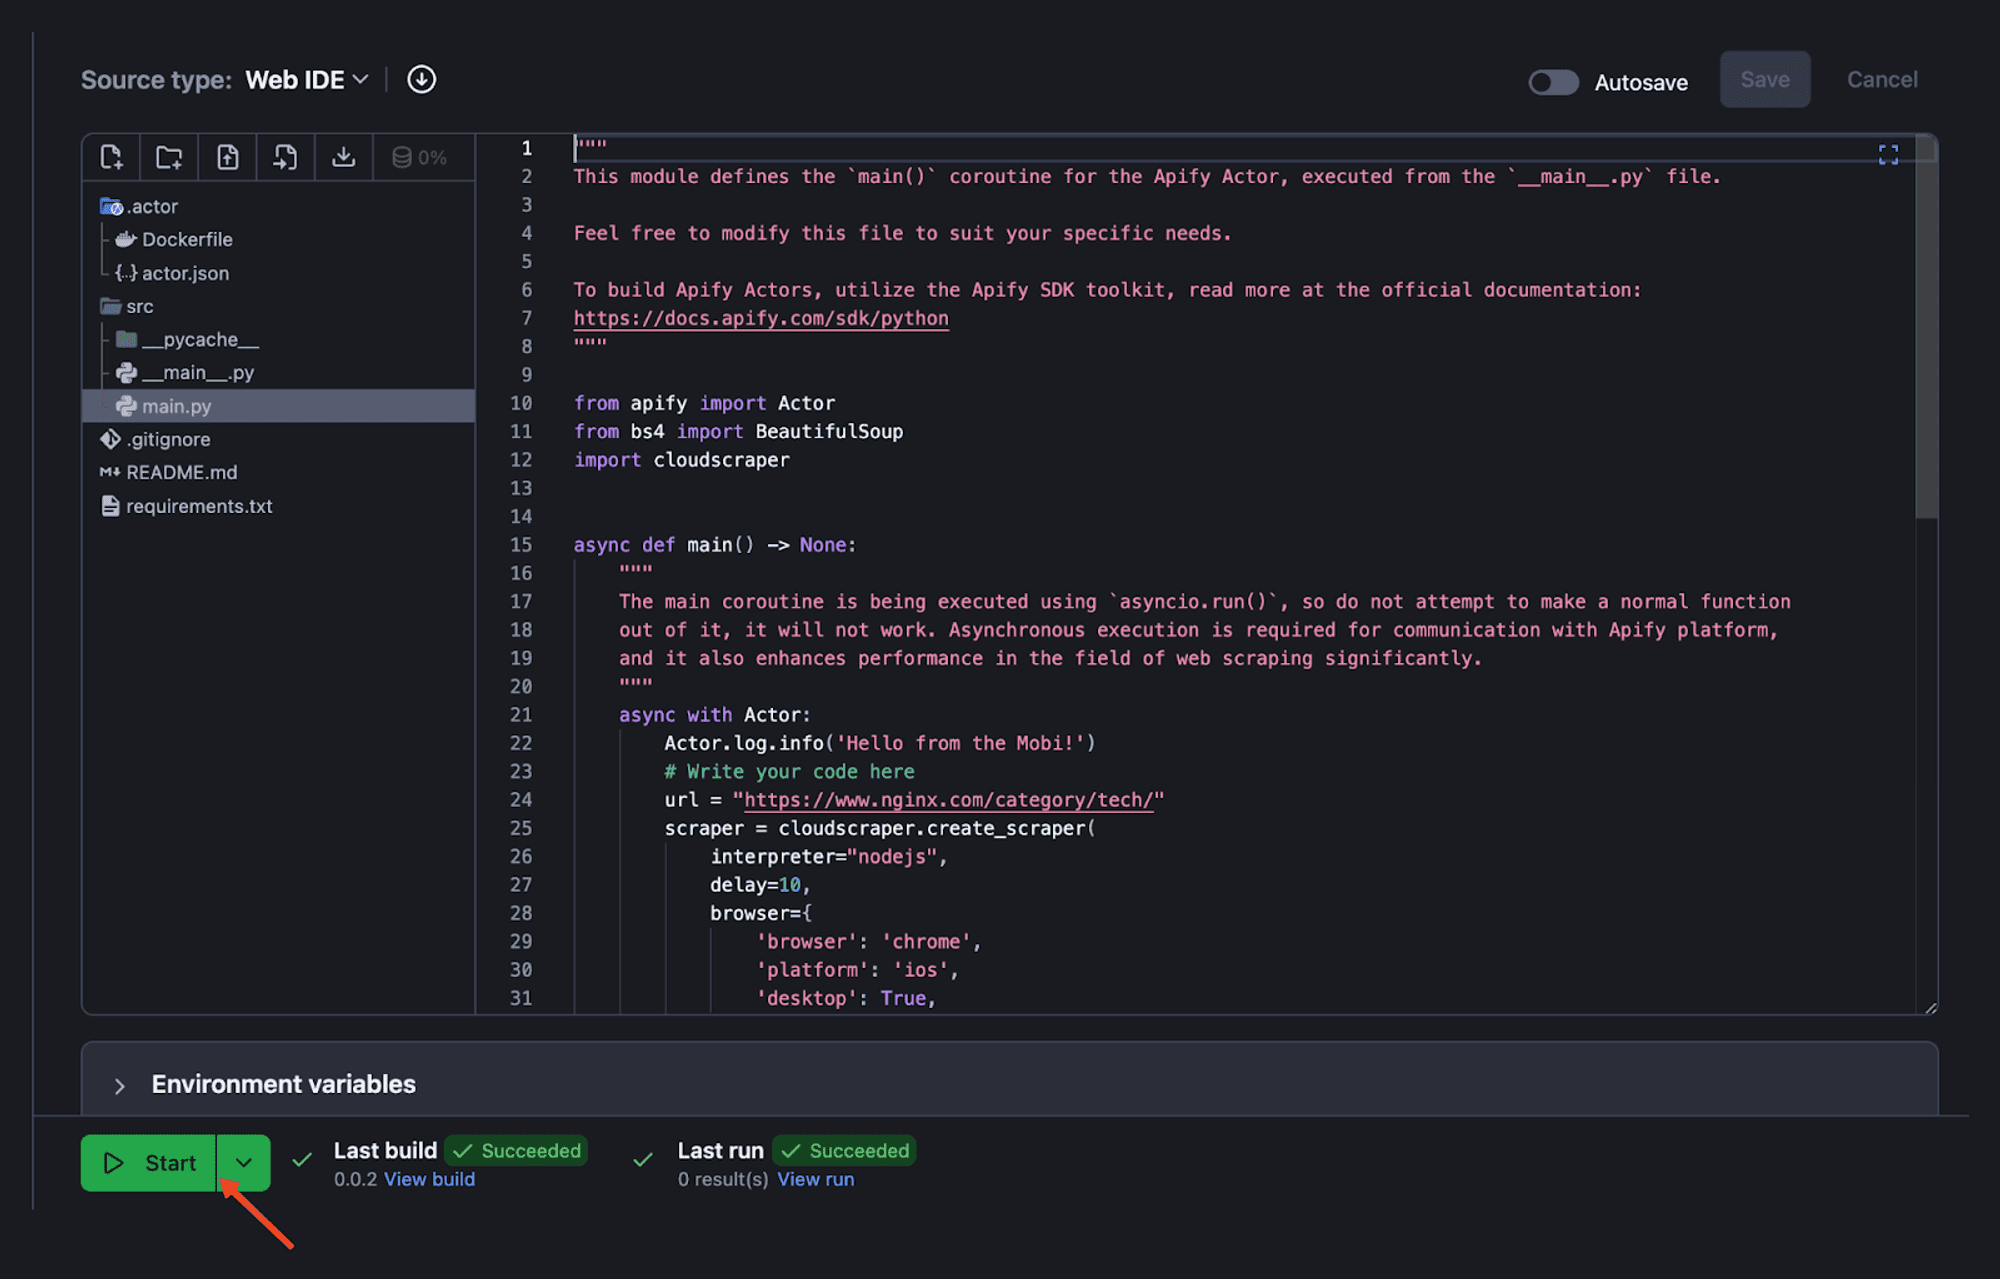
Edit the ./src/main.py file to include the Cloudscraper logic for scraping Zillow's home listings page. Your main.py file should be similar to this:
"""
This module defines the `main()` coroutine for the Apify Actor, executed from the `__main__.py` file.

Feel free to modify this file to suit your specific needs.

To build Apify Actors, utilize the Apify SDK toolkit, read more at the official documentation:

"""

from apify import Actor
from bs4 import BeautifulSoup
import cloudscraper

async def main() -> None:
    """
    The main coroutine is being executed using `asyncio.run()`, so do not attempt to make a normal function
    out of it, it will not work. Asynchronous execution is required for communication with Apify platform,
    and it also enhances performance in the field of web scraping significantly.
    """
    async with Actor:
        Actor.log.info('Hello from the Actor!')
        # Write your code here
        url = "https://www.zillow.com/homes/"
        scraper = cloudscraper.create_scraper(
            interpreter="nodejs",
            delay=10,
            browser={data
                'browser': 'chrome',
                'platform': 'ios',
                'desktop': True,

            },
            captcha={
                "provider": "2captcha",
                "api_key": "5c68d8ed3412d886351e476550904c2f",
            },

        )
        info = scraper.get(url)

        Actor.log.info(f'The status code is {info.status_code}')

        soup = BeautifulSoup(info.text, "lxml")

        # Find all listing elements
        listings = soup.find_all("div",class_='StyledCard-c11n-8-101-0__sc-1w6p0lv-0')

        # List to store all listings
        all_listings = []

        for listing in listings:
            # Dictionary to store information of each listing
            listing_info = {}

            price = listing.find(class_='PropertyCardWrapper__StyledPriceLine-srp-8-101-0__sc-16e8gqd-1 dZqidi')
            address = listing.find('address', {'data-test': 'property-card-addr'})
            beds_baths_sqft = listing.find_all('li')

            beds = beds_baths_sqft[0].find('b') if len(beds_baths_sqft) > 0 else None
            baths = beds_baths_sqft[1].find('b') if len(beds_baths_sqft) > 1 else None
            sqft = beds_baths_sqft[2].find('b') if len(beds_baths_sqft) > 2 else None

            listing_info['price'] = price.get_text(strip=True) if price else "N/A"
            listing_info['address'] = address.get_text(strip=True) if address else "N/A"
            listing_info['beds'] = beds.get_text(strip=True) if beds else "N/A"
            listing_info['baths'] = baths.get_text(strip=True) if baths else "N/A"
            listing_info['sqft'] = sqft.get_text(strip=True) if sqft else "N/A"

            all_listings.append(listing_info)

        # Print all listings
        for listing in all_listings:
            print(listing)
            # Push each listing to the dataset
            await Actor.push_data(listing)
The Actor.push_data() function will append each listing dictionary to the dataset and store the results in the ./storage/datasetsdirectory, making it ready for further analysis or processing. Remember to add beautifulsoup4 ~= 4.12.3 and cloudscraper ~= 1.2.71 to your “requirements.txt” file.
beautifulsoup4 ~= 4.12.3

cloudscraper ~= 1.2.71
#5. Deploy your scraper to the Apify cloud platform
Deploy your scraper to Apify Cloud using this command:
apify push
This command uploads your project to the Apify cloud and builds an Actor from it.
Once uploaded, you can start your scraper by clicking the "Start" button on Apify Console.
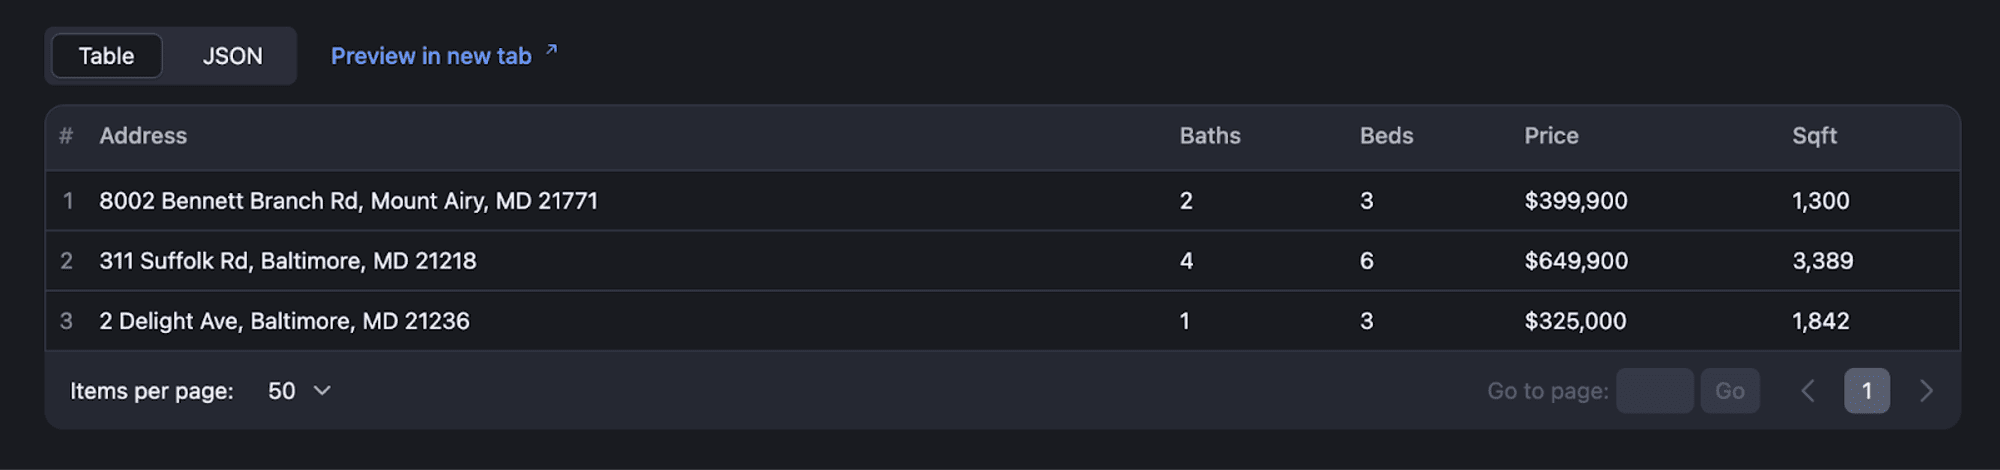
#6. View results
After deploying and running your scraper, you can view the scraping results in Apify Console, where you’ll see logs, dataset entries, and other output data generated by your Actor.
Limitations of Cloudscraper: when scraping Becomes challenging
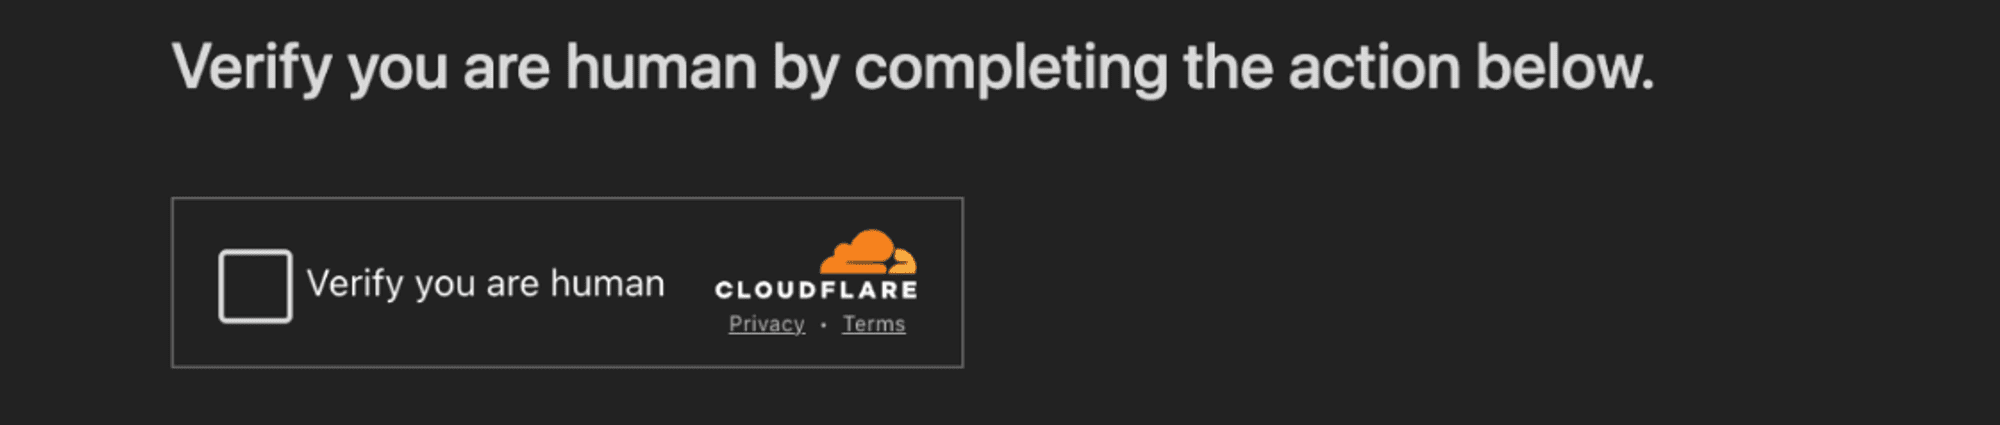
While Cloudscraper proves to be a powerful tool for bypassing Cloudflare's protection in many cases, it's important to acknowledge its limitations. One notable challenge arises when dealing with websites protected by Cloudflare's Bot Detection v2, a newer and more sophisticated version of their anti-bot technology.
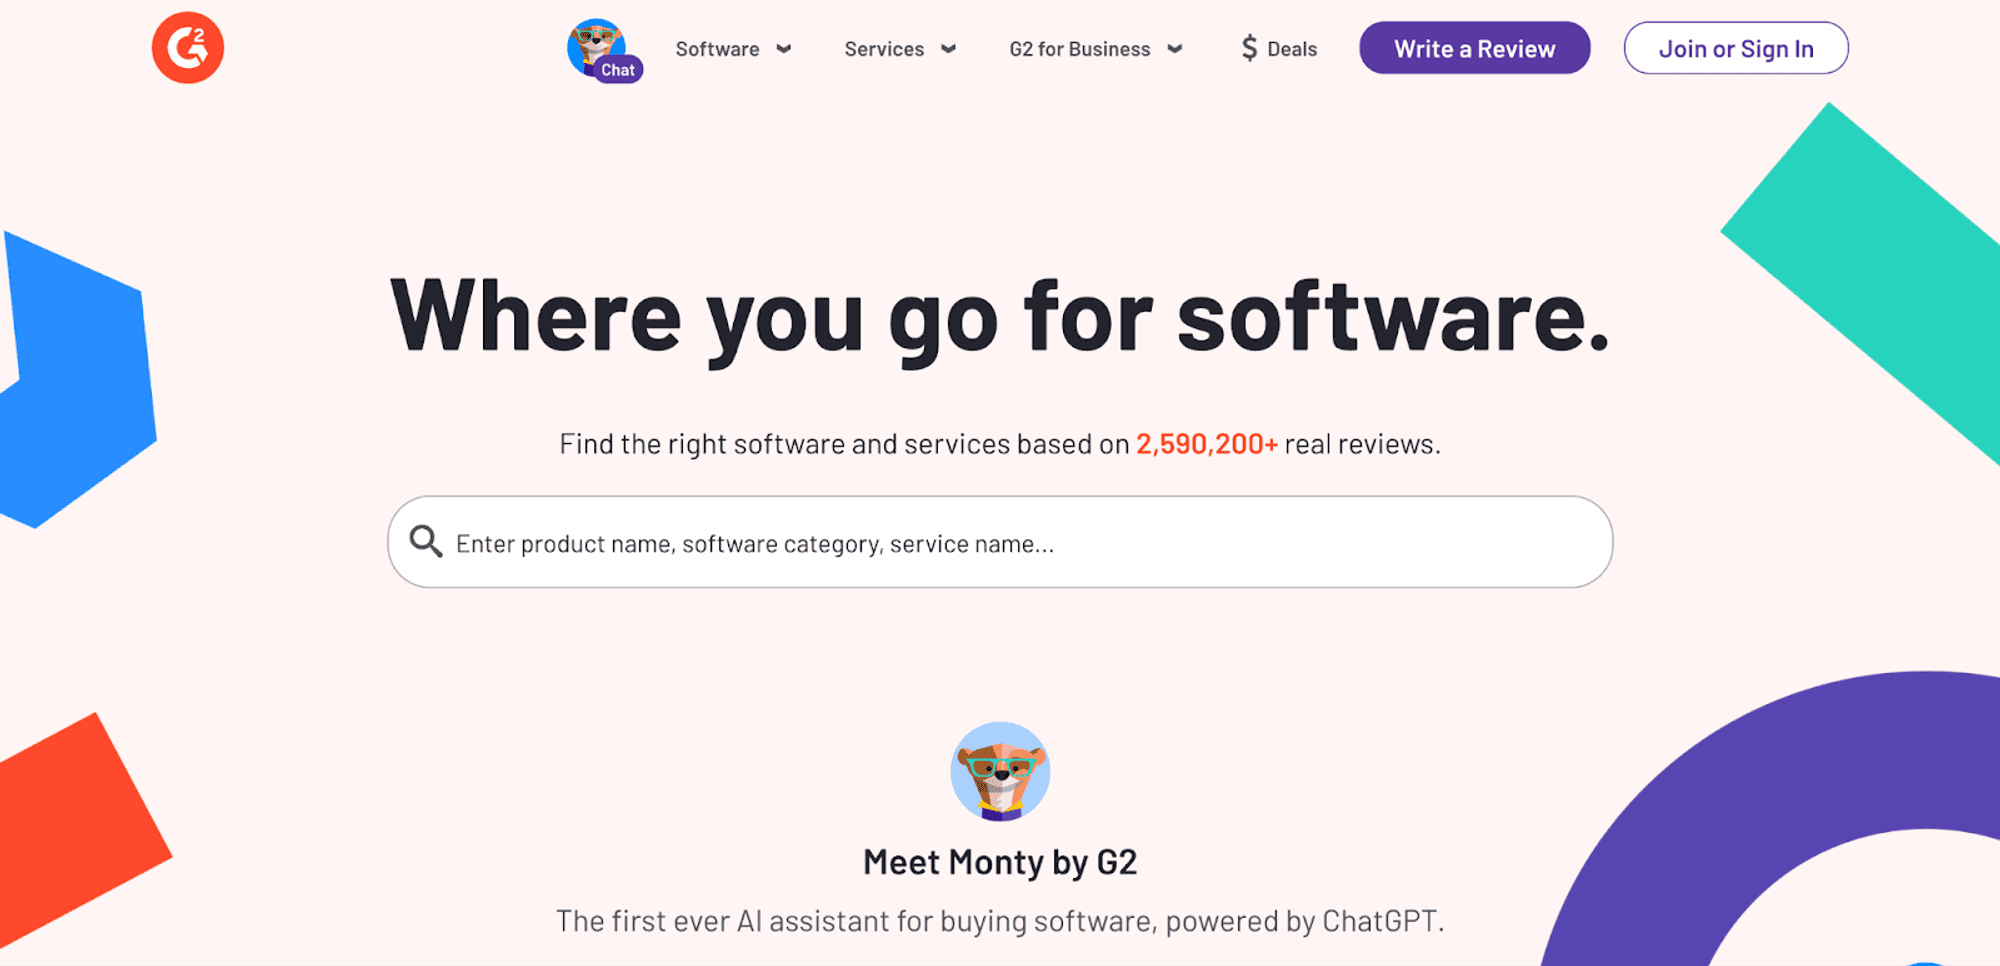
This newer version of bot detection is employed by a growing number of websites, including notable ones like G2. When attempting to access such websites using Cloudscraper, the tool often fails to navigate past the challenge page, indicating that the website's bot protection is too advanced for Cloudscraper to handle.
Let's try to access the website with Cloudscraper.
import cloudscraper

url = "https://g2.com/"

scraper = cloudscraper.create_scraper()

info = scraper.get(url)

Actor.log.info(f'The status code is {info.status_code}')

print(info.text)
The output received:
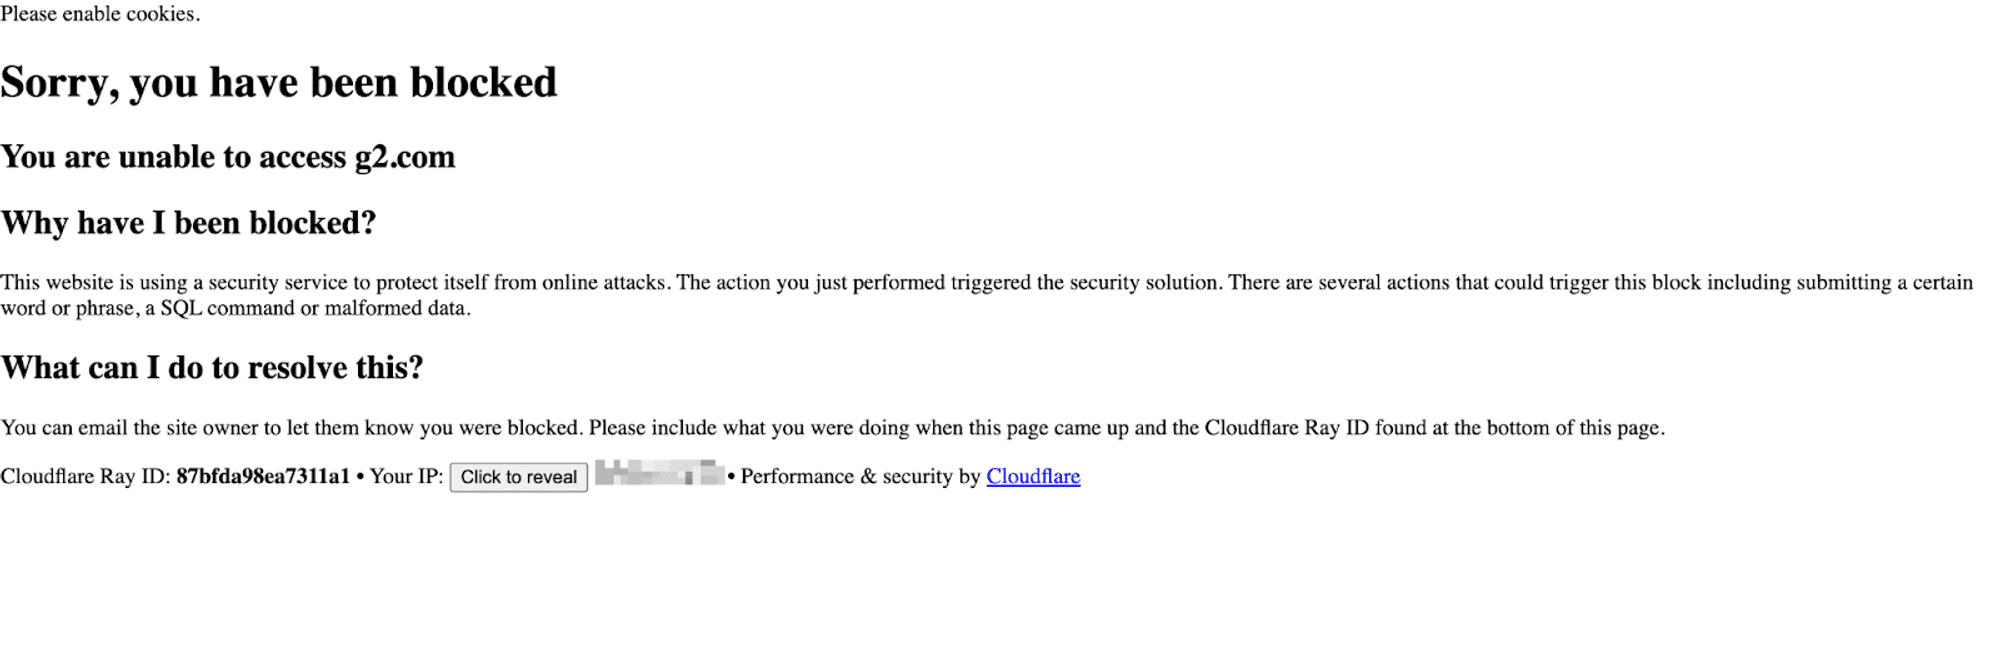
You need to be aware of these limitations and understand that Cloudscraper may not always guarantee successful scraping, especially when encountering websites with the latest anti-bot defenses.

Alternatives to Cloudscraper
Cloudscraper is powerful but often needs updates as Cloudflare and others improve their defenses against scraping tools.
If you need alternatives to Cloudflare and Cloudscraper for web scraping and want better performance, here are some options:
- Selenium
Selenium is a popular web scraping tool that allows for the automation of web browsers. It can be used to scrape websites protected by Cloudflare or other anti-bot measures, as it simulates real user interactions with the website.
Selenium supports various programming languages, including Python, and can be integrated with headless browsers like Chrome for efficient scraping operations.
- Playwright
Playwright is a tool by Microsoft for automating browsers and is designed to work with multiple browsers. It supports Chromium, Firefox, and Safari browsers, helps automate tasks, and can be set to avoid detection by anti-bot tools.
- Requests with proxies from third-party scraping solutions like Apify
Apify offers a web scraping platform with built-in proxies to avoid detection and region restrictions. The quickest way to start using Apify is to integrate the proxies with requests.
Here's how you can do it:
import requests

import os

from dotenv import load_dotenv

load_dotenv()

proxy_user = os.getenv("APIFY_PROXY_USERNAME ")

proxy_password = os.getenv("APIFY_PROXY_PASSWORD")

proxy_url = f"http://{proxy_user}:{proxy_password}@proxy.apify.com:8000"

proxies = {

'http': proxy_url,

}

url = "https://httpbin.org/ip"

response = requests.get(url, proxies=proxies)

print(f'Response status code : {response.status_code}')

---

Run the following command to install the python-dotenv package:

pip install python-dotenv

---

To set the Apify proxy credentials inside a “**.env**” file, create a file named “**.env**” in the root directory of your project and add the following lines:

APIFY_PROXY_USERNAME=Your_Apify_Proxy_Username

APIFY_PROXY_PASSWORD=Your_Apify_Proxy_Password
Note: Remember to add the .env file to your .gitignore file to prevent your credentials from being committed to a public repository.
More web scraping tutorials
So, that's how you can use Cloudscraper to scrape websites protected by Cloudflare. You should now have a solid understanding of how to configure Cloudscraper from its basic setup to utilizing advanced features and deploying your scraper to a cloud platform like Apify.
If you're hungry for more web scraping knowledge, head over to Apify's Web Scraping Academy to learn from the experts. It's a free course that will level up your scraping skills.