What is web scraping?
Every website has data in some form or another. Web scraping is simply a term to describle the process of programmatically extracting this data, then storing it somewhere for our own uses. Web scraping doesn't always have to be about collecting the data from a website, though. We can also perform actions based on the data, such as automatically filling out forms.
What tools do I need to scrape a website?
Node.js is a fantastic language for writing web scrapers of any complexity. Certain packages such as Cheerio and Playwright provide functionalities which make it easier to develop a web-crawler, and libraries like the Apify SDK use these packages plus lots of other under-the-hood magic to streamline the process of writing scalable web scraping solutions.
Web scraping can be done in almost any programming language; however, the most popular are Python and Node.js. We'll be focusing on Node.js in this article.
Is web scraping legal?
Extracting data from the web is legal, as long as you’re not scraping personal information or content that is copyrighted or located on a private server. To find out more about the legality of web scraping, have a read through our blog article on the subject.
The learning curve 📈
What if you only have experience writing client-side JavaScript and haven't yet delved into Node.js and its popular scraping tools, but you still want to get started with web scraping? Though it's all still JavaScript, there can be a steep learning curve for all these new technologies, which has the potential of driving away people who are interested in web automation. For example, the Cheerio package uses jQuery syntax to make it easy to collect data from a page. Some code written using Cheerio might look like this:
const titles = [];

$('div.container').find('li[title]').each((_, li) => titles.push($(li).attr('title')));

console.log(titles);
For new developers, this is slightly daunting, as they most likely haven't been focused on learning jQuery due to the fact that it's dying (this is debatable, but the fact of the matter is that modern web-app developers are more focused on technologies like React or Vue). Newer developers might be more familiar with the Vanilla JavaScript equivalent of the code above, which could look like this:
const listElements = document.querySelectorAll('div.container > li[title]');

const titles = [...listElements].map((li) => li.getAttribute('title'));

console.log(titles);
And even though tools like Apify's Cheerio Scraper make it extremely easy to scrape a web page right from your browser without even installing Node.js, the fact that they can't be used with regular client-side JavaScript syntax places a barrier between new developers and the data they'd like to scrape.
So, how can we scrape data from websites with only knowledge of basic client-side JavaScript fundamentals?
Getting started with Vanilla JS Scraper 🚀
Vanilla JS Scraper is a new (and 100% free) tool on Apify Store that aims to make scraping more accessible by easing the learning curve and helping you get right into writing your first web crawler without the need for any new knowledge.
All you need to get started with Vanilla JS Scraper is a free Apify account, which can be set up within a minute or two:
- Create a free Apify account
- Click on the verification link in your email inbox
- Party time!🎉
Our first scraping task 👨💻
When you visit the front page of the official Apify website, you'll notice a list of some companies with whom we have worked with:
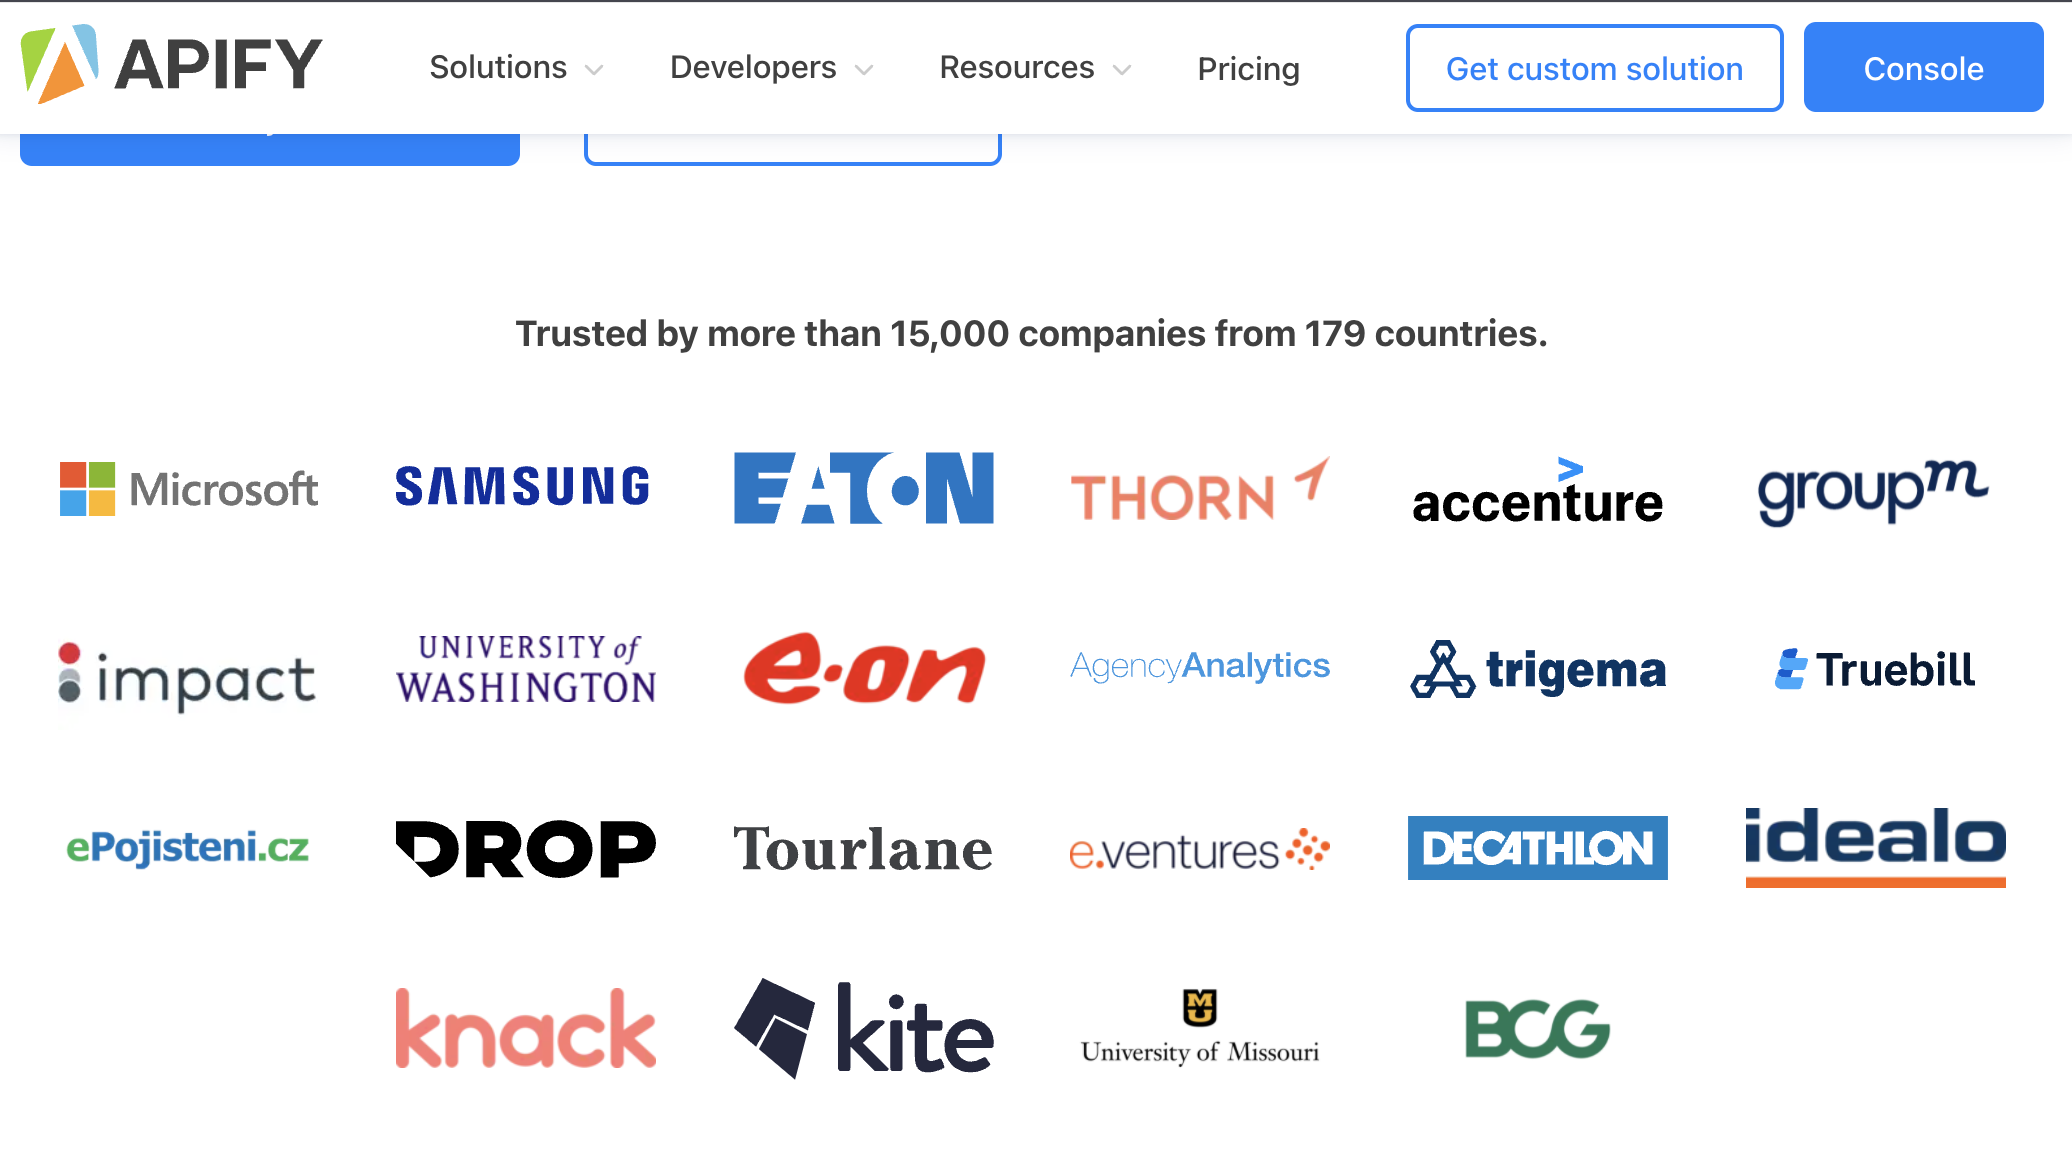
Using Vanilla JS Scraper, let's scrape the logo of each of these companies, as well as the link to each brand's website. We'll push this data into the dataset so that we can do whatever we want with it after the scraper has finished.
Note: Though it is recommended to have at least a bit of knowledge of JavaScript, it is not required to complete the task in this article. All code used will be provided right here for you to copy/paste and test out yourself.
Step-by-step guide to scraping with Vanilla JS Scraper
- If you haven't already, log into your Apify account. Then, visit the Vanilla JS Scraper page and click the big green Try For Free button to get started.
- On the “Input and Options” page, paste our target link (
https://apify.com) into “Requests”. Then, delete the boilerplate code and options to make your configuration look like this:
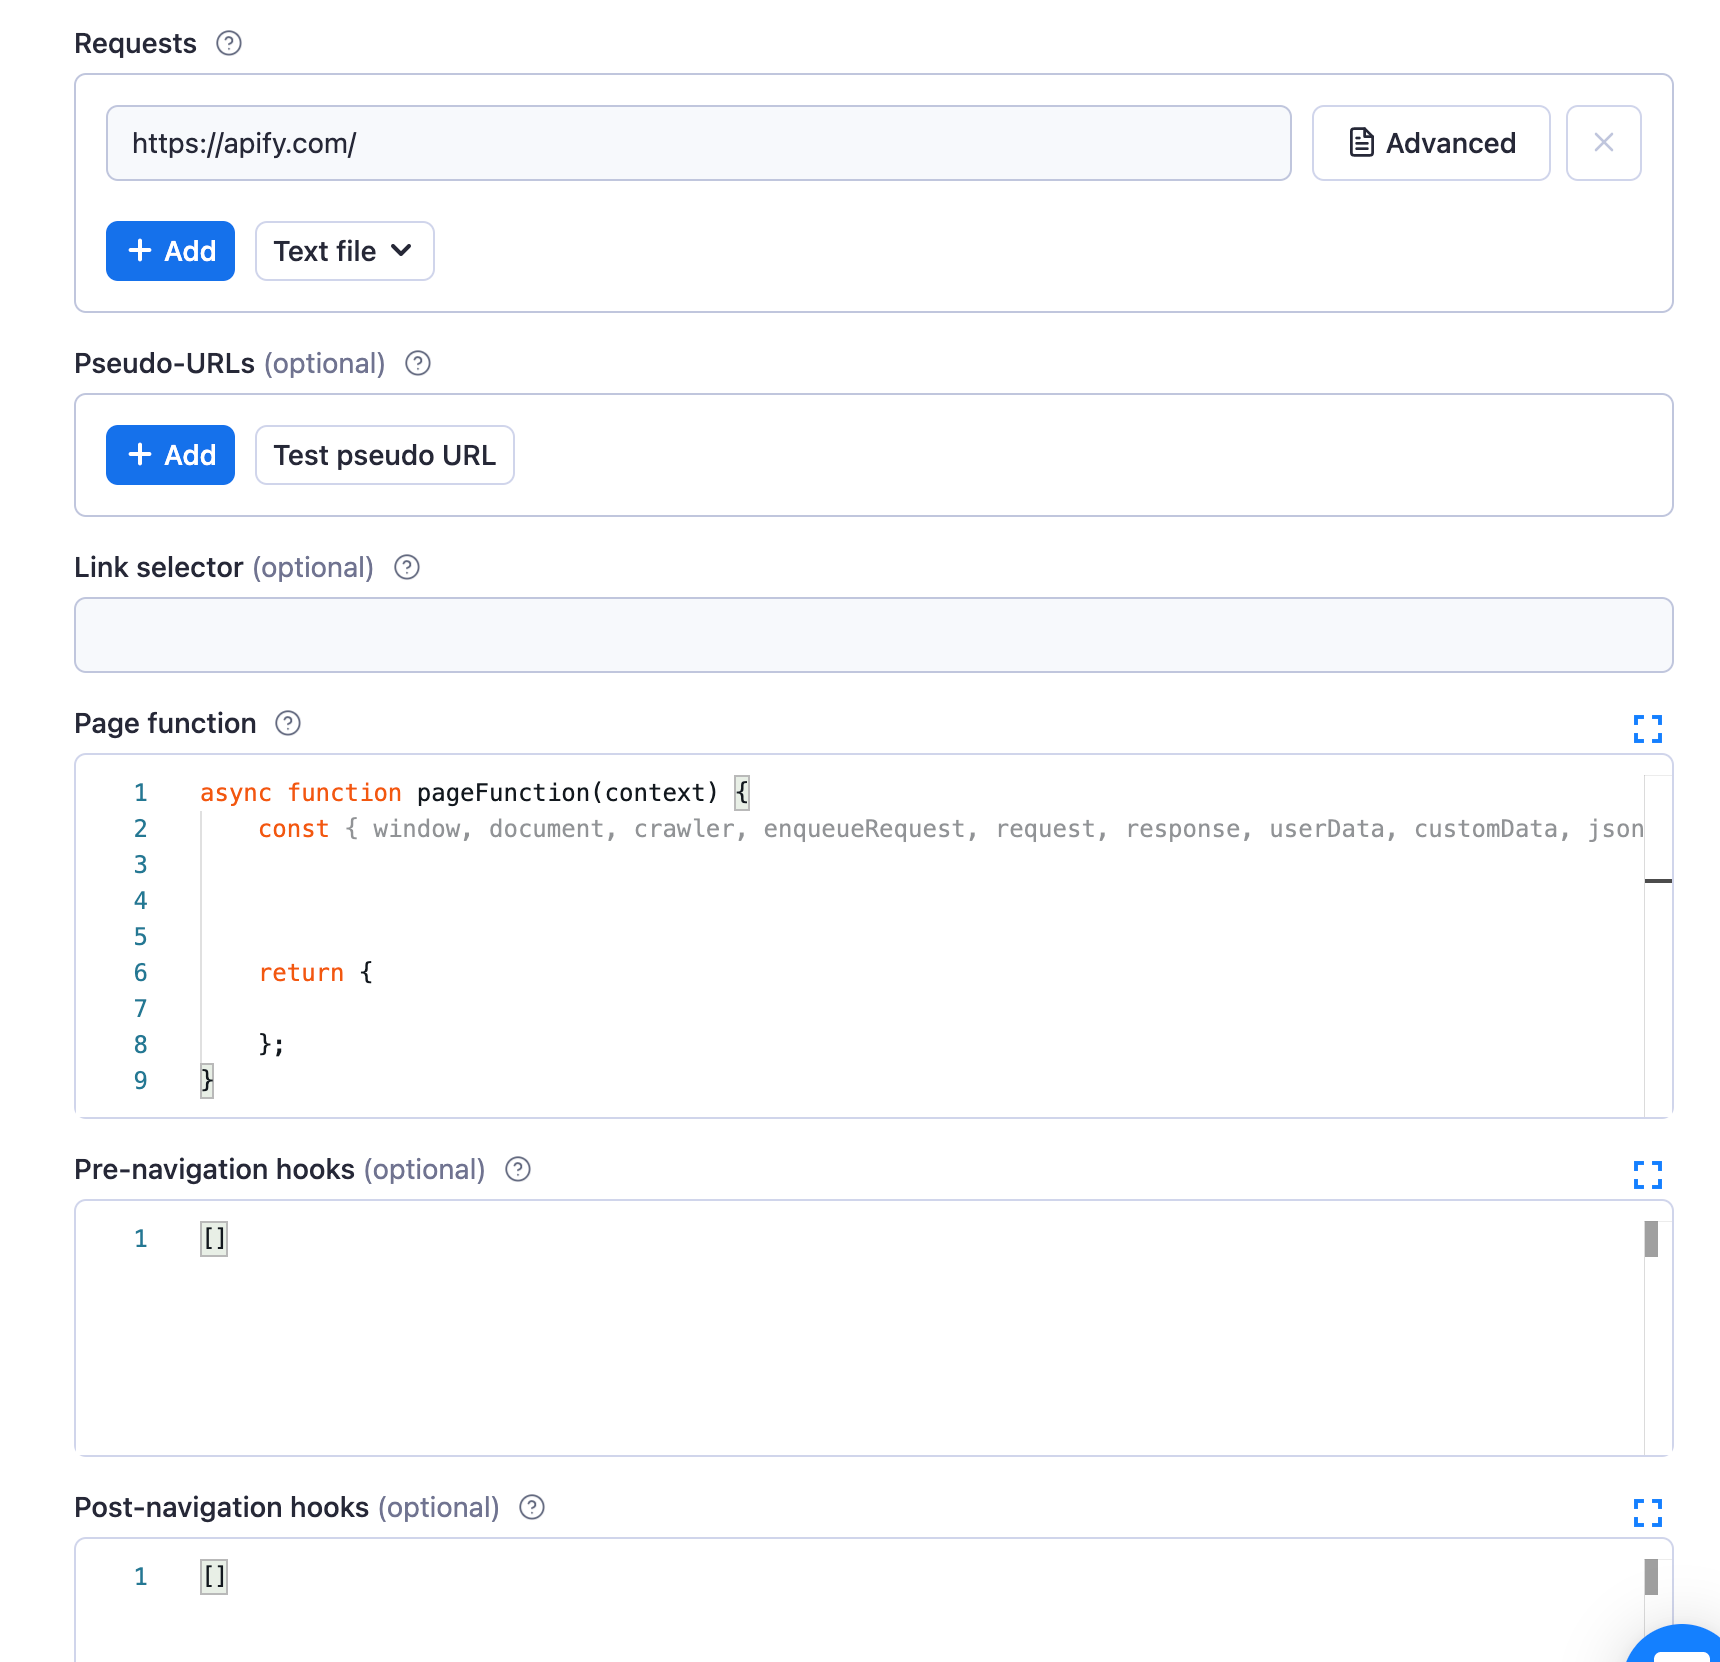
We've now cleared out any unnecessary boilerplate code to provide a clean slate, upon which we can build our very own scraper!
You're going to notice a lot of different configuration options on the "Input" page, but don’t let that scare you away! None of them require manual configuration, and we will only be using Requests and Page function to build the crawler in this tutorial.
- Locate the data on the target page using DevTools.
If you aren't already familiar with browser DevTools, we recommend checking out the DevTools tutorial (which is part of the Apify Web Scraping Academy), as we won't be covering DevTools in this article. For a quick rundown of how we'll be using DevTools today, refer to the tutorial section of our Cheerio Scraper article.
Back on the Apify website, we can inspect the page and see that all of the logos are held within a <div> element with a class name of .Logos__container. Each logo item is an <a> tag which wraps an <img> tag.
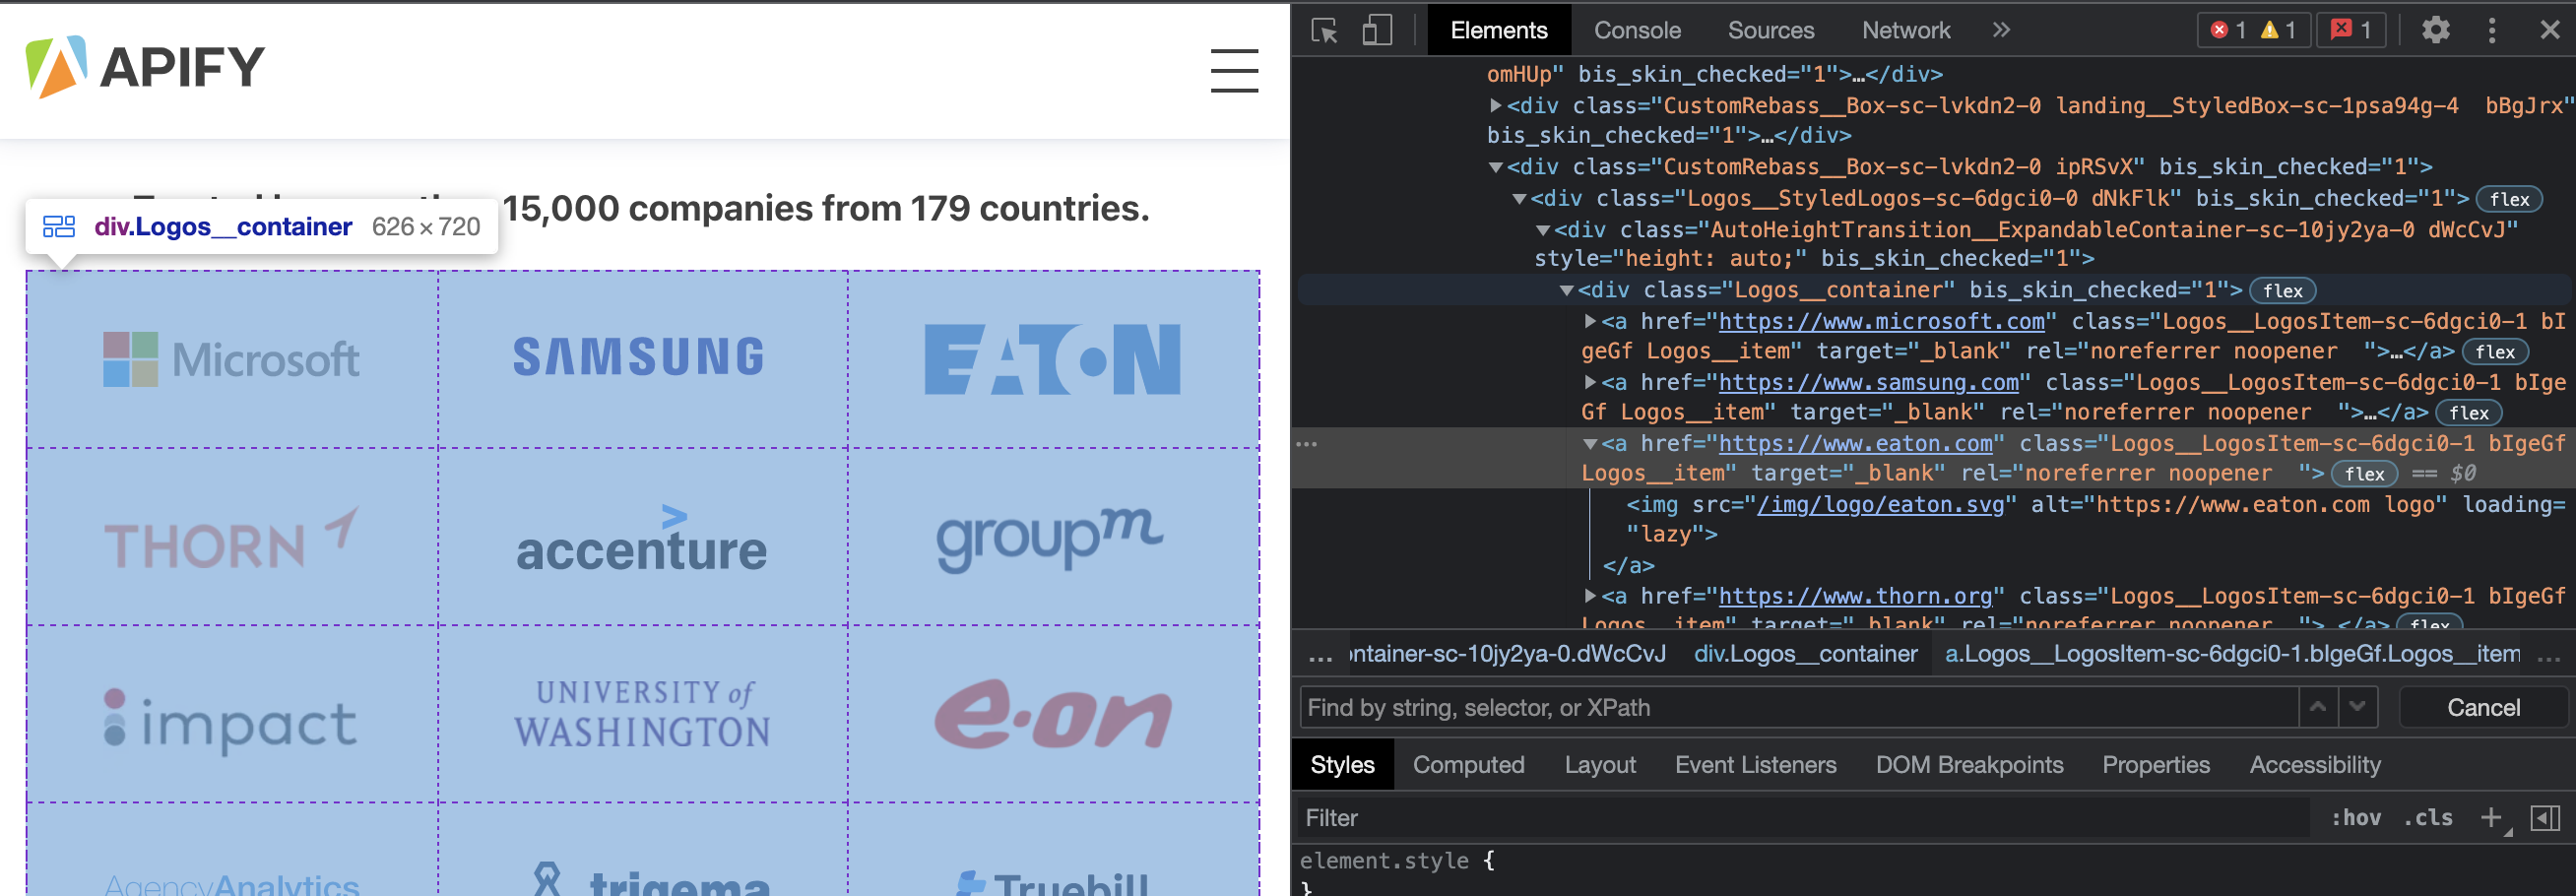
From this information, we can build a selector which will only match the elements we want to extract data from.
.Logos__container > a
- Write our script.
Moving into our Page Function, we are going to write the logic required to grab each logo's website link, and image link from the page.
First, let's create an empty array, which is where each piece of data will be stored:
const brands = [];
Next, let's select all of the <a> tags we'd like to scrape using the selector from the previous step, along with a JavaScript method you might be very familiar with:
const logoItems = document.querySelectorAll('.Logos__container > a')
We can loop through each of these logo items, and then push an object containing the data for each item to our brands array:
for (const item of [...logoItems]) {
    brands.push({
        // the URL of the company is attached to the <a> tag
        url: item.getAttribute('href'),
        // each <a> tag has only one child, which is an <img> tag with a "src" attribute
        image: `https://apify.com${item.children[0].getAttribute('src')}`
    })
}
Finally, we want to return our brands so that they’ll be automatically added to the dataset:
return {
    brands
}
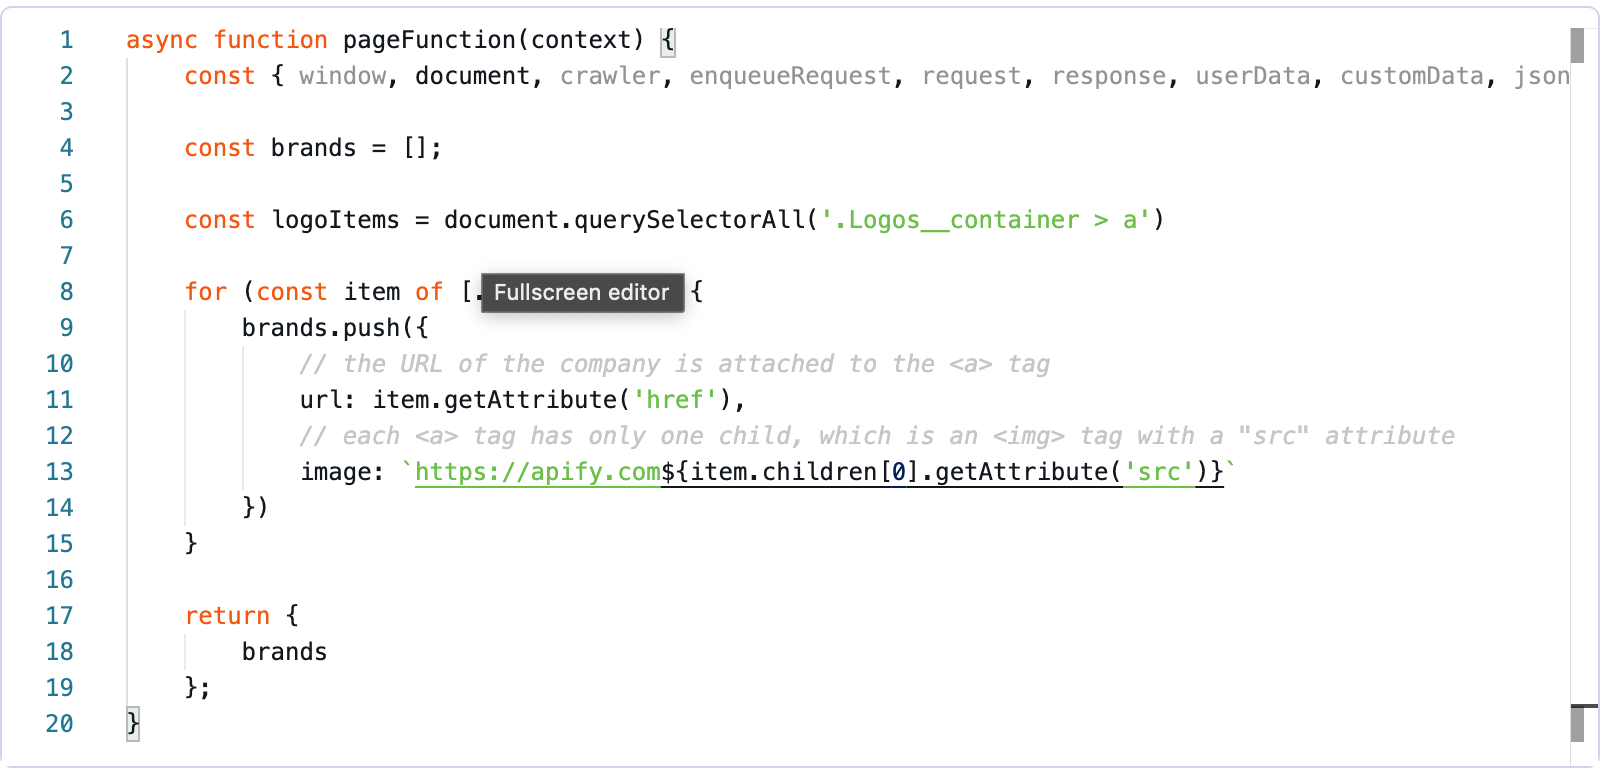
The final Page function should look like this:
- Run the scraper.
Click the green Start button in the bar at the bottom of the screen. After a second or two, the scraper will have a "SUCCEEDED" status, and it will say that there is one result.

Let’s view our results by clicking "1 result” and then “Preview.”
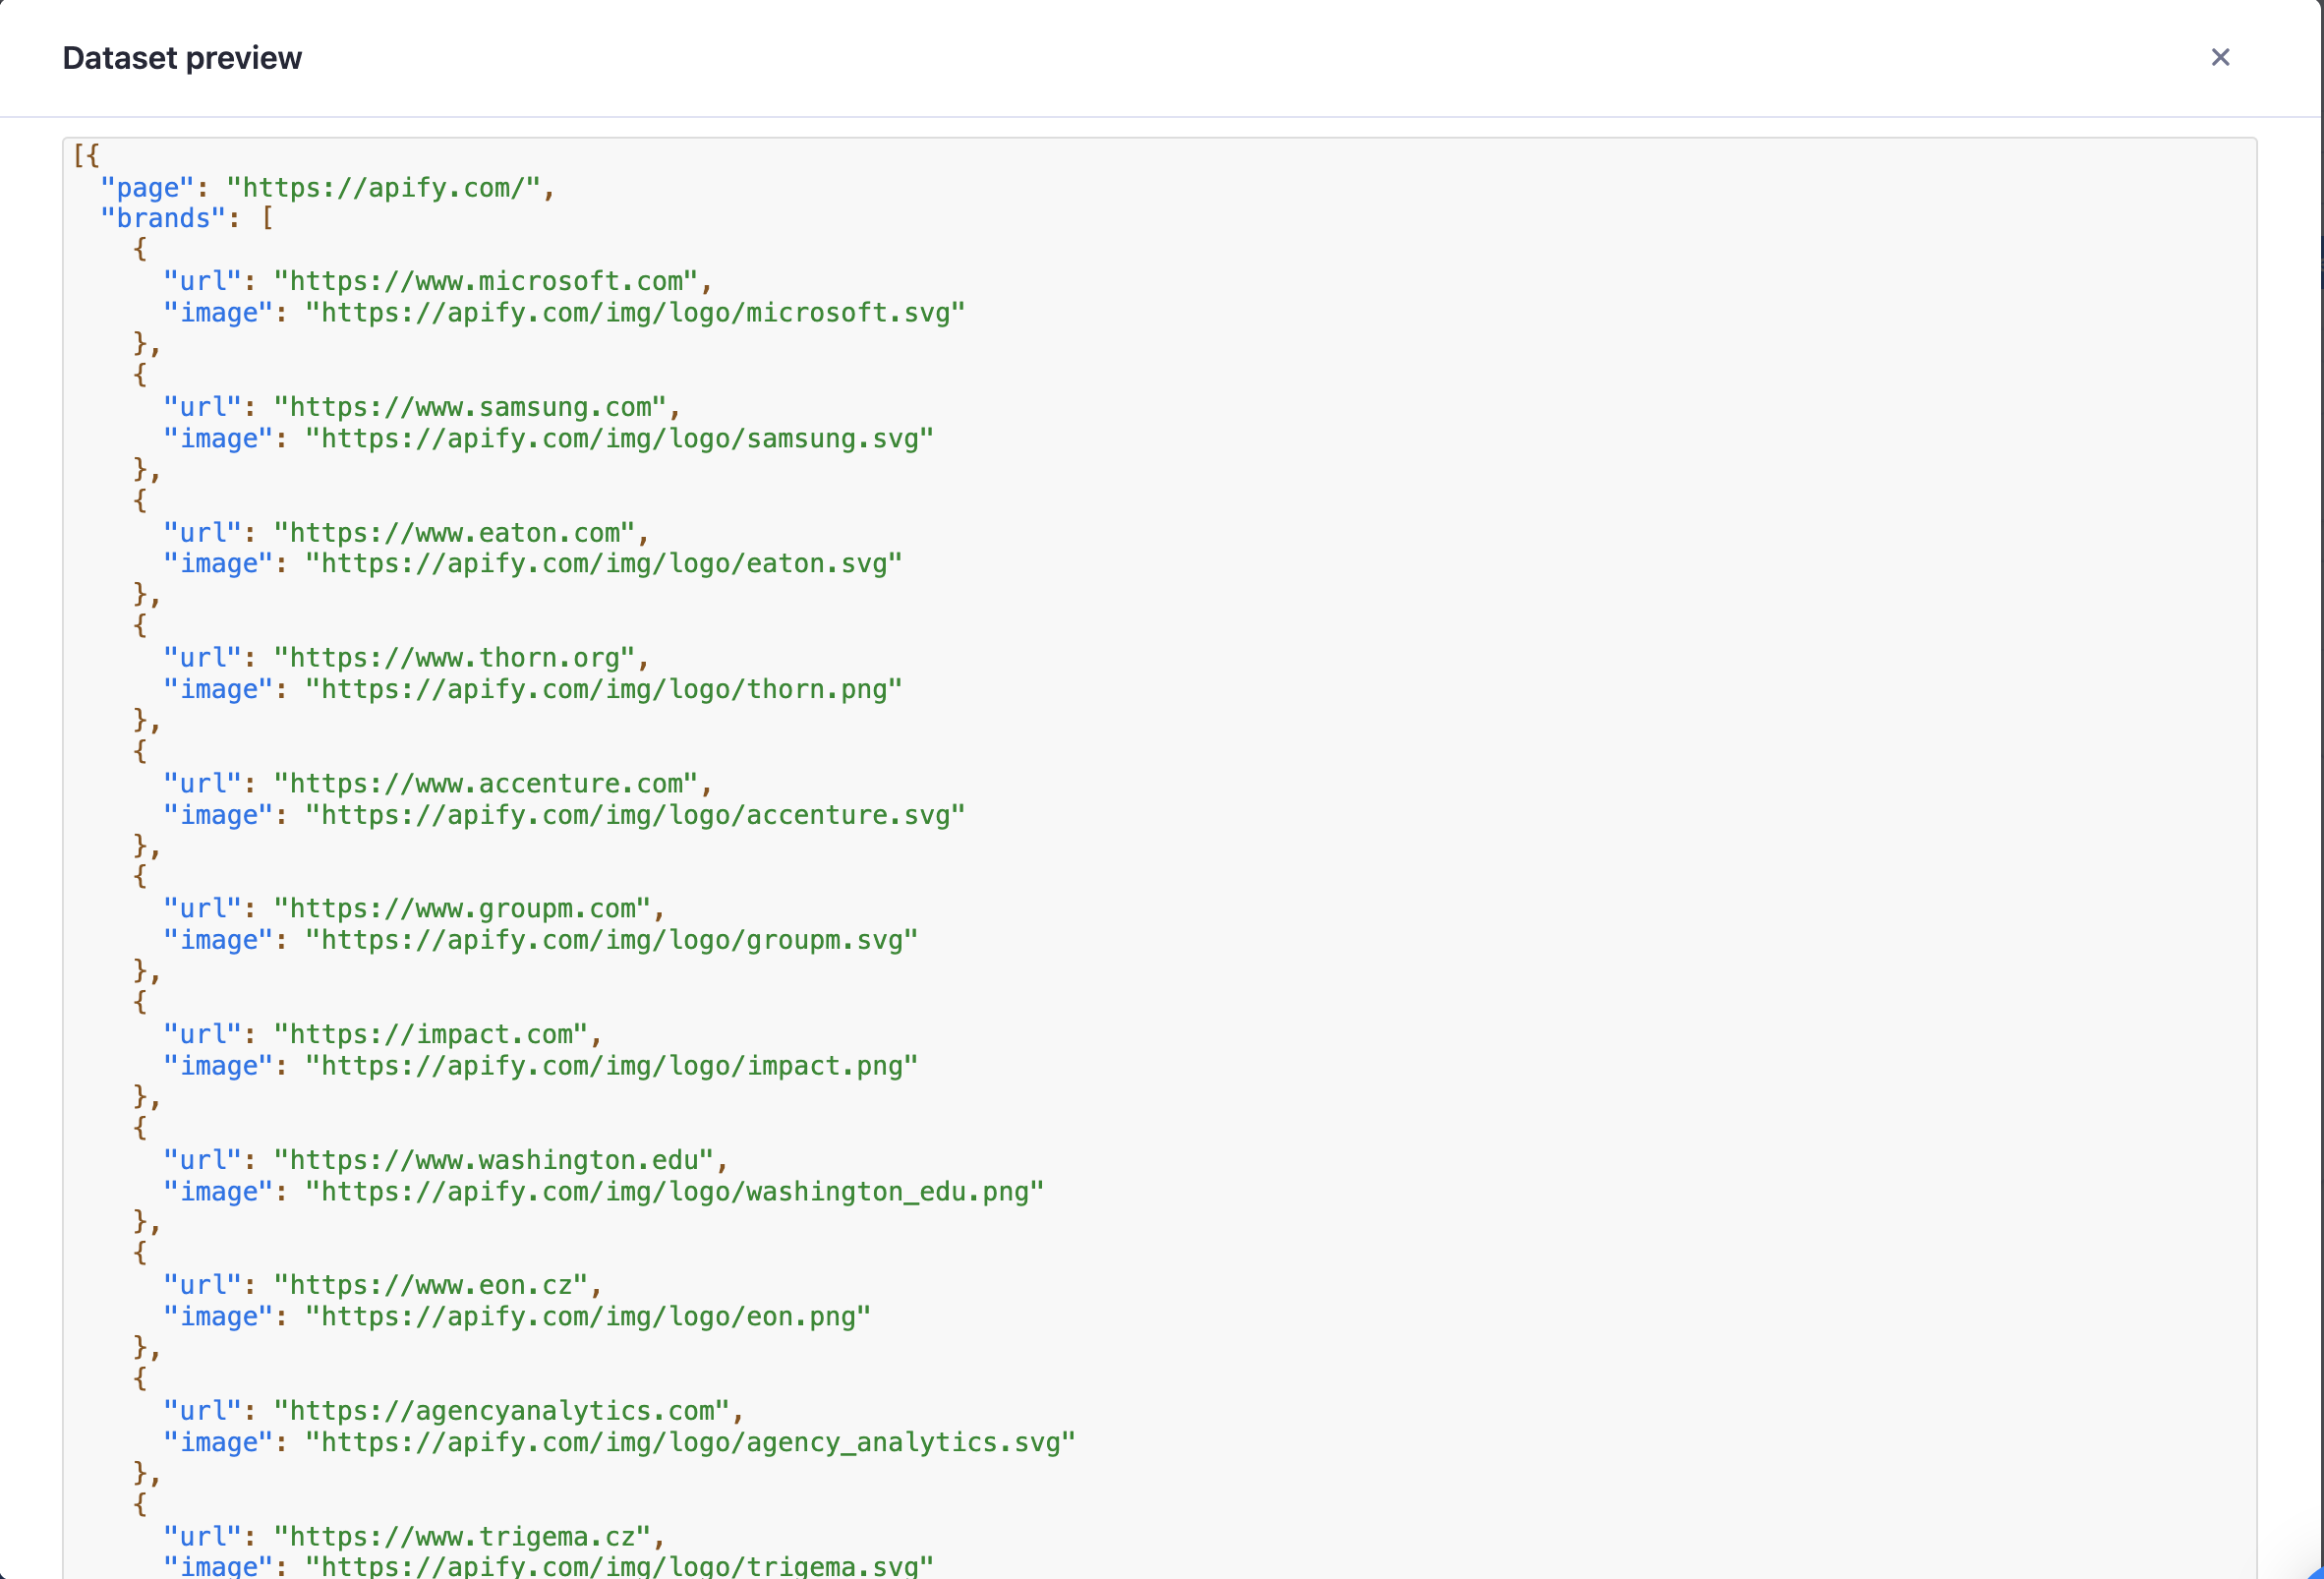
This preview is in JSON format but can be downloaded and viewed in other formats as well (JSON, XML, CSV, and Excel are the formats Apify supports).
Awesome! So that's it! You've successfully built a simple, yet scalable web-scraper using familiar client-side JavaScript syntax!
What now?
Now that you've dipped your toes into using JavaScript to scrape data from websites, you should also check out many of the other developer resources we offer:
- The FREE Apify Web Scraping Academy
- Apify's Help section/Knowledgebase
- Apify SDK Docs
- Crawlee
- Apify Store, where you can view and create scraping projects using the Apify SDK
- Apify Blog
Finally, a challenge for you 💪
After giving the Vanilla JS Scraper README a quick lookover, try to expand on the scraper we've built together by making it meet the following criteria:
- The scraper should also scrape the About page. Each employee's name and photo should be scraped and pushed to the dataset.
- Each page's title should also be scraped and pushed along with the data collected from it.


