Job boards offer a rare window into a company's internal strategy. A competitor posting 10 new data engineer roles in a single quarter exposes which cloud platforms they are standardizing on, the software vendors they are evaluating, and the technical bets they are placing well before they issue a public announcement.
The challenge is getting your hands on that data in real time and at scale. Platforms like LinkedIn Jobs, Indeed, and Glassdoor offer only limited API access to their data, which is often insufficient.
In this tutorial, you’ll build a pipeline that extracts job listings at scale with Apify and uses OpenAI to distill them into clear intelligence signals. n8n orchestrates the entire process, storing the cleaned data in Supabase while enabling you to chat with that data via Claude through MCP connectors.
What job postings reveal about your competitors
For sales teams, open roles can act as buying signals. If a company suddenly starts hiring for Snowflake and dbt, they are actively building a modern data platform and will soon need the tools to support it.
Competitive intelligence analysts can treat these listings as an early-warning system. A sudden wave of requests for Rust or Kubernetes exposes internal infrastructure shifts that a competitor’s public PR announcement simply won’t reveal.
A team might take a broader, strategy-focused view by tracking these roles to see exactly where their competitors are deploying capital, perhaps to spot regional expansions or new initiatives. Even investors rely on hiring velocity as a proxy for growth.
But a single job posting alone is not a sufficient indicator of these signals. The real signal appears across volume and historical trends, which is exactly why this system is built to continuously scrape, store, and filter records rather than running a single one-off scrape.
By now, you can tell this guide treats job listings as business signals. If you’re looking to just source candidates or map a hiring market, this Talent Market Intelligence Guide provides the exact blueprint for doing so.
Do Indeed, LinkedIn, and Glassdoor have job board APIs?
LinkedIn doesn’t have a public jobs search API. The LinkedIn jobs API that does exist is a partner program built for applicant tracking systems to publish listings on LinkedIn, not for anyone to search or pull listings from it. There’s no open, self-serve endpoint for retrieving job posting data.
Indeed used to have one. The old Publisher Jobs API supported job search, but that’s been deprecated. The APIs Indeed still offers, like Sponsored Jobs and Job Sync APIs, are built for the hiring and advertising side of the platform, not for searching listings; only paying advertisers can access them.
Glassdoor closed its public API years ago. Access is now limited to enterprise partners. There’s no public signup or free tier.
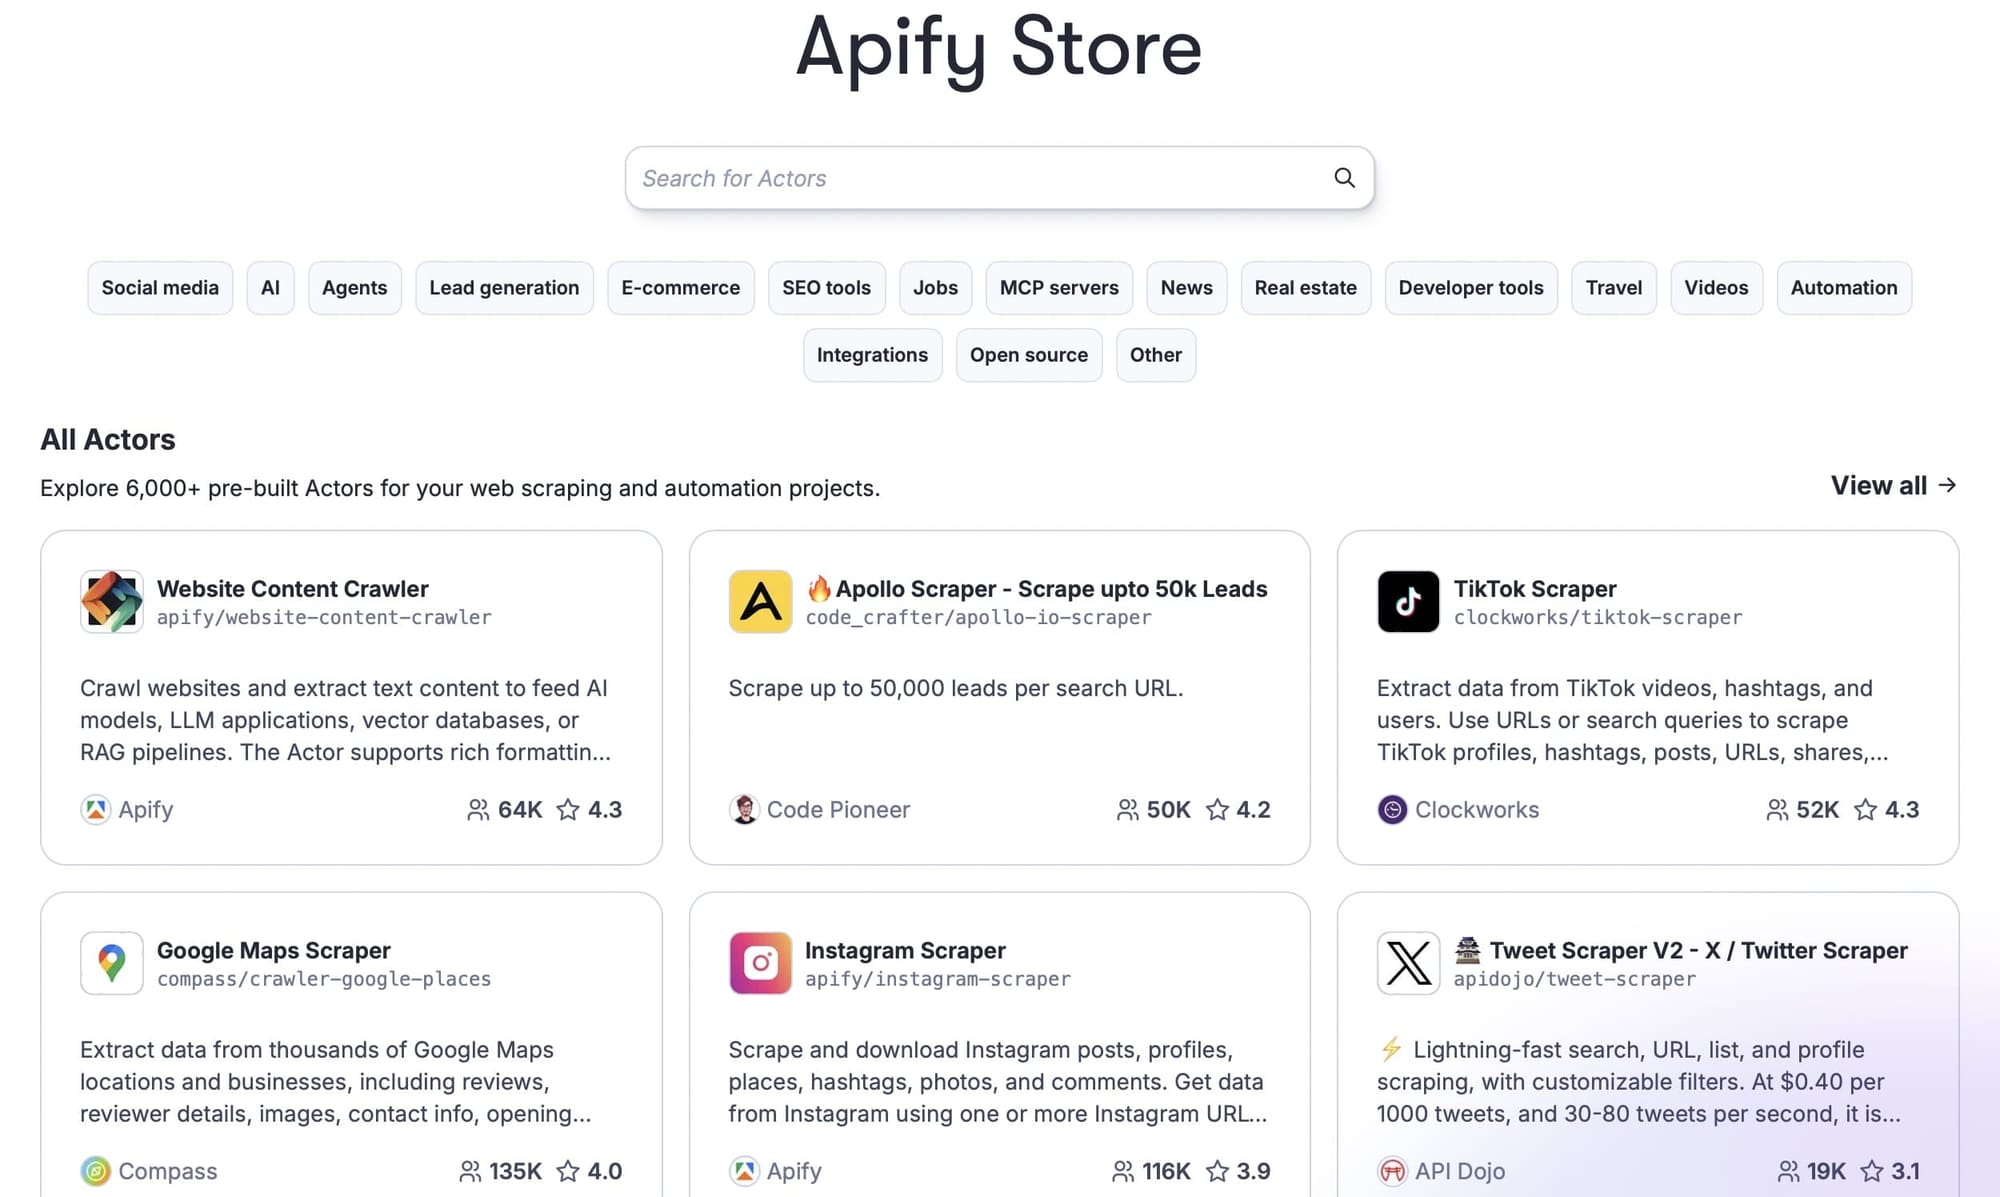
Your best alternative for accessing these platforms’ data is to use scrapers. And Apify runs the largest marketplace for scrapers (called Actors) that can extract job listings at scale and return them as clean, structured job-posting data ready for analysis.
This build uses three: an Indeed job scraper, a LinkedIn jobs scraper, and a Glassdoor jobs scraper that supports company-level searches. You can browse them all in Apify Console.
Summary of the build

This workflow is scheduled to run weekly. It scrapes target companies, filters postings by meaning, classifies them using AI, stores the records, and emails a briefing to its target audience.
Supabase anchors this workflow by serving as both a relational database for structured queries and a vector store for semantic filtering.
Outside this automated loop, your Claude assistant uses MCP connectors to query the stored data in Supabase or to trigger on-demand scrapes via Apify.
Prerequisites
You’ll need these accounts to proceed with the build. The first four have free tiers that don’t require a credit card to start.
- An Apify account.
- An n8n cloud account (n8n also offers a free self-hosting option).
- A Supabase account.
- A Stackby account.
- An OpenAI account with an API key (used for both the embeddings and the analysis).
- Claude Desktop (Pro or Max plans).
Phase 1: Accounts setup
A few setup tasks before you open n8n.
Step #1: Grab your Apify API token
- Sign up at apify.com if you don’t have an account.
- Open Apify Console.
- In the left sidebar, click Settings, then open the API & Integrations tab.
- Under "Personal API tokens," copy your default token, or click Add new token to create one and name it.
- Paste it somewhere safe for a moment.
This token lets n8n run the scrapers on your behalf. Keep it private, and revoke and regenerate it from this same screen if it ever leaks.

Step #2: Get your OpenAI API key
- Go to platform.openai.com and sign in or create an account.
- Open the API keys section, click Create new secret key, name it, and copy the key the moment it appears.
- Paste it somewhere safe.
- Open Billing under Settings, add a payment method, and buy a small amount of credit; $5 is plenty for testing.
This key enables you to generate embeddings and run the model that converts each posting into structured signals. Usage is pay-as-you-go and separate from any ChatGPT subscription, but costs stay low because you only embed and analyze posts you haven’t seen before.
Step #3: Set up your Supabase schema
- Go to supabase.com and sign up, using GitHub or your email.
- Create an Organization, give it a name, and keep it on the Free plan.
- Inside your organization, click New project.
- Give the project a name, click Generate a password for the database password, and copy it somewhere safe.
- Open the SQL Editor and run the script below. It enables vector support, creates your taxonomy (predefined categories) and signal tables, builds the similarity index, and creates a rollups view.
-- Enable vector support
create extension if not exists vector;

-- Your competitive rules live here as editable config, not in code
create table signal_taxonomy (
  id bigserial primary key,
  trigger text not null,
  signal text not null,
  relevant_to text,
  suggested_action text
);

-- One row per unique posting, with its embedding
create table job_signals (
  id bigserial primary key,
  company text,
  job_title text,
  location text,
  seniority text,
  department text,
  technologies text,
  signal_type text,
  signal_summary text,
  posted_date date,
  source text,
  url text unique,
  embedding vector(1536),
  first_seen timestamptz default now(),
  last_seen timestamptz default now()
);

-- Fast nearest-neighbor lookups for deduplication
create index on job_signals using ivfflat (embedding vector_cosine_ops) with (lists = 100);

-- Company-level rollups, computed whenever you read them
create view company_rollups as
select
  company,
  count(*) as open_roles,
  count(*) filter (where first_seen >= now() - interval '30 days') as roles_last_30d,
  count(distinct department) as departments,
  array_agg(distinct department) as department_mix,
  max(last_seen) as last_activity
from job_signals
group by company;
- Then input a few taxonomy rows so the analysis has something to classify against, edit these ones here to match what your team actually sells or tracks:
insert into signal_taxonomy (trigger, signal, relevant_to, suggested_action) values
('data or analytics engineer roles naming Snowflake, dbt, or Fivetran', 'building or modernizing the data stack', 'data tooling and reverse-ETL vendors', 'AE outreach within the hiring window'),
('a cluster of ML or MLOps roles at a company with no prior ML hiring', 'standing up an AI capability', 'ML infra and vector database vendors', 'flag for CI as a possible product pivot'),
('a first Head of or founding role for a function', 'a new function or business line', 'strategy and CI teams', 'note as a strategic signal'),
('a surge in sales or GTM roles in a new geography', 'market or geographic expansion', 'CI and investor watchlists', 'note as an expansion signal');
- Click the Connect button at the top of your project to open the connection panel.
- Open the Session pooler tab and copy its host (it looks like
aws-0-<region>.pooler.supabase.com), its port (5432), the database name (postgres), and the user (formatted aspostgres.<your-project-ref>). You'll also need the database password you set when you created the project.
This schema is the heart of the build. The job_signals table is both your readable dataset and vector store, since the embedding column lets you compare postings by meaning. The signal_taxonomy table lets you change what counts as a signal by editing rows rather than altering the workflow.
Phase 2: Set up your n8n cloud workspace
n8n provides a 2-week free trial for its cloud tier, after which your access will be revoked. The self-hosted option is completely free, but you’ll be responsible for your own server costs when you publish your workflow.
Step #1: Create your n8n cloud account
- Go to n8n.io and start a free cloud trial.
- Create your account and workspace. n8n hosts the instance for you at your own address.
- Create a new workflow to get a blank canvas.
Self-hosting gives you unlimited executions and full control of your data, which is the usual reason to run n8n in Docker. The cloud tier trades that for a setup you finish in minutes. Either way, you connect to n8n the same way, regardless of where it runs.
Step #2: Install the Apify node
You’ll need to install Apify as an official community node before you can use it on n8n. Here’s how to do that:
- In the left sidebar, open Settings, then Community Nodes.
- If you don’t see an install option, open the Admin Panel, enable the setting that allows verified community nodes, then return.
- Click Install, paste
@apify/n8n-nodes-apify - Accept the risk acknowledgment and install.

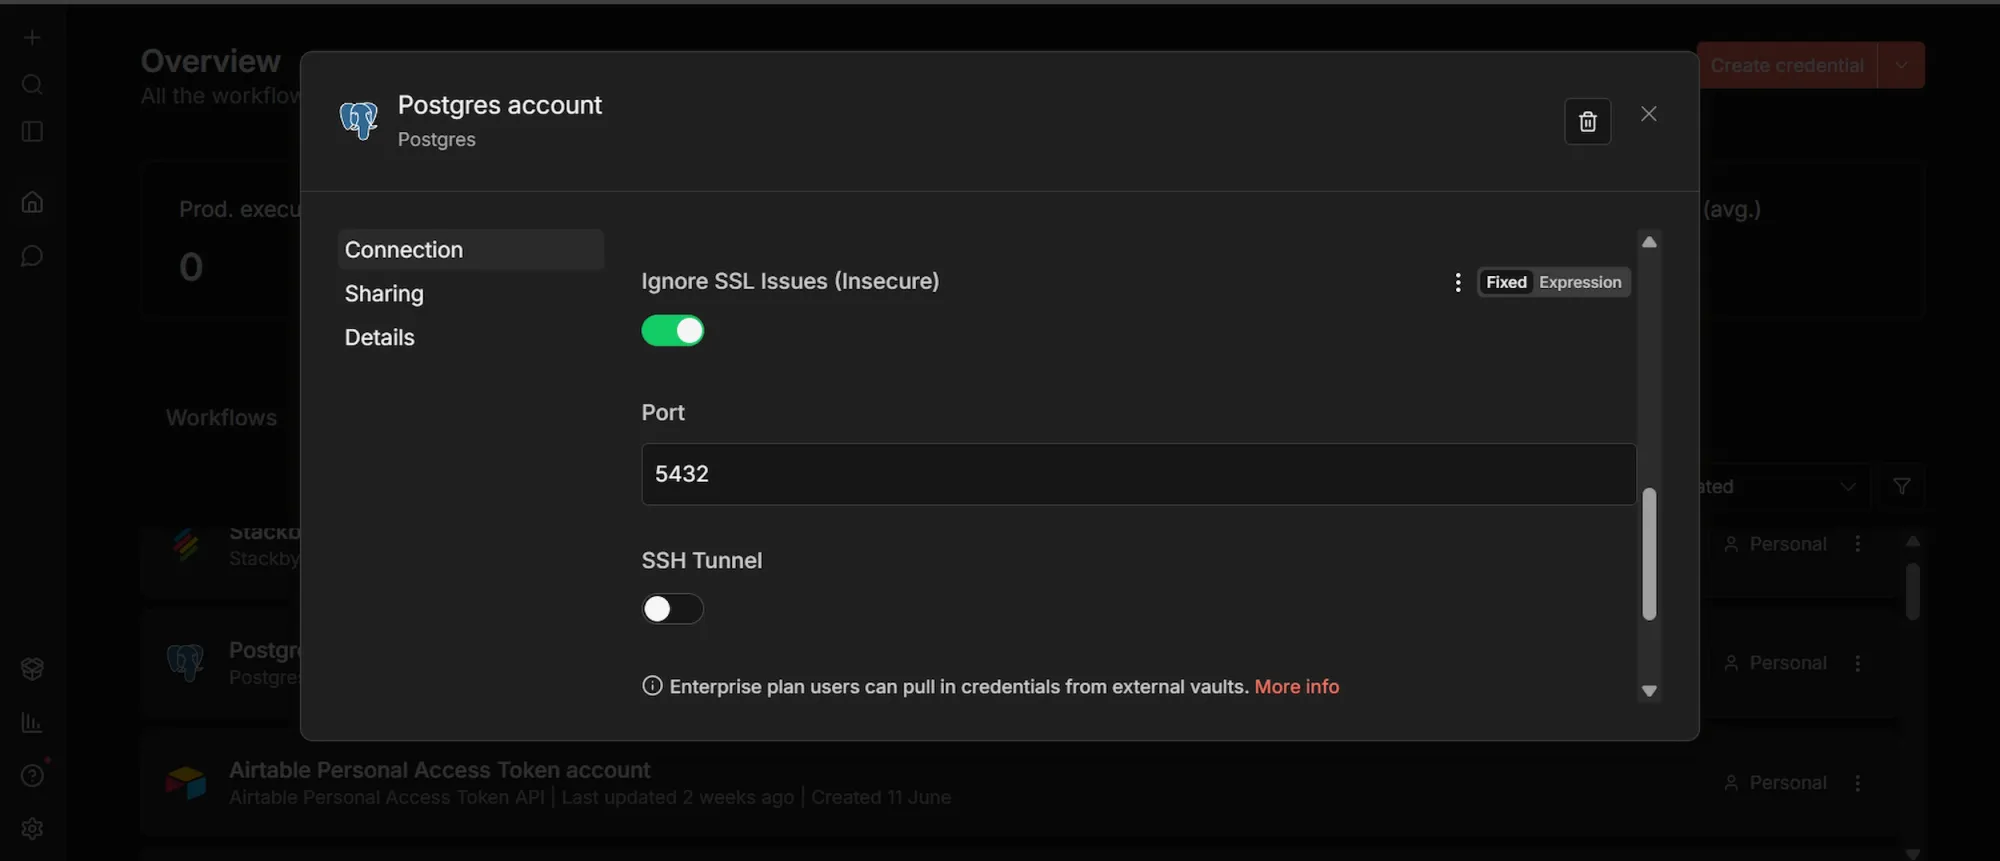
Step #3: Connect n8n to Supabase
- Click the + in the top-left sidebar, select Credentials, then Add Credential, and search for "Postgres".
- Enter the Session pooler values you copied from Supabase's Connect panel: Host (
aws-0-<region>.pooler.supabase.com), Databasepostgres, User (postgres.<your-project-ref>), your database Password, and Port5432. - Turn on Ignore SSL Issues (Insecure).
- Save the credential, then run the connection test to confirm it succeeds.
Supabase is Postgres under the hood, so the Postgres node is how n8n reads from and writes to it, including pgvector operations. Setting this up once means every database step in the workflow reuses the same connection.
Phase 3: Build the workflow
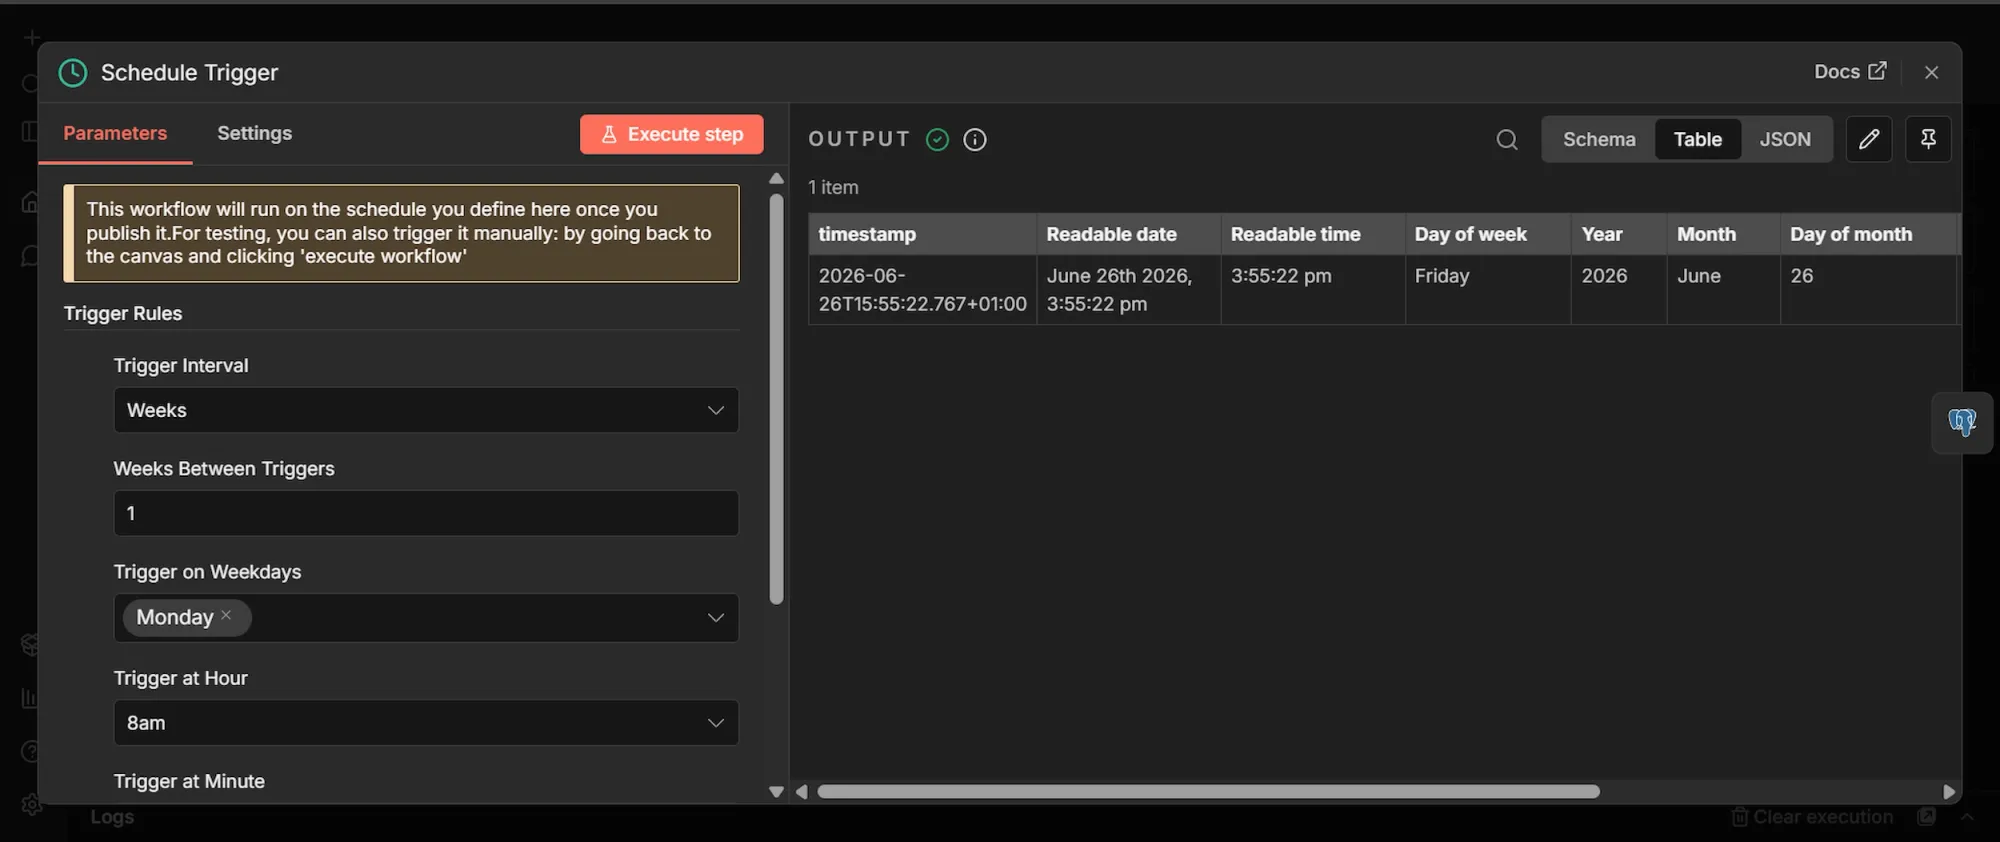
Step #1: Schedule Trigger node
- Click Add first step, search "Schedule Trigger," and select it.
- Set Trigger Interval to "Weeks," Weeks Between Triggers to 1, and pick a day and time.
Companies don’t post roles by the hour, so a weekly run captures the meaningful movement and keeps scraper costs predictable.
Step #2: Postgres node
- From the Schedule Trigger, add a node, search "Postgres," and add it.
- Double-click its title and rename it to Load taxonomy because you’ll add several more Postgres nodes later, and one references this node by name.
- Choose the Supabase credential, set the operation to "Execute a SQL query," and enter:
select trigger, signal, relevant_to, suggested_action from signal_taxonomy;
This pulls your signal guidelines from Supabase at the start of every run, ensuring the analysis step always uses the latest version. Because the taxonomy is in a table rather than being hardcoded in a prompt, you can change what counts as a signal without anyone editing the workflow, and the next run picks it up automatically.

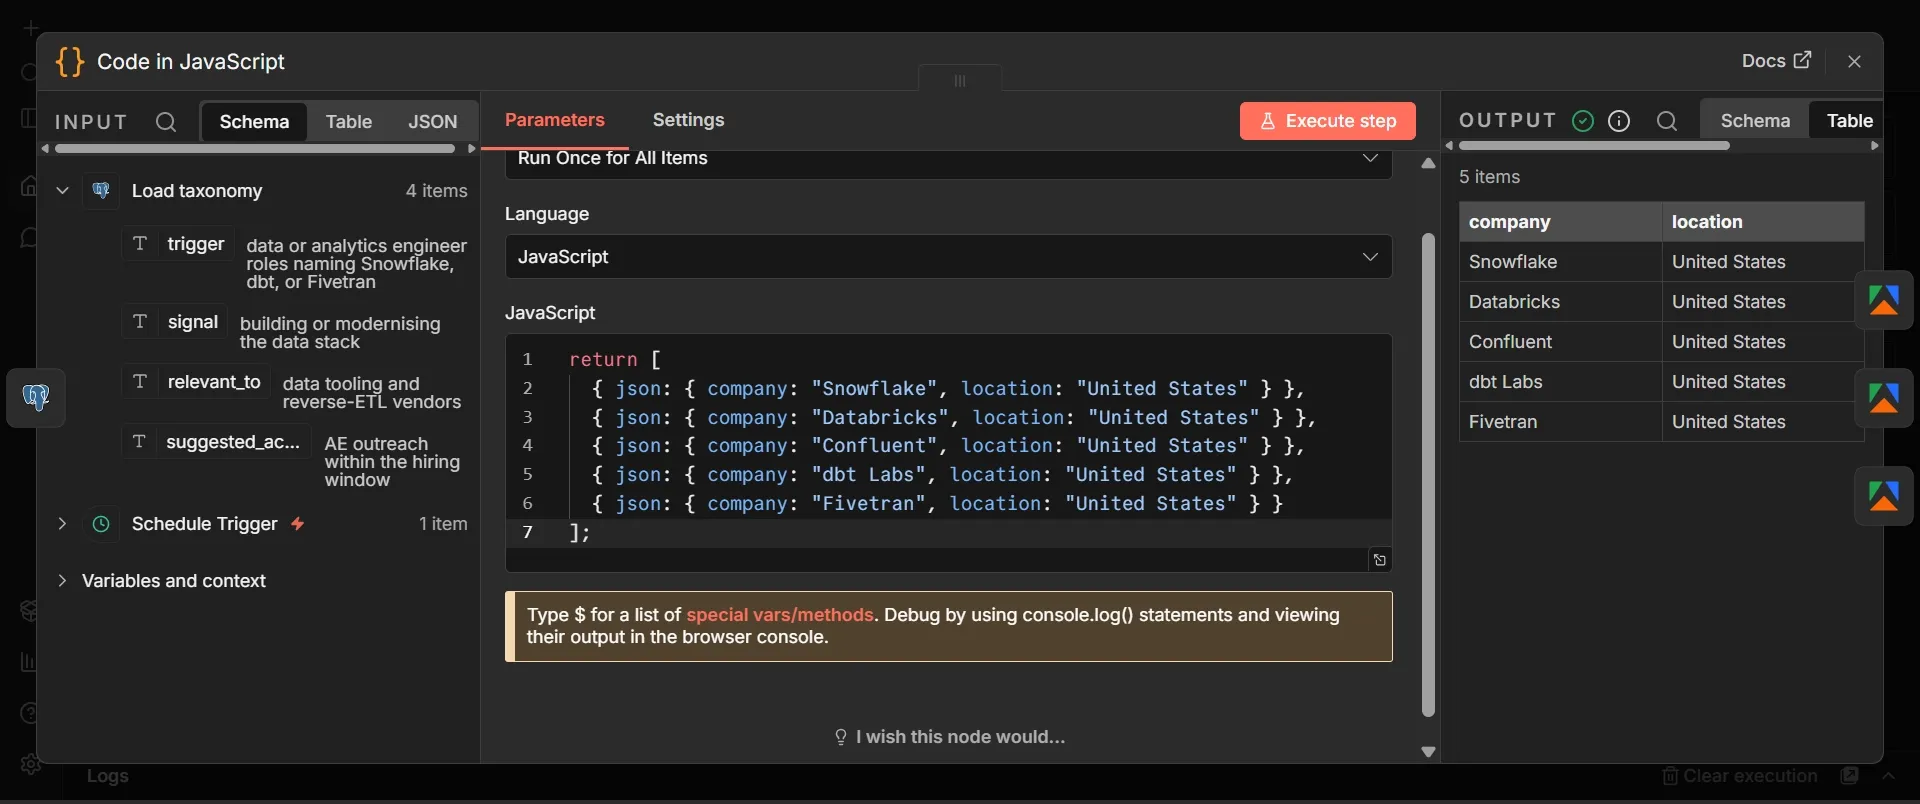
Step #3: Code node
- Add a Code node, set Mode to "Run Once for All Items" and Language to "JavaScript."
- Paste this watchlist, or edit based on your actual competitors:
return [
  { json: { company: "Snowflake", location: "United States" } },
  { json: { company: "Databricks", location: "United States" } },
  { json: { company: "Confluent", location: "United States" } },
  { json: { company: "dbt Labs", location: "United States" } },
  { json: { company: "Fivetran", location: "United States" } }
];
This tutorial uses three Actors and runs each against each company in turn, so adding or removing a competitor requires only one line. Keep the list focused, because every company multiplies the number of postings you scrape, embed, and analyze, which is the main determinant of cost.
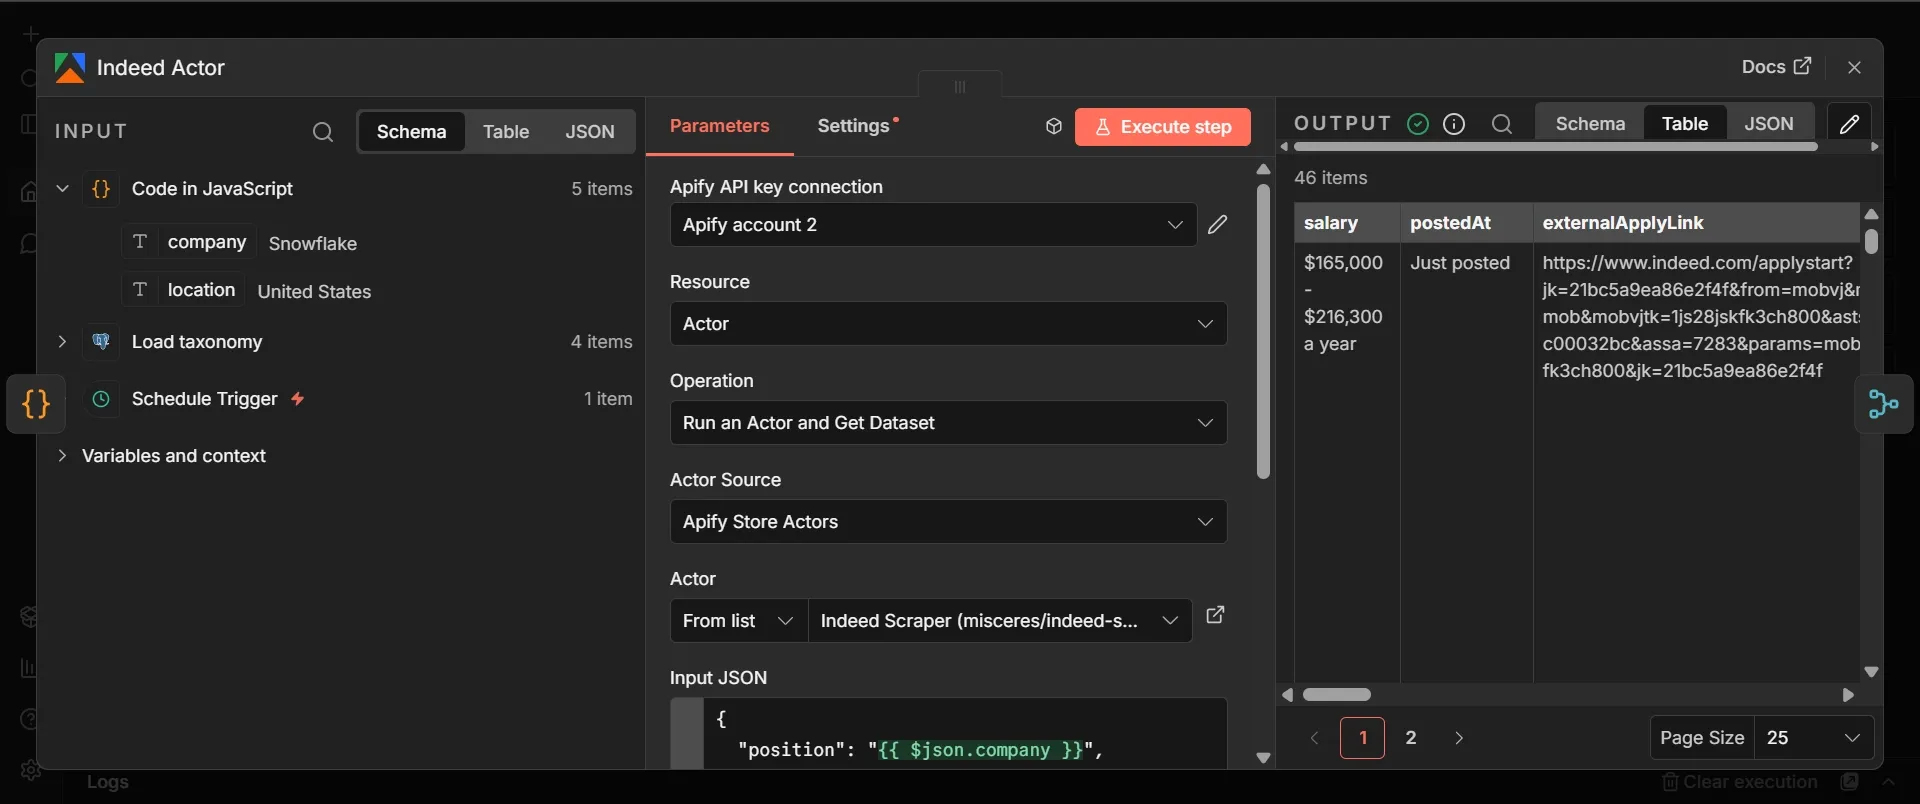
Step #4: Apify node for Indeed
- From the Code node that contains your watchlist, click the + on its output, search for "Apify," choose the "Run an Actor and get dataset" operation, and add it. Rename it to Indeed Actor.
- Create an Apify credential and paste your token, or on the cloud tier, choose the Apify OAuth2 option and connect your account.
- Under Actor, select the misceres Indeed scraper from Apify Store, or Apify's own Indeed Scraper if you prefer a maintained option.
- In Input JSON, paste this, confirming the exact field names against the Actor's input page:
{
  "position": "{{ $json.company }}",
  "country": "US",
  "maxItems": 10
}
This node searches Indeed for each company's open roles and returns them as structured job posting data. The country field is required and takes a two-letter country code, such as US or GB, not a full country name, so the scraper knows which Indeed domain to search; you can add an optional location field for a specific city, but the country alone is enough.
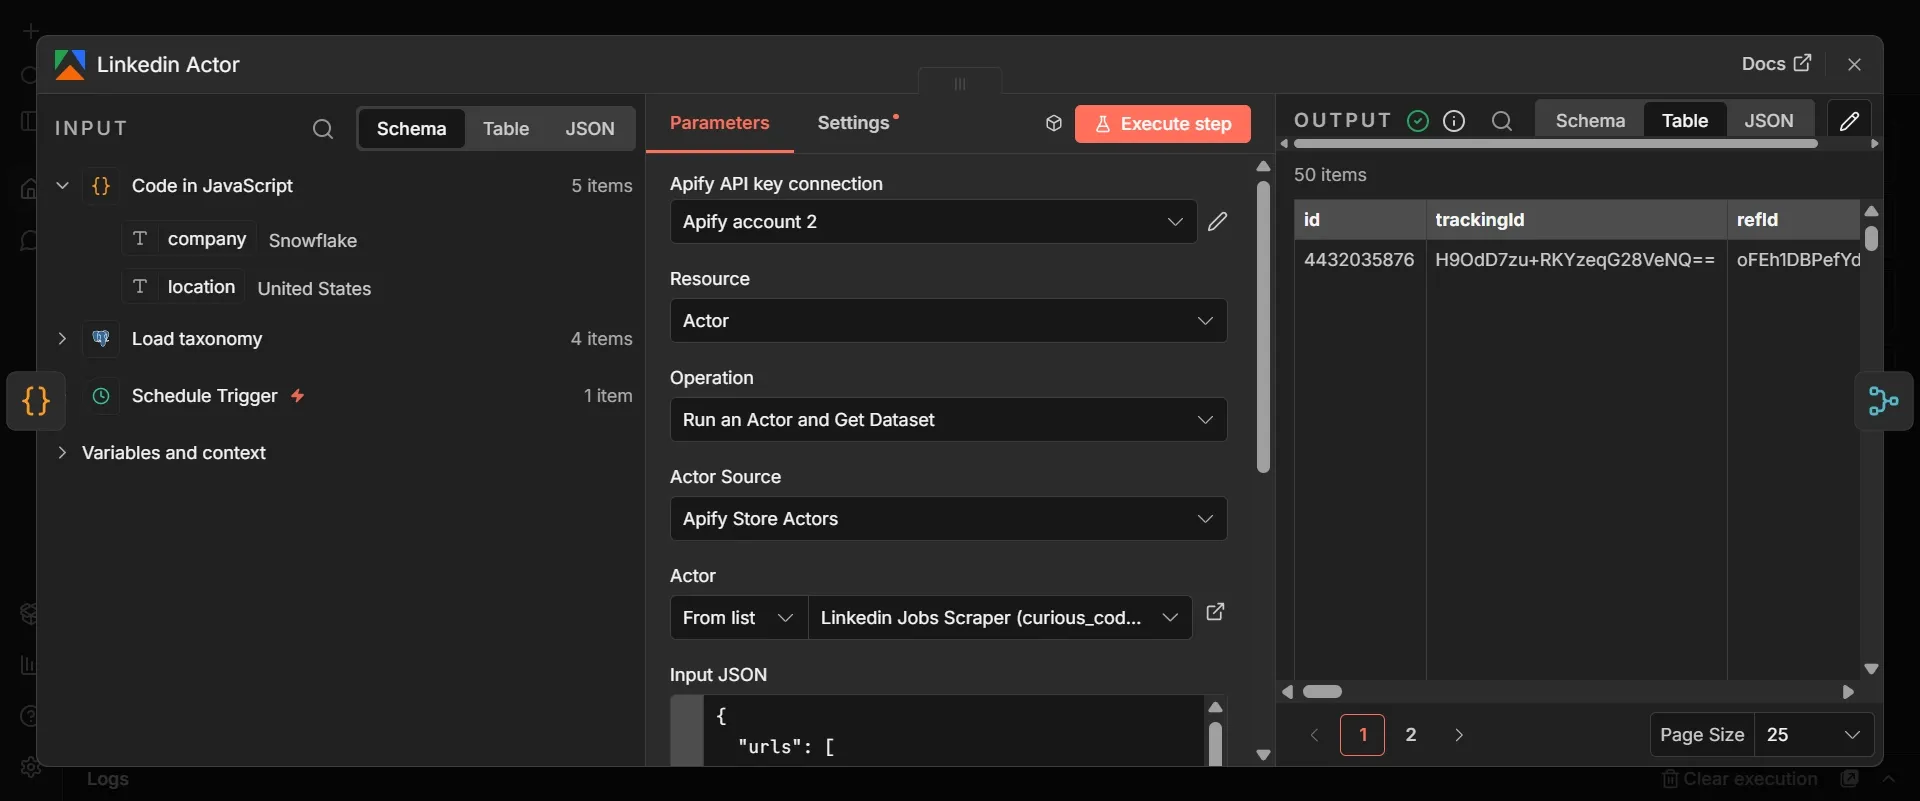
Step #5: Apify node for LinkedIn
- Going back to the same Code (watchlist) node, click the + on its output again to start a second parallel branch, add another Apify node the same way, and select the curious_coder LinkedIn jobs scraper from Apify Store. Rename it to LinkedIn Actor.
- In Input JSON, paste this:
{
  "urls": [
    "https://www.linkedin.com/jobs/search/?keywords={{ encodeURIComponent($json.company) }}&location={{ encodeURIComponent($json.location) }}"
  ],
  "count": 10,
  "scrapeCompany": true
}
This Actor doesn’t take a plain search term; instead, it takes a list of LinkedIn job-search URLs, so you build one URL per company by dropping the watchlist's company and location into LinkedIn's own search URL. The encodeURIComponent(...) wrapping is what turns a company like "dbt Labs" or a location with a space into a valid URL instead of breaking it.
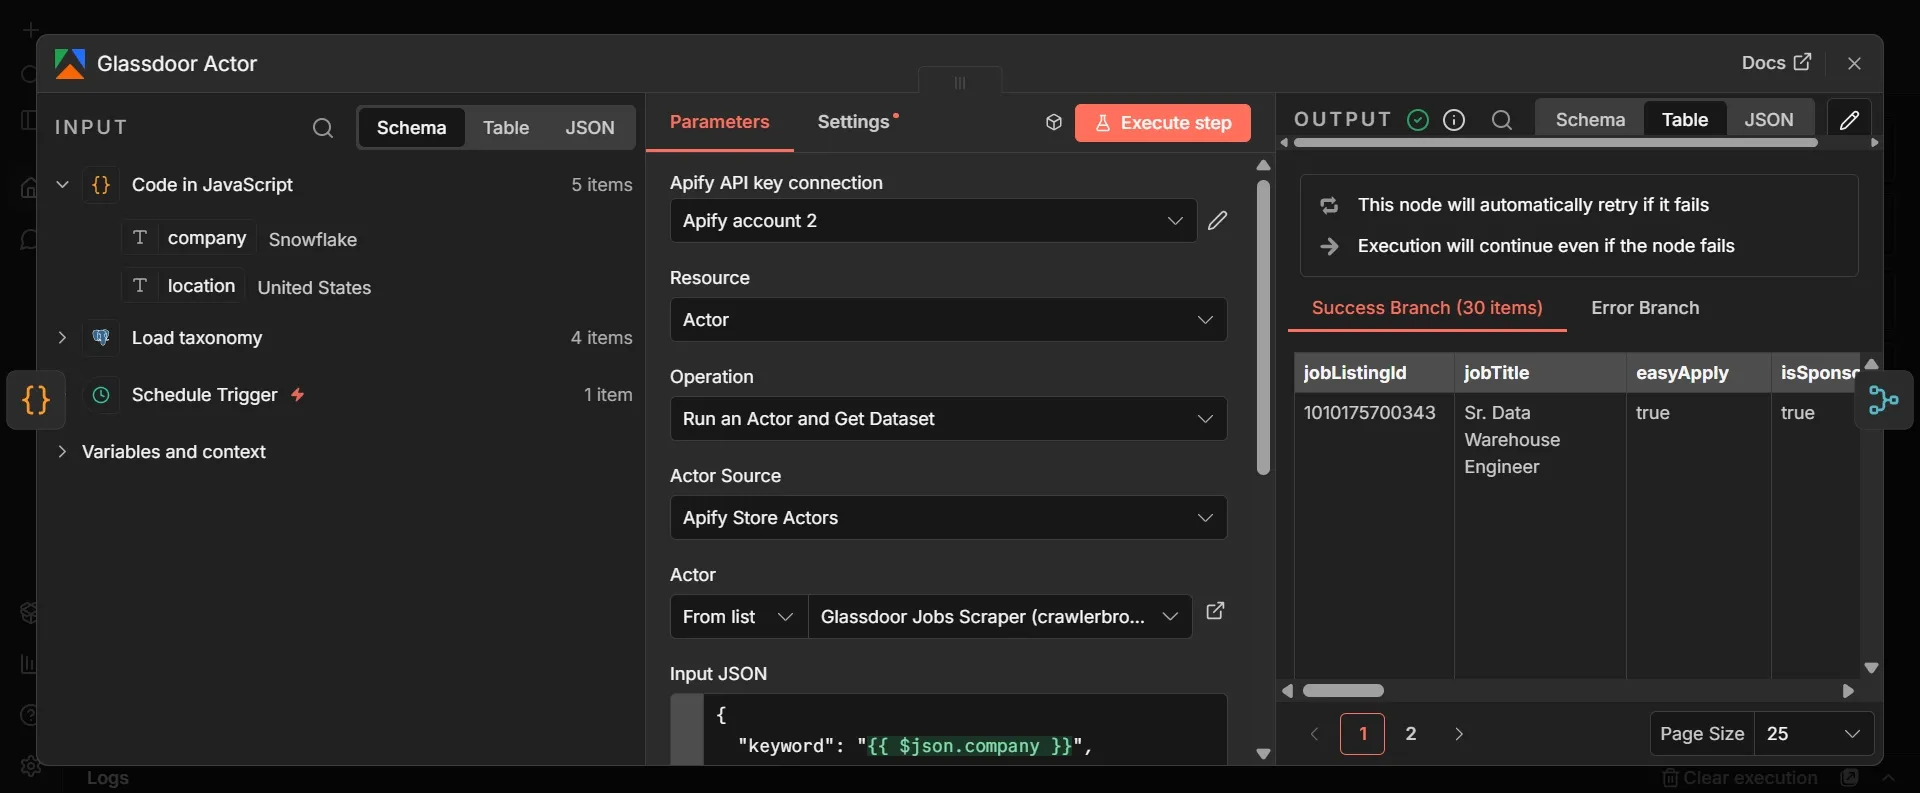
Step #6: Apify node for Glassdoor
- From the Code (watchlist) node, click the + once more to create a third parallel branch, add an Apify node, and select the Glassdoor jobs scraper from Apify Store. Rename it to Glassdoor Actor.
- In Input JSON, paste this:
{
  "keyword": "{{ $json.company }}",
  "location": "{{ $json.location }}",
  "maxItems": 10
}
- Open the node's Settings tab and turn on Retry On Fail, setting Max Tries to 2 or 3 and Wait Between Tries to 5000 ms. In the same tab, set On Error to Continue (using error output).
Glassdoor is the hardest of the three job boards to scrape. That’s why this node gets the extra settings: Retry On Fail rides out a transient block by trying again after a pause, and "Continue (using error output)", which means that if Glassdoor still fails, the workflow doesn’t stop; it just carries on with Indeed and LinkedIn.
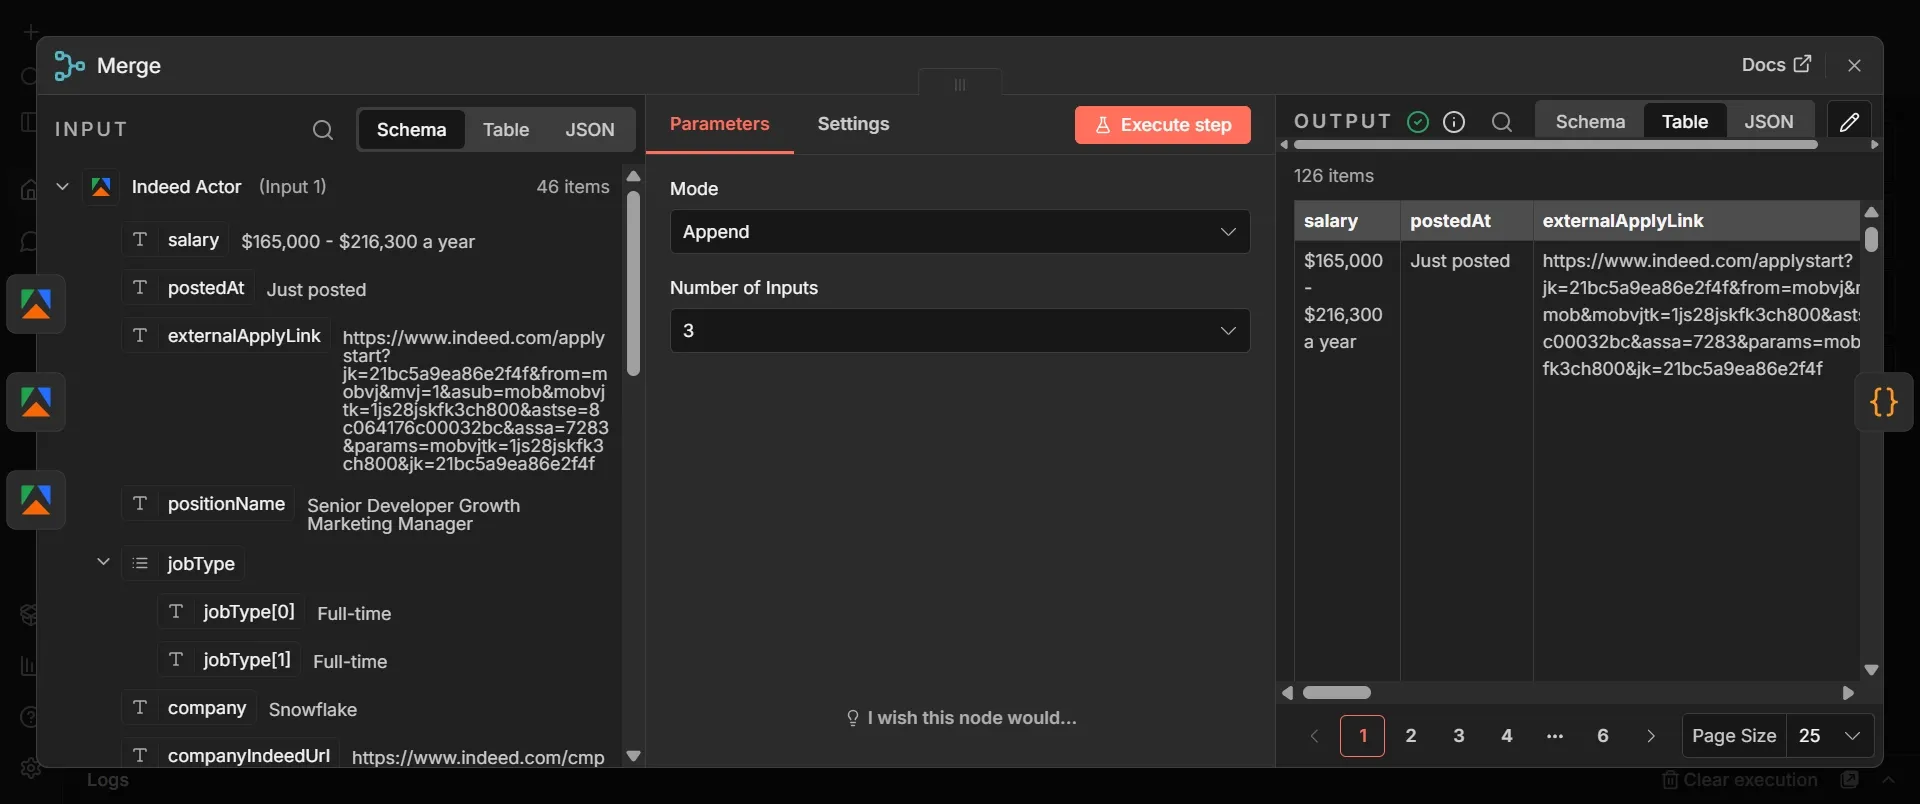
Step #7: Merge node
Merge node collapses the three separate streams of postings into a single list, so the rest of the pipeline only has to handle a single stream:
- Add a node, search "Merge," and add it.
- Set its mode to Append, and set Number of Inputs to 3.
- Connect the Indeed Actor output to Input 1, the LinkedIn Actor output to Input 2, and the Glassdoor Actor output to Input 3. For Glassdoor specifically, connect its Success output, not its error output, and leave the error output unconnected.
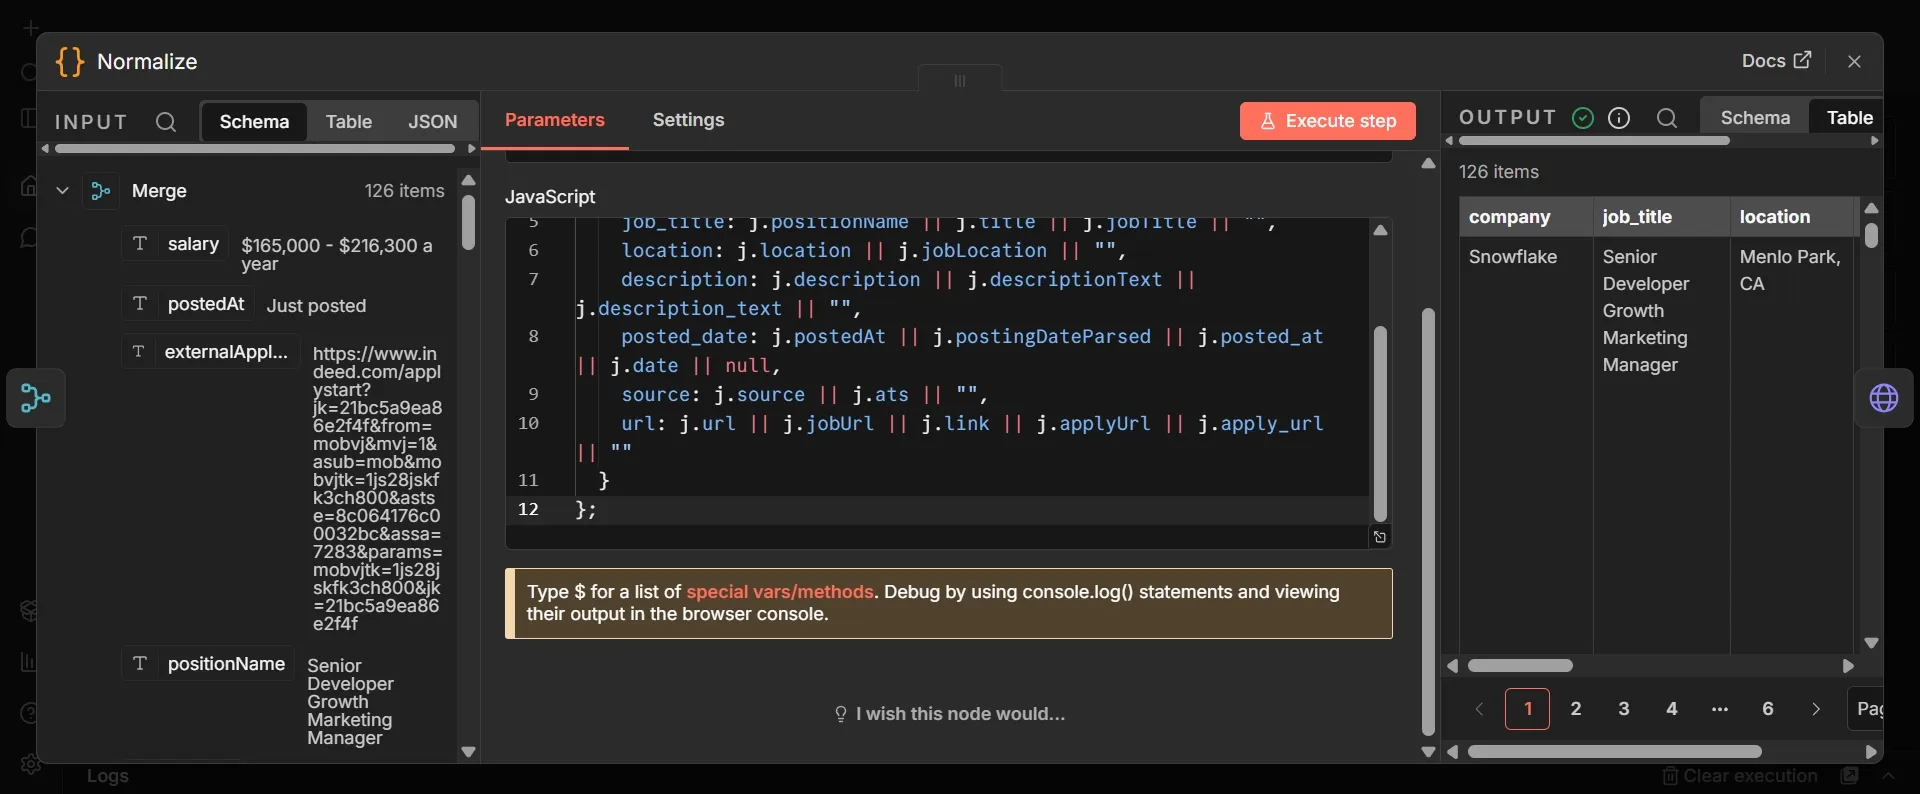
Step #8: Code node to normalize
- From the Merge node's output, click +, search "Code", and add it. Double-click its title and rename it to Normalize.
- Set Mode to "Run Once for Each Item" and Language to "JavaScript".
- Delete the sample code and paste this:
const j = $json;
return {
  json: {
    company: j.company || j.companyName || "",
    job_title: j.positionName || j.title || j.jobTitle || "",
    location: j.location || j.jobLocation || "",
    description: j.description || j.descriptionText || "",
    posted_date: j.postedAt || j.postingDateParsed || j.date || null,
    source: j.source || "",
    url: j.url || j.jobUrl || j.link || j.applyUrl || j.externalApplyLink || ""
  }
};
Your scrapers each return a different shape, and this node flattens them into a single record so everything downstream only needs to understand a single set of field names. The schema maps directly to the Actors' JSON outputs.
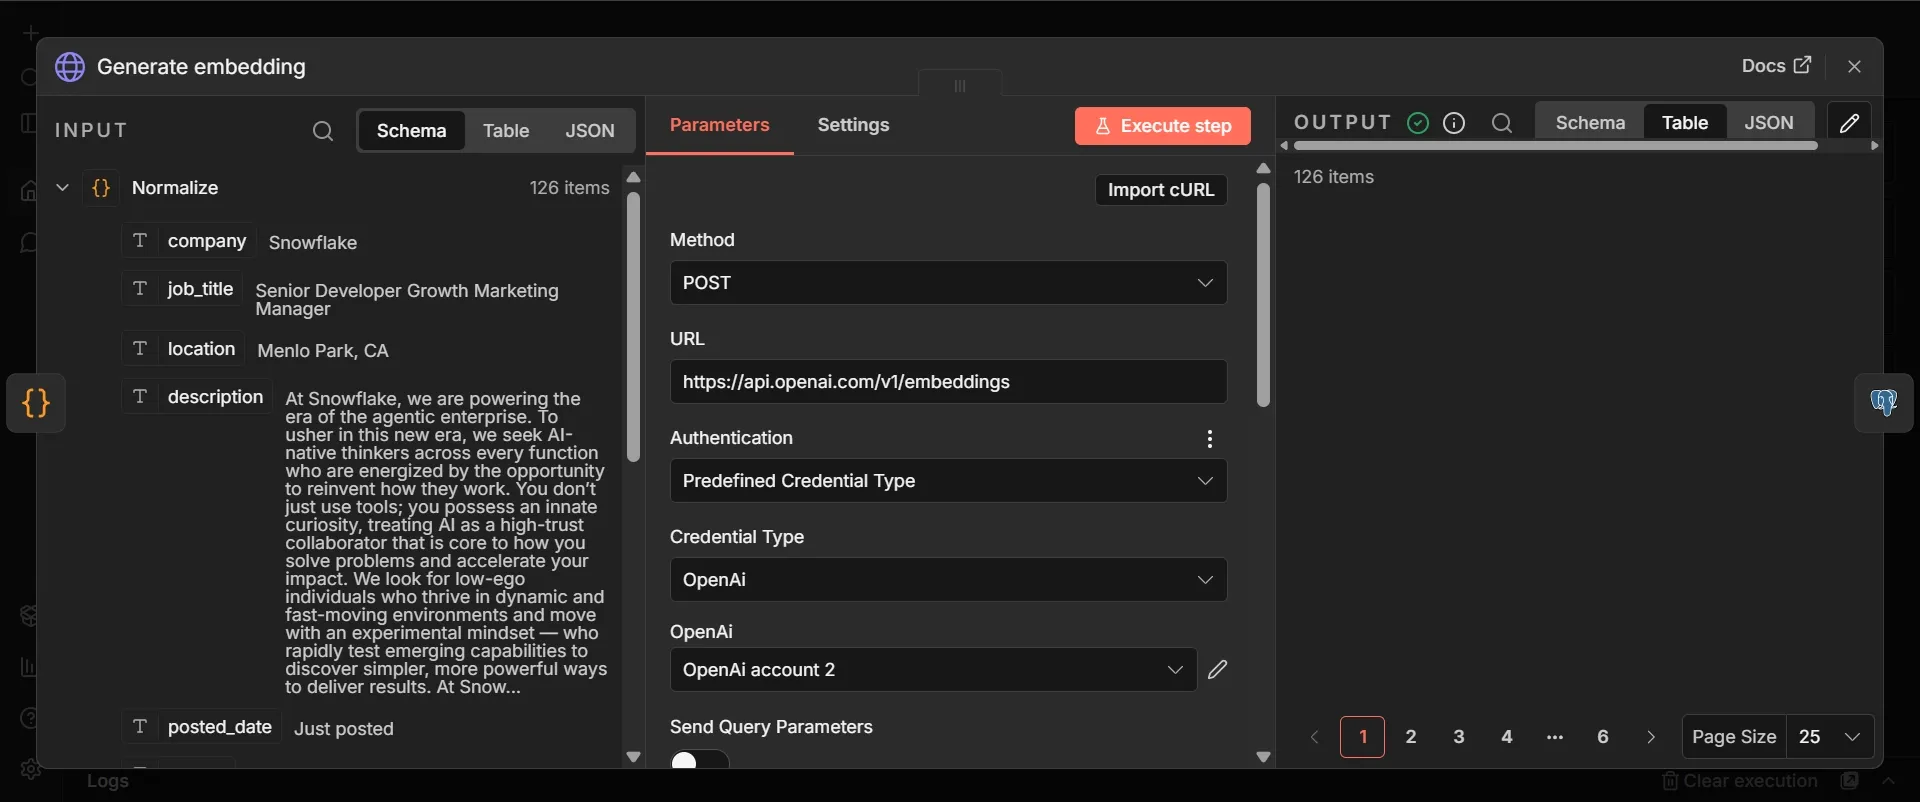
Step #9: HTTP Request node to generate an embedding
- From Normalize, click +, search for "HTTP Request", add it, and rename it to "Generate embedding".
- Set Method to "POST".
- Set URL to
https://api.openai.com/v1/embeddings. - Set Authentication to "Predefined Credential Type", then set Credential Type to "OpenAI".
- Click Create new credential, paste the OpenAI API key you made in Phase 1, and save.
- Turn on Send Body. Set Body Content Type to "JSON" and Specify Body to "Using JSON".
- In the JSON field, click the Expression toggle in its top-right corner so the field is in expression mode, then paste this:
{{ JSON.stringify({ model: "text-embedding-3-small", input: ($json.job_title + " " + ($json.description || "")).slice(0, 800) }) }}
The expression converts each posting into a list of numbers that capture its meaning, allowing the pipeline to recognize the same role across platforms even when the wording differs.
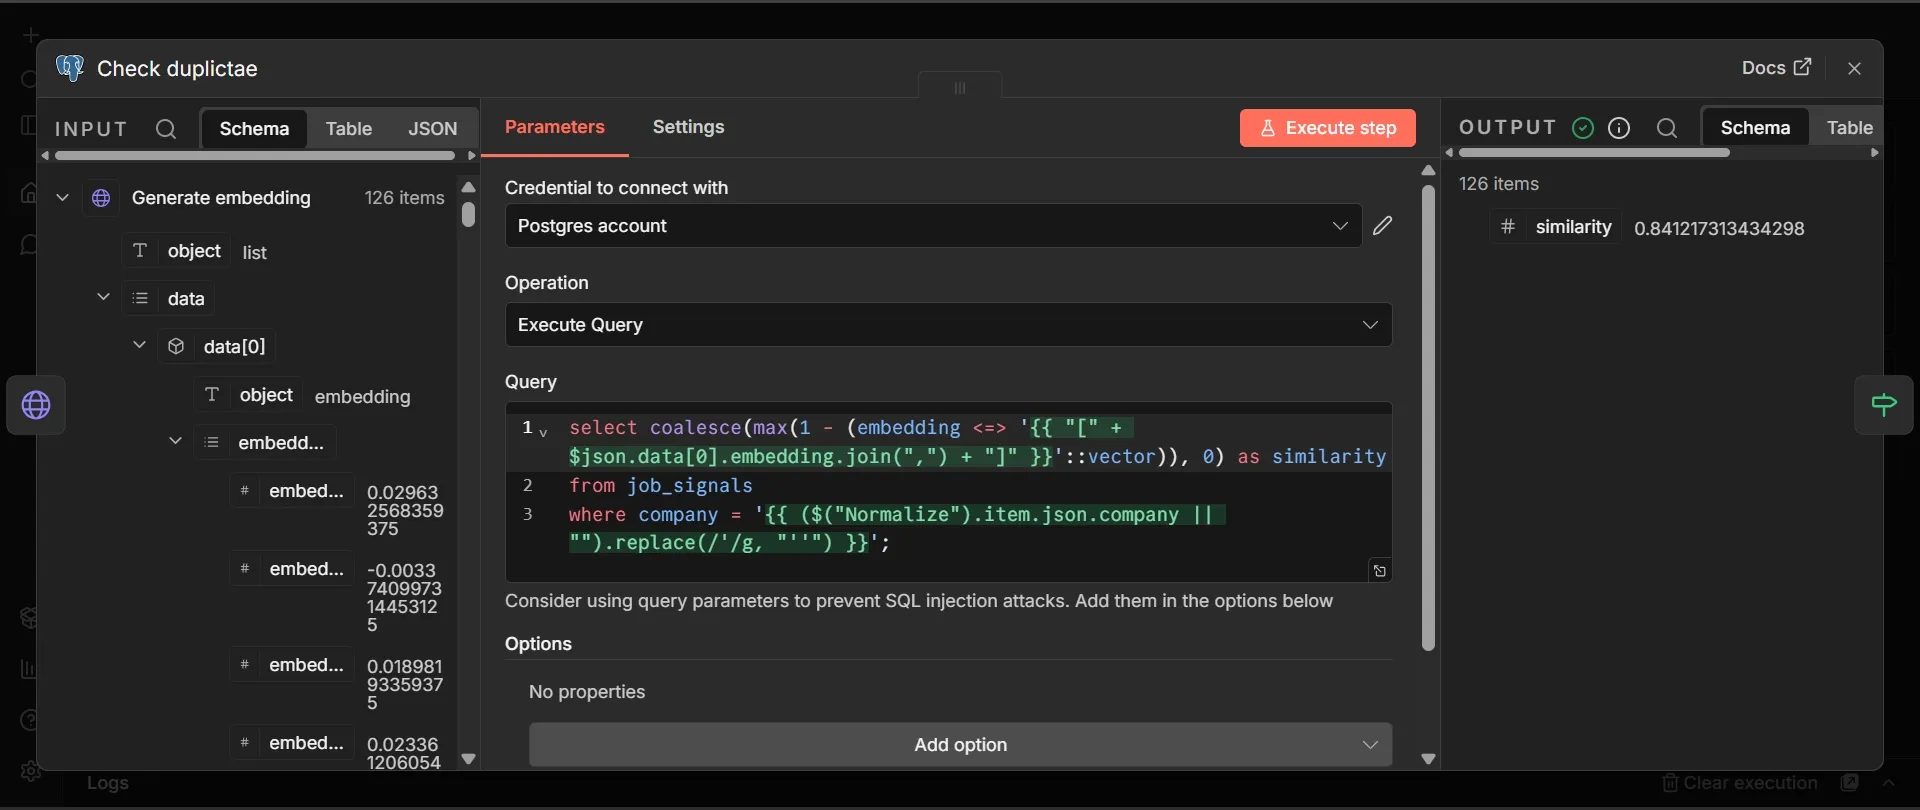
Step #10: Postgres node
- From Generate embedding, add a Postgres node and choose your Supabase credential. Rename it to Check duplicate.
- Set the operation to "Execute a SQL query".
- Paste this into the Query field exactly as written, including both expressions in double curly braces:
select coalesce(max(1 - (embedding <=> '{{ "[" + $json.data[0].embedding.join(",") + "]" }}'::vector)), 0) as similarity
from job_signals
where company = '{{ ($("Normalize").item.json.company || "").replace(/'/g, "''") }}';
You don’t need to fill in any separate query-parameter fields, because both values are built inside the query. The first expression converts the embedding into the bracketed list that pgvector expects, and the second inserts the company name, doubling any apostrophes so a name like O'Reilly doesn’t break the query.
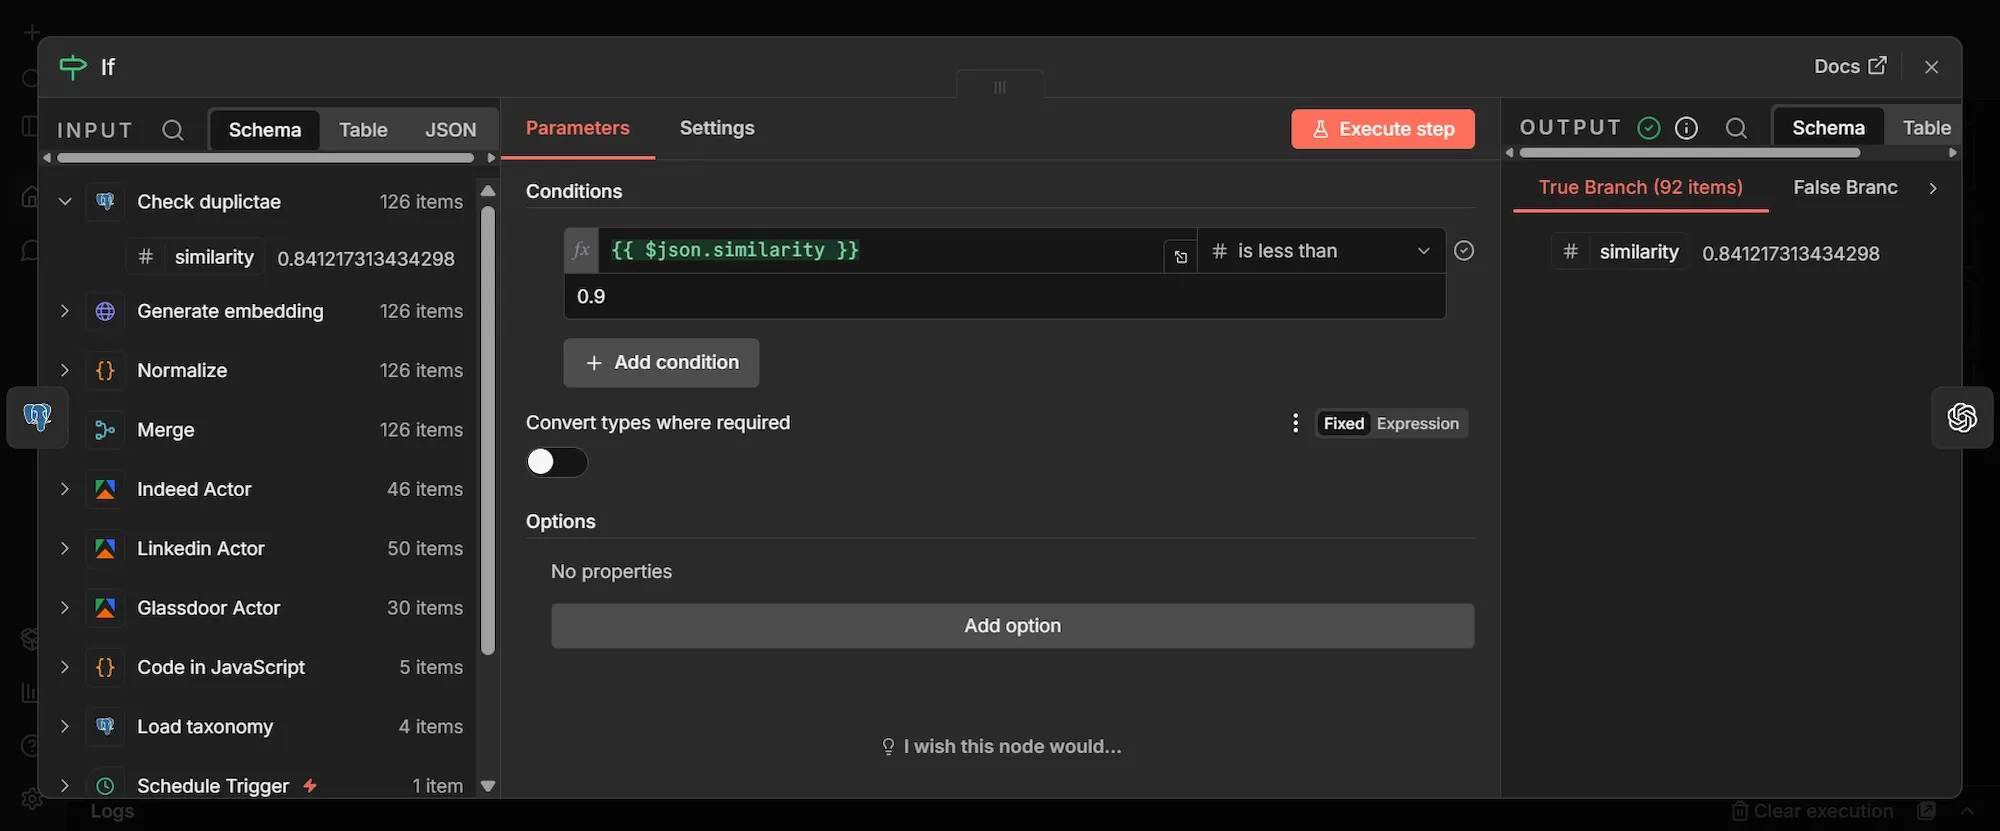
Step #11: If node
- From Check duplicate, click +, search "If", and add it.
- Under Conditions, click the first value field, switch it to expression mode, and enter
{{ $json.similarity }}. - Set the data type to "Number" and the operator to "is less than".
- Set the second value to
0.9.
The node now has two outputs. Everything scoring below 0.9 leaves the true output as a genuinely new posting and continues down the workflow; everything at or above 0.9 leaves the false output as a duplicate and goes nowhere, so you don’t analyze or store the same role twice.
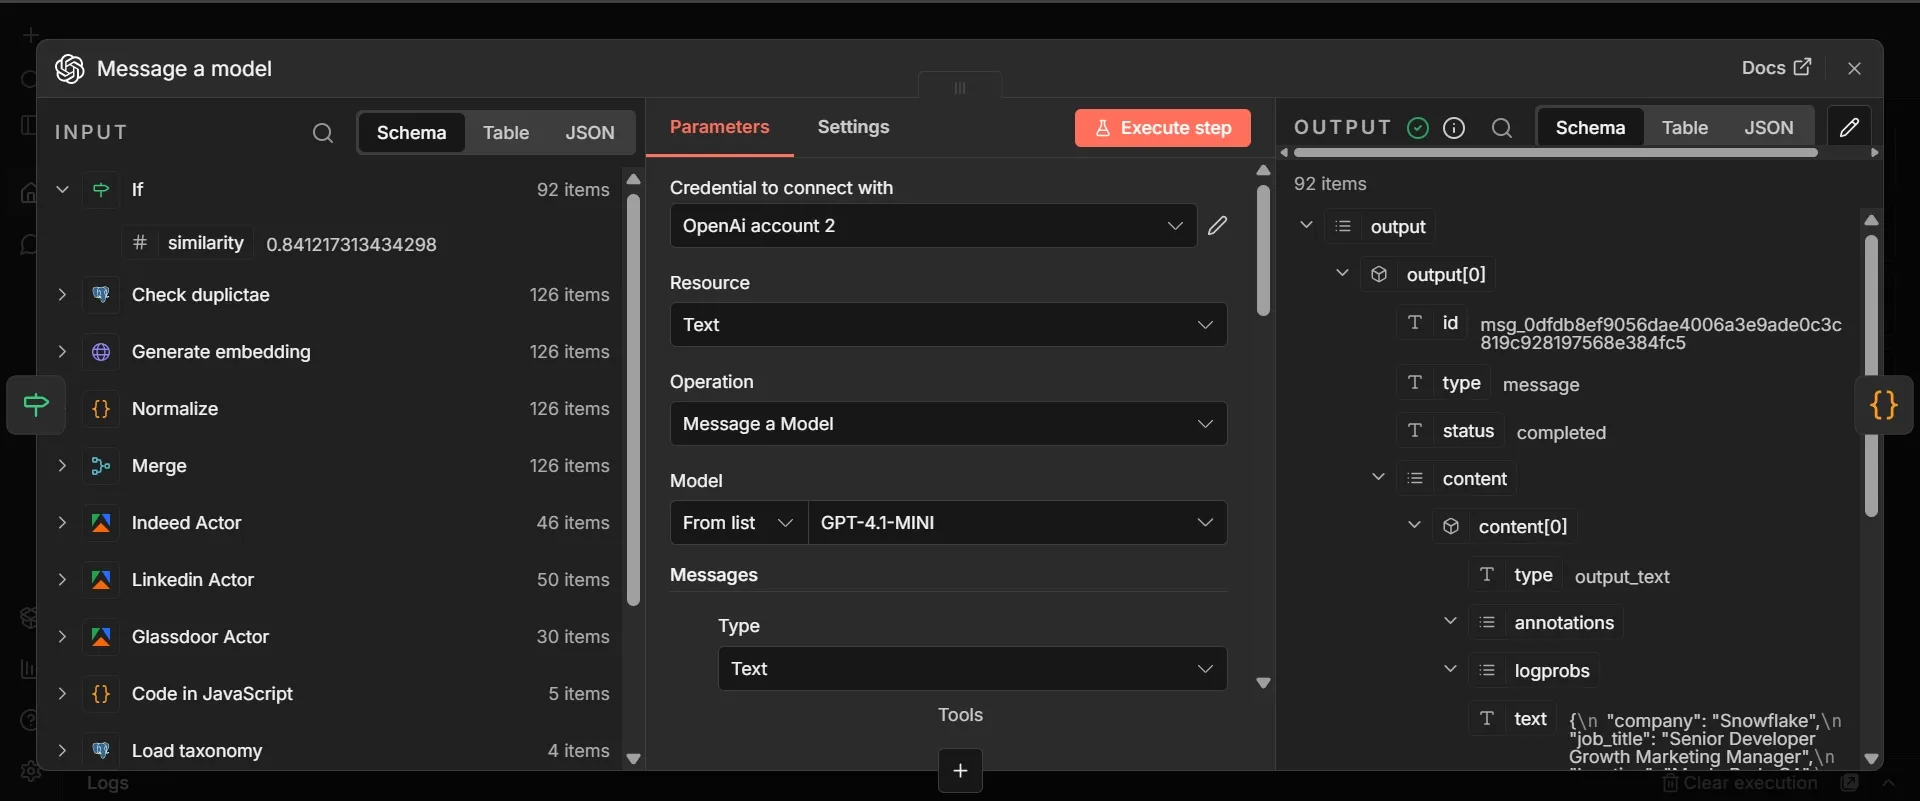
Step #12: OpenAI node to extract signals
- From the If node's true output, click +, search "OpenAI", choose the "Message a Model" action, and add it.
- Select the OpenAI credential you created in Step 9 (no need to make a new one). Under Model, choose
gpt-4.1-mini. - Find the Messages section. Click Add Message, set its Role to "System", and paste:
You are a competitive intelligence analyst. You read a single job posting and extract structured signals about the company that posted it, classifying it against a provided taxonomy of competitive signals. Only use information explicitly present in the posting. If a field is unknown, use null. Return one valid JSON object and nothing else, with no markdown and no commentary.
- Click Add Message again, set its Role to "User", and paste:
Signal taxonomy to classify against:
{{ JSON.stringify($('Load taxonomy').all().map(r => r.json)) }}

Here is one job posting as JSON:
{{ JSON.stringify($('Normalize').item.json) }}

Return a JSON object with exactly these fields:
- company: the hiring company
- job_title: the role title
- location: where the role is based
- seniority: one of junior, mid, senior, lead, executive, or unknown
- department: for example engineering, data, sales, marketing, product, or operations
- technologies: an array of tools or platforms named in the posting, only those explicitly mentioned
- signal_type: the closest matching signal from the taxonomy, or "routine backfill" or "unclear" if none fits
- signal_summary: one sentence on what this posting suggests about the company's direction
- posted_date: the date the role was posted, if available
- source: copy the source field from the posting
- url: the link to the posting
This node acts as the brain of the pipeline. It reads each new posting and classifies it against the taxonomy you loaded in Step 2. The first expression pulls every taxonomy row from your Load taxonomy node (the reason you renamed it, since plain Postgres would now be ambiguous) and hands it to the model; the second hands over the current posting. Passing the whole posting as JSON means you don't have to track field names. The instruction to use only what's present matters too: without it, the model invents a tech stack that was never in the posting, and an invented signal is worse than none.
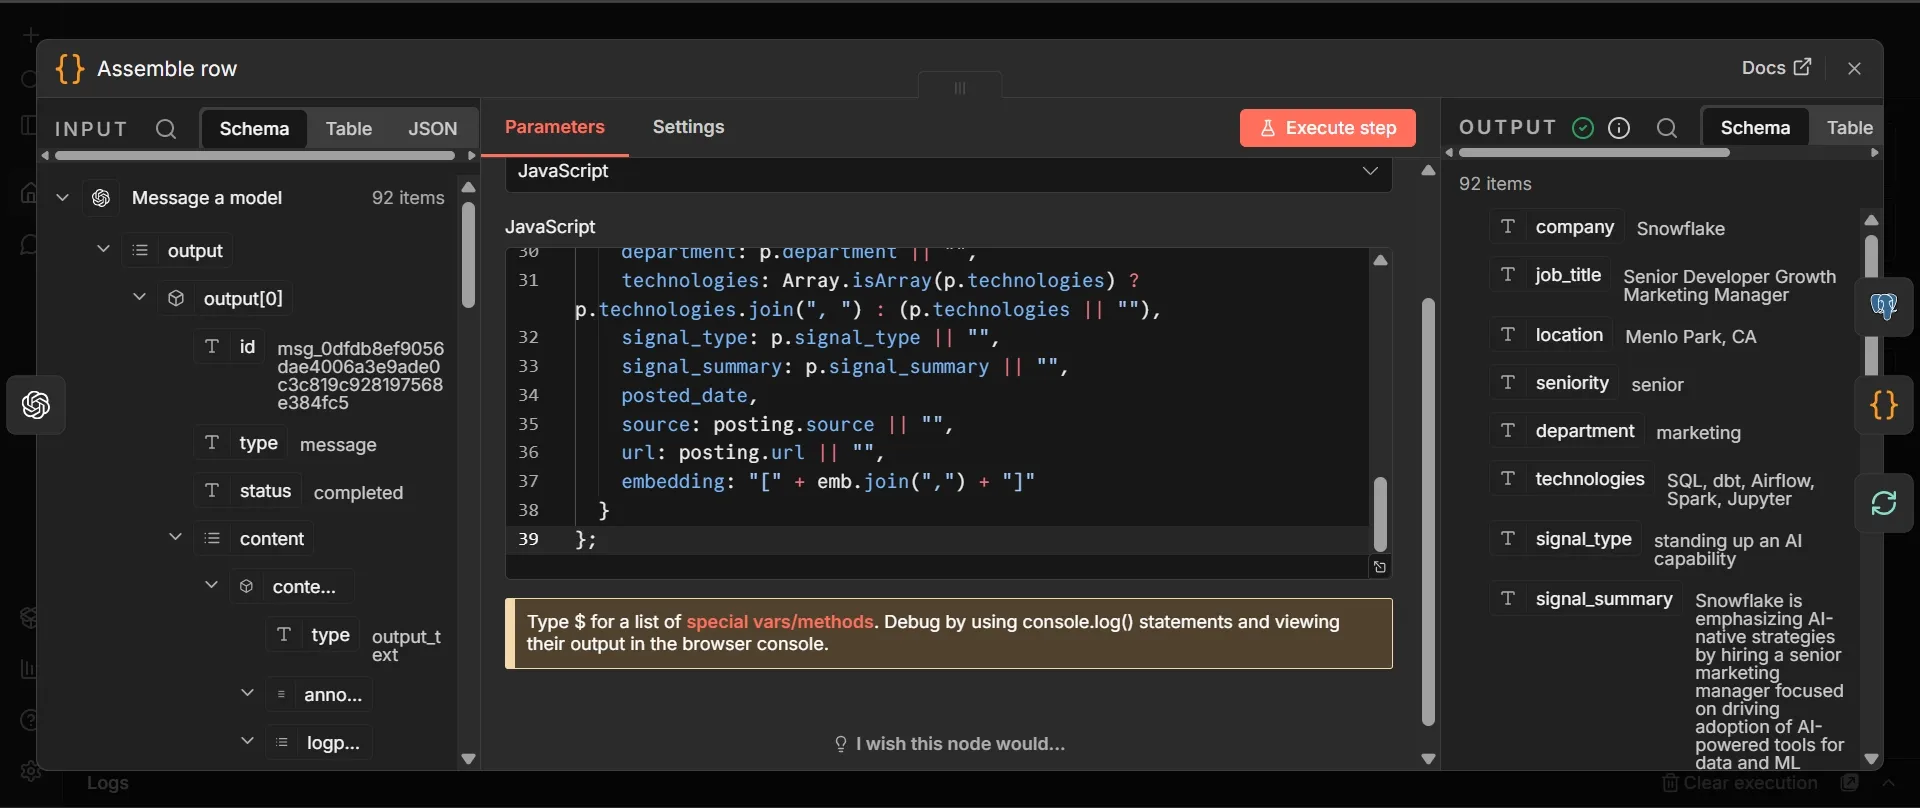
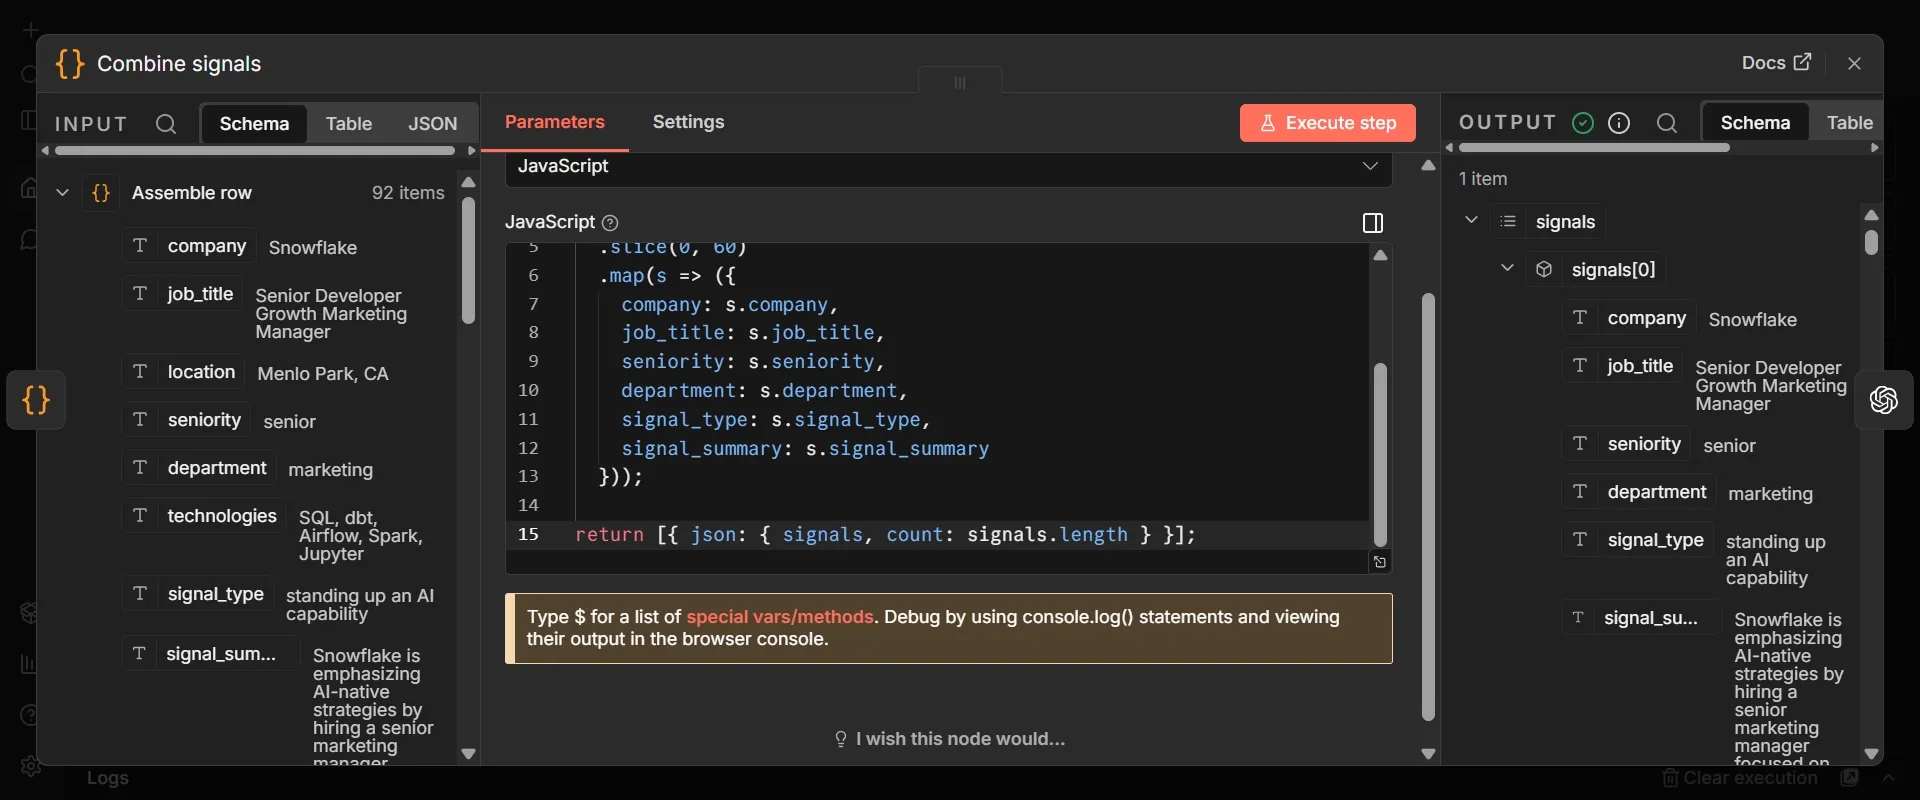
Step #13: Code node to assemble the row
- From the OpenAI node, click +, add a Code node, and rename it to Assemble row.
- Set Mode to "Run Once for Each Item" and Language to "JavaScript".
- Paste this:
const raw =
  $json.output?.[0]?.content?.[0]?.text
  ?? $json.message?.content
  ?? $json.content
  ?? $json.text
  ?? "";

let p;
try {
  p = JSON.parse(raw);
} catch (e) {
  return null; // drops anything the model didn't return as clean JSON
}

const posting = $('Normalize').item.json;
const emb = $('Generate embedding').item.json.data?.[0]?.embedding ?? [];

// turns the date into YYYY-MM-DD or null so the date column never errors
const rawDate = p.posted_date || posting.posted_date;
const posted_date =
  rawDate && !isNaN(Date.parse(rawDate))
    ? new Date(rawDate).toISOString().slice(0, 10)
    : null;

return {
  json: {
    company: p.company || posting.company || "",
    job_title: p.job_title || posting.job_title || "",
    location: p.location || posting.location || "",
    seniority: p.seniority || "",
    department: p.department || "",
    technologies: Array.isArray(p.technologies) ? p.technologies.join(", ") : (p.technologies || ""),
    signal_type: p.signal_type || "",
    signal_summary: p.signal_summary || "",
    posted_date,
    source: posting.source || "",
    url: posting.url || "",
    embedding: "[" + emb.join(",") + "]"
  }
};
This translates the model's text answer into a tidy record whose keys align with your database columns, pulling the original posting and its embedding back in by referencing the Normalize and Generate embedding nodes by name.
Step #14: Postgres node to store the posting
- From Assemble row, add a Postgres node, choose your Supabase credential, and rename it to Save signal.
- Set the operation to "Insert or update rows in a table".
- Set Schema to "public" and Table to "job_signals".
- Set Mapping Column Mode to "Map Automatically".
- Set the column to match on “url”.
This node writes each new posting, with its embedding, into your store. Matching on url means an identical posting that returns later updates the existing row rather than creating a second one.

Step #15: Prepare a Stackby table
- In Stackby, open or create a stack, and in your table, create columns named exactly
company,job_title,location,seniority,department,signal_typeandsignal_summary, each set to the text type. - Rename the default starter columns or add new ones as needed, and delete any you do not use.
- Click the user icon, open Account, go to the API section, click Create API key, then copy it.
Stackby gives you what Supabase doesn't: a shareable, editable workspace with competitor analysis templates where each signal is a row that your non-technical teammates can read, filter, annotate, and visualize with charts without touching SQL or the database.
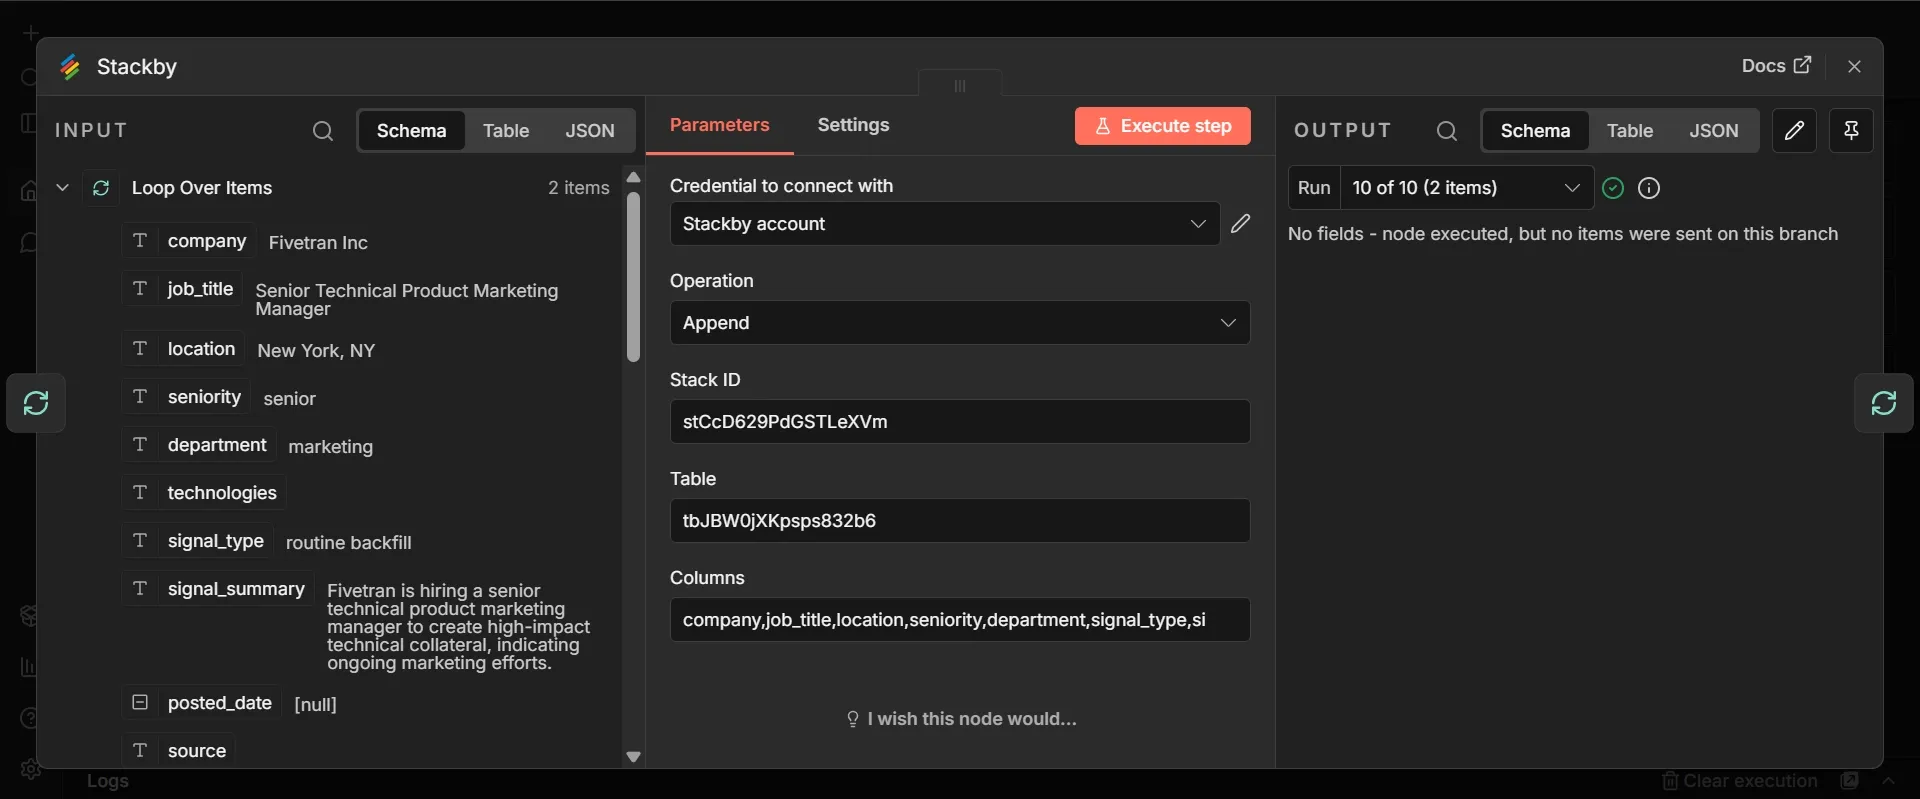
Step #16: Add the Stackby node to sync each signal
- Back on the n8n canvas, go to the Assemble row node from Step 13 and click the + on its output to start another branch off it.
- Create a Stackby credential with the API key from the previous step, and save it.
- Set Operation to "Append".
- Enter your Stack ID from its URL and the Table name:
https://stackby.com/stack/<stack_id>/<table_name> - In the Columns field, list your column names separated by commas, with no expressions:
company,job_title,location,seniority,department,signal_type,signal_summary
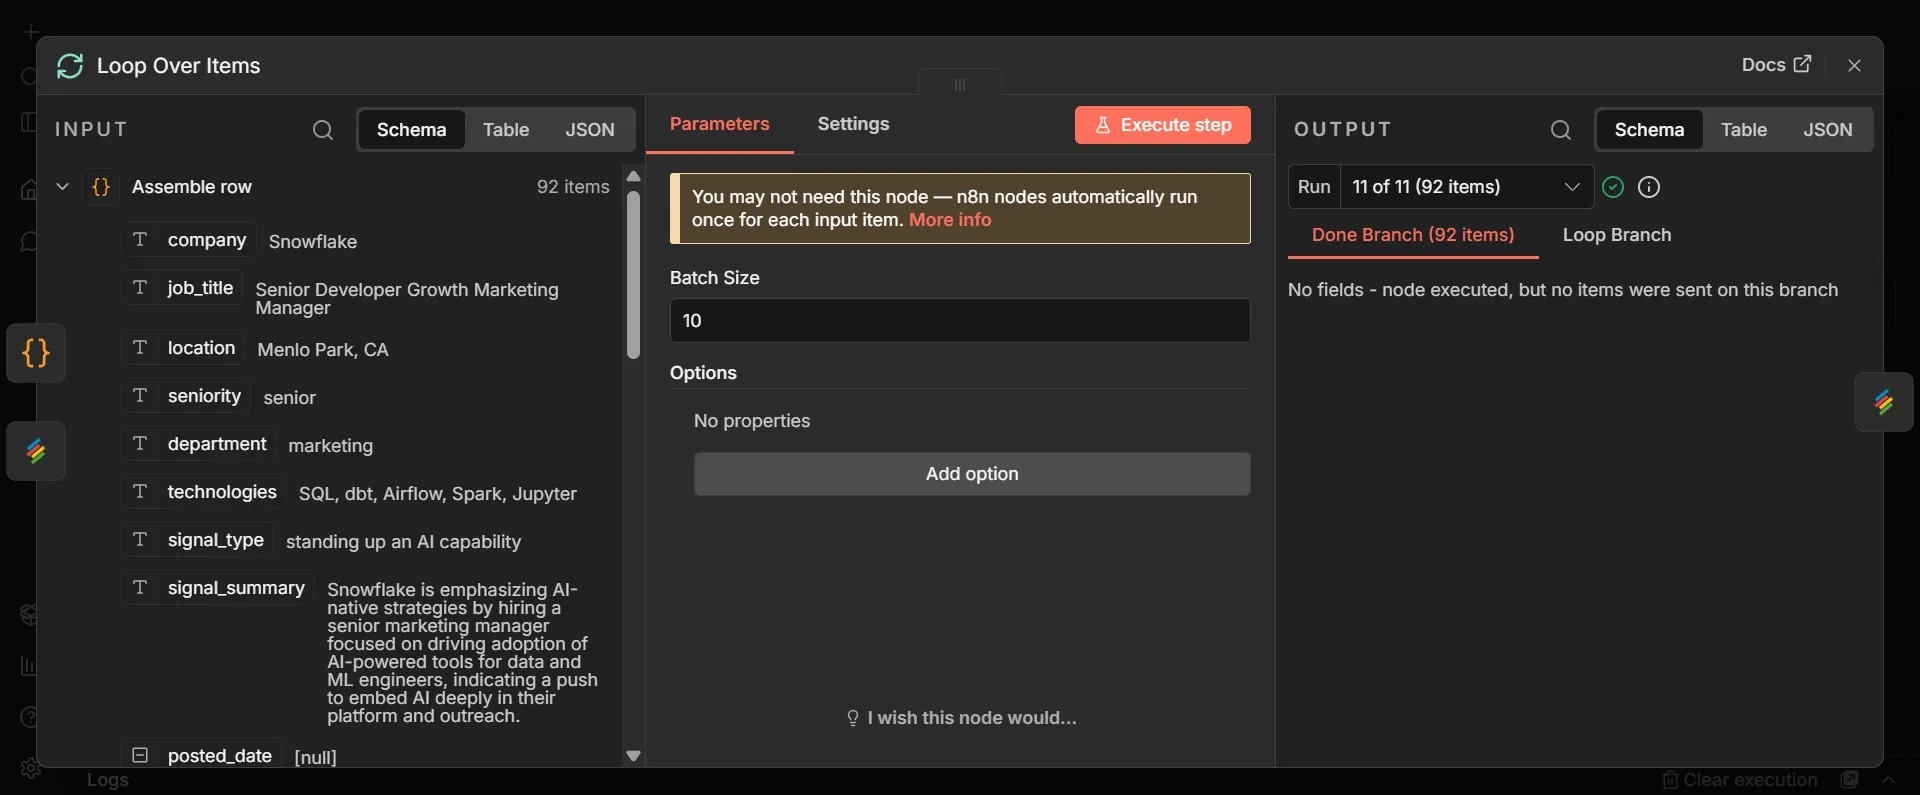
Step #17: Send signals in batches using the Loop Over Items node
- Between the Assemble row and the Stackby node, add a Loop Over Items node, so the order reads Assemble row, then Loop Over Items, then Stackby.
- Set Batch Size to 10.
- Wire the loop's loop output to the Stackby node, and wire the Stackby node's output back into the Loop Over Items node. Leave the loop's done output unconnected.
Stackby's Append accepts at most 10 records per request, but writing them all at once returns an error. The Loop Over Items node gives Stackby 10 rows at a time, repeating until none remain.
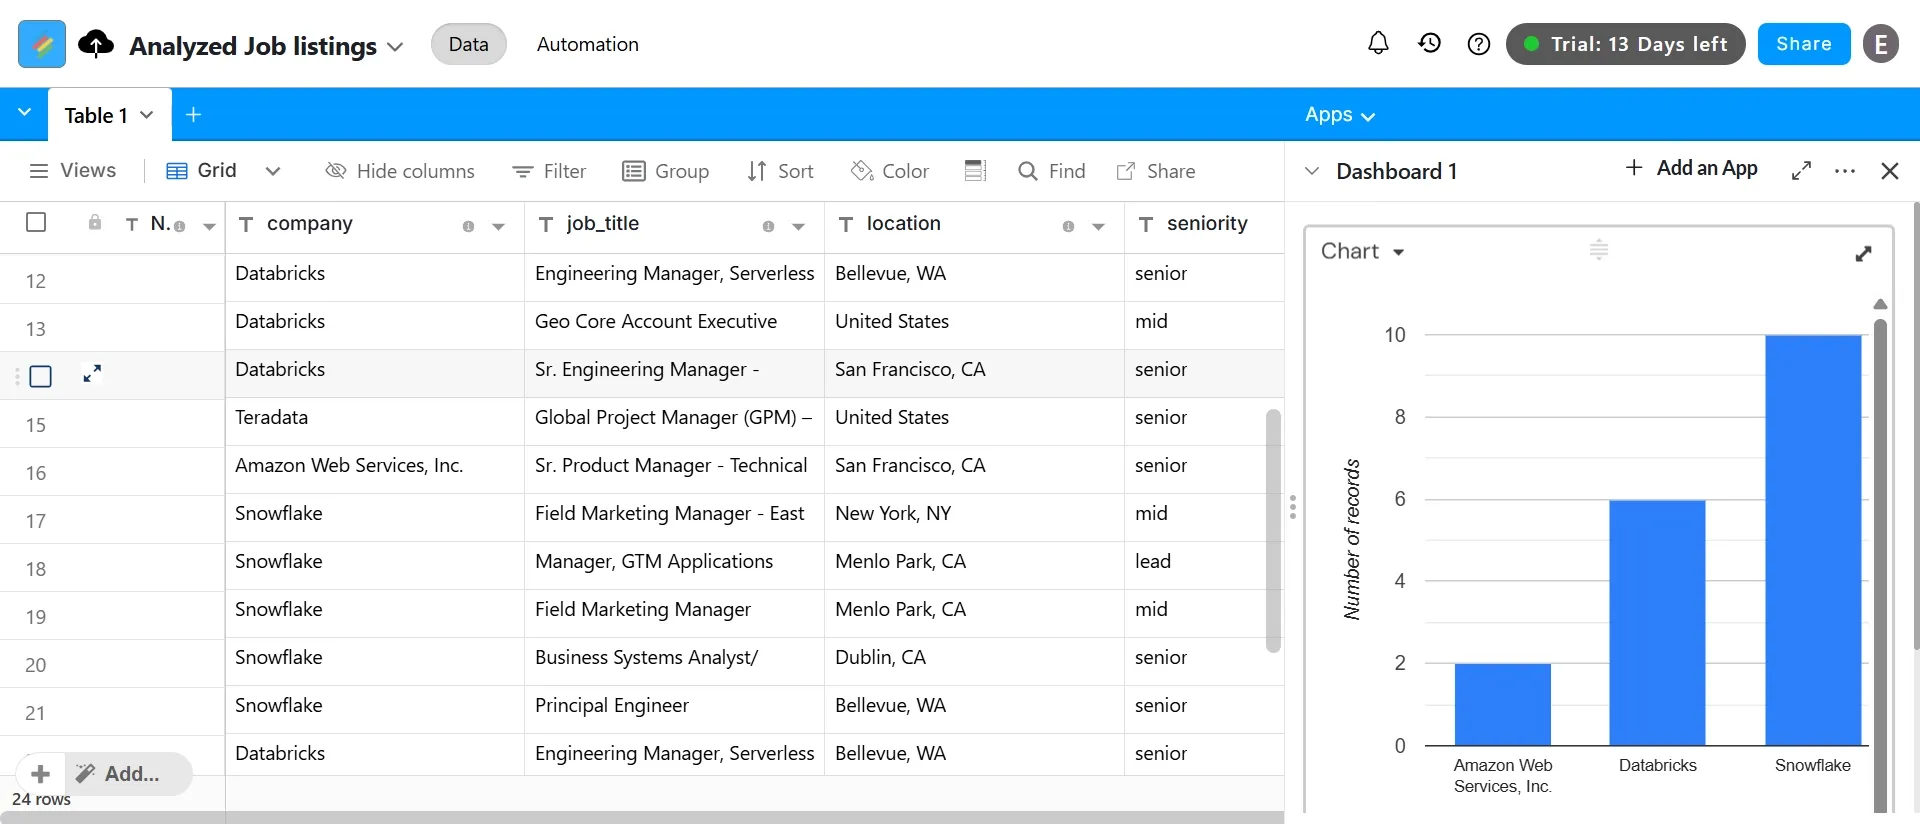
Step #18: Chart your signals in Stackby
- Once the workflow has run at least once and the table has rows, open the Apps area at the top right of Stackby and add a Chart app.
- Set the chart type to Bar, the X-axis to
company, and the Y-axis to Count. - Turn Include empty cells off, and leave Show labels on.
Step #19: Code node to combine the run's signals
- Go back to the Assemble row node and click the + on its output a second time.
- Add a Code node, rename it to Combine signals, and set Mode to "Run Once for All Items".
- Paste this:
const signals = $input
  .all()
  .map(i => i.json)
  .filter(s => s.signal_type && !["routine backfill", "unclear"].includes(s.signal_type))
  .slice(0, 150)
  .map(s => ({
    company: s.company,
    job_title: s.job_title,
    seniority: s.seniority,
    department: s.department,
    signal_type: s.signal_type,
    signal_summary: s.signal_summary
  }));

return [{ json: { signals, count: signals.length } }];
The store keeps each posting as its own row, but a mail briefing needs a single combined view of the run. This node gathers all new postings into a single item, drops routine backfills and unclear ones, so the briefing carries only signals that matter, and keeps only the six fields the briefing actually needs from each posting.
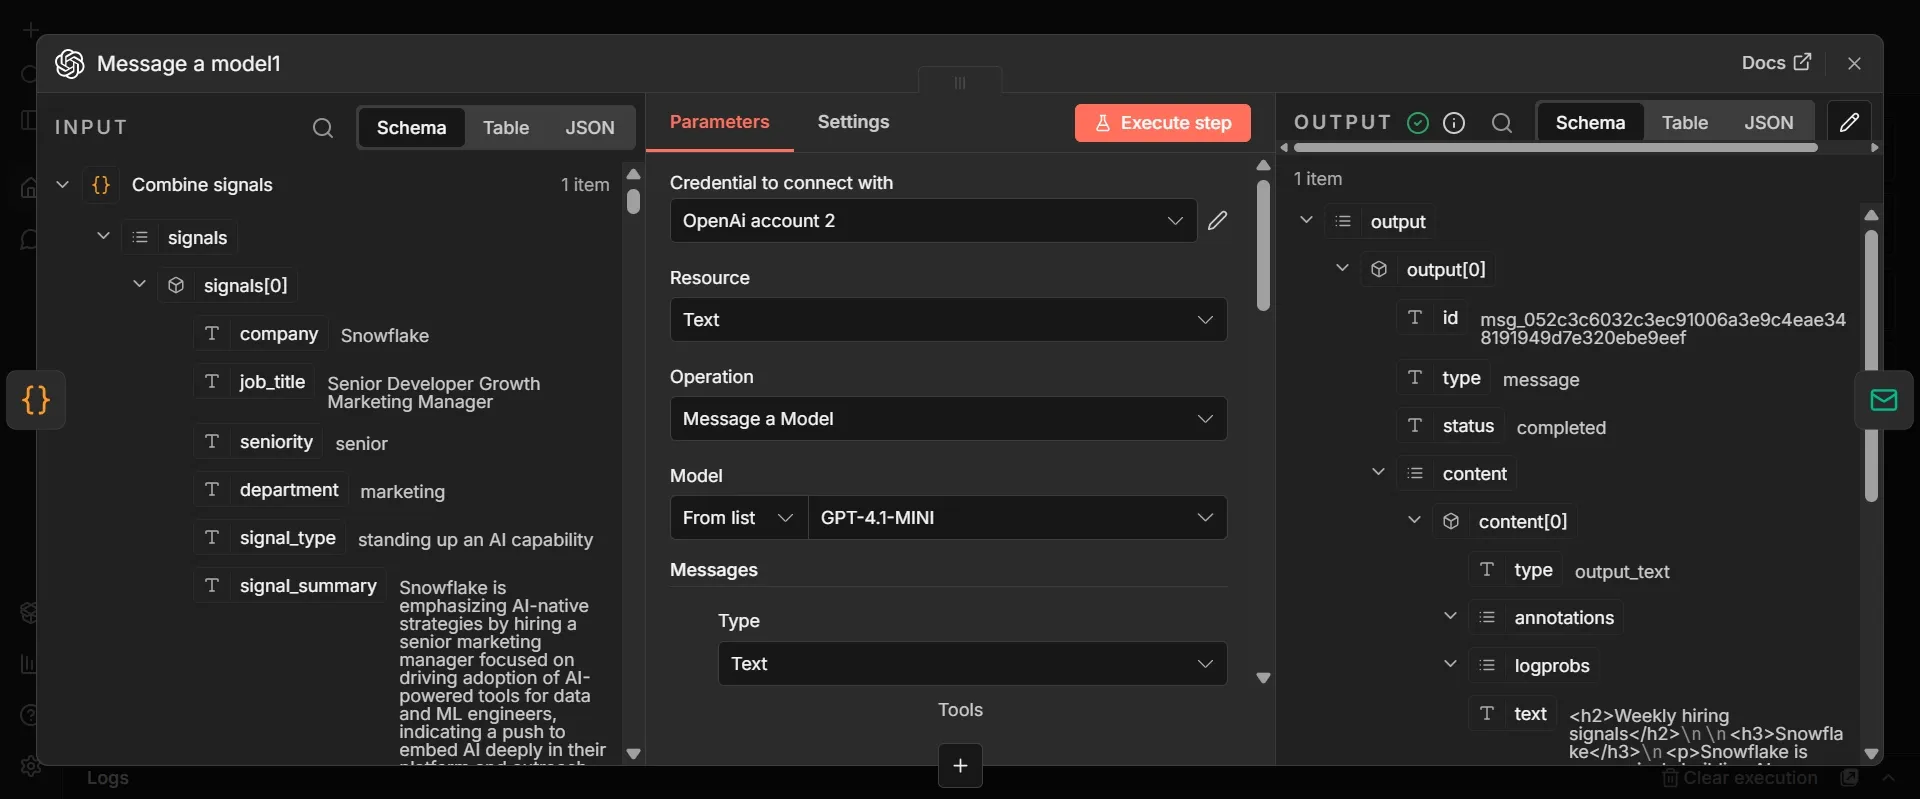
Step #20: OpenAI node to write the briefing
- From Combine signals, add an OpenAI node, choose "Message a Model", select the OpenAI credential from Step 9, and choose
gpt-4.1-mini. - Click Add Message, set Role to "System", and paste:
You are a competitive intelligence analyst writing a short weekly briefing for a sales and strategy team. Be concrete and easy to skim. Group your points by company and lead with the strongest signals. Return clean, simple HTML only, using <h2> for the title, <h3> for each company name, <p> for the explanation, and <p><em>Sales action:</em> ...</p> where relevant, with a <ul> of <li> items for minor companies. Do not use markdown, asterisks, or code fences, and do not include <html>, <head>, or <body> tags. Return only the inner HTML.
- Click Add Message again, set Role to "User", and paste:
Here are this week's notable hiring signals as JSON:
{{ JSON.stringify($json.signals) }}

Write a short briefing titled "Weekly hiring signals". For each notable company, give one or two lines on what their hiring suggests, and where relevant, a suggested action for the sales team. Keep it under 300 words.
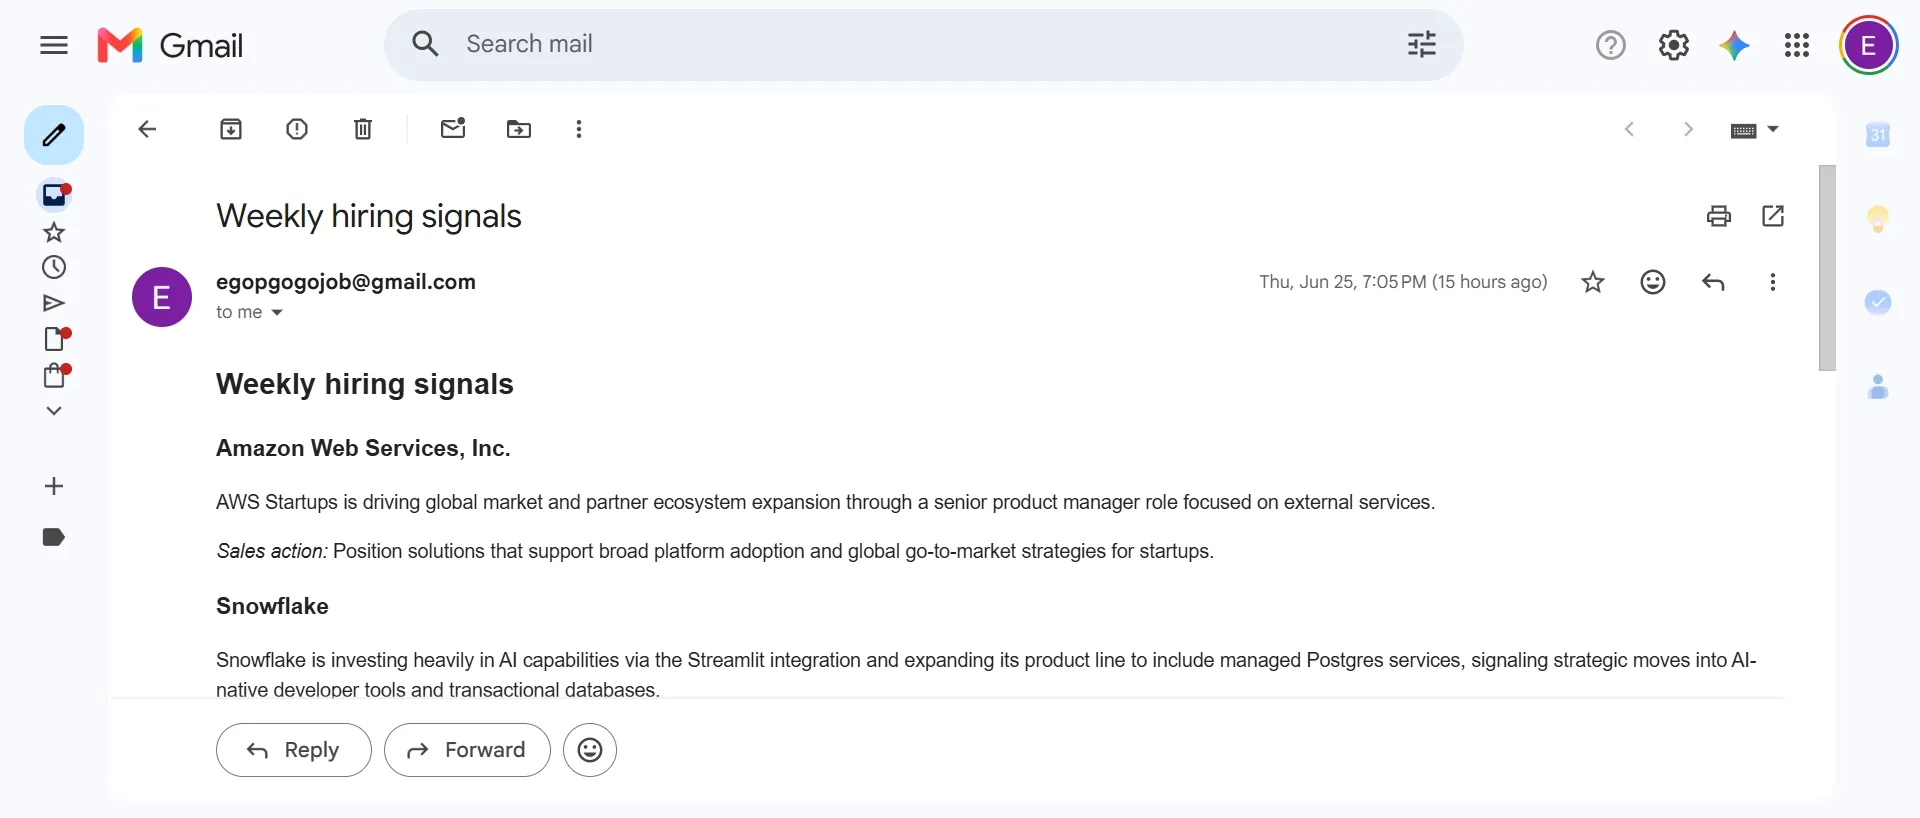
Because the previous node handed over a single item holding all the signals, this runs once and turns that list of rows into something a busy person will actually read on a Monday morning: a grouped summary that leads with what matters and suggests where to act.
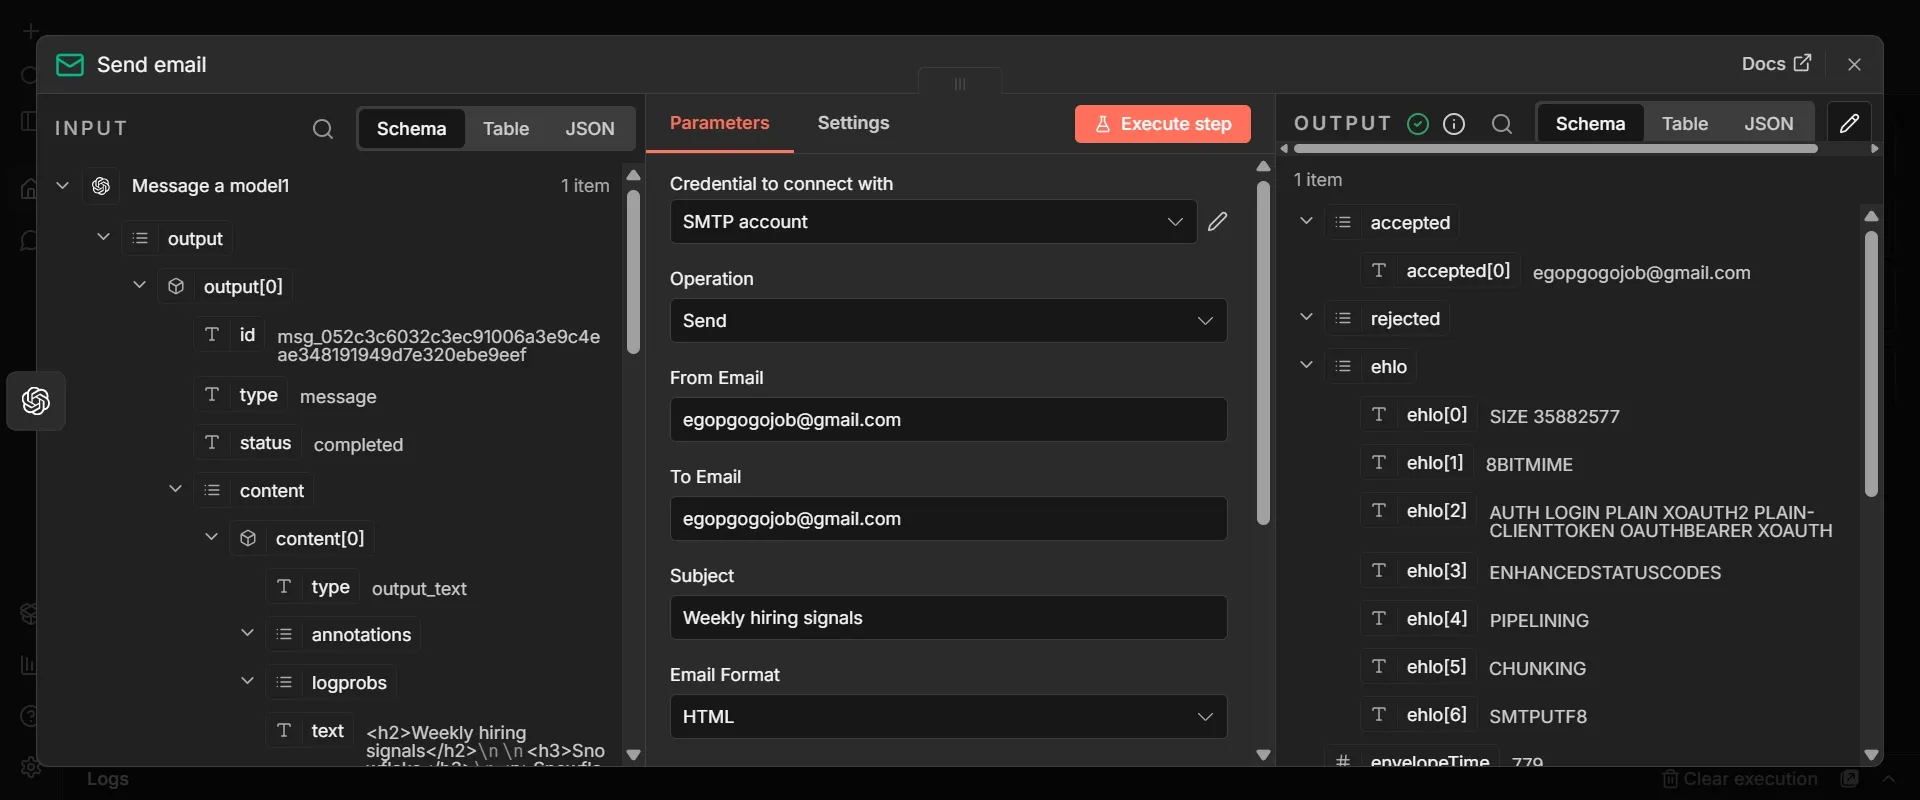
Step #21: Email the intelligence briefing
- From the OpenAI node, click +, search "Send Email", and add the Send Email node.
- Click Create new credential and enter your provider's SMTP details: Host, Port, User, and Password, with SSL or TLS set as your provider requires. For Gmail, that’ll be
smtp.gmail.com, port465with SSL on, your full Gmail address as the user, and a Google App Password as the password. - Set From Email to the address you are sending from, and To Email to whoever should receive the briefing.
- Set Subject to
Weekly hiring signals. - Set Email Format to "HTML".
- Switch that HTML field to expression mode and enter
{{ $json.output[0].content[0].text }}.
n8n provides a native Gmail node, but Send Email node is the universal option, because it works with any provider, whether Gmail, Outlook, Fastmail, etc.
Phase 4: Execute, test, and publish
- Click Execute Workflow to run the whole sequence once, and watch the nodes turn green.
- Open your Supabase table editor and confirm rows have appeared in
job_signals, each with a signal classification. - Check your inbox for the briefing.
- Once you confirm the quality of your briefing and see all n8n nodes turn green, the test is successful.
- Click Publish at the top right of the canvas to officially launch your workflow.
From this point on, the pipeline delivers an automated weekly intelligence briefing sourced from your competitors' latest job listings. The data store continuously accumulates these records in the background, providing deeper insights into their hiring trends over time.
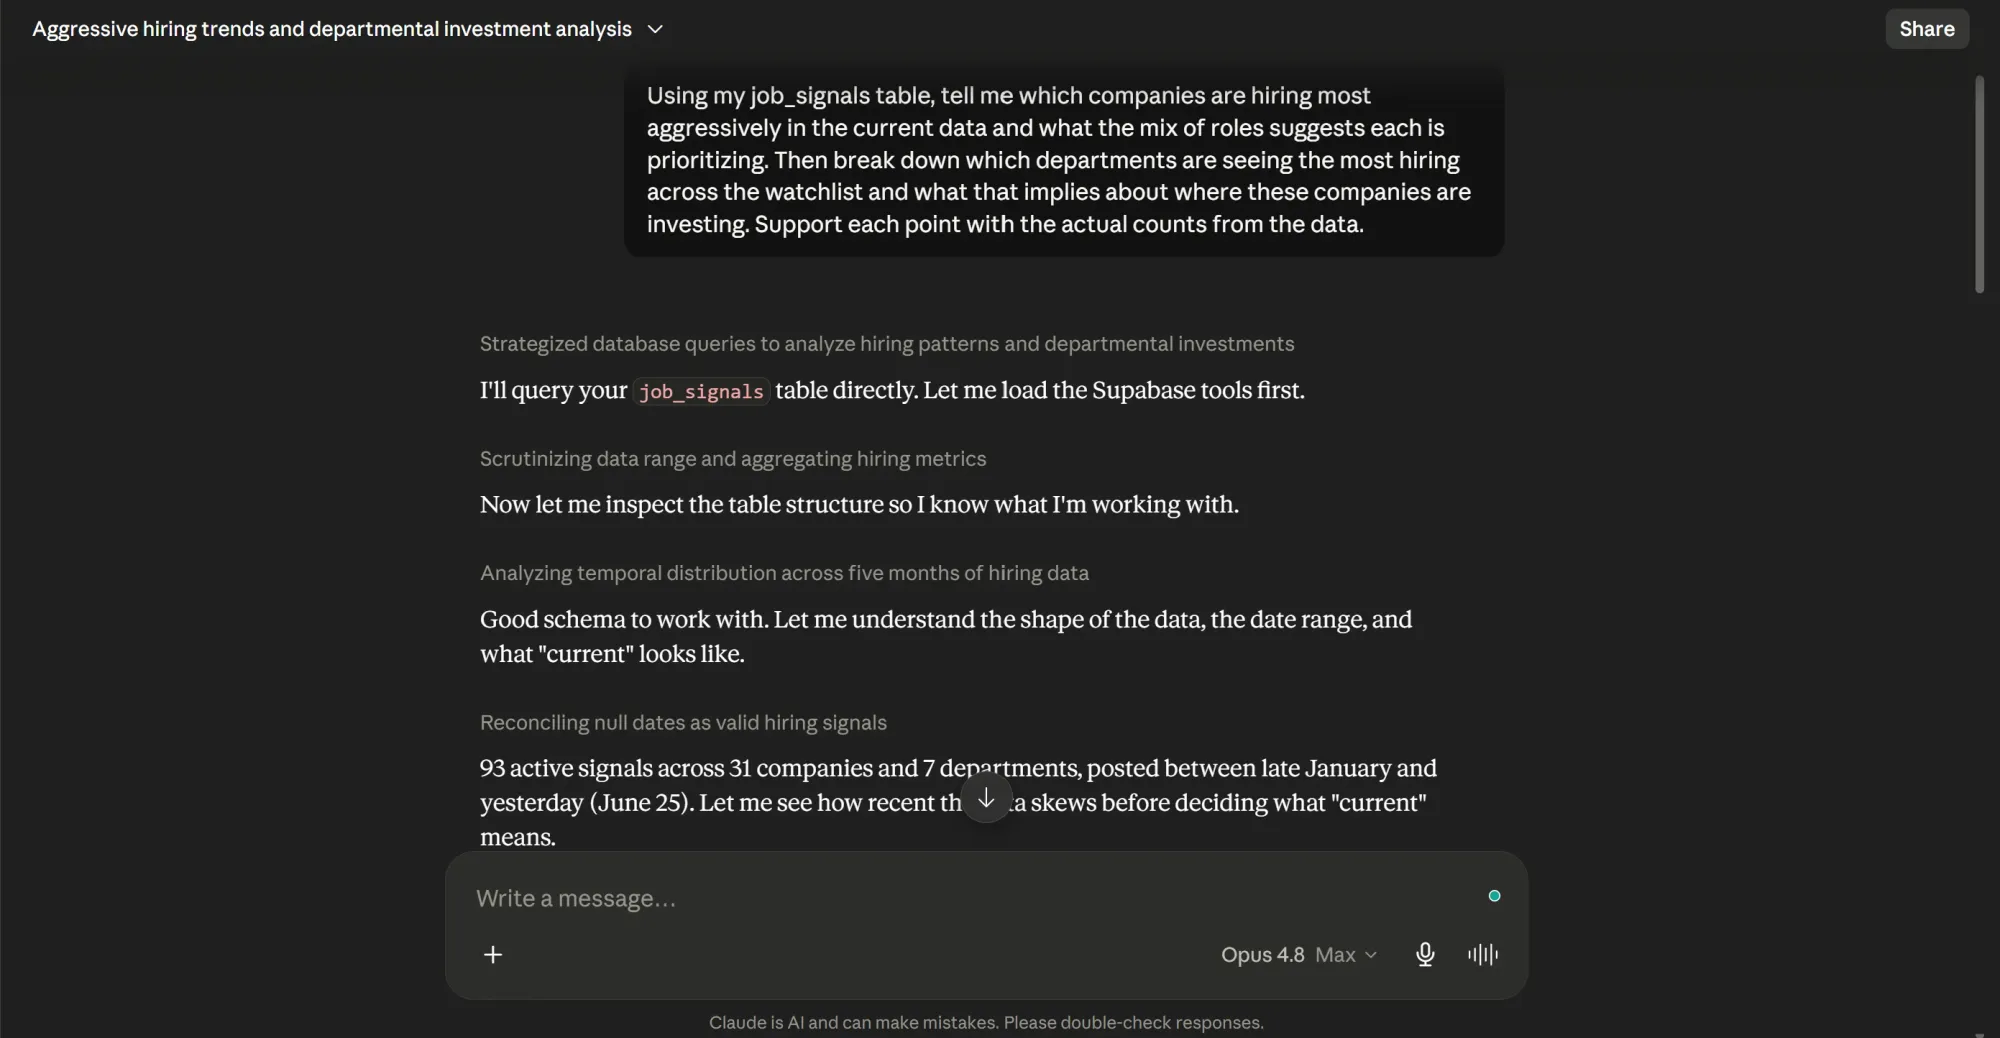
Query your results conversationally with Claude
Now that you have your results, instead of going through Supabase row by row, simply query the database by instructing Claude on what to find.
The Supabase MCP server lets Claude query the signals you’ve collected, and Apify MCP server lets it scrape a company that’s not on your watchlist yet, both in plain language. Here’s how to set them up:
Connecting Supabase to Claude
- In Supabase, open your project, go to Settings, then General, and copy the Project ID. That string is your
project_ref. - In Claude, open Settings, go to Connectors, and click Add a custom connector.
- Give it a name like "Supabase job-listings," and in the URL field, paste this address (replace
YOUR_PROJECT_REFwith the Project ID from Step 1):
https://mcp.supabase.com/mcp?read_only=true&project_ref=YOUR_PROJECT_REF
Two query parameters are handling safety here: read_only=true means Claude can read and analyze your tables, but can’t modify or delete anything, and project_ref locks it to this one project, so it can’t wander into anything else in your Supabase account.
Connecting Apify to Claude
To access new information on a separate competitor that’s not included in your database, configure Apify MCP connector as follows:
- Back in Settings, Connectors, add another custom connector.
- Name it something like "Apify job scrapers," and paste this URL:
https://mcp.apify.com/?tools=actors,docs,misceres/indeed-scraper,curious_coder/linkedin-jobs-scraper,crawlerbros/glassdoor-jobs-scraper
Save and sign in to authorize it over OAuth, the same flow as Supabase. Leave the Actor-run tool set to "Ask first" rather than auto-approve, so Claude pauses for your confirmation before launching a scrape.
Use the Apify MCP server for integration with MCP clients
Wrapping up
You just built a pipeline that reads competitor job postings exactly like a strategist. It pulls raw data, cleans it up, stores it in Supabase, and delivers weekly intelligence briefings.
All Actors are exclusive to Apify Store. Apify also gives you $5 in free monthly credits when you sign up, which covers the Actor runs in this tutorial.
If you ever spot a niche data source this tutorial missed, you can build your own custom scraper and monetize it directly on Apify Store, the largest marketplace for web data and AI tools.