AI agents running inside Claude Desktop, Cursor, and VS Code are powerful, but they can't reliably extract structured web data at scale. Your AI can browse websites, but it can't scrape Instagram profiles, extract Google Maps business data, or pull product details from Amazon without help.
That's what you can use the Apify MCP Configurator for.
What is the Apify MCP Configurator?
The MCP Configurator lets you build custom MCP servers tailored to your workflow. Instead of giving your AI access to all 25,000+ Actors on the Apify platform, you select exactly which tools your agent needs.
Think of it like building a custom toolbox. You choose the screwdrivers, hammers, and wrenches you need for a specific job - not the entire hardware store.
Why configure your own MCP server?
Pointing your agent at all 25,000+ Actors in Apify Store sounds powerful on paper. In practice, the agent has to pick the right tool from a huge list, and it gets it wrong. A custom MCP server fixes that in three ways.
1. Reduced noise, better accuracy
Models pick tools more accurately when the list is short. Pre-configure 10-15 relevant Actors, and your agent stops wading through irrelevant options. Accuracy goes up, and token usage goes down.
2. Test multiple Actors for your use case
Not every scraper handles your target site appropriately. With the configurator, you can add two or three Actors that solve the same problem - three different Instagram scrapers, say - and let your agent run them side by side to see which returns the cleanest data.
3. Deploy to any MCP client
Once you configure your server, you get a custom URL that works with Claude Desktop, Cursor IDE, VS Code, Antigravity, or any MCP-compatible client. One configuration, multiple deployment options.
How to configure your MCP server
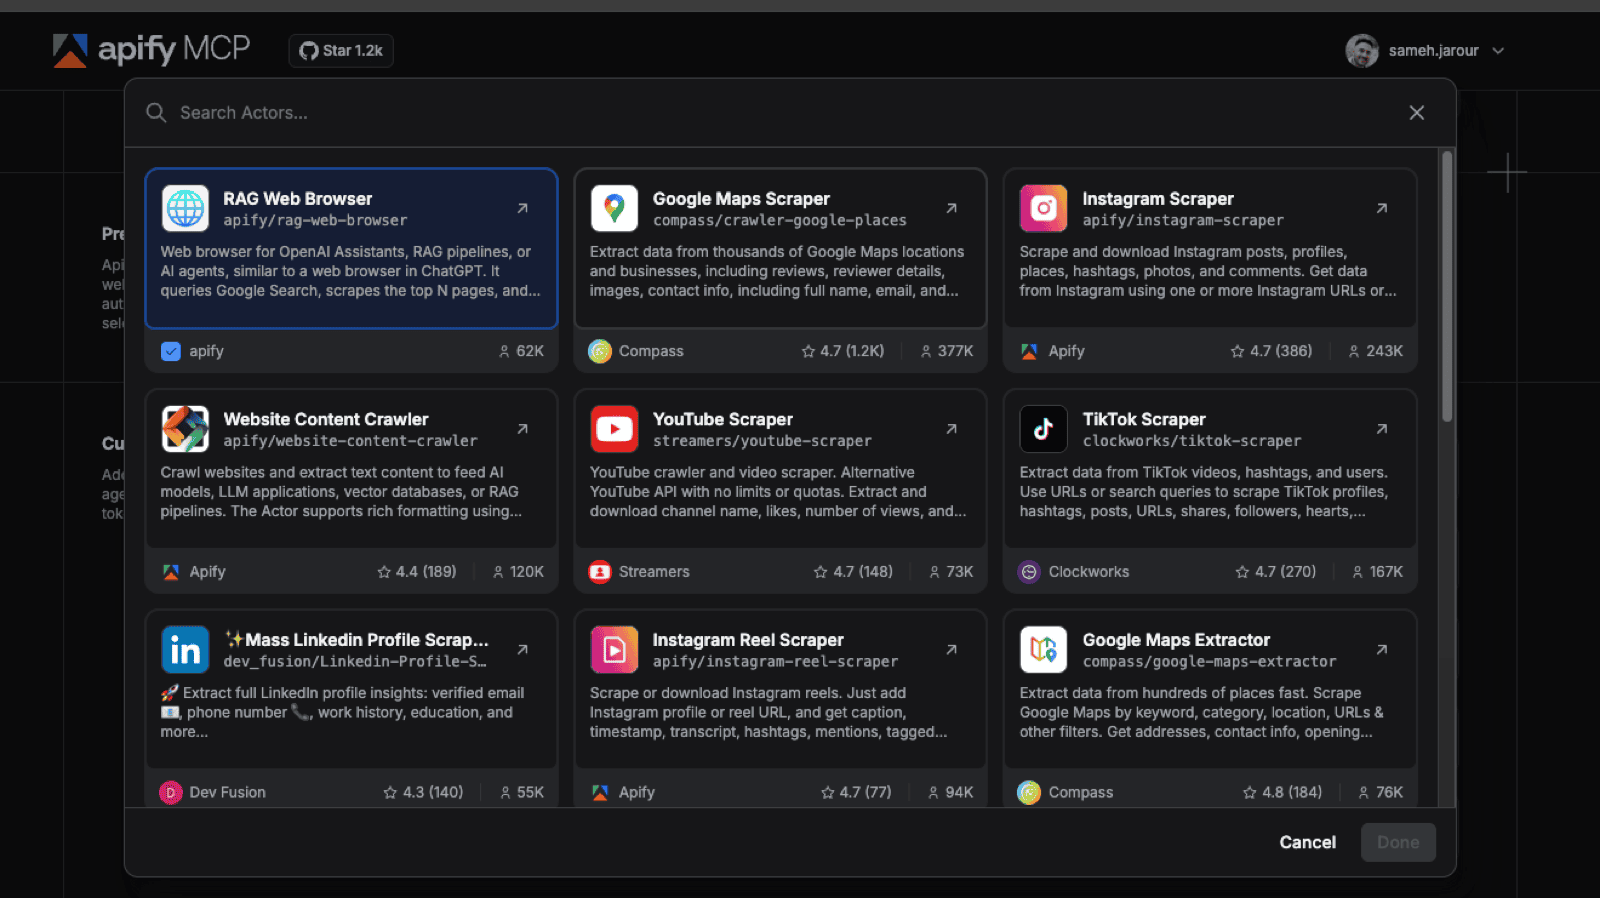
Step 1: Choose your Actors
Go to mcp.apify.com and start selecting Actors based on your workflow.
Example: E-commerce use case
If you're building an e-commerce competitor analysis tool, you might choose:
- E-commerce Scraper (14,000 installs, 4.9★) - generic scraper for any e-commerce site
- Amazon Product Scraper - extract product details, reviews, and pricing
- eBay Scraper (598 installs) - multi-platform price comparison
- Contact Details Scraper - for lead generation from scraped websites
Step 2: Add infrastructure tools
Beyond Actors, you need infrastructure tools that help your AI manage workflows:
Actor management tools (always include these):
- Search actors - lets your AI find additional Actors at runtime
- Fetch Actor details - provides readme, input schema, output schema for each Actor
- Call actor - allows dynamic Actor usage beyond pre-configured tools
Documentation tool (highly recommended):
- Gives your AI context about how each Actor works, including usage examples

Actor run tools (for async workflows):
- Get actor run - check run status
- Get Actor run list - see all recent runs
- Abort actor run - stop long-running tasks
Data storage tools (for large datasets):
- Get dataset items - retrieve scraped data from completed runs
- Get key-value store record - access saved assets (images, files)
Step 3: Generate your MCP server URL
Once you've selected your tools, the configurator generates a custom URL:
https://mcp.apify.com/...This URL is your MCP server. It exposes only the Actors and tools you selected.
Step 4: Deploy to your MCP client
The configurator shows deployment instructions for multiple clients. Here's how to connect to the most popular ones:
Claude Desktop (recommended)
- Go to Settings → MCP Servers
- Add the Apify connector (if not already installed)
- Click Configure
- Replace the actors array with your selected Actors:
- Restart Claude Desktop
Cursor IDE (one-click install)
- Click Install in Cursor on the configurator page
- Cursor opens with your MCP server pre-configured
- Click Connect to authenticate via OAuth
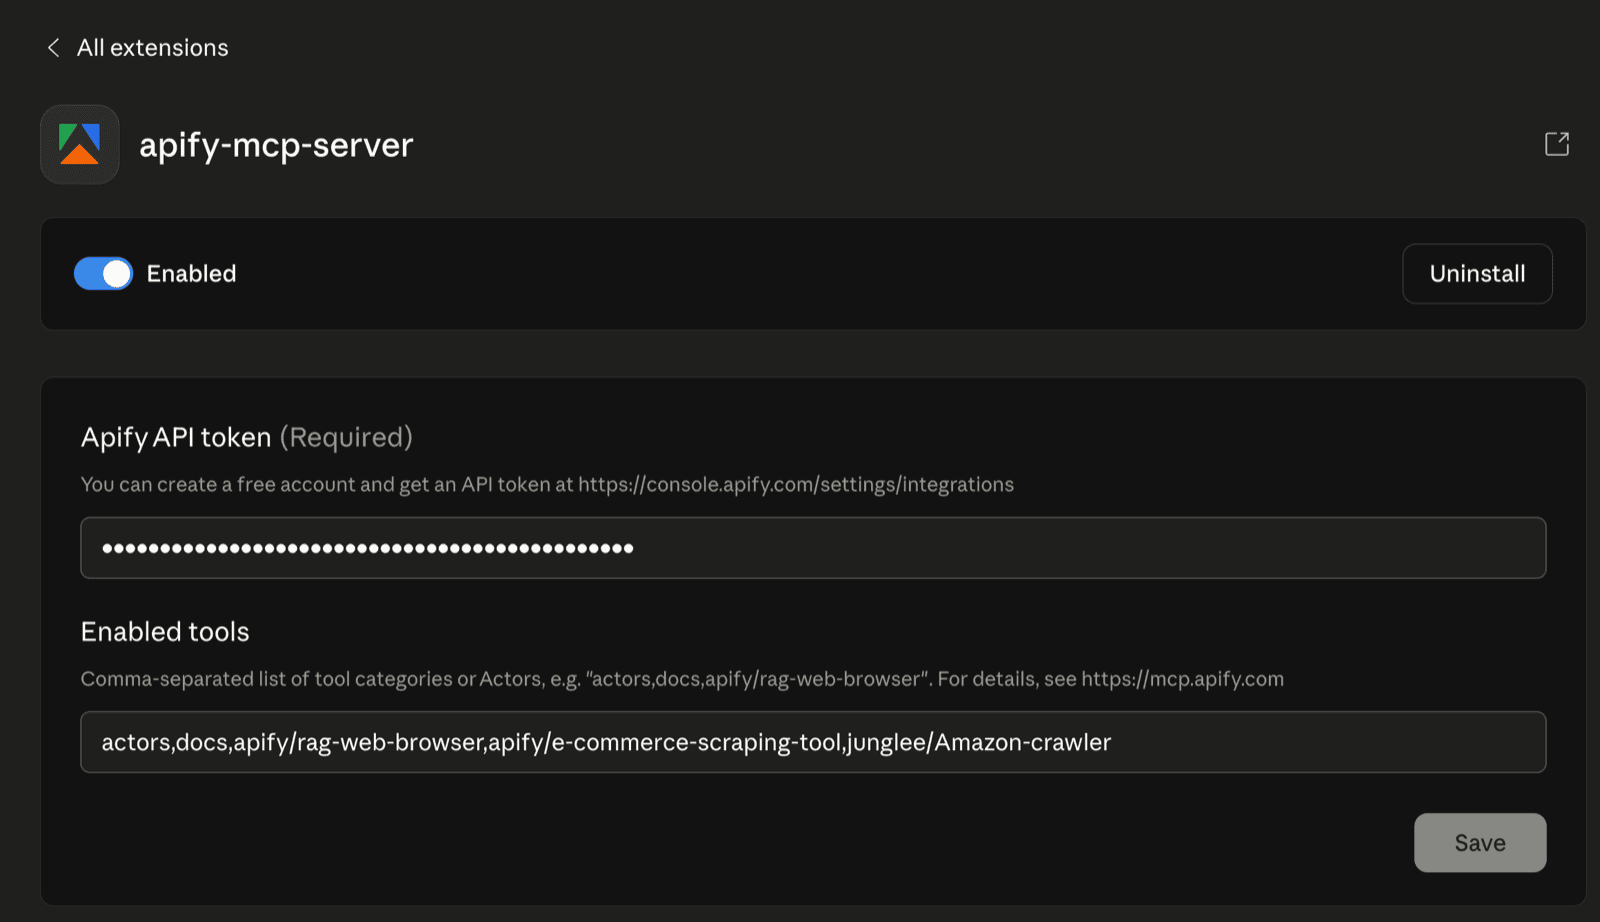
VS Code
- Install the Model Context Protocol extension
- VS Code also has Once Click Install so you can use the VS Code on click install or create
.vscode/mcp.jsonin your workspace - Reload VS Code
{
  "servers": {
    "apify": {
      "type": "http",
      "url": "https://mcp.apify.com/?tools=actors,docs,apify/e-commerce-scraping-tool,junglee/Amazon-crawler"
    }
  }
}
Testing your configuration
Once connected, test your MCP server.
Example prompt for Claude Desktop:
Find the top 20 smartwatches on Amazon and eBay using Apify MCP, then create a comparison dashboard showing prices, ratings, and features.
Your AI will:
- Select Amazon Product Scraper from your pre-configured tools
- Run the scraper with your search query
- Select eBay Scraper and run it in parallel
- Fetch the dataset items from both runs
- Build a comparison dashboard
You can check Apify Console to see which runs were triggered and verify the data quality.
Best practices for MCP configuration
Start with 5-10 core Actors
Don't add every Actor that might be useful. Start with the tools you know you'll use daily. You can always add more later.
Always include search and call actor tools
These let your AI discover new tools at runtime. If your pre-configured list doesn't cover a task, your agent can search Apify Store and add the right Actor on the fly.
Test multiple Actors for the same task
If you're scraping Instagram, add 2-3 different Instagram scrapers. Let your AI test which one works best for your specific use case. This is how you find the highest-quality tools.
Use dataset tools for large scraping jobs
If you're scraping thousands of records, your AI might time out waiting for the Actor to finish. With dataset tools enabled, your agent can trigger the run, move on to other tasks, and fetch the results later.
Optimize for your workflow
An e-commerce team needs different tools than a lead generation team. Configure multiple MCP servers for different use cases rather than one giant server with everything.
Real-world use cases
Performance marketing dashboard
Configure a server with:
- Google Ads Scraper
- Meta Ads Library Scraper
- LinkedIn Ads Scraper
- Dataset tools for fetching large ad datasets
Deploy to Bolt.new or Cursor and build automated competitor ad intelligence dashboards.
Lead generation pipeline
Configure a server with:
- Google Maps Scraper (find businesses)
- Contact Details Scraper (enrich with emails/phones)
- LinkedIn Profile Scraper (get decision-makers)
- Dataset tools for exporting to CRM
Deploy to Claude Desktop and automate prospecting workflows.
E-commerce price monitoring
Configure a server with:
- Amazon Product Scraper
- eBay Scraper
- E-commerce Scraper (generic)
- Key-value store tools (save product images)
Deploy to VS Code and build automated price tracking systems.
Troubleshooting common issues
AI isn't using my pre-configured Actors
Check that your Actor names are spelled exactly as they appear in Apify Store. Case matters: apify/instagram-scraper is correct, apify/Instagram-Scraper will fail.
Too many tool calls, high token usage
Reduce your tool count. If you have 20+ tools configured, your AI spends more tokens deciding which one to use. Aim for 10-15 core tools.
Actor runs failing
Check Apify Console to see error logs. Common issues:
- Invalid input parameters (your AI passed the wrong schema)
- Actor timeout (increase timeout in Actor settings)
- Rate limiting (upgrade your Apify plan)
MCP server not connecting
Verify your Apify API token is correct and has the right permissions. Get your token at console.apify.com/account/api-keys.
What's next?
The MCP Configurator is the easiest way to give AI agents reliable, structured web data without building custom scrapers. Whether you're automating lead generation, monitoring competitor ads, or building e-commerce dashboards, the configurator lets you tailor your MCP server exactly to your workflow. And once you have the data, you can connect Actors to tools like Notion, Slack, or your CRM through MCP Connectors - so results flow straight into the apps your team already uses.
Get started:
- Go to mcp.apify.com
- Select your Actors (10-15 recommended)
- Copy your MCP server URL
- Deploy to Claude Desktop, Cursor, VS Code, or Antigravity
- Start building
Questions? Join the Apify Discord or check the MCP documentation.