A $200 TV on Walmart.com at 9 could cost $150 by lunch. Walmart's prices can swing wildly throughout the day, but there's a great way to make those fluctuations work for you. In this tutorial, I'll show you how to use Apify for automatic price tracking so you can snag deals the moment they drop.
If you’ve tried CamelCamelCamel for Amazon, you may have noticed that there aren’t many similar options for Walmart. Of course, there are many price tracking tools on the market - but they are limited, lack features (like automation), and can be unreliable. Luckily, Apify’s Walmart Product Detail Scraper is a customizable solution to get you up and running.
How to set up a Walmart price tracker
1. Create an Apify account
- Go to Apify.com and create a free account. No credit card required.
- After creating your account, head over to Apify Console.
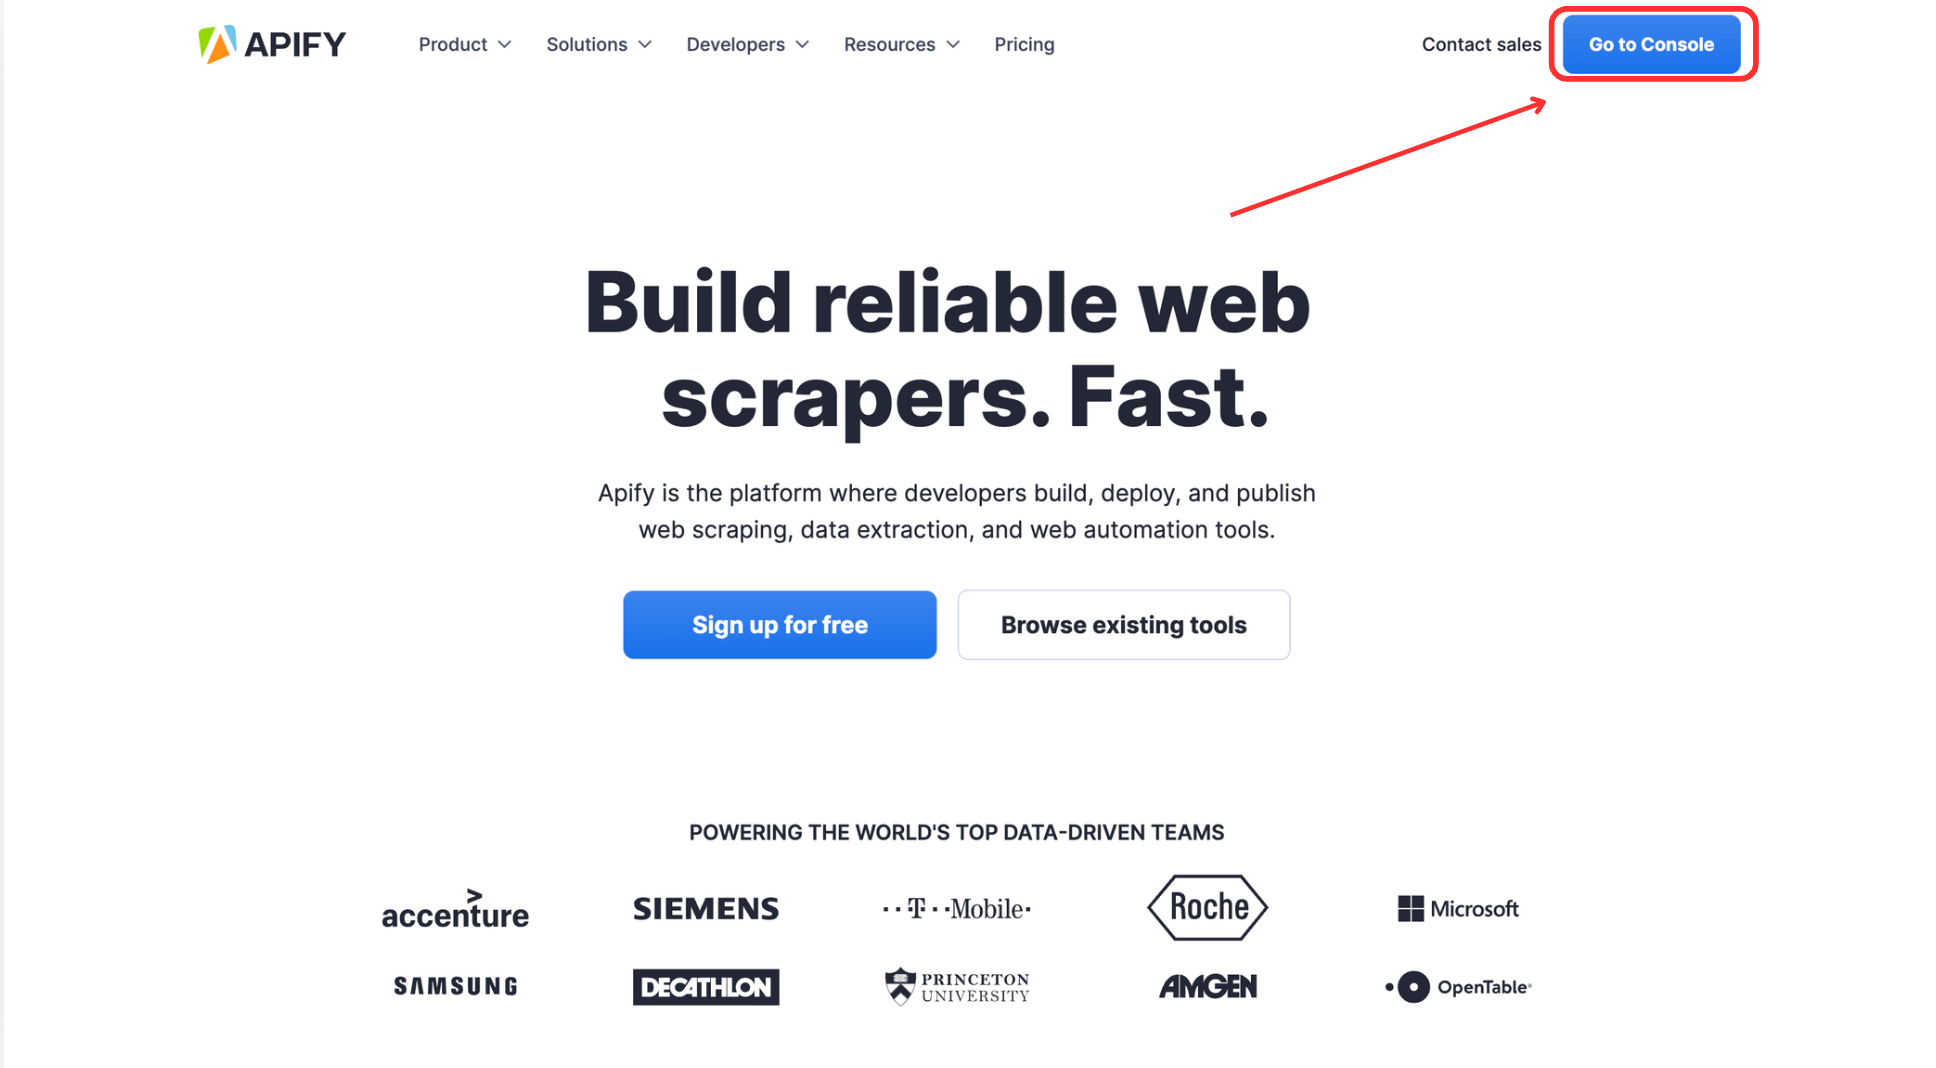
Using Apify Console, you can automate monitoring Walmart prices - unlike other tools that require consistent manual checking.
2. Set up the Walmart Product Scraper
Once logged in Apify Console, you can set up the Walmart Product Detail Scraper without using any code.
- Go to the Walmart Product Detail Scraper Actor page.
- Click the “Try for Free” button.
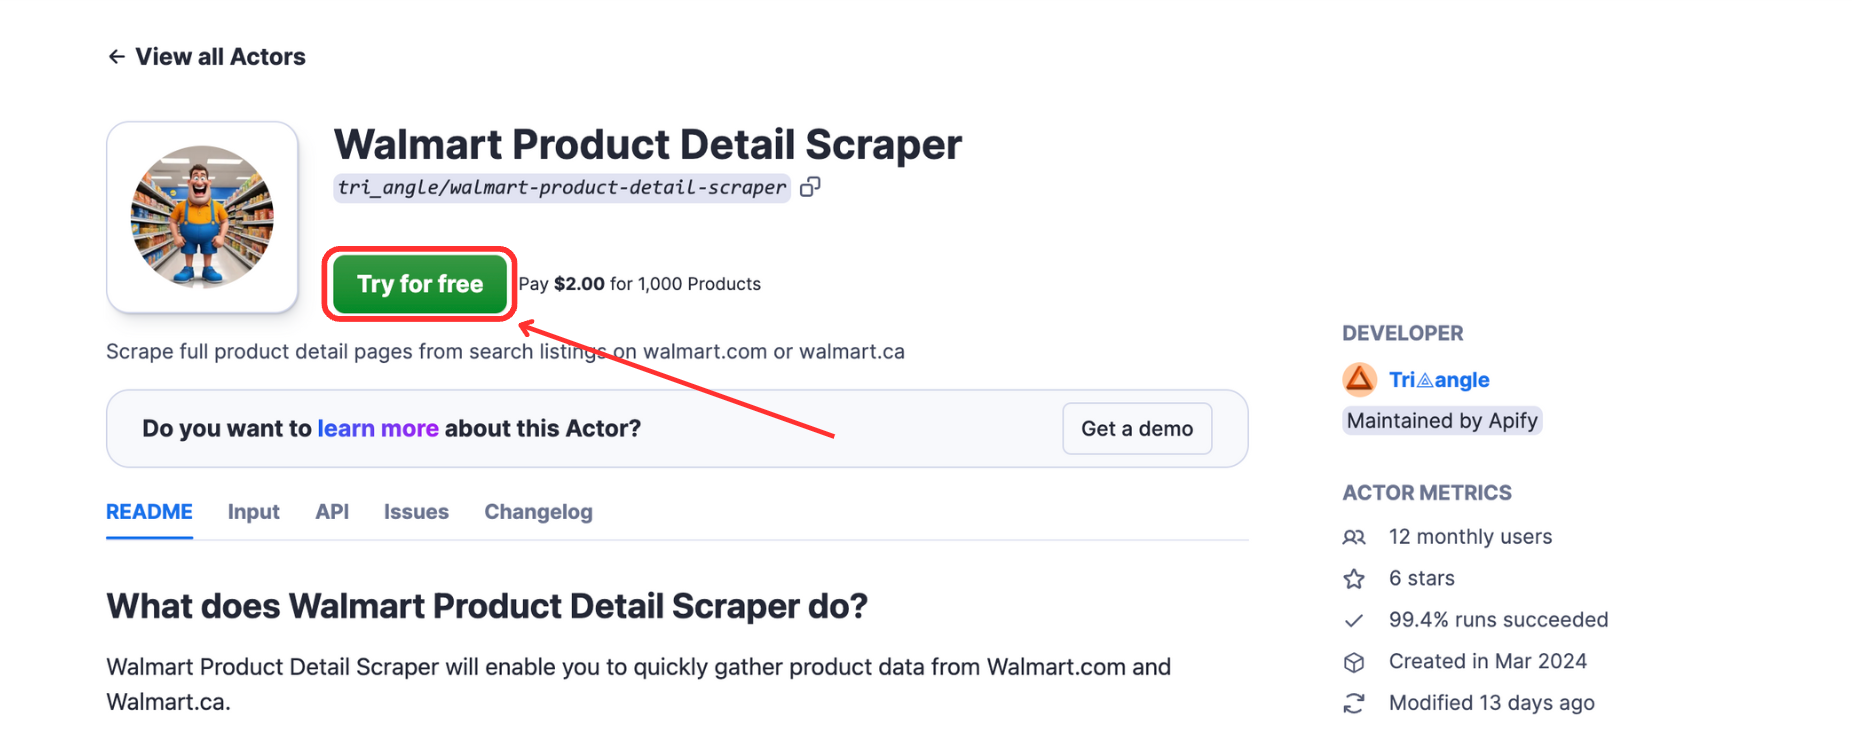
Next, you'll sign in to Apify Console to add your URLs and schedule the Actor runs. Let's go through the process:
3. Input product URLs
To start tracking the price of a certain product, you’ll need to input its URL to the scraper.
- Go to Walmart.com and search for a product you’d like to track. For example, “headphones”.
- Copy the URL of the search, which should follow this format:
https://www.walmart.com/search?q=searcheditem
Then, head back to the scraper in Apify Console and paste the URL to the input field.
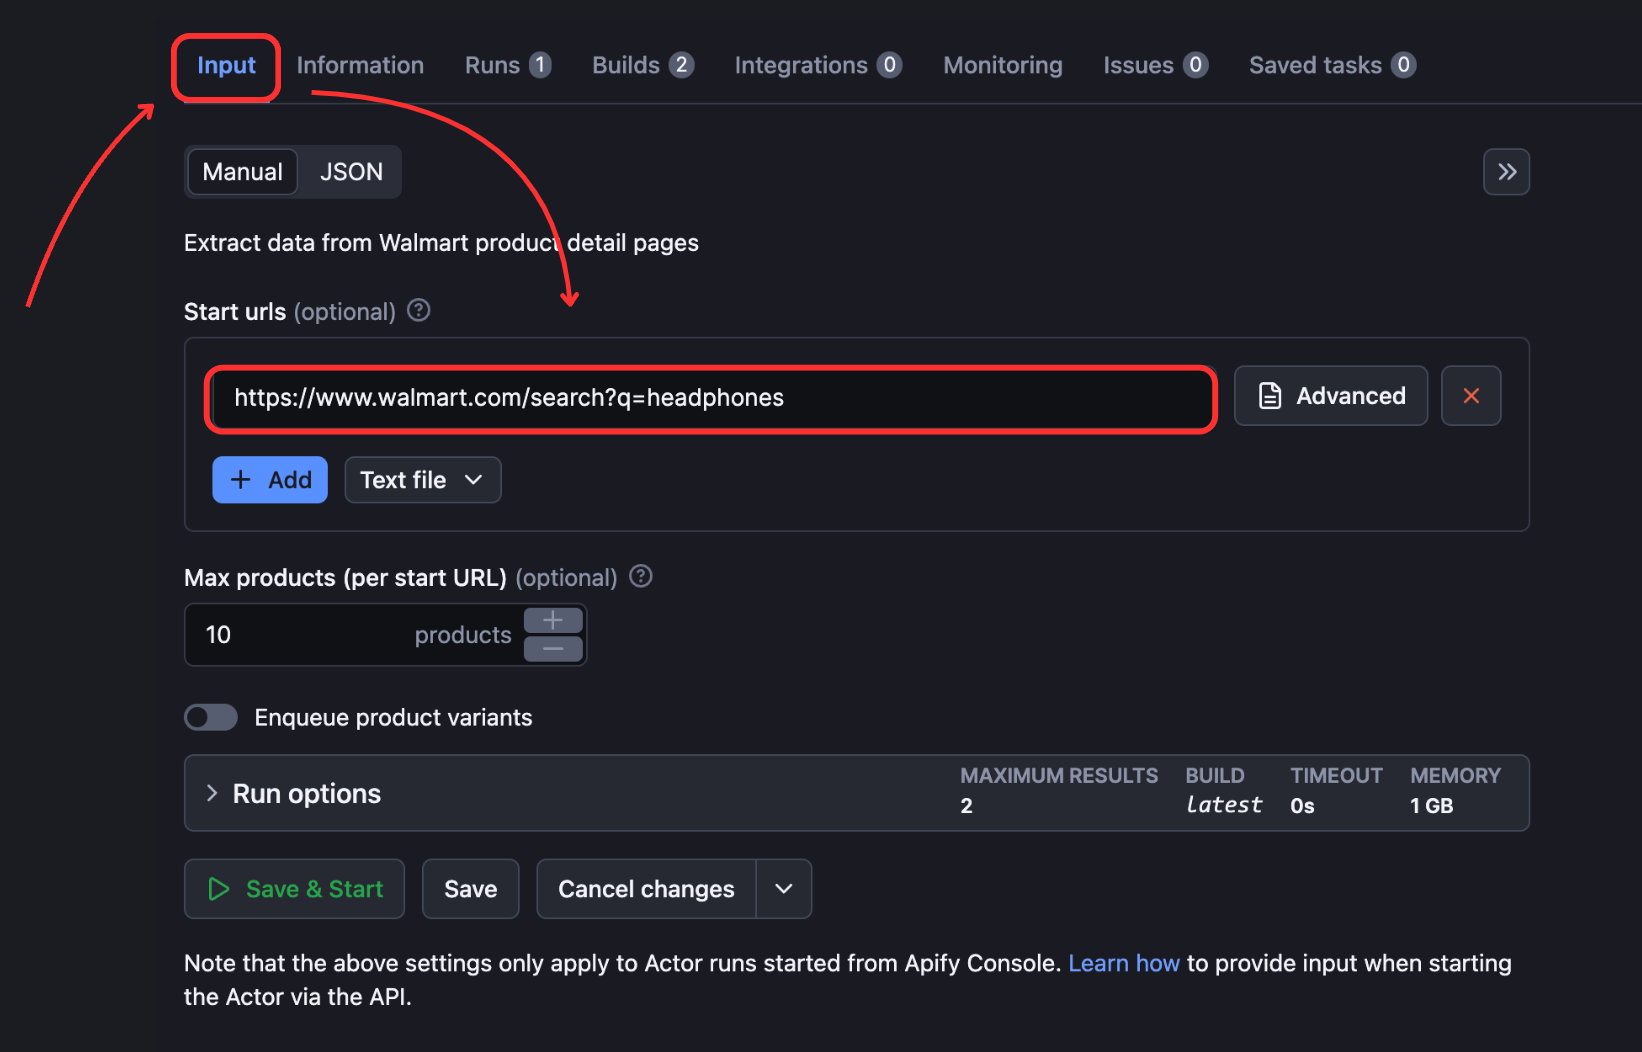
Please note that you can add any number of URLs for different products in the input field. To test the Actor, click the “Save and Start” button and wait for the results.
4. Integrate Walmart Product Scraper and Google Sheet Exporter
You can get email alerts by importing the data to Google Sheets and writing a simple script to detect price changes.
To fully automate this process, connect the Walmart Product Scraper with the Google Sheet Exporter Actor. This passes the scraper's dataset ID directly to the exporter, letting both Actors run together automatically.
Follow the below steps to integrate the Walmart Product Detail Scraper and Google Sheets Exporter:
- Go to your Walmart Product Detail Scraper Actor in Apify Console > Create task.

- After creating the task, go to integrations and select “Connect Actor or Task”.
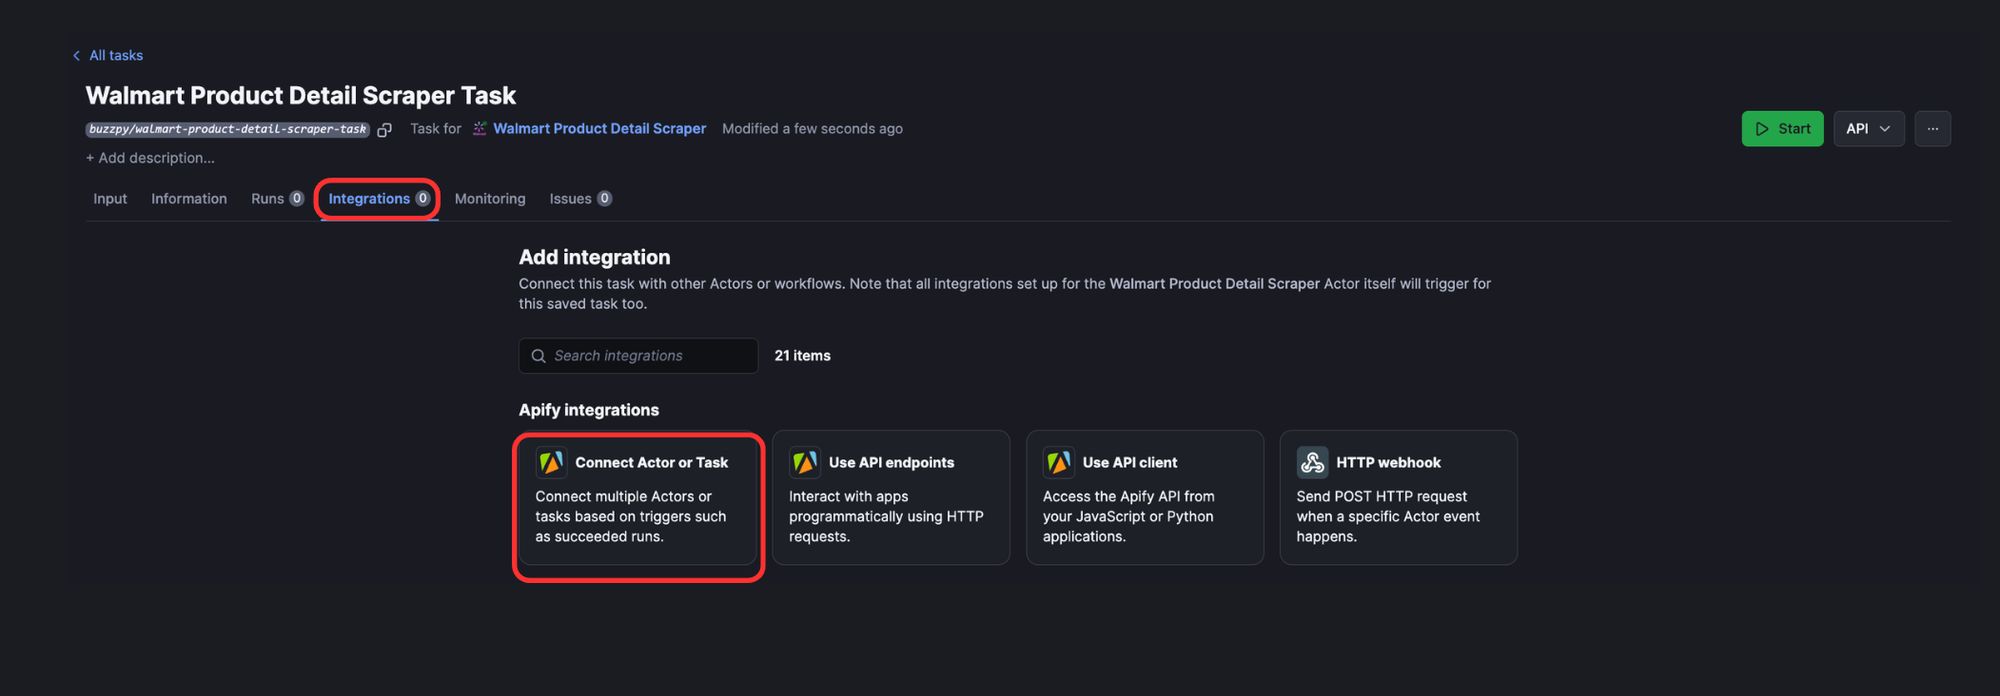
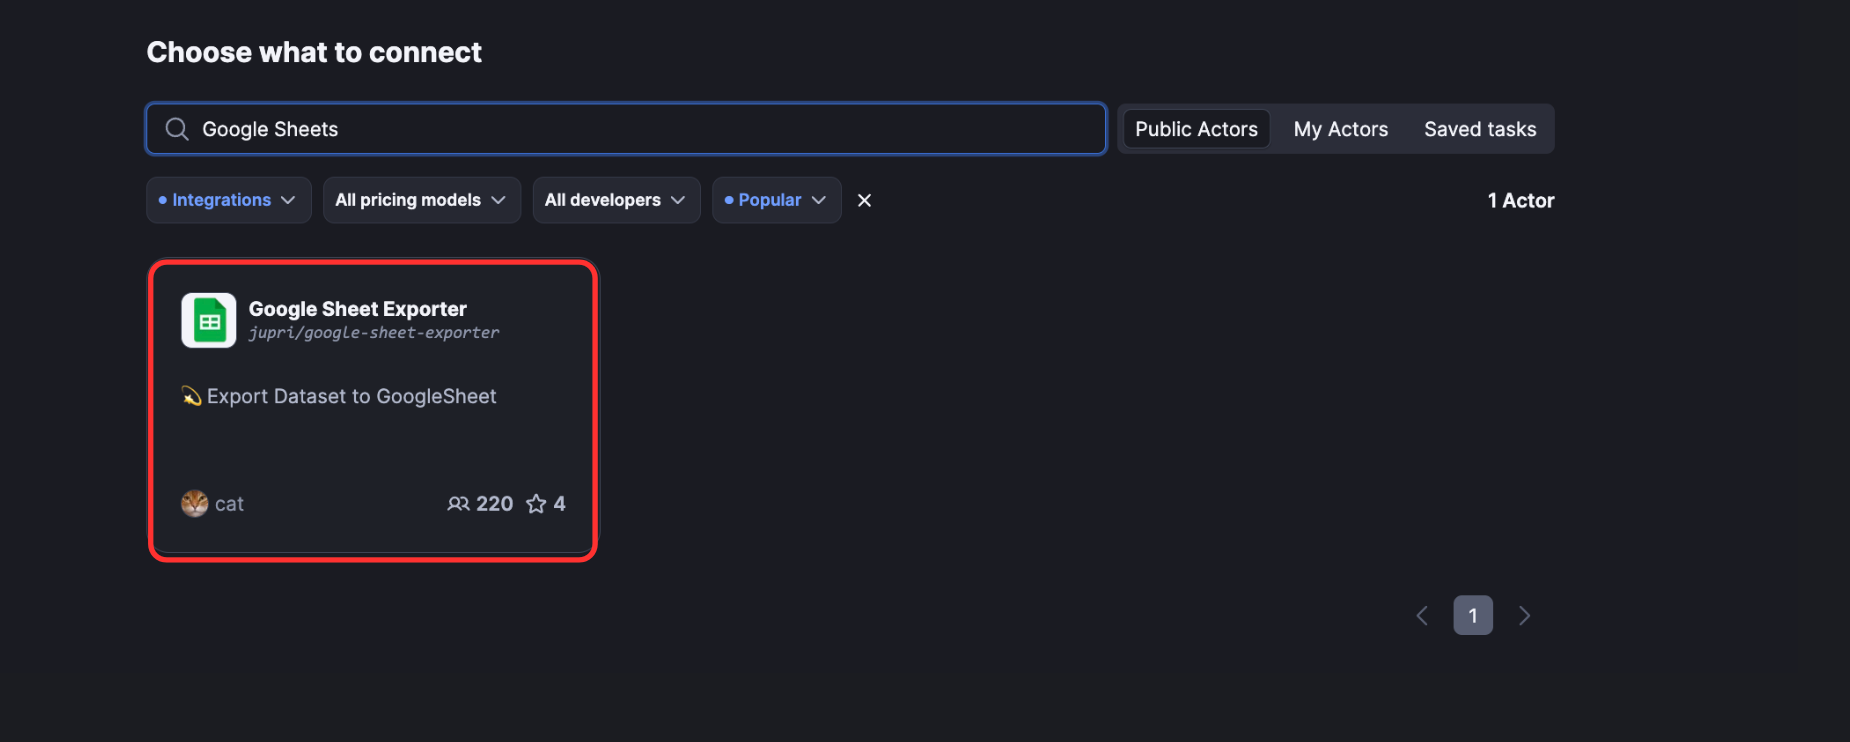
- Search and select Google Sheets Exporter Actor.
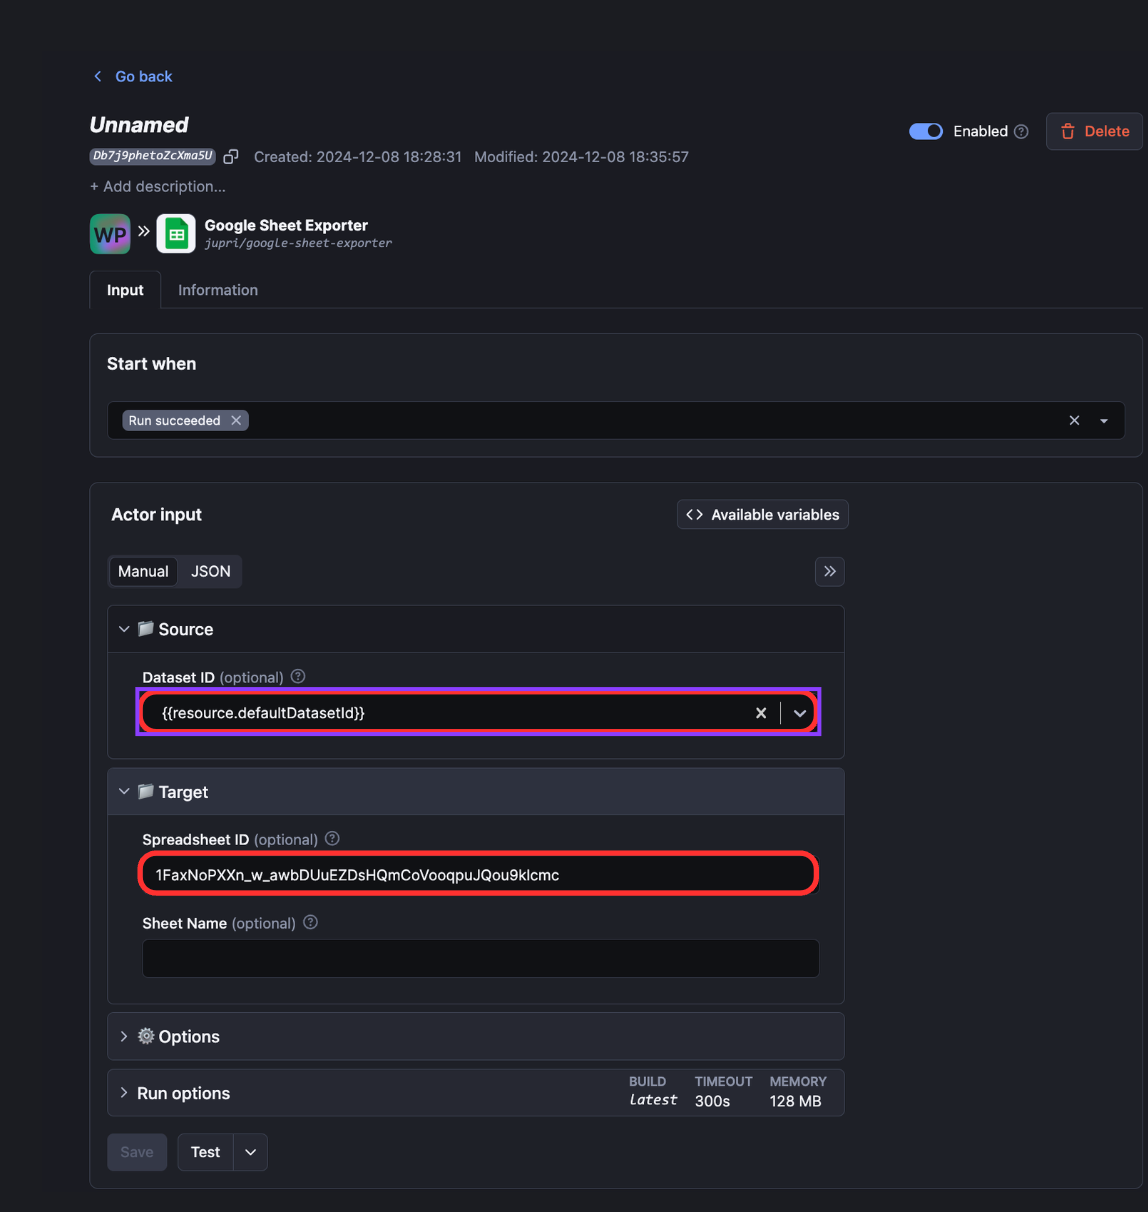
- In the input field’s Dataset ID placeholder, type the variable
{{resource.defaultDatasetId}}. This passes the dataset ID of Walmart Price Scraper’s output dataset ID to the Google Sheets exporter. The other input, Spreadsheet ID, is found in the URL of your Google Sheet, it’s the long alphanumeric string between/d/and/edit.Example:https://docs.google.com/spreadsheets/d/1WWdT6JNfQiW3k2YeJdbdAGGhQn3W3hZ_pwqB3EYA0VU/edit(In the above URL, Spreadsheet ID is1WWdT6JNfQiW3k2YeJdbdAGGhQn3W3hZ_pwqB3EYA0VU).
However, before running the above task, you'll need to authenticate the Google Sheets Exporter Actor to access Google Sheets. You only need to do this once, through the Actor itself, not the task.
- To start the authorization process, go to the Google Sheets Exporter Actor dashboard, fill in the input fields with the same information used in the task, and start the Actor.
- Once run, Apify Console will show a message asking you to open the “Live View” tab.
- Open it and Click the “Authorize” button.
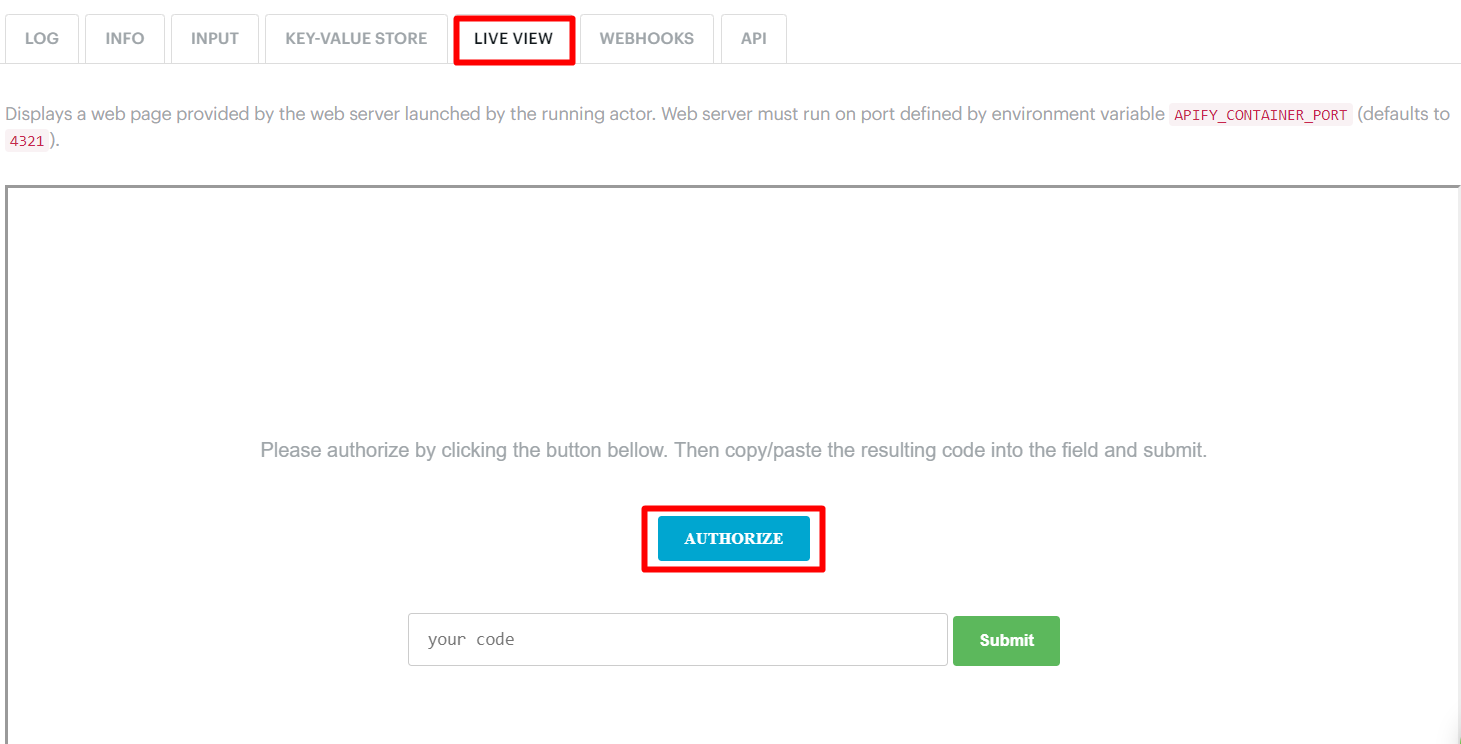
- Sign in to the Google account that contains your target spreadsheet when the redirect appears. When Google asks you to authorize Apify's access to Google Sheets, click approve. You'll receive an authorization token - copy this and paste it into the token field in the Actor's "Live View" tab.
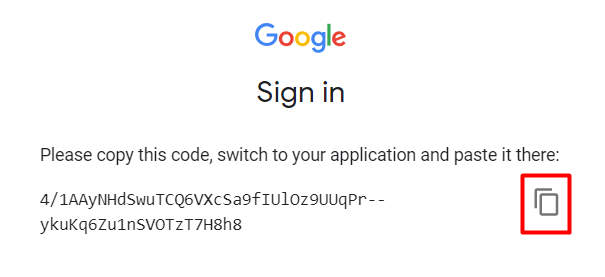
And you’re all set! Now, you can proceed to run the task we created.
- Run the above-created task as you normally would to check if the task works successfully.
If the task is working as intended (i.e., data is automatically uploaded to Google Sheets), proceed to the next step of scheduling your Walmart Product Detail Scraper.
5. Schedule the task
- In the task dashboard, click the three dots (
•••) next to the task information and select “Schedule.”

- Pick a schedule that fits your needs - run the task daily or set a custom frequency to match Walmart's price patterns.
Your Google Sheet will stay current with the latest prices, triggering email alerts whenever prices change.
6. Setting up email notifications
When the Google Spreadsheet is ready, you can use Google Apps Script to create a notification system.
- Go to Extensions > Apps Script.

- Copy and paste the following code, replacing the default script.
function sendEmailNotification() {
    const sheet = SpreadsheetApp.getActiveSpreadsheet().getActiveSheet();
    const lastRow = sheet.getLastRow();
    const priceColumn = 2; // Replace with the column index for prices
    const threshold = 50; // Set your desired price threshold
    const email = "your_email@example.com"; // Replace with your email

    for (let i = 2; i <= lastRow; i++) { // Assuming the first row is a header
        const price = sheet.getRange(i, priceColumn).getValue();
        if (price < threshold) {
            const productName = sheet.getRange(i, 1).getValue(); // Replace 1 with the product name column index
            const message = `Price drop alert! ${productName} is now $${price}.`;
            MailApp.sendEmail(email, "Price Drop Alert", message);
        }
    }
}

function createTrigger() {
    ScriptApp.newTrigger("sendEmailNotification")
        .timeBased()
        .everyMinutes(1)
        .create();
}
- Save the file with a relevant name (like “WalmartNotifications”) and click “Run” on the toolbar.
Follow the steps to authorize the script, and there you have it! You have successfully set up an email notification system. To test the script, decrease the price threshold (const threshold) and keep an eye on your email inbox.
Track and save
With real-time data, you can adjust your pricing to remain competitive, optimize your profit margins, and refine your sales channel strategy to target the right markets effectively.
You're now ready to use Apify and Google Sheets for smarter Walmart shopping. With automated price tracking, you'll catch every deal as it happens, saving you both time and money. Start tracking, get notified, and shop smart!


