Sentiment analysis helps understand public opinion, track emerging trends, and react quickly to what people are saying online. And when it comes to real-time insights, Twitter (X) remains one of the richest data sources available.
Collecting and processing Tweets manually is time-consuming, hard to scale, and quickly becomes impractical if you need consistent or real-time insights. With Apify, you can collect and analyze thousands of Tweets at scale using a fully automated workflow - without code, special tools, or complex setup.
In this tutorial, you’ll learn how to build a Twitter sentiment analysis pipeline using Apify Actors. You’ll scrape Tweets, process them with an LLM, and automatically deliver the enriched results to Google Sheets.
How to do a sentiment analysis of Tweets
We'll build a fully automated system that:
- Automatically collects Twitter data, namely Tweets and replies, via web scraping or by connecting to the official APIs.
- Sends the collected data to a sentiment analysis engine - whether NLP-based, LLM-powered, or similar - to generate sentiment insights.
This can be achieved by selecting and configuring the right Apify Actors to create a fully automated workflow within the Apify platform.
The great advantage of building this pipeline in Apify is that no coding is required. You simply pick the appropriate Actors and connect them directly in Apify Console through a point-and-click web interface. Alternatively, you can define the same workflow using Apify integration nodes in Zapier, Make, or n8n.
Let’s now explore the two main approaches for implementing the steps of a Twitter sentiment analysis process.
Tweet data retrieval
Developing a custom script to scrape Twitter/X is tricky and requires technical skills, along with ongoing maintenance. That’s why the recommended approach to retrieving Twitter data is to rely on a ready-made, reliable solution.
Apify offers hundreds of pre-built Actors for Twitter data scraping. Here, we’ll focus on two in particular:
| Actor | Description | Scope |
|---|---|---|
| Twitter (X.com) Tweets & Profiles Scraper | Scrapes Tweets and full profile data from specific accounts or search queries. | Profile-level + tweet-level extraction, including replies and user info. |
| Tweet Scraper V2 – X / Twitter Scraper | High-scale scraper based on advanced search queries with powerful filtering. | Large-scale Tweet extraction (up to 100K+ Tweets per query). |
ML/AI-powered sentiment analysis
Once you have a dataset containing Tweets, the next step is to perform sentiment analysis on their text. This can be done using traditional ML-based natural language processing techniques. However, Tweets often include slang, require context, and contain nuances like irony or sarcasm. As a result, employing an LLM-powered approach typically yields better results.
Examples of possible prompts for Twitter sentiment analysis are:
Classify the sentiment of the following Tweet as Positive, Negative, or Neutral. Respond with only the label.
Tweet: "<insert Tweet text here>"
Or, a more technical one:
Act as a social media analyst. Evaluate the following Tweet and return your analysis strictly in JSON format with the following keys: `sentiment` (string), `confidence_score` (float; 0-1), and `detected_irony` (boolean).
Tweet: "<insert Tweet text here>"
A possible implementation involves a custom script that:
- Sends the scraped Tweets to the chosen LLM.
- Connects to an LLM to process the data for sentiment analysis.
- Enriches the original dataset with sentiment analysis fields.
This approach isn’t straightforward, which is why it’s generally easier to rely on one of the many Apify sentiment analysis Actors. For example, LLM Dataset Processor (covered later in this guide).
Common preliminary steps
In this section, you’ll see how to set up an Apify account and access Apify Store. There, you’ll find 20,000+ Actors, including the ones mentioned earlier, for retrieving Twitter data for sentiment analysis.
Prerequisites
To follow this tutorial, make sure you have:
- An Apify account.
- A basic understanding of how Apify integrations work.
- A Google account to send Twitter data enriched with sentiment analysis fields to Google Drive.
Access Apify Store and select an Actor
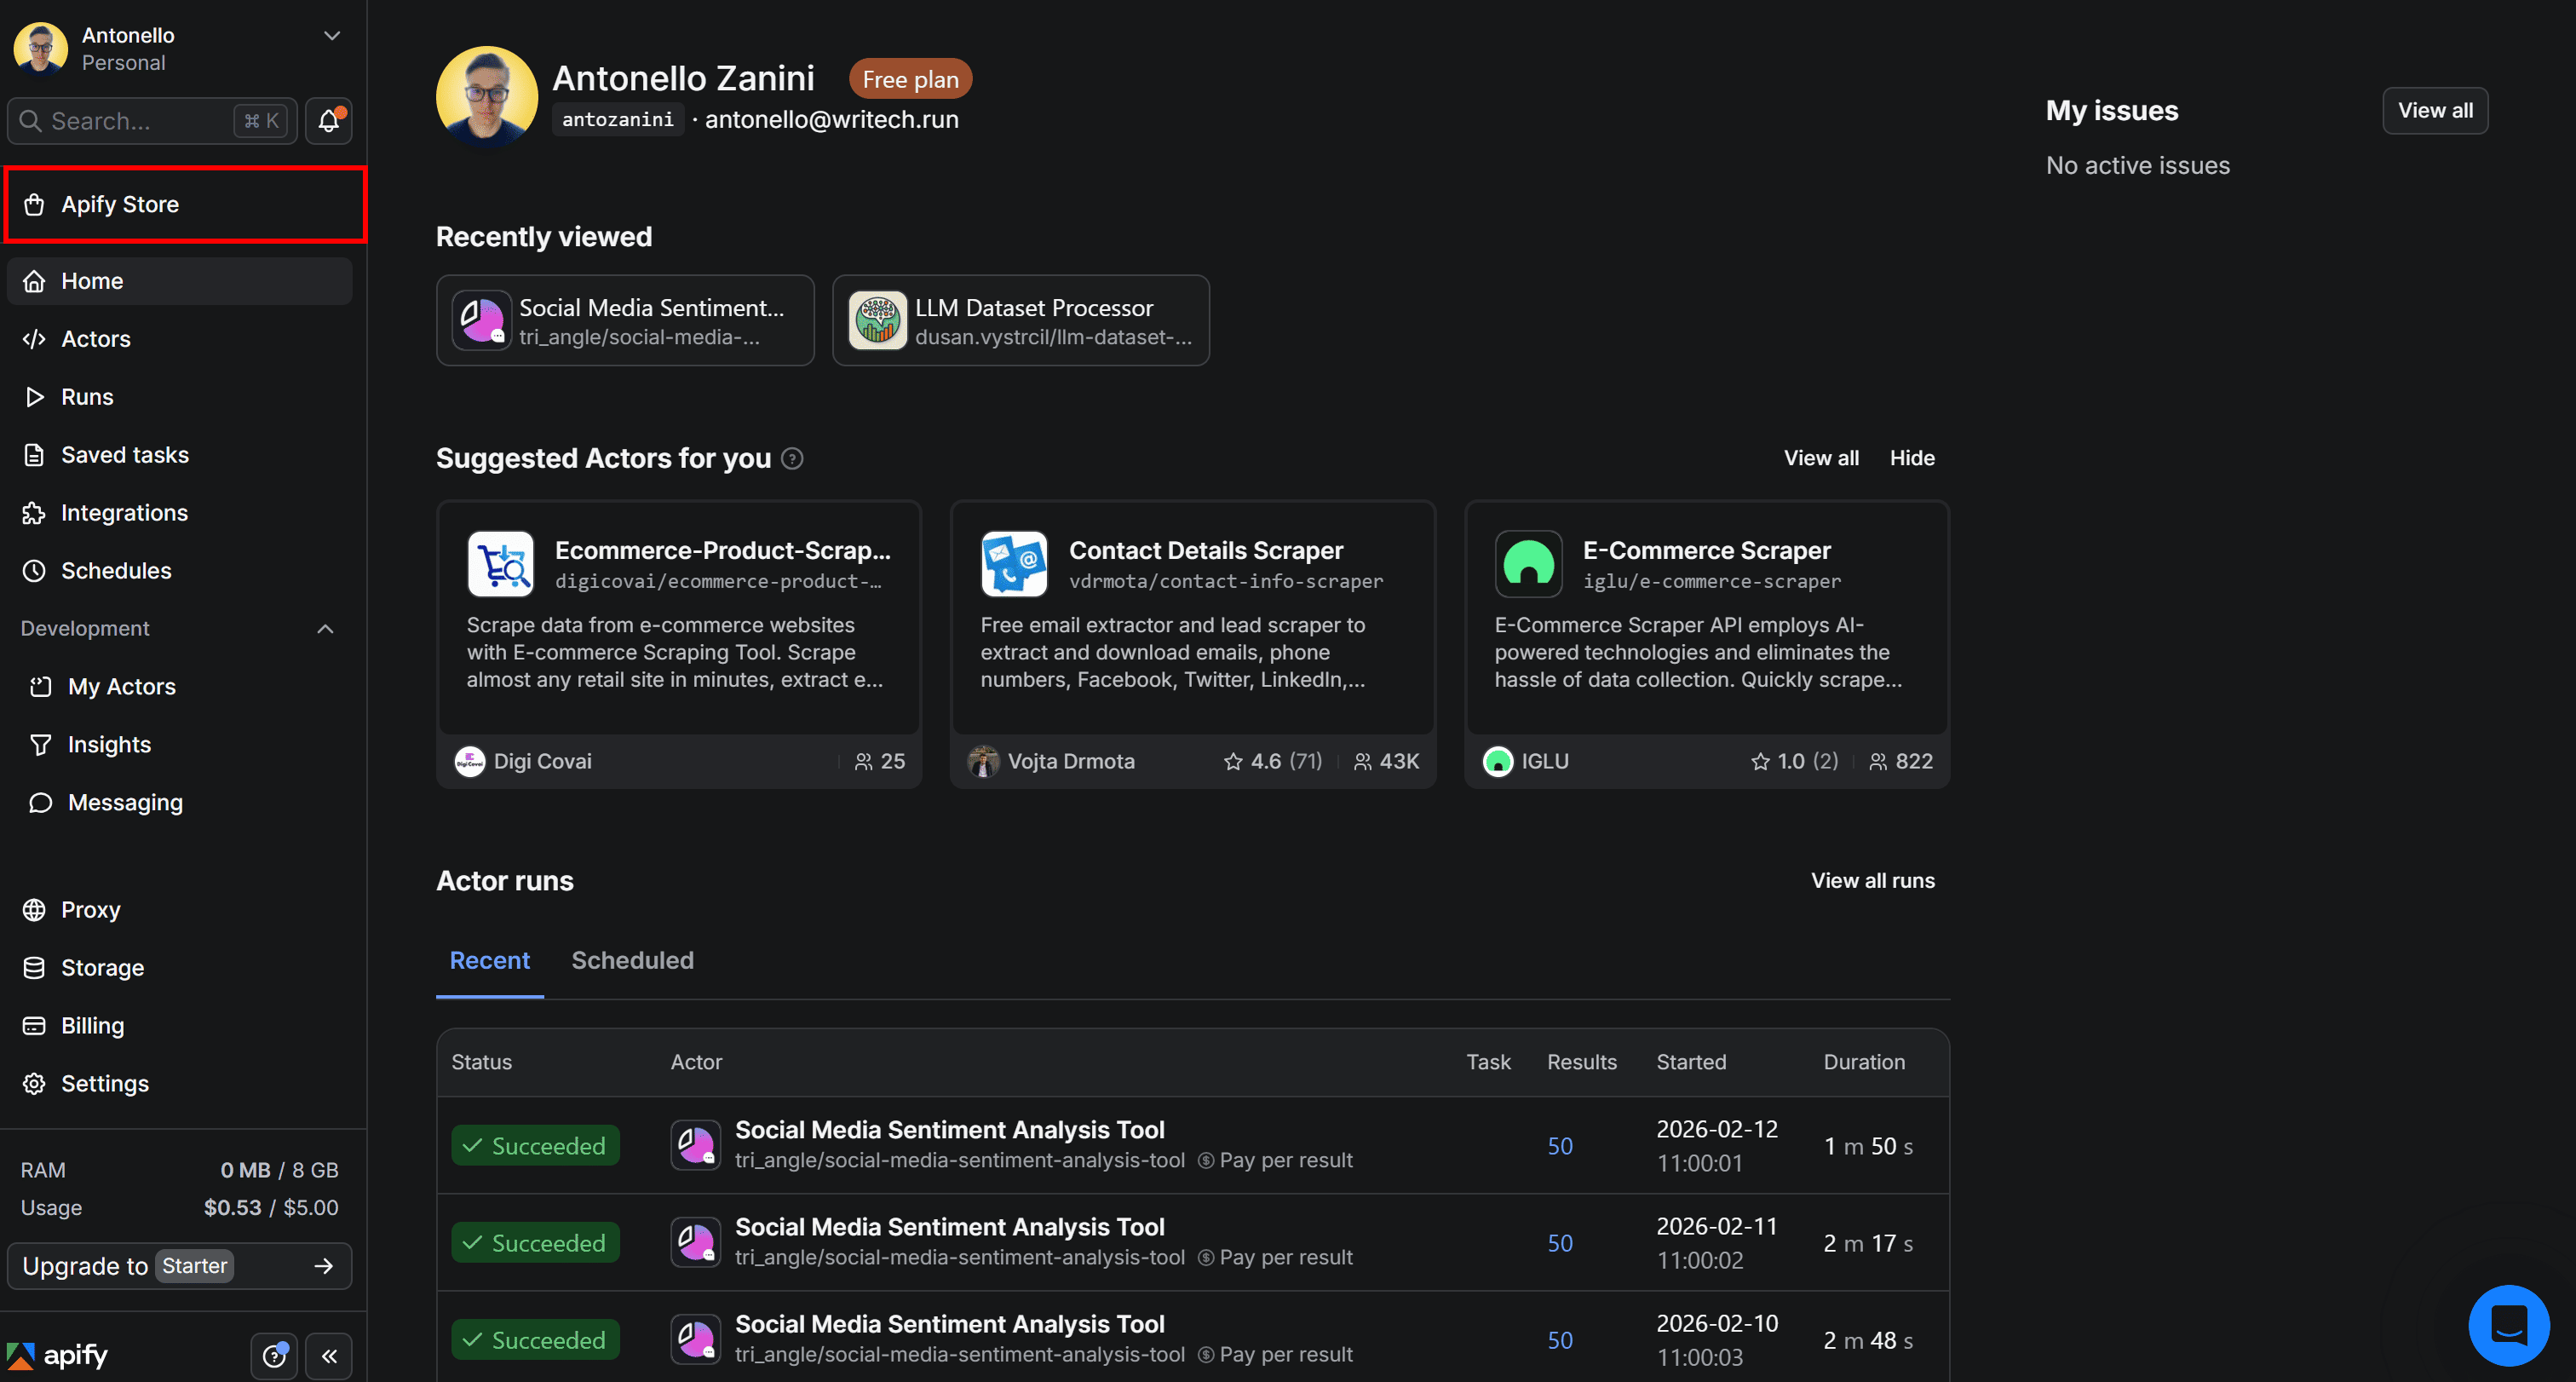
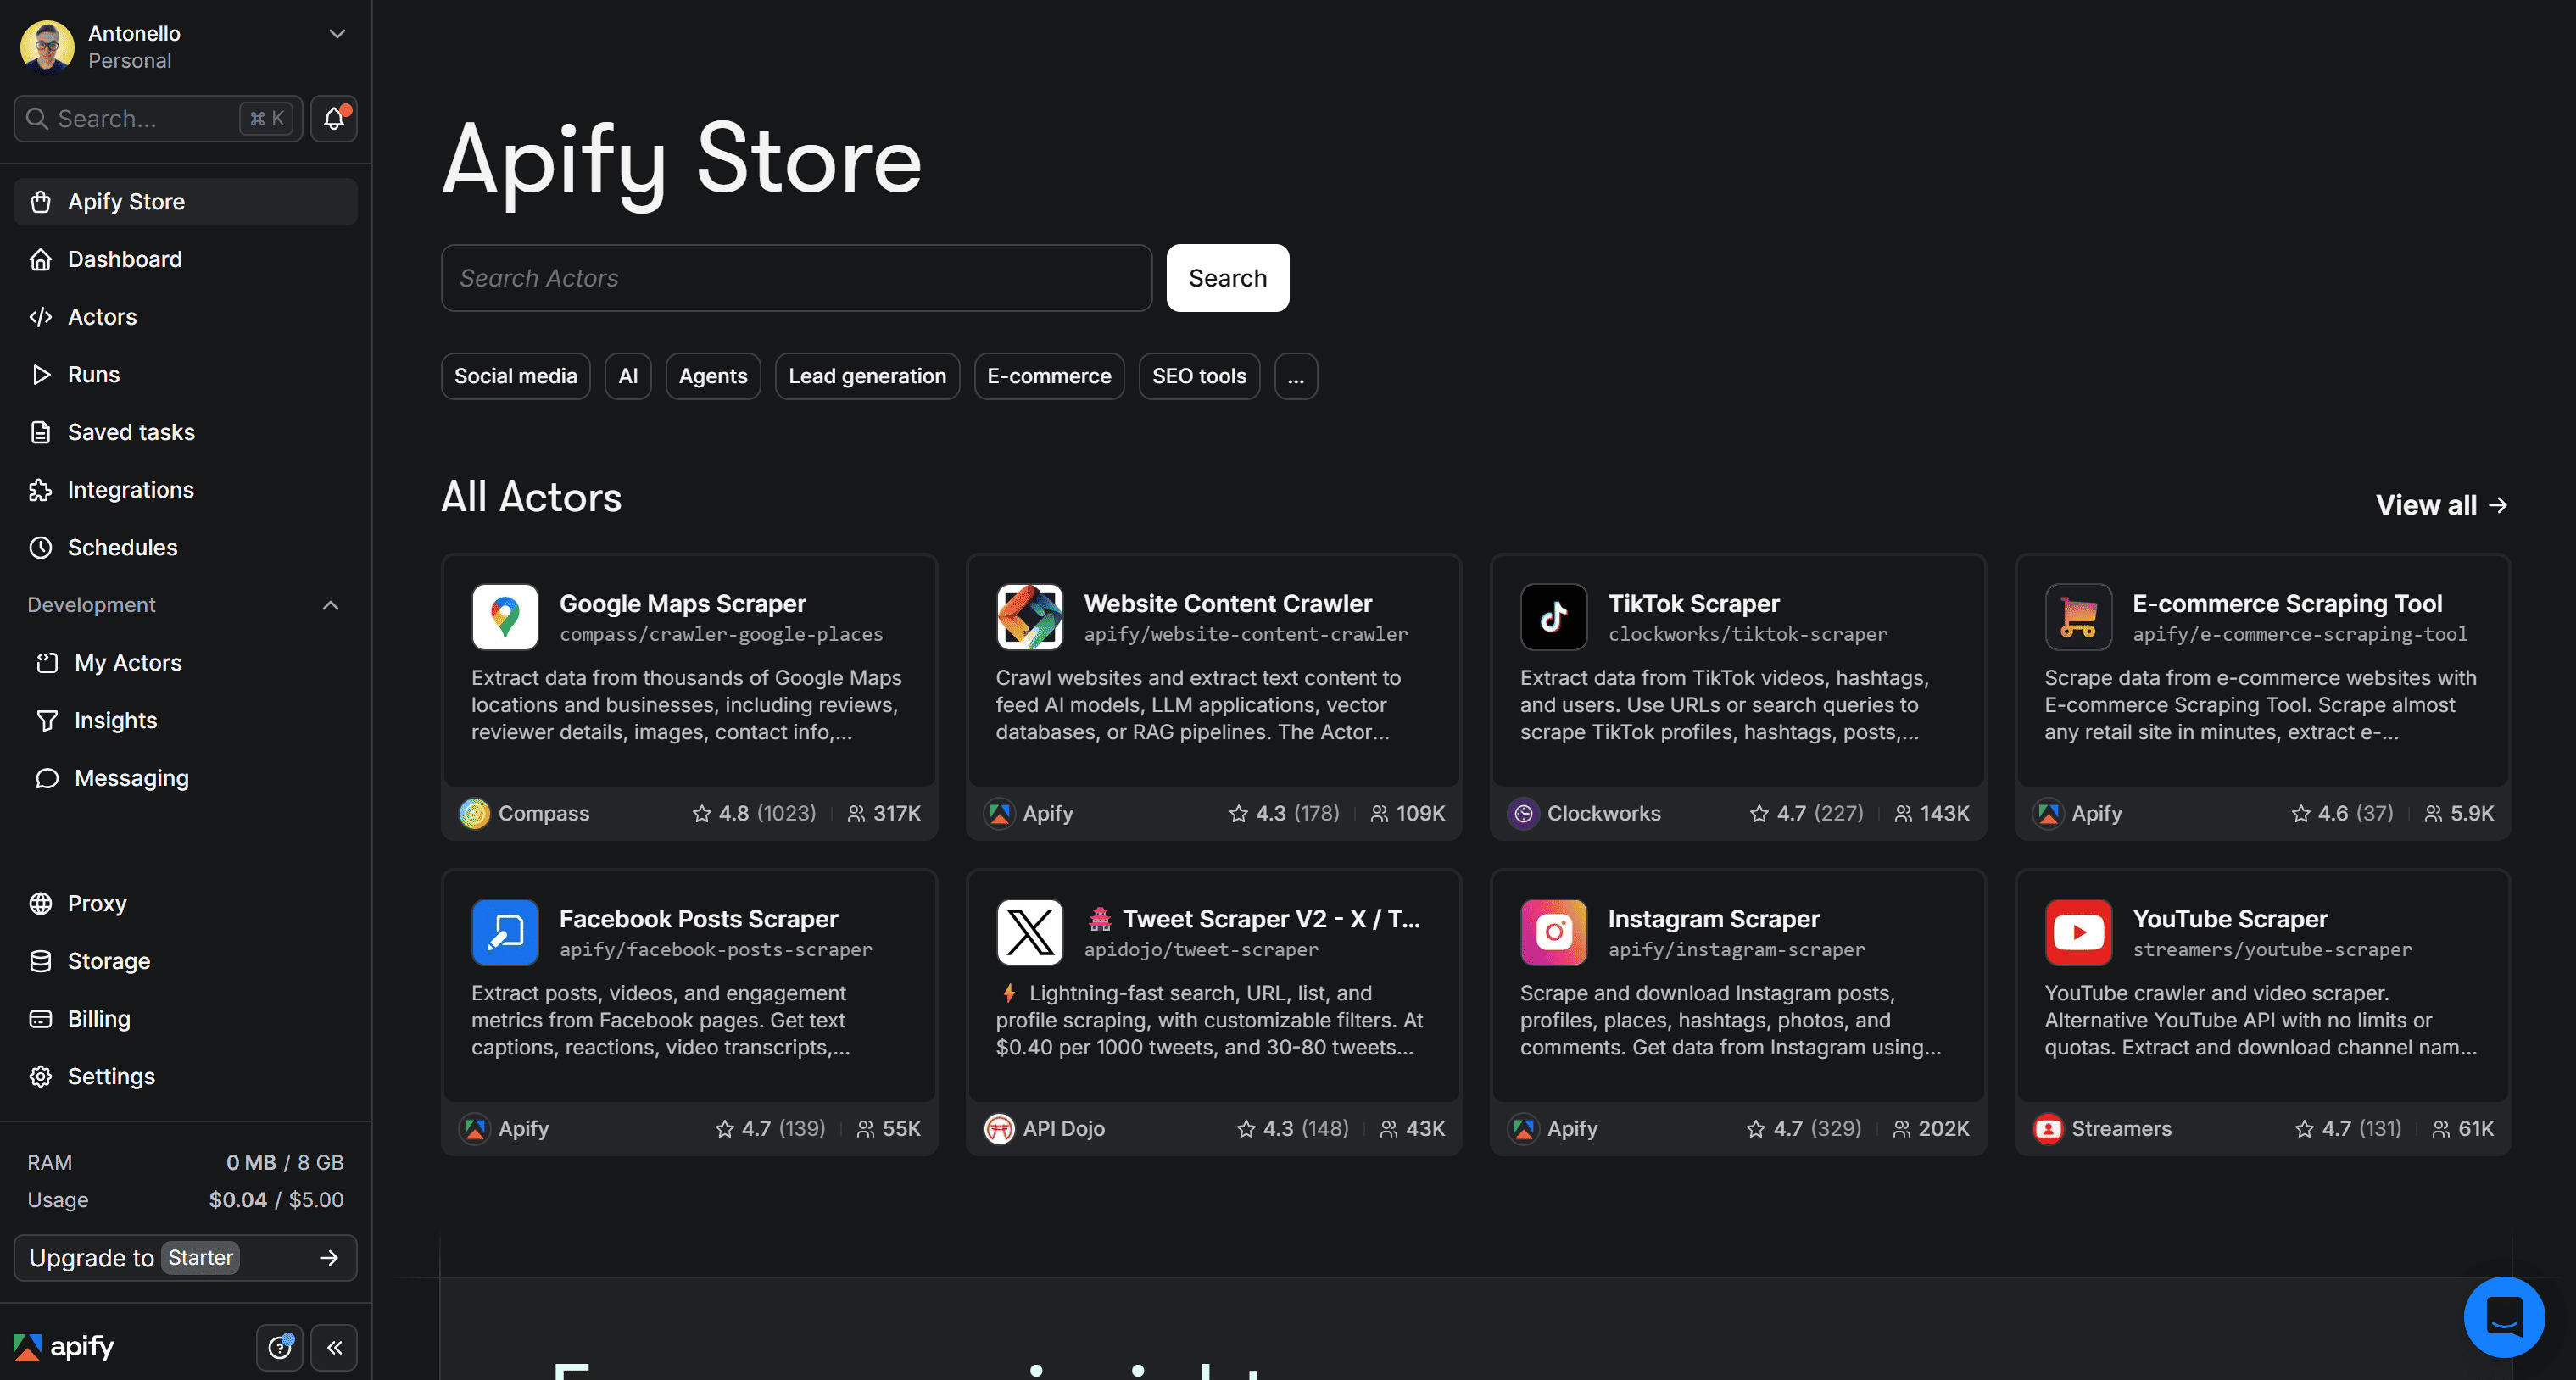
To build your workflow for retrieving Twitter data and then analyzing its sentiment, start by logging in to your Apify account. In Apify Console, select Apify Store in the left-hand navigation menu:
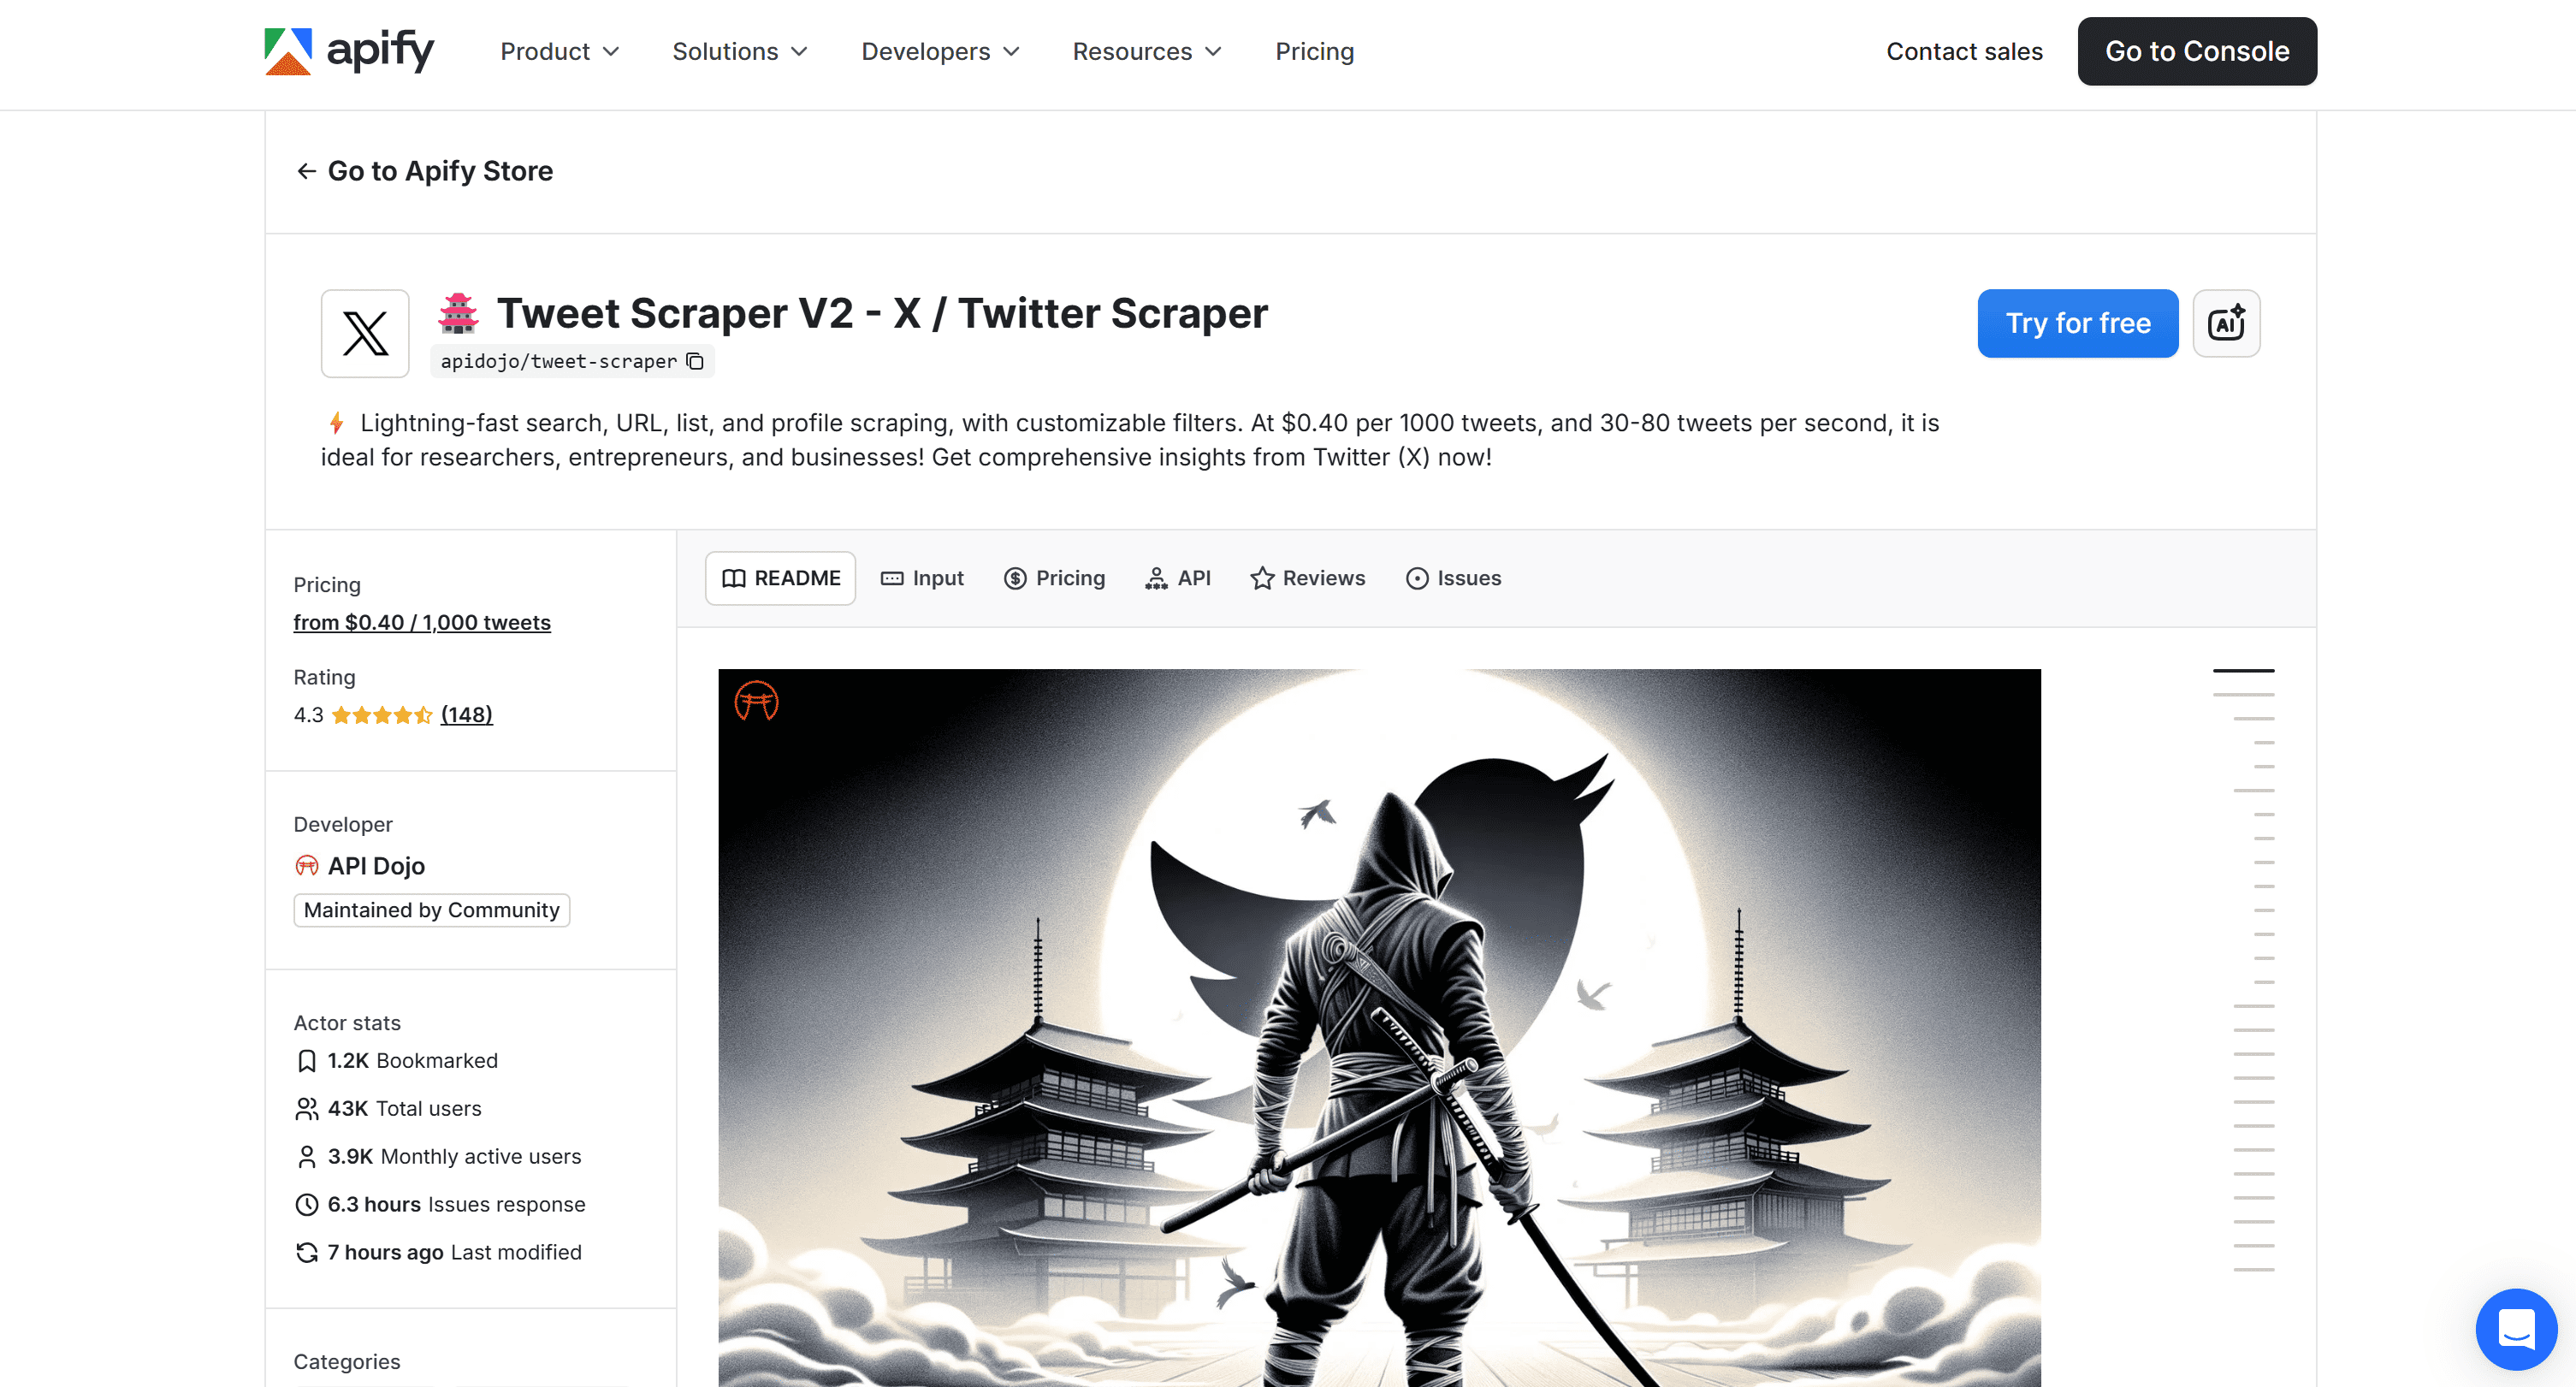
This will take you to Apify Store, where all available Actors are listed:
Here, use the search bar to look for “twitter”. Then, select the Actor you want to proceed with:
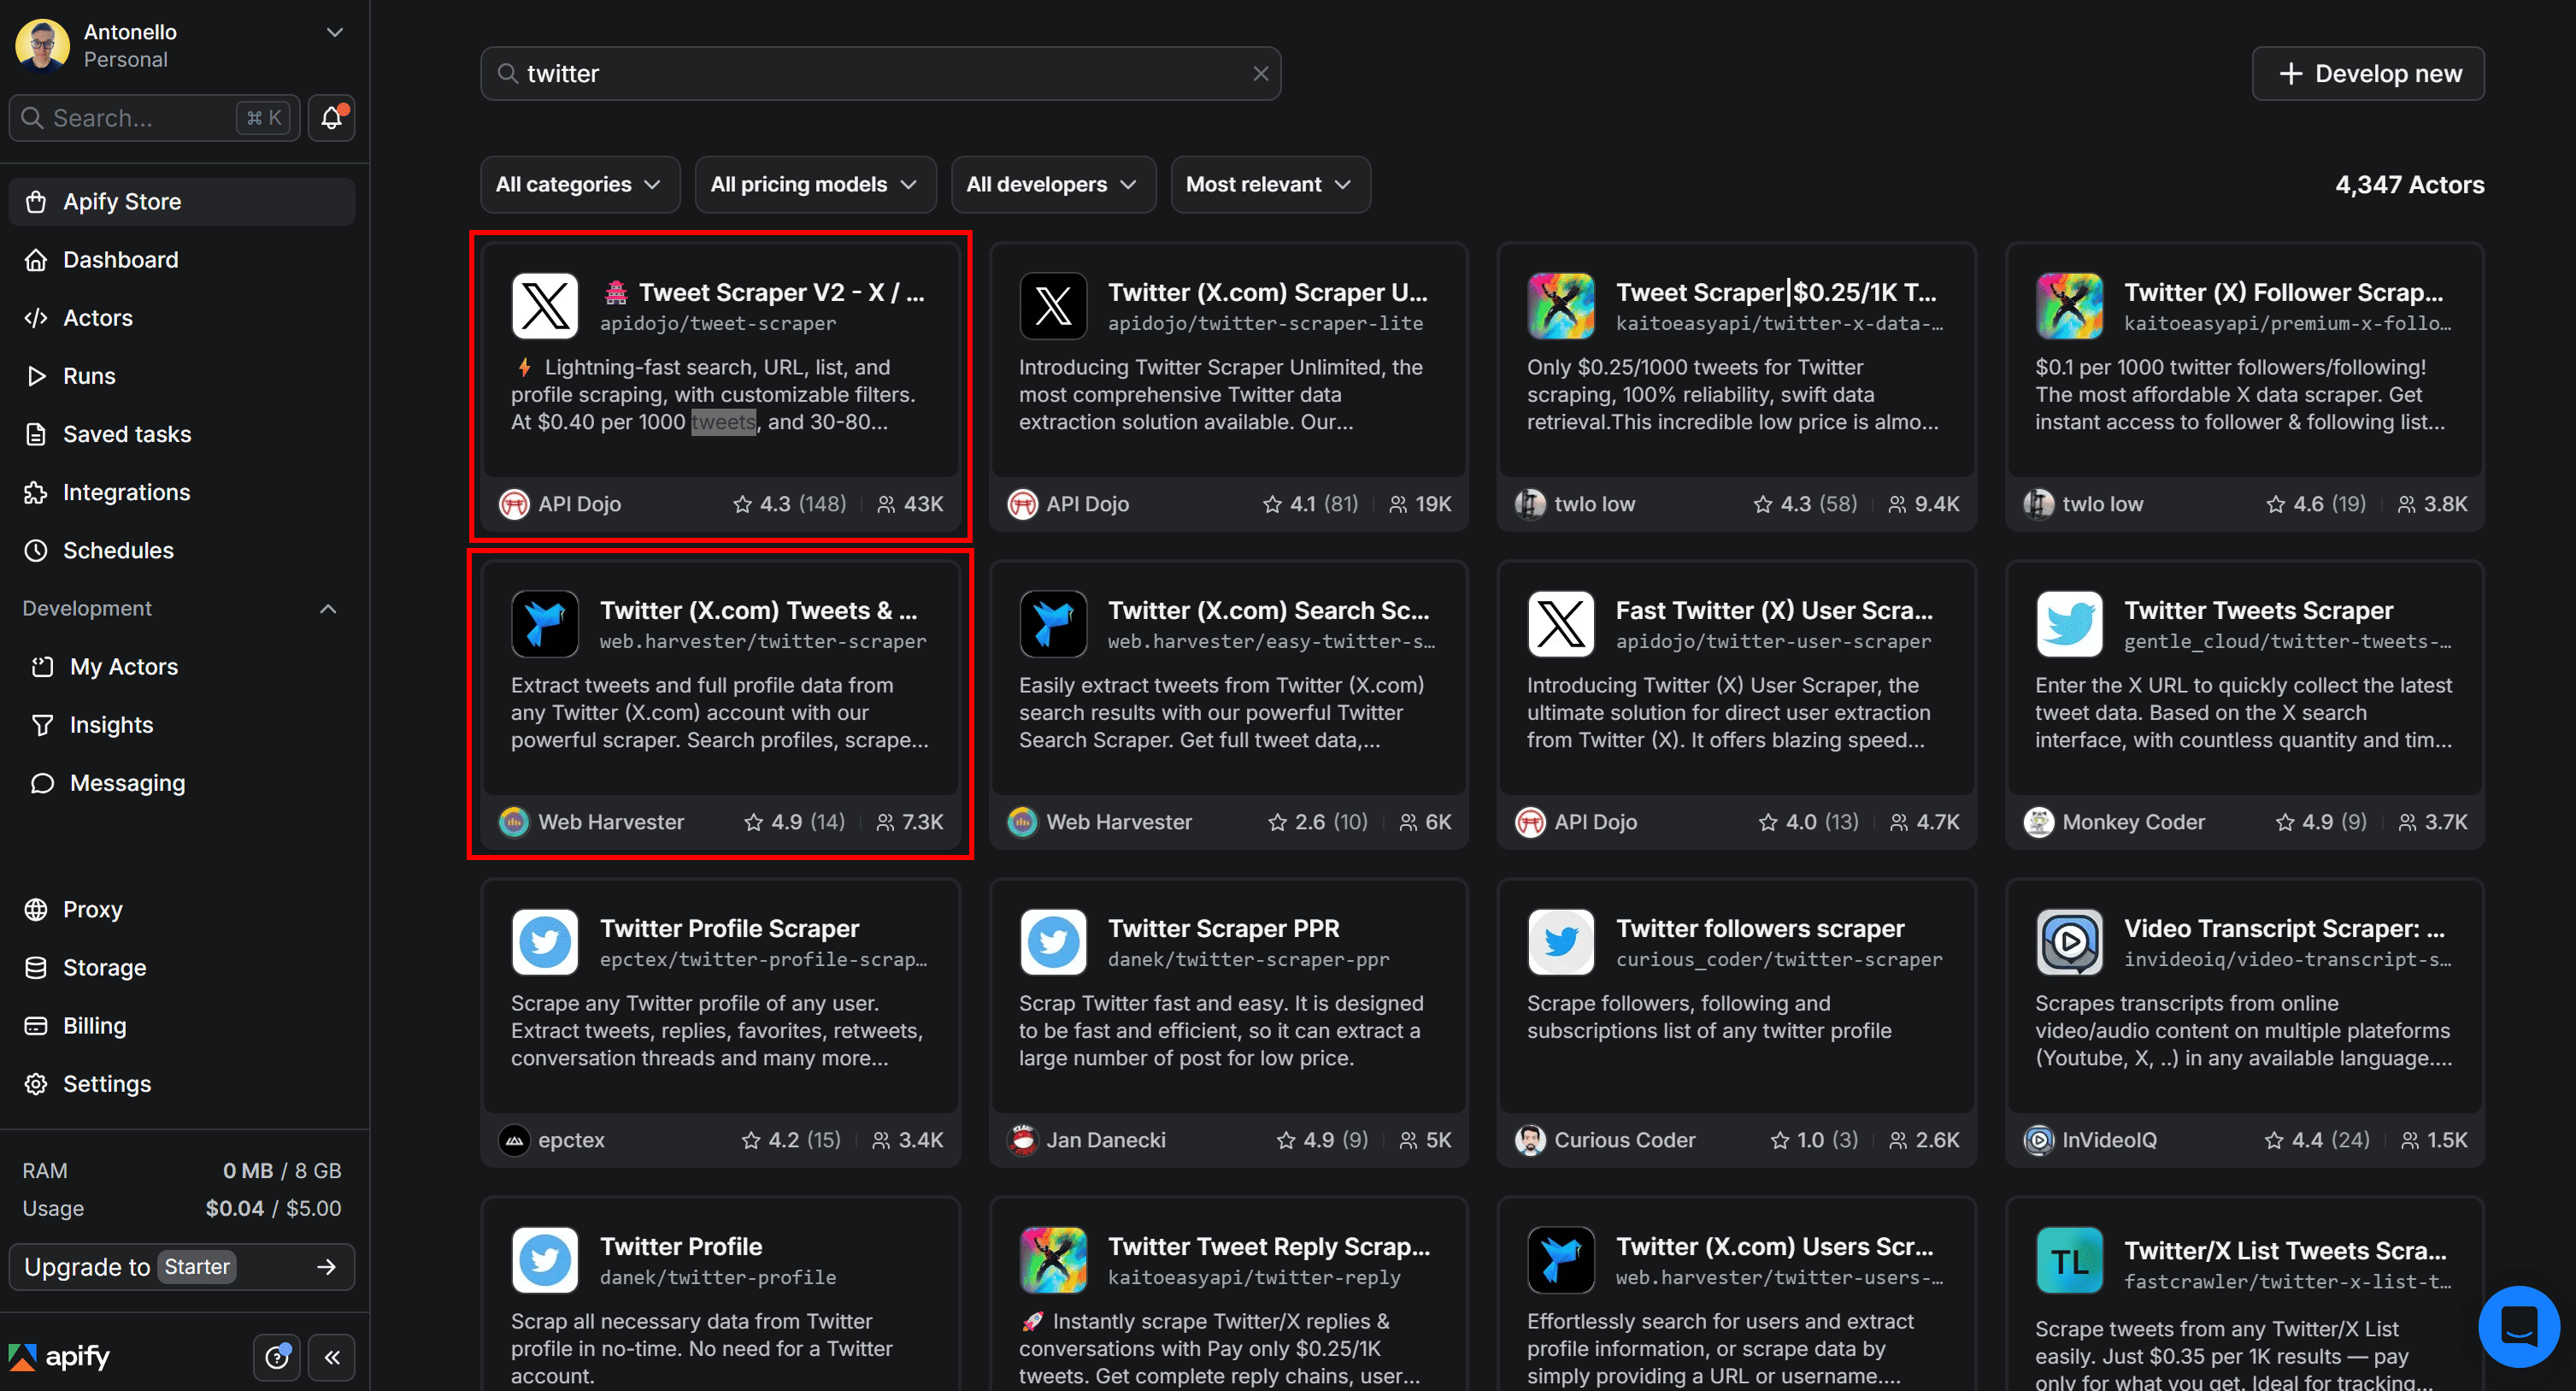
After clicking on an Actor card, you’ll be redirected to its detail page. In the next steps, we’ll assume you’re already on the selected Actor’s page in Apify Console.
- Pay per result: You’re charged based on the number of dataset items the Actor produces. The pay-per-result Actors consume credits from your Apify balance.
- Rental Actor: You pay a recurring subscription fee after the free trial, plus usage costs. The Rental Actor includes a free trial period, with any usage costs deducted from your Apify balance.
Since Apify’s free plan includes $5 in monthly credits, you can test both for free as long as you stay within that limit. In short, you can experiment with the two Actors at no cost.
Now, for the selected Twitter data scraping Actor, you’ll see:
- A short overview of what the Actor does and its main use cases
- Supported inputs, with examples
- The resulting output, along with a clear explanation
How to use Twitter (X.com) Tweets & Profiles Scraper
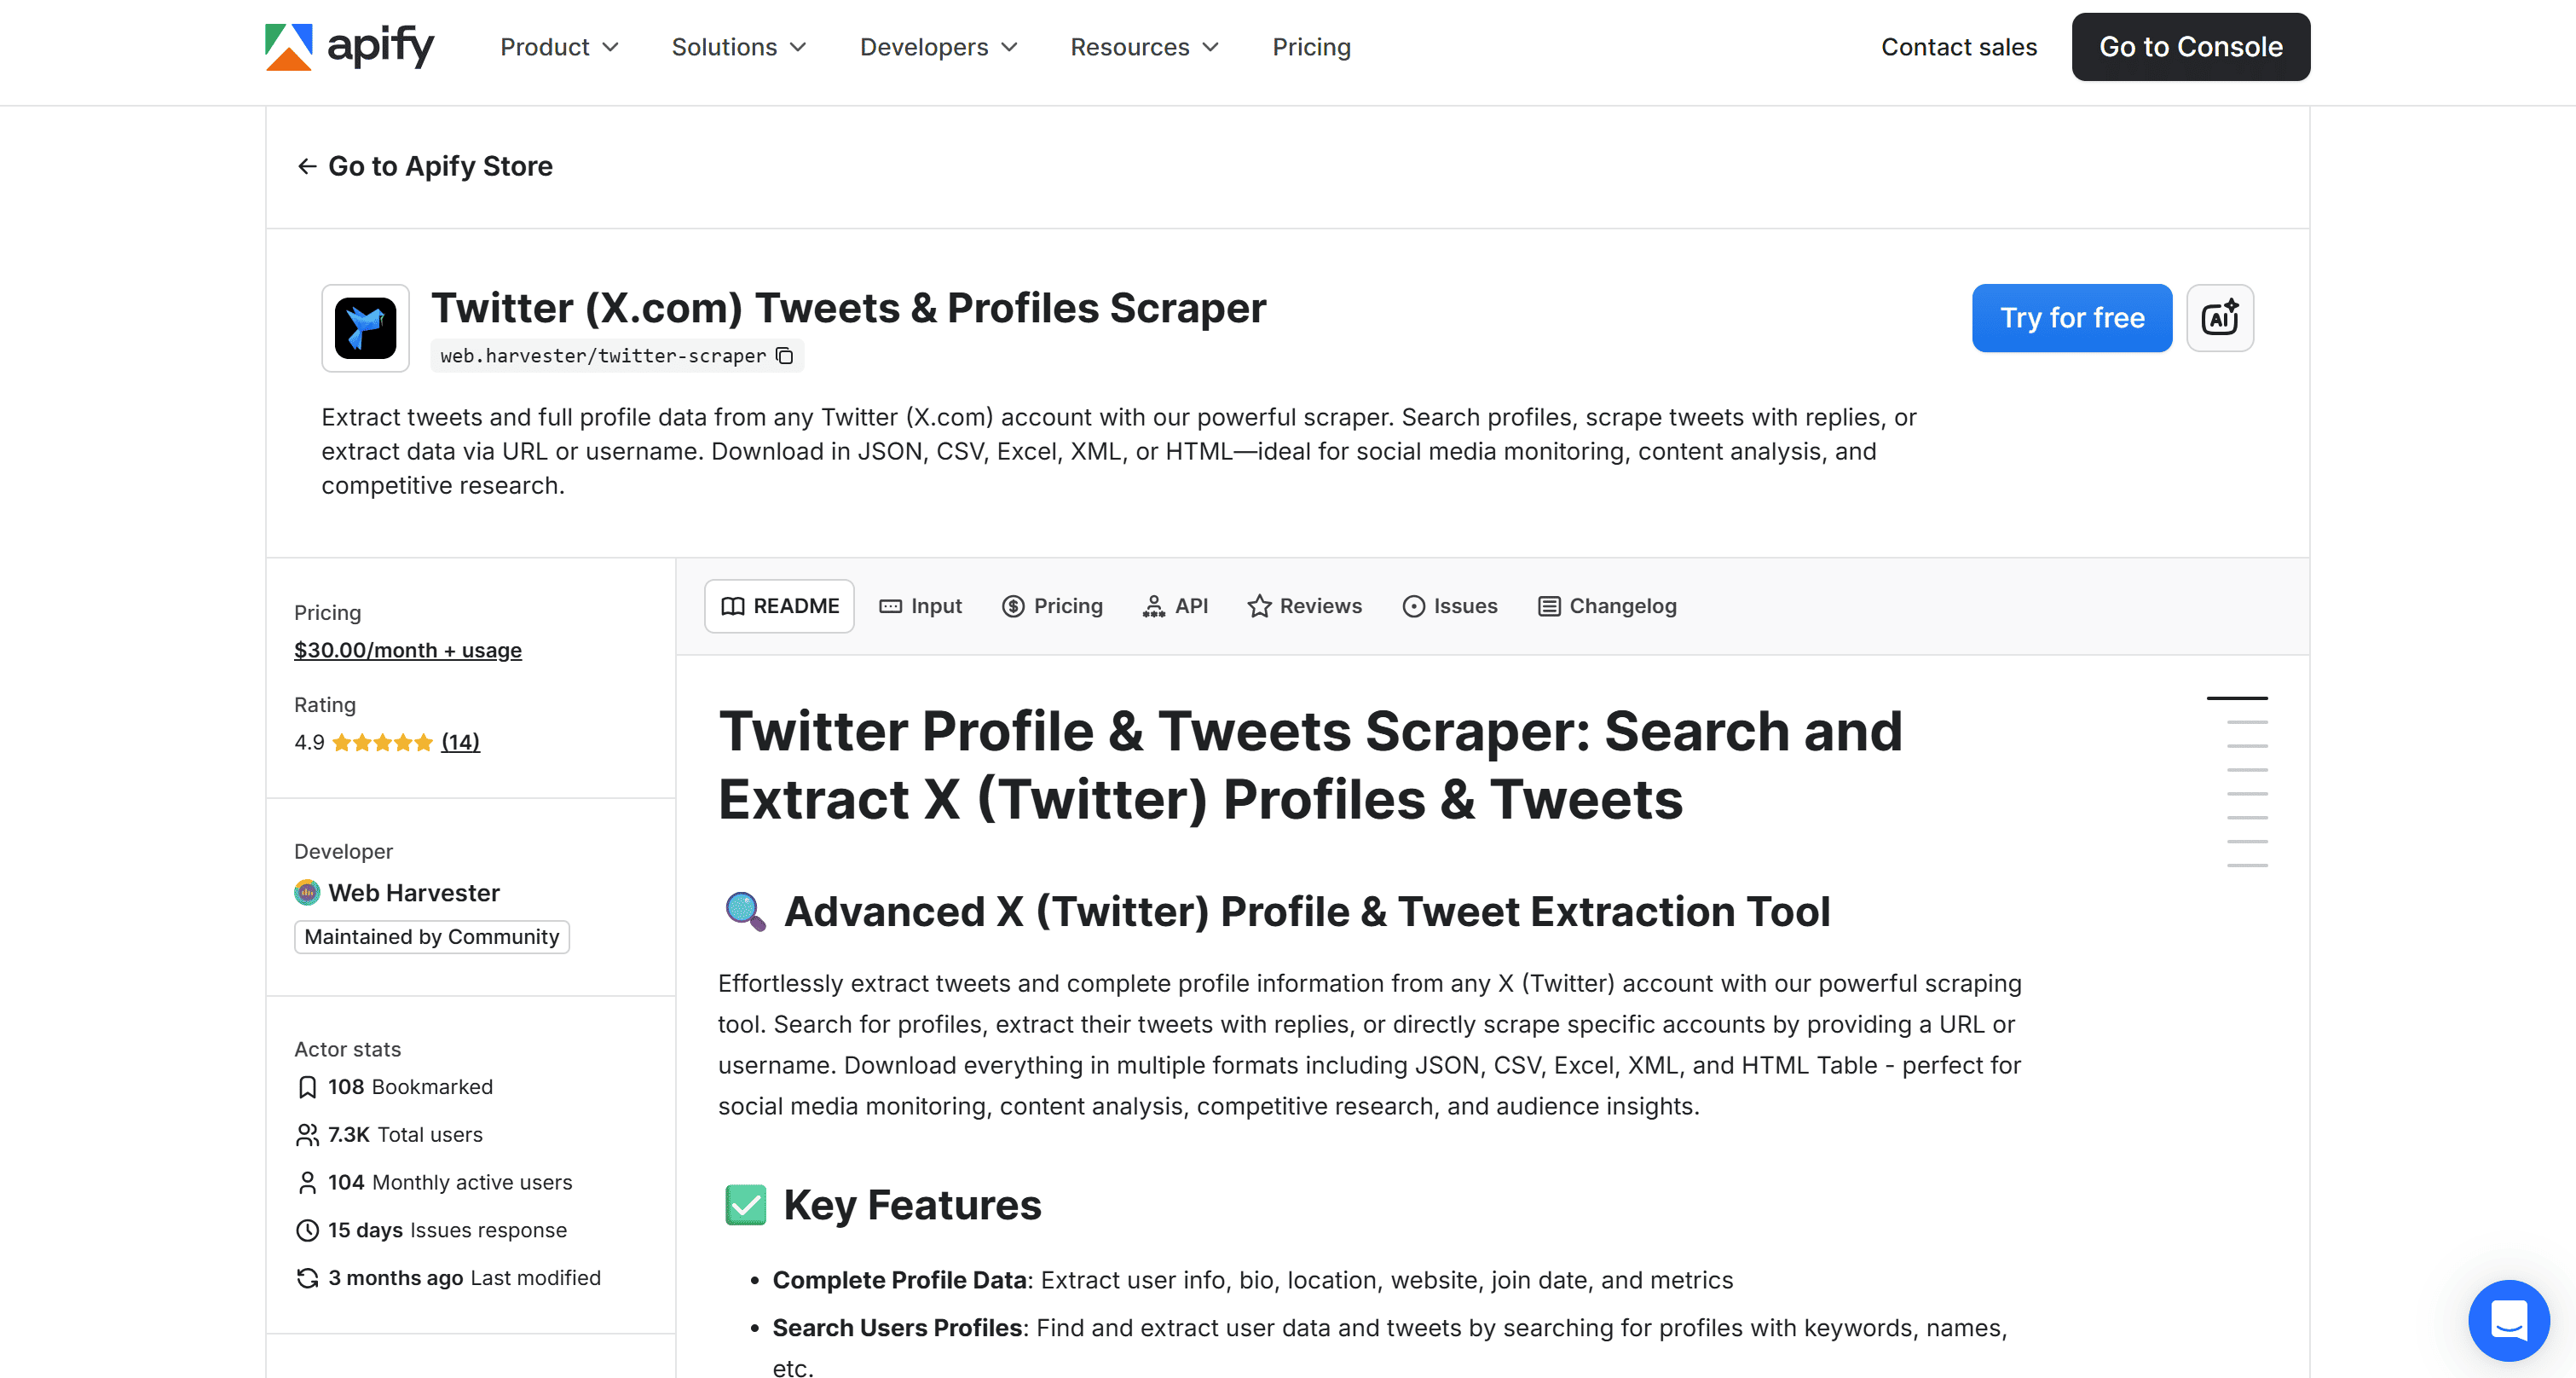
Twitter (X.com) Tweets & Profiles Scraper is an Apify Actor that allows you to search for profiles, extract their Tweets (including replies), or scrape specific accounts by providing a URL or username.
Apart from the obvious use case of performing sentiment analysis on scraped Tweets, other possible applications include:
- Social media monitoring: Track mentions, conversations, and engagement metrics in real time to understand brand perception and audience reactions.
- Competitor analysis: Monitor competitors’ profiles, content strategies, and engagement trends to identify opportunities and benchmark performance.
- Lead generation: Extract user profiles and bios to identify potential leads, influencers, or niche communities relevant to your business.
Input
The most relevant inputs accepted by the Actor are:
| Input name | Description | Type | Required | Notes |
|---|---|---|---|---|
| Start URLs | Direct links to Twitter profiles or Tweets to scrape. | array | No | Provide full URLs (e.g., profile or Tweet links). |
| Handles | Twitter/X usernames to scrape | array | No | Accepts values with or without @ (e.g., elonmusk or @elonmusk). |
| User queries | Search queries to find Twitter users and scrape their Tweets. | array | No | Returns profiles matching the query, then extracts their Tweets. |
| Tweets desired | Maximum number of Tweets to collect per profile or URL. | integer | No | Default: 100. Up to ~800 without replies, ~3200 with replies enabled. |
| Since | Oldest date for Tweets to include. | string | No | Format: YYYY-MM-DD or relative (e.g., “1 month”, “2 days”). |
Explore all other accepted inputs.
Suppose you want to scrape the last 100 Tweets published by Elon Musk in the past week, excluding profile information (since for sentiment analysis, you’re only interested in Tweets).
This is how you can configure the Actor directly on its page in Apify Console:
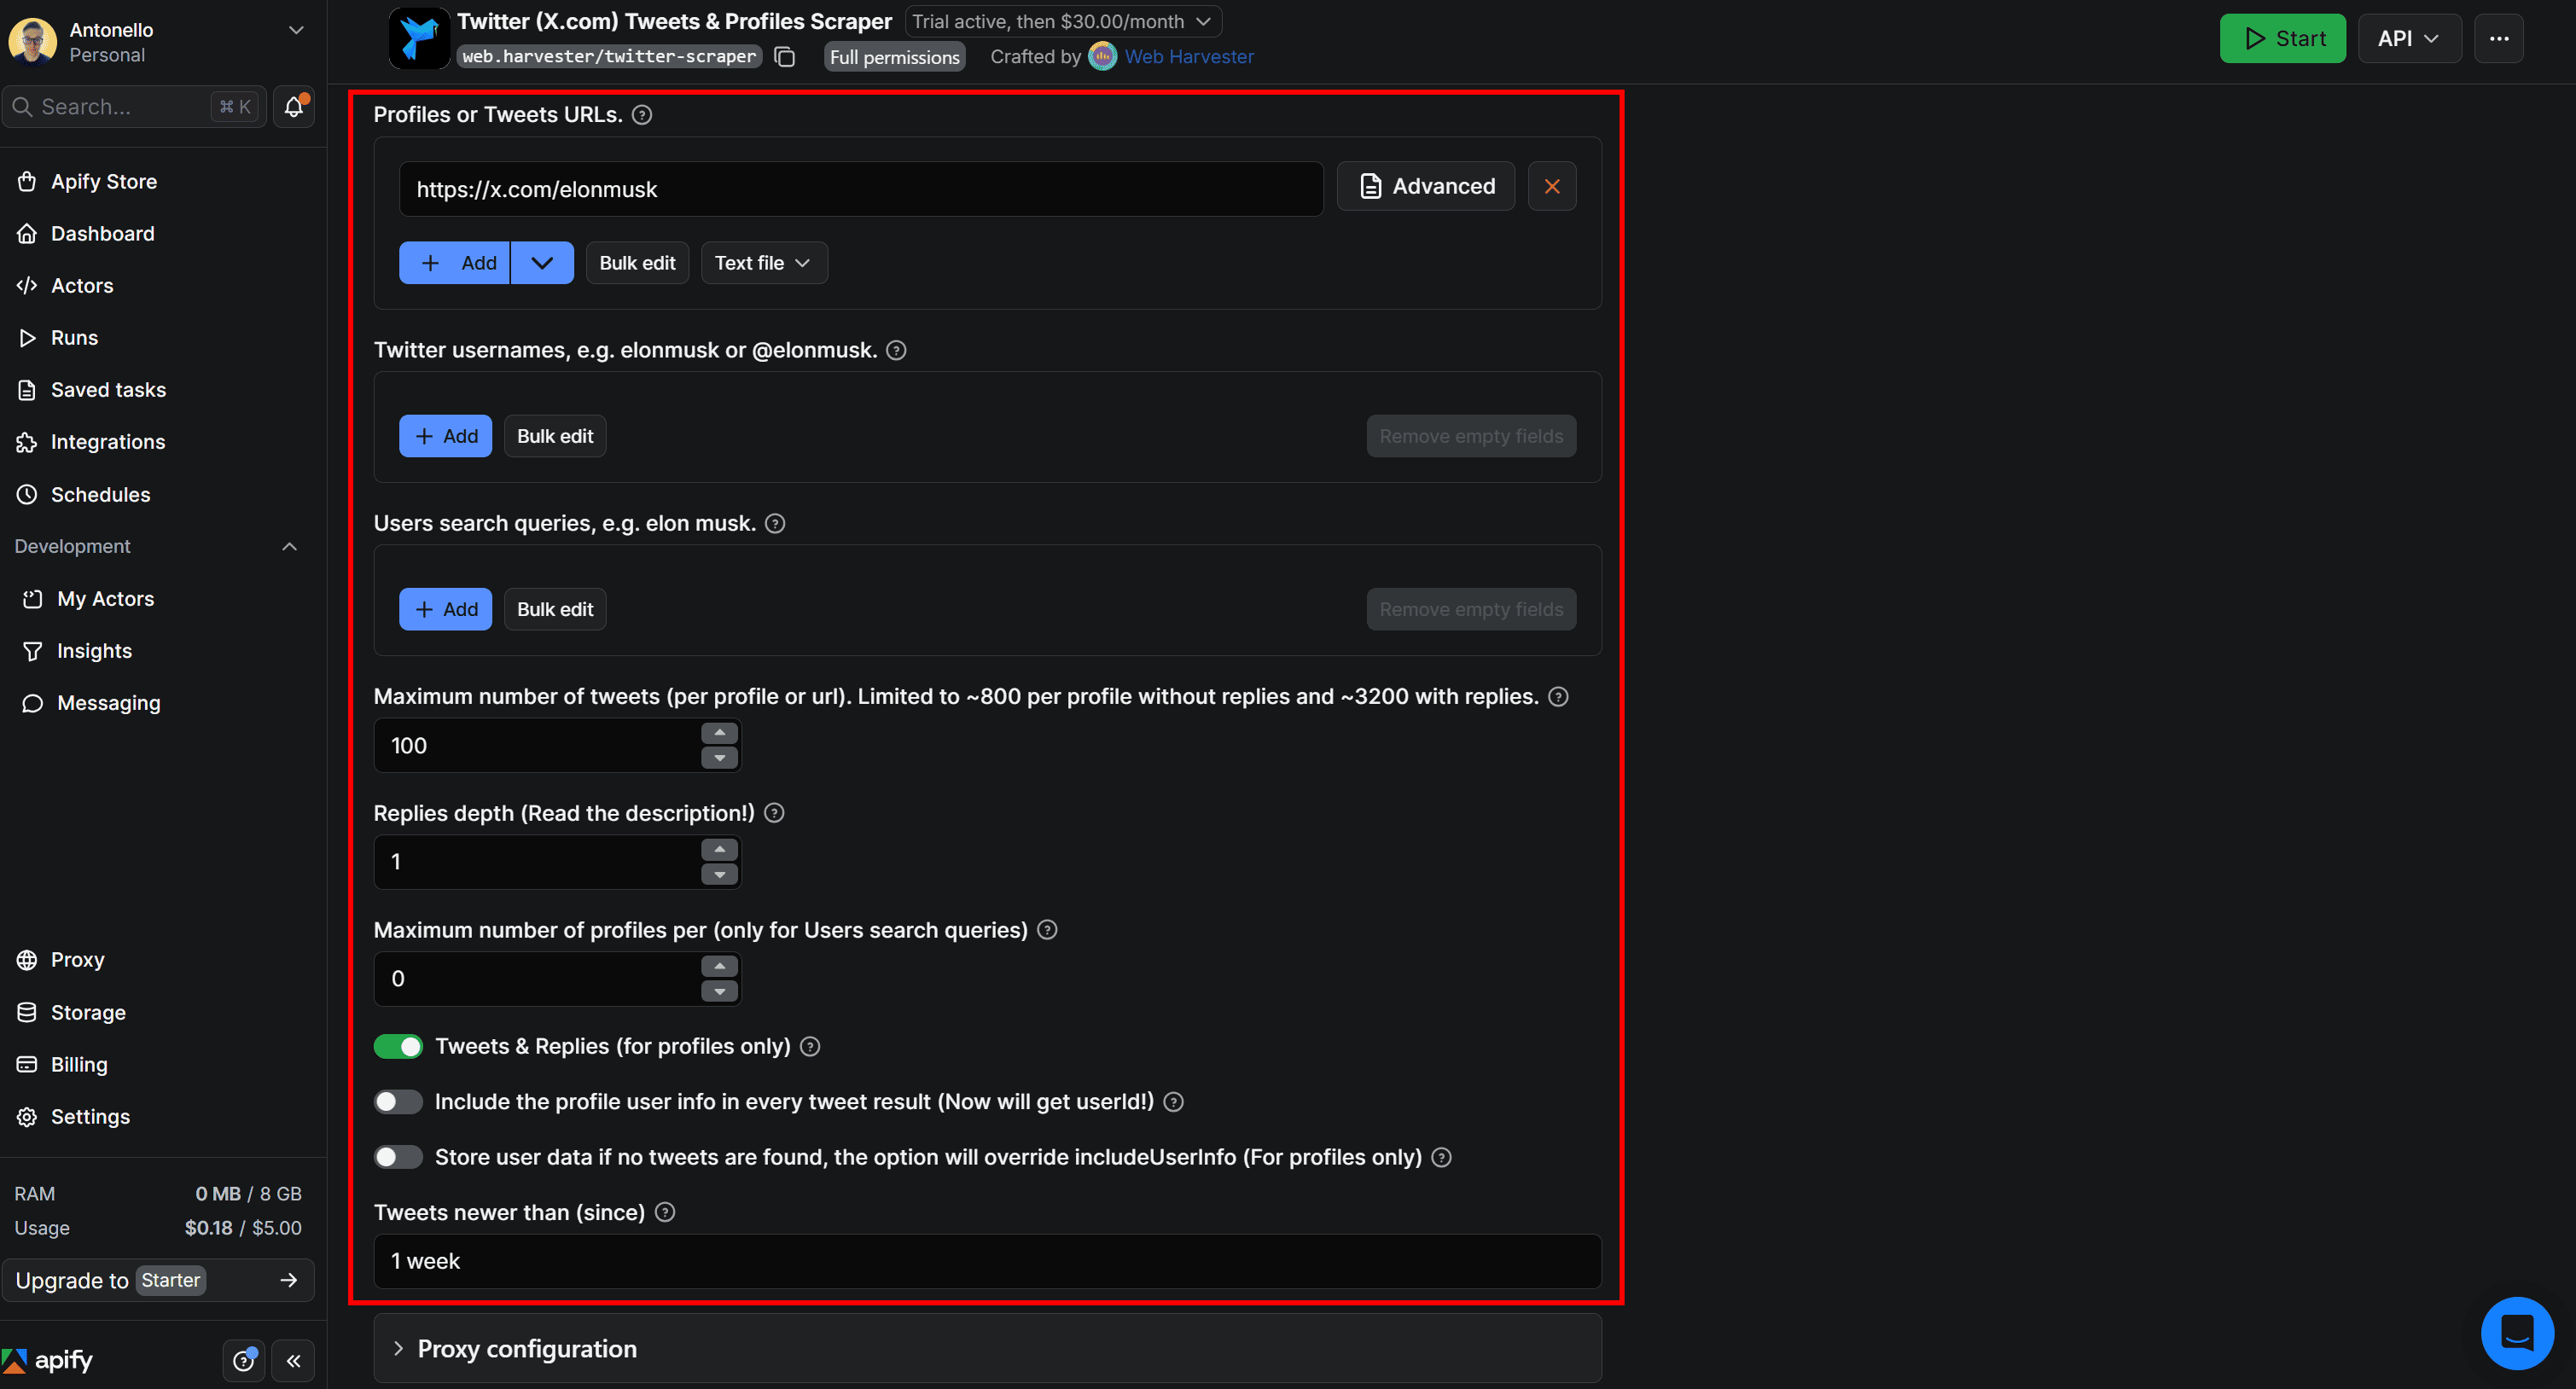
Press the Save & Start button in the top-right corner to launch the Actor. This is what you’ll see next:
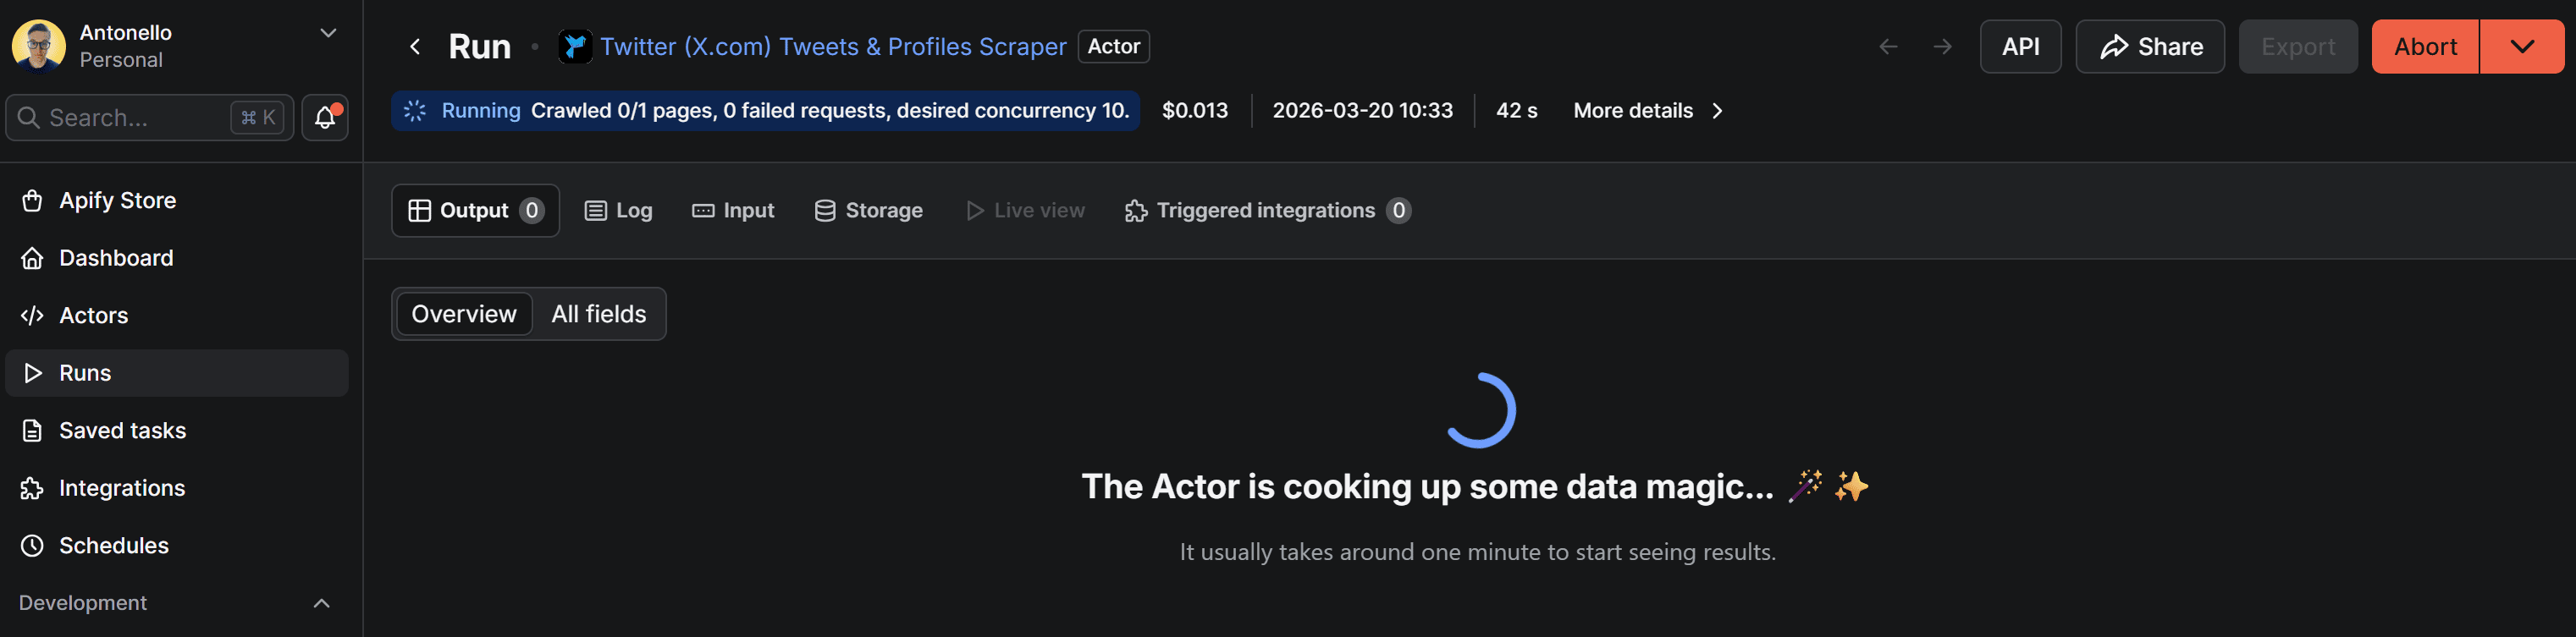
Keep in mind that it usually takes about 1 minute for results to appear.
Output
The output will be displayed directly in Apify Console in a tabular format, as follows:
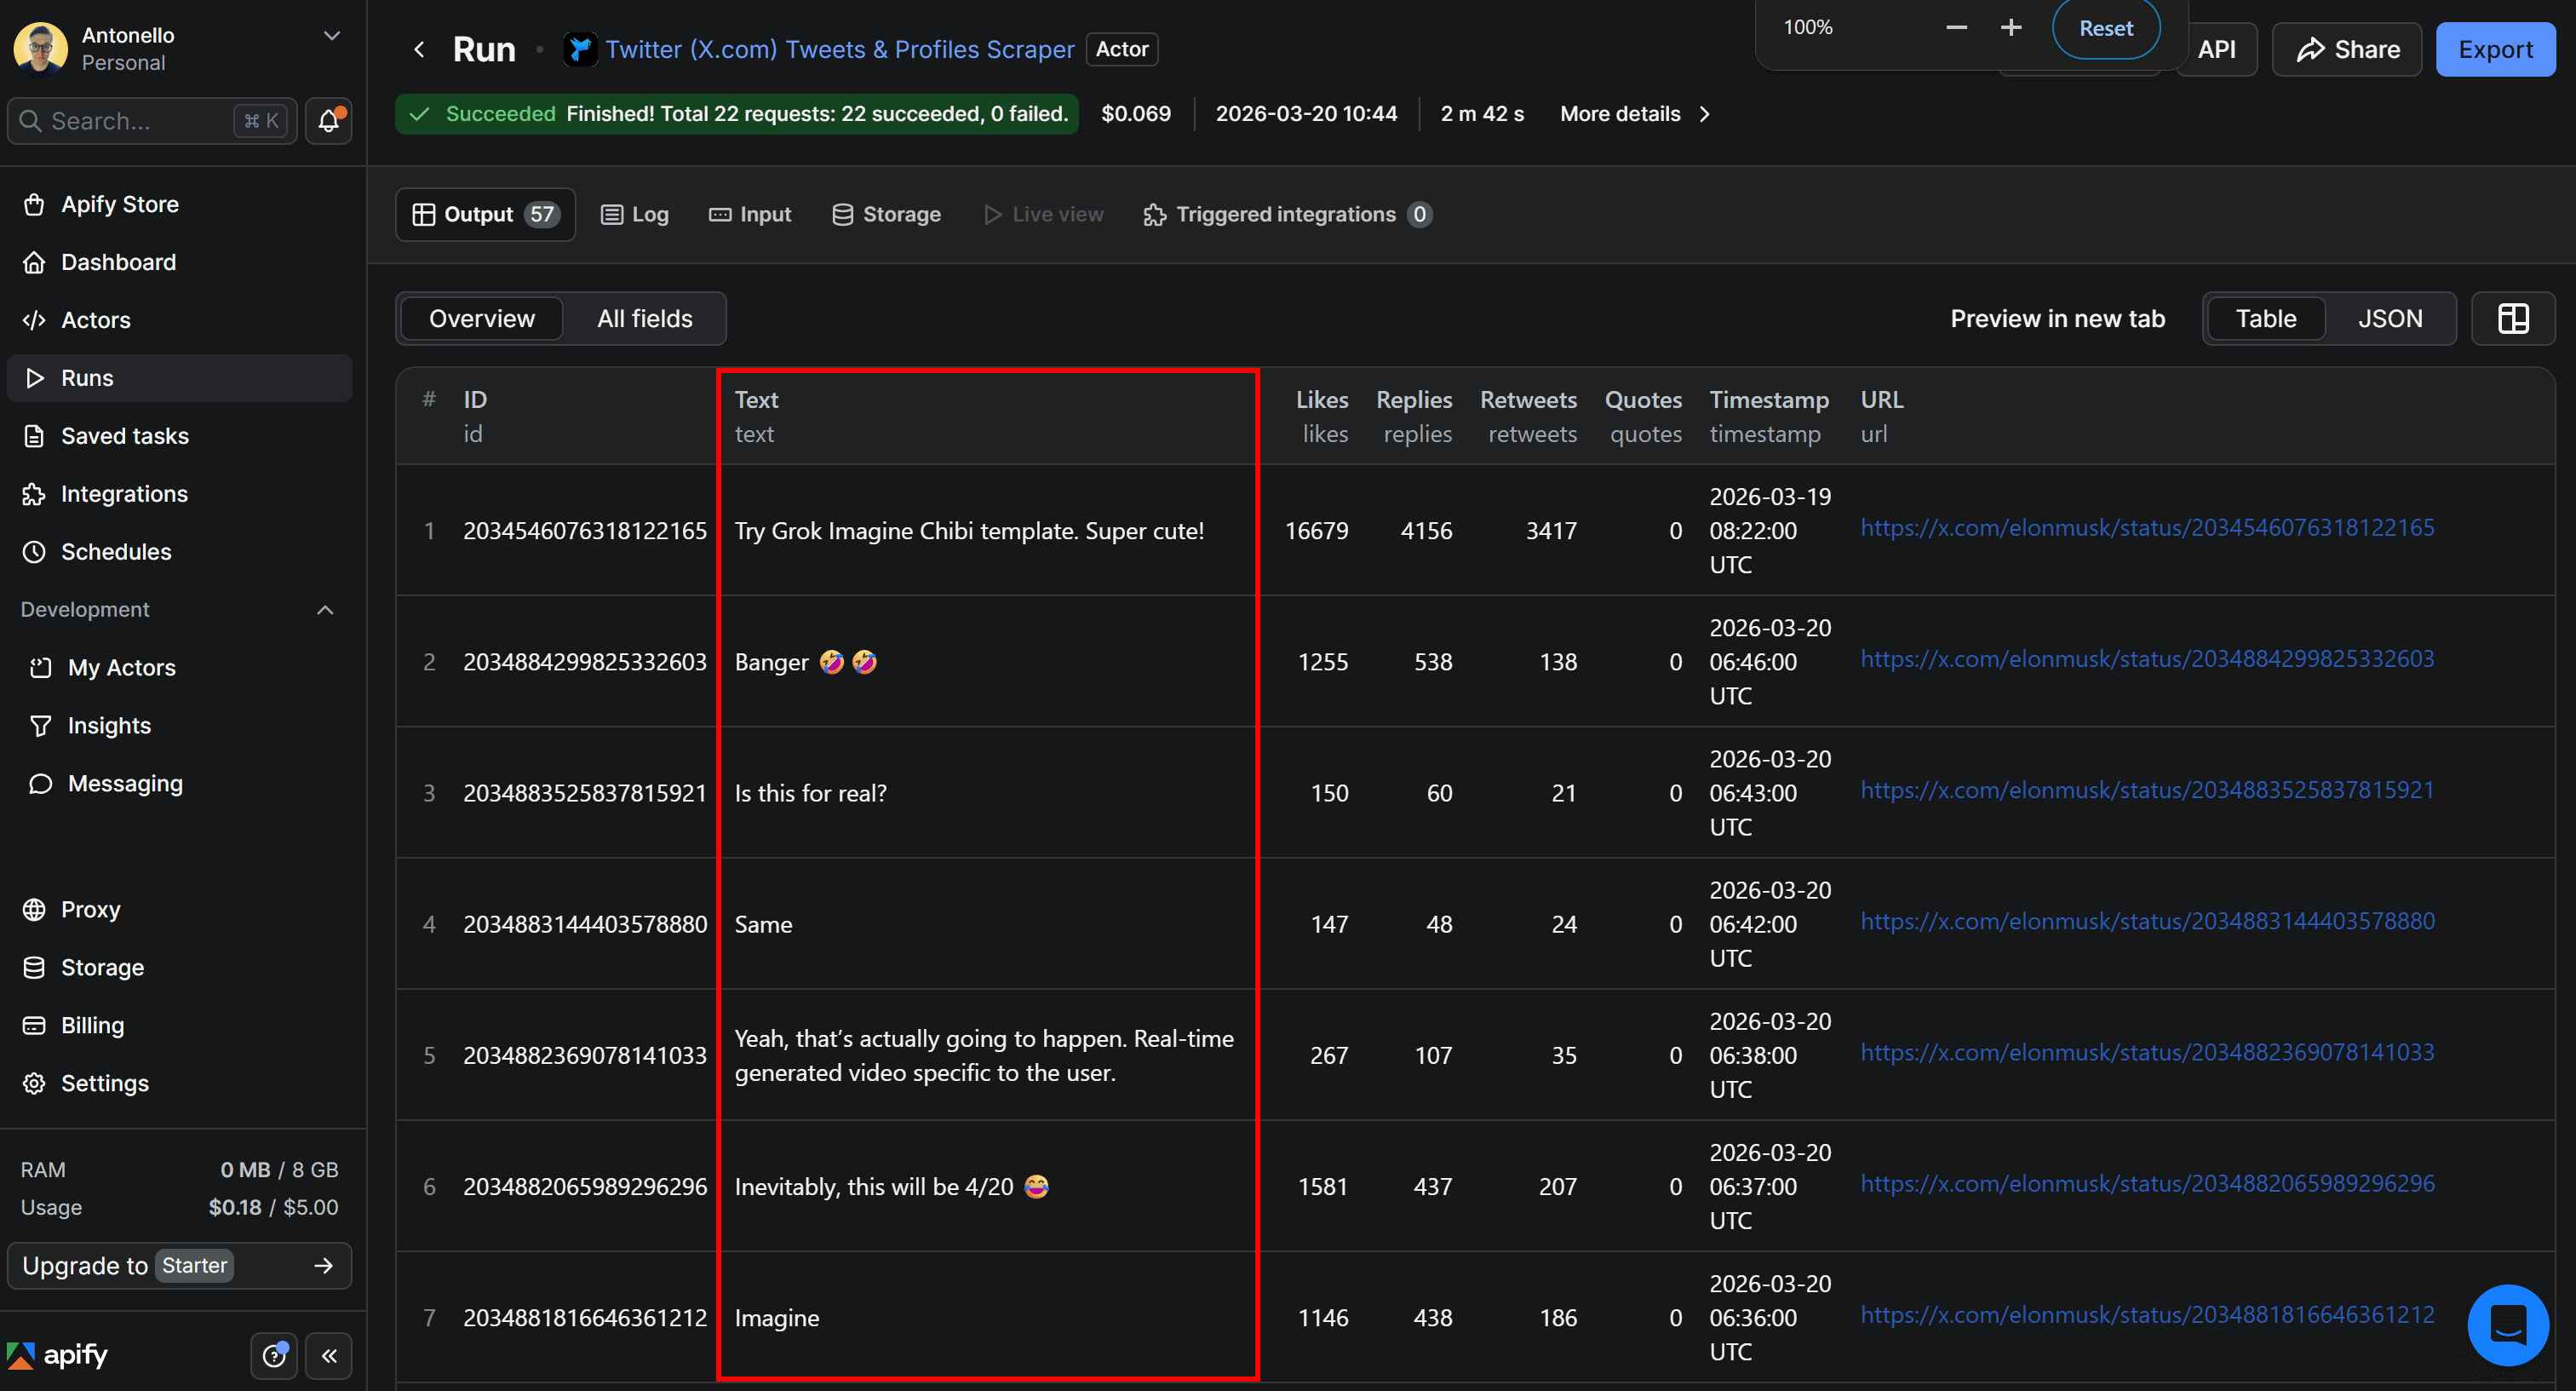
The results include up to the last 100 Tweets published by Elon Musk in the past week, with details such as the Tweet URL, number of replies, retweets, quotes, and timestamp. Yet, the most important part of our workflow is the text content, which will be used as input for the sentiment analysis pipeline.
How to use Tweet Scraper V2 - X / Twitter Scraper
Tweet Scraper V2 – X / Twitter Scraper is an Apify Actor designed for large-scale Tweet extraction based on search queries. It supports highly targeted data collection, with responses of up to 100K+ Tweets from a single query.
Other than sentiment analysis, additional use cases covered by this Actor include:
- Market research: Analyze large volumes of Tweets to uncover customer opinions, emerging trends, and sentiment shifts across industries or products.
- Keyword monitoring: Track keywords in real time to understand brand perception and audience engagement.
- Data for AI models: Collect large-scale, real-world textual datasets to train or fine-tune NLP and sentiment analysis models.
Input
Tweet Scraper V2 – X / Twitter Scraper supports the following input options:
| Input name | Description | Type | Required | Notes |
|---|---|---|---|---|
| Search terms | Keywords or advanced queries to search Tweets on Twitter (X). | array | No | Supports Twitter advanced search syntax for highly targeted results. |
| Twitter handles | Specific Twitter usernames to extract Tweets from. | array | No | Accepts handles with or without @. |
| Maximum items | Maximum number of Tweets to return in the output. | array | No | Default: unlimited. |
| Sort | Sorting method for search results. | string | No | Options: Top, Latest, Latest + Top (may include duplicates). |
| Start date | Retrieve Tweets published after a specific date. | string | No | Format: YYYY-MM-DD. Works best with search queries. |
| End date | Retrieve Tweets published before a specific date. | string | No | Format: YYYY-MM-DD. |
For the complete list of inputs, take a look at the Actor Input page.
Now, consider that you want to scrape the 100 latest Tweets related to a specific product, such as MacBook Neo. Configure the Actor on its page in Apify Console as shown below:

Click Save & Start to launch the Actor. After a few seconds, you’ll start seeing results.
Output
The resulting data will look like this:

Notice how each Tweet contains the target keyword MacBook Neo, just as expected. While the tabular output includes several columns, the text field is what matters for sentiment analysis.
LLM-powered Tweet sentiment analysis + Google Drive export
You now know how to programmatically get Tweets from Twitter/X. To complete the workflow, it’s time to feed that Twitter data into a sentiment analysis engine. This is where LLM Dataset Processor Actor comes in.
LLM Dataset Processor enables you to process the output of other Actors (or an existing dataset) using an LLM. In practice, it applies a single LLM prompt to every entry in a dataset. This makes it ideal for sentiment analysis, as well as tasks like summarization, keyword extraction, and more.
The results, enriched with sentiment analysis fields, will then be sent to your Google Drive as a Google Sheets file for easier access.
For simplicity, we’ll build on Tweet Scraper V2 – X / Twitter Scraper, but the same procedure works with Twitter (X.com) Tweets & Profiles Scraper or any other Twitter/X scraping Actor on Apify.
Follow the instructions below to enhance your Twitter data with custom sentiment analysis logic powered by an LLM. Here’s what we’ll do:
- Configure LLM Dataset Processor integration
- Test the sentiment analysis prompt
- Connect the Google Drive integration
- Complete the Google Drive integration
- Set up scheduled runs for the workflow
- Explore the Twitter sentiment analysis output
Prerequisites
This section builds on the previous one, so all earlier prerequisites still apply. Additionally, you will need:
- An LLM provider API key (for example, an OpenAI API key) from one of the providers supported by the LLM Dataset Processor Actor.
Step #1: Configure the LLM Dataset Processor integration
Navigate to the Integrations tab of the Tweet Scraper V2 - X / Twitter Scraper Actor and press the Add integration button. Search for llm dataset processor:
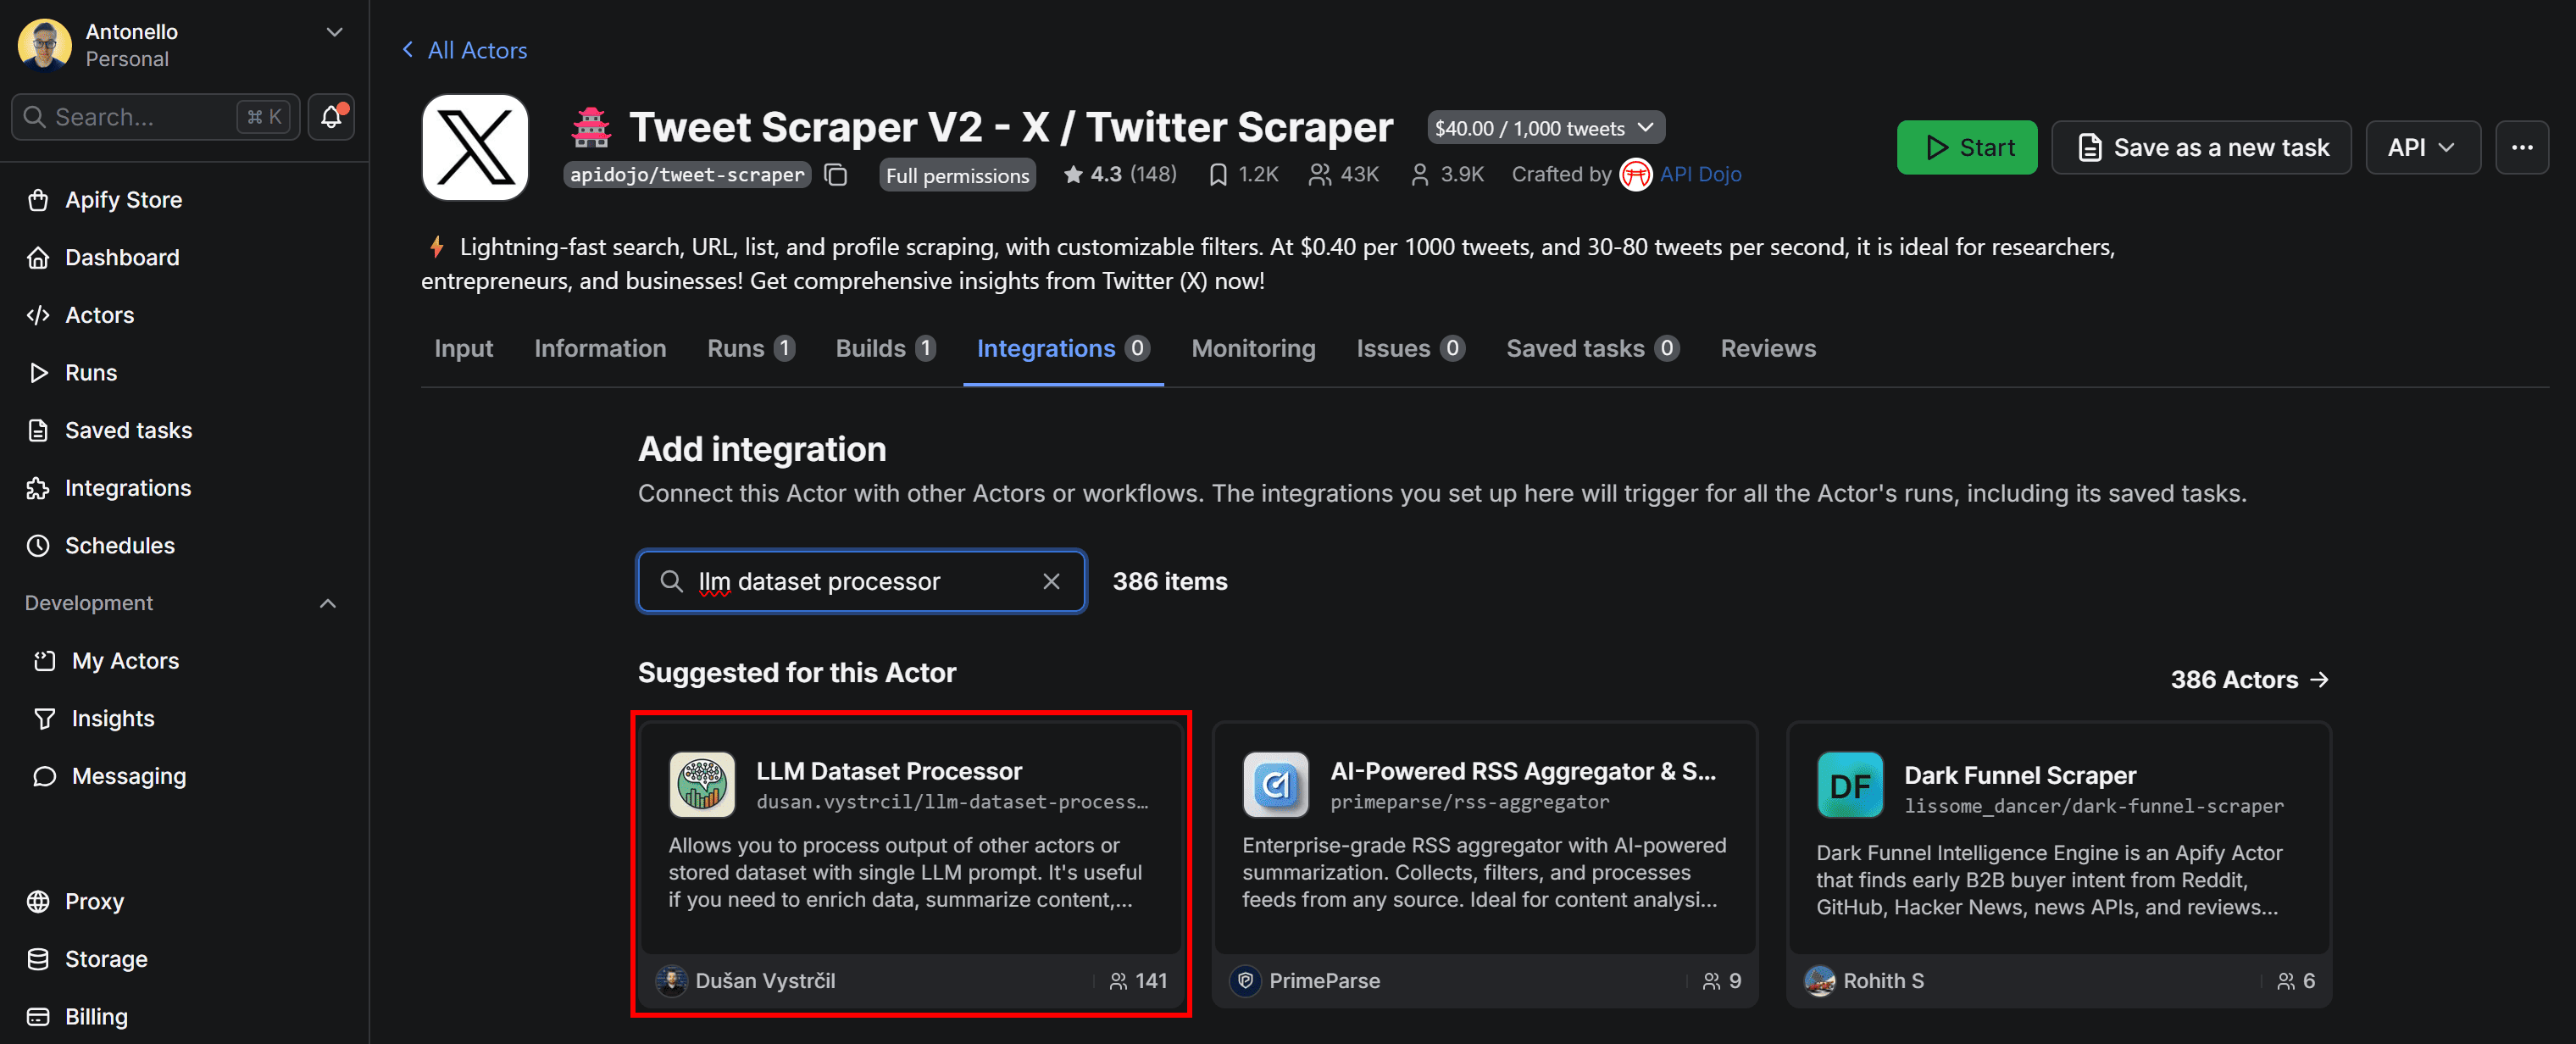
Here, you’ll find all integrations available in Apify (over 20,400 in total).
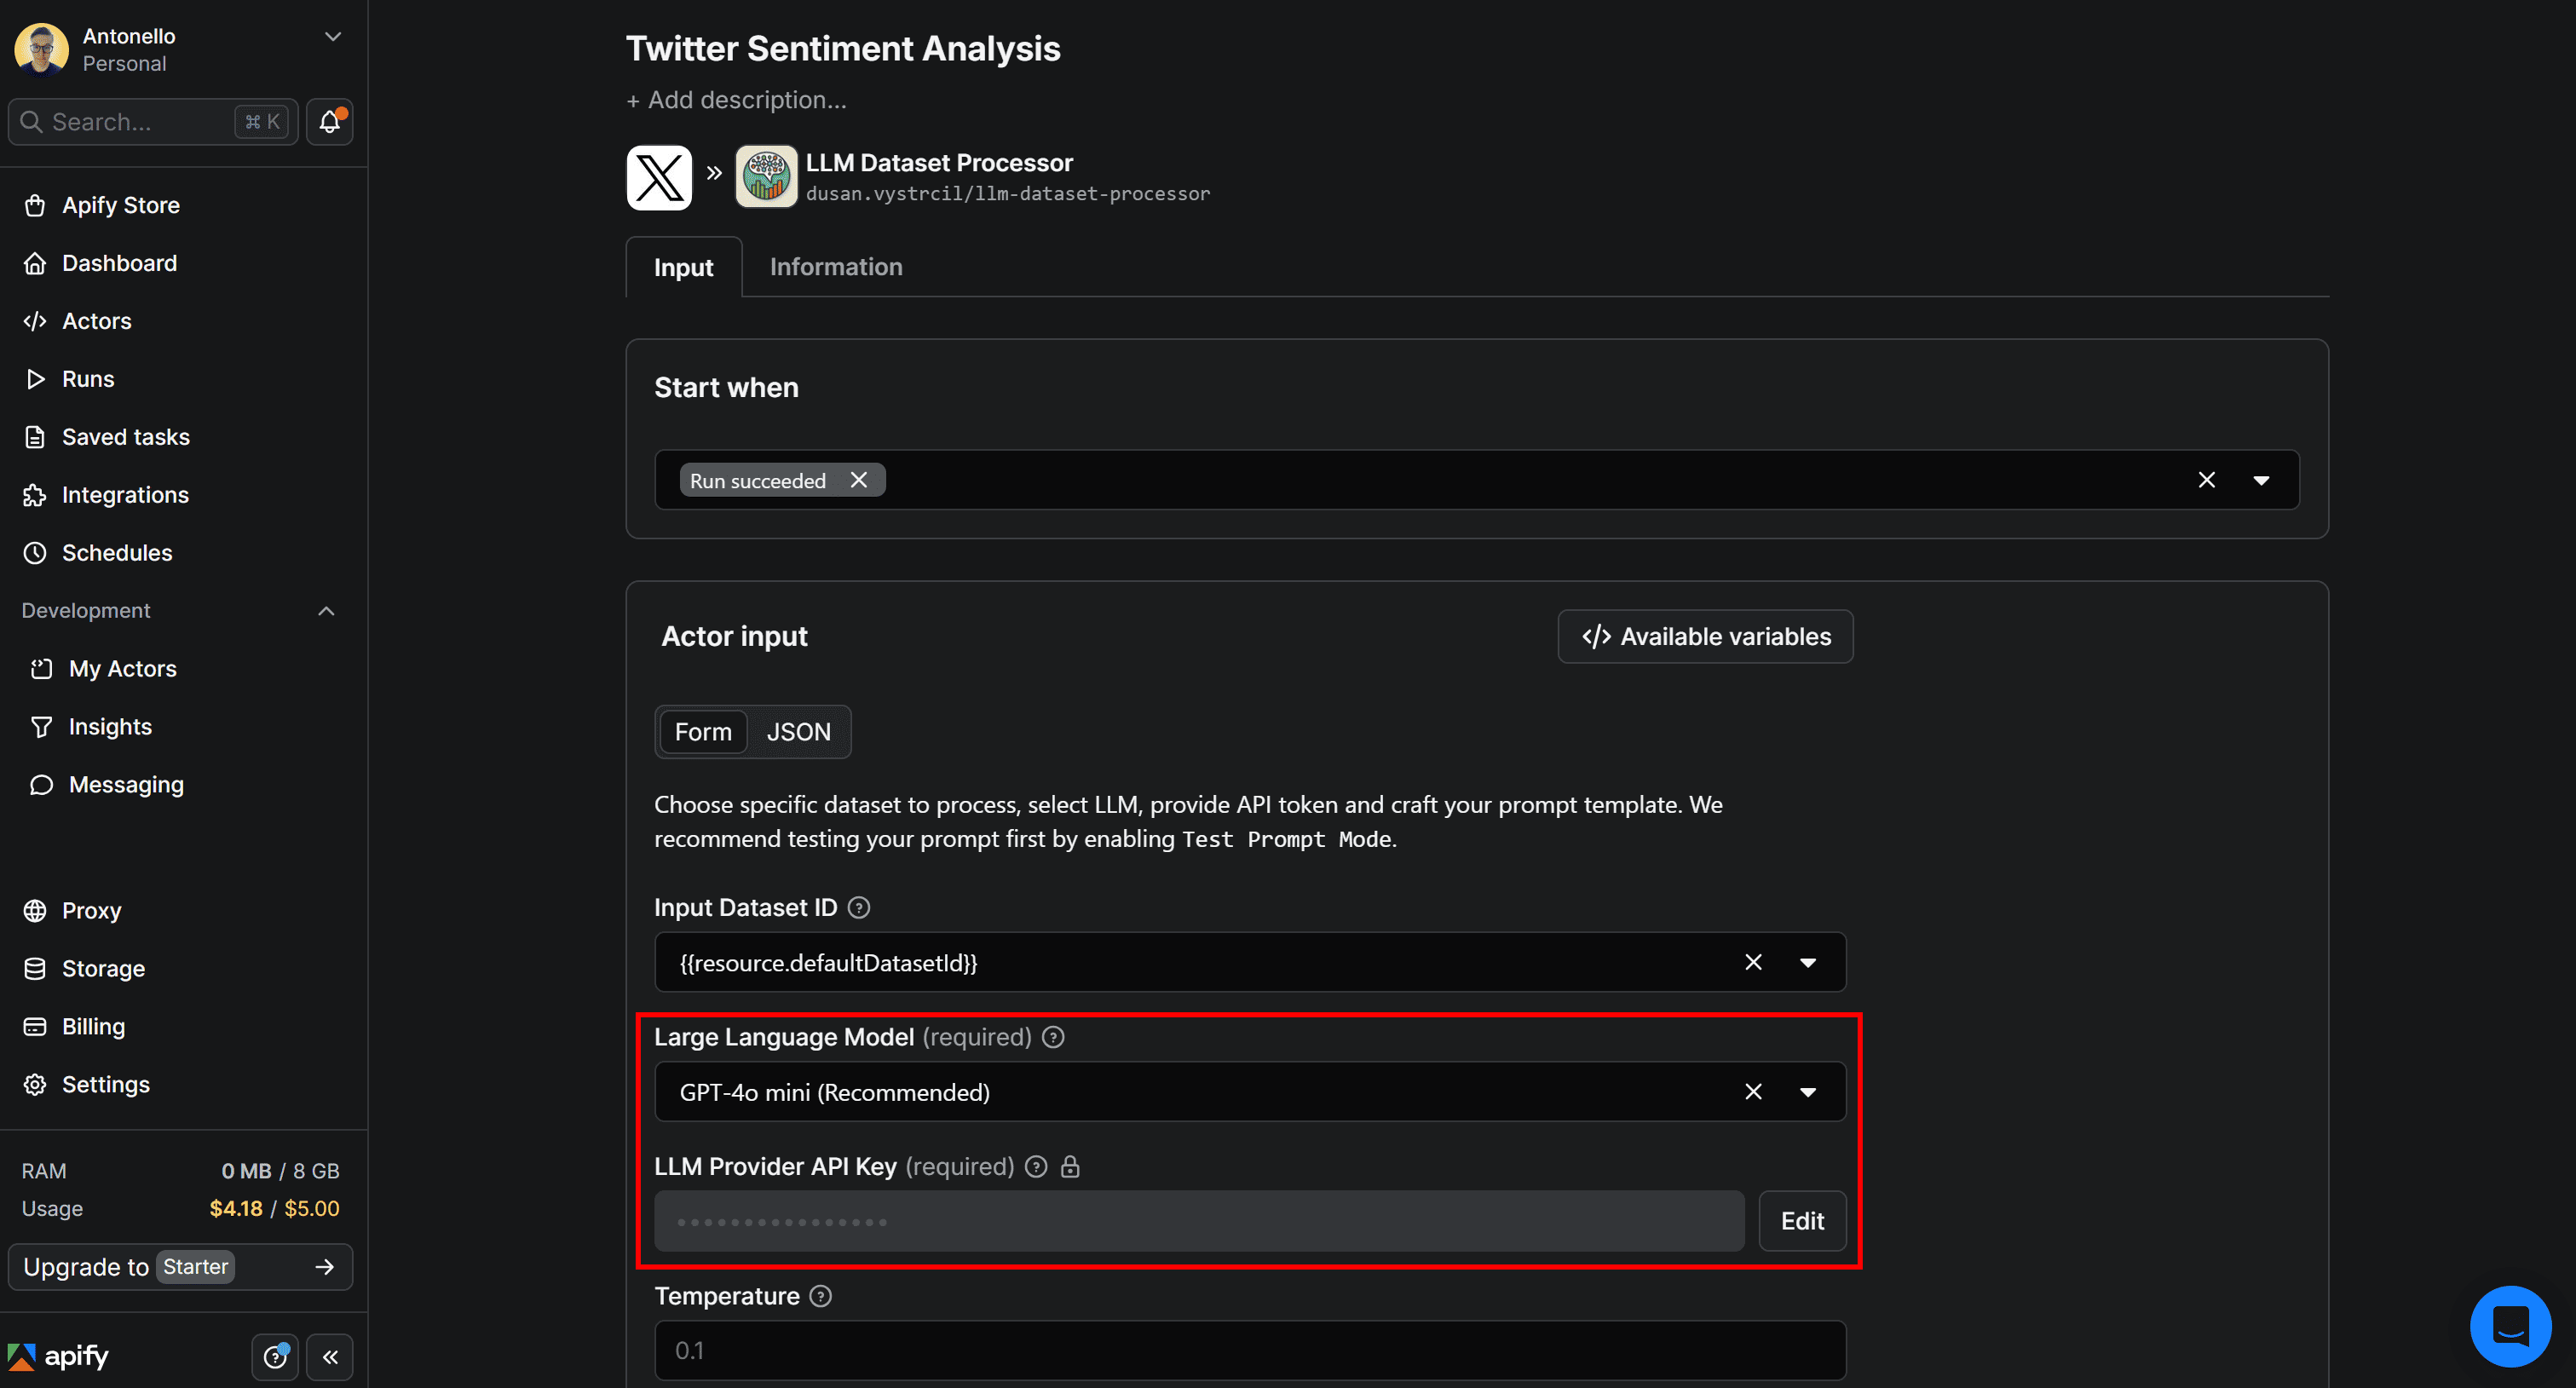
Select the LLM Dataset Processor card and give the integration a name, such as Twitter Sentiment Analysis. Then, fill out the form by choosing the LLM to use for sentiment analysis (in this case, GPT-4o mini) and provide your LLM provider API key (here, your OpenAI API key):
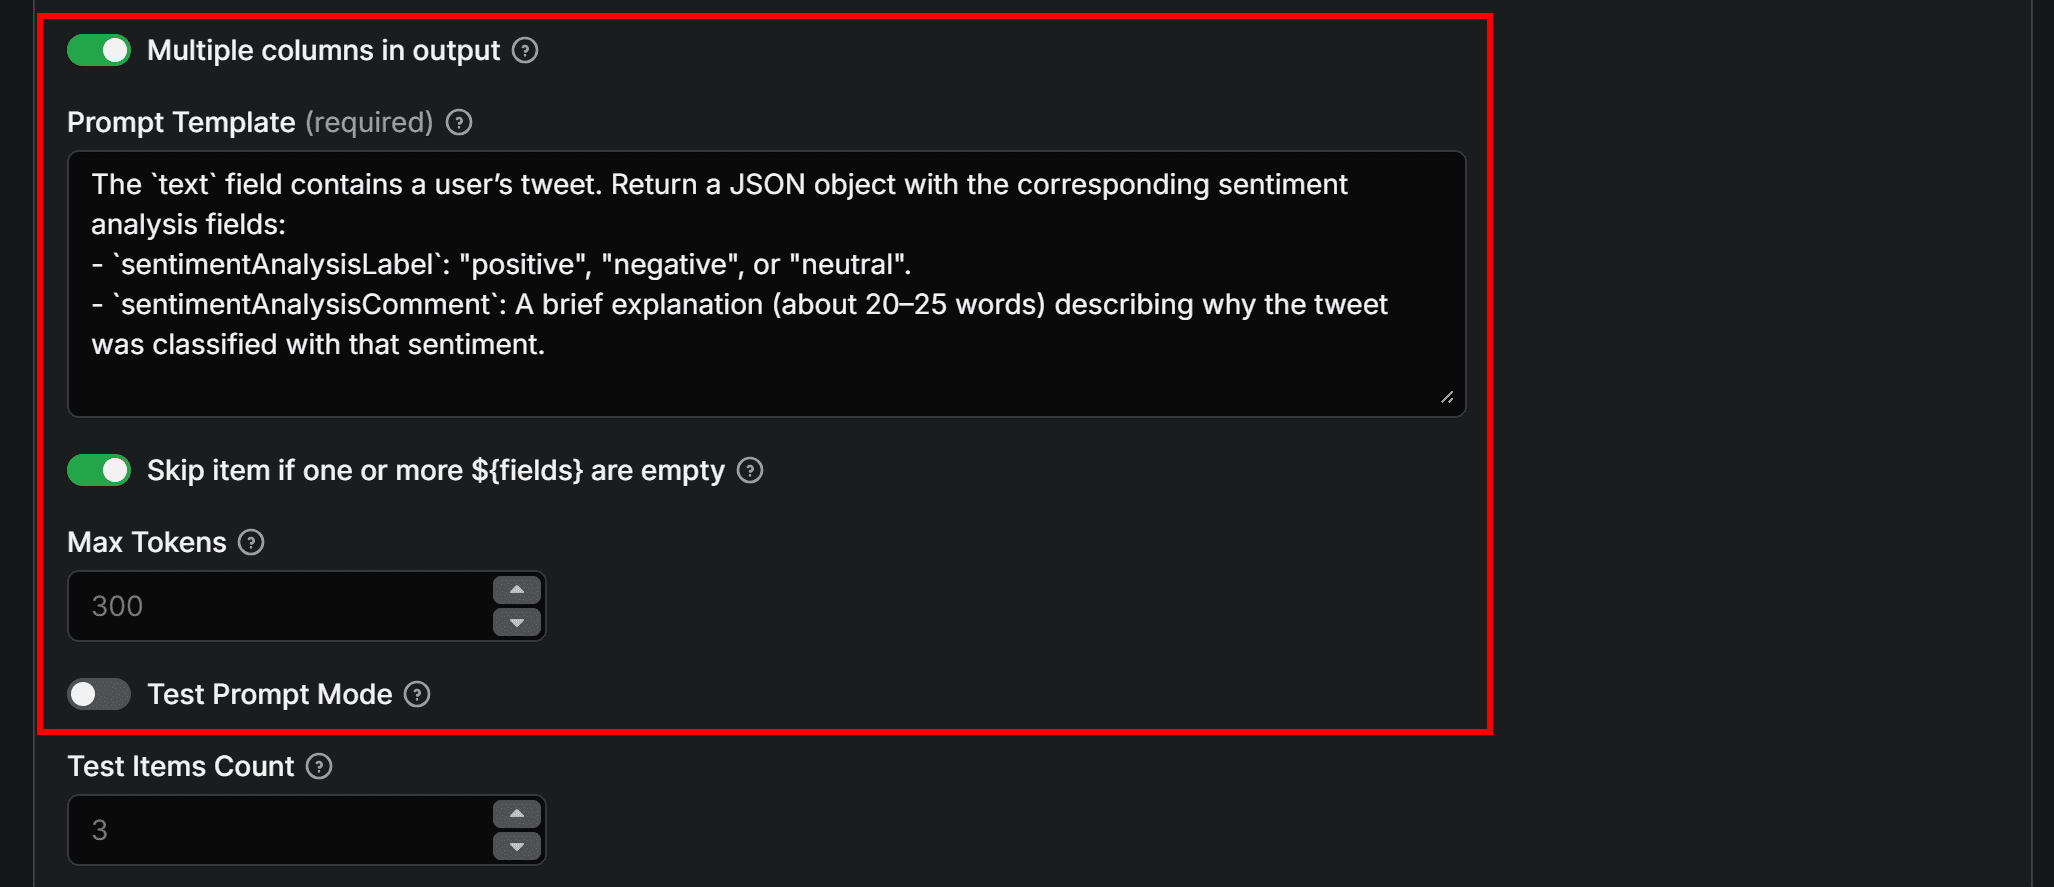
Next, enable the Multiple columns in output option to allow the LLM to add multiple columns to the dataset. Add a prompt for sentiment analysis like the following:
The `text` field contains a user’s tweet. Return a JSON object with the corresponding sentiment analysis fields:
- `sentimentAnalysisLabel`: "positive", "negative", or "neutral".
- `sentimentAnalysisComment`: A brief explanation (about 20–25 words) describing why the Tweet was classified with that sentiment.
This prompt defines the sentiment analysis task and explicitly specifies a JSON output (required when using the Multiple columns in output option). It ensures that sentimentAnalysisLabel and sentimentAnalysisComment are correctly added as separate columns in the dataset.
The first time you run the automation, consider toggling the Test prompt mode option. This way, only 3 entries from the input dataset will be analyzed. Once you’ve verified the prompt behaves as expected, you can disable that option.
Finally, click Save to add the integration. LLM Dataset Processor has now been successfully added to the Twitter/X sentiment analysis workflow.
Step #2: Test the sentiment analysis prompt
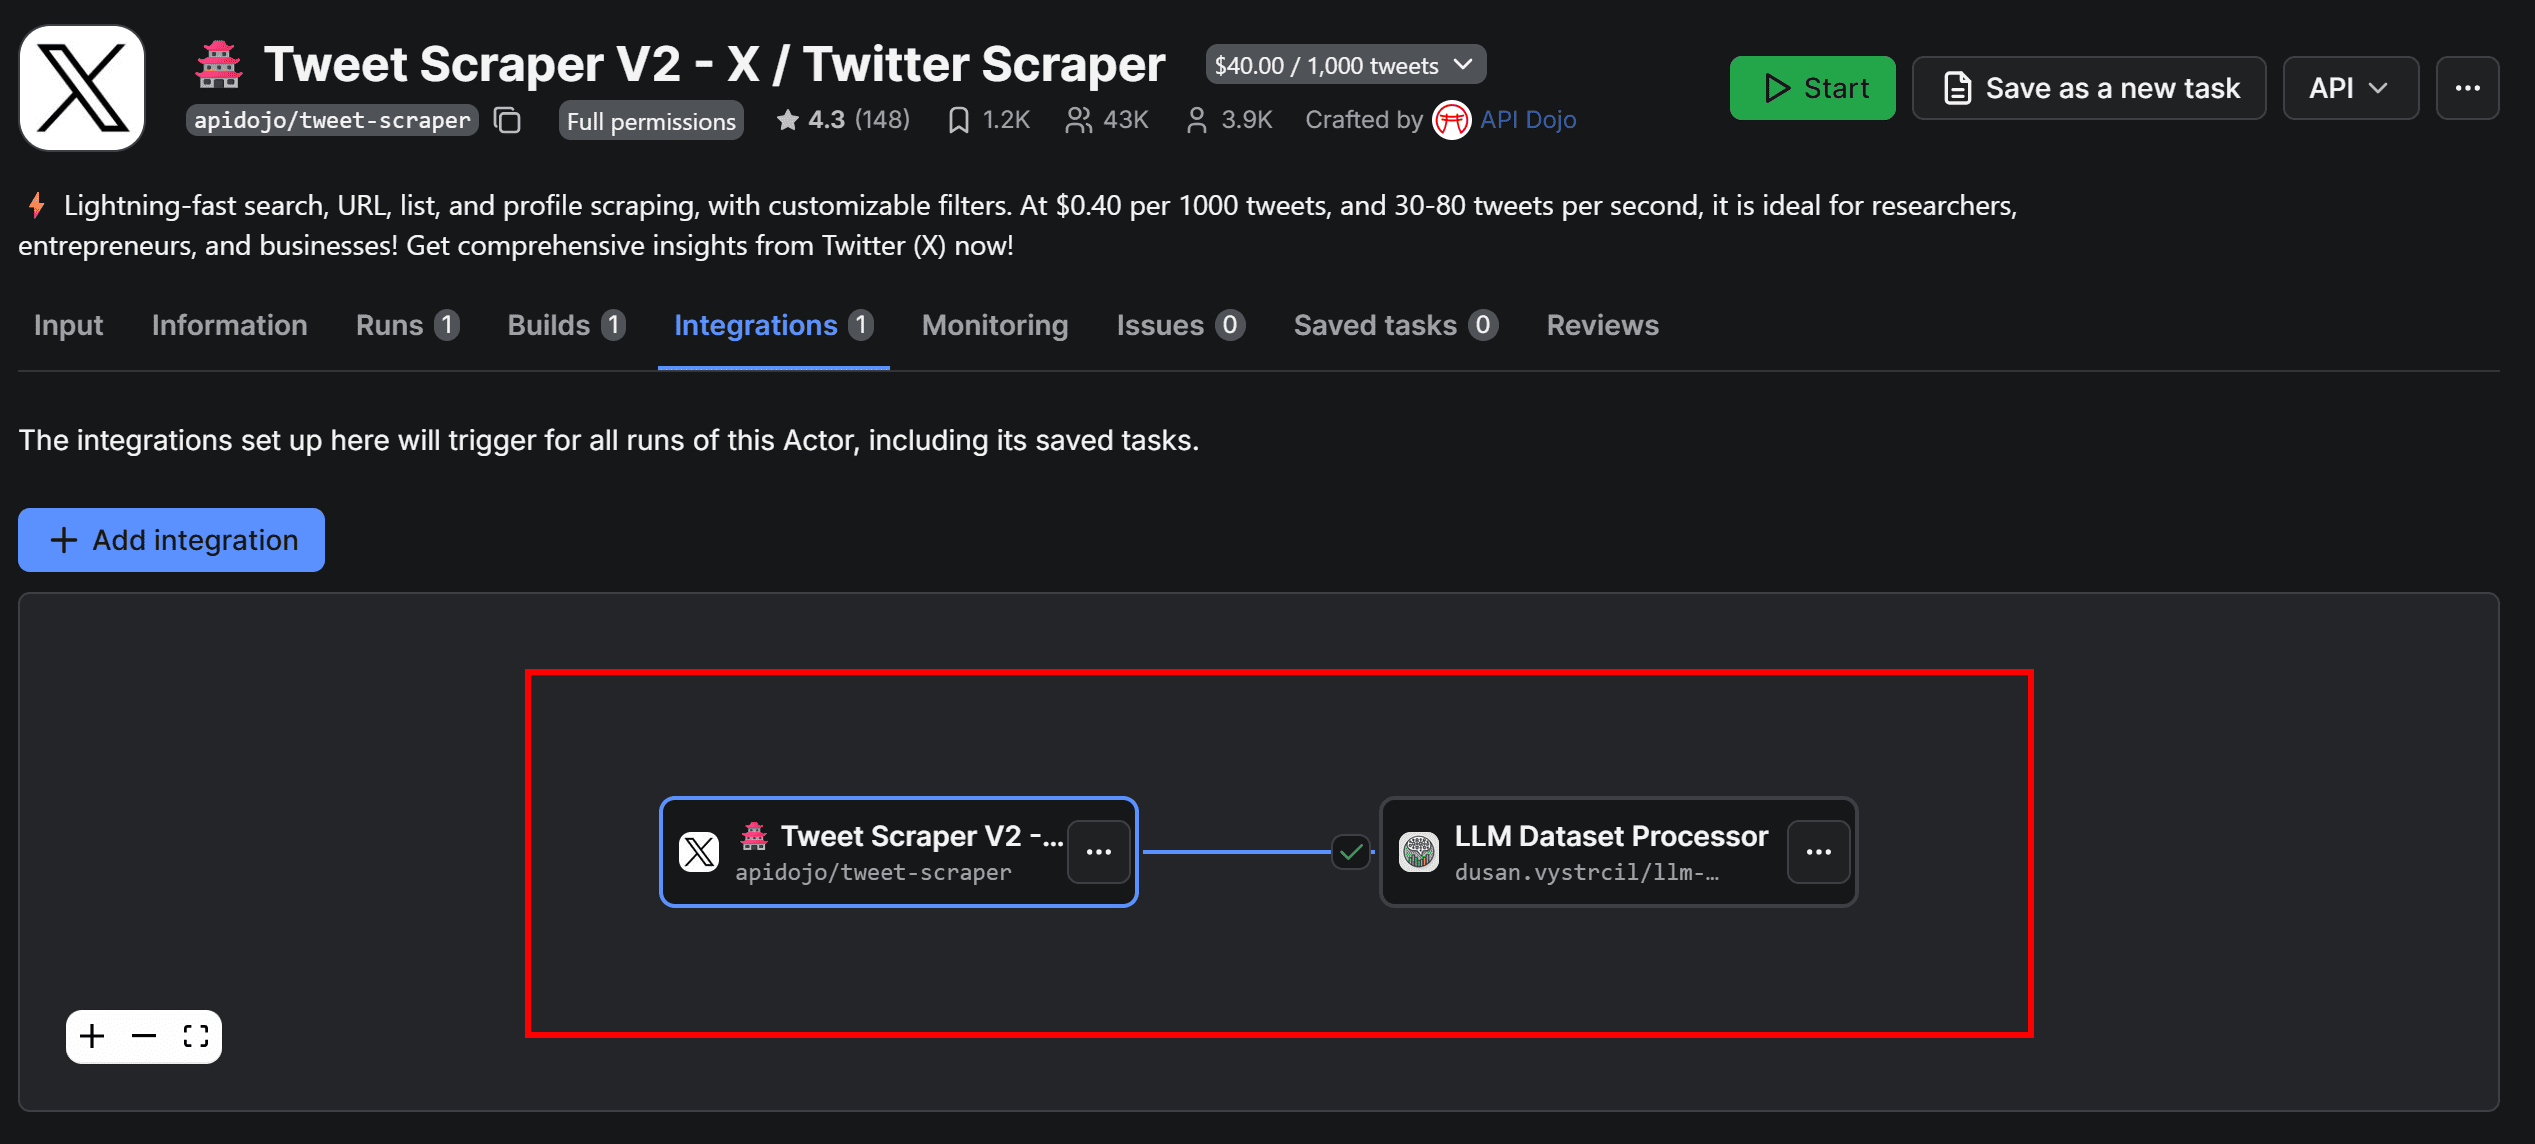
In the Integrations tab, you should now see the two connected Actors:
Configure Tweet Scraper V2 – X / Twitter Scraper Actor to process only a small number of Tweets (e.g., 3–5) to avoid wasting API credits, then click Start to test the workflow. Next, go to the LLM Dataset Processor Actor page to view the results.
Move to the Run tab, select the last run, and access the Output tab. This will display the original dataset retrieved by the Tweet scraping Actor, now enhanced with two additional columns: sentimentAnalysisLabel and sentimentAnalysisComment.
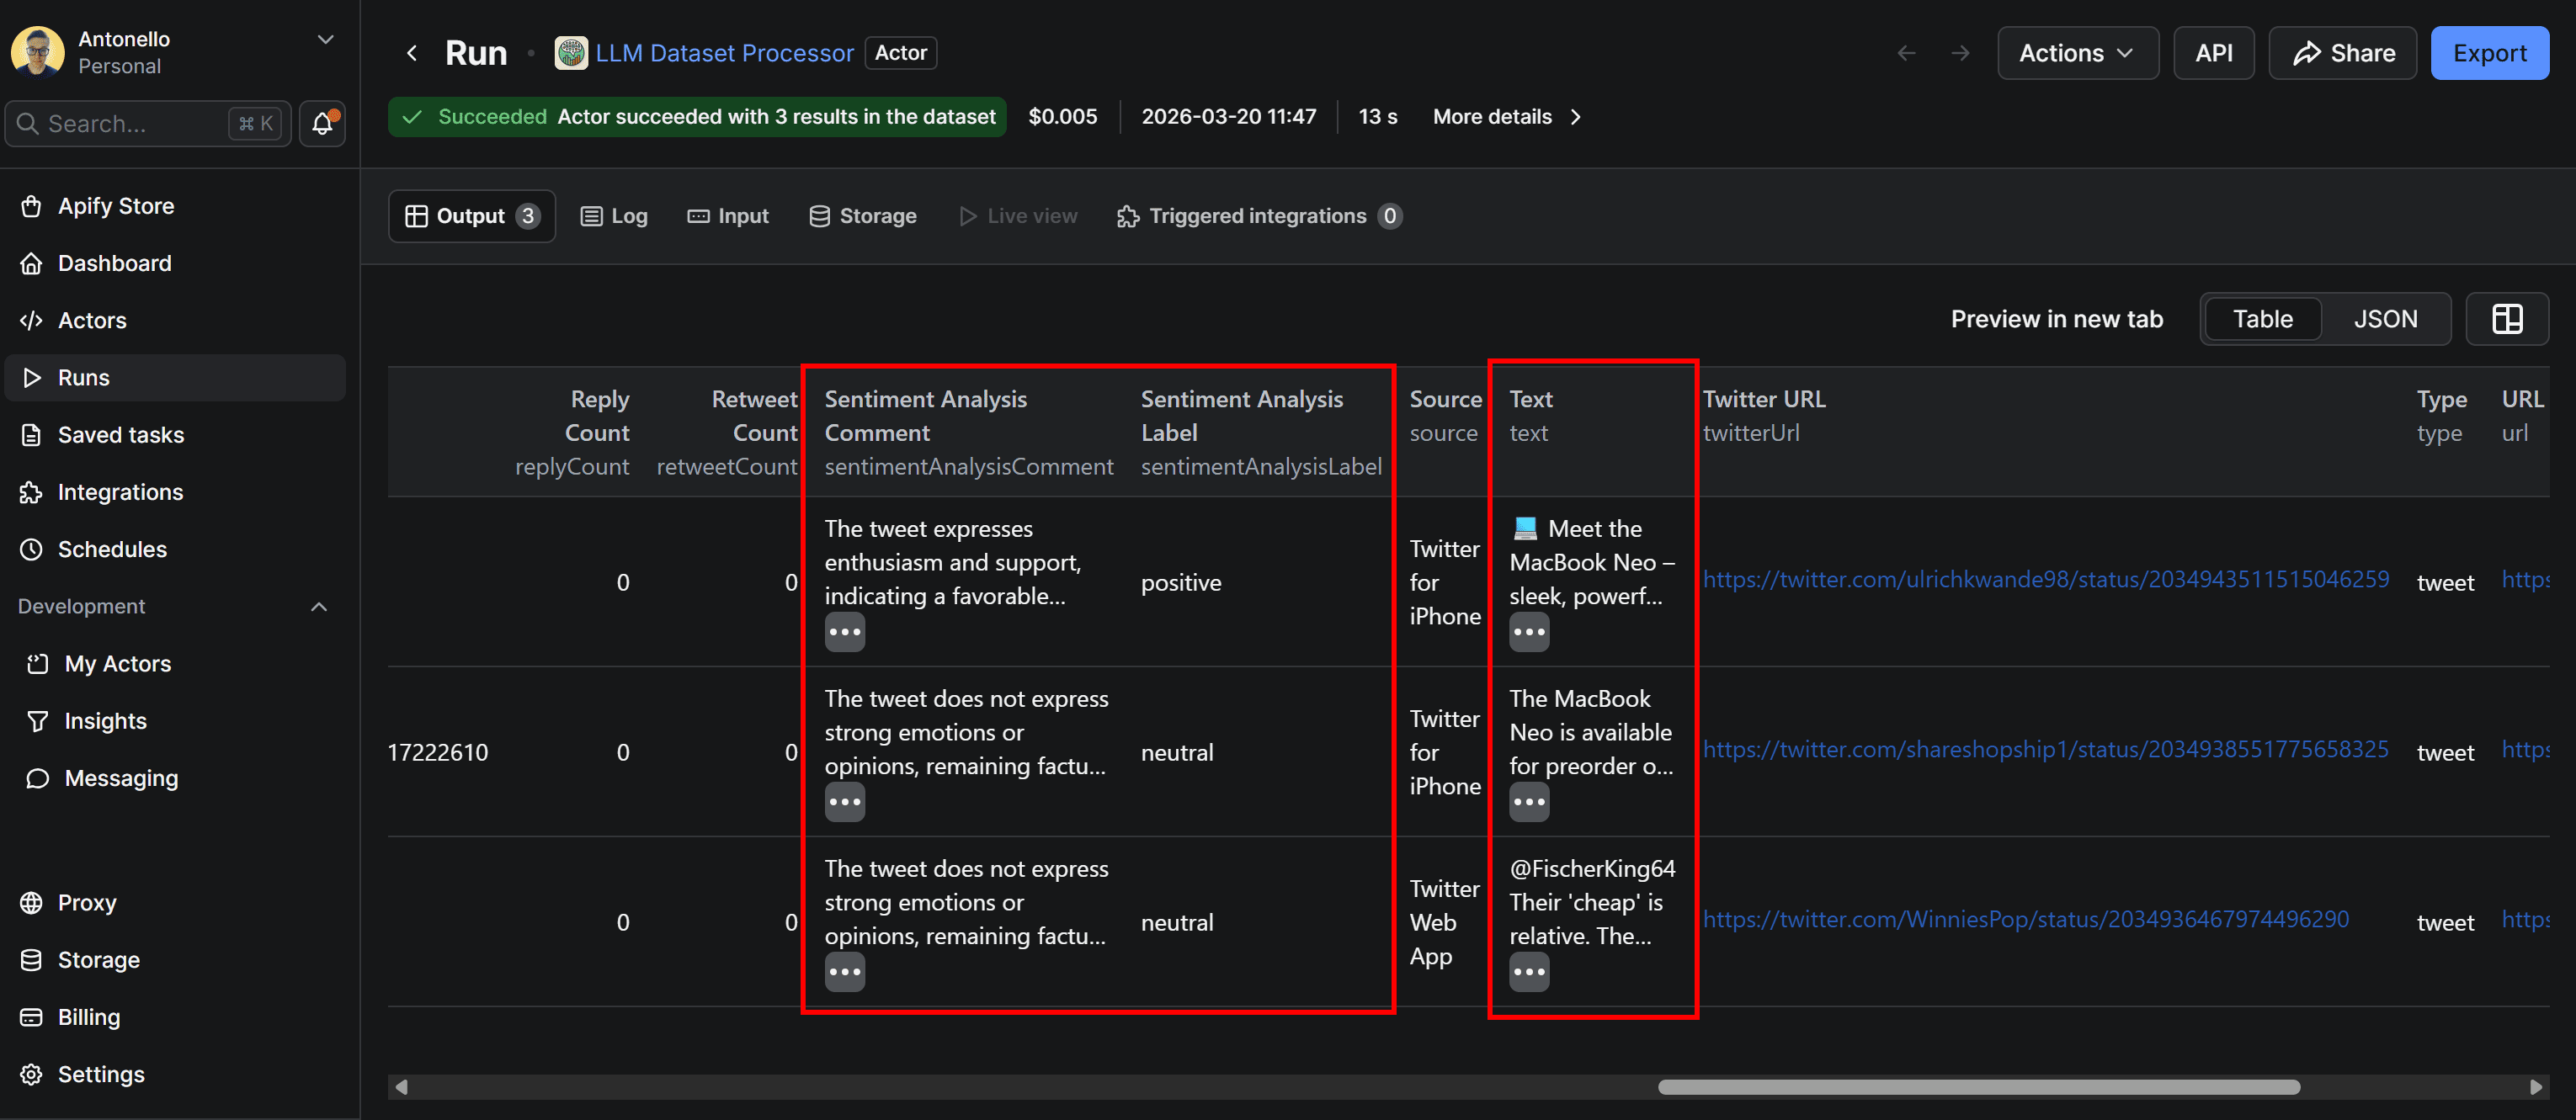
By inspecting the Tweets and their corresponding sentiment analysis labels and comments, you can see that the results provide a reasonable and coherent analysis.
You’ve now confirmed that the LLM prompt for sentiment analysis works. The next step is to send the Twitter data, enriched with sentiment analysis, to a Google Sheets file in your Drive.
Step #3: Connect the Google Drive integration
By default, the Actor’s output is only available in Apify Console. From there, you can export the dataset in JSON, XLS, CSV, or other formats. At the same time, it may be more convenient to send the results directly to Google Drive as a Google Sheets document.
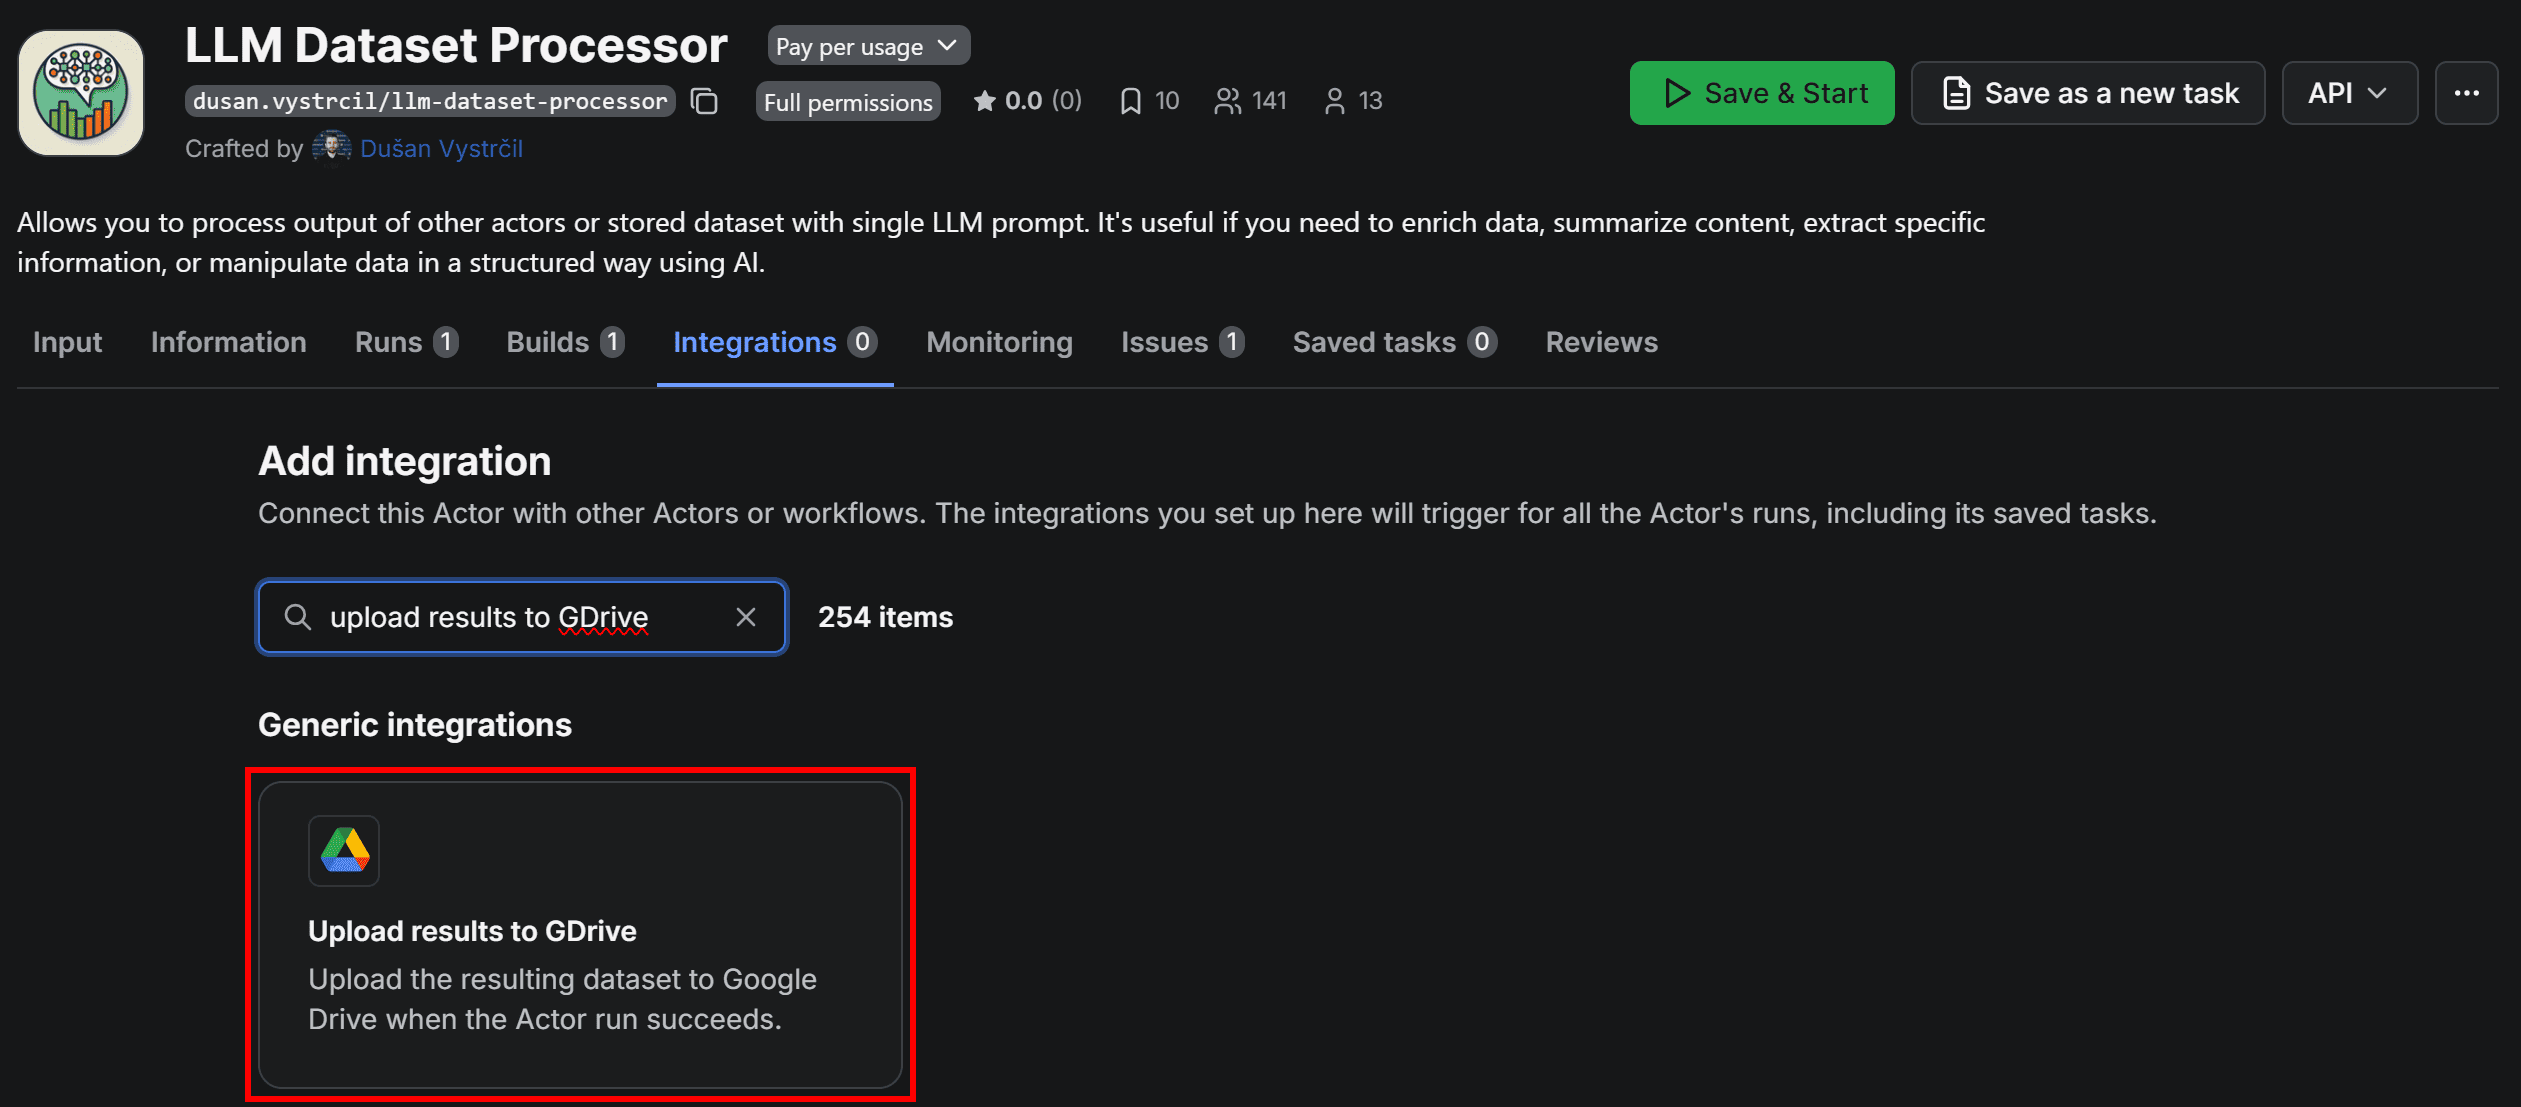
To do that, go to LLM Dataset Processor, open the Integrations tab, and select the Upload results to GDrive integration:
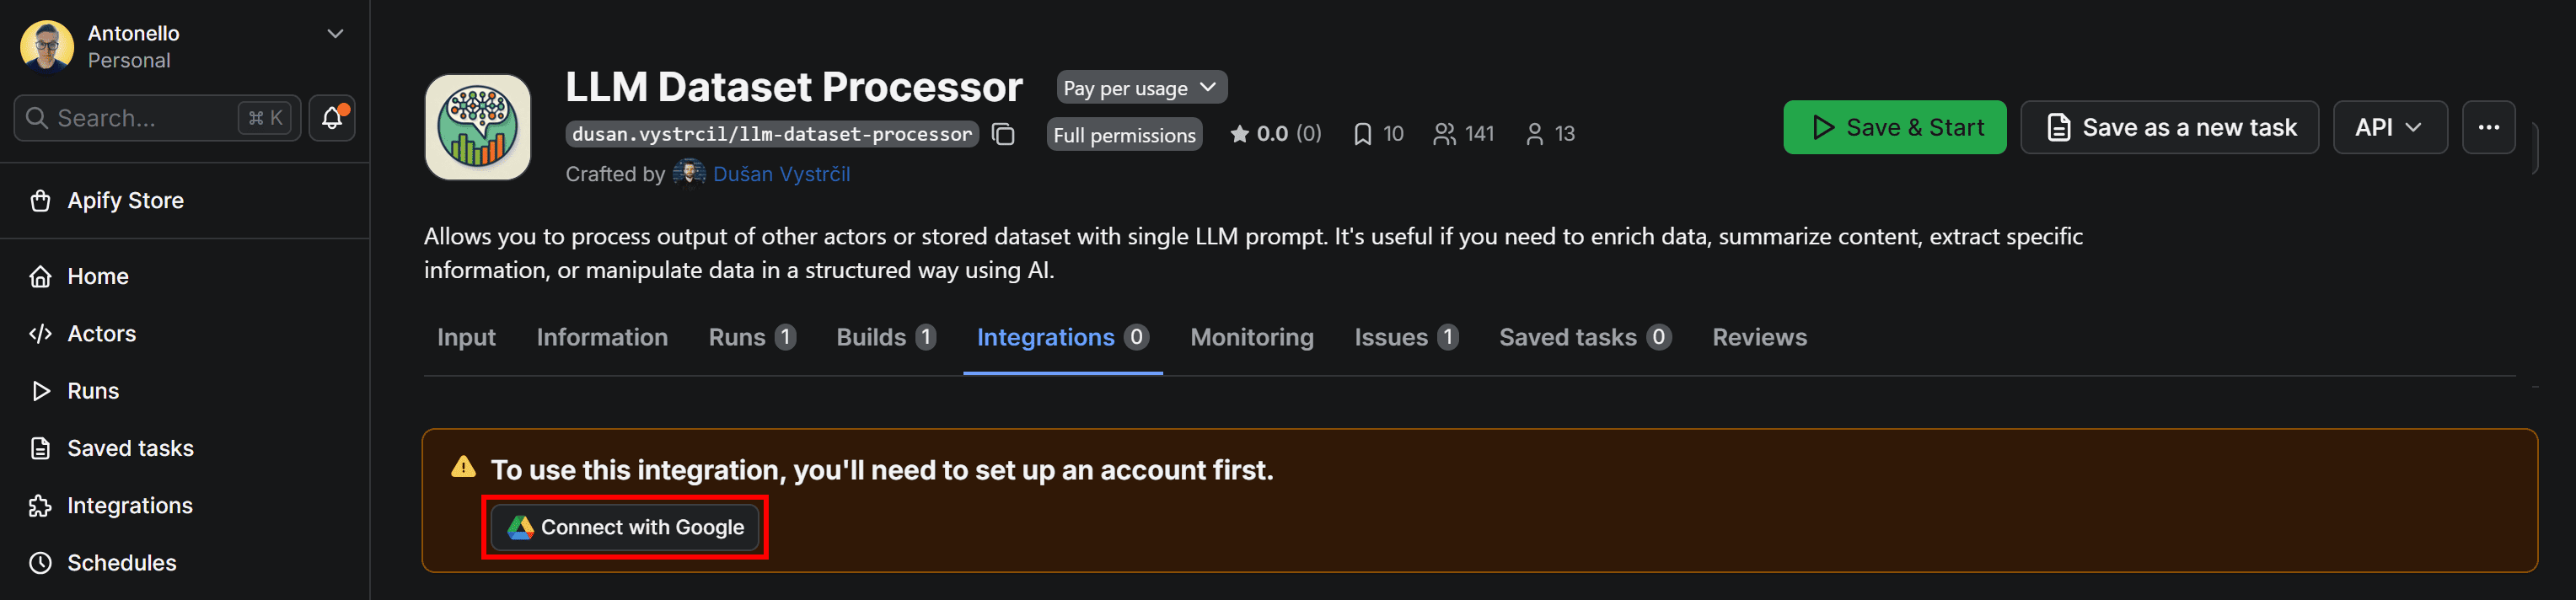
When adding the integration, you’ll be prompted to connect your Google account. Click Connect with Google and follow the on-screen instructions:
Be sure to grant Apify the necessary Google permissions. Once connected, you’ll be redirected to a configuration form where you can customize how the dataset is uploaded to Google Drive:
Step #4: Complete the Google Drive integration
Let’s finalize the integration so that the Apify-powered Twitter sentiment scraping workflow sends results directly to your Google Drive.
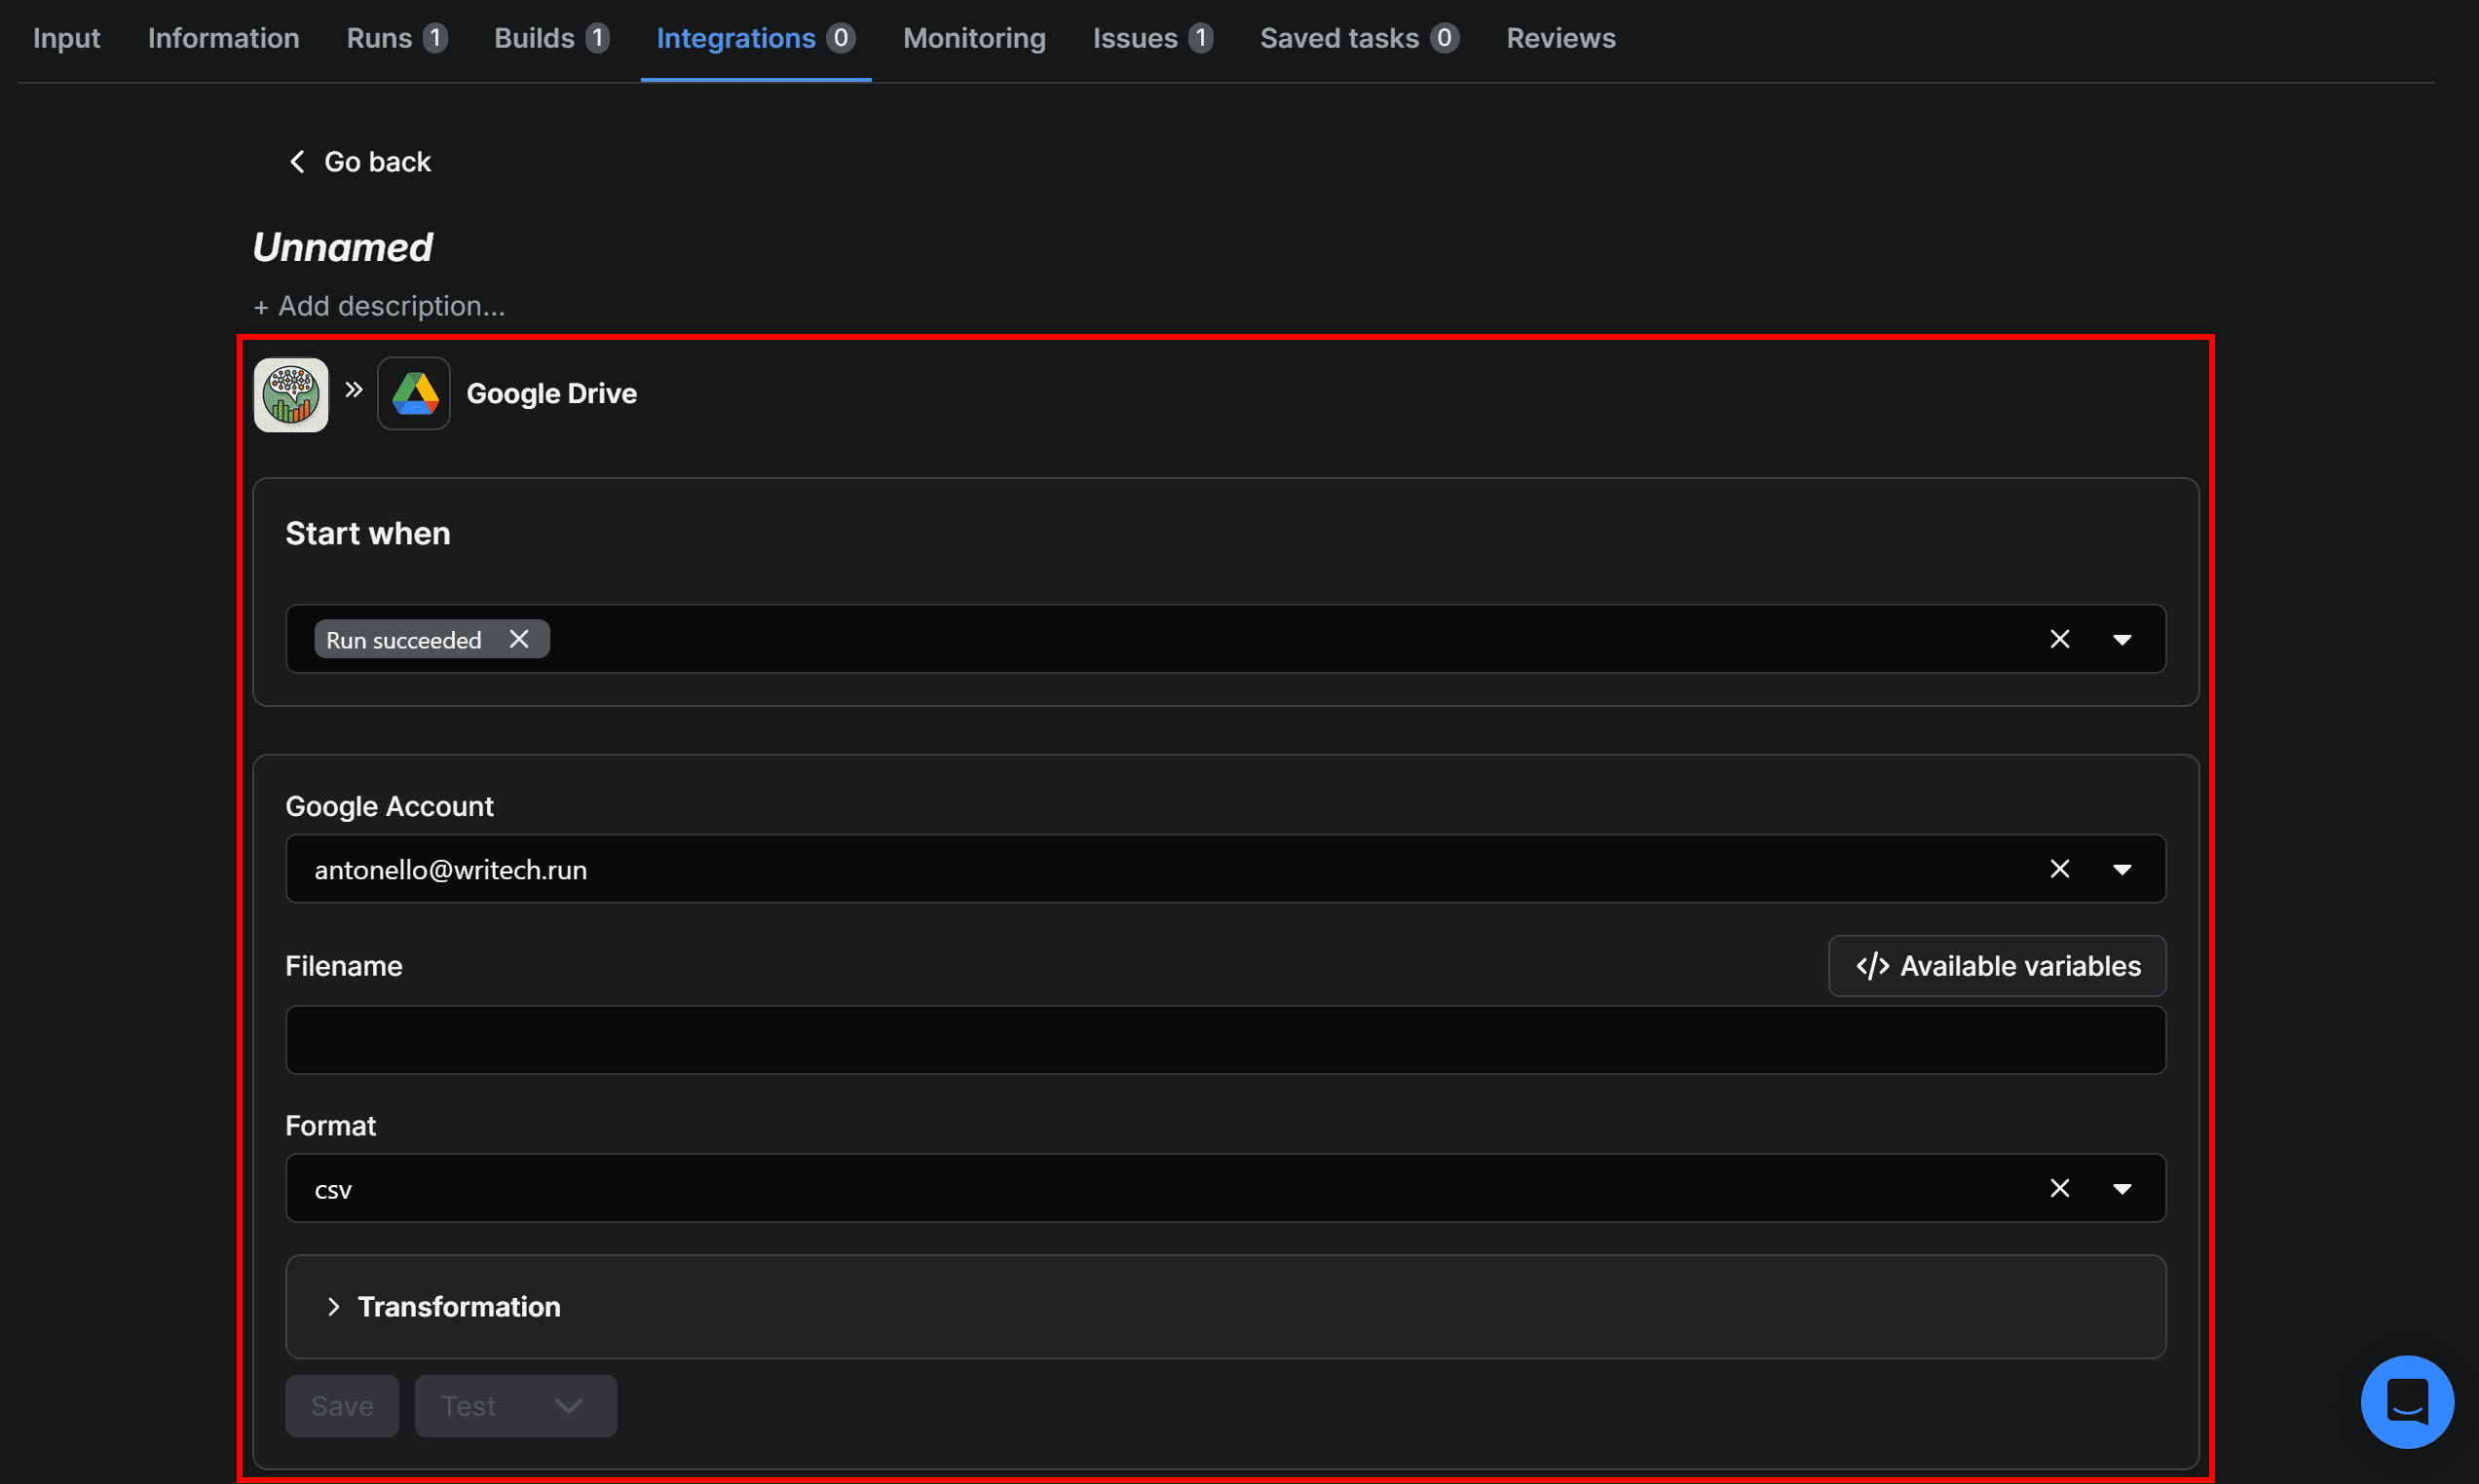
Start by giving the Upload results to GDrive integration a name, such as Google Drive Integration. Next, fill out the form like this:
- Start when:
Run succeeds(ensures the upload runs only if the Actor completes successfully). - Google account: Select the connected Google account email.
- Filename:
apify_x_sentiment_analysis_{{resource.finishedAt}}. - Format:
xlsx(makes the output easy to open and analyze in Google Sheets).
{{resource.finishedAt}} is a special variable representing the end time of the Actor run. Appending it to the filename helps track individual runs and prevents overwriting previous XLSX files.
Once configured, click Save to add the integration. Head back to Tweet Scraper V2 – X / Twitter Scraper, switch to the Integrations tab. The workflow will now appear visually as below:

Before running the Actor again to verify end-to-end functionality, there’s one final optional step.
Step #5: Set up scheduled runs for the workflow (optional)
Users tweet all the time, so a sentiment analysis workflow usually requires continuous re-running. In other words, you should trigger the workflow by repeating the Tweet scraping jobs on a recurring schedule.
To achieve that, configure the first Actor in the workflow to run on a schedule. On Tweet Scraper V2 – X / Twitter Scraper Actor page, click the “…” menu in the top-right corner and select Schedule Actor:

In the Schedule Actor modal, set the workflow to run periodically (for instance, every day at 3:00 pm):
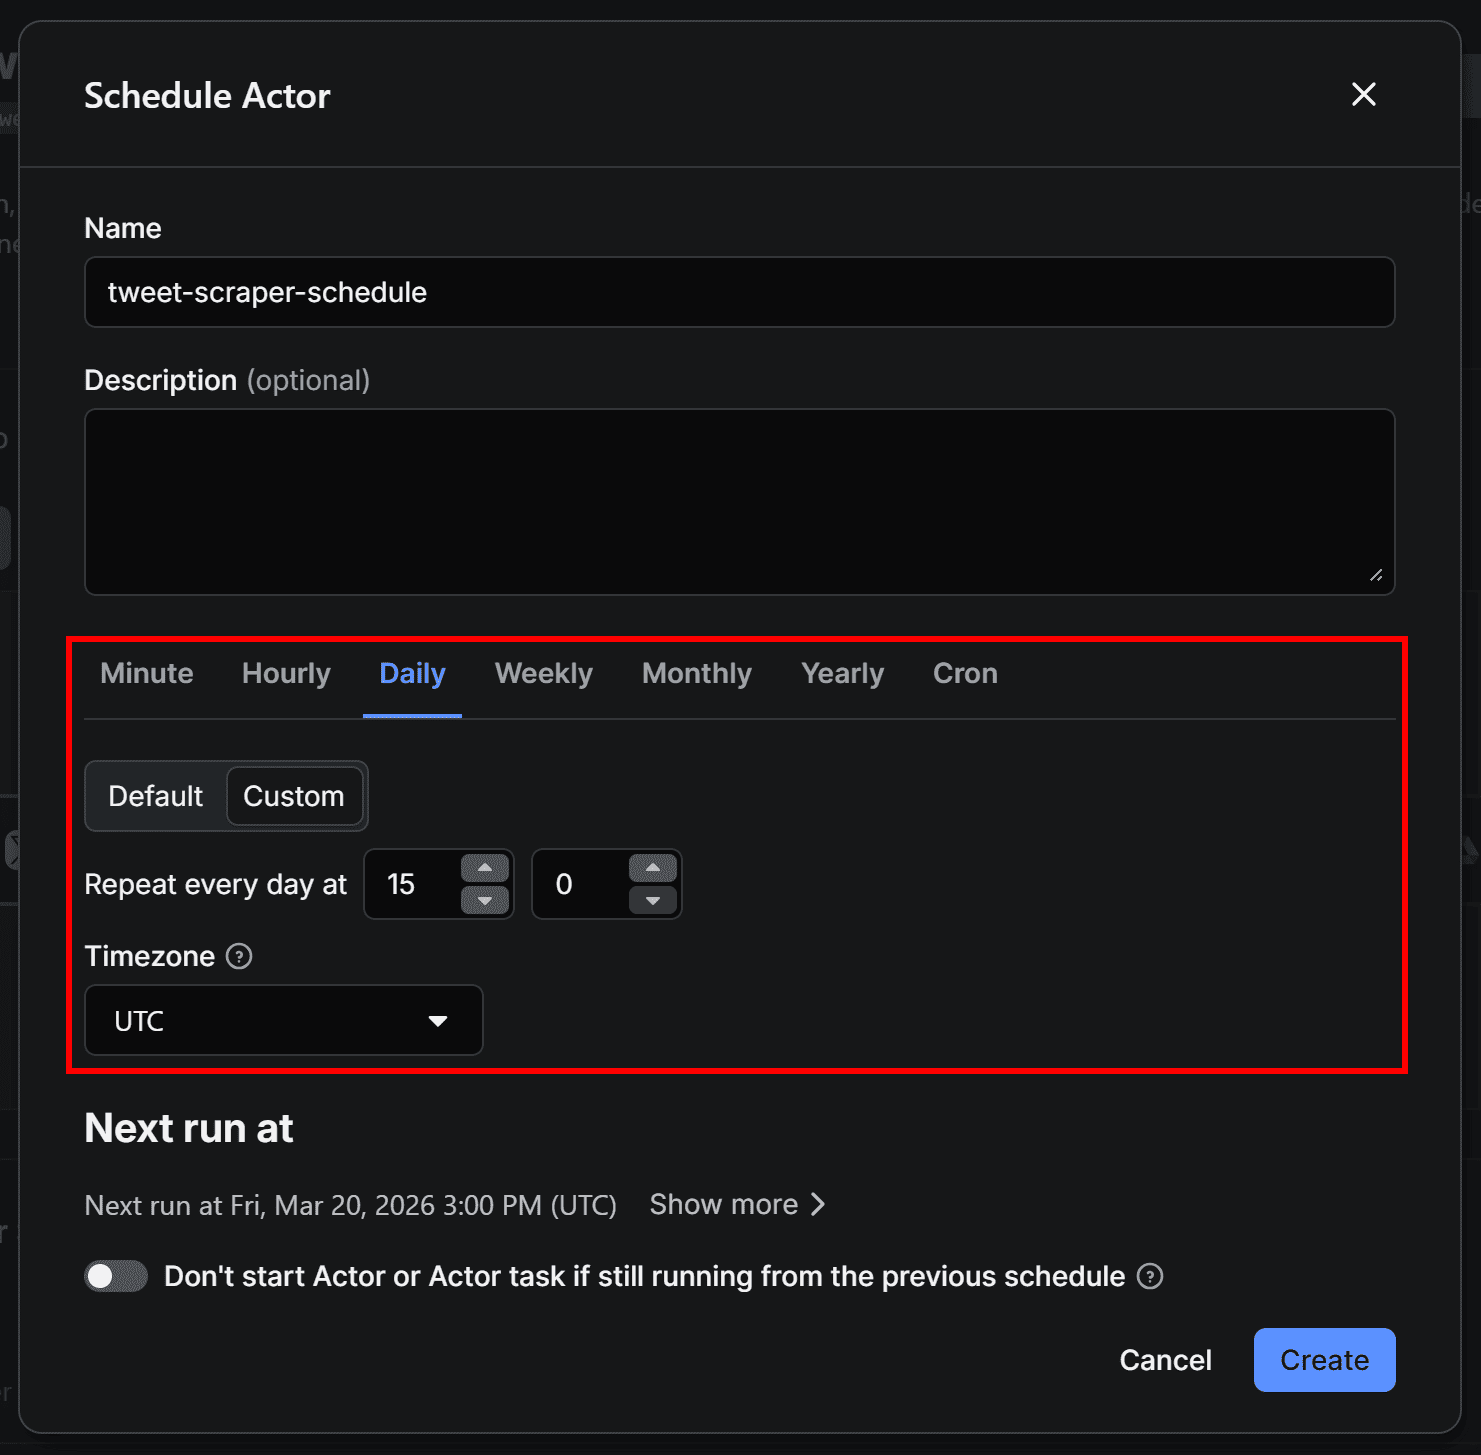
Click Create to confirm. Your workflow will now run automatically at the scheduled time. Since the entire workflow can take a few minutes to complete, you’ll receive the Google Sheets file in your Drive shortly after each run.
You can view and manage all scheduled runs in the Schedules section of Apify Console. Now, make sure the Twitter/X scraping Actor’s input is correctly configured so you’re tracking the Tweets you’re interested in.
Step #6: Explore the Twitter sentiment analysis output
If you run Tweet Scraper V2 – X / Twitter Scraper again and switch to the Integrations tab, you’ll see that the LLM Dataset Processor and Upload Results to GDrive integrations were triggered as part of the connected workflow:
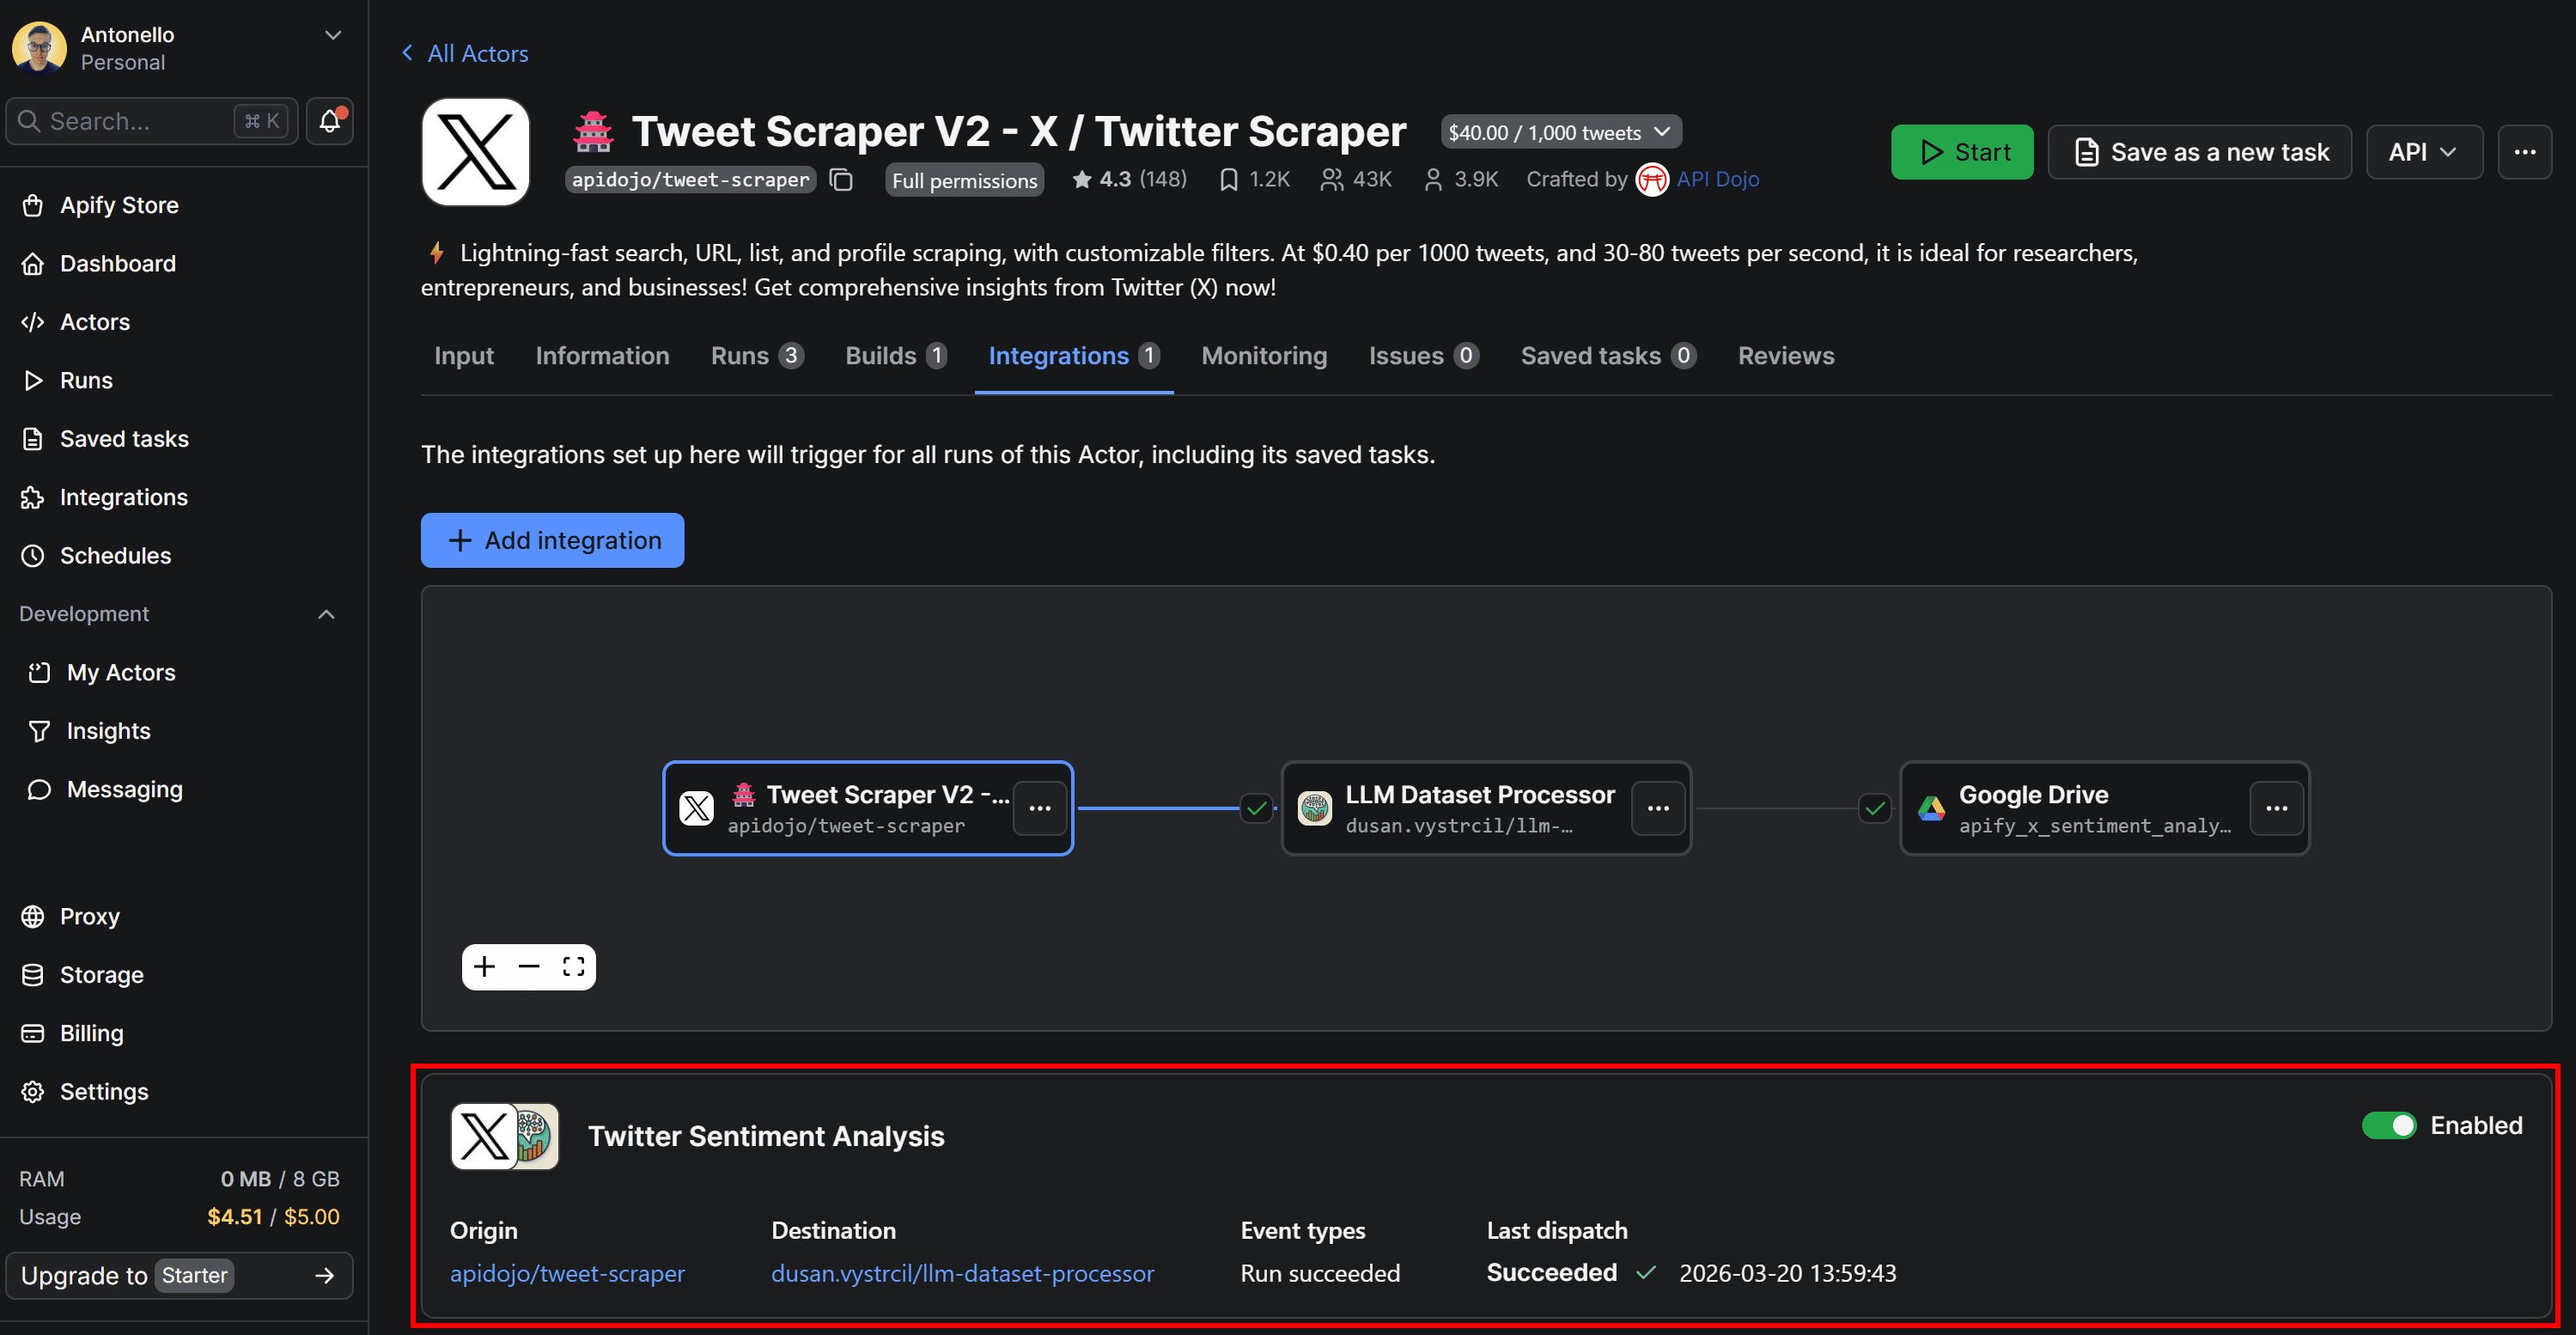
Once the last Actor finishes running, open your Google Drive and locate the Apify Uploads folder. Inside, you’ll find the file generated by the workflow:
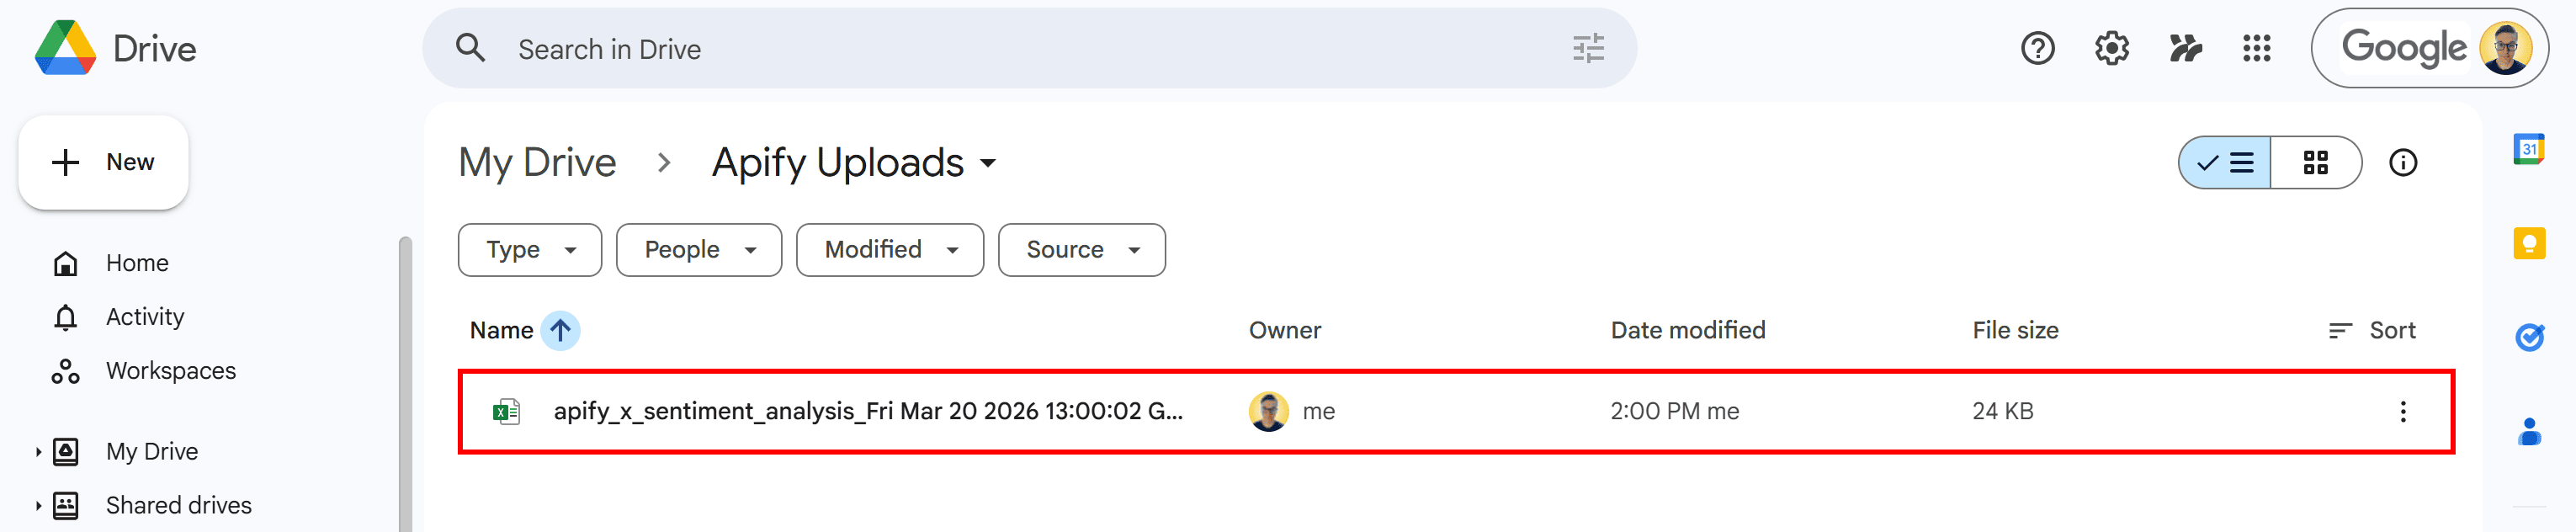
Notice the timestamp appended to the file name - this is added automatically using the {{resource.finishedAt}} variable to help track individual runs.
Open the XLSX document with Google Sheets, and you’ll see something like this:
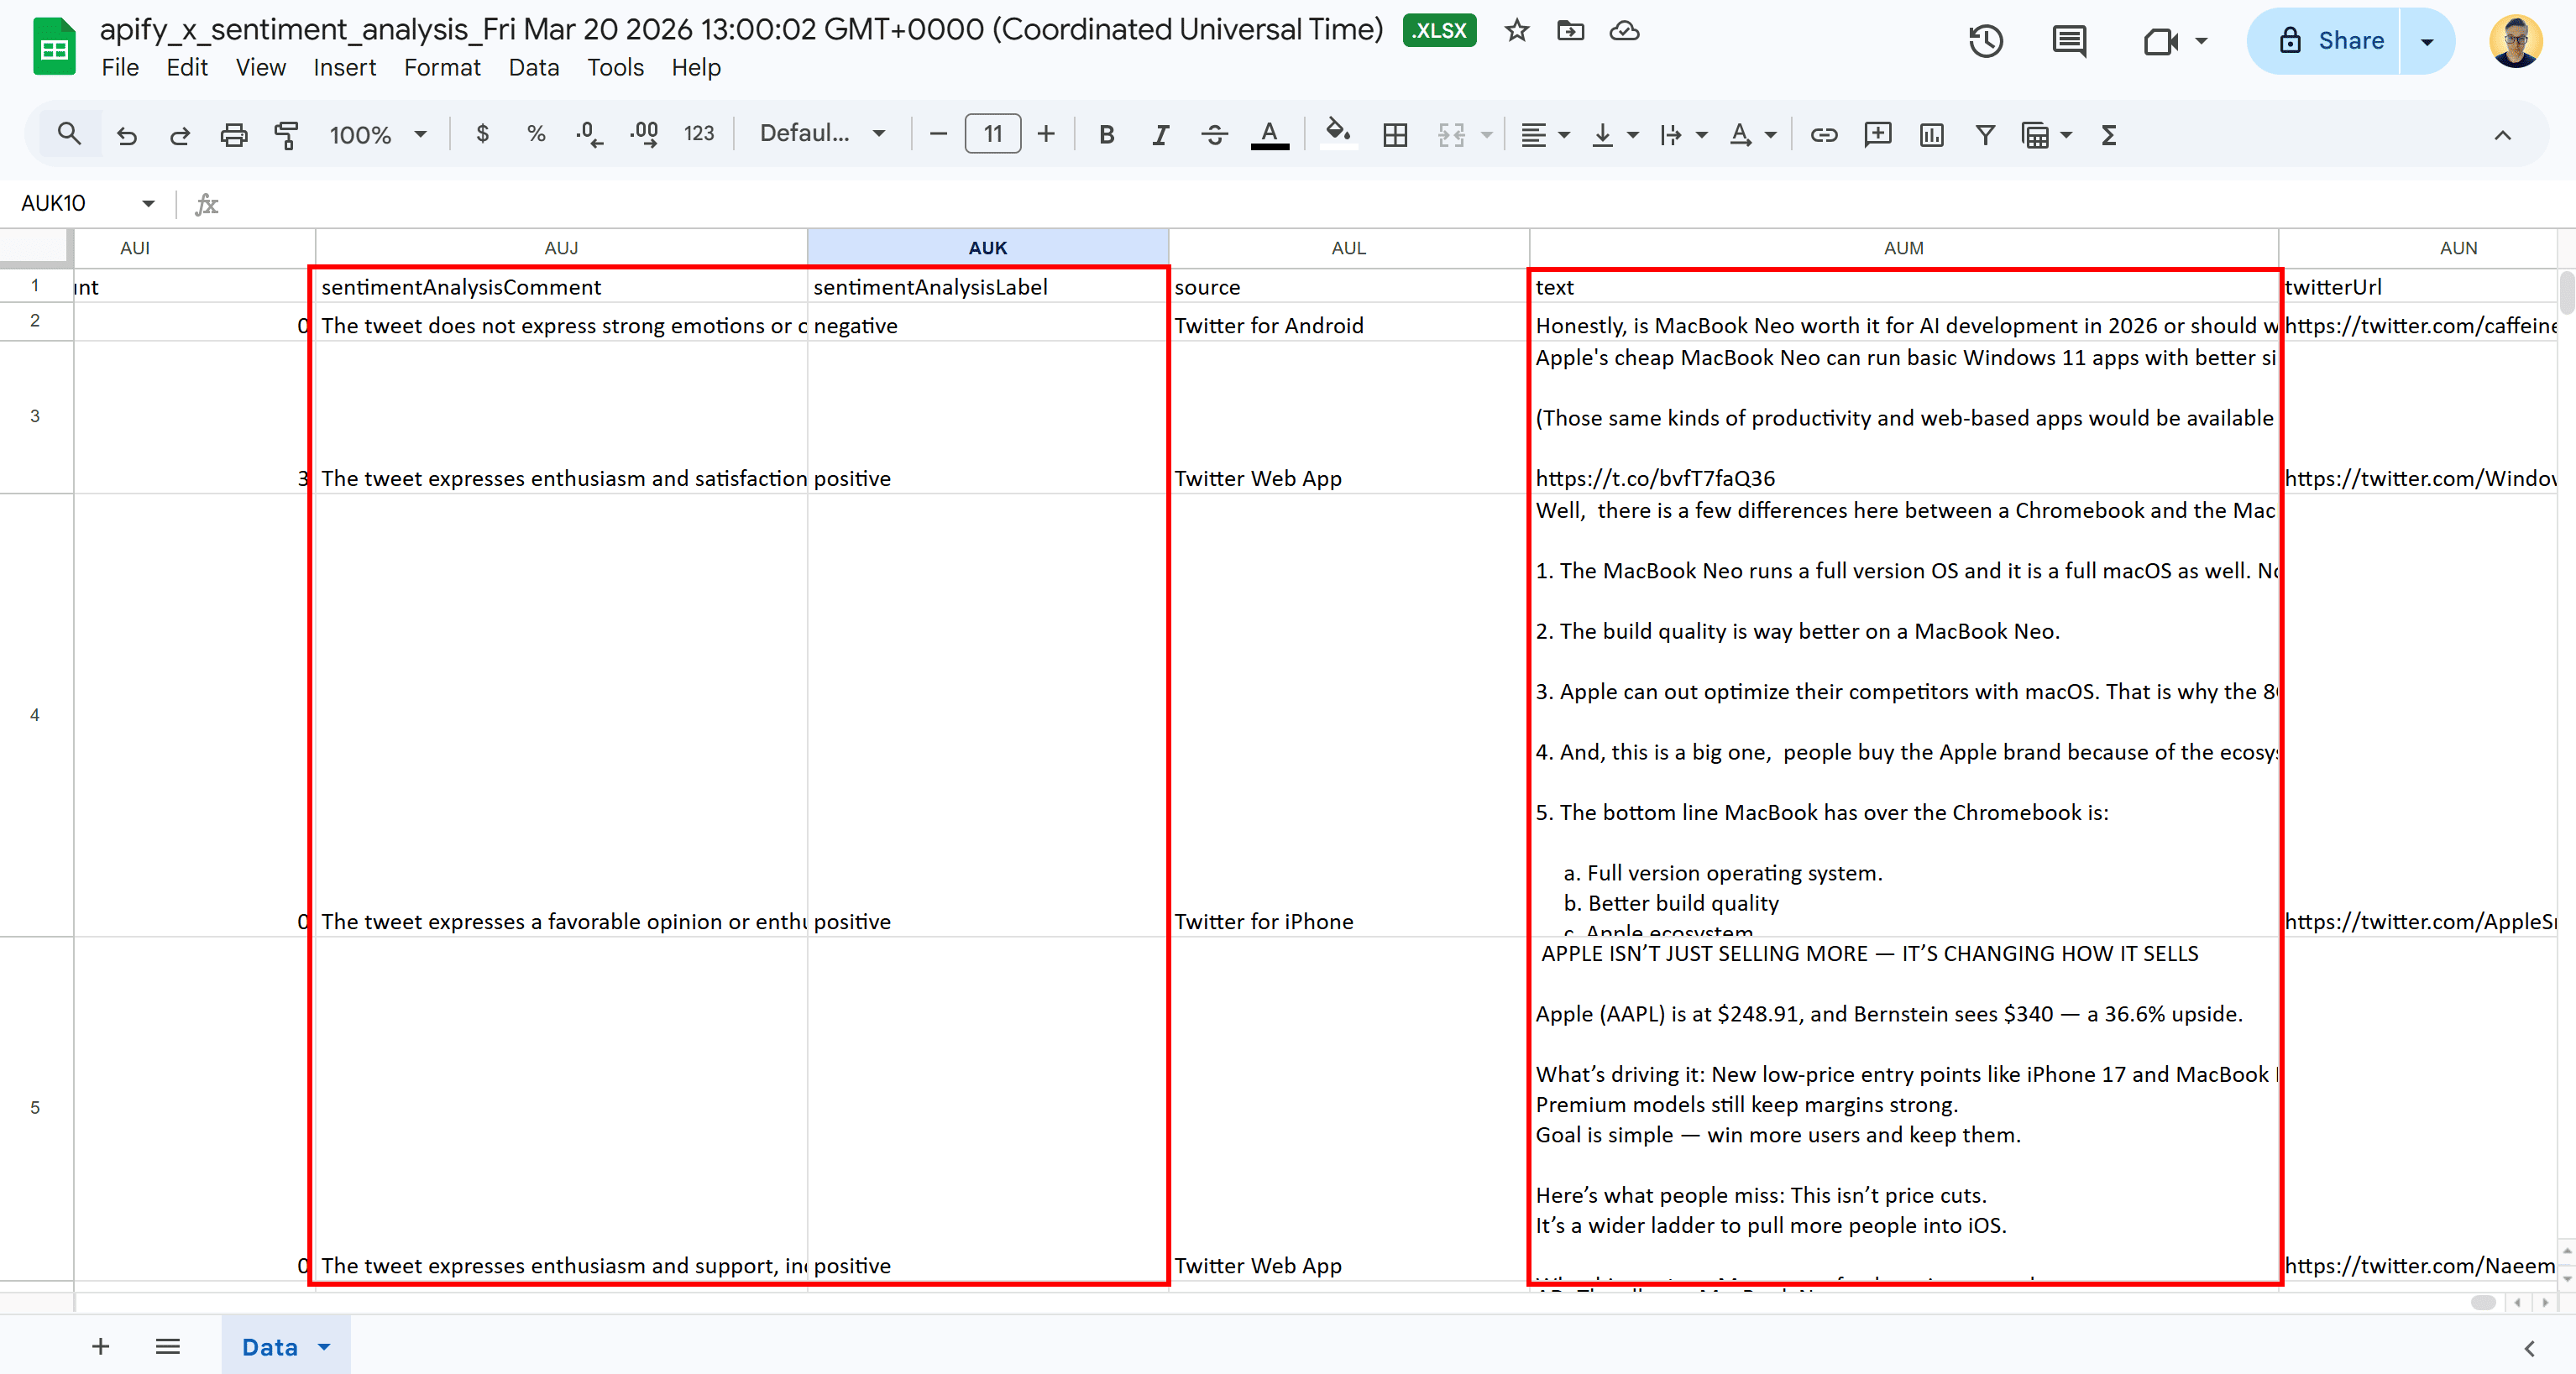
This matches the tabular output with sentiment analysis columns we explored in Step #2.
Your automated Twitter (X) scraping + sentiment analysis workflow is now fully operational.
Conclusion
You now have a complete Twitter sentiment analysis workflow. It collects Tweets, analyzes their sentiment with an LLM, and exports the results to Google Sheets automatically.
This setup shows how you can combine Apify Actors to handle data collection and processing without manual work. From here, you can tweak the pipeline or explore other Actors and integrations to fit your own use case.

Frequently asked questions
What is Twitter sentiment analysis?
Twitter sentiment analysis is the process of using natural language processing and ML/AI techniques to automatically detect and categorize the emotions, opinions, or attitudes expressed in Tweets and replies.
How is Twitter sentiment analysis done?
In simple terms, it involves two steps: first, collecting Tweets (via scraping or APIs), and second, analyzing their text using machine learning models or LLMs to classify sentiment. This helps turn raw social media data into useful insights.
How to get data from Twitter (X) for sentiment analysis?
You can collect Twitter data using scraping tools designed for specific queries or keywords. On Apify, this includes Actors like Tweet Scraper V2 or the Twitter (X.com) Tweets & Profiles Scraper, along with many other Twitter/X scrapers available on Apify Store.