The job market is more dynamic than ever, and it's always wise to keep an eye on new opportunities. However, tracking job listings across multiple sites takes time and effort. Why not automate the process?
Job scraping guide
In this guide, you'll learn how to build a job scraper in Python using the Apify CLI. We'll focus on scraping job postings from Indeed, but the same approach can be applied to other job sites like LinkedIn.
We’ll scrape “Software Engineer” job postings on New York from Indeed and guide you through the process via the following steps:
- Choose the scraping libraries
- Project setup
- Connect to Indeed
- Analyze the job posting DOM elements
- Prepare to scrape all job posting cards on the page
- Scrape the job posting information
- Store the scraped data
- Put it all together
- Deploy to Apify
Prerequisites
To follow along with this tutorial, you need to meet the following prerequisites:
- Understanding of how the web works, including HTTP requests, status codes, and JavaScript rendering
- Familiarity with the DOM, HTML, and CSS selectors
- Awareness of the differences between a static and a dynamic site
Thanks to its powerful web scraping libraries, Python is the programming language used for this guide. That means you’ll need:
- Python 3+ installed locally
- A Python IDE, such as Visual Studio Code with the Python extension or PyCharm
- Basic knowledge of Python, async programming, and browser automation
Since you'll deploy your script to Apify, you'll also require:
- An Apify account
- A basic understanding of how Apify works
Step 1: Choose the scraping libraries
Before jumping into coding, you should familiarize yourself with the job posting site you plan to scrape. The goal is to determine the best web scraping tools for effectively extracting data from it.
To analyze the website for job scraping:
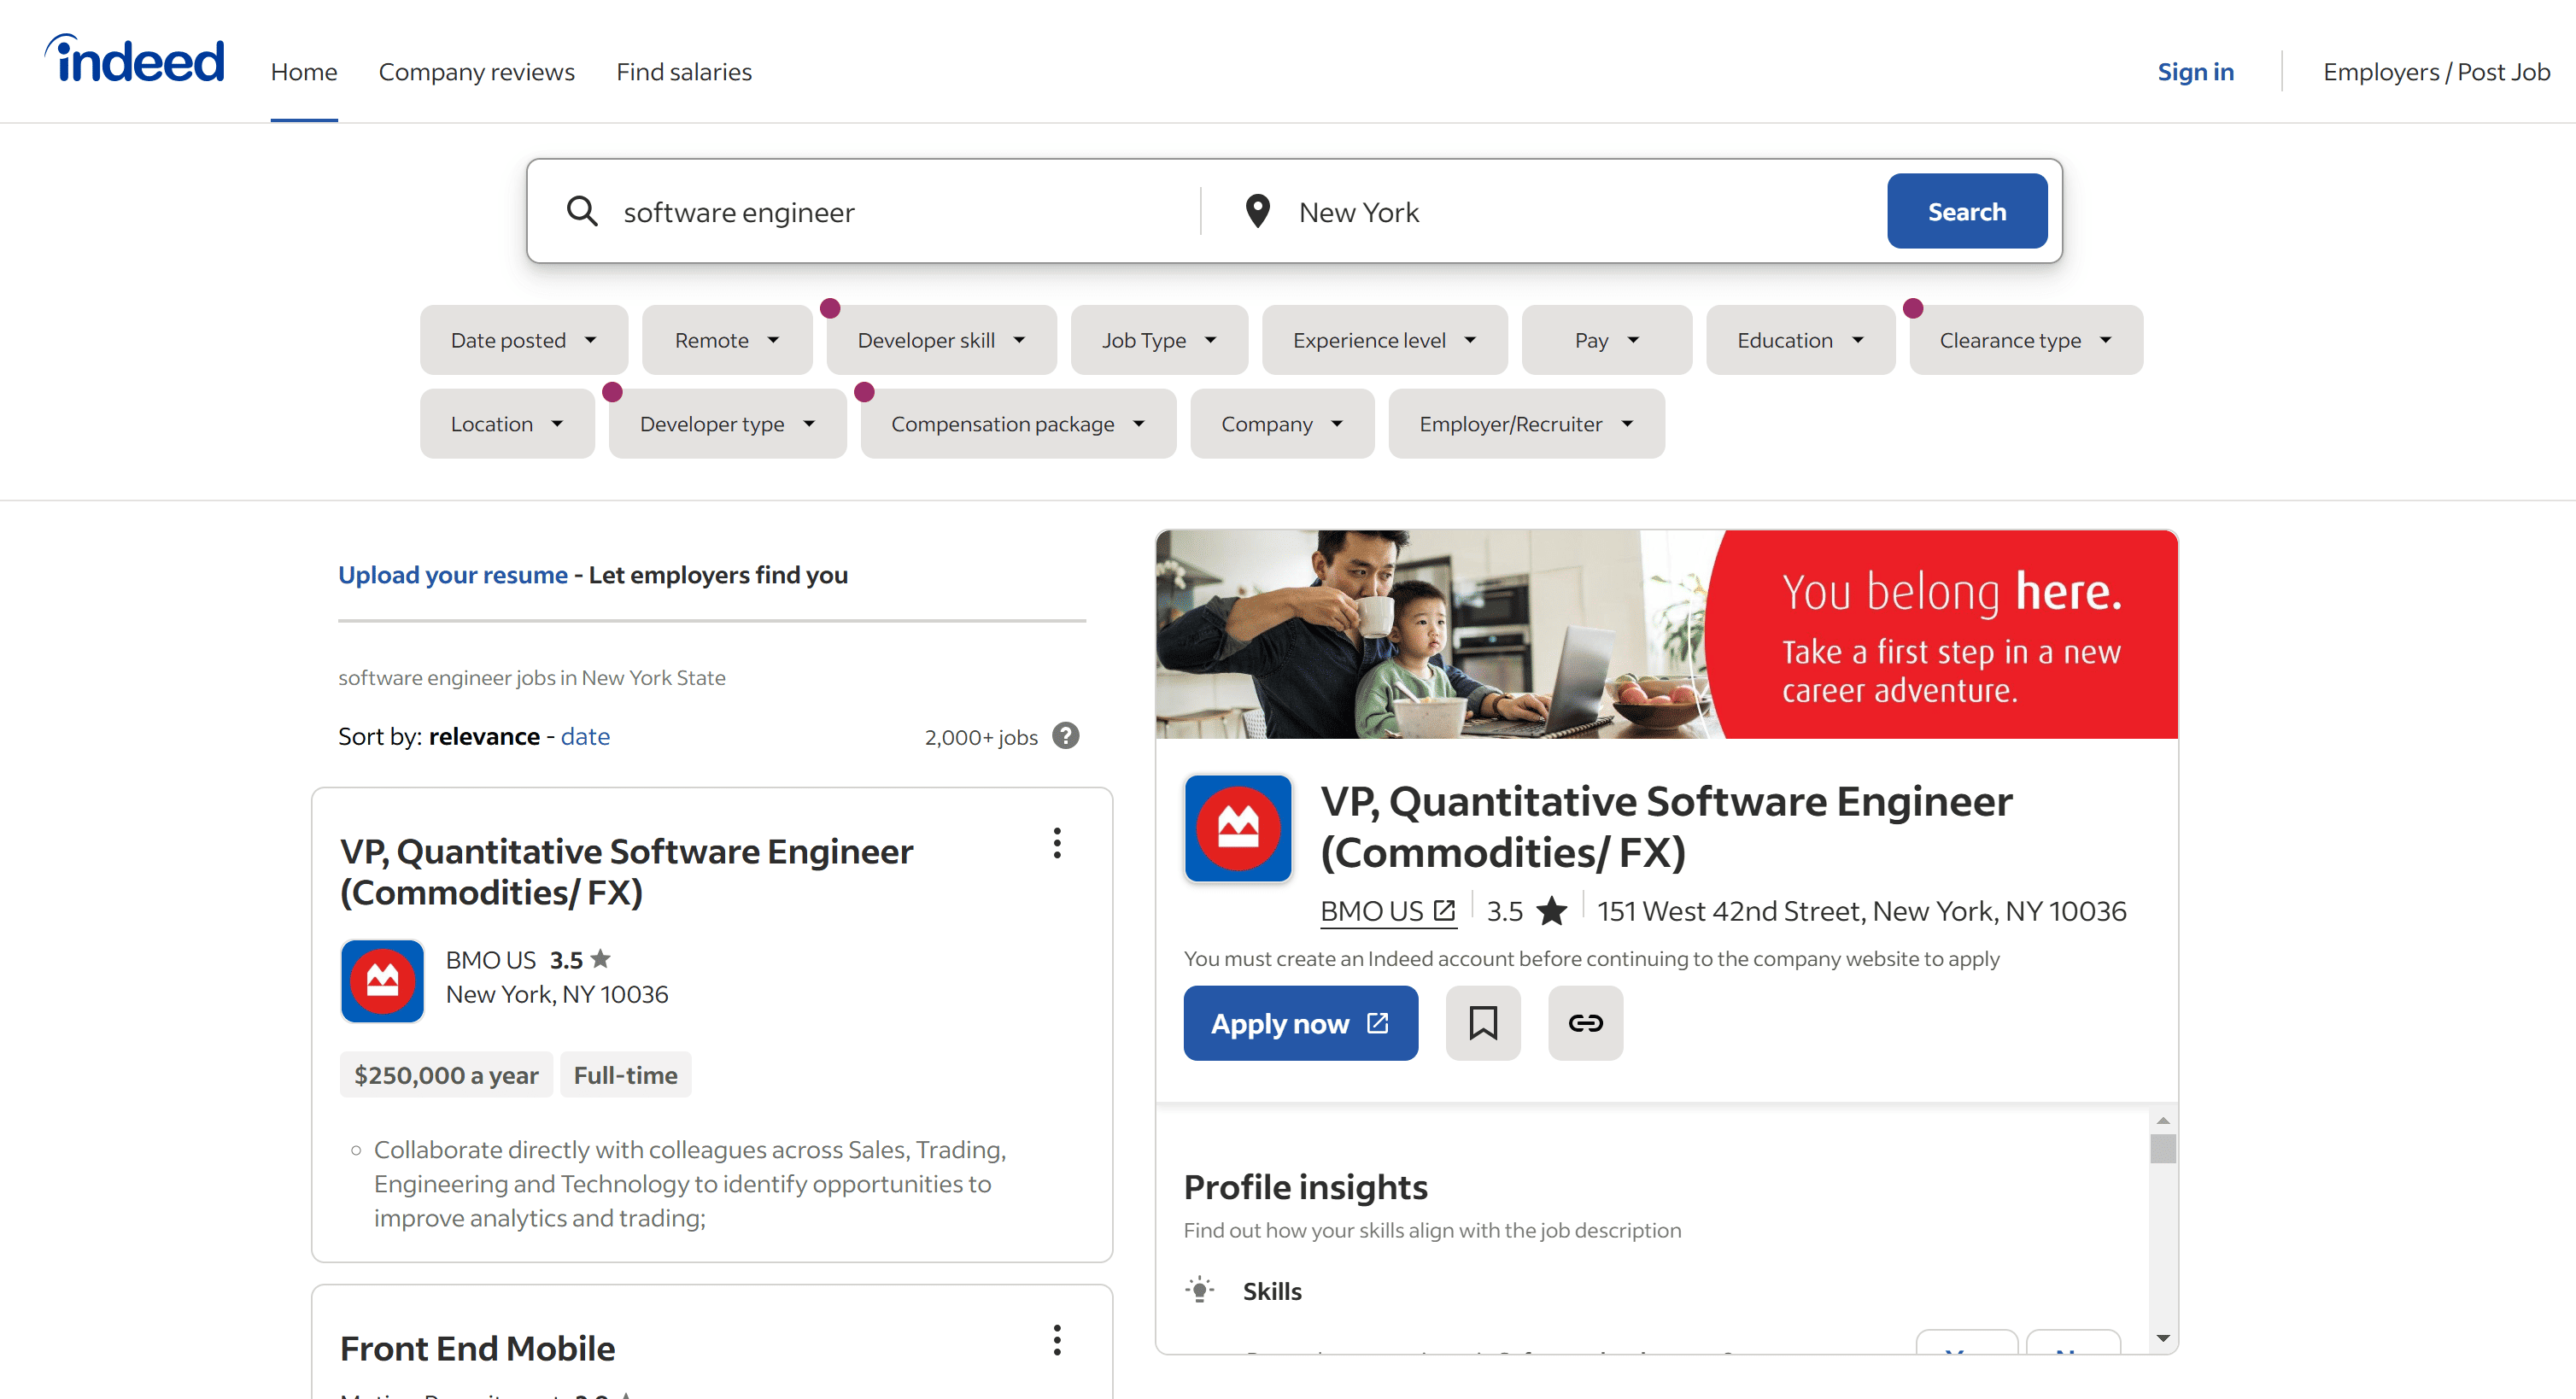
- Open your browser and navigate to the target webpage. In this case, visit the Indeed New York Software Engineer job posting page.
- Right-click anywhere on the page and select "Inspect" to open the DevTools.
- Reload the page and examine the network requests made dynamically by the page:
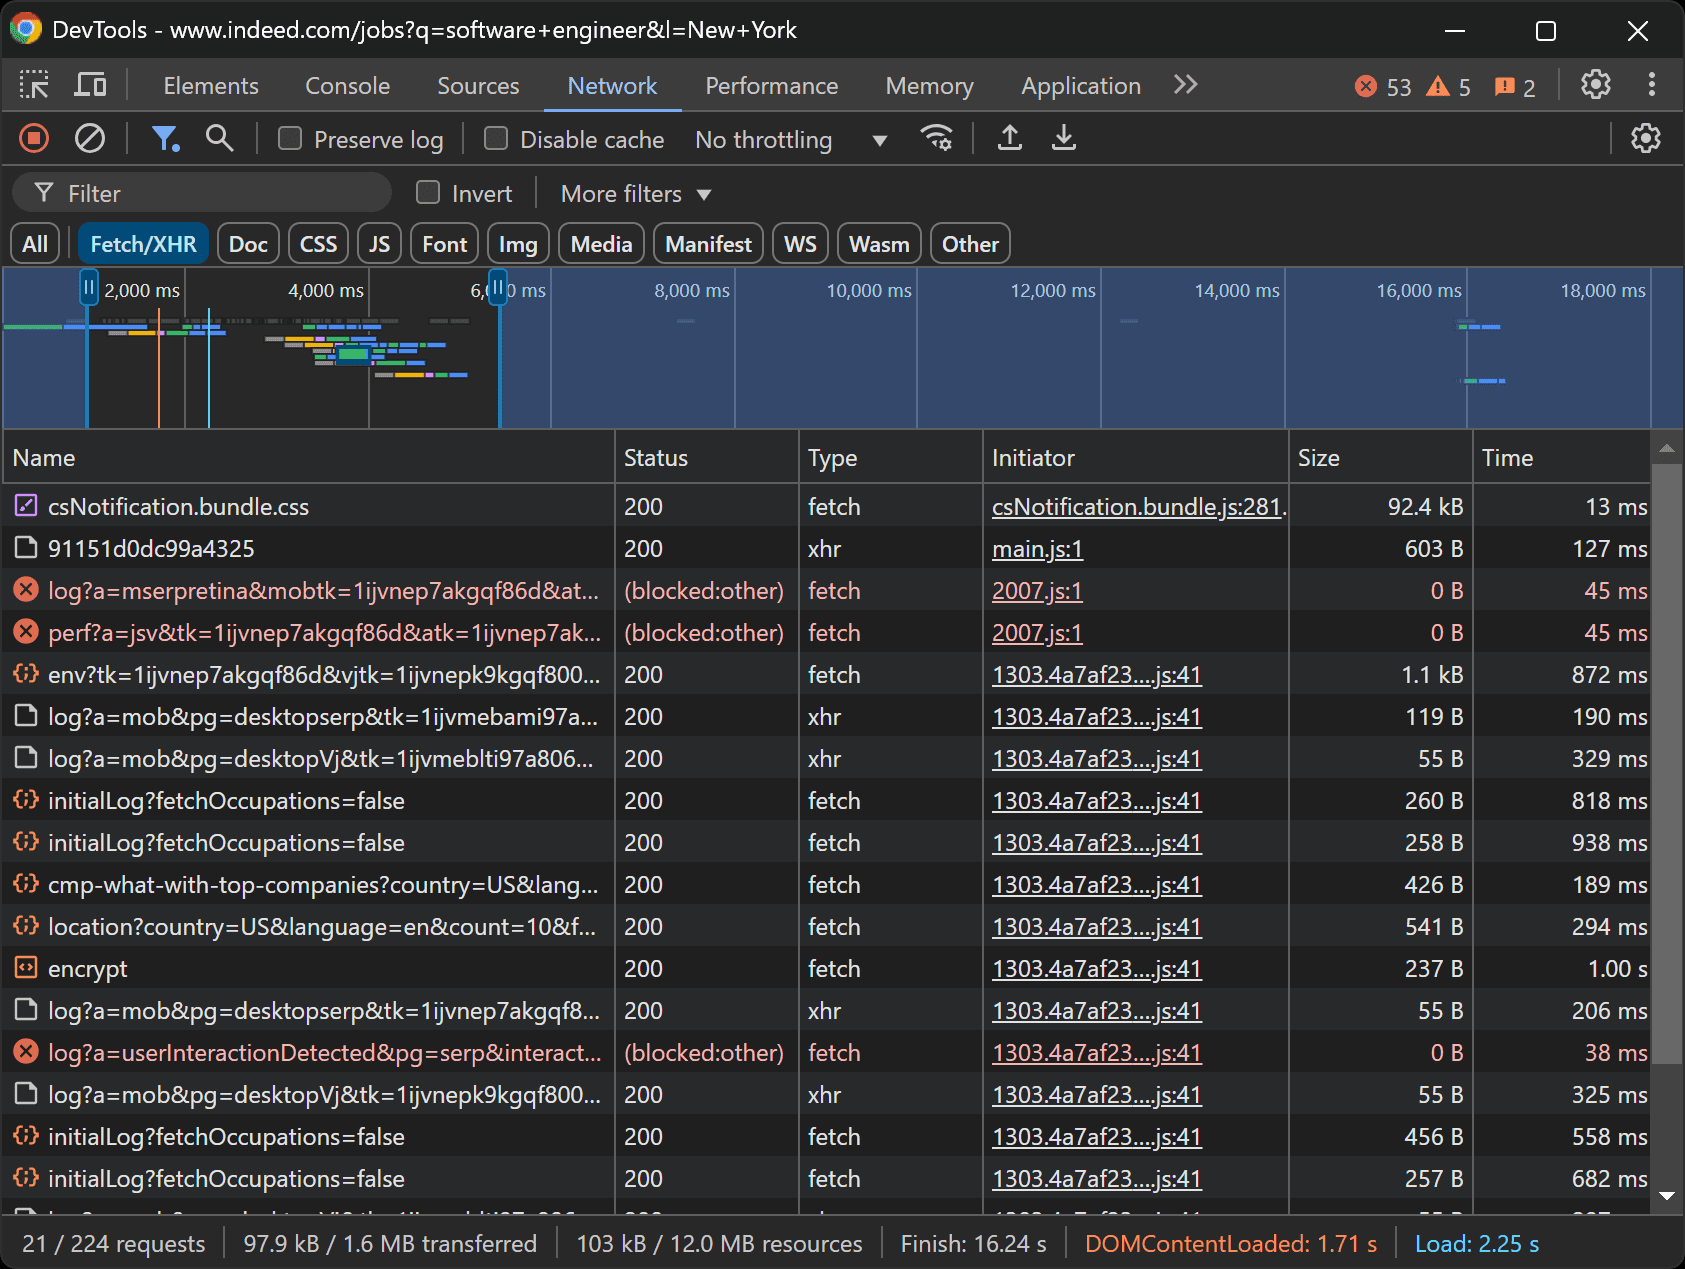
Upon inspecting these requests, you’ll notice that most of them are logging requests and don’t contain significant data. Additionally, by viewing the page source code, you can confirm that the page is primarily static.
This means that the data of interest is already embedded within the HTML document returned by the server, and there’s no JavaScript rendering or dynamic data retrieval in the browser.
At this point, you might assume that a simple HTTP client like Requests combined with an HTML parser like BeautifulSoup is sufficient for scraping Indeed. To verify that, try simulating an automated HTTP GET request using a real browser's User-Agent in an HTTP client like Postman:
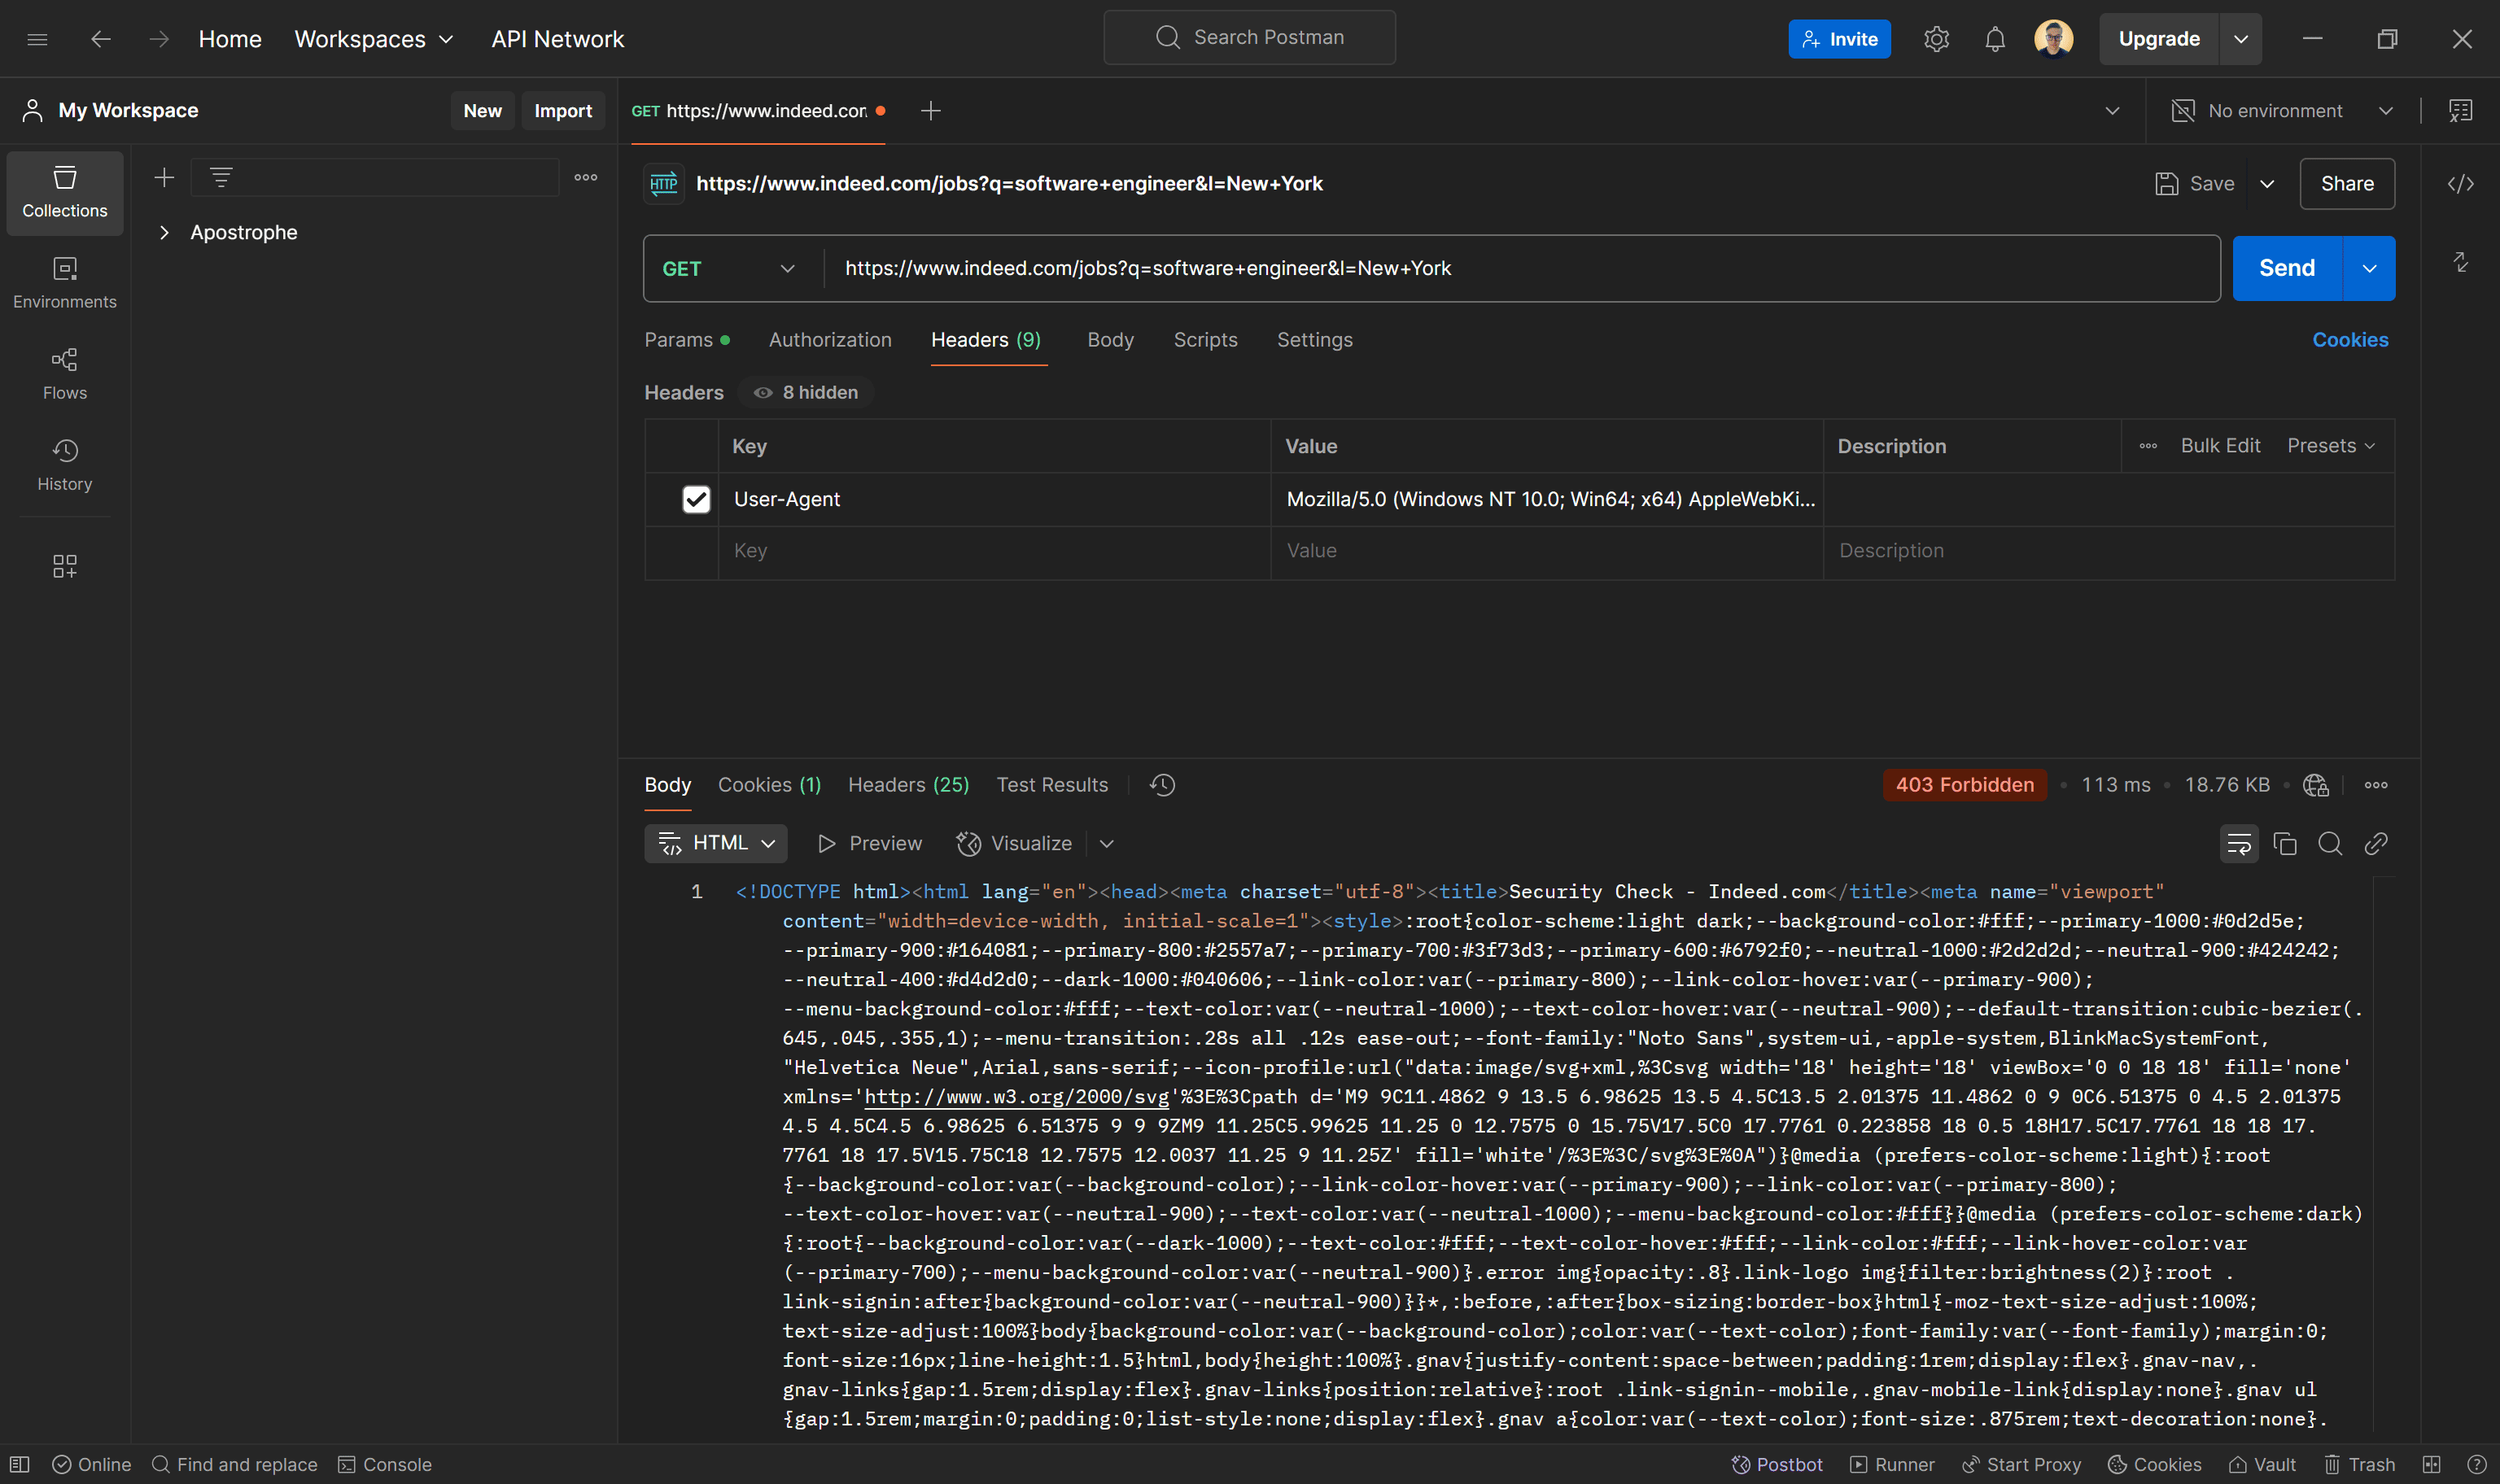
As shown in the image above, the Indeed server responds with a 403 Forbidden error. This indicates that Indeed has anti-scraping mechanisms in place, blocking automated requests from standard HTTP clients. This is likely due to TLS fingerprinting, which detects non-browser traffic.
To bypass these restrictions and programmatically access the page, you need a browser automation tool like Selenium. If you're unfamiliar with this approach, get started with our guide on browser automation with Python and Selenium.
Step 2: Project setup
Before building your Python job posting scraper, you need to set up your environment. Since the script will be deployed on Apify, start by installing the Apify CLI using the following npm command:
npm install -g apify-cli
This installs the Apify CLI globally on your system.
Next, create a new Apify Actor by running:
apify create
You’ll be prompted with a few configuration questions. Answer them as follows:
✔ Name of your new Actor: indeed-scraper
✔ Choose the programming language of your new Actor: Python
✔ Choose a template for your new Actor. Detailed information about the template will be shown in the next step. Selenium
 + Chrome
✔ Do you want to install the following template?
 Selenium + Chrome:
This will generate a new Python Apify Actor inside the indeed-scraper folder using the “Selenium + Chrome” template. The installation process may take some time, so be patient.
Once completed, your indeed-scraper folder should have the following structure:
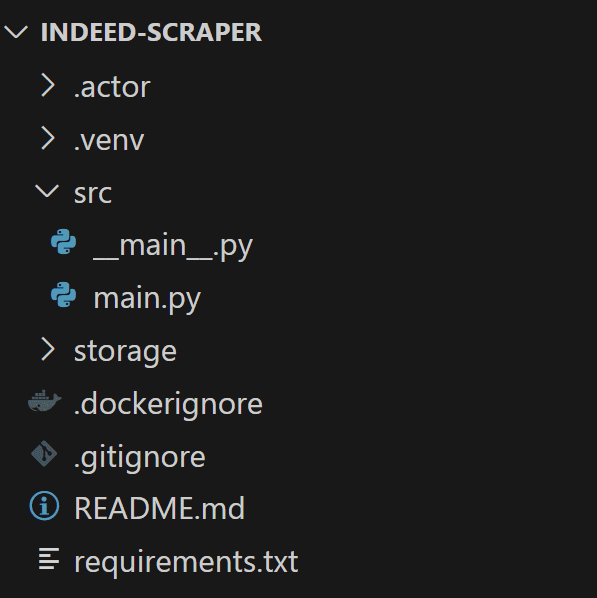
Navigate to the src folder and open the main.py file. You’ll find a section that starts with async with Actor, which currently contains sample scraping logic. Clear that section and prepare to replace it with your custom scraping logic:
import asyncio
from urllib.parse import urljoin

from selenium import webdriver
from selenium.webdriver.chrome.options import Options as ChromeOptions
from selenium.webdriver.common.by import By

from apify import Actor, Request

async def main() -> None:
    async with Actor:
        # Your Actor scraping logic...
Don’t forget that you can run your Actor locally for testing purposes with:
apify run
Step 3: Connect to Indeed
To ensure that Apify reads the target URL from the input arguments, write the following lines of code:
# Retrieve the Actor input, and use default values if not provided
actor_input = await Actor.get_input() or {}
start_urls = actor_input.get("start_urls")

# Exit if no start URLs are provided
if not start_urls:
    Actor.log.info("No start URLs specified in actor input, exiting...")
    await Actor.exit()

# Open the default request queue for handling URLs to be processed.
url = start_urls[0]["url"]
If the start_urls argument is missing, the Actor will immediately exit using Actor.exit(). Otherwise, it will retrieve and use the provided URL.
To configure the desired Indeed job posting page as the default target, override the INPUT.json file inside /key_value_store/default/ with the following JSON data:
{
  "start_urls": [
    {
      "url": "https://www.indeed.com/jobs?q=software+engineer&l=New+York"
    }
  ]
}
start_urls[0]["url"] will access specifically that URL.
Next, initialize a Selenium ChromeDriver instance and use its get() method to navigate to the target page:
driver = webdriver.Chrome()
driver.get(url)
You can avoid that issue by configuring Selenium with the following options:
chrome_options = ChromeOptions()
chrome_options.add_argument("--headless")  # Enable headless mode for non-GUI execution
chrome_options.add_argument("--window-size=1920,1080")  # Set a fixed resolution to avoid layout shifts
chrome_options.add_argument("--no-sandbox")  # Bypass OS security restrictions (useful in Docker)
chrome_options.add_argument("--disable-dev-shm-usage")  # Prevent crashes in low-memory environments

# Set a real-world User-Agent
user_agent = "Mozilla/5.0 (Windows NT 10.0; Win64; x64) AppleWebKit/537.36 (KHTML, like Gecko) Chrome/132.0.0.0 Safari/537.36"
chrome_options.add_argument(f"user-agent={user_agent}")

driver = webdriver.Chrome(options=chrome_options)
This configuration ensures that Chrome:
- Runs in headless mode to avoid opening a visible browser window.
- Uses a large window size (1920x1080) to prevent responsive rendering issues.
- Can be executed safely on Docker
- Mimics a real user with a genuine
User-Agent, reducing the chances of detection.
At the end of your main.py script, remember to close the Selenium driver to free up resources:
driver.quit()
If you launch your Actor, a Chrome window will briefly open, navigate to the target page, and then close automatically due to the quit() instruction:
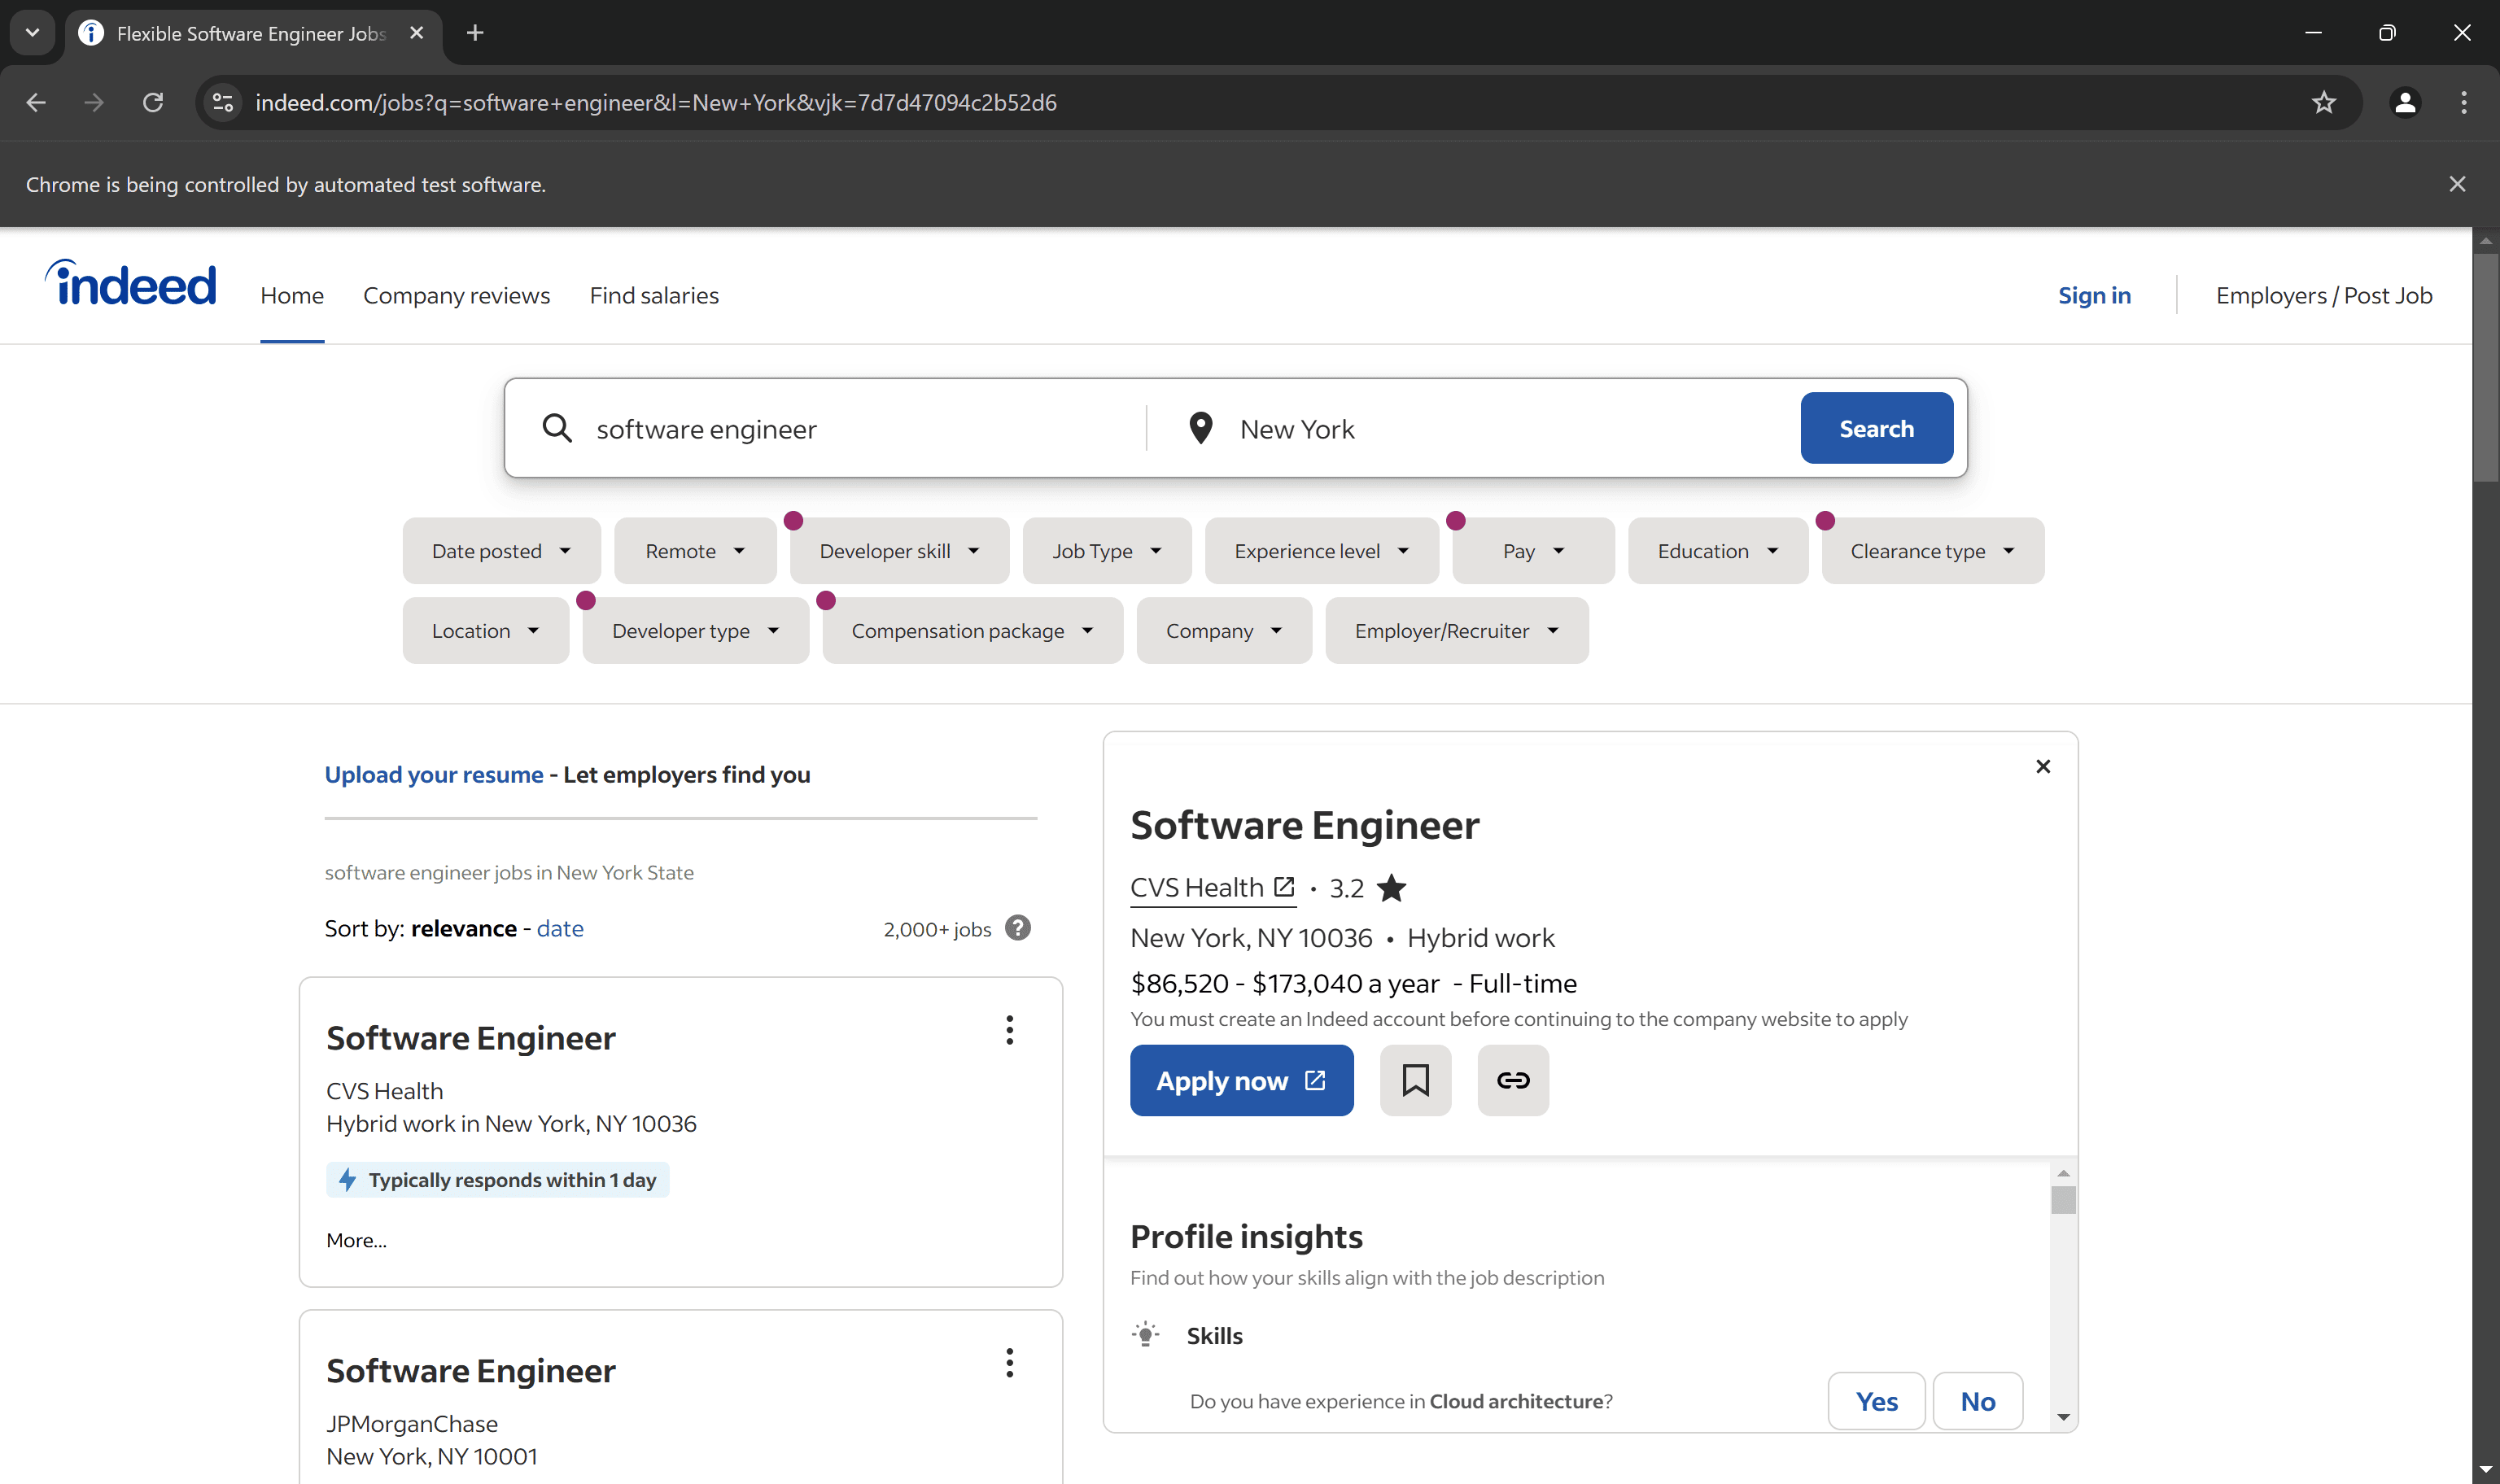
Step 4: Analyze the job posting DOM elements
Before implementing the data retrieval logic, it’s important to inspect the DOM of the target page. That way, you can understand how to select the HTML elements that contain the job data you're interested in.
Start by opening the target page in your browser. Right-click on a job posting card and select the “Inspect” option:
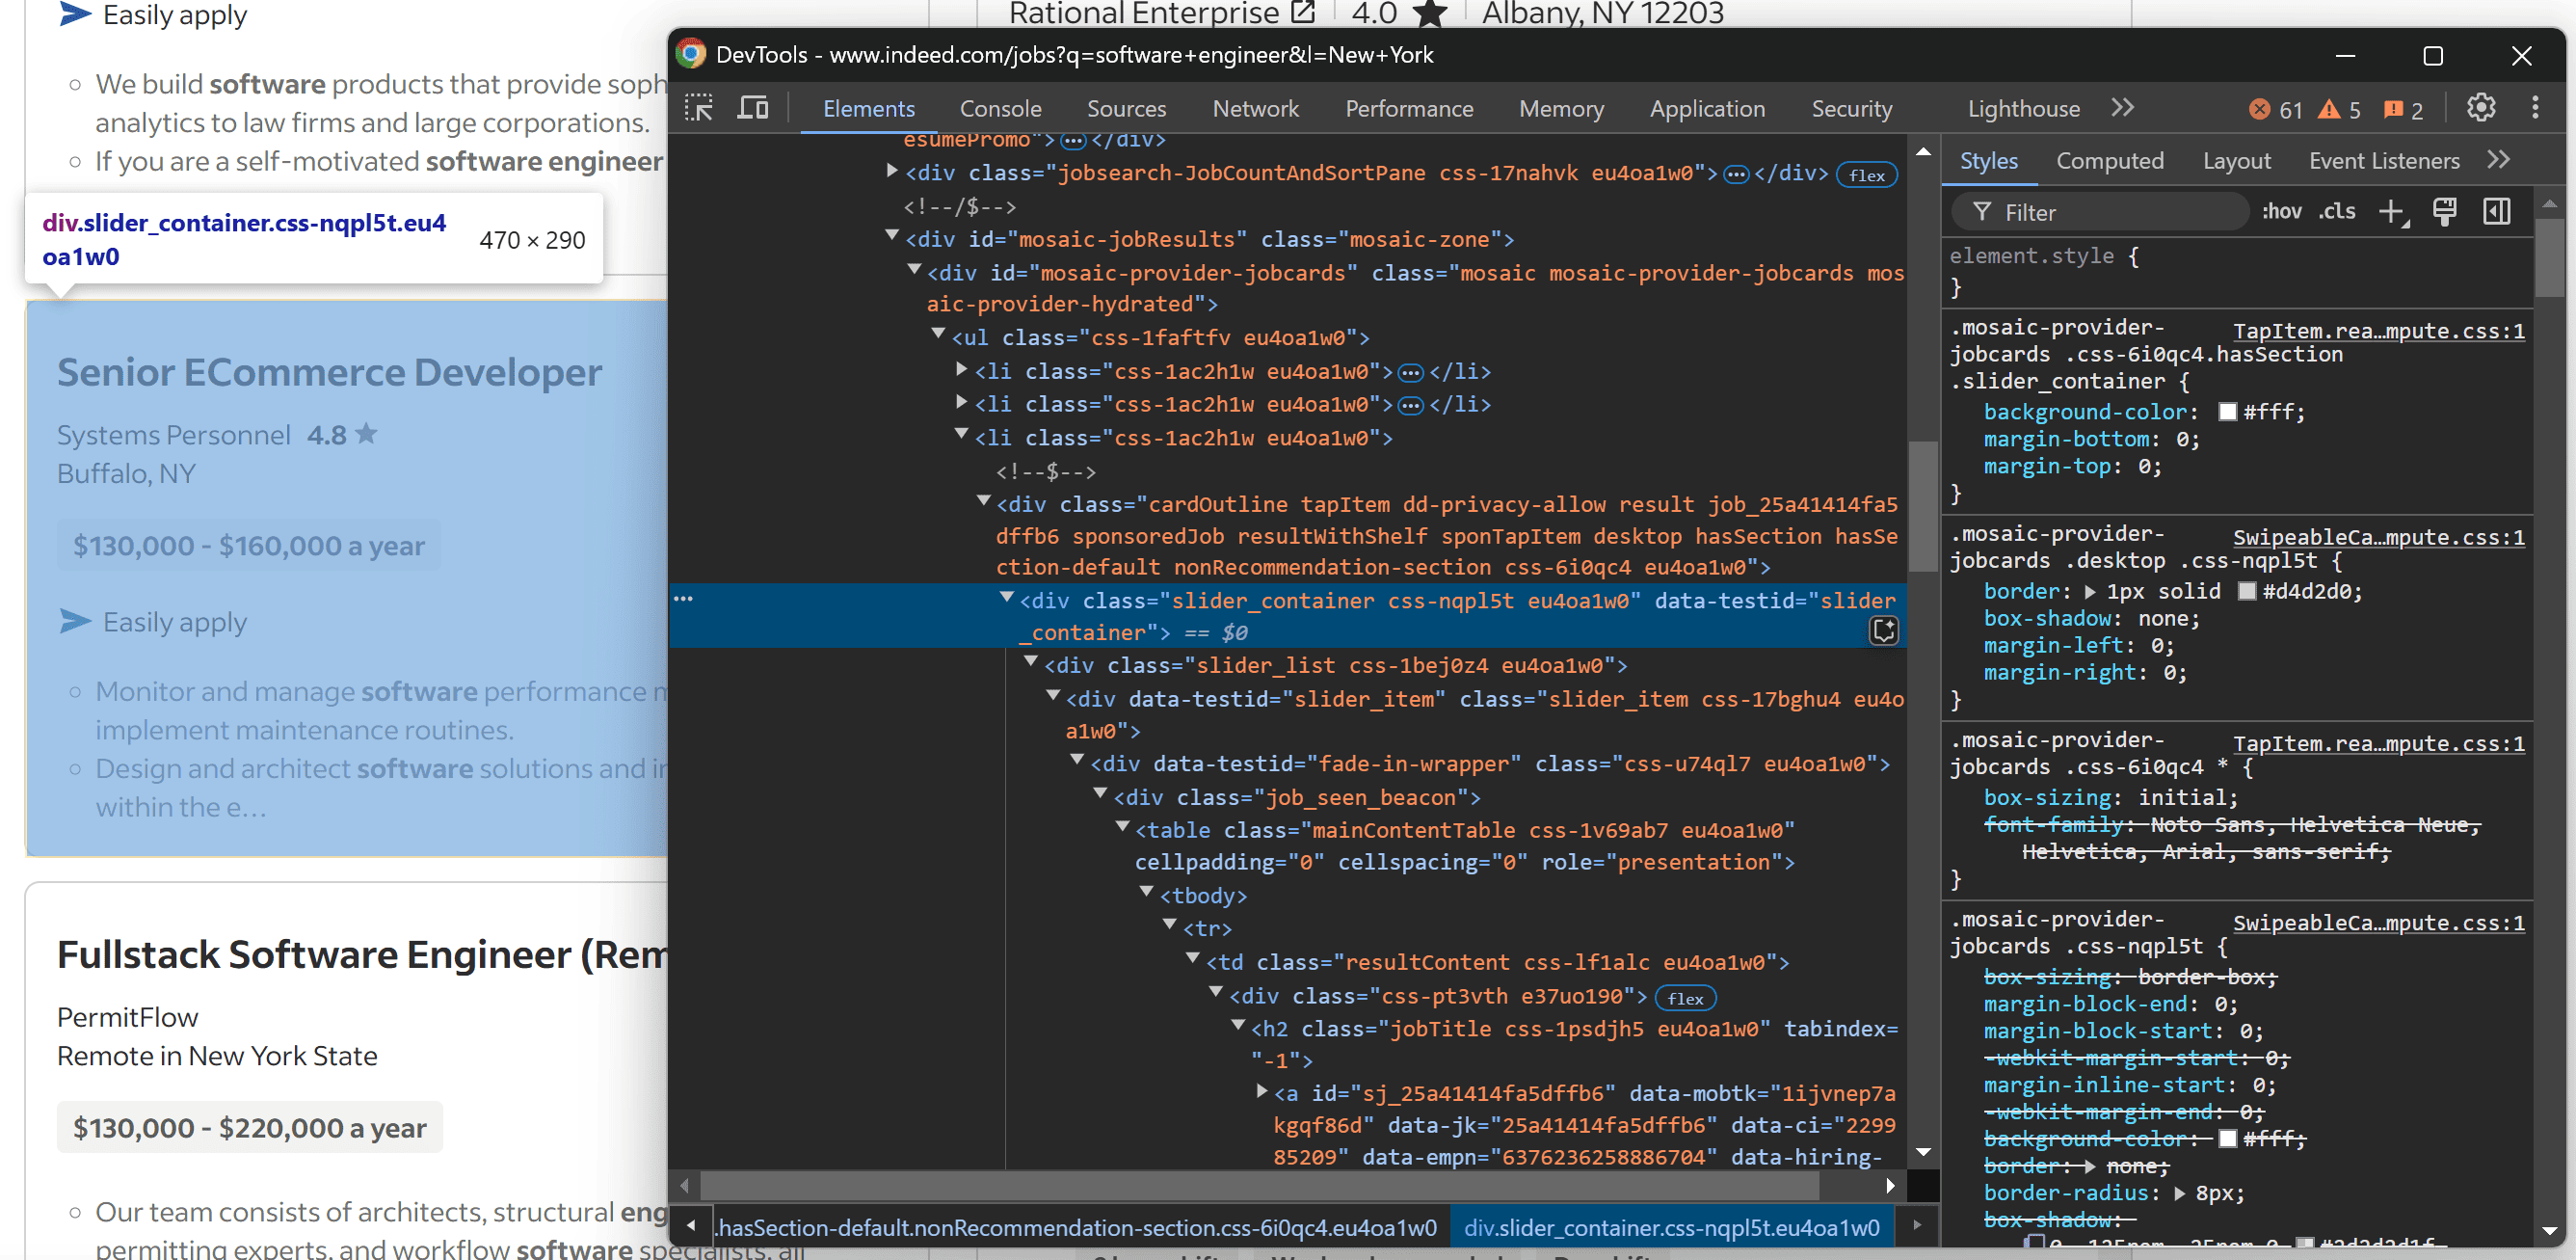
Upon inspection, you’ll notice that the job posting card has a data-testid="slider_container" attribute. In HTML, data-* attributes are often used for testing purposes and serve as reliable selectors for web scraping since they tend to remain consistent over time.
Specifically, each job card typically contains this information:
- Job title
- Company name
- Location
- Salary range
- Job description
Keep in mind that the data shown may vary across different cards, and some fields might be optional. Therefore, you should account for these differences in your parsing logic.
If you aren’t familiar with the process of inspecting elements, refer to our article on inspecting elements with DevTools.
Step 5: Prepare to scrape all job posting cards on the page
Since the target page contains multiple job postings, you’ll need a data structure where to store them all. For that reason, initialize an empty list to store the extracted data:
job_postings = []
Then, use Selenium's find_elements() method to select all job posting cards matching the CSS selector identified in the previous step:
job_posting_card_elements = driver.find_elements(By.CSS_SELECTOR, "[data-testid=\\"slider_container\\"]")
The job_posting_card_elements list now contains all the job posting elements on the page. The By parameter tells Selenium which DOM selection strategy to use—in this case, a CSS selector.
By manually, as the Apify “Selenium + Chrome” template already includes it.Next, iterate over job_posting_card_elements and implement the data extraction logic for each job card:
for job_posting_card_element in job_posting_card_elements:
    # Scraping logic...
Step 6: Scrape the job posting information
Use the methods provided by Selenium to select the relevant nodes inside each job posting element and extract data from them. As some HTML elements are optional, you will need to wrap your code with the following logic:
try:
    # Selenium selection instructions
except NoSuchElementException:
    # Default value
When the find_element() method in Selenium fails to locate a specified element, it raises a NoSuchElementException. The try ... except block ensures that this exception is handled gracefully, assigning a default value to the missing field instead of causing the script to fail.
Import NoSuchElementException in main.py:
from selenium.common.exceptions import NoSuchElementException
Now, reopen the job posting card in DevTools and expand the HTML structure further:
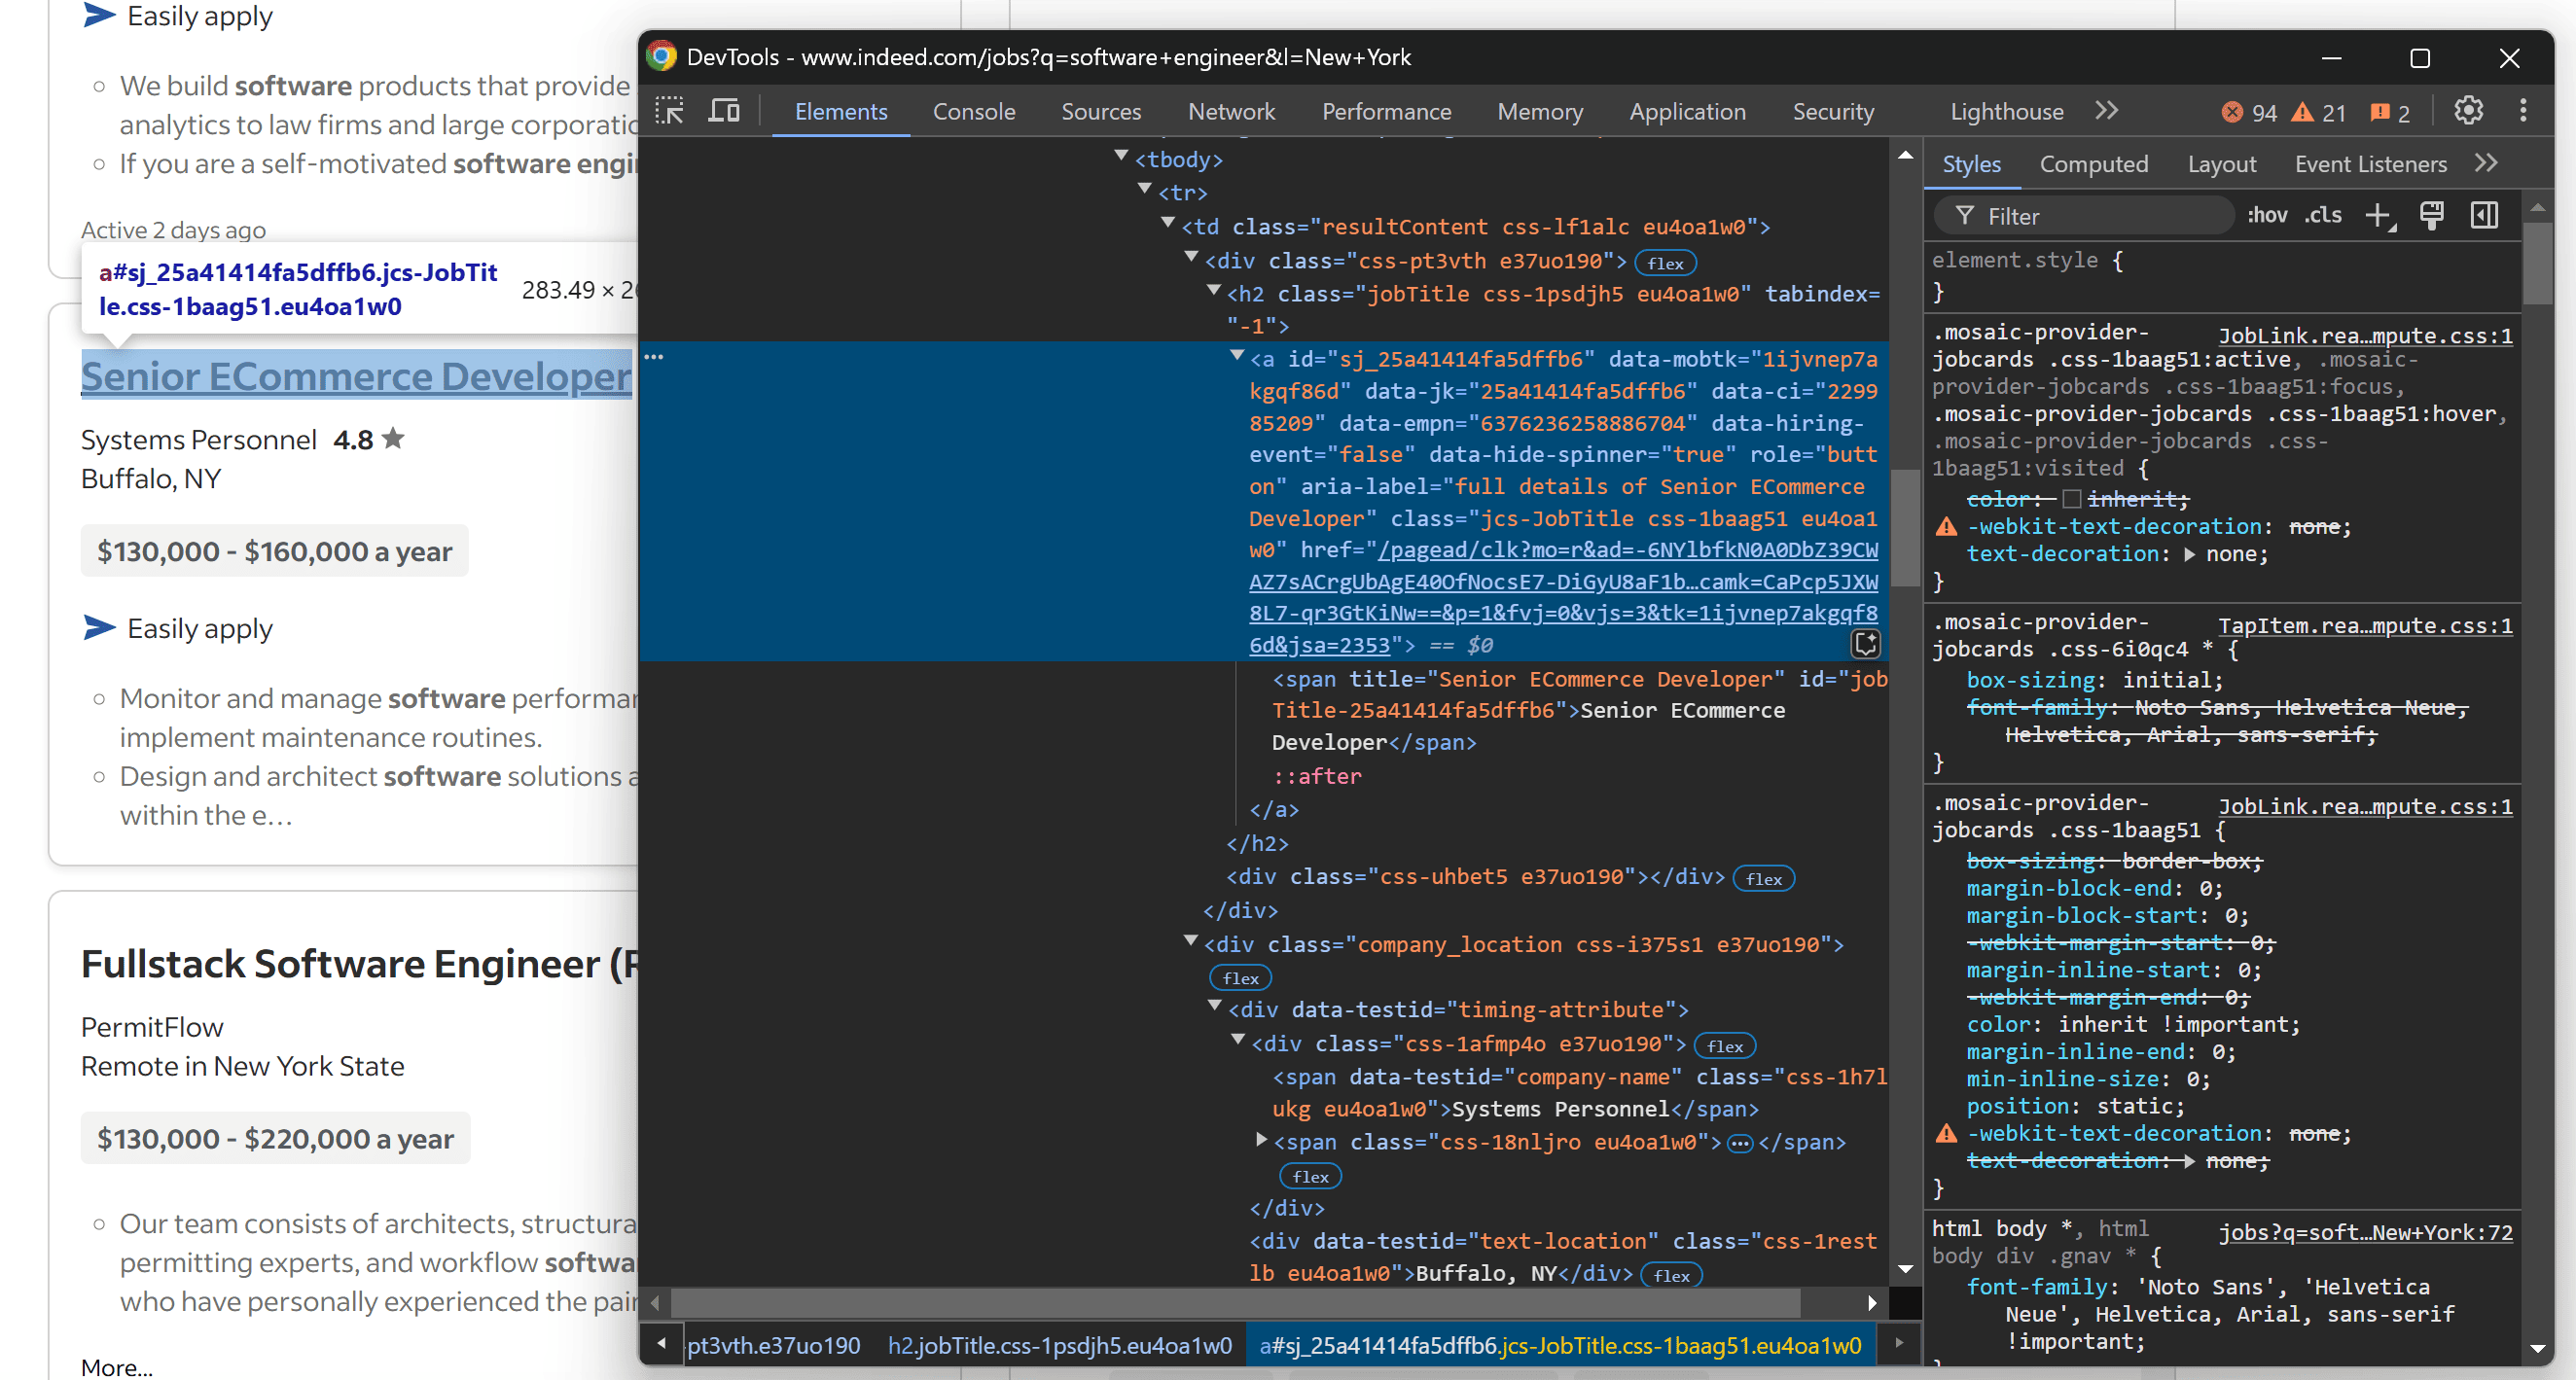
Notice that you can extract:
- The job title is inside an element with an ID that starts with
"jobTitle". - The company name is within
[data-testid="company-name"]. - The company location is within
[data-testid="text-location"].
Use the find_element() method to locate the single HTML elements with the above CSS selectors. Then, extract their text content with the text attribute. Wrap optional fields (company name and location) inside a try...except block to handle missing values:
job_title_element = job_posting_card_element.find_element(By.CSS_SELECTOR, "[id^=\\"jobTitle\\"]")
job_title = job_title_element.text

try:
    company_element = job_posting_card_element.find_element(By.CSS_SELECTOR, "[data-testid=\\"company-name\\"]")
    company = company_element.text
except NoSuchElementException:
    company = None

try:
    location_element = job_posting_card_element.find_element(By.CSS_SELECTOR, "[data-testid=\\"text-location\\"]")
    location = location_element.text
except NoSuchElementException:
    location = None
Now, inspect the lower section of the job posting card:
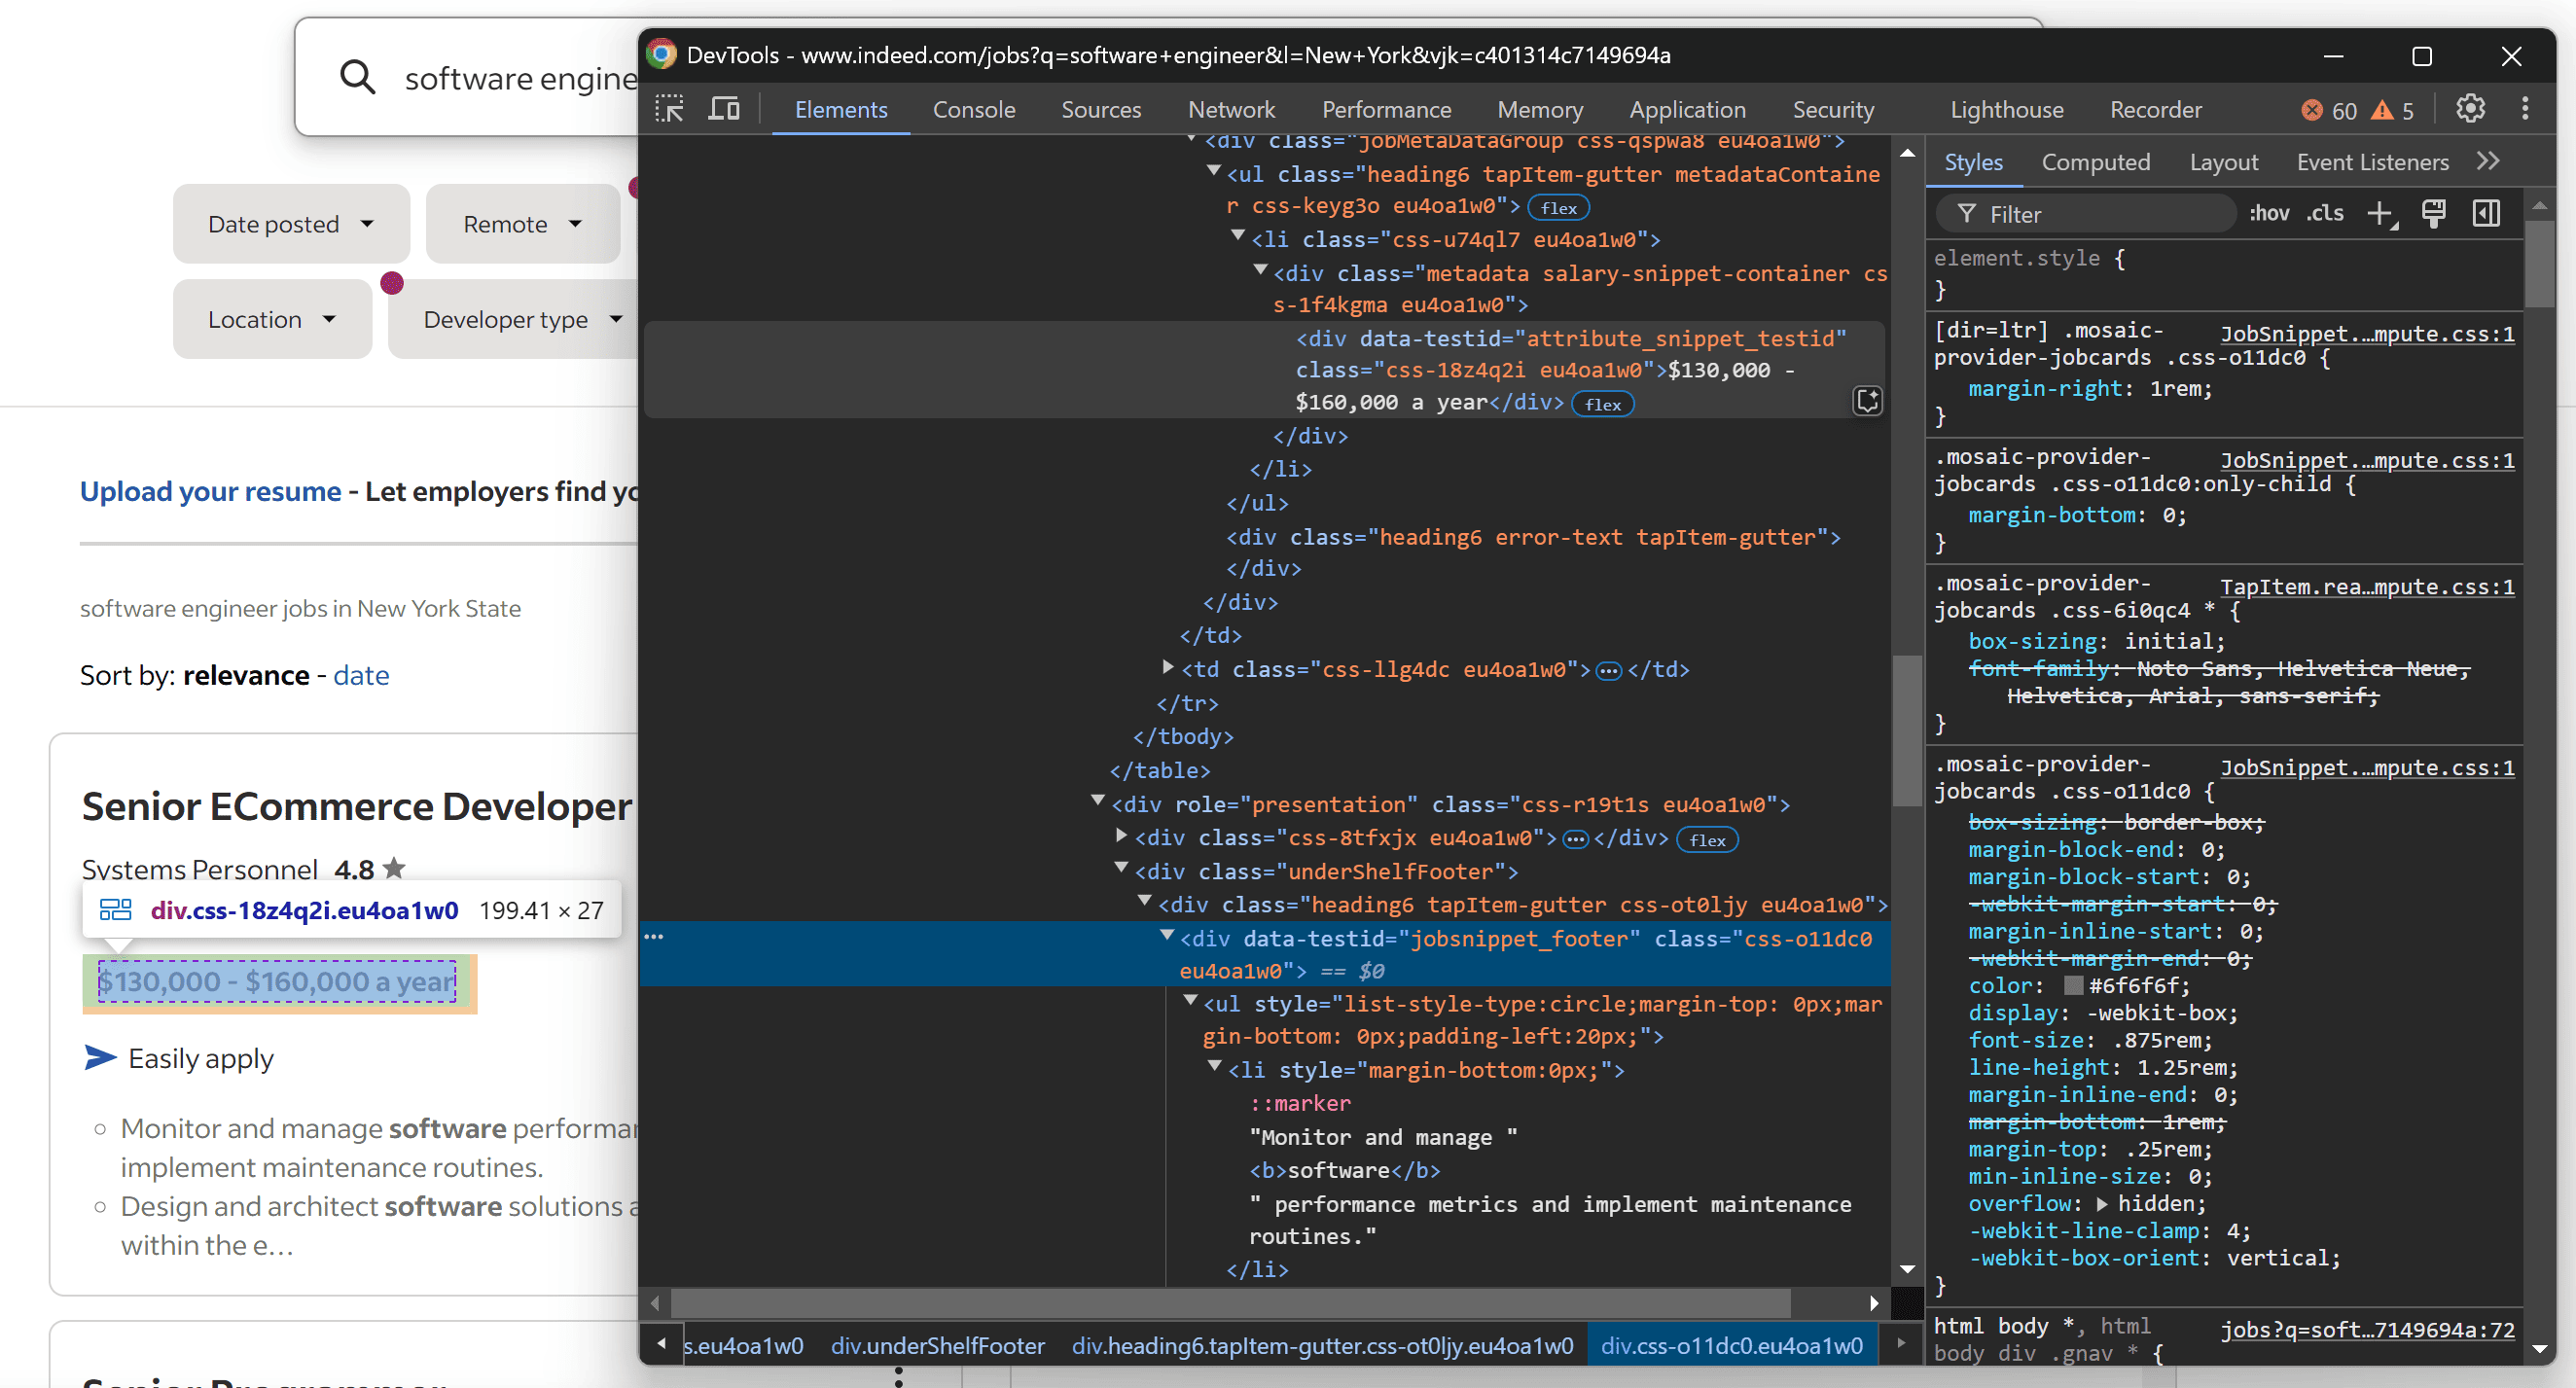
Note that you can retrieve:
- The salary range from
[data-testid="attribute_snippet_testid"] - The job description from
[data-testid="jobsnippet_footer"]
Since these fields are also optional, apply the same try...except logic:
try:
    salary_element = job_posting_card_element.find_element(By.CSS_SELECTOR, "[data-testid=\\\\"attribute_snippet_testid\\"]")
    salary_range = salary_element.text
except NoSuchElementException:
    salary_range = None

try:
    description_element = job_posting_card_element.find_element(By.CSS_SELECTOR, "[data-testid=\\"jobsnippet_footer\\"]")
    job_description = description_element.text
except NoSuchElementException:
    job_description = None
Remember that sometimes, Indeed loads job posting cards without salary and description information—as in the example below:
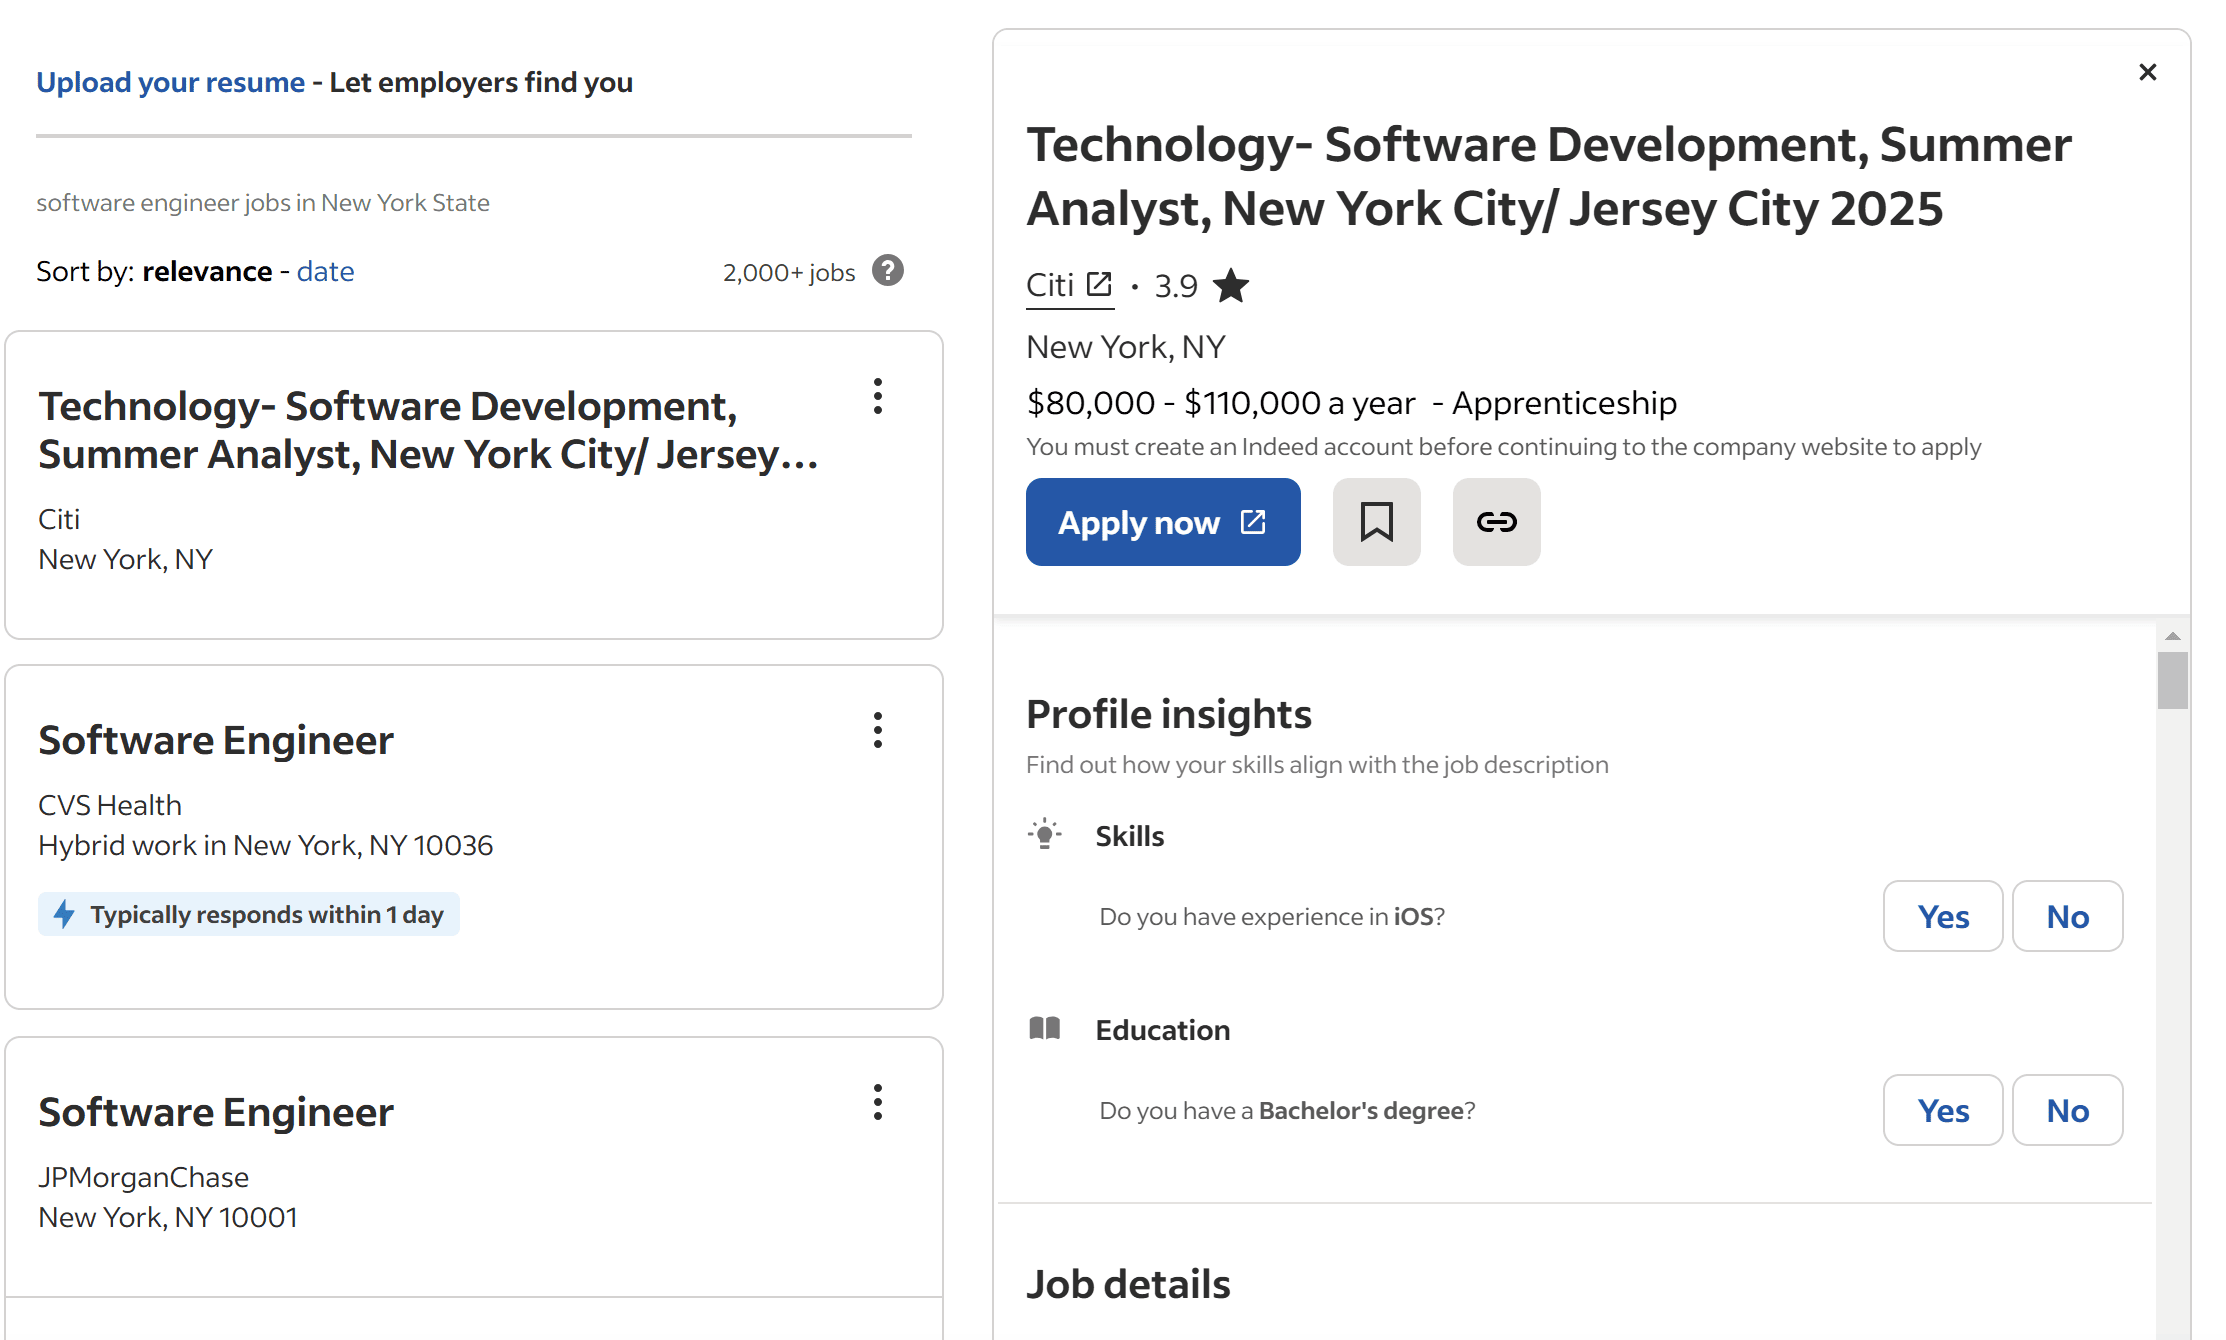
So, the salary_range and job_description variables may store None.
Step 7: Store the scraped data
Inside the for loop, create a new job_posting object with the scraped data and add it to the job_postings list:
job_posting = {
    "title": job_title,
    "company": company,
    "location": location,
    "salary_range": salary_range,
    "description": job_description
}
job_postings.append(job_posting)
Once the for completes, the job_postings list will contain all scraped job postings from the target page. Now, outside the loop, push the data to the Actor dataset through the push_data() method:
await Actor.push_data(job_postings)
You’ll now be able to get the scraped data via the API. Additionally, you’ll be export it in multiple formats directly from the Apify dashboard.
Step 8: Configure residential proxies
Your job scraper is now ready. Try to start locally with:
apify run
The script may not be able to retrieve any data. To investigate, configure Chrome to run in headed mode and run the Actor again. You'll likely see that the failure is caused by the following error page:
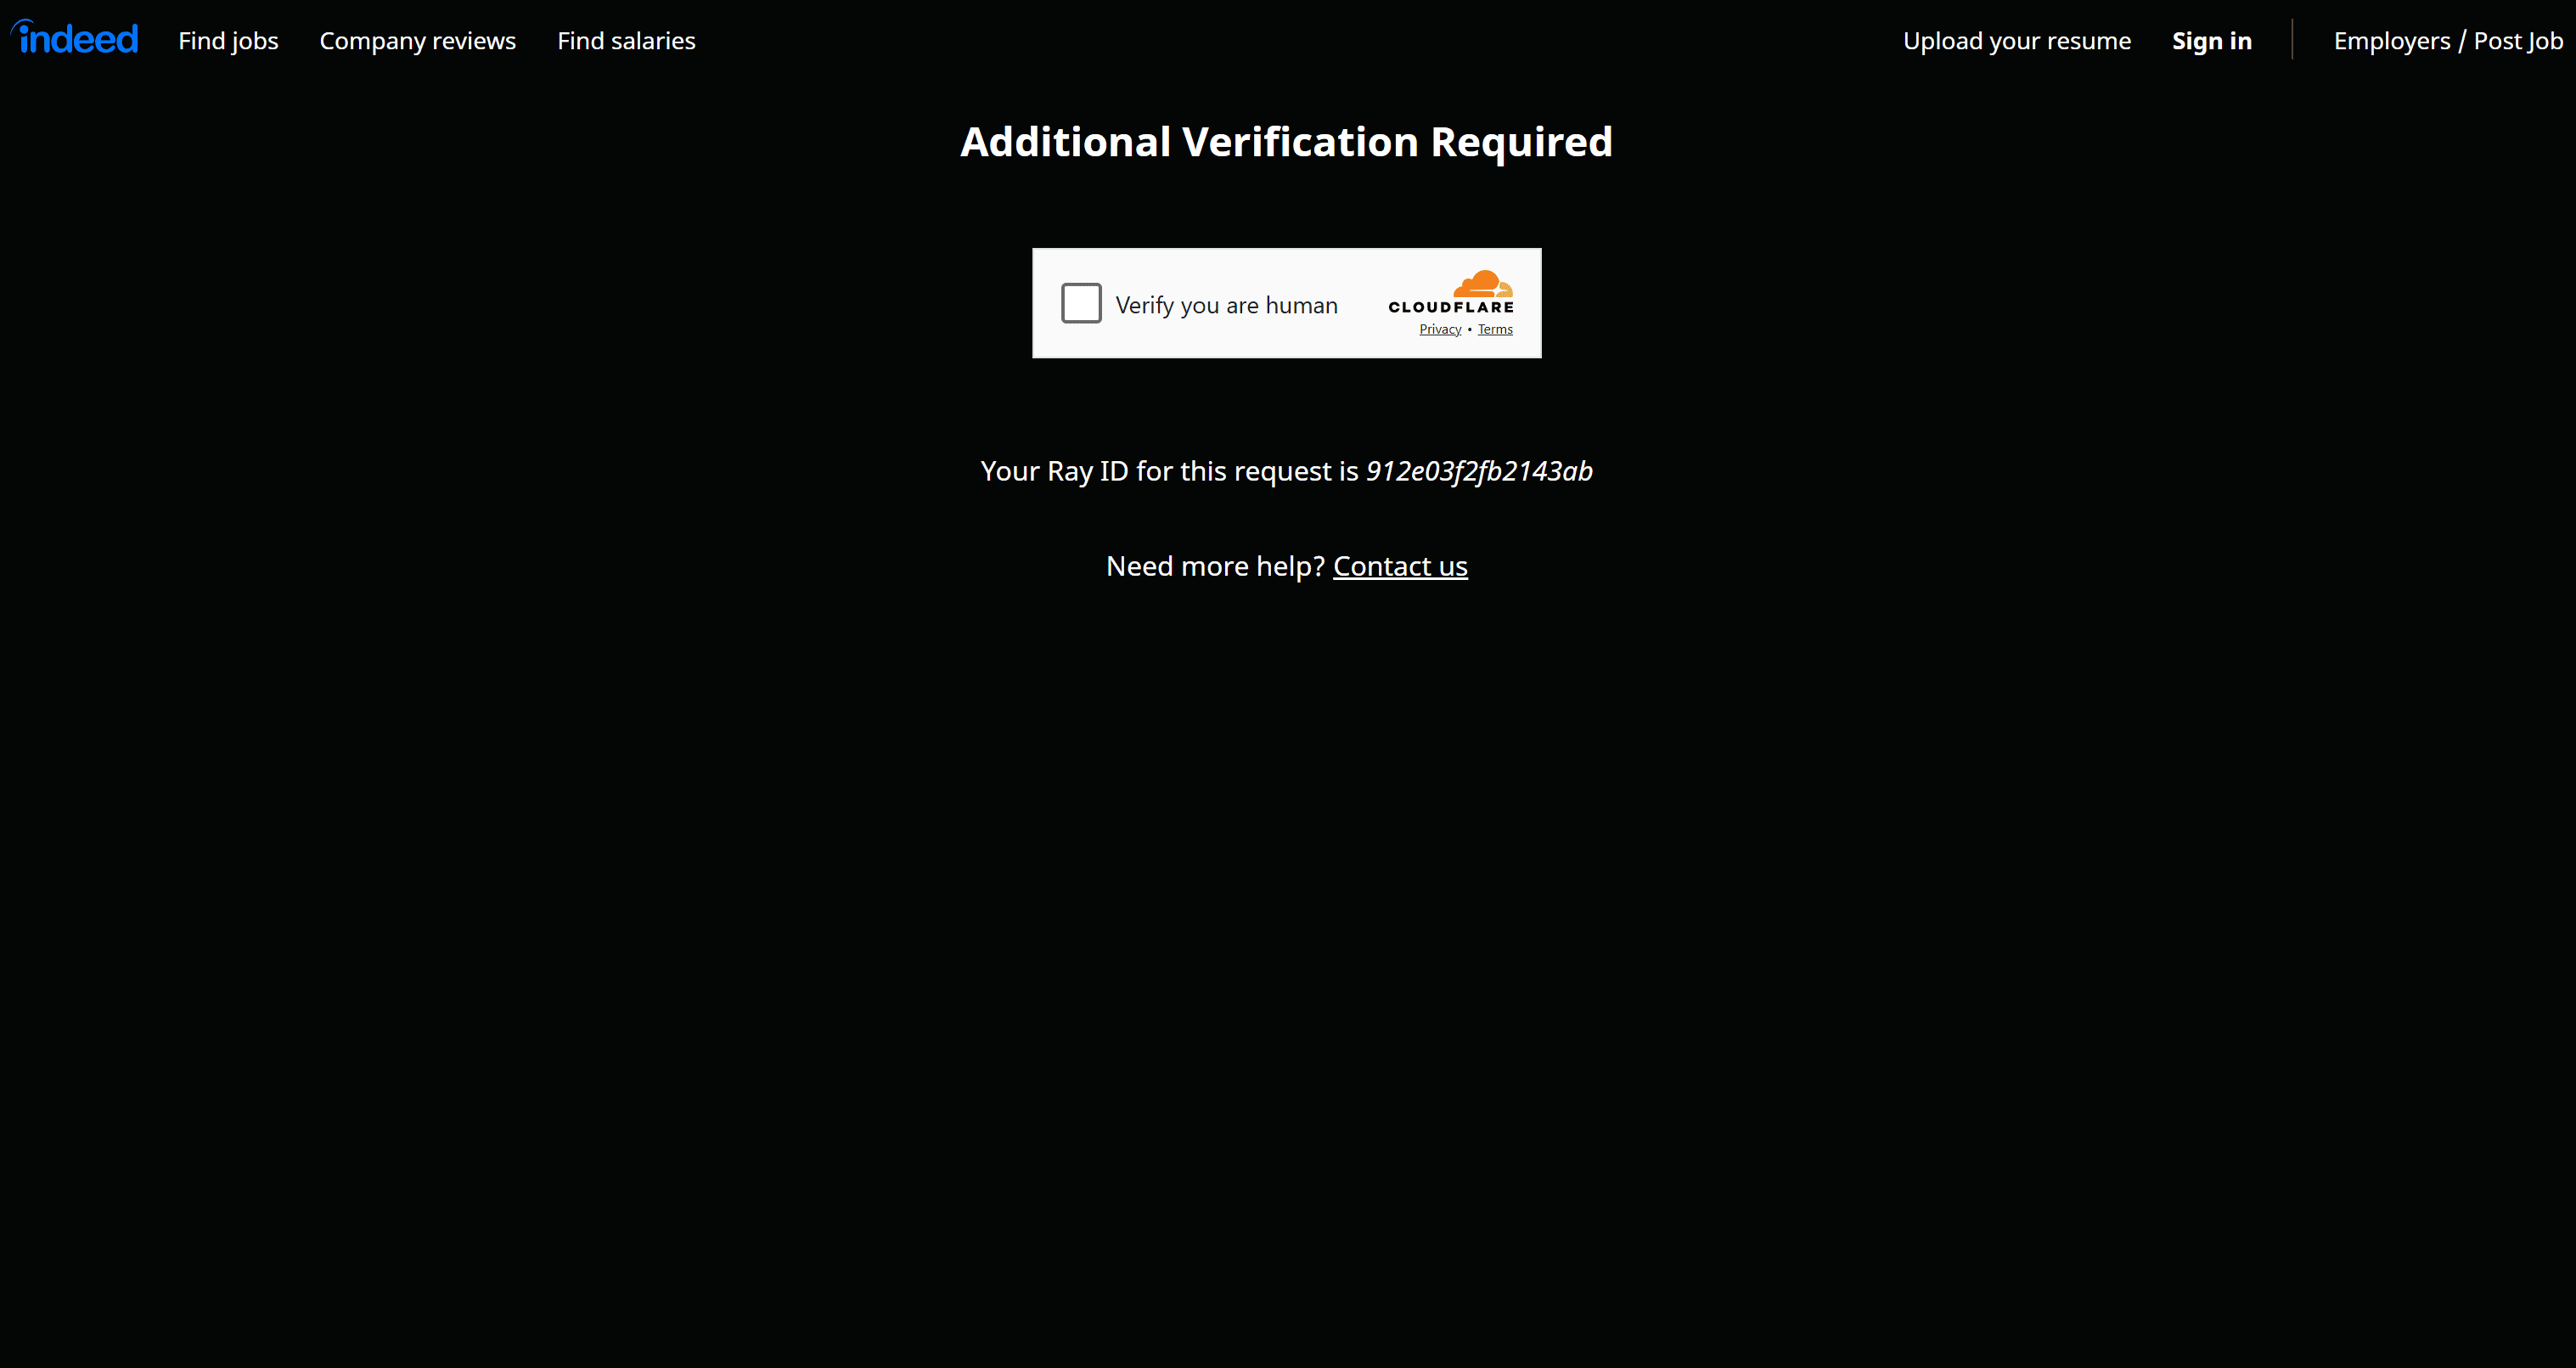
This is Indeed’s bot protection page, which requires you to verify that you're human via a Cloudflare single-click CAPTCHA. This issue is especially common if your IP has a low reputation, such as when using a VPN.
That bot verification page disrupts your entire scraping logic. You can try to avoid it by configuring a residential proxy in your script. Residential proxies provide real-world IPs with high authority, making your automated requests appear as if they are coming from real users.
Apify provides residential proxies even on the free plan. The probem is that high-quality residential proxies require authentication and Chrome does not natively support authenticated proxies.
To bypass that limitation, install the selenium-proxy-utils library in your virtual environment:
pip install selenium-proxy-utils
Also, add it to your requirements.txt file, which should now contain:
apify < 3.0
selenium
selenium-proxy-utils
In the main.py file, import the required modules from selenium-proxy-utils:
from selenium_proxy import add_proxy
from selenium_proxy.schemas import Proxy
Next, define the proxy settings as follows:
proxy = {
    "host": "proxy.apify.com",
    "port": "8000",
    "username": "groups-RESIDENTIAL",
    "password": "<YOUR_PROXY_PASSWORD>"
}
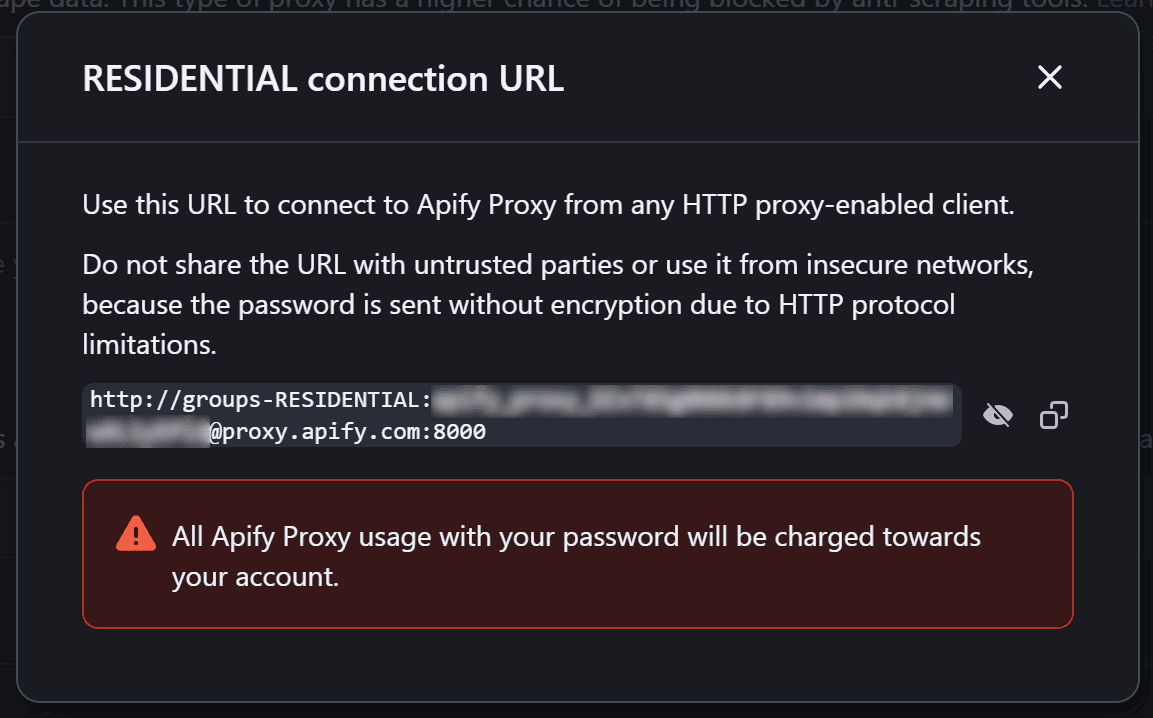
Replace <YOUR_PROXY_PASSWORD> with the password found in Apify Console under “Proxy > Groups” by clicking the "Show connection URL" icon:
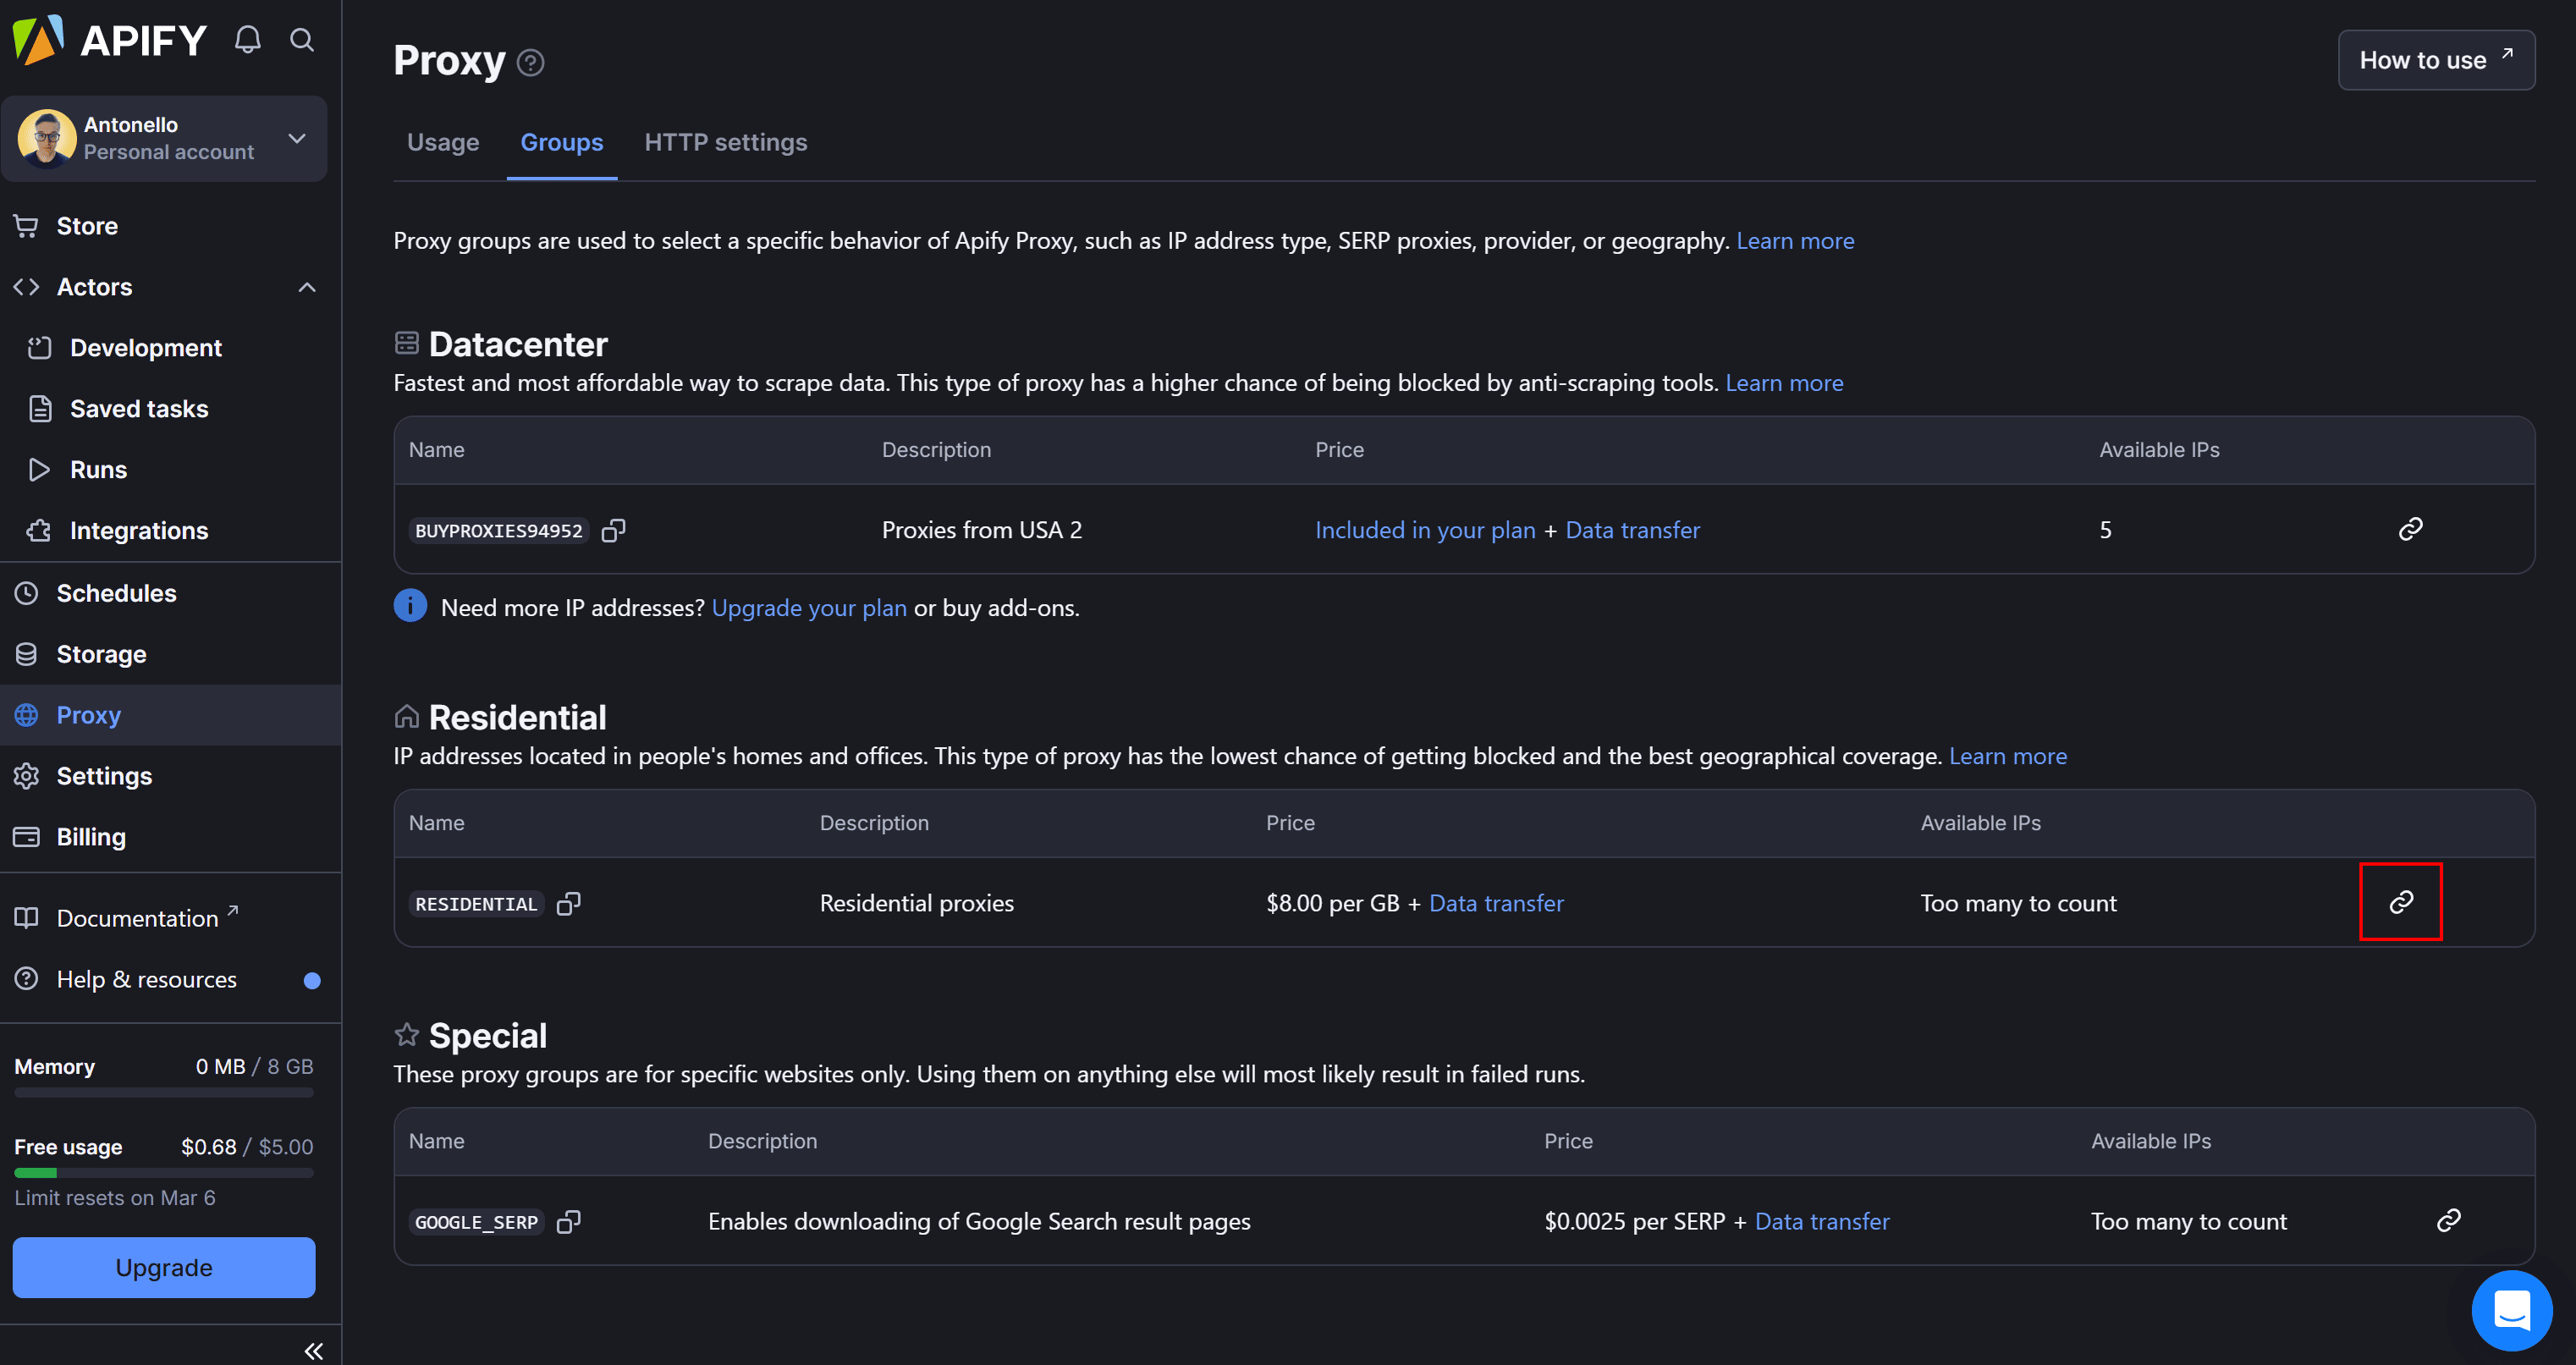
In the modal that will open, <YOUR_PROXY_PASSWORD> is the string between groups-RESIDENTIAL and proxy.apify.com:
Finally, apply the residential proxy in Selenium:
add_proxy(chrome_options, proxy=Proxy(**proxy))
Note that on a free Apify plan, you can only use residential proxies on deployed Actors. If you try to run the Actor locally, the connection to the proxy server will fail, and you’ll get this error:
selenium.common.exceptions.WebDriverException: Message: unknown error: net::ERR_TUNNEL_CONNECTION_FAILED
So, if you're on a free plan, you need to deploy your Actor to test it.
Remove the unused import from the "Selenium + Chrome" template, and you'll get the final code:
from selenium import webdriver
from selenium.webdriver.chrome.options import Options as ChromeOptions
from selenium.webdriver.common.by import By
from selenium.common.exceptions import NoSuchElementException
from selenium_proxy import add_proxy
from selenium_proxy.schemas import Proxy

from apify import Actor

async def main() -> None:
    async with Actor:
        # Retrieve the Actor input, and use default values if not provided
        actor_input = await Actor.get_input() or {}
        start_urls = actor_input.get("start_urls")

        # Exit if no start URLs are provided
        if not start_urls:
            Actor.log.info("No start URLs specified in actor input, exiting...")
            await Actor.exit()

        # Extract the URL of the target page
        url = start_urls[0]["url"]

        # Configure Chrome to run:
        # 1. In headless mode
        # 2. On a large window to avoid responsive rendering
        # 3. With a real-world User-Agent
        # 4. Improve stability in containerized environments
        chrome_options = ChromeOptions()
        chrome_options.add_argument("--headless")  # Enable headless mode for non-GUI execution
        chrome_options.add_argument("--window-size=1920,1080")  # Set a fixed resolution to avoid layout shifts
        chrome_options.add_argument("--no-sandbox")  # Bypass OS security restrictions (useful in Docker)
        chrome_options.add_argument("--disable-dev-shm-usage")  # Prevent crashes in low-memory environments

        # Set a real-world User-Agent
        user_agent = "Mozilla/5.0 (Windows NT 10.0; Win64; x64) AppleWebKit/537.36 (KHTML, like Gecko) Chrome/132.0.0.0 Safari/537.36"
        chrome_options.add_argument(f"user-agent={user_agent}")

        # Configure residential proxy settings
        proxy = {
            "host": "proxy.apify.com",
            "port": "8000",
            "username": "groups-RESIDENTIAL",
            "password": "<YOUR_PROXY_PASSWORD>"
        }
        add_proxy(chrome_options, proxy=Proxy(**proxy))

        # Initialize a WebDriver instance to control Chrome
        driver = webdriver.Chrome(options=chrome_options)

        # Visit the target page
        driver.get(url)

        # Where to store the scraped data
        job_postings = []

        # Select all job posting card HTML elements on the page
        job_posting_card_elements = driver.find_elements(By.CSS_SELECTOR, "[data-testid=\\"slider_container\\"]")

        # Iterate over them and extract data from each job posting
        for job_posting_card_element in job_posting_card_elements:
            # Scraping logic

            job_title_element = job_posting_card_element.find_element(By.CSS_SELECTOR, "[id^=\\"jobTitle\\"]")
            job_title = job_title_element.text

            try:
                company_element = job_posting_card_element.find_element(By.CSS_SELECTOR, "[data-testid=\\"company-name\\"]")
                company = company_element.text
            except NoSuchElementException:
                company = None

            try:
                location_element = job_posting_card_element.find_element(By.CSS_SELECTOR, "[data-testid=\\"text-location\\"]")
                location = location_element.text
            except NoSuchElementException:
                location = None

            try:
                salary_element = job_posting_card_element.find_element(By.CSS_SELECTOR, "[data-testid=\\"attribute_snippet_testid\\"]")
                salary_range = salary_element.text
            except NoSuchElementException:
                salary_range = None

            try:
                description_element = job_posting_card_element.find_element(By.CSS_SELECTOR, "[data-testid=\\"jobsnippet_footer\\"]")
                job_description = description_element.text
            except NoSuchElementException:
                job_description = None

            # Populate an object with the scraped data
            job_posting = {
                "title": job_title,
                "company": company,
                "location": location,
                "salary_range": salary_range,
                "description": job_description
            }
            # Add it to the list of scraped job postings
            job_postings.append(job_posting)

        # Close the Selenium Chrome driver and release its resources
        driver.quit()

        # Register the scraped data to the Actor
        await Actor.push_data(job_postings)
In under 100 lines, you've built a Python-based job-scraping Actor that retrieves job postings from Indeed!
Step 10: Deploy to Apify
Before deploying your Actor to Apify, update the actor.json file inside the actor folder. That file defines the Actor’s configuration. Modify it as follows to describe your Indeed job posting scraper:
{
  "actorSpecification": 1,
  "name": "indeed-scraper",
  "title": "Job Posting Scraper",
  "description": "Scrapes job postings from Indeed",
  "version": "0.0",
  "buildTag": "latest",
  "meta": {
    "templateId": "python-selenium"
  },
  "input": "./input_schema.json",
  "dockerfile": "./Dockerfile"
}
Similarly, override input_schema.json with:
{
  "title": "Python Job Scraper for Indeed",
  "type": "object",
  "schemaVersion": 1,
  "properties": {
    "start_urls": {
      "title": "Start URLs",
      "type": "array",
      "description": "URLs to start scraping from",
      "prefill": [
        { "url": "https://www.indeed.com/jobs?q=software+engineer&l=New+York" }
      ],
      "editor": "requestListSources"
    }
  },
  "required": ["start_urls"]
}
Now, make sure you are logged in to your Apify account in the CLI with this command:
apify login
Then, you can deploy your Actor to Apify with a single command:
apify push
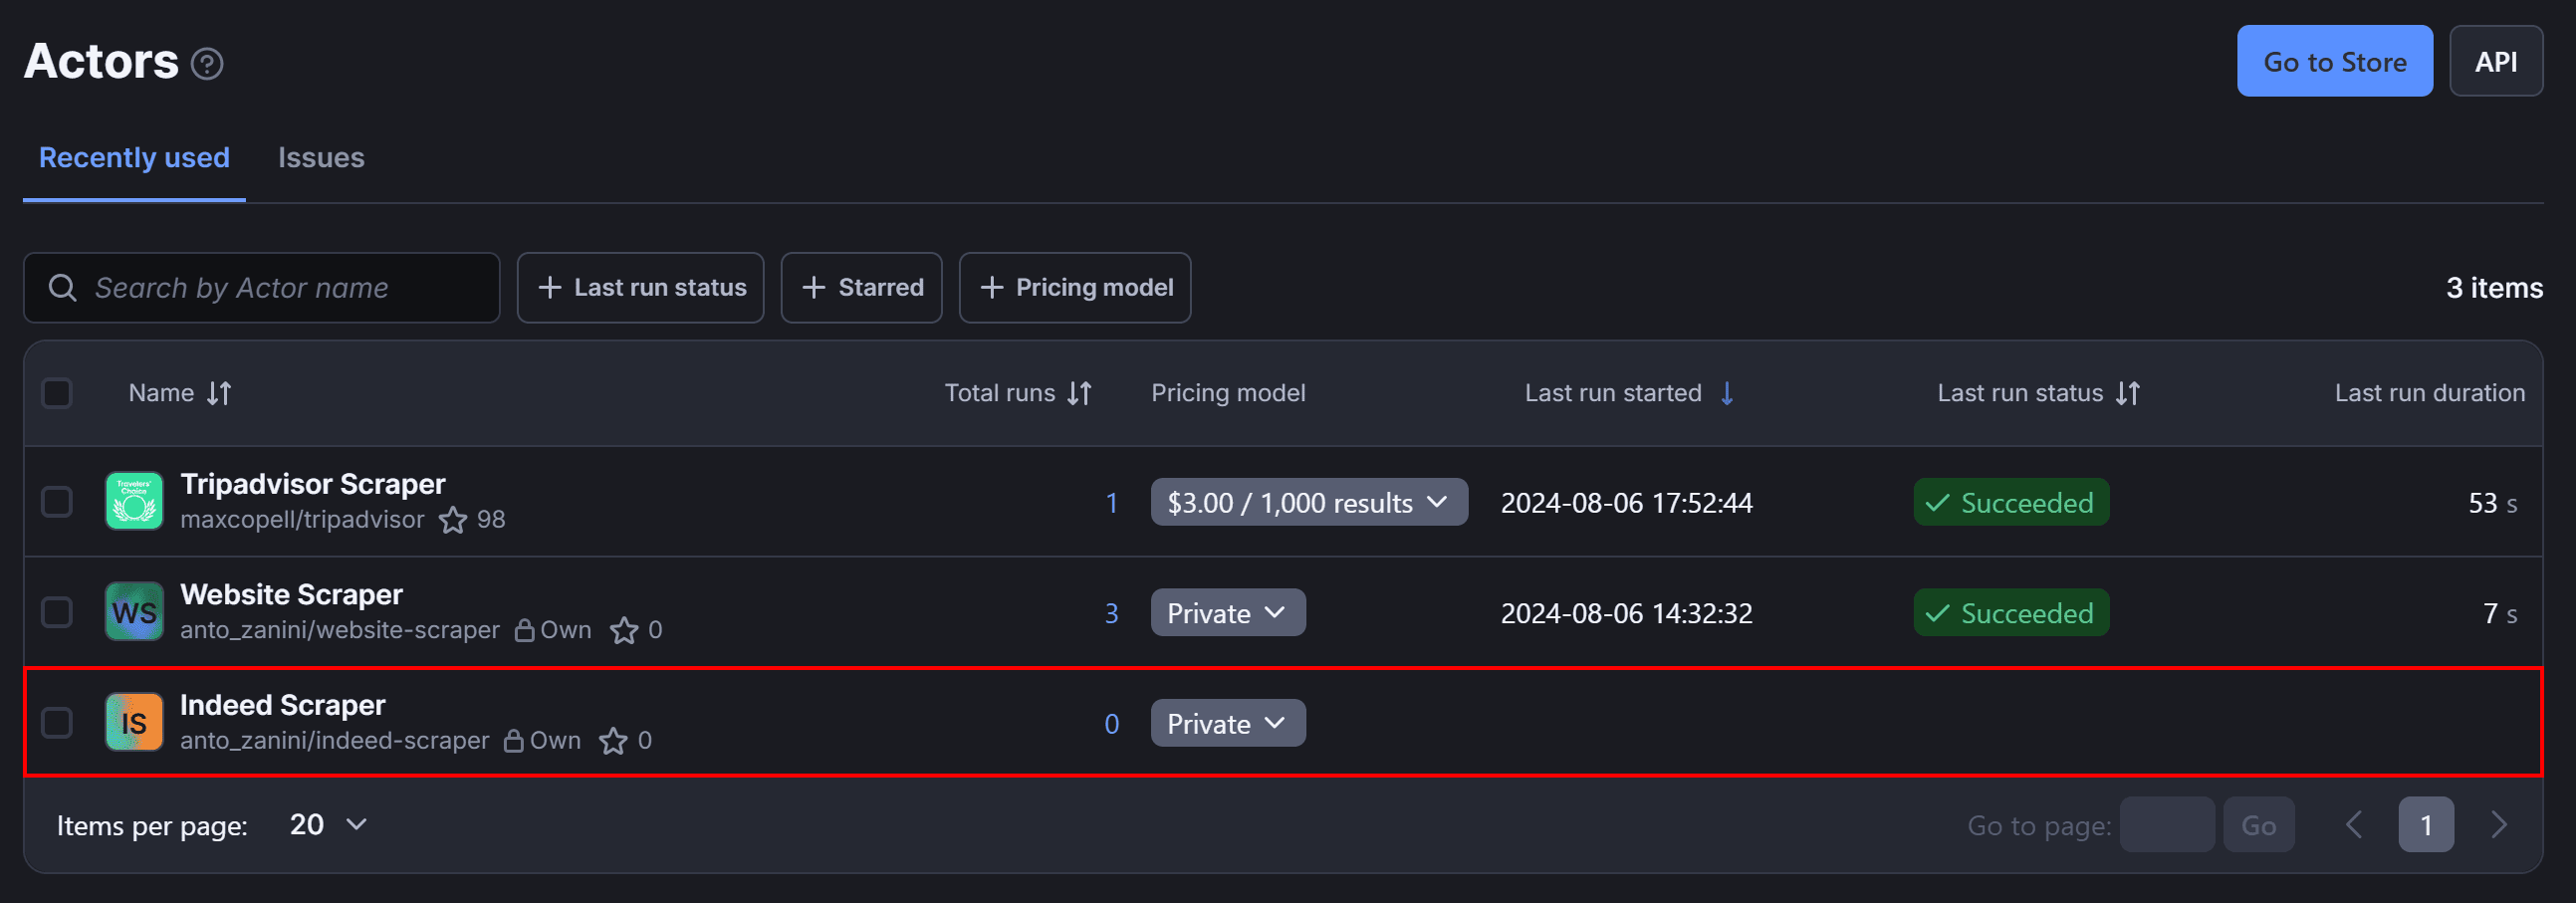
Access your Apify dashboard and navigate to the Actors page. You’ll see your newly deployed Actor:
Click on it and start execution by clicking the “Start” button:
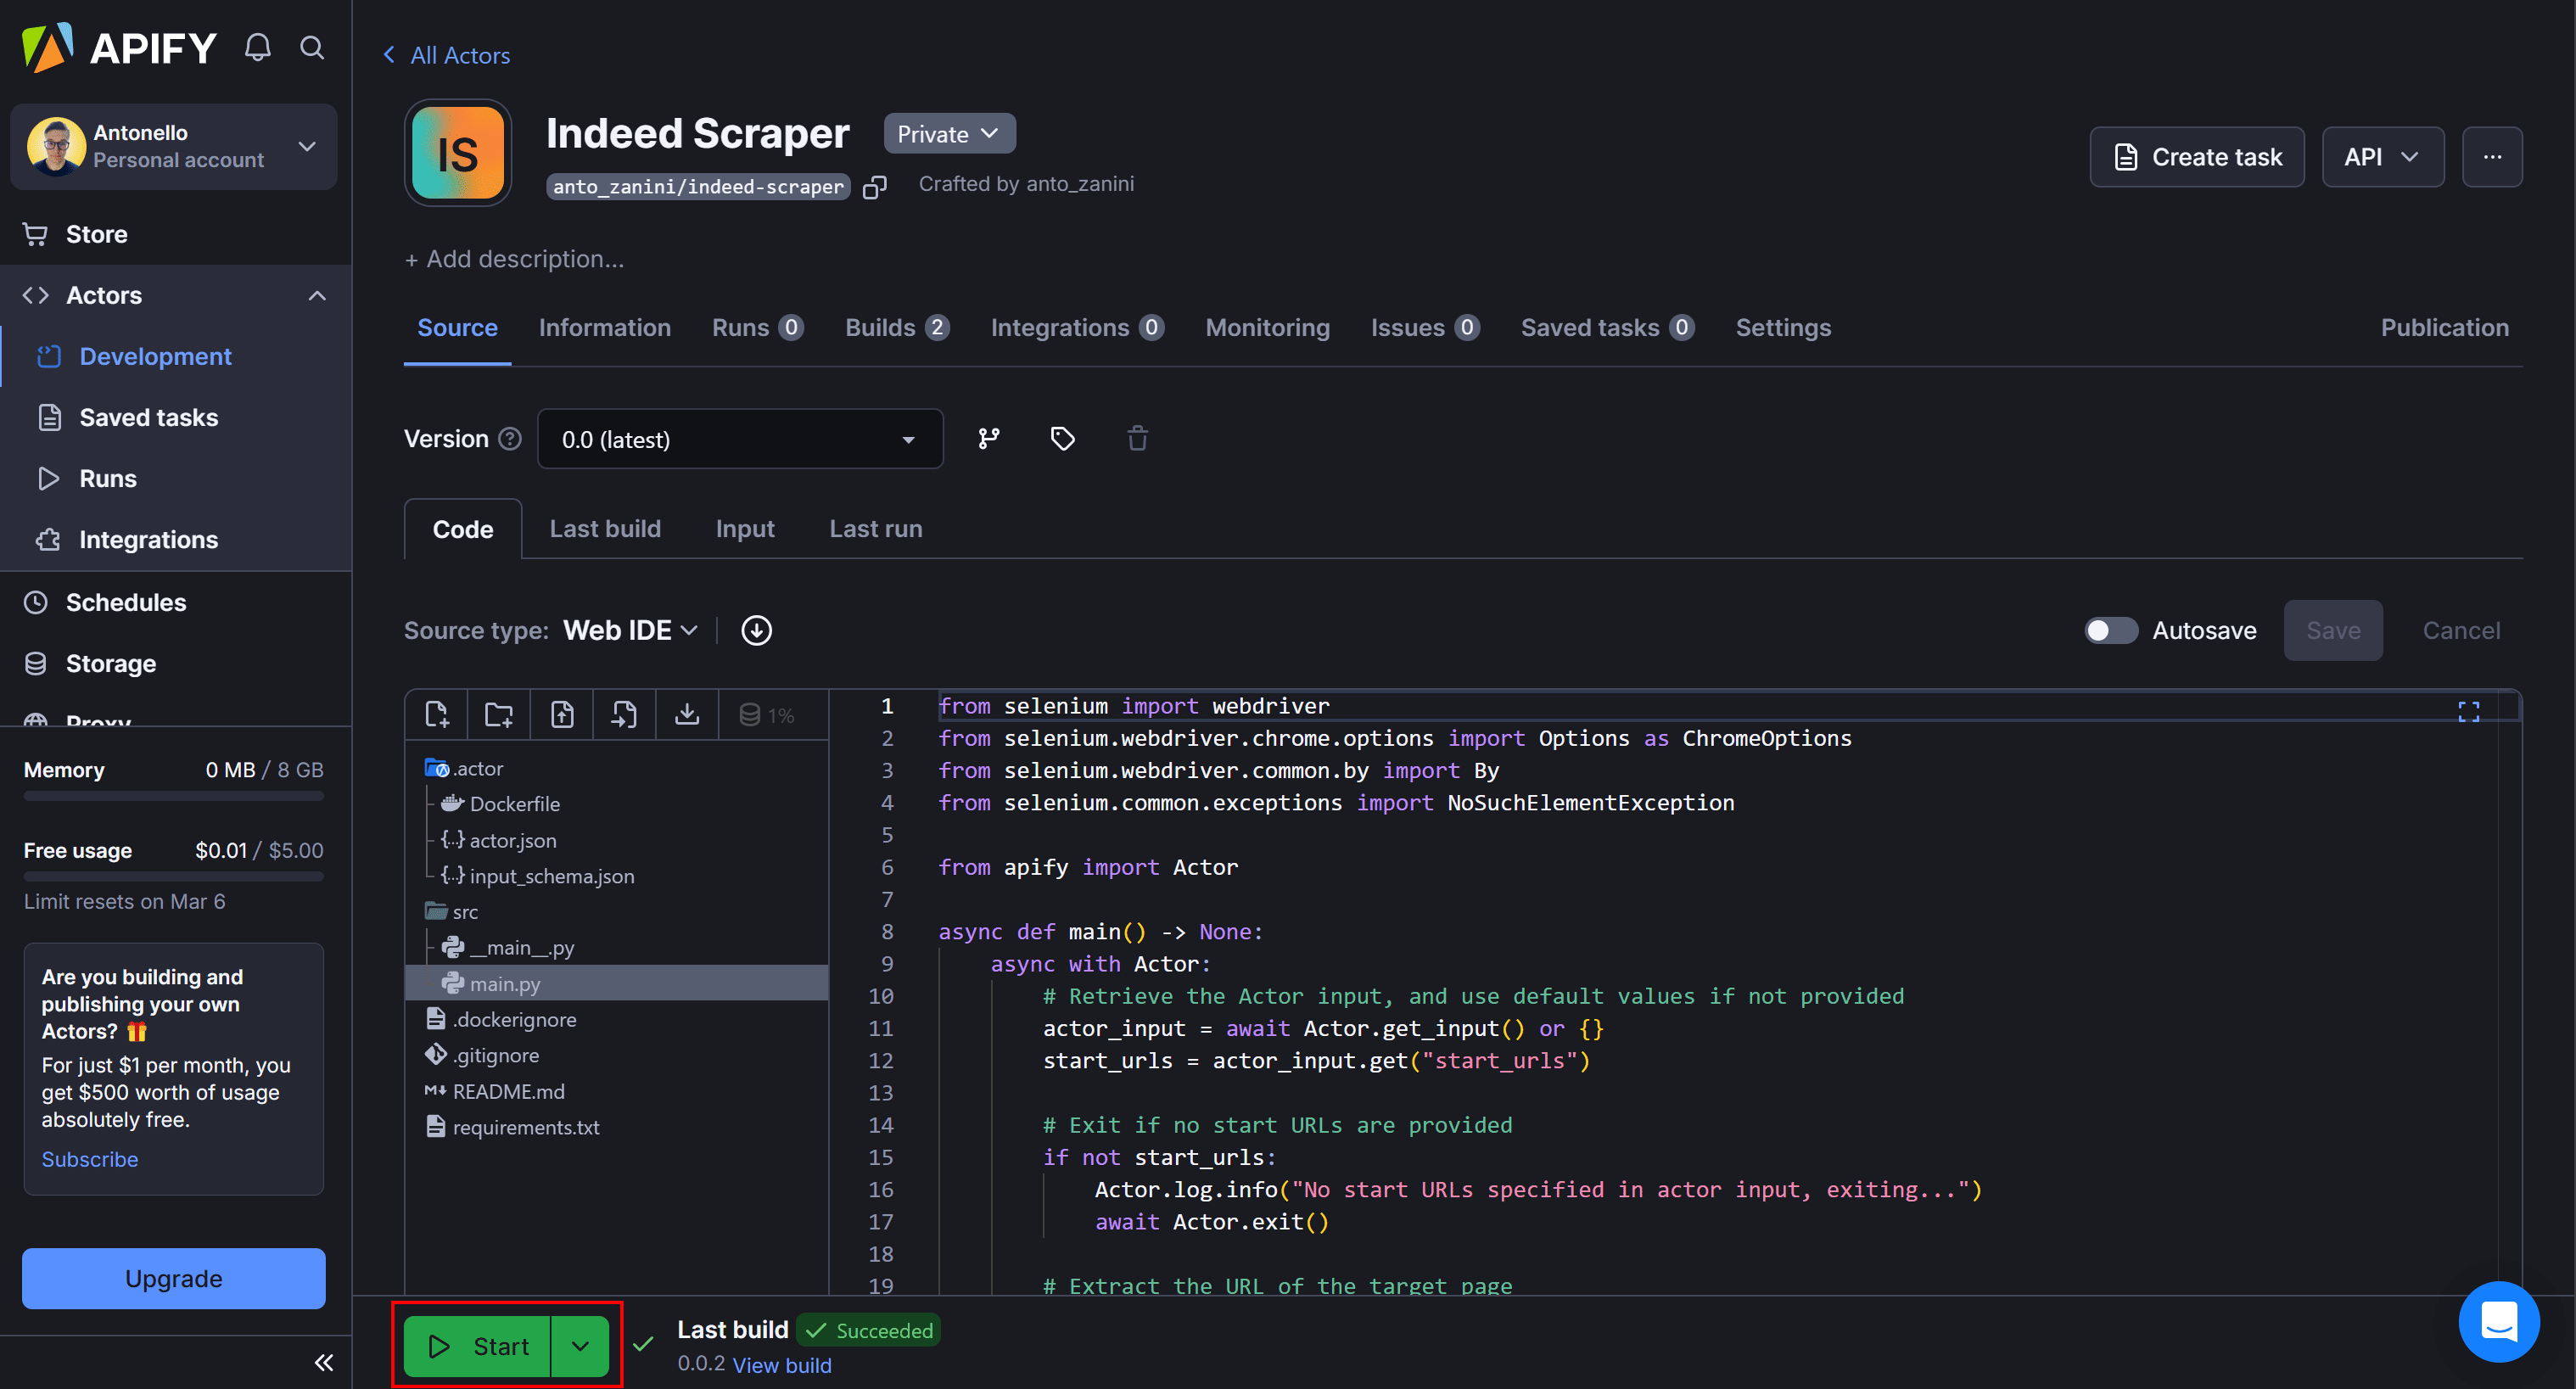
Wait for the script to finish—this usually takes just a few seconds.
Once the Actor completes its run successfully, click the "Export 15 results" button to download the scraped job postings. You can export the data in multiple formats, including:
- JSON
- CSV
- XML
- Excel
- HTML Table
- RSS
- JSONL
For example, export the data as a CSV file, open it, and you’ll see the extracted job postings:
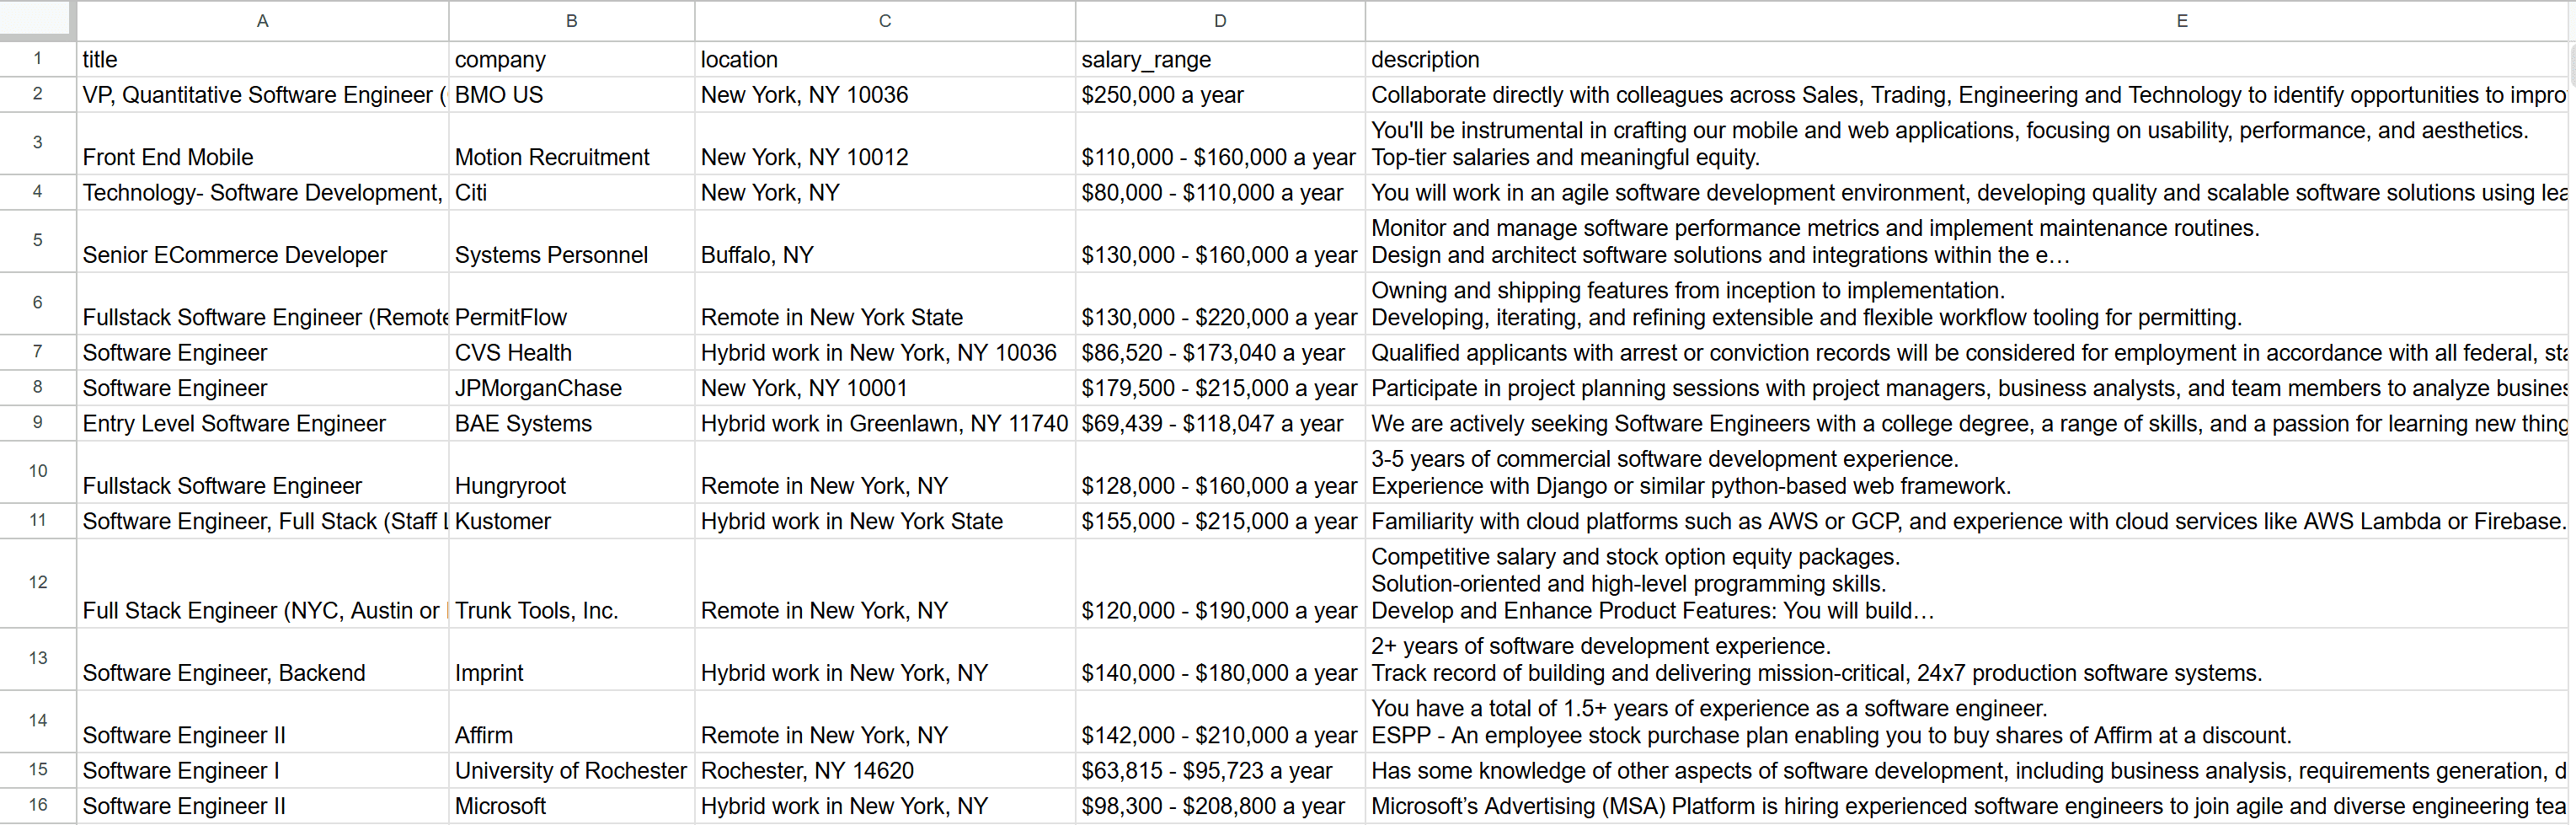
Et voilà! You’ve successfully performed job web scraping from Indeed.
Next steps
This tutorial has covered the fundamentals of web scraping jobs. To take your script to the next level, consider these advanced techniques:
- Automated interaction: Automate interactions to select job positions and locations by filling out Indeed's search forms.
- Web crawling: Retrieve all job postings in a specific category by scraping all pagination pages. For step-by-step guidance, check out our blog post on how to do web crawling in Python.
Job scraping methods
When it comes to scraping job postings from the web, there are several approaches. Explore the most relevant ones and see their benefits and drawbacks!
Manual job extraction
This method involves manually copying and pasting job postings from websites into a spreadsheet or database.
👍 Pros:
- No technical skills required
- Avoids scraping restrictions and CAPTCHAs
- Ensures data accuracy since it's manually verified
👎 Cons:
- Extremely time-consuming
- Limited scalability
- Prone to human error
Building your own scraper
Developing a custom web scraping script by using HTML clients, HTML parsers, or browser automation tools.
👍 Pros:
- You have full control over the data parsing process
- Can extract specific data fields as needed
- Can be launched when needed
👎 Cons:
- Requires programming knowledge
- Maintenance is needed to keep up with website changes
- Risk of getting blocked without proxy management and anti-scraping tweaks
Buying databases with job data
Some companies sell ready-to-use job posting datasets that contain the data you may be interested in.
👍 Pros:
- Instant access to large amounts of data
- No need for scraping infrastructure
- Saves development time
👎 Cons:
- Data may be outdated or inaccurate
- Expensive, depending on data freshness and scope
- Limited customization options
Using a pre-made scraper
Pre-built job scrapers, like our Apify Actors, provide a hassle-free solution for extracting job listings at scale. They handle anti-bot protections, proxies, and data structuring automatically.
👍 Pros:
- Quick and easy to set up
- Can handle IP rotation and CAPTCHAs for you
- Regularly updated to work with website changes
- Can be used without technical knowledge
- Overall cost-effective solution
👎 Cons:
- Dependent on a third-party provider
Job board scraping challenges
As you've seen throughout this article, job board scraping comes with several challenges. Indeed, for example, has anti-scraping systems that detect and block:
- Automated HTTP requests from standard clients
- Requests from Headless browsers without proper configuration
- Requests from IPs from known datacenters.
Below are some additional challenges to consider:
- Changes in site structure: Web pages frequently update their layouts and structure, causing scrapers to break. If your script relies on specific HTML elements, even minor changes can prevent data extraction, requiring constant maintenance.
- CAPTCHAs: Many job boards use CAPTCHAs to prevent automated access. These can appear when submitting search forms or after multiple requests, requiring CAPTCHA-solving techniques.
- Login walls: Some job posting sites like LinkedIn require users to log in before accessing full details. Scraping behind a login wall may violate terms of service and requires handling authentication methods like session cookies or API tokens.
- Rate limits: Job boards usually monitor request frequency and block IPs that make too many requests in a short period. Using rotating proxies and introducing delays can help mitigate this issue.
- Legal and privacy concerns: Scraping candidate information and applicants from job postings can lead to privacy issues if the data is not handled in compliance with laws like GDPR or CCPA.
Job scraping tools
As mentioned earlier, scraping job boards comes with several challenges. The easiest way to overcome them is by using a pre-made scraper that handles everything for you.
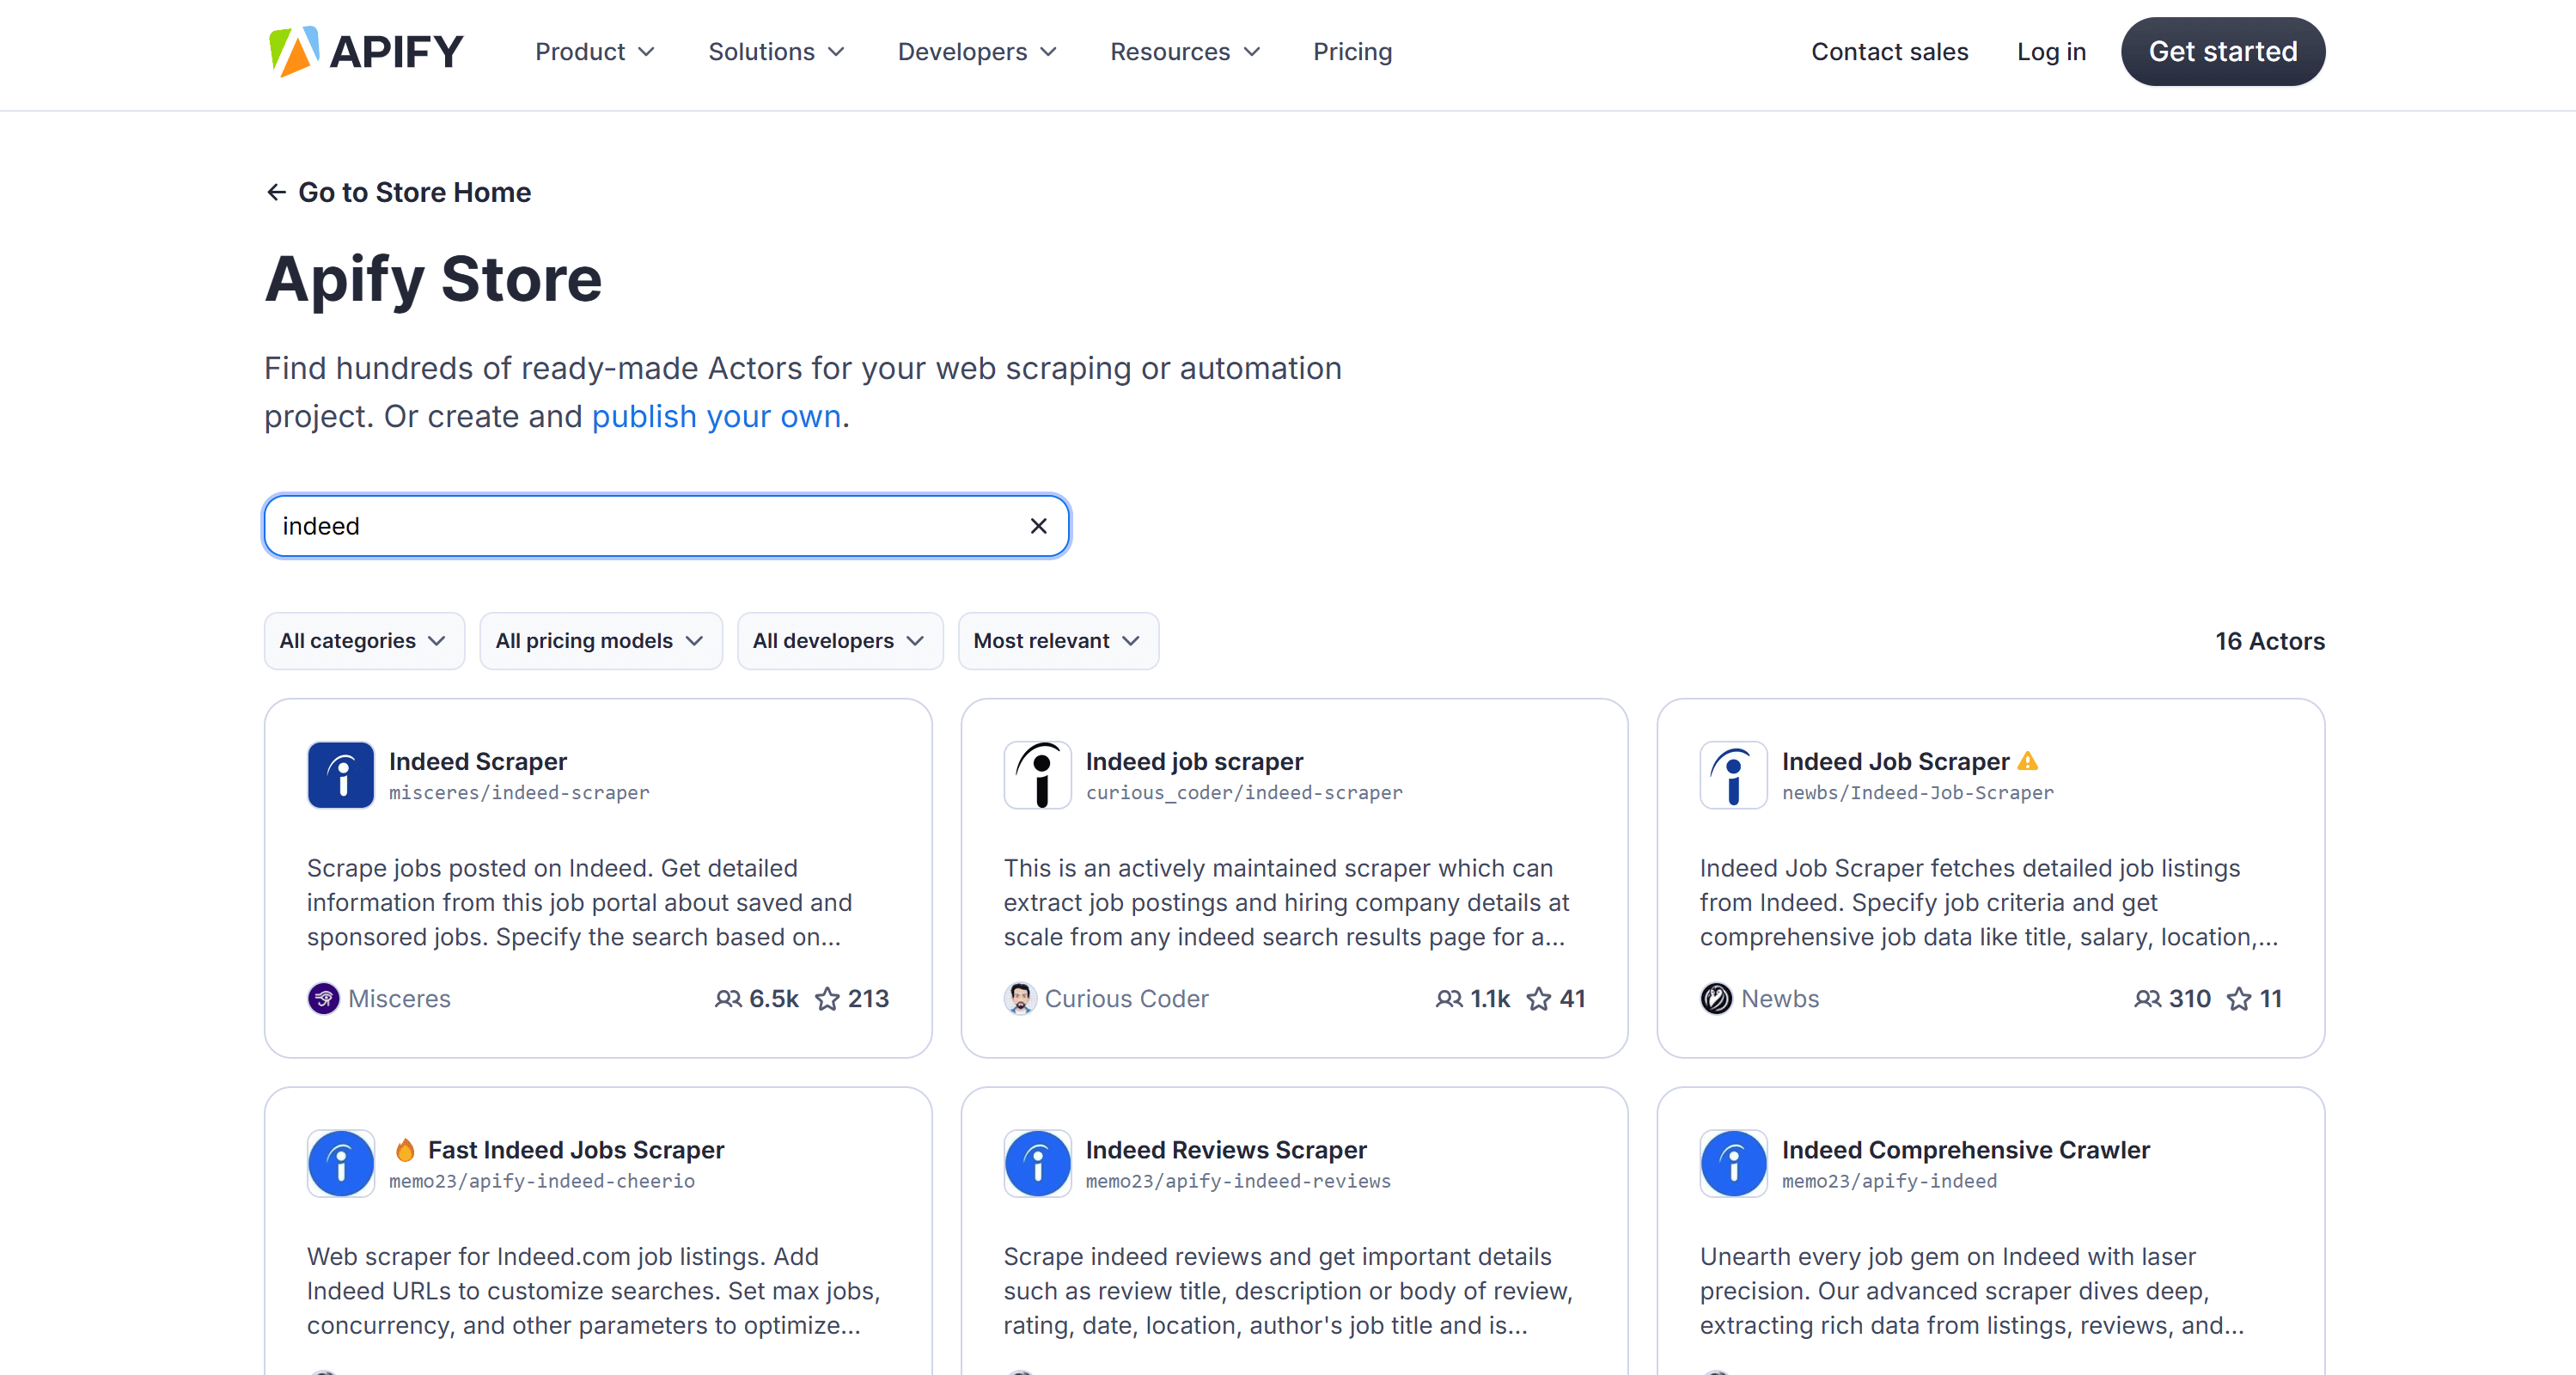
Apify offers over 3,000 Actors for various websites, including around 200 specifically for Indeed and LinkedIn.
If you're interested in scraping Indeed job postings but don’t want to build a scraper yourself, simply visit Apify Store and search for the "Indeed" keyword:
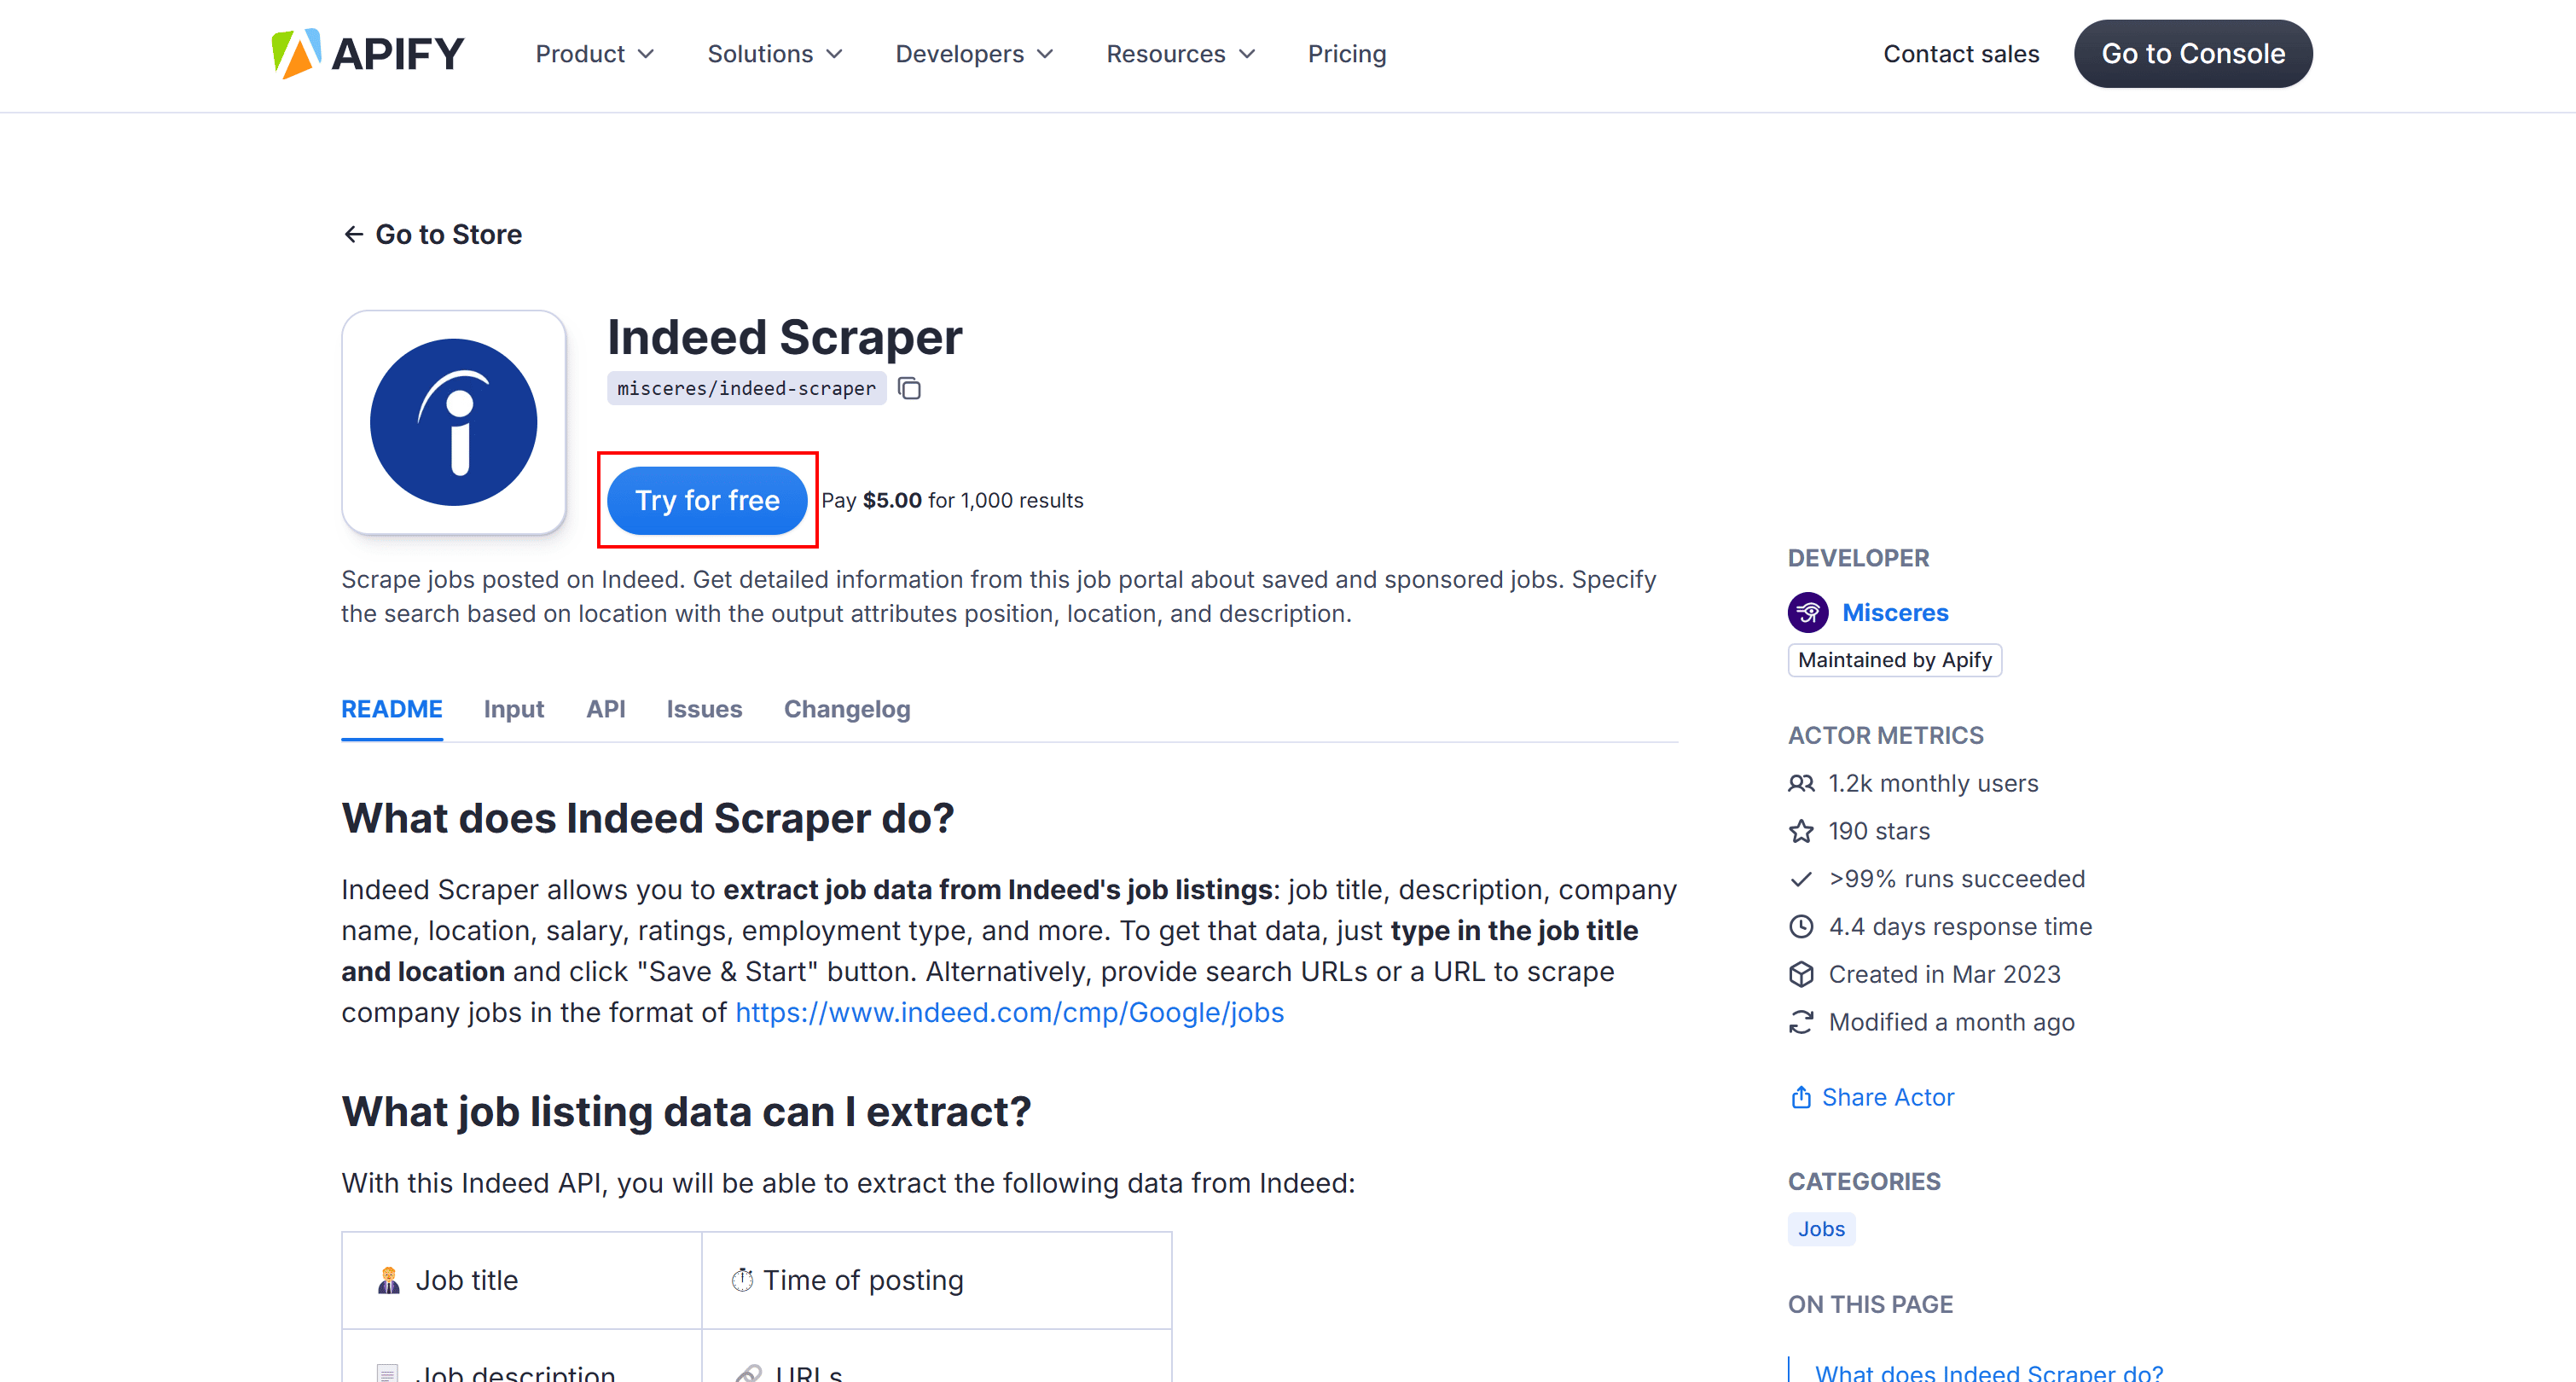
Select the "Indeed Scraper" Actor, then click "Try for free" on its public page:
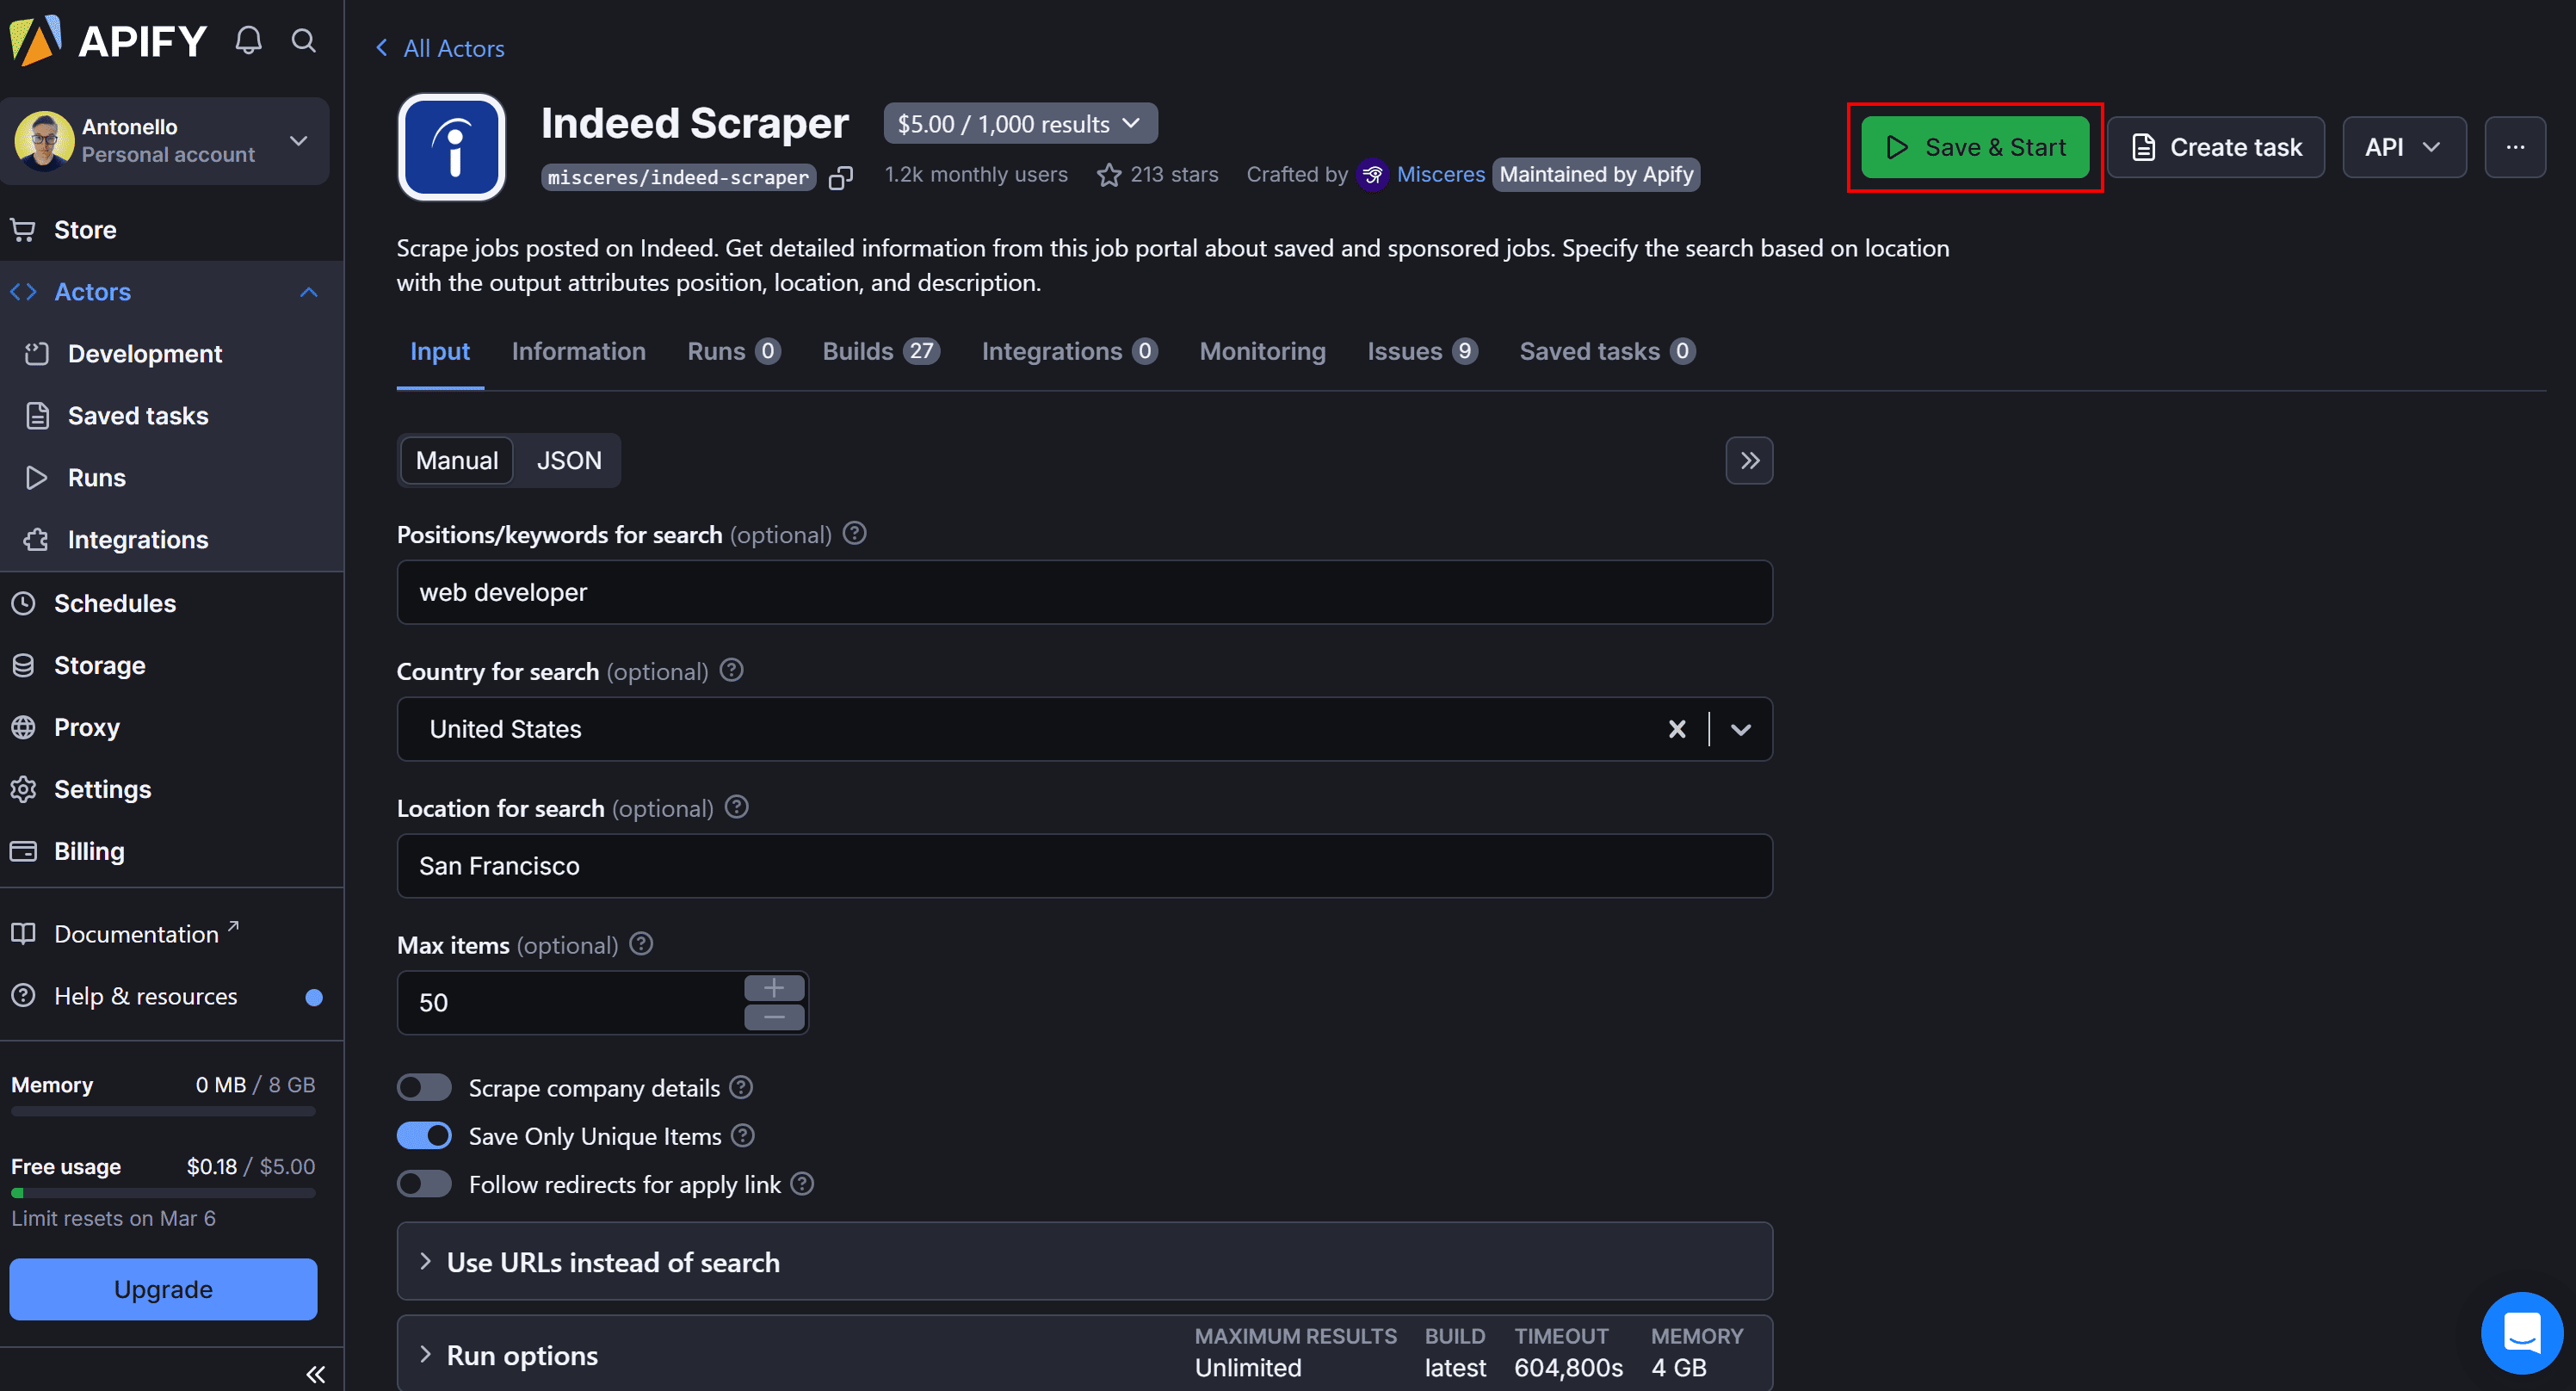
The Actor will be added to your personal Apify dashboard. Configure it as needed, then click "Save & Start" to launch it:
In just a few seconds, you’ll see job posting data like this:
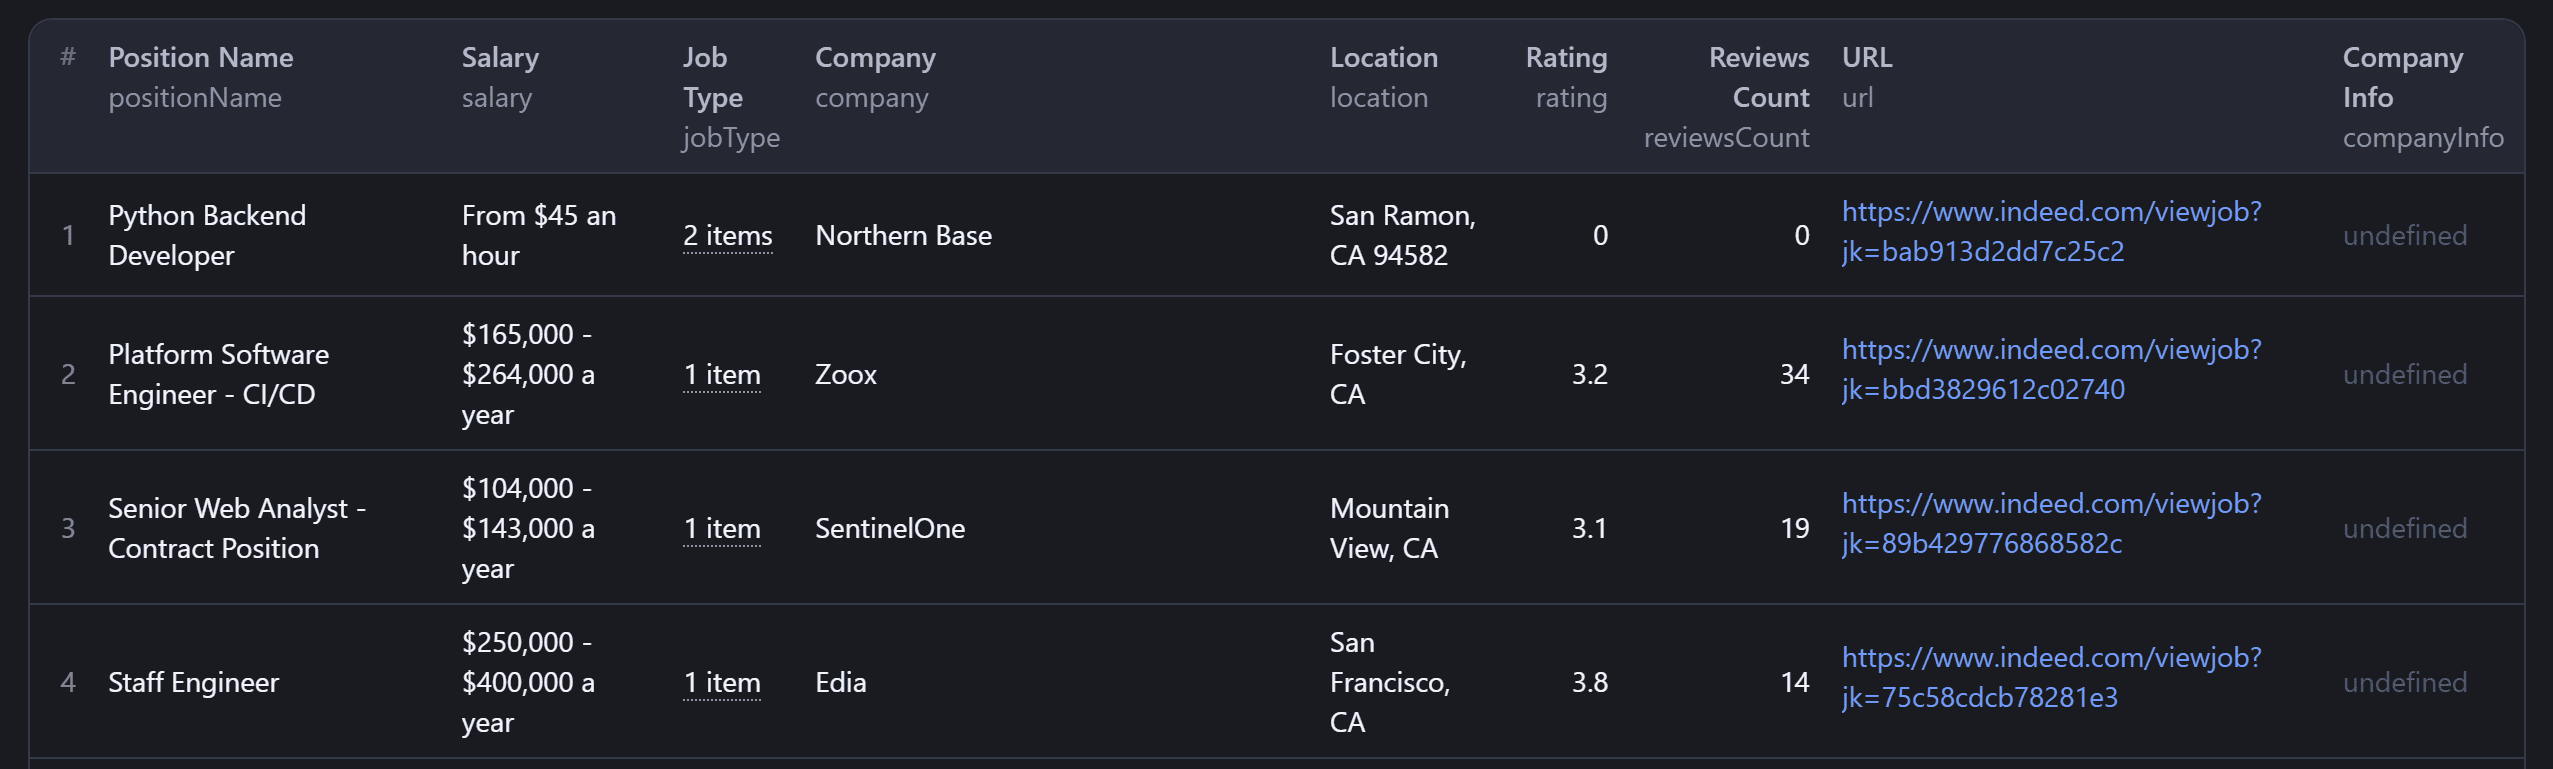
And that's it! You’ve successfully scraped Indeed job postings in just a few clicks—no coding required.
Conclusion
In this tutorial, you used Apify's “Selenium + Chrome” template to build a web scraper for Indeed. Thanks to it, you extracted job postings from the platform and then deployed the scraper on Apify.
This project demonstrated that Apify enables efficient and scalable job web scraping while saving development time. You can explore other templates and SDKs to test additional web scraping and automation capabilities.
As learned here, using a pre-made Indeed Actor or LinkedIn Actor is the recommended approach to streamline and simplify data retrieval.
Frequently asked questions
What is job scraping?
Job scraping is the process of automatically extracting job postings from sites via web scraping. The end goal is to collect job data at scale, making it easier to track openings and analyze trends. You could use that data to build job board aggregators.
How does job scraping work?
Job scraping works by using automated scripts to fetch job listings from websites. These tools connect to job board pages, extract relevant information from job postings, and store that in structured formats like JSON or CSV.
Is it legal to web scrape job postings?
It depends on how you scrape job postings. Scraping publicly available data is legal, but scraping behind login walls might violate the site’s terms of service. Respecting the site's robots.txt policies is also recommended for ethical scraping.
Does Indeed scrape jobs?
It’s unclear whether Indeed scrapes job listings from other websites or company career pages. While there are online claims suggesting it aggregates jobs from thousands of sites, there’s no official statement confirming that.