Some websites, especially those in e-commerce, offer a feature called a watchdog that notifies you when something changes, like a product price. This feature is convenient because you don't have to keep checking the page manually. With Content Checker, you can extend this convenience to any website. It allows you to set up a watchdog and get email notifications whenever the content you're monitoring changes.
We'll show you how to set up this watchdog to stay ahead of the game.
Use cases of monitoring a website for changes
Content Checker is one of the most popular tools on the Apify platform because it simplifies tracking website changes. It monitors specific web page content and sends notifications with before-and-after screenshots whenever changes occur.
This makes Content Checker a truly universal solution because you can use it to:
- Keep on top of retail prices, product updates, or sales in industries like e-commerce or real estate.
- Check the availability of tickets or appointments, from concerts to hotels.
- Track competitor activity for market research, including price changes or product launches.
- Stay updated on news, from niche topics to general categories.
Essentially, Content Checker automates repetitive tasks, freeing up your time to focus on what matters.
How does the page change monitor work?
The logic behind the website checker is simple: it searches for specific text in a chosen CSS selector and compares the current results to the original state. If there is any change, Content Checker launches another Actor to send an email or a Slack notification and also makes and sends screenshots before and after the change occurred on the website.
How to set up an alert when a web page changes
No time for reading today? Video guide to the rescue:
No time for reading today? Video guide to the rescue!
1. Go to Content Checker on Apify Store
You need to have a free Apify account to use Content Checker. If you don't already have an Apify account, you'll be prompted to sign up before you begin.
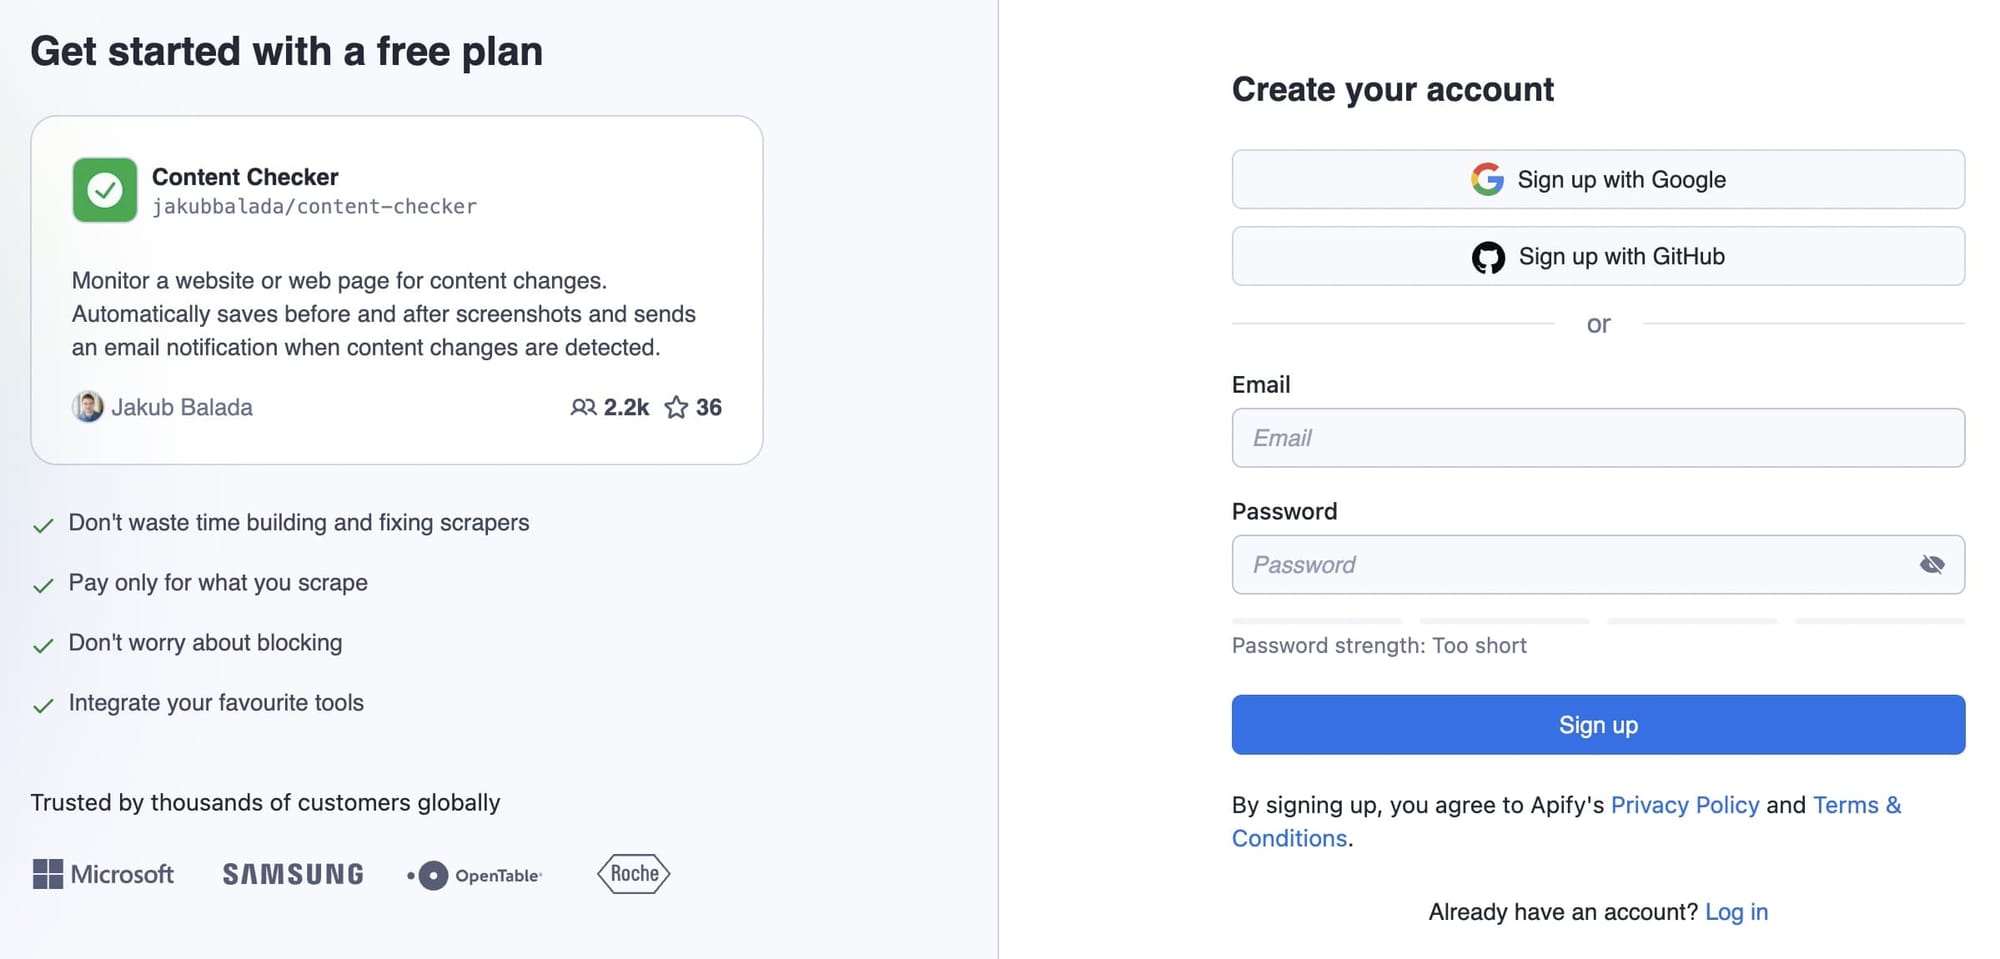
If you already have an account, you'll be taken straight to Apify Console, where you can configure the tool.
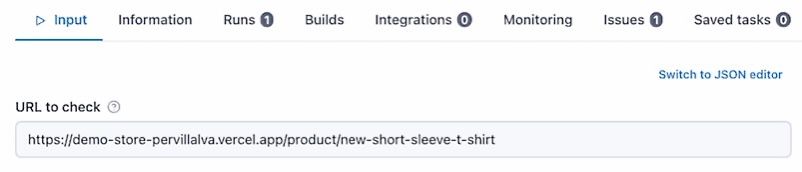
2. Provide the URL you want to monitor
We're going to replace the default input URL with a mock website URL created for this demo.
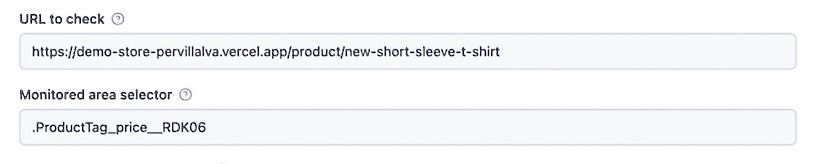
You can just copy the URL and paste it into the URL to check field.
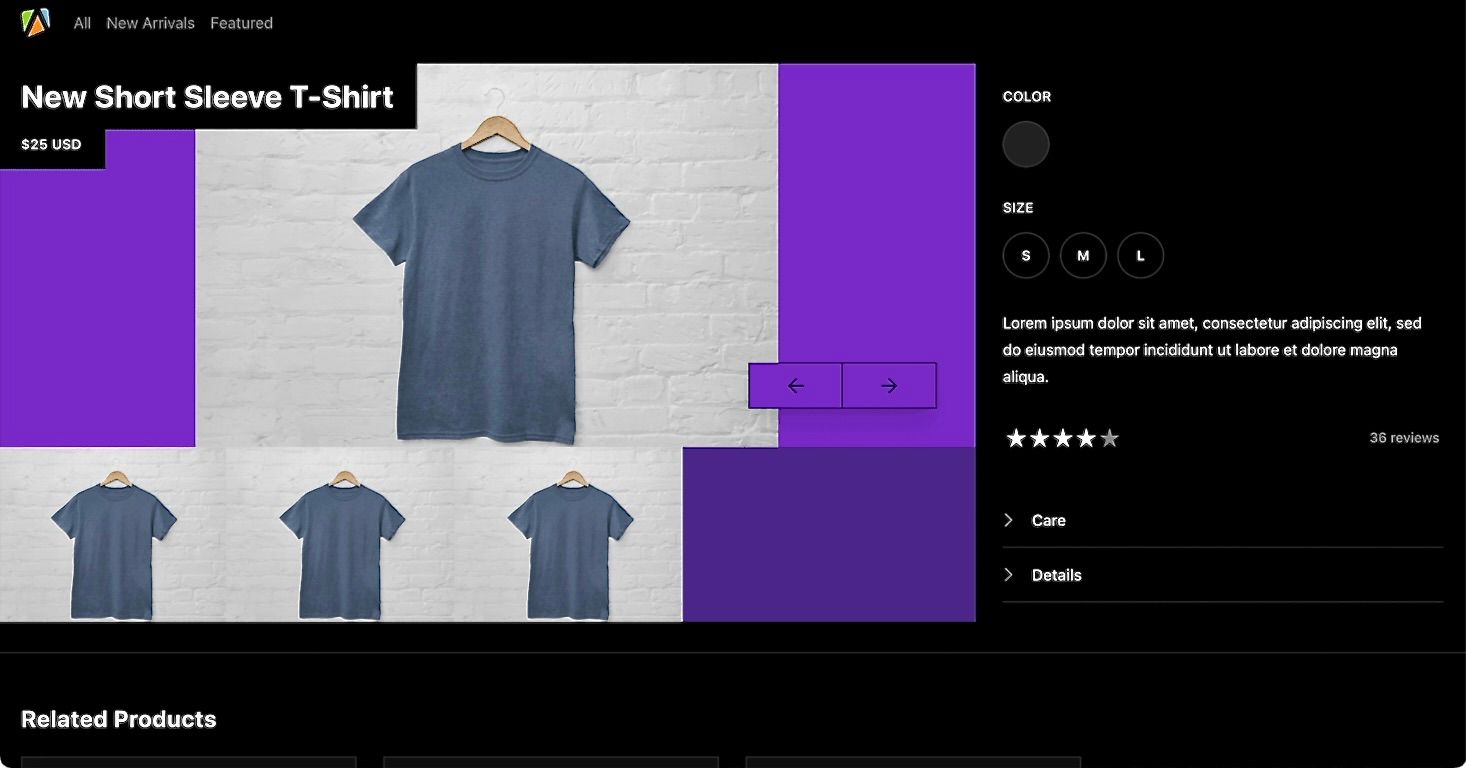
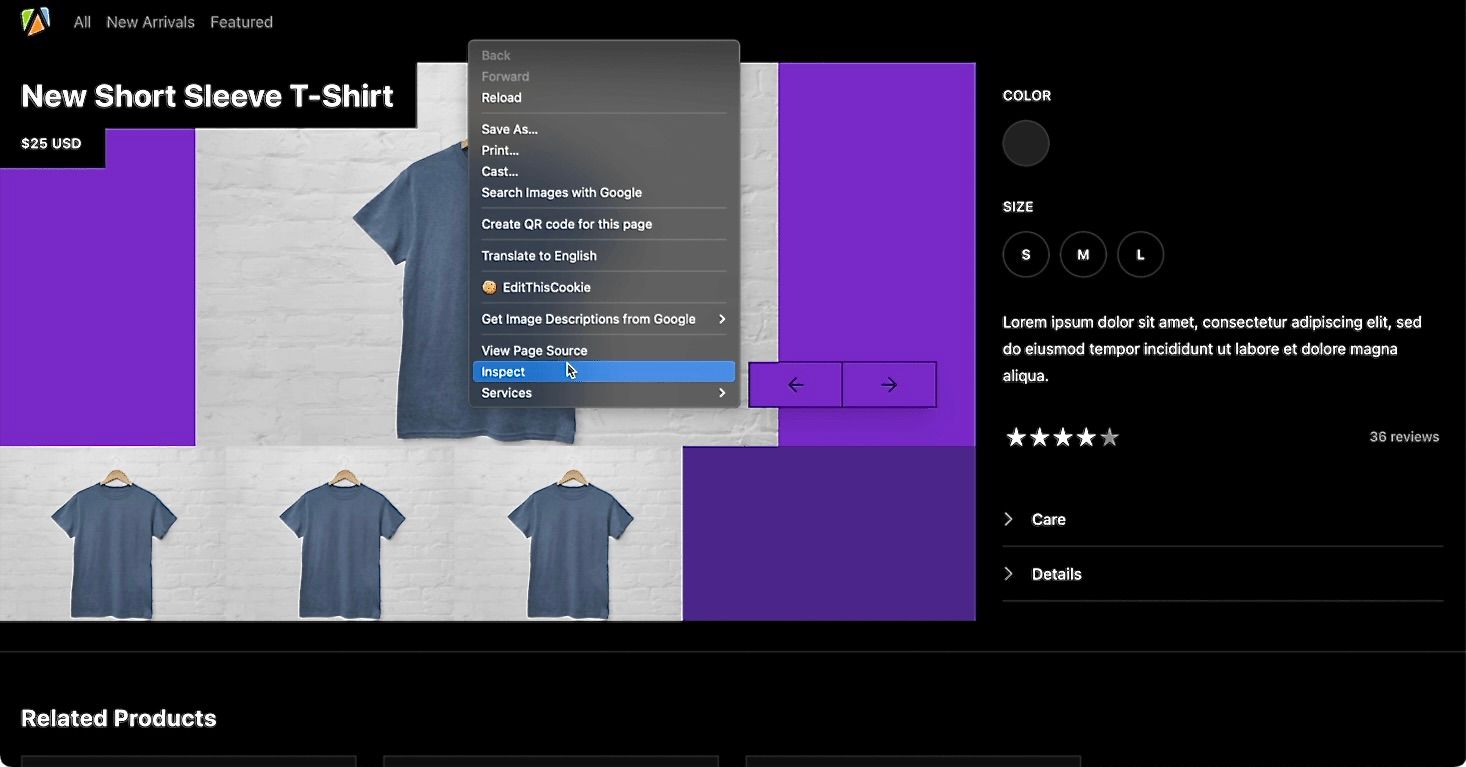
3. Select the area you want to monitor
In this example, we want to monitor any price changes on this website. Go to the web page you want to monitor and click Inspect to open Developer Tools and find the CSS selector for price.
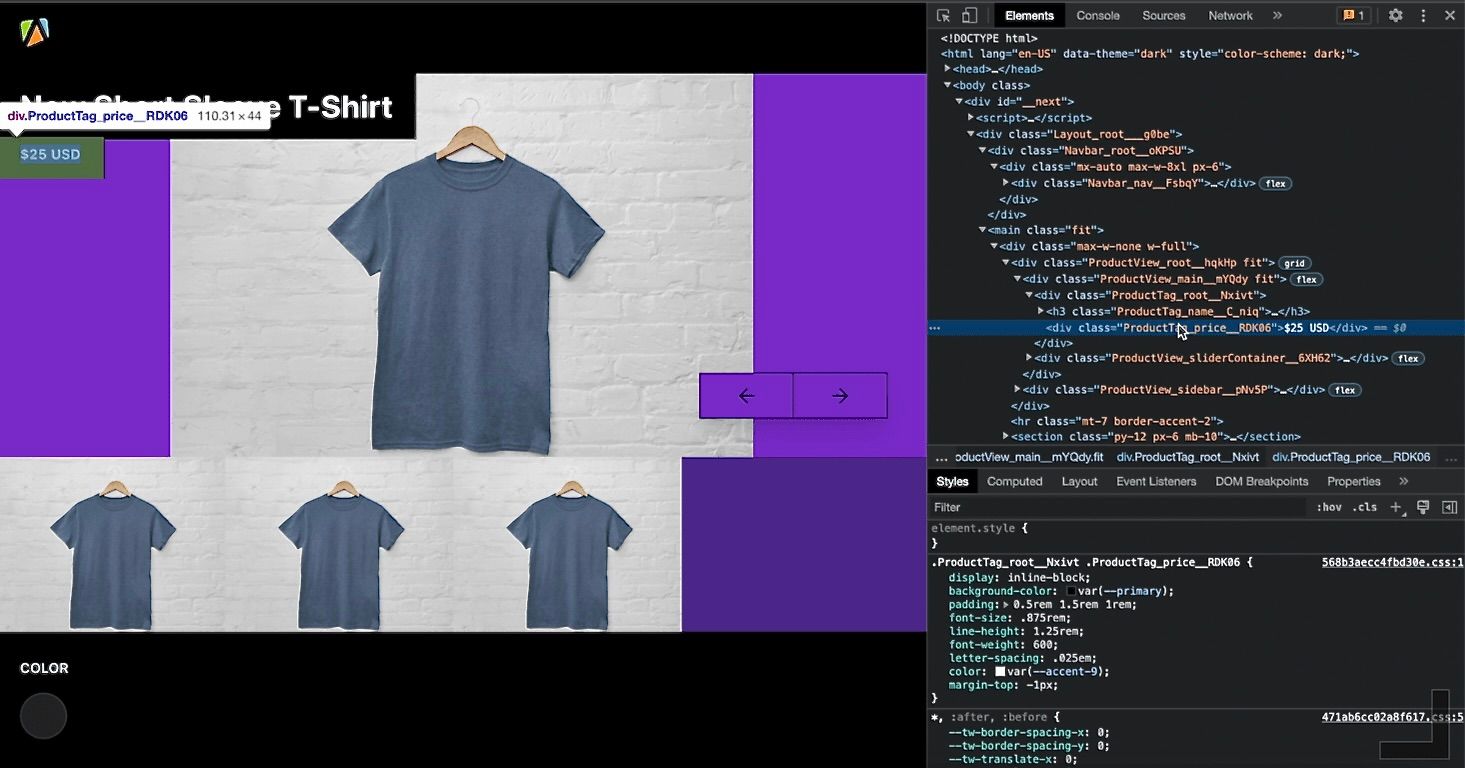
Now paste it into the Monitored area selector field. Don't forget to put a period (.) in front.
4. Select the area you want to screenshot
Go back to the developer tools to select the area you want to screenshot. In our case, we want to take a screenshot of the entire product view.
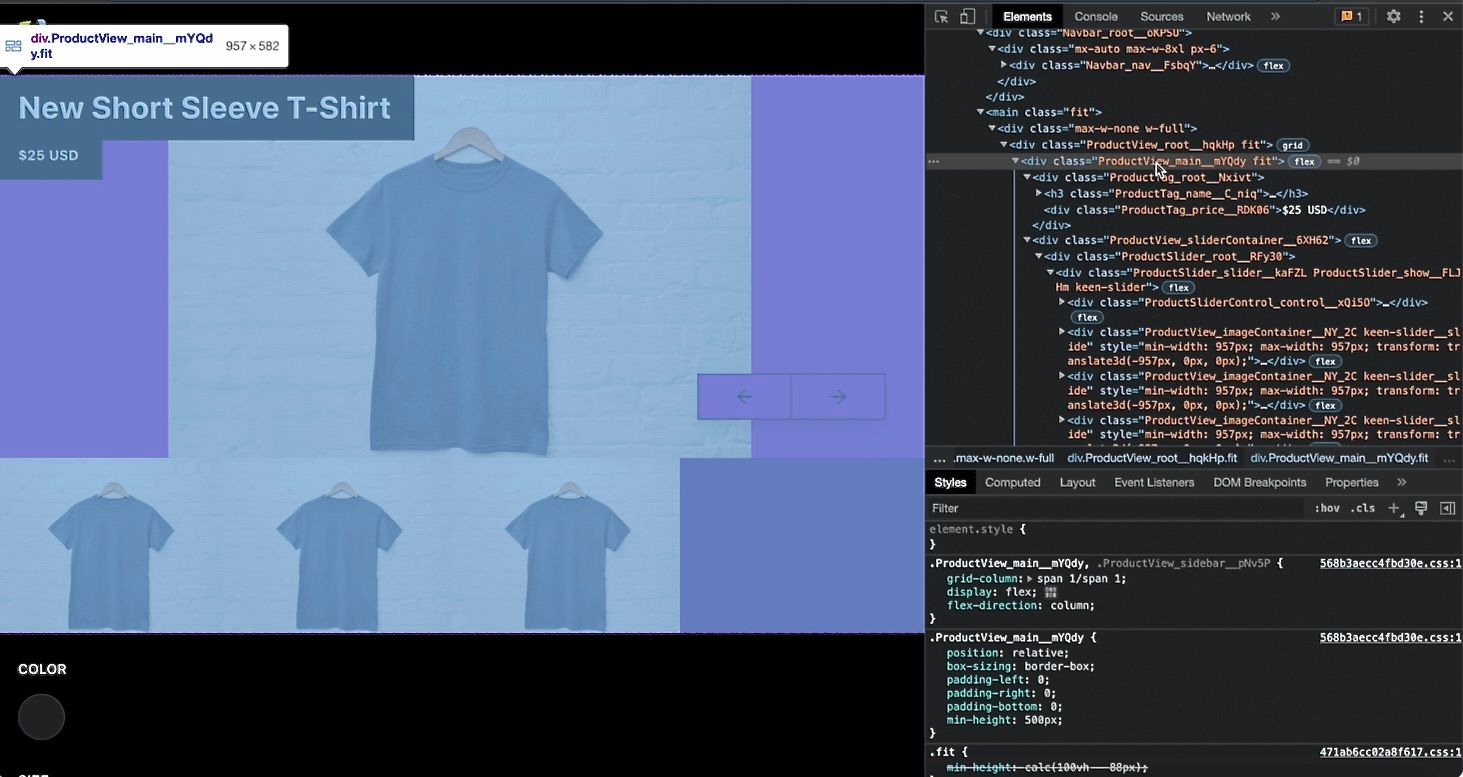
Select the CSS selector and paste it into the Screenshot selector field. Again, don't forget to put a period (.) in front.

5. Choose an email address for receiving notifications
Insert the email address for notifications in the Email address field. You can also adjust the text in the Notification Text field. The default is Apify found a new change!
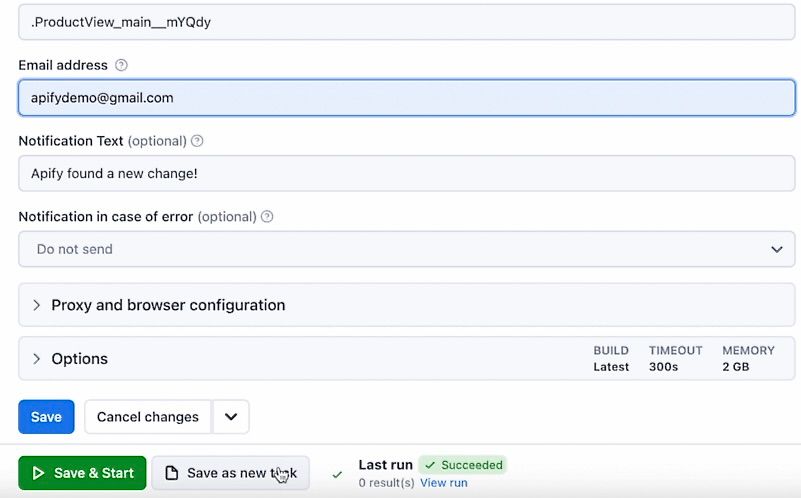
6. Save your configuration as a new task
Click Save as new task at the bottom of the screen. This will save your configuration so you can re-use it later. Now that your task is created click the Start button to run it.
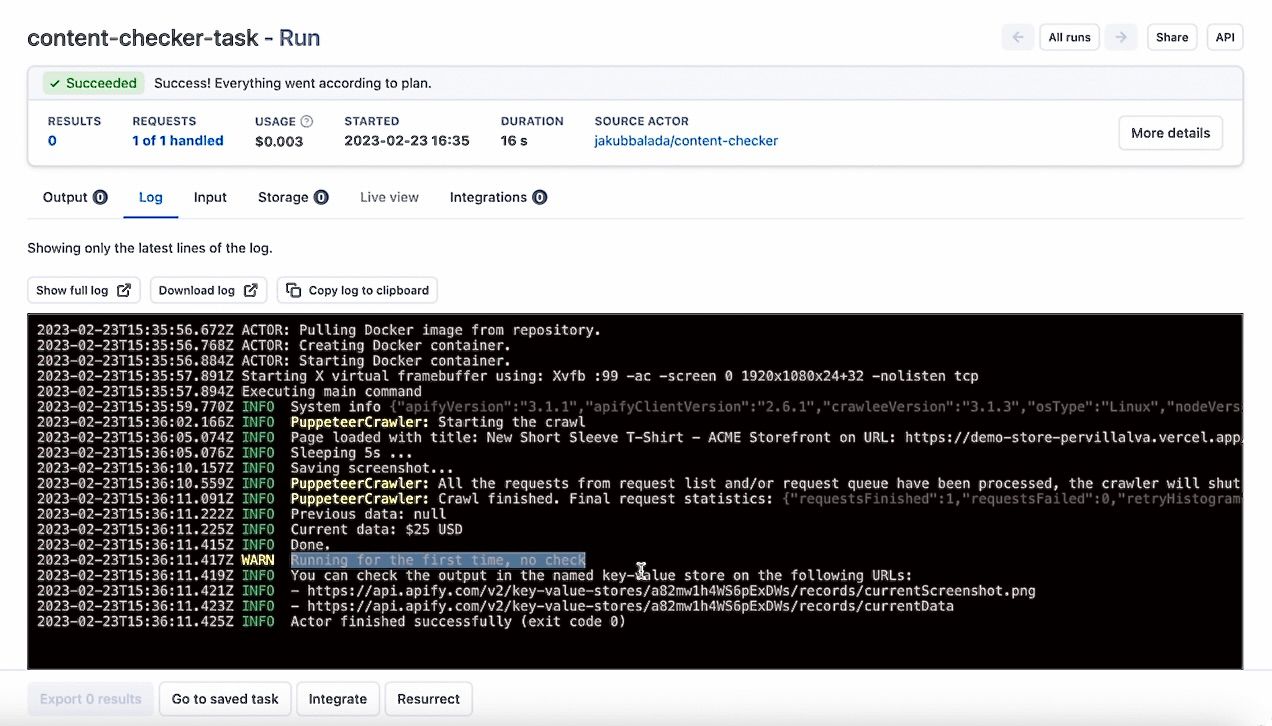
Once the run has finished, the status will change to Succeeded, and you can see the results in the Output tab. As this was the first run, there's no data to compare and so no email will be sent to us. Now we need to set up Content Checker to run on a schedule so we can regularly check the website and monitor any price changes.
7. Schedule the Actor
To schedule Content Checker to run automatically:
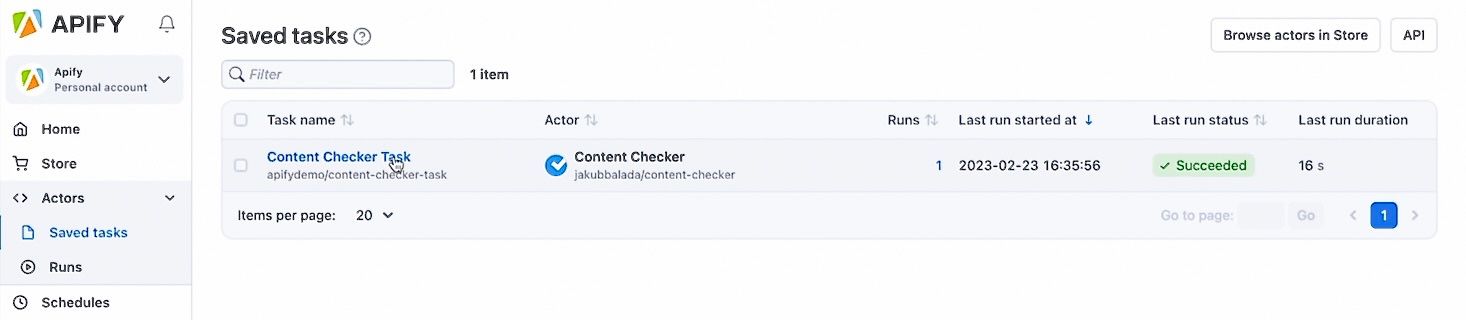
a. Go to saved tasks and select the task you want to schedule.
b. Go to Actions and select Schedule.
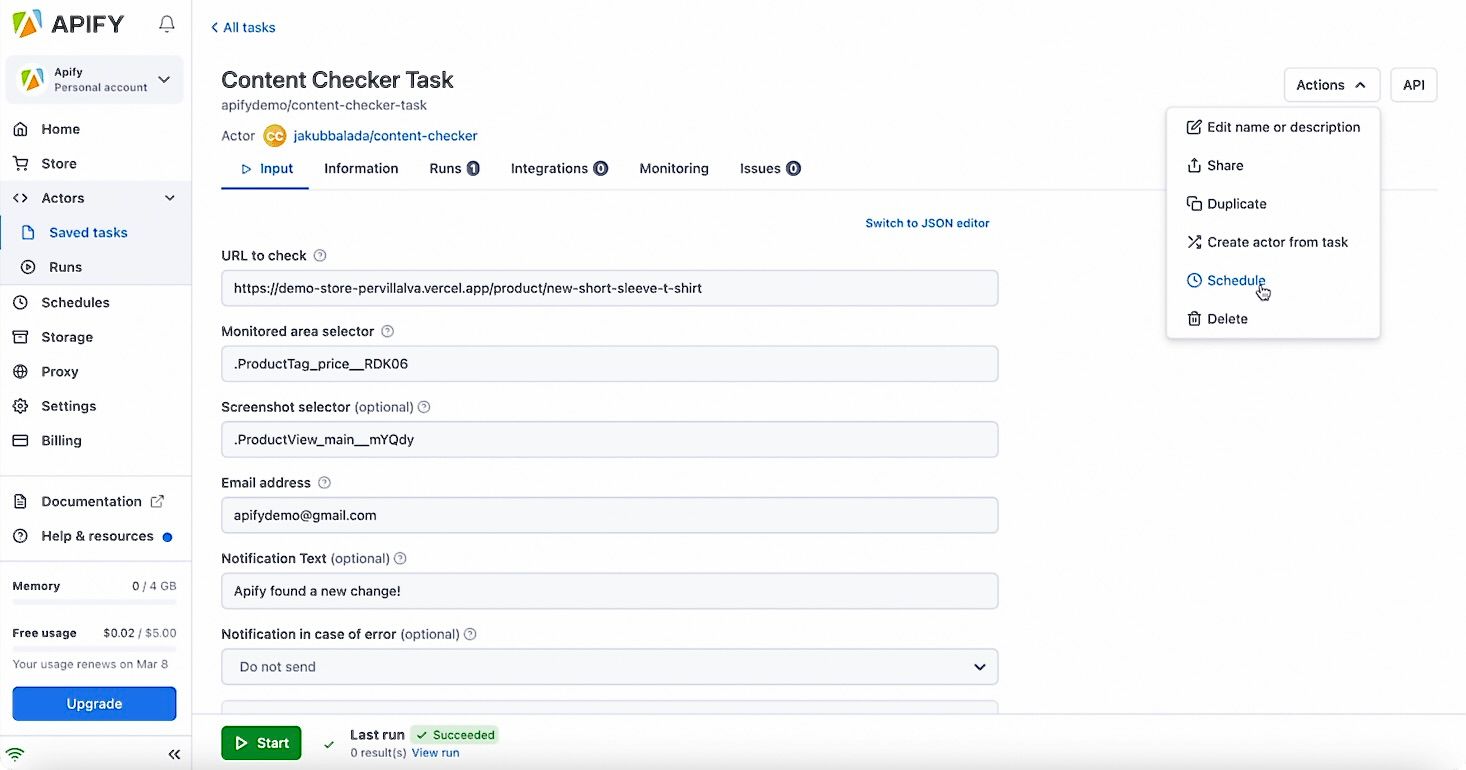
c. Choose the frequency of the run (in our case, we'll choose Hourly), then click Create.
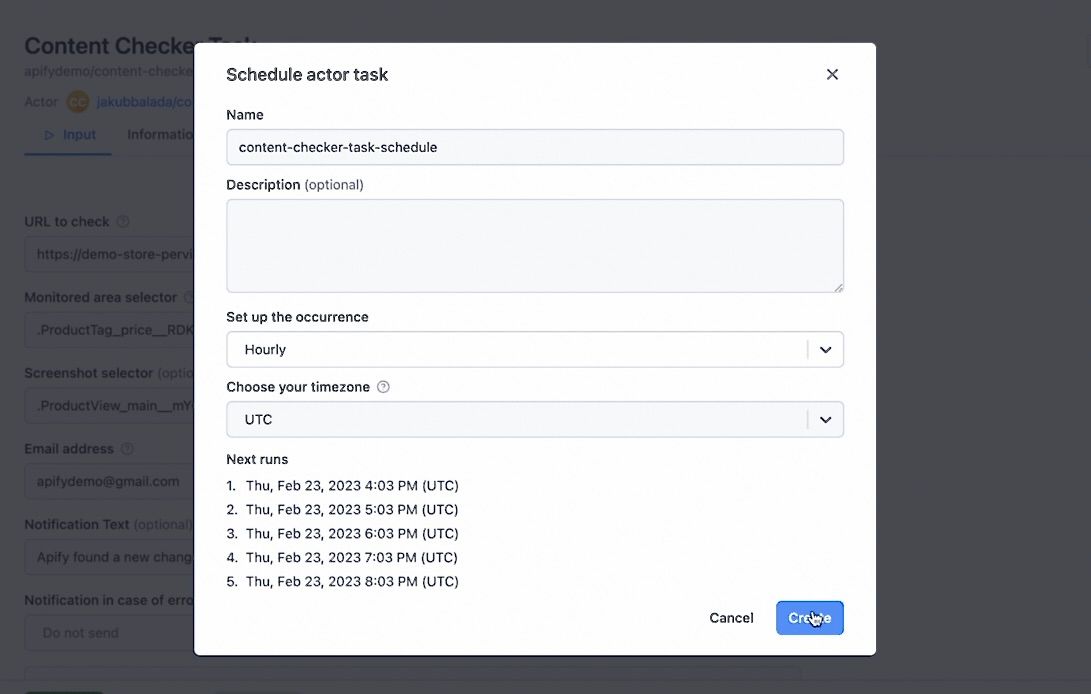
Now your schedule is set up. You can find and adjust your scheduled tasks by going to the Schedules tab in the left sidebar.
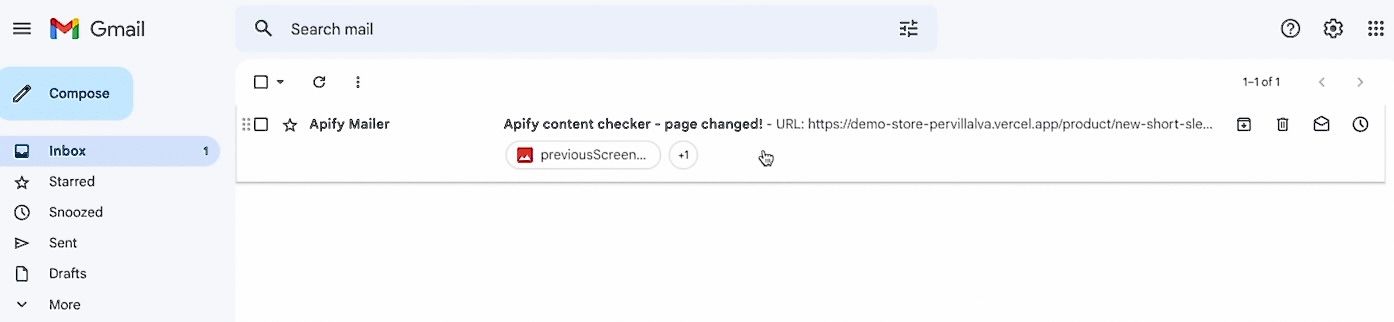
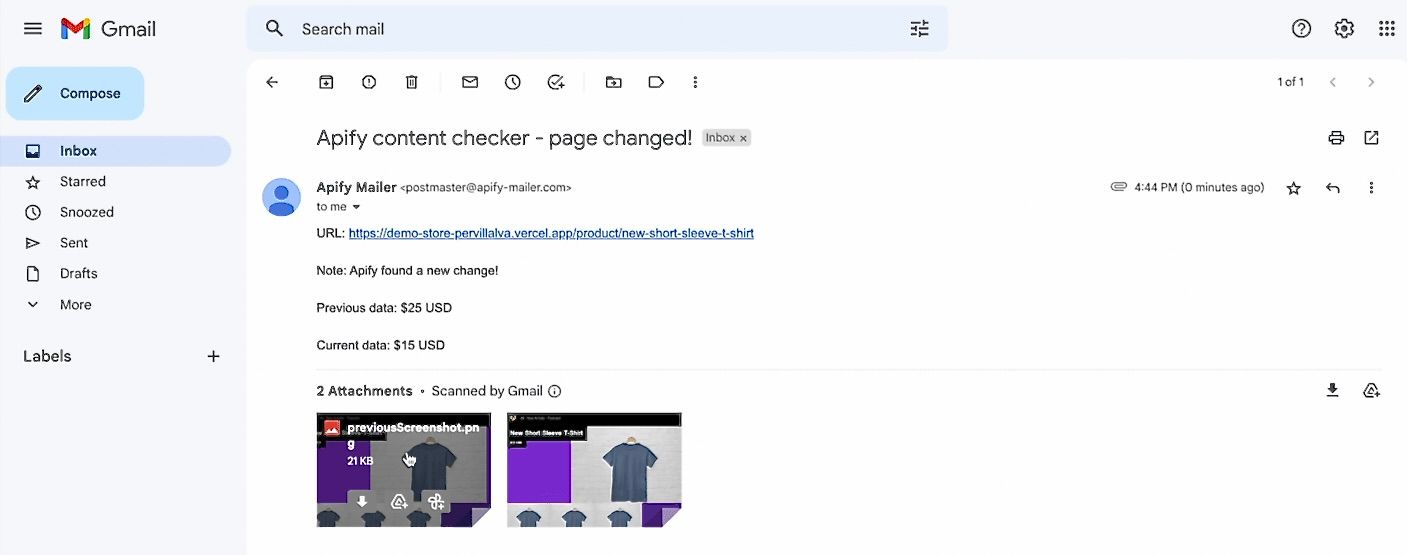
Once Content Checker detects a change on the page, you'll receive an email with before and after screenshots.
And that’s everything you need to know to get started using Content Checker.