
Google Sheets is by far the most commonly used tool for handling Excel-like tables on the web. It’s fast, easy to use, has powerful features, and is accessible from anywhere.
That's why we’ve developed a complete Actor that can manage everything you could ever need from a Google Sheets integration. It allows you to read or write thousands of rows in just a few seconds, works behind proper authentication and authorization (you don’t need to share your Google credentials at all), and is brimming with various functionalities that can convert every possible use case. You can read detailed documentation in the readme section on the Google Sheets Import & Export page. So, let’s start learning by actually using the tool.
Just one note: If this tutorial seems too long and detailed, feel free to skip any parts. You only need to go through the Initial setup and Authorization chapters to get the basics. Don’t worry if you just want to use it as an API — only the initial setup is required in our app.
Initial setup
First, let’s go to the Google Sheets Import & Export Actor page on Apify Store.
You need an Apify account to use this Actor. So, if you don't have one already, take a few minutes to sign up for free. This comes with many free benefits, including $5 of platform credits every month, and an Apify Proxy free trial. Otherwise, if you already have an account, go ahead and click on "Try for free".
You are now on the Actor's page in Apify Console. Take a quick look at the input options, but don’t worry about them for now. For most use cases, you just need the basics. To get you started, let’s focus on the first three fields.
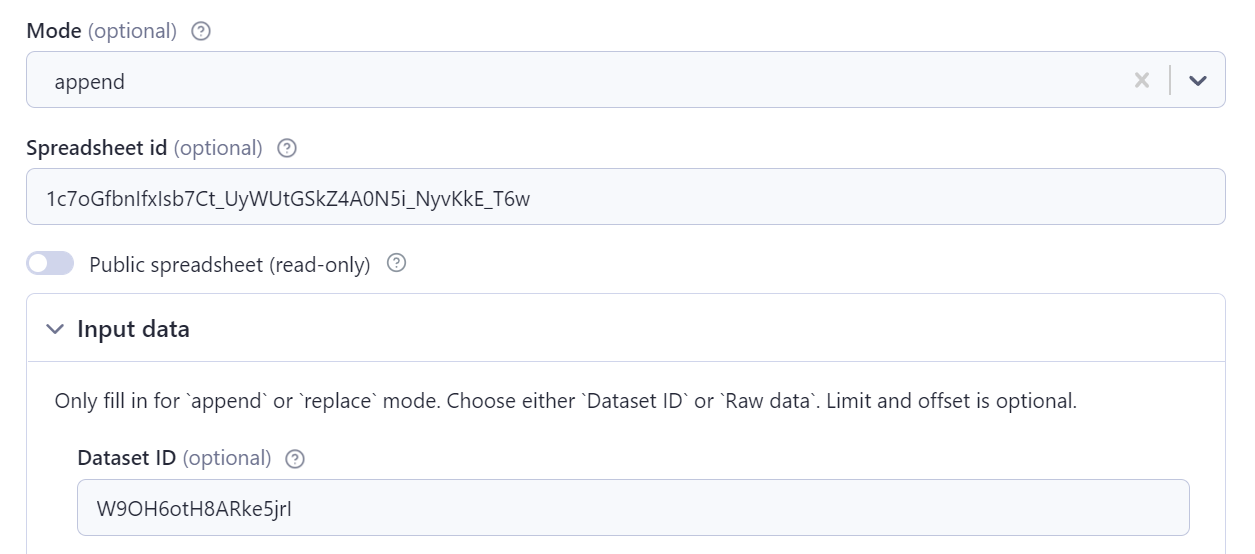
To start using the Actor we need two things: a spreadsheet and the data to be imported. So, create an empty google spreadsheet and fill in its id (you can find this in its URL — it will look like this: 1oz8YzfE5gVw84qWAywlugH0ddrkc1FyAe1aEO4TFTjA) in the “Spreadsheet id” field.
Now we need the data. If you’ve used any Apify Actor before, you can use the resulting dataset from one of your previous runs.
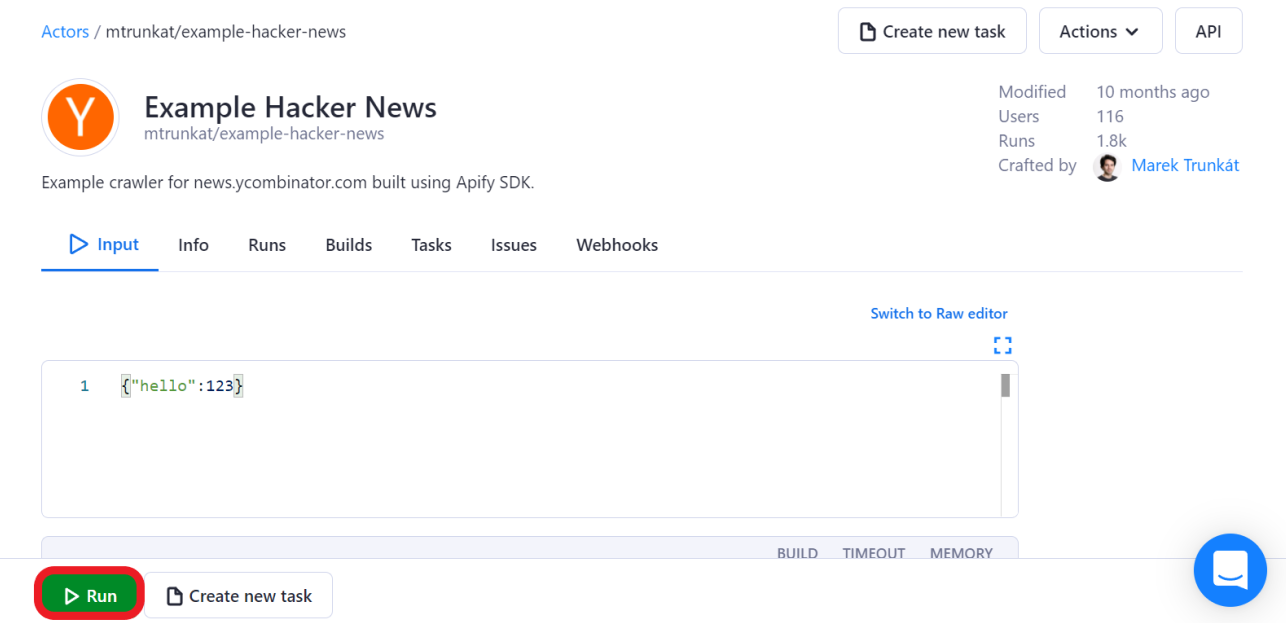
If not, don’t worry. We can quickly scrape something easy to test on our spreadsheet using this Example Hacker News Actor. Simply follow the Actor's link, click on "Try for free" and then "Start". Now, just wait a couple of minutes for the Actor to finish its run.
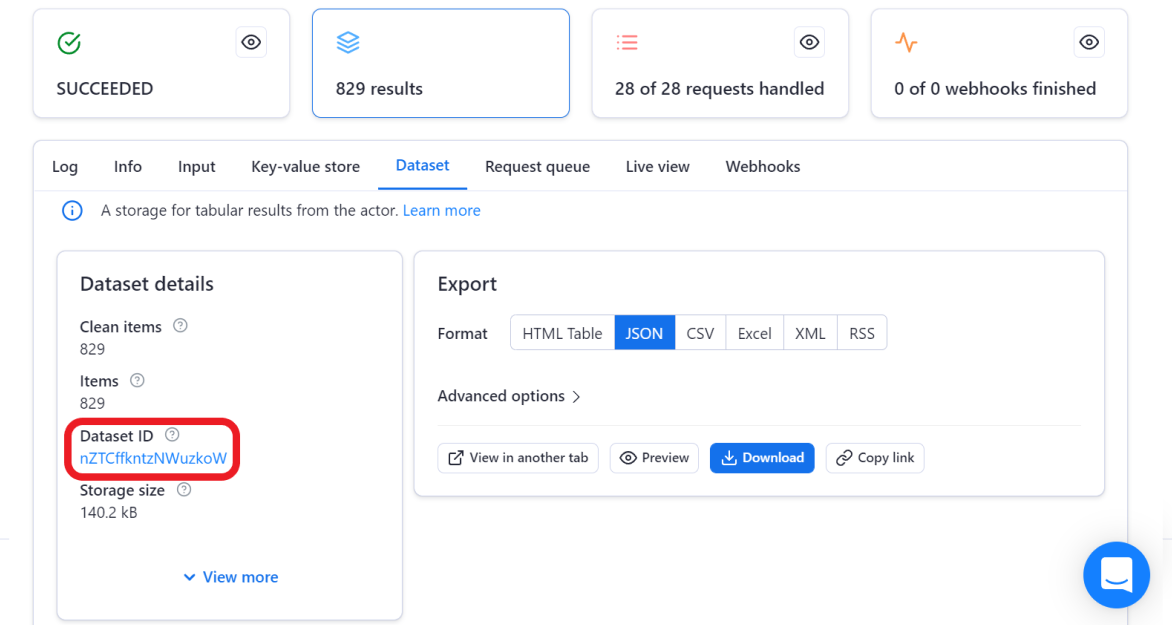
Head over to the "Dataset" tab and copy your newly generated "Dataset ID" and paste it into the “Dataset ID” input field.
You can leave mode on “append”. That’s everything we need to provide as input. However, there’s still one thing needed before we can finally upload the data. I promise this is the final step before you can get started — and you only have to do it once for your account.
Authentication and first run
Since we wanted to make everything secure for you, the Google Sheets Actor requires your authentication and authorization. Basically, you need to prove your identity to Google by logging in and allowing Apify to work with your spreadsheet.
To set up your authentication, please check this article for a step-by-step guide on how to set up a Google integration and enable Apify to access your spreadsheets.
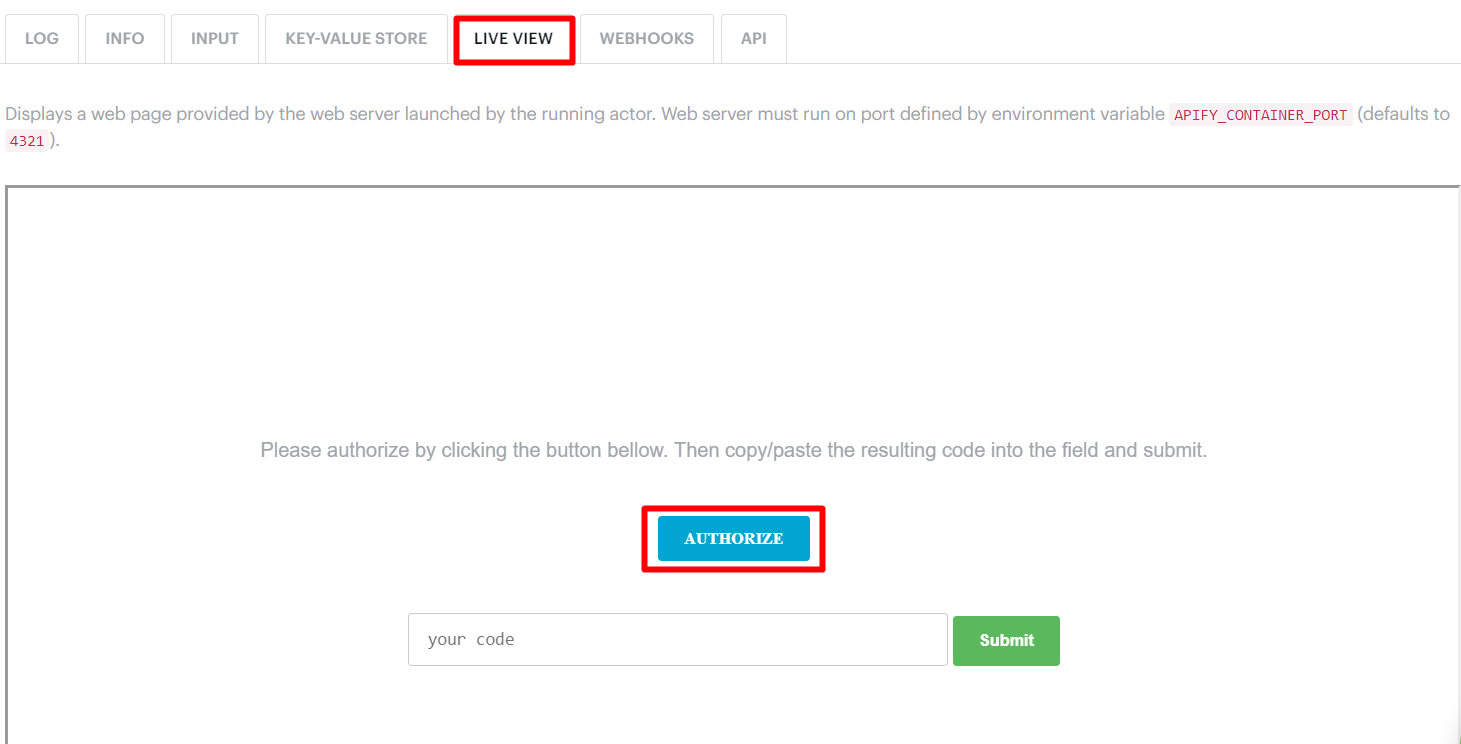
This is the only time you need to run it manually. Once authorized, future runs will be carried out automatically. So just click “Start” and the log will prompt you to open a live view tab.
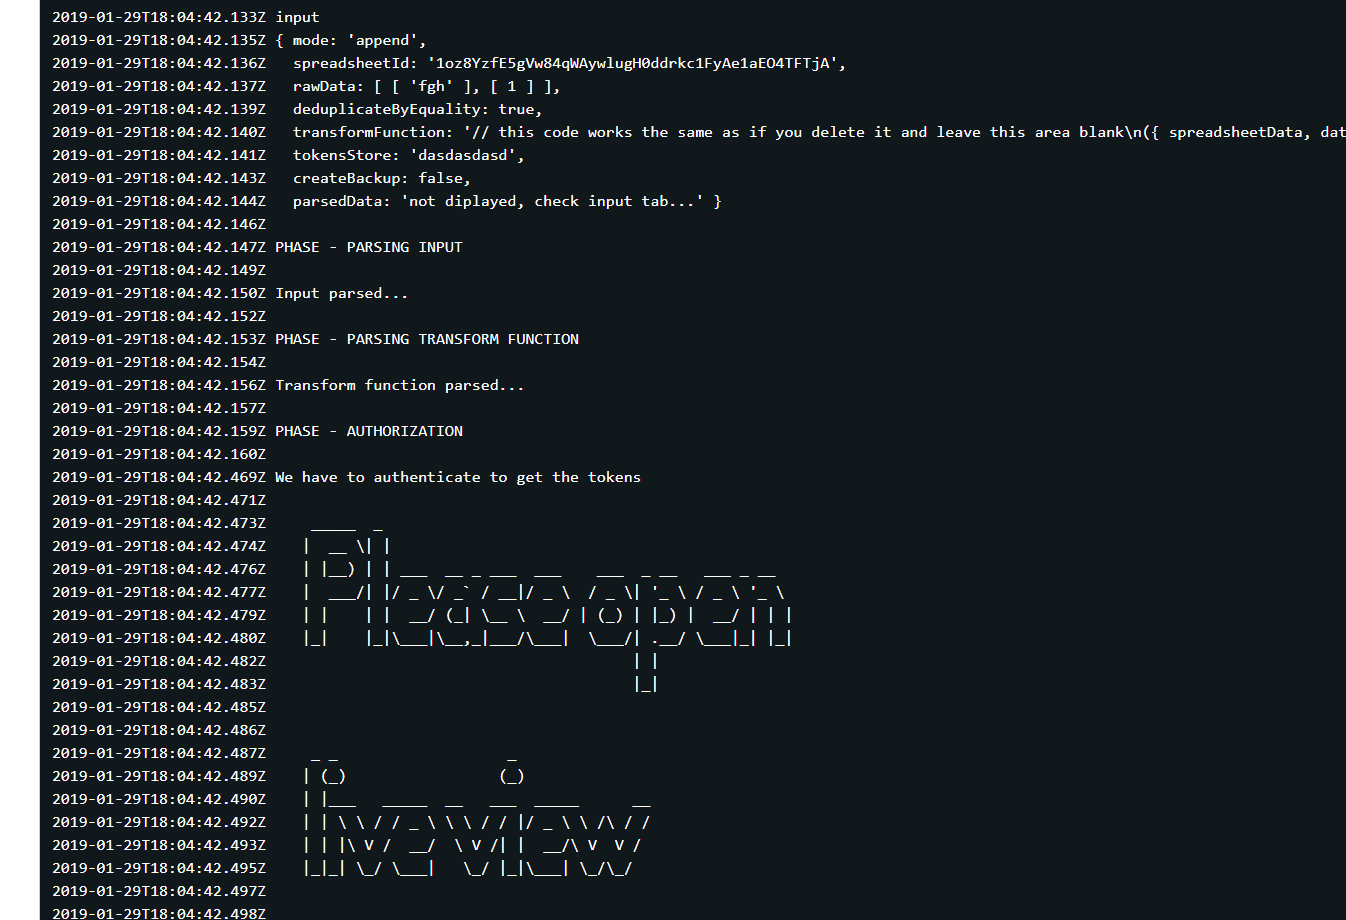
Open it and click Authorize. If you are running it locally, open localhost:3000.
It will open a new tab in your browser where you need to log in to Google with the account where your spreadsheet is saved. Allow Apify to access your spreadsheet and you will be directed to a page displaying a long token.
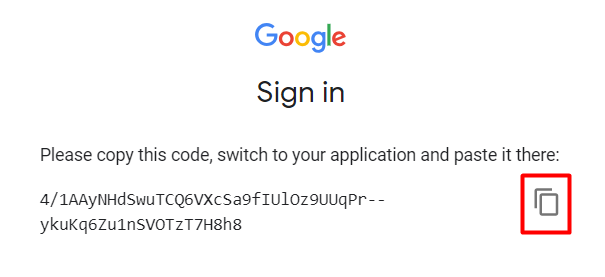
Copy and paste it into the input field in the live view tab and press “submit”.
That’s it! You are now authorized for life! Well, almost… Unless you stop using this Actor for a full six months you will not need to authorize again. If you want to use different Google accounts, you will have to authorize the Actor once for each of them and each requires a unique “Google OAuth tokens store” input, e.g.

You can always disable Apify’s access to your spreadsheet either by disallowing it directly in your Google account or by deleting the key-value store, e.g. “lukas-2nd-email”, where the tokens are stored.
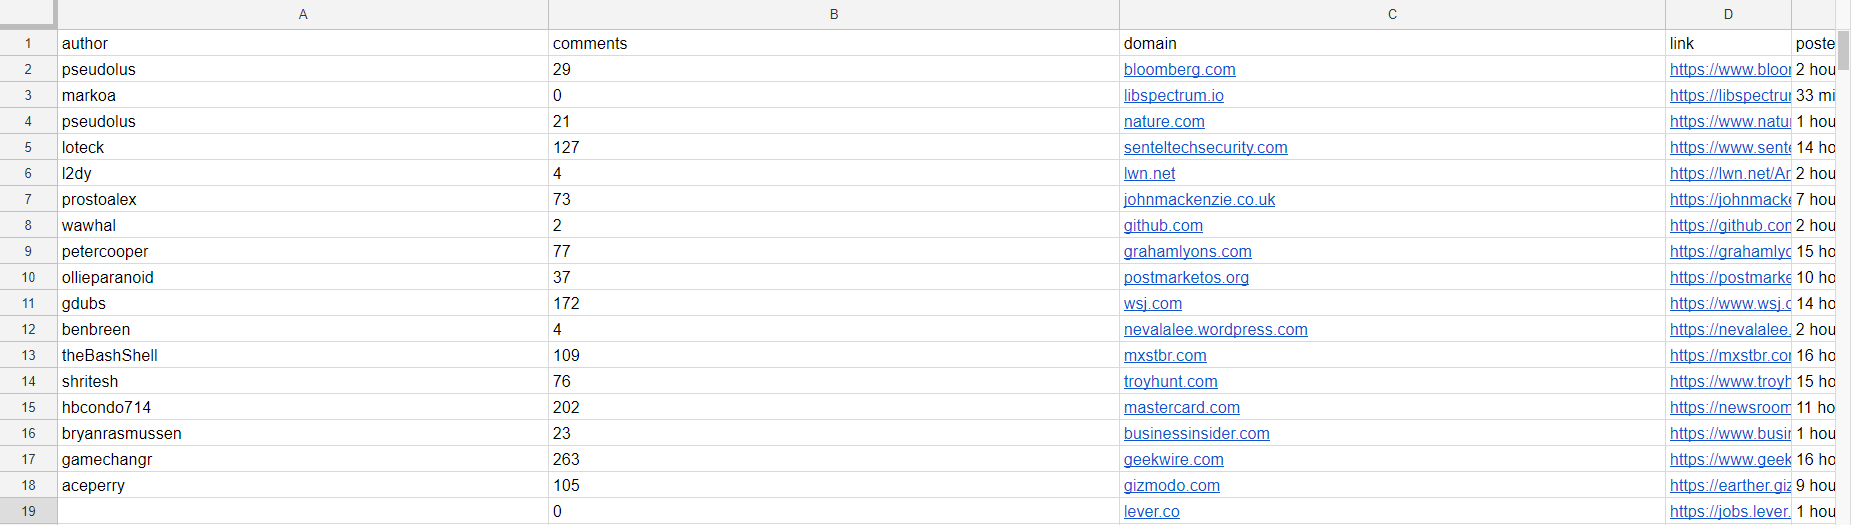
The run should only take a few seconds to change from “RUNNING” to “SUCCEEDED”. Then you can go and get your spreadsheet. Voila!
Raw Data upload
What if you don’t want to scrape any data and just want to use the Google Sheets Actor as an API to easily import your data behind proper authentication? Google’s API is very complicated and requires a lot of reading and developer experience. The Google Sheets Actor gives you the ability to use it out of the box with only a minimal setup!
You can pass raw data in JSON format as part of the input.
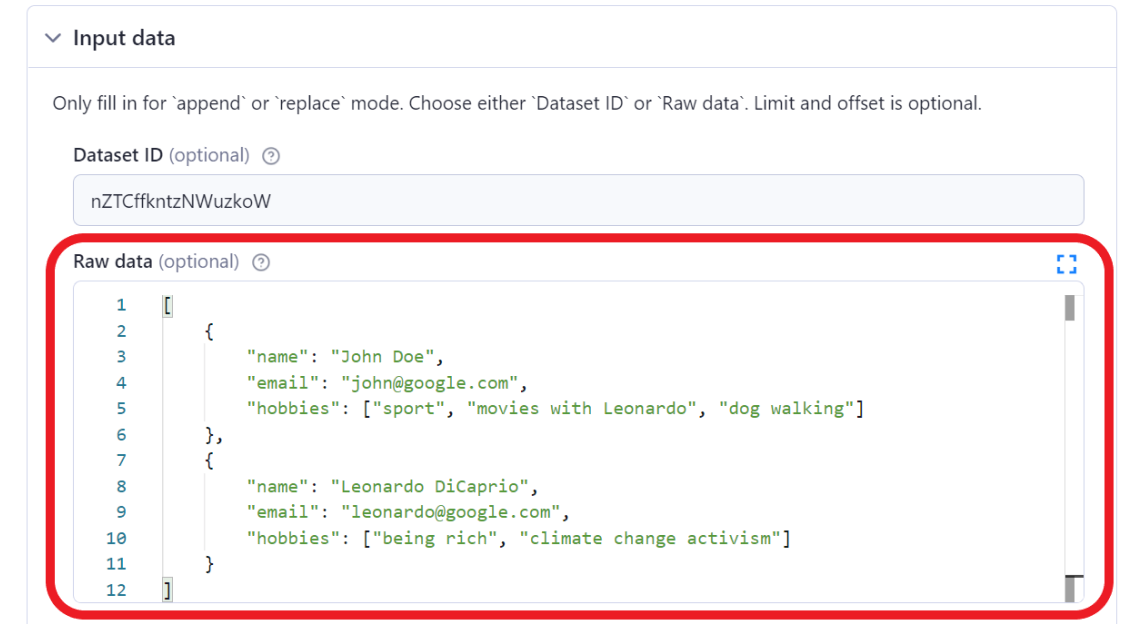
Raw data can either be passed as an array of objects (where each object represents one data row) or as an array of arrays (where the first array is the header row and the next are data rows).
You can easily upload large amounts of data using our API.
A short video tutorial to guide you through the pitfalls of retrieving data using API
Appending and saving a backup
Let’s explore some other options. First, let’s shuffle the data a bit so we have something new. Go back to the Hacker News Actor, copy the Dataset ID and paste it into the “Dataset ID” field in the Google Sheets like before.
Now if we were to click run it would just add the data as additional rows to the spreadsheet. That might be enough for some use cases, but let’s go further. When appending new rows, we usually want to skip duplicates. To solve this problem, we have two input fields: Deduplicate by equality and Deduplicate by field. Deduplicate by equality would not work for us since the same post will change its rank and number of comments over time. But we can deduplicate the posts by a particular field. The link field makes the most sense since that is kind of unique for each post.
Let’s add that to the input and check the Create backup box.
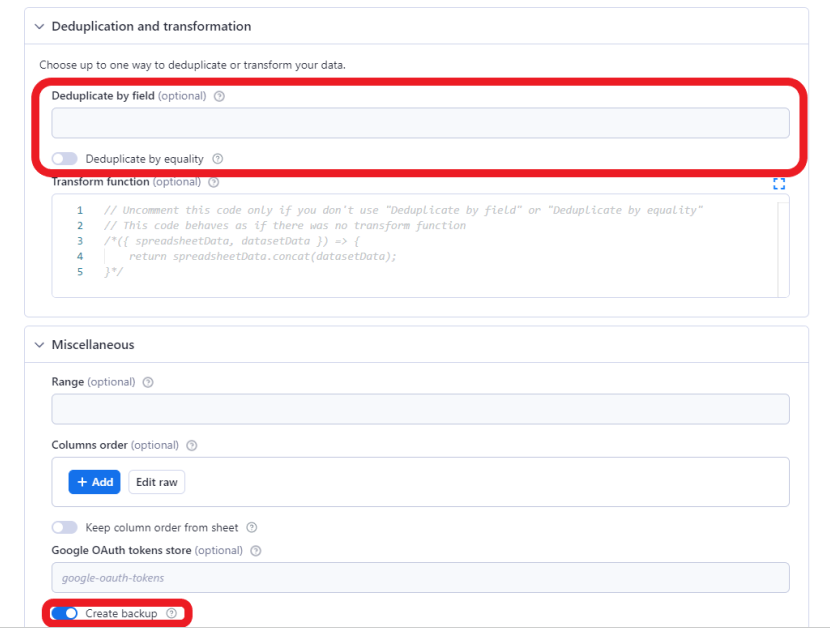
If you want to be sure that your new data set will only contain unique items, you can fill in the deduplicate inputs according to your specifications. Because we checked the Create backup option, the run will also save a backup file in a JSON format where the rows are displayed as arrays.
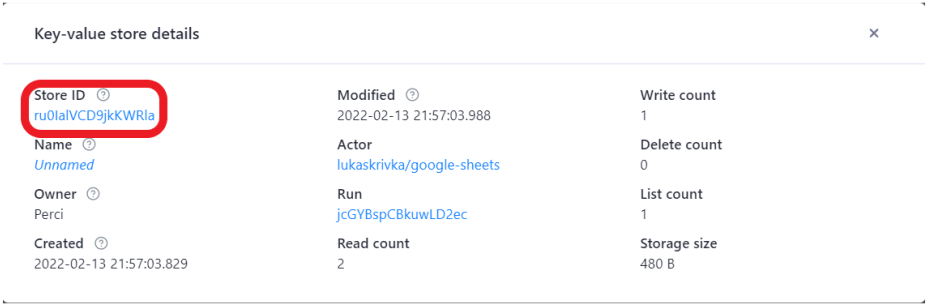
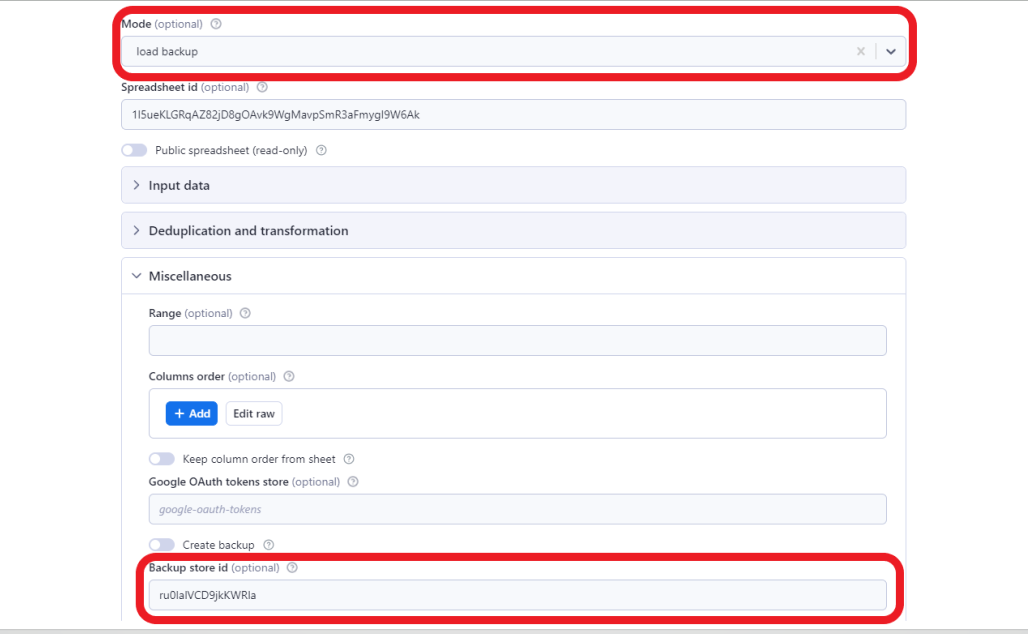
If we are not sure that we are doing the correct transformation, we can easily restore the spreadsheet using load backup mode and inserting the id of the key-value store where the backup was saved.
Google Sheets has its own version history, so if you prefer you can use that instead of creating your own backup.
Other modes (replace, modify, read)
So far we’ve only tried the append and load backup modes. Let me briefly explain the other three modes you can use.
- Replace behaves basically the same way as append, but the sheet is cleared before inserting the new rows. This is useful when you want to have only the most recent data.
- Modify applies deduplication options or transform function (more about that later) to the data directly in your spreadsheet. So you can process the data directly in your spreadsheet.
- Read allows you to retrieve the data from the spreadsheet and save them in the default key-value store as an OUTPUT record.

As you can see, we are getting the data back in the same format as they were pushed.
Google Sheets integration with other Apify Actors
Now for some more real use cases. The most basic use case is to have a scheduled scraping job upload the data into a spreadsheet. To do that, we'll create a separate task so we can save the Google Sheets Actor settings.
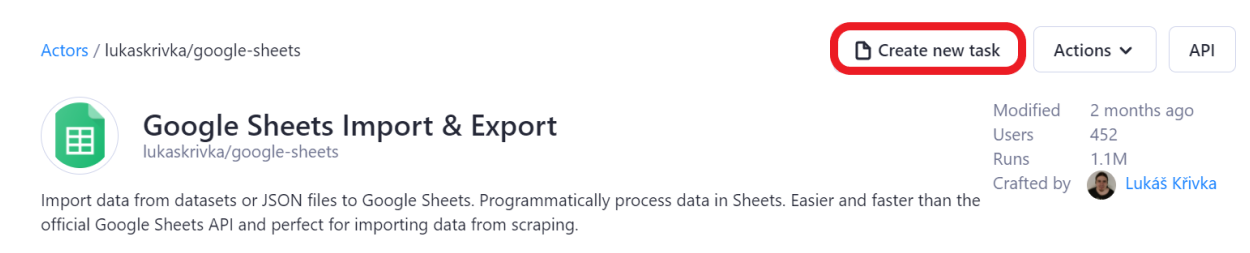
Go to the Google Sheets Import & Export Actor page and click on Create new task.
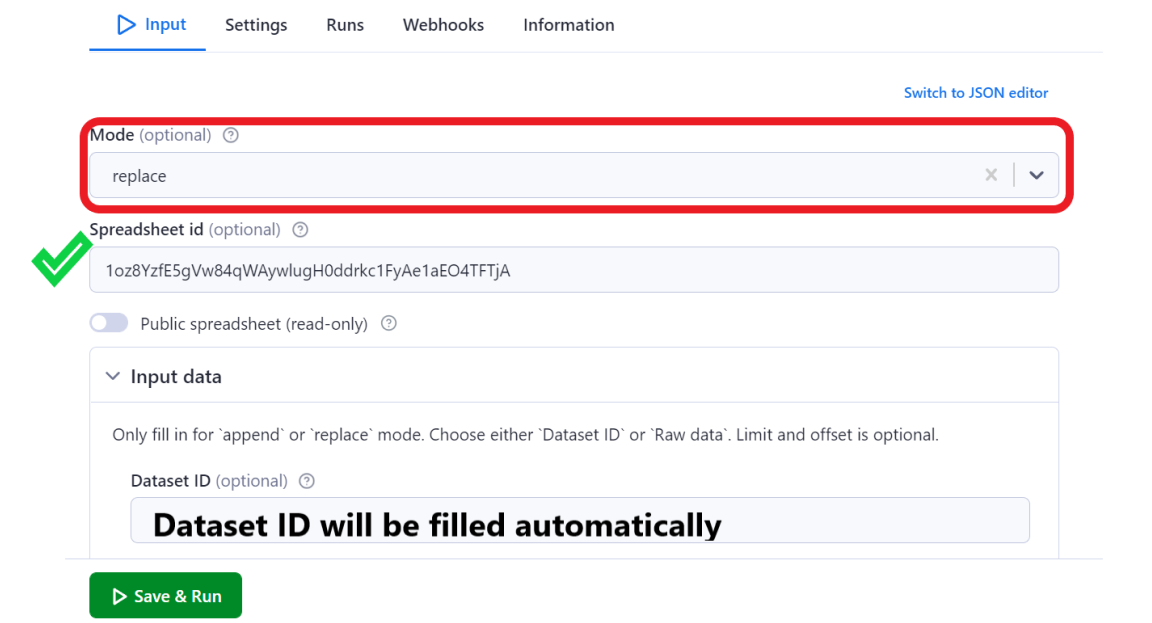
You will be redirected to your newly created task in Apify Console. A task has a very similar setup to the Actor's input page. Now let’s prepare the input here before we call it from the source code. Switch to replace mode and keep the Spreadsheet id, but we don’t need the dataset id anymore. That’s the only thing that will change over time since every Actor run has a different dataset (unless you use named datasets).
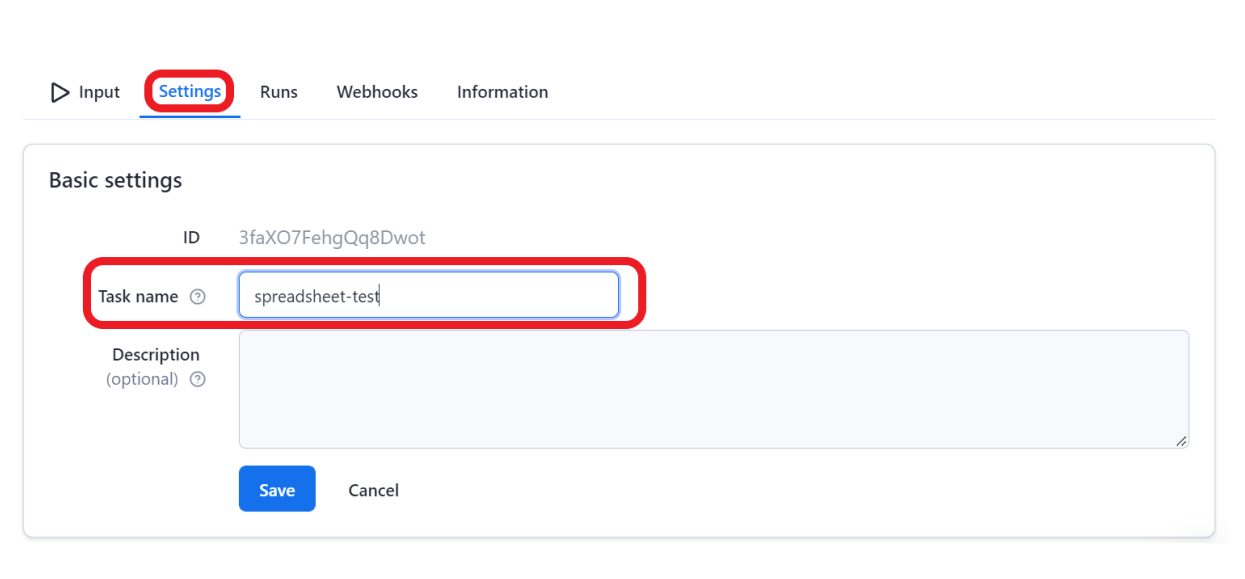
Next, go to the settings of the task and give it a name so you can easily identify it.
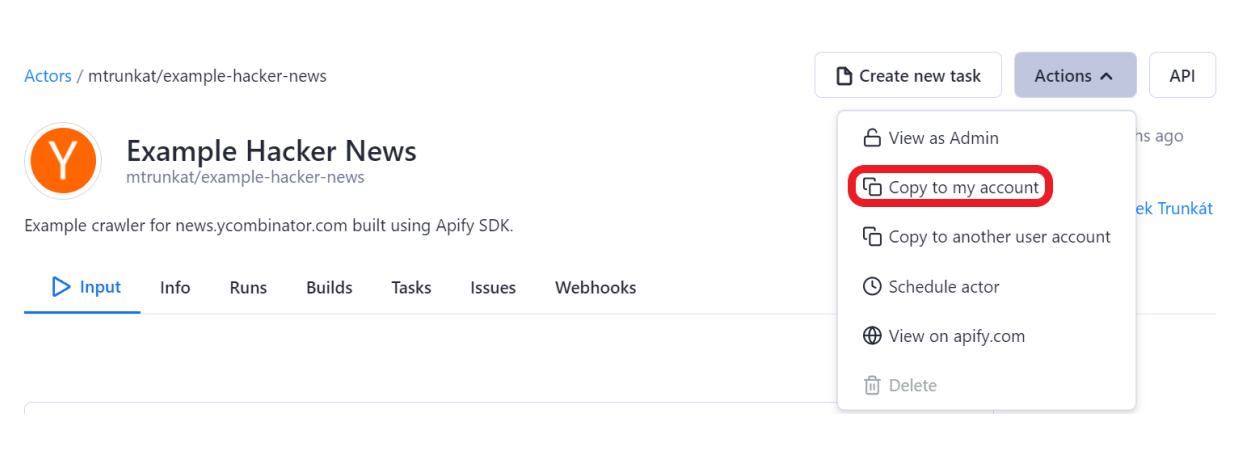
This task is ready to use! Let’s open any Actor that saves data into a dataset. If you don’t have one, you can copy the Hacker News Actor so you can write it into the source code.
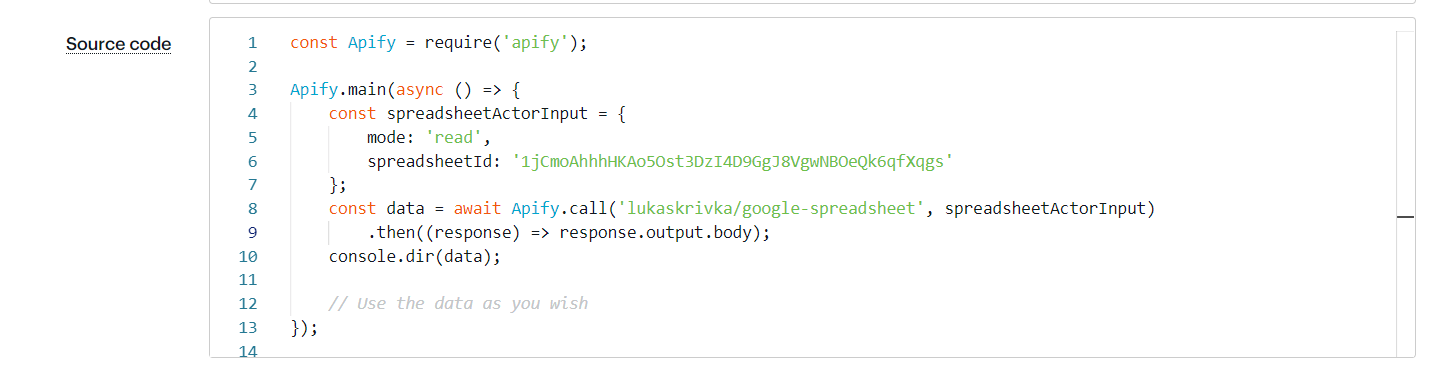
Now go to the source and at the end of the source code call the spreadsheet-test task.
- ** Screenshot with Apify.callTask() if it gets implemented ***

That’s it! If we schedule this Actor, we will have fresh data uploaded to our spreadsheet immediately after each run.
Advanced (transformations)
Finally, we’ll explore how to transform our data using JavaScript. So far we’ve only deduplicated the data. But we might often want to carry out more complicated workflows. Fortunately, the Transform function gives us the flexibility to do this.
You simply pass a JavaScript function that gets an object with arrays of data from the spreadsheet and dataset. It then returns a new array that will be imported to the spreadsheet or outputted to the key-value store depending on the mode you choose. An array of data from the spreadsheet is called spreadsheetData and an array of data from the dataset is called datasetData. Inside the array are objects with fields and values with the same structure as returned from the read mode.
Let’s say we are only interested in the most successful posts on Hacker News and we want to monitor the rankings for a long time. We’ll set up a scheduler to run the Hacker News Actor daily and we’ll call the Google Sheets Actor in append mode at the end of the source code as shown above. Then we will set a transform function that will check the data we have in the spreadsheet as well as the data from the daily crawled dataset. It will pick the top 20 most successful posts (measured by score) and sort them. In JavaScript, this is really trivial.
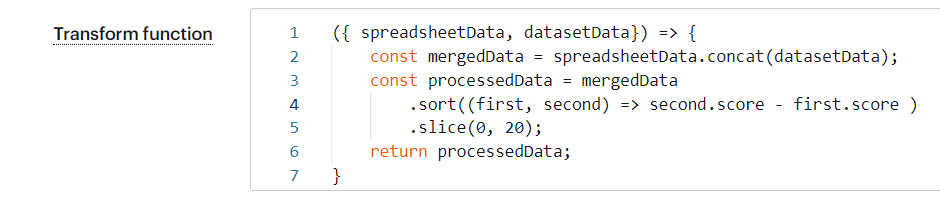
And here we have it:

One important thing to keep in mind when using the transform function is that the data you are working with are flattened and the field names are concatenated with a slash. That means that every nested object (such as arrays) is flattened too. The property price that was pushed to the dataset is this object:
{
    options:[
        {
         price: 200
        }
    ]
}
It will have to be accessed like this:
oneOfObjects['options/0/price']Conclusion
That’s it. Now you can continue to play with the different options and, if you can spare the time, we would appreciate your feedback.
Don't forget to join our Discord. You can have direct access to our team of developers and become part of a community of web scraping and automation enthusiasts. We are constantly improving our public Actors to ensure Apify users always have the best tools at their disposal.
For more information and detailed documentation, please take a look at the Actor detail page of the Google Sheets Actor or GitHub.