
Developers building e-commerce competitive intelligence systems often face the same bottleneck: the frontend moves quickly, but the backend turns chaotic as soon as web data is involved. Pulling prices, listings, SERP results, or social posts means evaluating scrapers, juggling proxies, and testing configs. It gets even harder when dealing with multiple marketplaces like Amazon, eBay, or Walmart, each with its own scraping strategy and anti-bot challenges.
A more efficient path is to simply define the data you need and let a coding agent assemble the scraping workflow for you on the Apify platform. With the Apify integration expert, a Copilot agent selects and configures the appropriate scraper, installs the Apify client, generates API call code, and automatically stores the scraped output in your backend.
What is a GitHub Copilot custom agent?
In October 2025, GitHub launched one of its most impactful capabilities: custom Copilot agents tailored to your tools, tech stack, and workflows. Apify built one to help you integrate real-time web data tools into your project.
-- GitHub product announcement
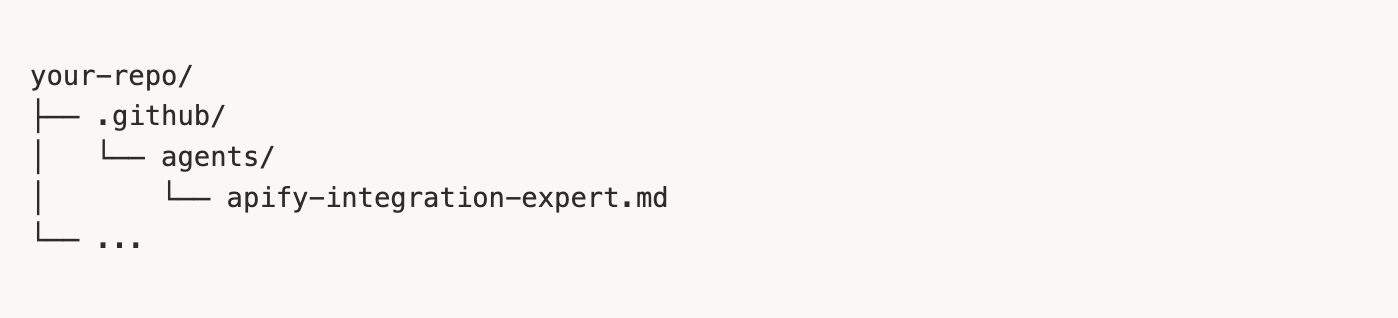
Custom agents are specialized versions of Copilot’s coding assistant. Instead of using a single generic Copilot model for everything, you create an agent profile. It’s a simple Markdown file stored in your repo’s .github/agents folder specifying:
- the agent’s role,
- what it should focus on,
- what tools it can use,
- how it should behave,
- what NOT to do,
- how it should process user requests.
Custom agents act like dedicated teammates: Your frontend agent knows your React patterns, your DevOps agent understands your CI/CD pipelines, and the Apify integration agent knows how to work with Apify Actors. With it, Copilot can autonomously integrate Apify web scraping tools directly into your existing codebase in the background.
What the Apify integration agent can do
The Apify Copilot agent utilizes Apify’s MCP server, giving your coding agent real-time access to over 10,000+ production-ready web automation tools (called Actors) along with their documentation. This allows Copilot to understand your project’s codebase, analyze the data needs of your application, and automatically integrate the most suitable Actors into your backend.
Example: If you’re building a social media analytics app and need to pull Instagram profile data, posts, reels, or hashtags, the agent can identify the right Instagram scraper, generate backend integration code with the right API calls, set up PostgreSQL persistence, and help surface the data in your frontend.
Key features:
- Actor selection: Find the right Actor for your use case
- Workflow design: Plan the entire integration workflow
- Multi-language implementation: Support for JavaScript/TypeScript and Python
- Database integration: Persist scraped data to SQL database or vector storage
- End-to-end testing: Ensure your integration works correctly
- Production deployment: Best practices for security and error handling
How to set up the Apify Copilot agent
In order to configure the agent, you need to have a GitHub account with Copilot access, as well as a free Apify account (for your API token).
By the end of this guide, you’ll have a working Apify Copilot agent that can find the right Actor for your use case and deploy the whole workflow end-to-end. Let’s start.
Step 1 - Copy the agent configuration
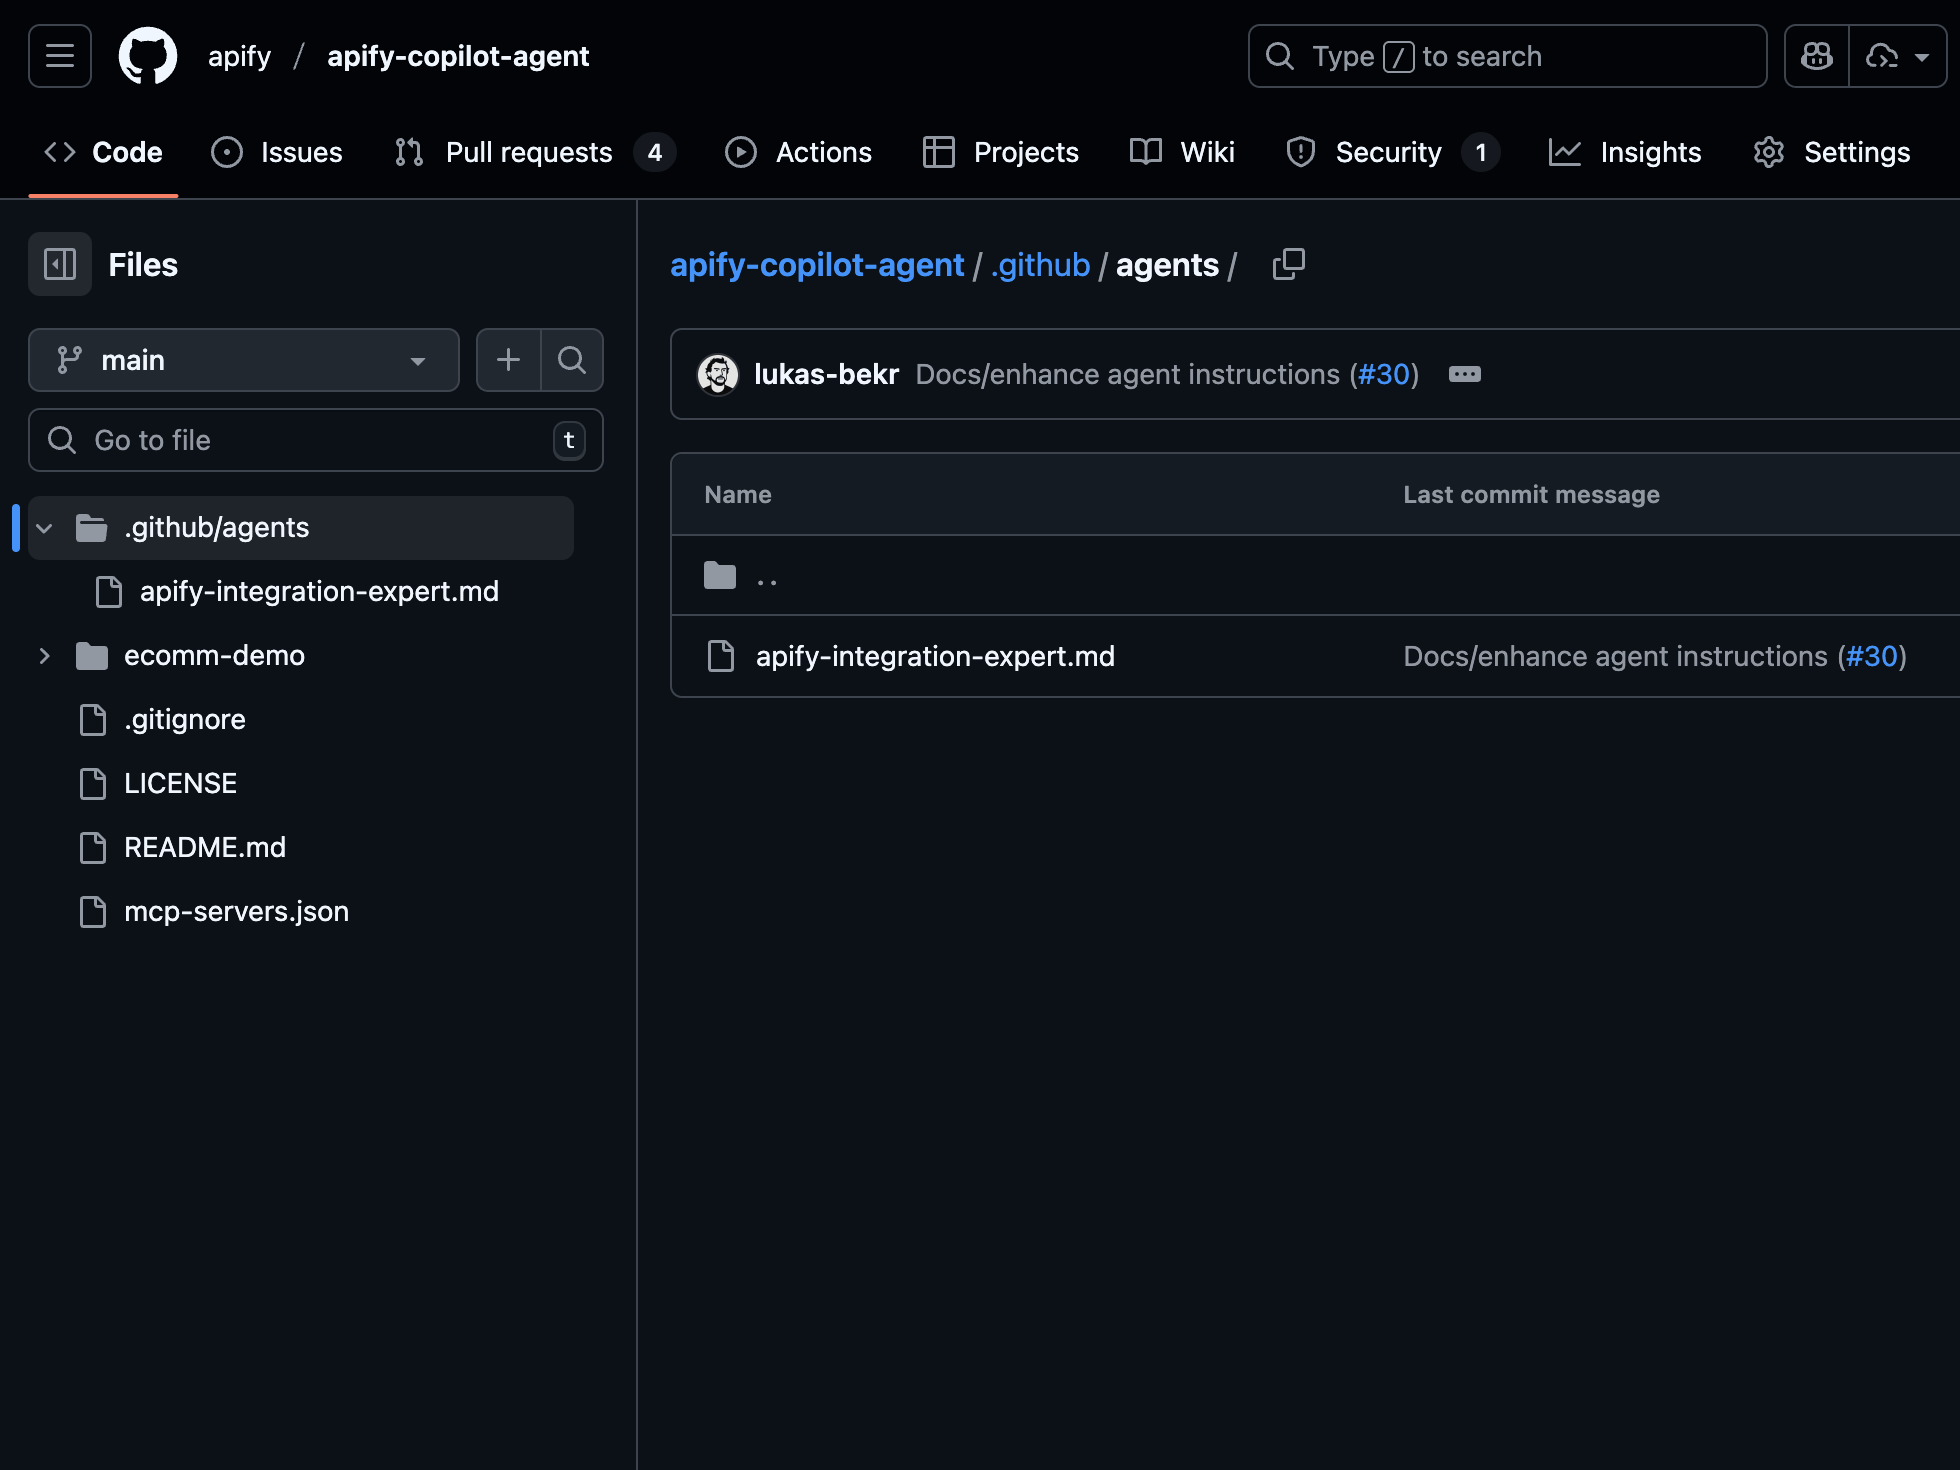
Head to the Apify Copilot agent repo and copy the .github/agents folder into your project. This folder includes the Markdown file that defines the Apify integration expert agent.
Step 2 - Add your Apify API token
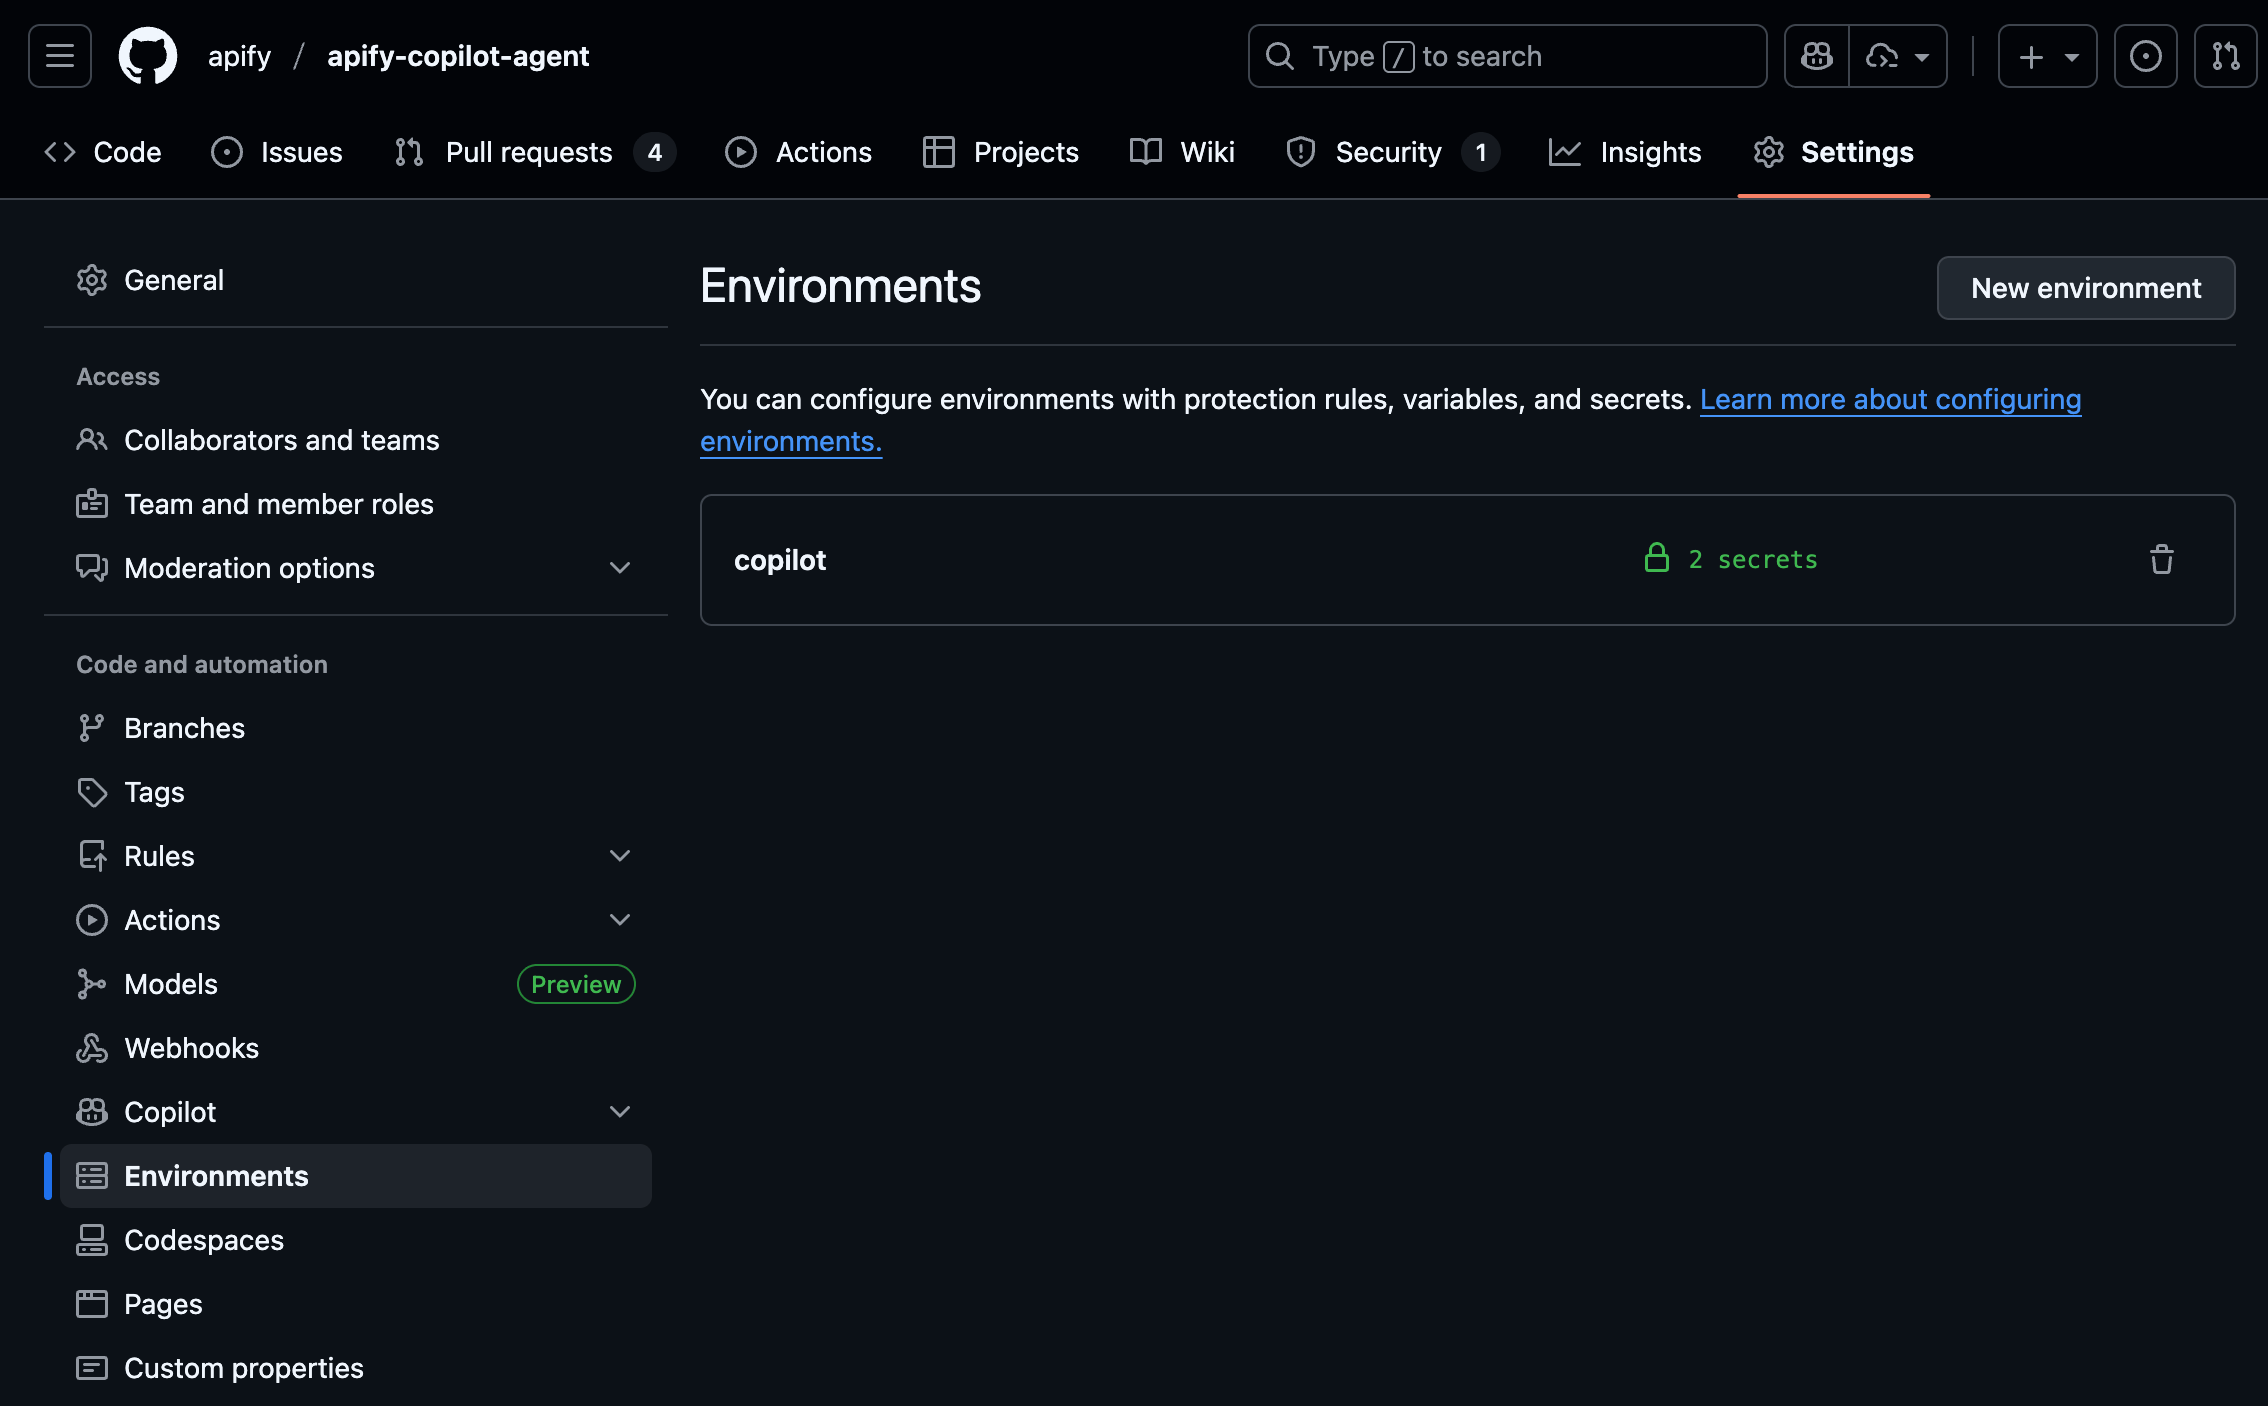
Set up the Copilot environment secrets in your GitHub repository settings:
- Go to your repository’s main page
- Open Settings → Environments → New environment
- Call the new environment
Copilotand click Configure environment. - Under Environment secrets, add a new secret named:
APIFY_TOKEN
- To access the Apify API in your integrations, you need to authenticate using your secret API token. You can find it on the Integrations page in Apify Console. Check how to get your API token for more details.
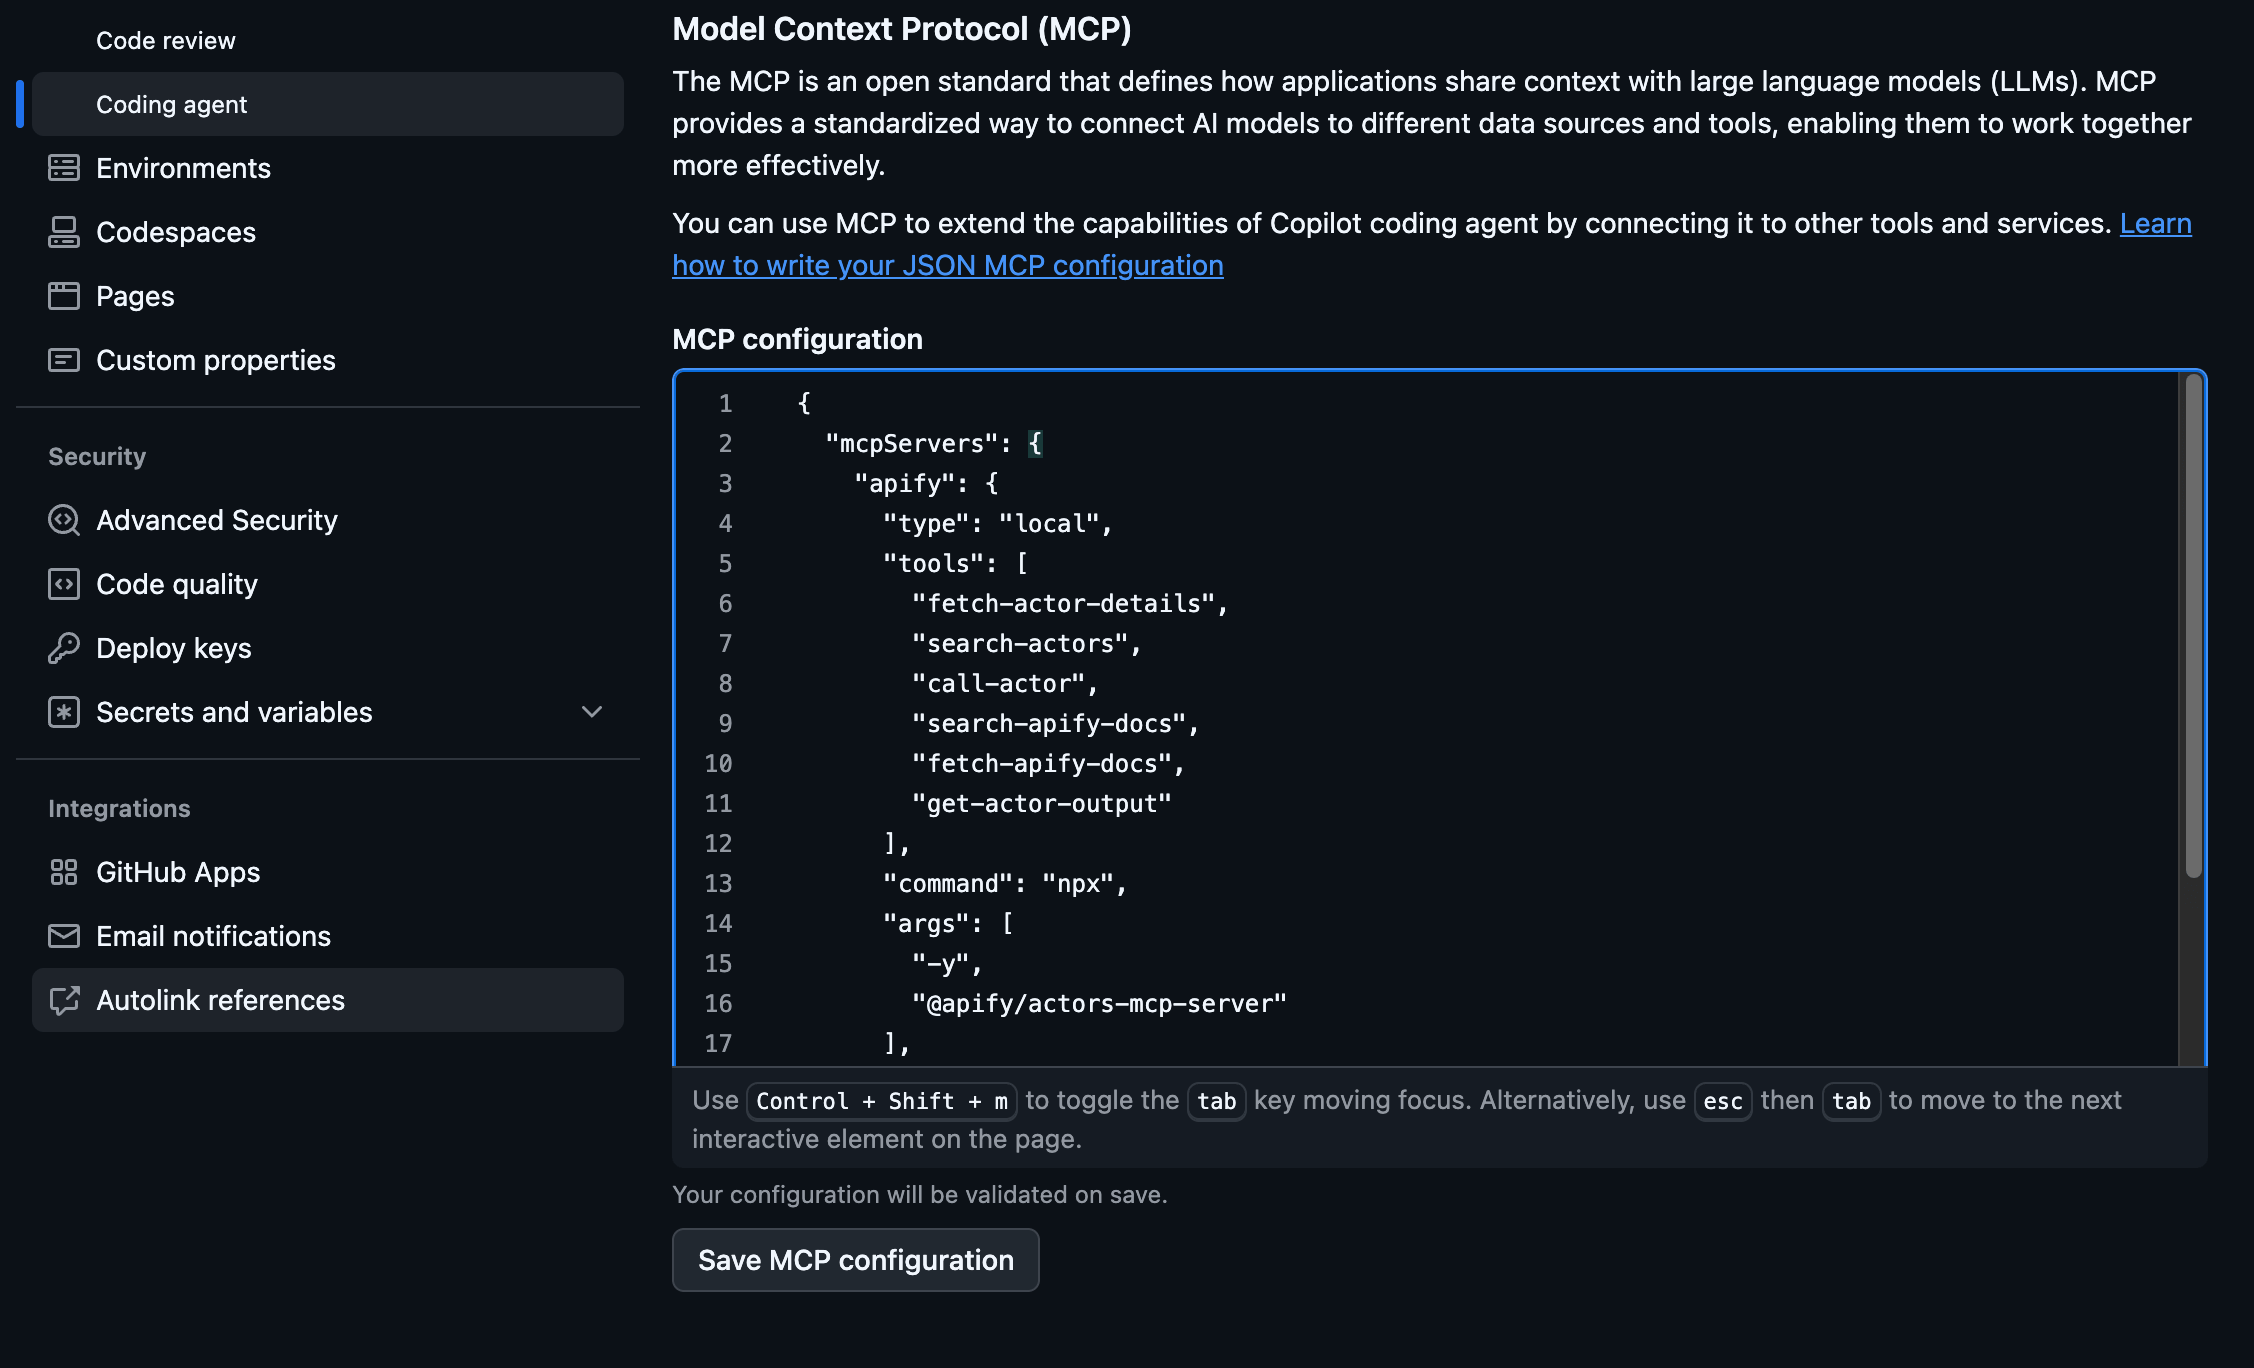
Step 3 - Configure the MCP server
The agent uses Apify’s MCP server, which provides tools for searching Actors, fetching Actor details, calling Actors, and accessing documentation. To configure the server, head to your repo Settings and:
- In the Code & automation section, click Copilot, then Coding agent
- Add the configuration from the
mcp-servers.jsonfile in the repository in the MCP configuration section: - In the Code & automation section, click Copilot, then Coding agent
- Add the configuration from the
mcp-servers.jsonfile in the repository in the MCP configuration section:
{
  "mcpServers": {
    "apify": {
      "type": "local",
      "tools": [
        "fetch-actor-details",
        "search-actors",
        "call-actor",
        "search-apify-docs",
        "fetch-apify-docs",
        "get-actor-output"
      ],
      "command": "npx",
      "args": [
        "-y",
        "@apify/actors-mcp-server"
      ],
      "env": {
        "APIFY_TOKEN": "APIFY_TOKEN"
      }
    }
  }
}
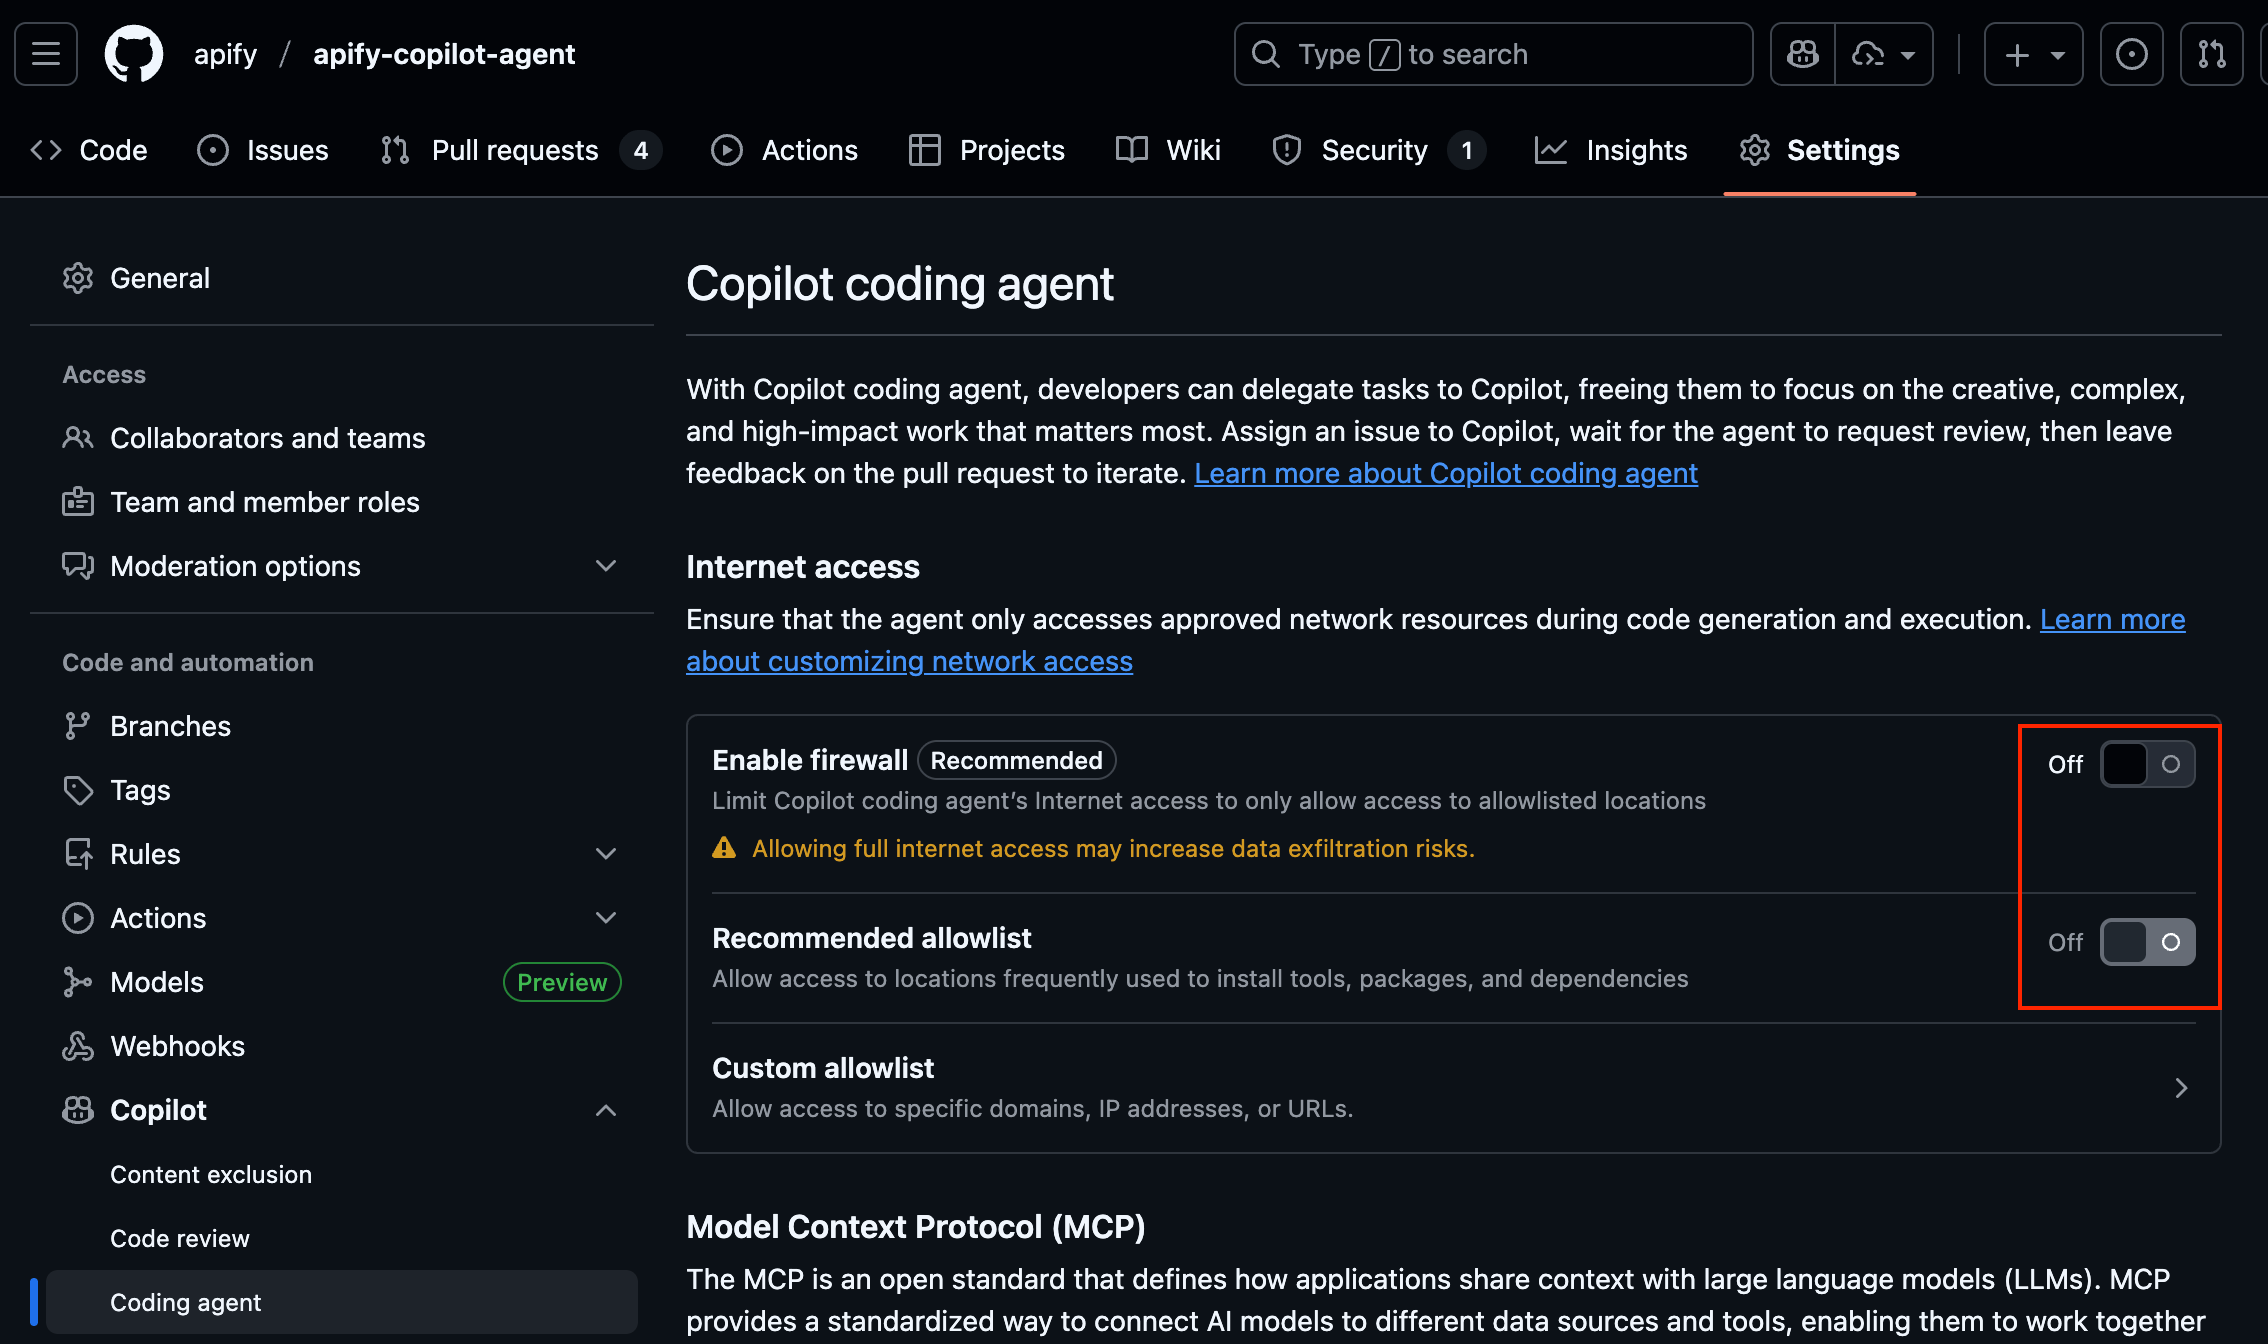
Step 4 - Disable firewall restrictions
By default, Copilot has network restrictions and can’t call external APIs, scrape websites, or hit production servers. To interact with the Apify platform and MCP, users need to disable these restrictions in Settings.
Turn off the following toggles:
- Enable firewall - Turn OFF to allow access to Apify MCP
- Allow access to locations frequently used to install tools, packages, and dependencies - Turn OFF to allow calling Apify Actors
Step 5 - Start using the agent
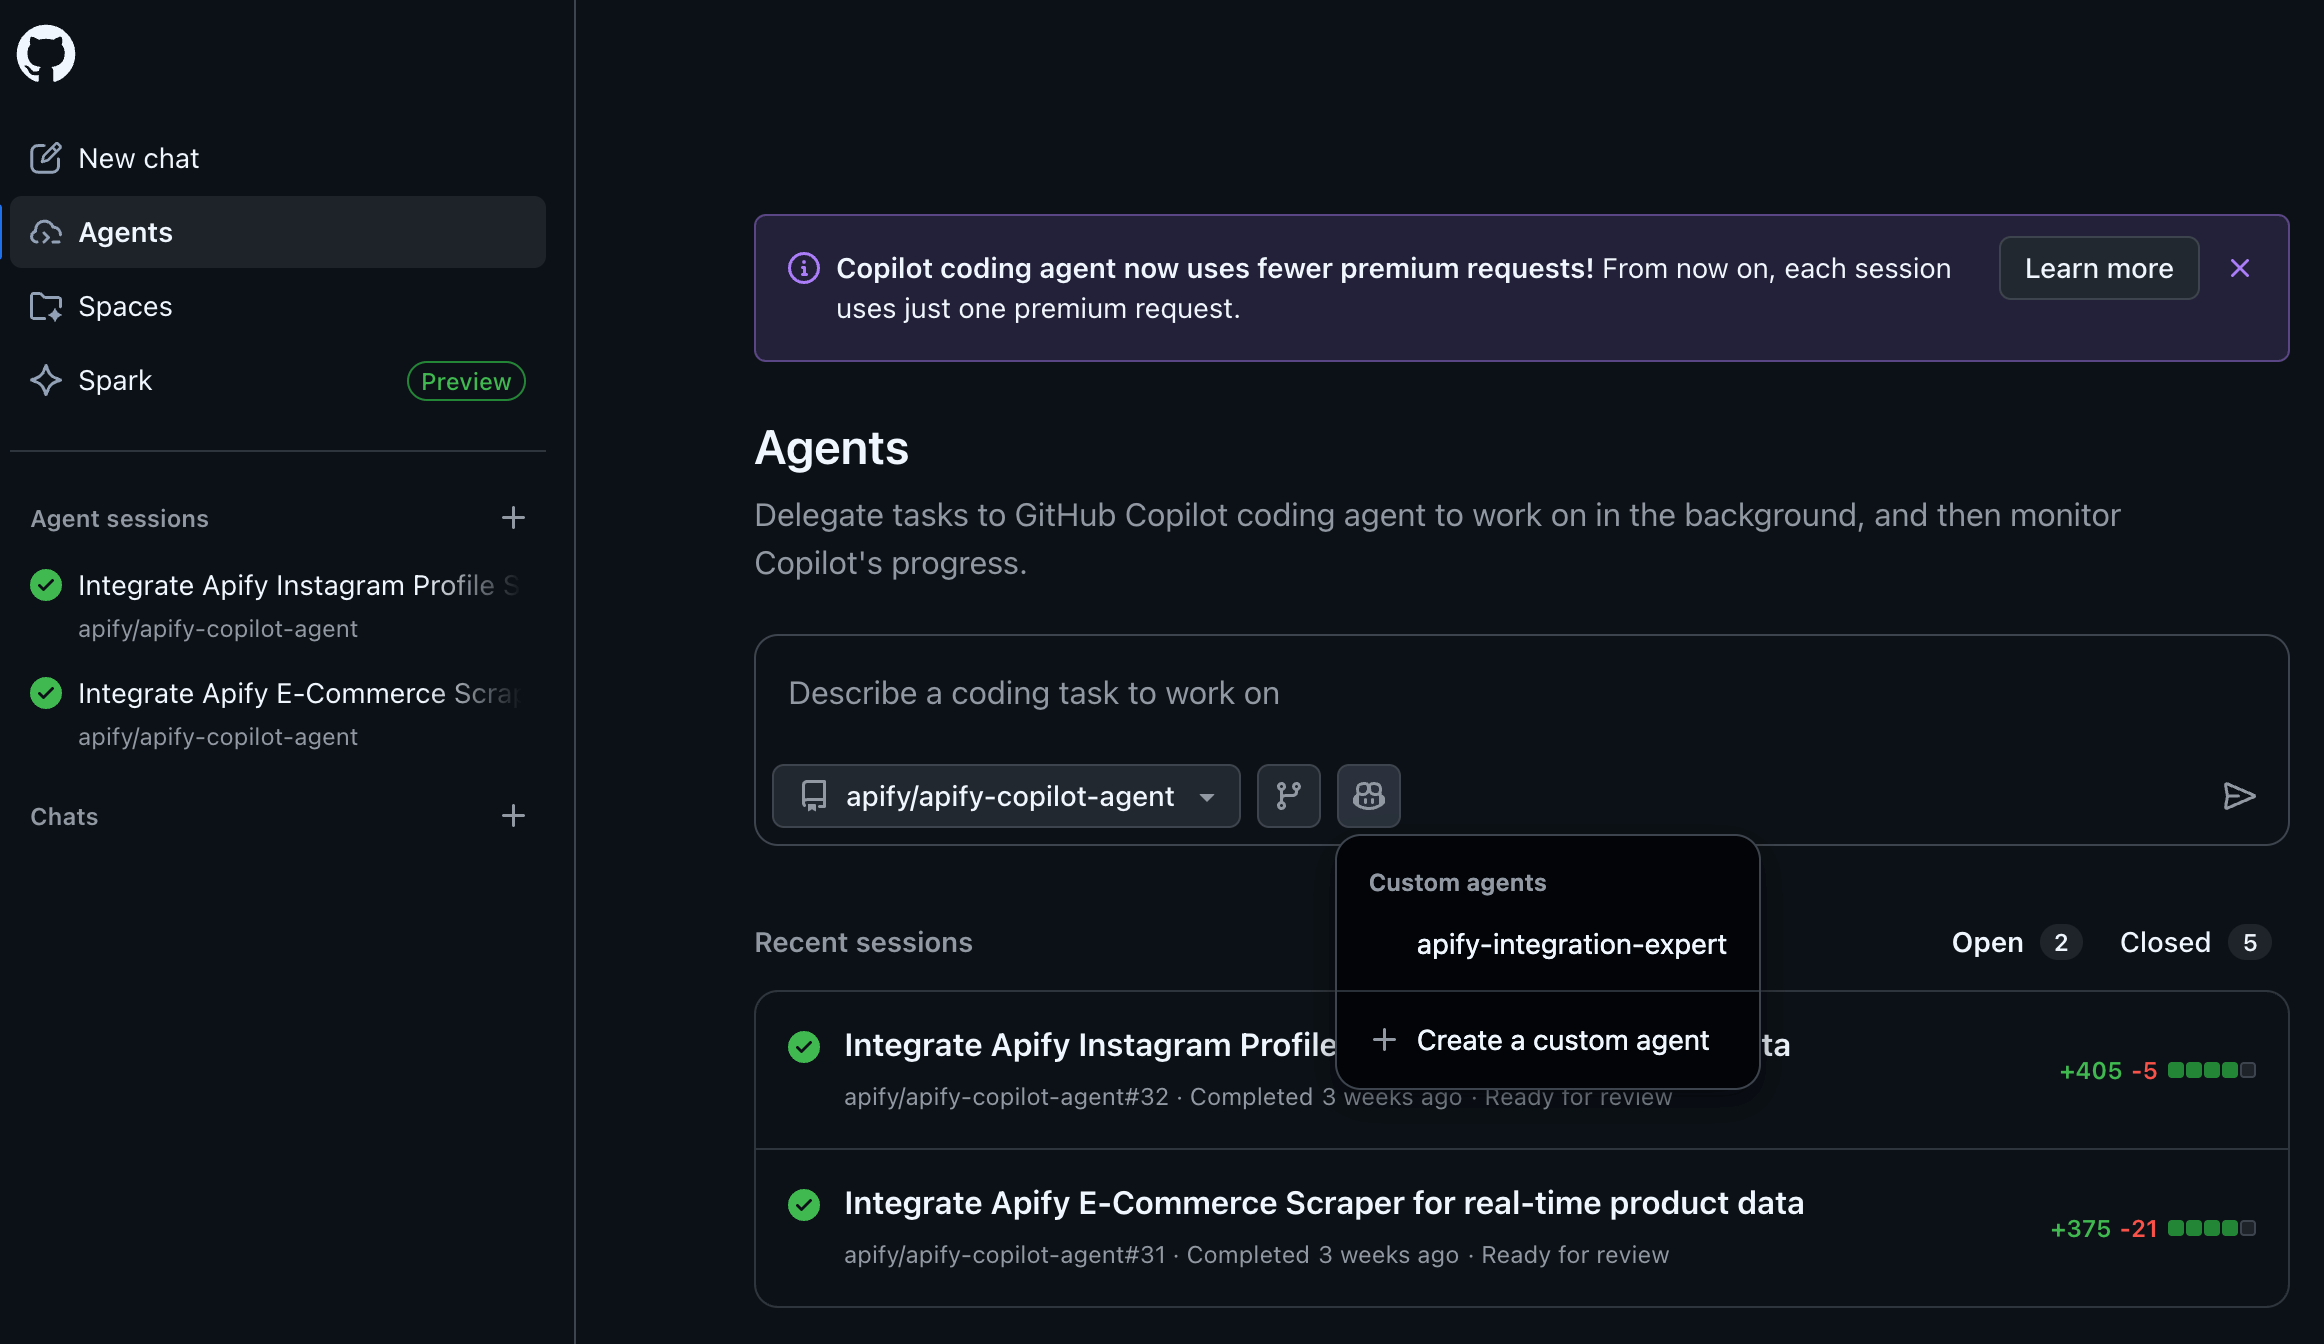
Push all your changes (including the .github/agents folder) to your repository and go to https://github.com/copilot/agents:
- Select your repository from the list
- Select the "Apify integration expert" agent to start using it
Example: Build a product data extractor with Copilot
Let’s put the agent to work. In our example, we’re building a simple e-commerce product comparison tool. We want to scrape product data from Amazon and display real-time results on the frontend.
The prompt
Integrate an appropriate Apify ecommerce Actor to fetch real-time product data from Amazon and display it in my front-end scaffolding.
When a user enters a search query in the search bar and clicks submit, use that query to call Apify Actor, fetch its dataset, and display the scraped results in the demo UI instead of placeholder data.
Test the webapp integration end-to-end with Playwright to verify everything works correctly.
What the agent does
First, it searches Apify Store and identifies E-commerce Scraping Tool as the best choice for our use case.
Then it fetches documentation, runs a test scrape, and determines the input/output schema.
Finally, it generates full TypeScript integration code:
- Initializing the Apify client
- Running the Actor with our query
- Fetching results
- Inserting rows into PostgreSQL
- Exposing the data to the frontend
In a few minutes, you have a working product-tracking backend. Watch our demo video to see how easy it is:
Add the Apify Copilot agent to your projects
You now have everything you need to integrate Apify Actors directly into your project with Copilot custom agents. Simply clone the Apify agent instructions from our repo, get your API token, and explore Apify Actors. While you’re at it, you can also test a Copilot agent on an e-commerce demo app included in the ecomm-demo folder.
Visit our MCP server configurator to set up integrations with Claude, Cursor, and other AI clients.