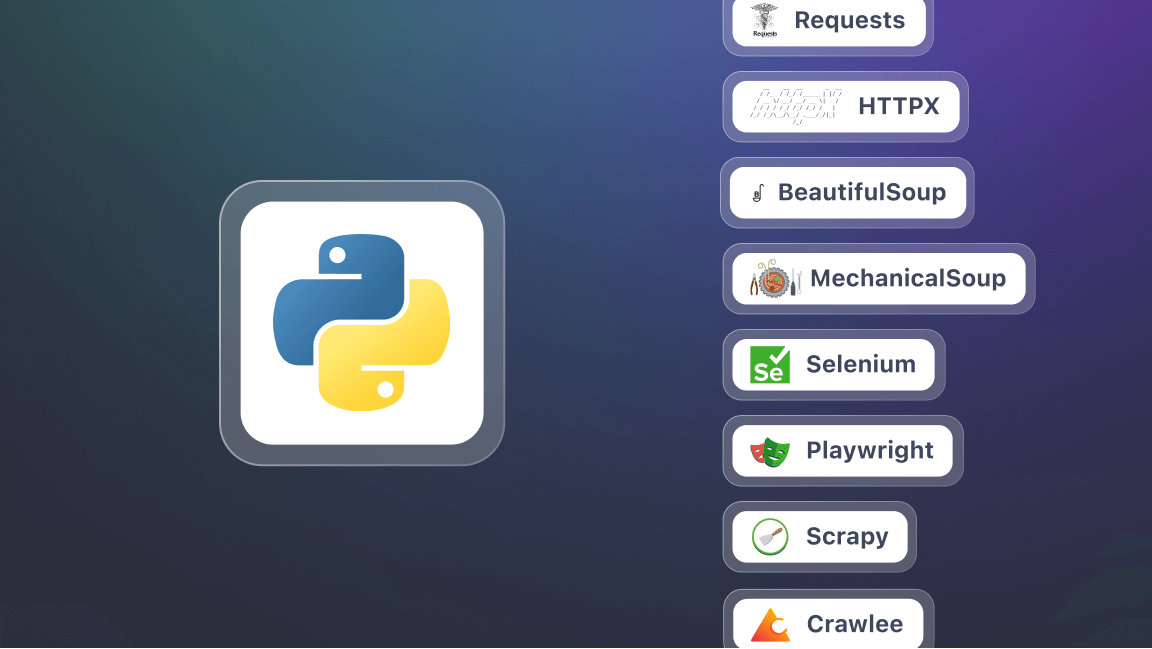
If you've found this article, you likely have some experience with web scraping and are familiar with tools like Axios, Cheerio, Puppeteer, and Playwright. These tools each serve a role in the web scraping process, where you need an HTTP client like Axios to retrieve web content and an HTML parser like Cheerio to process it. For JavaScript-heavy sites, browser automation tools like Puppeteer or Playwright become necessary.
Juggling these tools can quickly become complicated, especially considering the constantly changing nature of the web and when dealing with websites that employ advanced anti-blocking measures.
Instead of having to juggle a myriad of libraries, wouldn't it be easier to have a single library that integrates all these functionalities, along with scraping-specific features like proxy rotation, browser fingerprinting, and streamlined pagination?
If you just wet your pants with excitement at the prospect of a unified, powerful web scraping library, then let me introduce you to Crawlee.
Crawlee is an open-source Node.js web scraping and browser automation library designed to handle a wide range of web scraping scenarios, from simple static pages to dynamic, JavaScript-heavy pages. For a more in-depth look into Crawlee, I highly suggest you watch the video below.
Let this video introduce you to Crawlee and its features
In practice, if a website implements JavaScript rendering, Crawlee allows you to simply switch to a browser crawler instead of rewriting your entire code. Should you discover an efficient API later, you can easily revert to the previous settings.
On top of that, Crawlee enhances your proxies’ longevity by intelligently rotating them and using sophisticated fingerprints, ensuring your crawlers mimic human behavior and, consequently, drastically reducing your scraper’s blocking rates.
To showcase some of Crawlee’s functionalities, let’s build a HackerNews Scraper.
Getting started with Crawlee
The easiest way to set up a Crawlee project is through the CLI command below. It utilizes npx which is a package runner that comes with npm. In this tutorial, we'll start by creating a crawler for HackerNews.
npx crawlee create hackernews-crawler
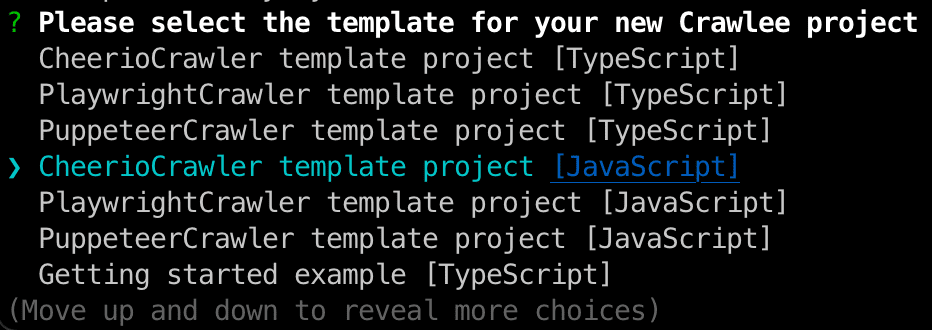
Right after running the command above, you'll be prompted to select a template for your Crawlee project. All templates come with a JavaScript and TypeScript version, so choose the one that fits you best. HackerNews doesn't rely on JavaScript to load content on its webpage, so we can go ahead with the CheerioCrawler template.
Crawlee will take care of installing all the necessary dependencies to get our project ready. After the installation is complete, go ahead and move into the newly created directory, hackernews-crawler
cd hackernews-crawler
Crawlee actually already generated a fully functional template for us, so let’s see what happens if we simply run it.
npm start
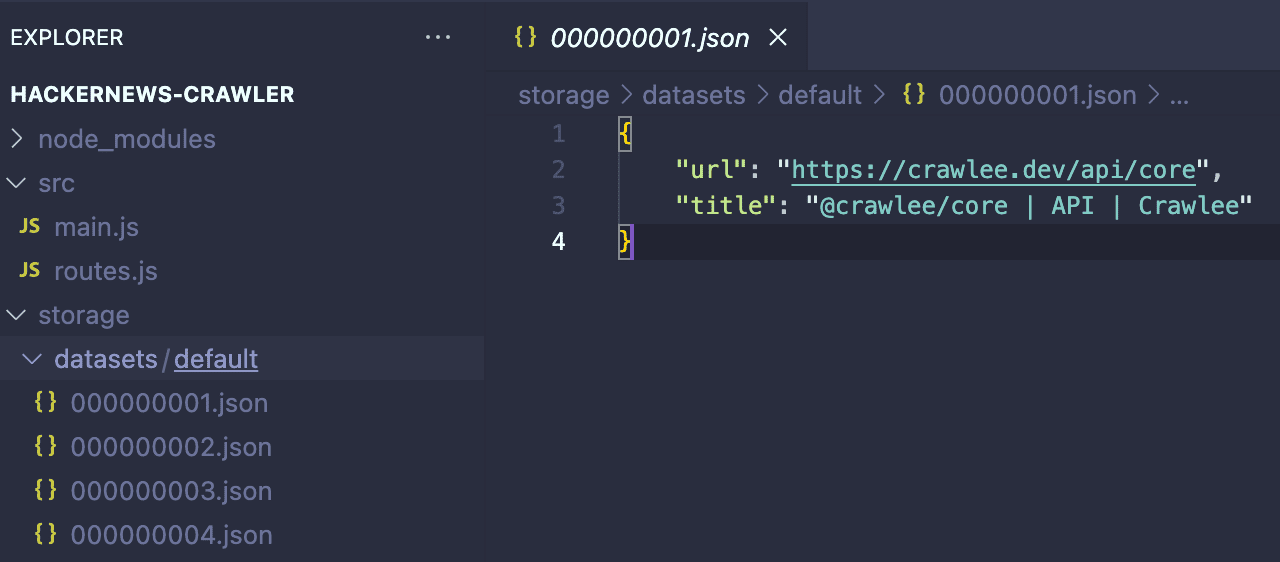
This template code is set up to crawl Crawlee’s own website. But the reason why I wanted to run it is to show you how Crawlee’s system works. If you go to storage → datasets you will see that it's populated with the scraped results. Data storage is a central part of what makes Crawlee special, and working with the different storages can give us a lot of flexibility in how we handle our data.
Building a HackerNews scraper
Now that the CheerioCrawler template is set up, the next step is to adjust it for our particular use case: scraping HackerNews.
First things first, you might have noticed that Crawlee separates its crawling logic into two files: main.js and routes.js with the bulk of our crawling logic being in the routes.js file. This helps us maintain our code organized while handling different contexts. Don’t worry, its purpose will become clear soon enough.
Before we get to the actual code, let’s briefly describe what action we want our crawler to perform.
main.js
We'll start by replacing the template code on main.js with the code below:
import { CheerioCrawler, ProxyConfiguration } from 'crawlee';
import { router } from './routes.js';

const proxyConfiguration = new ProxyConfiguration({
    proxyUrls: [
        'http://<username>:<password>@proxy.apify.com:8000',
    ],
});

const crawler = new CheerioCrawler({
    requestHandler: router,
    proxyConfiguration,
});

await crawler.run([`https://news.ycombinator.com/`]);
In the code you just saw, besides setting our starting point for the crawler, we also set up the proxyConfiguration. In web scraping, employing proxies is not always essential but becomes crucial for scraping complex sites with sophisticated anti-scraping measures, as it significantly reduces the chances of being blocked. In our case, attempting to scrape HackerNews without a proxy often leads to receiving a 503 error from the server, so we will need to use a proxy to scrape HN effectively.
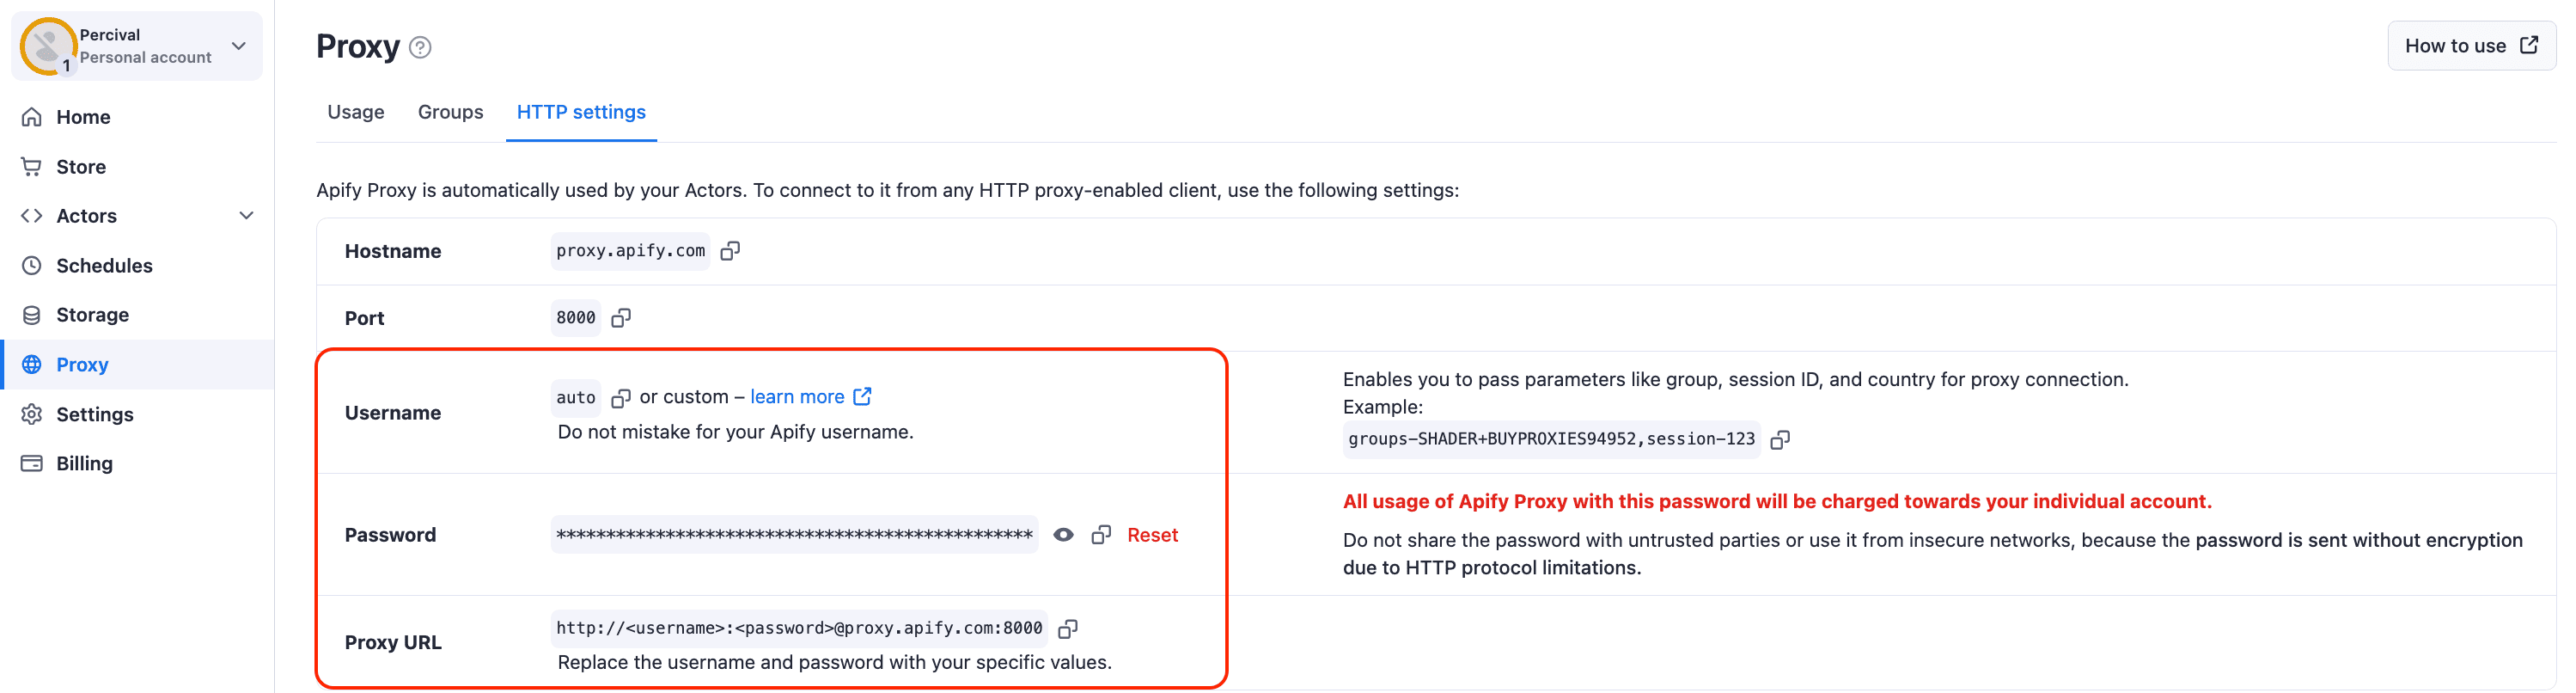
In the code example above, I’m using the Apify Proxy URL. Crawlee allows you to use proxies from any provider, but if you don't already have one, you can sign up for a free Apify account to obtain a proxy URL. Once you have an Apify account, navigate to Proxy → HTTP Settings to access the Apify Proxy URL and your unique proxy credentials, which you'll need to input into the crawler.
With proxies out of the way, we will now work on the actual scraping logic in the routes.js file.
routes.js
The logic in this file is divided into two handlers. The default handler logic is applied to every unlabelled request. On the other hand, the second handler’s logic will only be applied to requests containing the “DETAIL” label.
import { Dataset, createCheerioRouter } from 'crawlee';

export const router = createCheerioRouter();

// Default Handler applied to every request without a label
router.addDefaultHandler(async ({ enqueueLinks, log, $, request }) => {
    log.info(`🔎 Scraping ${request.url}`);

    // Step 1: Enqueue posts' links and label these links as "DETAIL"
    await enqueueLinks({
        selector: '.subline .age a',
        label: 'DETAIL',
    });

        // Step 2: Enqueue next page
    await enqueueLinks({
        selector: '.morelink',
    });
});

// Handler applied only to requests with the "DETAIL" label
router.addHandler('DETAIL', async ({ enqueueLinks, log, $, request }) => {
    const $post = $('.athing');

    // Handle HN Urls
    const hnPostUrl =
        'https://news.ycombinator.com/item?id=' + $post.attr('id');
    const postUrl = $post.find('.titleline a').attr('href');
    const url = postUrl.includes('item?id=') ? hnPostUrl : postUrl;

    // Handle Job Listings
    const authorName = $post.find('+tr .subline .hnuser').text();
    log.info(authorName);
    const author = authorName !== '' ? authorName : 'YC Jobs';
    const pointsCount = $post.find('+tr .score').text().replace(' points', '');
    const points = pointsCount !== '' ? pointsCount : 'Job listing';


        // Handle comments
    const ct = $('.athing.comtr');

    const comments = ct
        .map((_, comment) => {
            const $comment = $(comment);
            return {
                commentAuthor: $comment.find('.comhead a.hnuser').text(),
                commentContent: $comment
                    .find('.comment span.commtext')
                    .text()
                    .trim(),
            };
        })
        .toArray();

        // Define the structure of the scraped data
    const data = {
        hnPostUrl,
        url,
        title: $post.find('td:nth-child(3) > span > a').text(),
        author,
        points,
        date: $post.find('+tr .age').attr('title'),
        comments,
    };

        // Push data to Crawlee's dataset
    await Dataset.pushData(data);
});
To make things clearer, let’s break down each handler’s functionality.
Default handler - enqueueing links
As previously mentioned, the default handler is applied to every request without a label, making it the ideal handler for us to use to enqueue the links we need to scrape HackerNews.
// Default Handler applied to every request without a label
router.addDefaultHandler(async ({ enqueueLinks, log, $, request }) => {
    log.info(`🔎 Scraping ${request.url}`);

    // Step 1: Enqueue posts' links and label these links as "DETAIL"
    await enqueueLinks({
        selector: '.subline .age a',
        label: 'DETAIL',
    });

        // Step 2: Enqueue next page
    await enqueueLinks({
        selector: '.morelink',
    });
});
The initial enqueueLinks function gathers all post URLs from HackerNews that conform to the specified CSS selector within the function. Each of these requests is tagged with the label 'DETAIL', allowing us to specifically address these requests later with a dedicated handler to manage the scraping process for these pages.
The subsequent enqueueLinks function queues the next page to ensure the scraping of all posts on HackerNews continues until there are no more pages available.

“DETAIL” handler
In the default handler, we tagged all enqueued HackerNews post URL requests with the label "DETAIL". With this setup, we can now establish a specialized handler that outlines the processing logic for these tagged requests.
// Handler applied only to requests with the "DETAIL" label
router.addHandler('DETAIL', async ({ enqueueLinks, log, $, request }) => {
    const $post = $('.athing');

    // Handle HN Urls
    const hnPostUrl =
        'https://news.ycombinator.com/item?id=' + $post.attr('id');
    const postUrl = $post.find('.titleline a').attr('href');
    const url = postUrl.includes('item?id=') ? hnPostUrl : postUrl;

    // Handle Job Listings
    const authorName = $post.find('+tr .subline .hnuser').text();
    const author = authorName !== '' ? authorName : 'YC Jobs';
    const pointsCount = $post.find('+tr .score').text().replace(' points', '');
    const points = pointsCount !== '' ? pointsCount : 'Job listing';


        // Handle comments
    const ct = $('.athing.comtr');

    const comments = ct
        .map((_, comment) => {
            const $comment = $(comment);
            return {
                commentAuthor: $comment.find('.comhead a.hnuser').text(),
                commentContent: $comment
                    .find('.comment span.commtext')
                    .text()
                    .trim(),
            };
        })
        .toArray();

        // Define the structure of the scraped data
    const data = {
        hnPostUrl,
        url,
        title: $post.find('td:nth-child(3) > span > a').text(),
        author,
        points,
        date: $post.find('+tr .age').attr('title'),
        comments,
    };

        // Push data to Crawlee's dataset
    await Dataset.pushData(data);
});
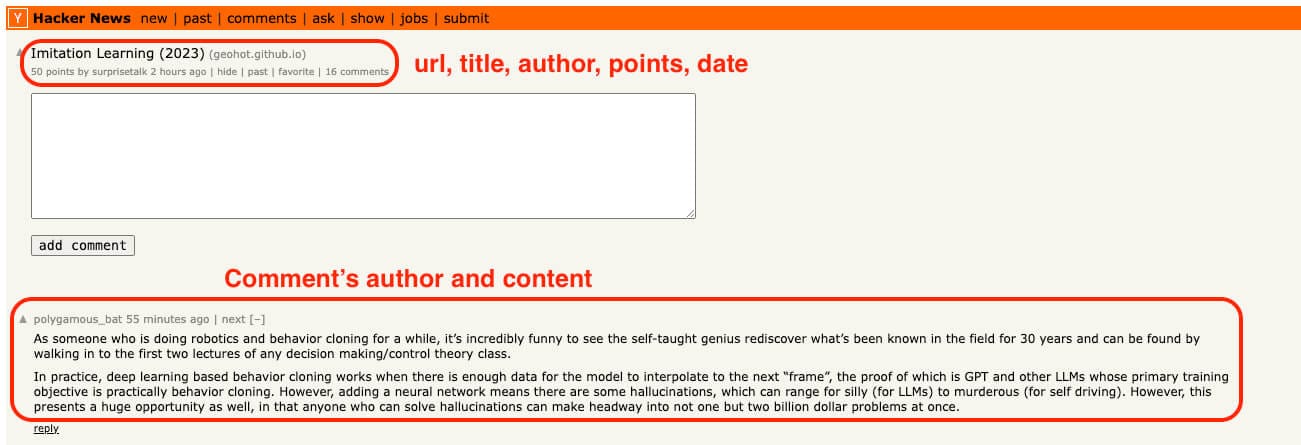
In this code, we focus on pulling out key details from posts, like the post's own link on HackerNews, the main link it shares, its title, the writer, points, date, and comments. We also make sure to handle special posts, such as Show/Ask HN and job listings from YC, which might have a different page structure.
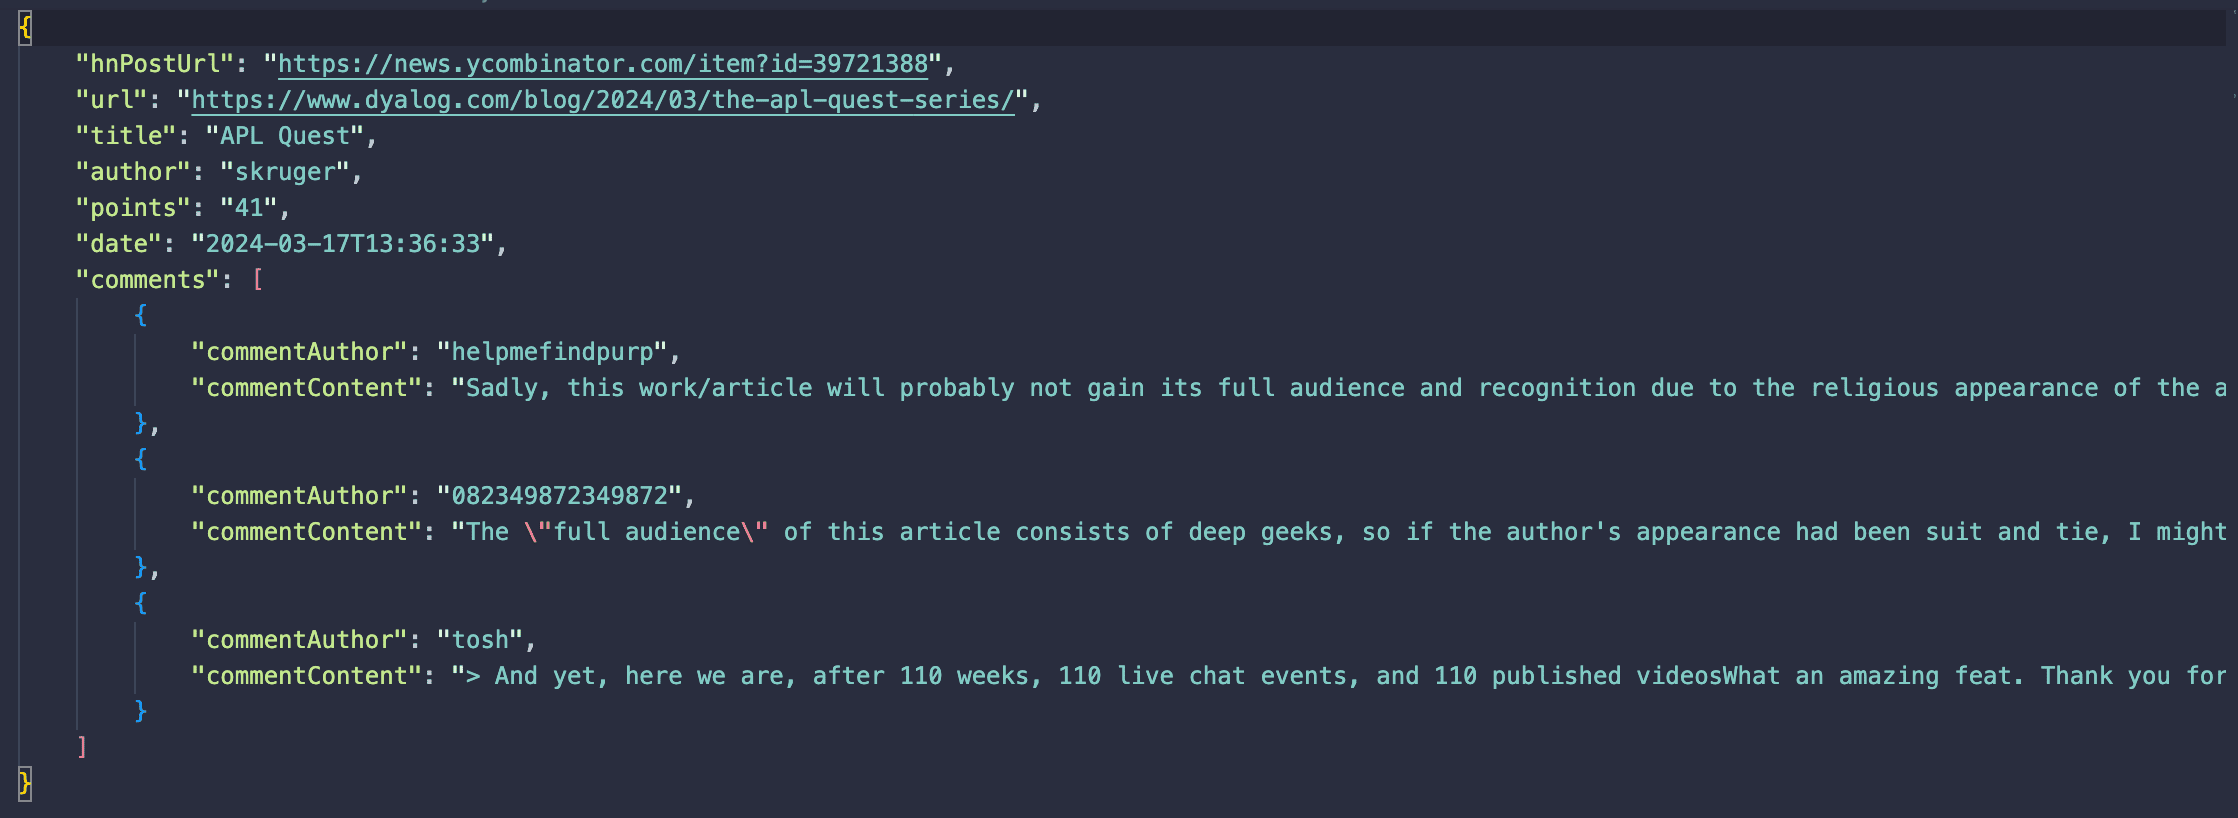
Testing and output
Now that our scraper is ready, let's test it. Type npm start in your terminal to begin the crawl. Wait a few minutes for it to finish. When it's done, Crawlee's dataset folder will be filled with results similar to the one shown in the picture below.
What’s next?
This was just a small peek into what you can do with the full-stack web scraping library that's Crawlee. Like what you see? Give Crawlee a star on GitHub! And if you're keen to learn more about the library and boost your scraping skills, check out this detailed tutorial on using Crawlee to scrape Amazon products or watch the video guide below.
Learn to build an Amazon scraper with Crawlee