We're Apify, a full-stack web scraping and browser automation platform. We are the maintainers of the open-source library Crawlee.
Managing and storing the data you collect is a crucial part of any web scraping and data extraction project. It's often a complex task, especially when handling large datasets and ensuring output accuracy. Fortunately, Crawlee simplifies this process with its versatile storage types.
In this article, we will look at Crawlee's storage types and demonstrate how they can make our lives easier when extracting data from the web.
Setting up Crawlee
Setting up a Crawlee project is straightforward, provided you have Node and npm installed. To begin, create a new Crawlee project using the following command:
npx crawlee create crawlee-dataAfter running the command, you will be given a few template options to choose from. We will go with the CheerioCrawler JavaScript template. Remember, Crawlee's storage types are consistent across all crawlers, so the concepts we discuss here apply to any Crawlee crawler.
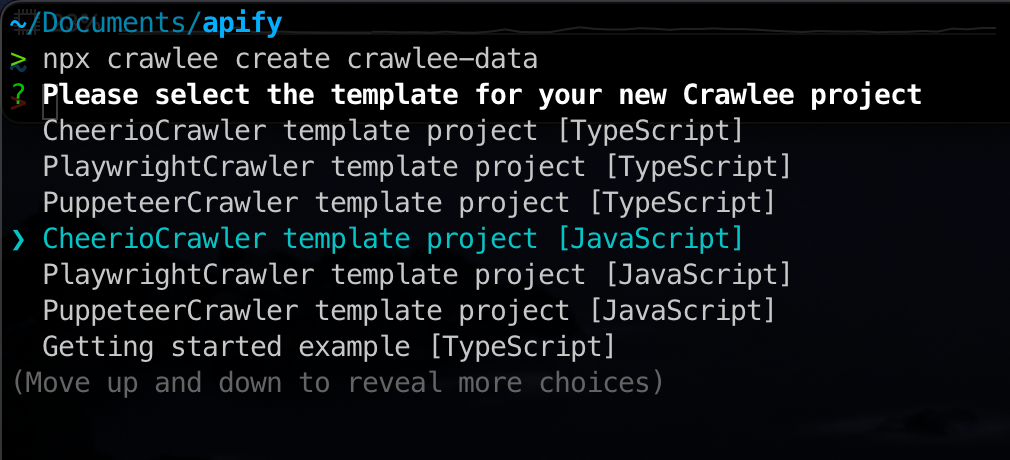
Once installed, you'll find your new project in the crawlee-data directory, ready with a template code that scrapes the crawlee.dev website:
To test it, simply run npm start in your terminal. You'll notice a storage folder appear with subfolders like datasets, key_value_stores, and request_queues.
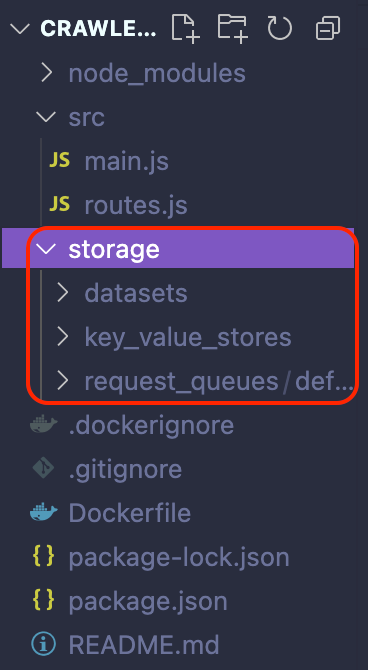
Crawlee's storage can be divided into two categories: Request Storage (Request Queue and Request List) and Results Storage (Datasets and Key Value Stores). Both are stored locally by default in the ./storage directory.
Also, remember that Crawlee, by default, clears its storages before starting a crawler run. This action is taken to prevent old data from interfering with new crawling sessions. In case you need to clear the storages earlier than this, Crawlee provides a handy purgeDefaultStorages() helper function for this purpose.
Crawlee request queue
The request queue is a storage of URLs to be crawled. It's particularly useful for deep crawling, where you start with a few URLs and then recursively follow links to other pages.
Each Crawlee project run is associated with a default request queue, which is typically used to store URLs for that specific crawler run.
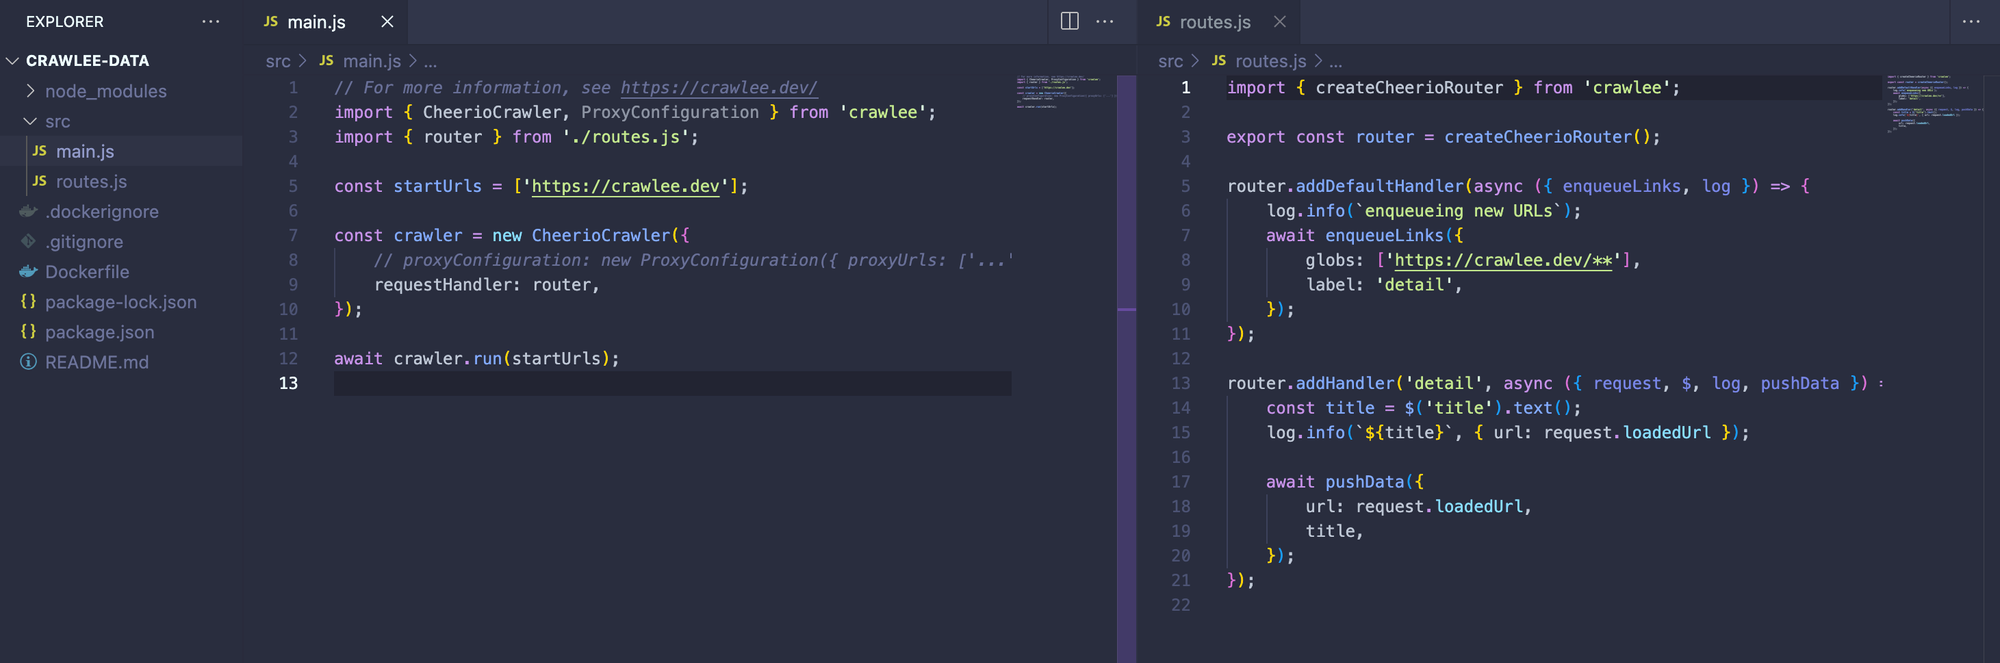
To illustrate that, let’s go to the routes.js file in the template we just generated. There you will find the code below:
import { createCheerioRouter } from 'crawlee';

export const router = createCheerioRouter();

router.addDefaultHandler(async ({ enqueueLinks, log }) => {
    log.info(`enqueueing new URLs`);

    // Add links found on page to the queue
    await enqueueLinks({
        globs: ['https://crawlee.dev/**'],
        label: 'detail',
    });
});

router.addHandler('detail', async ({ request, $, log, pushData }) => {
    const title = $('title').text();
    log.info(`${title}`, { url: request.loadedUrl });

    await pushData({
        url: request.loadedUrl,
        title,
    });
});
Let's take a closer look at the addDefaultHandler function, particularly focusing on the enqueueLinks function it contains. The enqueueLinks function in Crawlee is designed to automatically detect all links on a page and add them to the request queue. However, its utility extends further as it allows us to specify certain options for more precise control over which links are added.
For instance, in our example, we use the globs option to ensure that only links starting with https://crawlee.dev/ are queued. Furthermore, we assign a “detail” label to these links. This labeling is particularly useful as it lets us refer to these links in subsequent handler functions, where we can define specific data extraction operations for pages associated with this label.
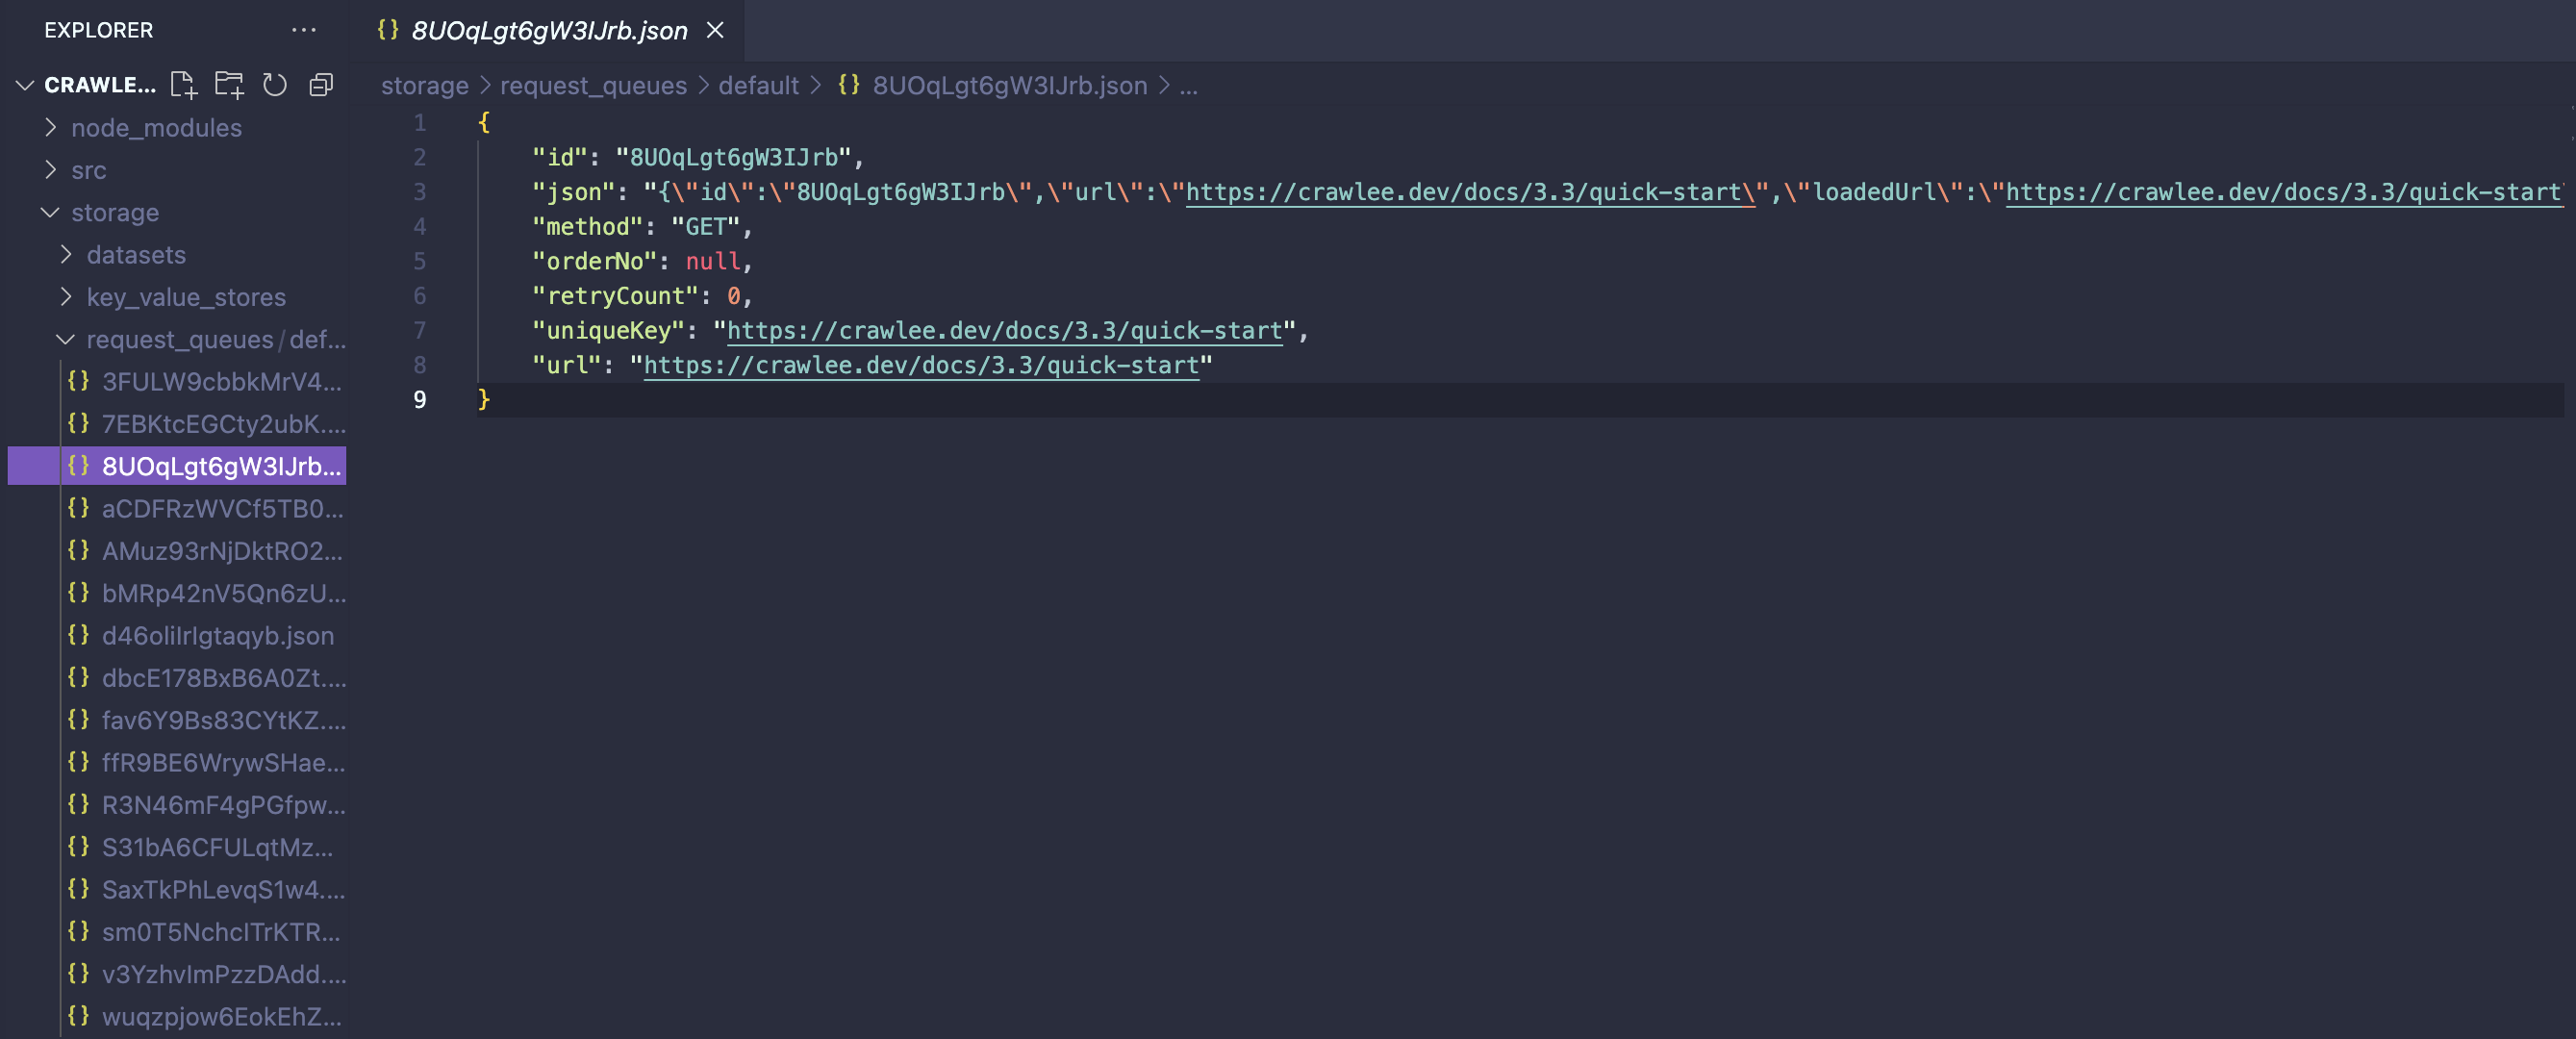
In line with our discussion on data storage types, we can now find all the links that our crawler has navigated through in the request_queues storage, located within the crawler’s ./storage/request_queues directory. Here, we can access detailed information about each request that has been processed in the request queue.
Crawlee request list
The request list differs from the request queue as it's not a form of storage in the conventional sense. Instead, it's a predefined collection of URLs for the crawler to visit.
This approach is particularly suited for situations where you have a set of known URLs to crawl and don't plan to add new ones as the crawl progresses. Essentially, the request list is set in stone once created, with no option to modify it by adding or removing URLs.
To demonstrate this concept, we'll modify our template to utilize a predefined set of URLs in the request list rather than the request queue. We'll begin with adjustments to the main.js file.
main.js
import { CheerioCrawler, RequestList } from 'crawlee';
import { router } from './routes.js';

const sources = [
    { url: 'https://crawlee.dev' },
    { url: 'https://crawlee.dev/docs/3.0/quick-start' },
    { url: 'https://crawlee.dev/api/core' },
];

const requestList = await RequestList.open('my-list', sources);

const crawler = new CheerioCrawler({
    requestList,
    requestHandler: router,
});

await crawler.run();
With this new approach, we created a predefined list of URLs, named sources, and passed this list into a newly established requestList. This requestList was then passed into our crawler object.
As for the routes.js file, we simplified it to include just a single request handler. This handler is now responsible for executing the data extraction logic on the URLs specified in the request list.
routes.js
import { createCheerioRouter } from 'crawlee';

export const router = createCheerioRouter();

router.addDefaultHandler(async ({ request, $, log, pushData }) => {
    log.info(`Extracting data...`);

    const title = $('title').text();
    log.info(`${title}`, { url: request.loadedUrl });

    await pushData({
        url: request.loadedUrl,
        title,
    });
});
Following these modifications, when you run your code, you'll observe that only the URLs explicitly defined in our request list are being crawled.
This brings us to an important distinction between the two types of request storages. The request queue is dynamic, allowing for the addition and removal of URLs as needed. On the other hand, the request list is static once initialized and is not meant for dynamic changes.
With the request storage out of the way, let’s now explore the result storage in Crawlee, starting with datasets.
Crawlee datasets
Datasets in Crawlee serve as repositories for structured data, where every entry possesses consistent attributes.
Datasets are designed for append-only operations. This means we can only add new records to a dataset, and altering or deleting existing ones is not an option. Each project run in Crawlee is linked to a default dataset, which is commonly utilized for storing precise results from our web crawling activities.
You might have noticed that each time we ran the crawler, the folder ./storage/datasets was populated with a series of JSON files containing extracted data.
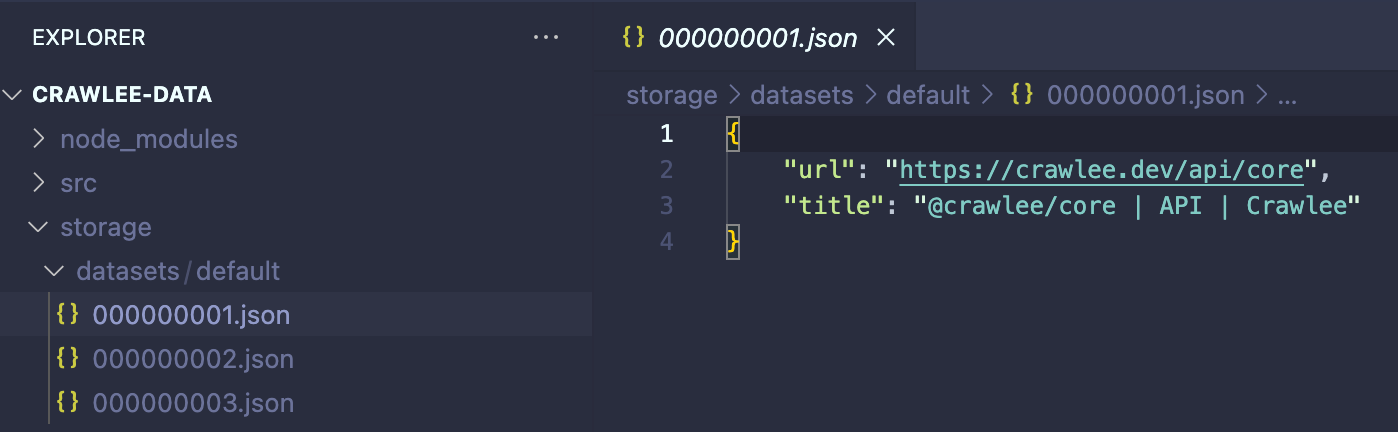
Storing scraped data into a dataset is remarkably simple using Crawlee's Dataset.pushData() function. Each invocation of Dataset.pushData() generates a new table row, with the property names of your data serving as the column headings. By default, these rows are stored as JSON files on your disk. However, Crawlee allows you to integrate other storage systems as well.
And if you take a closer look at our addDefaultHandler function in routes.js you will see just how the pushData() function was used to append the scraped results to the Dataset.
For a practical example, let’s take another look at the addDefaultHandler function within routes.js. Here, you can see how we used pushData() function to append the scraped results to the Dataset.
routes.js
router.addDefaultHandler(async ({ request, $, log, pushData }) => {
    log.info(`Extracting data...`);

    const title = $('title').text();
    log.info(`${title}`, { url: request.loadedUrl });

    await pushData({
        url: request.loadedUrl,
        title,
    });
});
Key-value store
The key-value store in Crawlee is designed for storing and retrieving data records or files. Each record is tagged with a unique key and linked to a specific MIME content type. This feature makes it perfect for storing various types of data, such as screenshots, PDFs, or even for maintaining the state of crawlers.
Saving screenshots
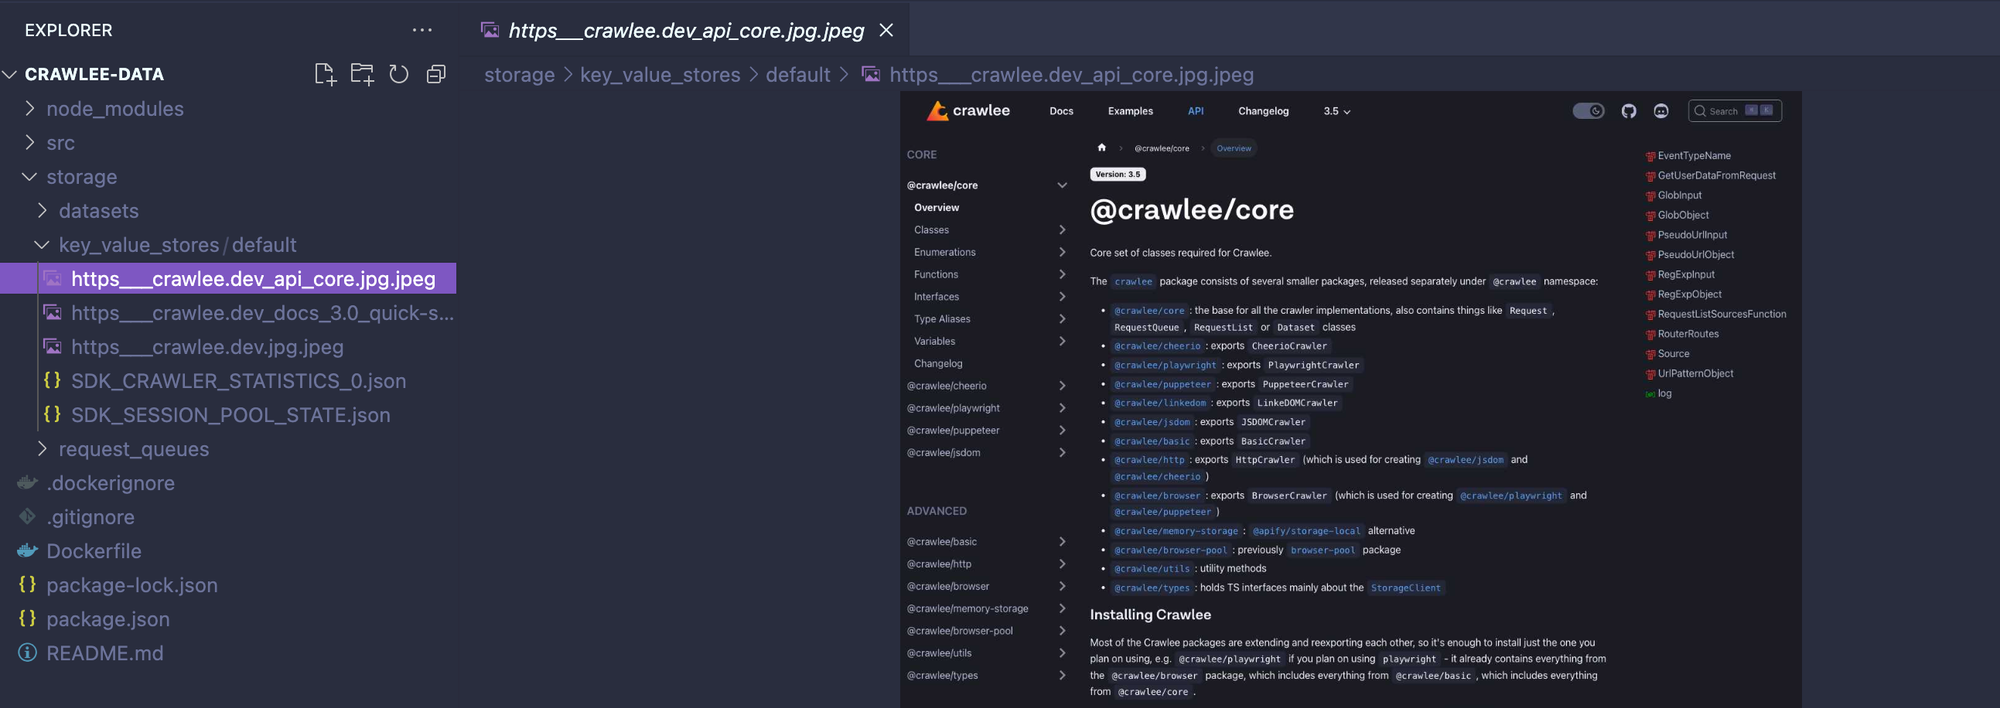
To showcase the flexibility of the key-value store in Crawlee, let's take a screenshot of each page we crawl and save it using Crawlee's key-value store.
However, to do that, we need to switch our crawler from CheerioCrawler to PuppeteerCrawler. The good news is that adapting our code to different crawlers is quite straightforward. For this demonstration, we'll temporarily set aside the routes.js file and concentrate our crawler logic in the main.js file.
To get started with PuppeteerCrawler, the first step is to install the Puppeteer library:
npm install puppeteerNext, adapt the code in your main.js file as shown below:
main.js
import { PuppeteerCrawler } from 'crawlee';

// Create a PuppeteerCrawler
const crawler = new PuppeteerCrawler({
    async requestHandler({ request, saveSnapshot }) {
        // Convert the URL into a valid key
        const key = request.url.replace(/[:/]/g, '_');
        // Capture the screenshot
        await saveSnapshot({ key, saveHtml: false });
    },
});

await crawler.addRequests([
    { url: 'https://crawlee.dev' },
    { url: 'https://crawlee.dev/docs/3.0/quick-start' },
    { url: 'https://crawlee.dev/api/core' },
]);

await crawler.run();
After running the code above, we should see three screenshots, one for each website crawled, pop up on our crawler’s key_value_store.
Saving pages as PDF files
Suppose we want to convert the page content into a PDF file and save it in the key-value store. This is entirely feasible with Crawlee. Thanks to Crawlee's PuppeteerCrawler being built upon Puppeteer, we can fully utilize all the native features of Puppeteer. To achieve this, we simply need to tweak our code a bit. Here's how to do it:
import { PuppeteerCrawler } from 'crawlee';

// Create a PuppeteerCrawler
const crawler = new PuppeteerCrawler({
    async requestHandler({ page, request, saveSnapshot }) {
        // Convert the URL into a valid key
        const key = request.url.replace(/[:/]/g, '_');

        // Save as PDF
        await page.pdf({
            path: `./storage/key_value_stores/default/${key}.pdf`,
            format: 'A4',
        });
    },
});

await crawler.addRequests([
    { url: 'https://crawlee.dev' },
    { url: 'https://crawlee.dev/docs/3.0/quick-start' },
    { url: 'https://crawlee.dev/api/core' },
]);

await crawler.run();
Similar to the earlier example involving screenshots, executing this code will create three PDF files, each capturing the content of the accessed websites. These files will then be saved into Crawlee’s key-value store.
Doing more with your Crawlee scraper
That’s it for an introduction to Crawlee’s data storage types. As a next step, I encourage you to take your scraper to the next level by deploying it on the Apify platform as an Actor.
With your scraper running on the Apify platform, you gain access to all of Apify's extensive list of features tailored for web scraping jobs, like cloud storage and various data export options. Not sure what it means or how to do it? Don’t worry, all the information you need is in this link to the Crawlee documentation.